HP Printer Setup Guide

Installing an HP printer is a simple process with our easy-to-follow instructions. Start by unpacking the printer and connecting it to a power source. Install the ink cartridges and load paper into the input tray. Next, install the necessary software either from the provided CD or by downloading it from the official HP website. Connect the printer to your computer using a USB cable or establish a wireless connection. Finally, perform a test print to ensure everything is functioning properly. With these steps, you'll have your HP printer set up and ready to print in a matter of minutes. Enjoy the convenience of seamless printing from the comfort of your home or office. get more info at https://www.printerfixes.com/installing-an-hp-printer-a-comprehensive-installation-guide/

Recommended
Recommended
More Related Content
Similar to HP Printer Setup Guide
Similar to HP Printer Setup Guide (20)
Recently uploaded
Recently uploaded (20)
HP Printer Setup Guide
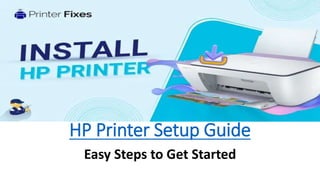
- 1. HP Printer Setup Guide Easy Steps to Get Started
- 2. Setting up an HP printer doesn't have to be a daunting task. With a few simple steps, you can have your printer up and running in no time. Whether you're a tech-savvy individual or a beginner, this guide will walk you through the process and ensure a smooth setup.
- 3. Unbox and Prepare Begin by unboxing your HP printer and removing all the packaging materials. Place the printer on a flat and stable surface near your computer. Make sure you have the necessary cables, such as the power cord and USB cable, within reach.
- 4. Power Connection Connect one end of the power cord to the printer and the other end to a power outlet. Ensure that the printer is receiving power by pressing the power button. The printer should power up, and the control panel display should light up.
- 5. Ink Cartridge Installation Open the printer's ink cartridge access door. Carefully remove the protective tape from the ink cartridges and insert them into their respective slots. Close the ink cartridge access door once you've installed all the cartridges securely.
- 6. Paper Loading Adjust the paper guides in the input tray to fit the paper size you will be using. Load a stack of paper into the tray, making sure it is aligned correctly. Slide the tray back into the printer, ensuring it is firmly in place.
- 7. Software Installation Insert the printer's software installation disc into your computer's CD/DVD drive. If your computer doesn't have a CD/DVD drive, you can download the latest printer software from the HP website. Follow the on-screen prompts to complete the installation process.
- 8. Connection Setup Connect one end of the USB cable to the printer and the other end to an available USB port on your computer. Ensure that both devices are powered on. Your computer should automatically detect the printer and install the necessary drivers.
- 9. Test Print Once the software installation is complete, it's time to test your printer. Open a document or image and select the print option. Choose your HP printer from the list of available printers and click "Print." If the printer successfully prints your document, then congratulations! Your setup is complete.
- 10. Remember, this guide provides a general overview of the HP printer setup process. It's essential to consult your printer's user manual for specific instructions related to your printer model. In case you encounter any issues during the setup, HP's customer support is always available to assist you.
- 11. In conclusion, setting up your HP printer is a straightforward process if you follow these steps. Soon enough, you'll be able to print documents, photos, and more with ease. Enjoy the convenience and reliability that an HP printer brings to your home or office.