
Recommended
More Related Content
Viewers also liked
More from Mustansir Dahodwala
More from Mustansir Dahodwala (20)
Recently uploaded
Recently uploaded (20)
Microsoft Office Powerpoint 2013 Tutorial- Using Instant Search to Find Messages and Text
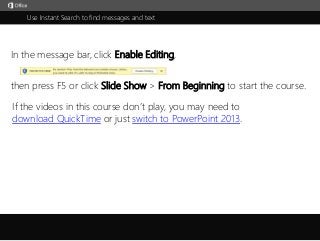
- 1. Use Instant Search to find messages and text j then press F5 or click Slide Show > From Beginning to start the course. In the message bar, click Enable Editing, If the videos in this course don’t play, you may need to download QuickTime or just switch to PowerPoint 2013.
- 2. 51 2 3 4 Course summary HelpUse Instant Search to find messages and text Closed captions 1/2 videos Summary Feedback HelpIntroduction Narrow results 3:49 4:06 Press F5 to start, Esc to stop 51 2 3 4 Instant Search helps you find email fast. To use it, type some words to search for in this box at the top of the message list. And Outlook immediately starts searching, even before you finish typing,and comes back with a list of all the email containing your search words, highlighted in yellow.Outlook searches all parts of an email message:the subject, message body, To and From lines; it even searches text inside attachments.When you find what you’re looking for, double-click the email to open it or view it in the reading pane.To close search, click the X in the search box.So that’s all you need to know to start using Instant Search. By the way, don’t confuse it with People Search up here. People Search is for finding people in your address book.Instant Search is for searching email. You’ll also find Instant Search in other areas of Outlook.For example, click Calendar in the navigation bar, and there’s an Instant Search here for finding calendar items. And click People, and there’s an Instant Search for contacts, too.Back in Mail, let’s say you don’t find what you want. It could be because Outlook shows only 30 results when you start. Go to the bottom of the list and click More to see the rest of the results.By default, Outlook limits results to 250.But, if you have that many emails to look through, you should really consider narrowing your search criteria.The easiest way to do that is type another word. Now the email must contain both words - book and store.If you want to see how many search results you have, look on the status bar next to Items.With book and store we have 22 results. That’s better.Another thing you can do to narrow the search is use quotation marks.If you add quotes around the words, Outlook will only show results if both words are together.Notice that we now have 12 results.What else can you do? Well, you can use combining words, like AND, OR and NOT.Let’s delete the quotes, and type capital O-R between the words.Now an email only needs to contain book or store to end up on the results list.As you can see, the number of results went way up.OR is a good combining word to use if you have the opposite problem and don’t get enough results.Now let’s see what happens when we delete OR and type capital N-O-T.Outlook searches for email that contains book, but not store. Now we have 12 results.AND is another combining word you can use.But you don’t need to type it, because Outlook assumes you mean AND if you just type words.Another way to get more specific is to limit the scope – or the places Outlook searches.Hold the pointer over a message. If you have ScreenTips enabled, you’ll see a pop-up showing where the message was found. By default, Outlook searches every folder in the mailbox that’s currently open, even your deleted and sent items. To change that, click the arrow on the right side of the search box, and choose another scope.For example you can search only the current folder, which in this case is the Inbox.So in many cases, you can find the email you’re looking for by using the methods in this movie.But if you have a lot of email to search, it helps to really pinpoint your search criteria.Check out the next movie in this course, Narrow your search results, for more ideas.
- 3. 51 2 3 4 Course summary HelpUse Instant Search to find messages and text Closed captions 2/2 videos Summary Feedback Help Press F5 to start, Esc to stop 51 2 3 4 You may have thousands of messages stored in your mailbox.But there’s no point in saving them if you can’t find a message when you need it.If the methods we used in movie 1, Use Instant Search to find messages and text,don’t give you what you’re looking for, you can try some other things to narrow your search.First, you can search for things other than text. Go to the Home tab and in the Find group, click Filter Email.Here you can search for Unread email or email that contains attachments.Click Important to see all the mail marked with high importance.Notice that when you choose an option, Outlook enters special search script in the Instant Search box.So if you want, you can add something to the criteria.For example, we could type OR patti to view all important email and all the email that contains patti.Let’s click the X to close this search and click the Instant Search box again.When you do the Search tab opens on the ribbon.Over here you’ll find Scope options.These are the same options you get when you click the arrow on the right side of the Instant Search box.The Refine group has all the options we found in Filter Email and a lot more.Click Subject and Outlook adds search script to the Instant Search box.Type a key word, and Outlook limits its search to the Subject line of the email.Click More to find a lot more ways to refine your search. Let’s try Sensitivity.With this option you need to choose a Sensitivity level.Open the list and choose Private. And Outlook searches for all email that’s marked as Private.Let’s close this search and look in the Options group. Click Recent Searches.This is where you go if you want to repeat a search but don’t want to enter all the criteria again.Click Search Tools. Chances are you won’t need the options in here very often, except for one. Click Advanced Find. This is the tool you use when all else fails.You can do everything here that you can do on the Search tab, and then some.For example, let’s type a search word, and click In and choose subject field and message body. Then, click Browse. Now the scope is set to Inbox. Let’s check the whole mailbox and uncheck Inbox.And at the bottom check Search subfolders. And OK. Then, click Find Now.The search results we get down here are pretty much the same as those we got when we simply typed a word in Instant Search. So why go through all this extra work? Well, because you have a lot more choices.In fact, you can click the More Choices tab to see what I mean.For example, down here you can search by the size of the message.First, click New Search, and OK to start a new search. Click the first box, and choose greater than.Then over here, type a size in kilobytes.Click Find Now, and Outlook finds all the messages that are larger than 800 kilobytes.Finally, there’s the Advanced tab. Here you can perform the ultimate search.Look for anything in any field in any Outlook item.Check out the links in the course summary at the end of this course to see how to set up the options here.So, when you need to find something in your mailbox, start by typing search words in the Instant Search box. But if you need more help, try Filter Email or the options on the Search tab.If you still can’t find what you’re looking for, check out Advanced Find.For more information, check out the links in the course summary. Introduction Narrow results 3:49 4:06
- 4. Help Course summary Press F5 to start, Esc to stop Course summary—Use Instant Search to find messages and text Summary Feedback Help 51 2 3 4 Introduction Narrow results 3:49 4:06 Use Advanced Find Getting too many results? Or are you just not finding what you want? 1. Click in the search box. 2. On the Search tab, click Search Tools > Advanced Find. The Advanced Find dialog box opens. In this box, you can specify much more complex criteria and even search in your calendar, contacts list, notes, and tasks. 3. Click the Advanced tab. 4. Under Define more criteria, click the Field button and then click All Mail Fields. You'll see a menu of fields you can search on, such as From, To, Received, Subject, and dozens more. 5. Start by choosing a field, then choose a condition and a value to test. 6. Add as many additional conditions as you need or want to test. 7. Finally, click Find Now to run the search. Filter email messages When searching for a particular message, you might remember that it contained an attachment, was marked important, or was received last week. To find a message based on certain criteria, the Filter Email command provides fast access to the most frequently used Instant Searches. • Click Home, and then in the Find group, click Filter Email. When you use a filter, the same Search Tools tab appears on the ribbon as when you click in the Instant Search box. To clear the search results and view all items in the selected mail folder, click X in the Instant Search box, or on the Search tab, in the Close group, click Close Search. See also • Find a message with Instant Search • Filter email messages • Find people and contacts • More training courses • Office Compatibility Pack
- 5. Help Course summary Press F5 to start, Esc to stop Rating and comments Thank you for viewing this course! Please tell us what you think Summary Feedback Help 51 2 3 4 Check out more courses Introduction Narrow results 3:49 4:06
- 6. Help Course summary Press F5 to start, Esc to stop Help Summary Feedback Help 51 2 3 4 Using PowerPoint’s video controls Going places Stopping a course If you download a course and the videos don’t play get the PowerPoint Viewer. the QuickTime player upgrade to PowerPoint 2013 Introduction Narrow results 3:49 4:06