SlideShare a Scribd company logo
1 of 14
Download to read offline
Service manual H1 & S3 Page1 of 14
Rev. A
SERVICE
MANUAL
S3
H1
English
Service manual H1 & S3 Page2 of 14
Rev. A
No part of this publication may be reproduced, transmitted, stored or translated into any
language, in any form or through any electronic, magnetic, optical, chemical, manual,
physical device or other means, without written consent from Wuhan Pioon Technology
Co.,Ltd.
Title – Service manual
Date – 11th October 2021
Rev. A
Wuhan Pioon Technology Co.,Ltd
3rd Floor, Great Wall Park Industrial Center
Building, #323 Minzu Avenue,
430223 Wuhan, PEOPLE’S REPUBLIC OF CHINA
Tel. +86-27-81783687
E-mail info@pioon.com
The device is manufacture in compliance with the provisions of
Council Directive 93/42/EEC and 2007/47/CE concerning medical devices.
Its compliance is based on the following standards : IEC 60601-1.
Service manual H1 & S3 Page3 of 14
Rev. A
Index
1 Service procedure ............................................................................................................
1.1 Rechargeable battery replacing .................................................................................5
1.2 Internal battery replacing............................................................................................6
1.3 Device calibration.......................................................................................................8
1.4 Electrical safety test ................................................................................................. 12
2 Cleaning, maintenance and service................................................................................
2.1 Cleaning of the device.............................................................................................. 13
2.2 Troubleshooting of simple defects ........................................................................... 13
2.3 Maintenance ............................................................................................................ 14
2.4 Safety check ............................................................................................................ 14
2.5 Technical support..................................................................................................... 14
Service manual H1 & S3 Page4 of 14
Rev. A
1 Service procedure
The following service performances could be performed on the device:
1. Rechargeable battery replacing (also performable by user);
2. Internal battery replacing;
3. Device calibration;
4. Calibration check;
5. Electrical safety test.
These operations (except the first one) must be performed by Authorized Service Center. The
illustrations in this service manual are for reference only. There may be some differences in the
color and software interface of the material object, and the material object shall prevail.
Service manual H1 & S3 Page5 of 14
Rev. A
1.1 Rechargeable battery replacing
1) Unscrew 4 screws and take out the
battery.
2) Mount the new battery in the proper
house. Tighten the screws.
Plug in the power supply, switch on the laser device and charge the battery for at least 1 h .
2
1
Service manual H1 & S3 Page6 of 14
Rev. A
1.2 Internal battery replacing
Unroll the fiber.
Cover the fiber with protective cap.
Remove the host.
1) Remove the front panel from the device.
Take particular care removing the screws (A, B, C,D,E) shown in the 2 following pictures.
Then open the device.
2) Remove the display.
E
D
B
A
C
Service manual H1 & S3 Page7 of 14
Rev. A
3) Replace the battery (model CR 2032).A soldering
iron is used to remove and install the battery.
4) install the display.
5) Reassemble the device.
Take particular care to the 5 previously shown
screws (A, B, C,D,E).
3
Service manual H1 & S3 Page8 of 14
Rev. A
6) Align the four locating pins according to the
corresponding position in the drawing and press
down firmly.
1.3 Device calibration
The detailed steps of power calibration can be viewed through video
https://youtu.be/ubTiRSZhYTA
Connect the device and the power meter, as in the figure below.
Use an external power meter and put the handpiece on a distance of 2-3 cm to the head of the
power meter.
Follow the procedure.(Taking H1 interface as an example, S3 power calibration process is the
same)
Power Calibration Procedure:
A1 A2
A3 A4
B1
B2
B3 B4
Service manual H1 & S3 Page9 of 14
Rev. A
Step 1: Input the password 03986086 to enter the engineer interface. As shown below
Step 2: Click POWR Calibration to enter the power calibration interface. As shown below
Note:First, we need to calibrate the threshold, that is, the power value at 0.5W, and then we
will calibrate the debugging power step by step.
Step 3: Click the SET Threshold button to enter the 0.5w threshold setting interface. As shown
below
Service manual H1 & S3 Page10 of 14
Rev. A
Threshold calibration steps
① Enter the power calibration interface, click ,emit 0.5W, check the actual output
power.
② Enter the interface, Based on the default value, adjust the value according to the
actual output power.(There is no limit value for downward adjustment, and upward
adjustment cannot exceed twice the default value, each adjustment data recommended
increase or decrease 1-2, if the value difference is too large, increase or decrease 5-8)
Example:
1、If you click 0.5w, the actual light output is 0.4. In the threshold adjustment interface, add 1 to
the initial value, and check the actual power again, and so on;
2、If you click 0.5w, the actual light output is 0. In the threshold adjustment interface, add 5 to the
initial value, and check the actual power again, and so on;
3、If you click 0.5w, the actual light output is 0.6. In the threshold adjustment interface, decrease 1
from the initial value, and check the actual power again, and so on;
4、If you click 0.5w, the actual light output is 1. In the threshold adjustment interface, decrease 8
from the initial value, and check the actual power again, and so on;
Step 4: Return to the power calibration interface, select the power to emit light, fill in the ‘Real’
option with the number on the power meter, and click the CONFIRM button. Repeat this step for
each line
Service manual H1 & S3 Page11 of 14
Rev. A
Step 5: After recording the measured power value, click the ‘Restore’ button, wait for the "bee----"
sound, then click ‘All Down’, at this time, the power calibration data issuance process will be
displayed. After the process is over, select the power to emit light again, record the re-measured
value, and check whether the power is within the error range.
If the power re-measured value is within the error range, the calibration is complete. If the power
re-measured value is out of the error range, repeat the fourth and fifth steps until the power output is
within the error range.
Enter the treatment interface, set different wavelengths and powers, and check whether the power
input is within the error range. If it is out of range, perform fine-tuning on the power calibration
interface until the power output is within the error range, then the power calibration is completed.
Service manual H1 & S3 Page12 of 14
Rev. A
1.4 Electrical safety test
Use the instrument to perform electrical safety test (class II type B), and consider USB
as accessible part.
Switch on the electrical safety analyzer and set up the data.
Switch on the device.
Confirm the setting of the analyzer and begin the test sequence.
Print the test result.
Service manual H1 & S3 Page13 of 14
Rev. A
2 Cleaning, maintenance and service
2.1 Cleaning of the device
Following treatment, switch off the device and disconnect the power cable from the power supply.
Clean the device and the accessories with a dry, soft cloth to remove dust from the device. More
stubborn spots can be removed with a damp cloth. Please proceed careful not to scratch and
damage the foil on the touchscreen. The device may be disinfected only by wiping it. Spray
disinfection may allow liquids to penetrate into the device.
2.2 Troubleshooting of simple defects
In case of malfunctioning, proceed as follows:
First of all, be sure that operation steps have been carried out correctly.
The touchscreen of the device remains dark after switching it on.
▪ Check the connection of the power cable and/or check the rechargeable battery.
When using an interlock device the laser will not be stopped and blocked after interrupting the
circuit.
▪ Check the connection of the interlock device.
There is no aiming beam or it does not project a uniform circular pattern.
▪ Check to see if the optical fiber is damaged. If the optical fiber is damaged, replace it with a
new one.
▪ Check the connection of the optical fiber is damaged.
Self test fails.
▪ Repeat test.
▪ Check the fiber connection.
Service manual H1 & S3 Page14 of 14
Rev. A
2.3 Maintenance
The device does not require special maintenance.
However, the manufacturer recommends taking the following actions at regular intervals:
Action Frequency Responsible
Check of the optical fiber Before each treatment session System owner
Voluntarily check of the optical
power
Every month System owner
Safety checks Every 2 years Authorized Service Center.
2.4 Safety check
The following safety checks must be performed every 24 months by a qualified service engineer:
Visual inspection of the unit and its accessories for mechanical damage that might impair
operation;
General function check;
Check of the visual and audible indicators;
Check the electrical power;
Check the power emission of the laser.
2.5 Technical support
In case technical support, contact the following address:
Wuhan Pioon Technology Co.,Ltd
3rd Floor, Great Wall Park Industrial Center
Building, #323 Minzu Avenue,
430223 Wuhan, PEOPLE’S REPUBLIC OF CHINA
Phone +86-27-81783687
E-mail info@pioon.com
The device may be sent in for repair or for safety inspection only in its original packaging, including
all accessories.
Wuhan Pioon Technology is the only provider of technical service for its products, unless otherwise
indicated by the company. This is to guarantee the product’s safety and for the preservation of the
product’s characteristics.

More Related Content

Similar to Service manual s3 & h1 rev.english

Hướng dẫn sử dụng Testo 435
Hướng dẫn sử dụng Testo 435Hướng dẫn sử dụng Testo 435
Hướng dẫn sử dụng Testo 435Tenmars Việt Nam
 
Hướng dẫn sử dụng máy đo nhiệt độ bề mặt Testo 435-3
Hướng dẫn sử dụng máy đo nhiệt độ bề mặt Testo 435-3Hướng dẫn sử dụng máy đo nhiệt độ bề mặt Testo 435-3
Hướng dẫn sử dụng máy đo nhiệt độ bề mặt Testo 435-3Tenmars Việt Nam
 
Hướng dẫn sử dụng Testo 435
Hướng dẫn sử dụng Testo 435Hướng dẫn sử dụng Testo 435
Hướng dẫn sử dụng Testo 435Tenmars Việt Nam
 
Autel Powerscan PS100 User Manual
Autel Powerscan PS100 User ManualAutel Powerscan PS100 User Manual
Autel Powerscan PS100 User Manualobddeal
 
Hướng dẫn sử dụng máy đo đa năng Testo 435
Hướng dẫn sử dụng máy đo đa năng Testo 435Hướng dẫn sử dụng máy đo đa năng Testo 435
Hướng dẫn sử dụng máy đo đa năng Testo 435Tenmars Việt Nam
 
Hướng dẫn sử dụng Testo 435-3
Hướng dẫn sử dụng Testo 435-3Hướng dẫn sử dụng Testo 435-3
Hướng dẫn sử dụng Testo 435-3Tenmars Việt Nam
 
Hướng dẫn sử dụng testo 435-3
Hướng dẫn sử dụng  testo 435-3 Hướng dẫn sử dụng  testo 435-3
Hướng dẫn sử dụng testo 435-3 Tenmars Việt Nam
 
Cataloge ge 3.control and_automation_dienhathe.com-4_speed_drive_units_vat200...
Cataloge ge 3.control and_automation_dienhathe.com-4_speed_drive_units_vat200...Cataloge ge 3.control and_automation_dienhathe.com-4_speed_drive_units_vat200...
Cataloge ge 3.control and_automation_dienhathe.com-4_speed_drive_units_vat200...Dien Ha The
 
Cataloge ge 3.control and_automation-4_speed_drive_units_vat200_manual_english
Cataloge ge 3.control and_automation-4_speed_drive_units_vat200_manual_englishCataloge ge 3.control and_automation-4_speed_drive_units_vat200_manual_english
Cataloge ge 3.control and_automation-4_speed_drive_units_vat200_manual_englishThuan Kieu
 
Cataloge ge 3.control and_automation-4_speed_drive_units_avat200_manual_english
Cataloge ge 3.control and_automation-4_speed_drive_units_avat200_manual_englishCataloge ge 3.control and_automation-4_speed_drive_units_avat200_manual_english
Cataloge ge 3.control and_automation-4_speed_drive_units_avat200_manual_englishDien Ha The
 
200SM035-V1.6-EM-INSTALL-GUIDE
200SM035-V1.6-EM-INSTALL-GUIDE200SM035-V1.6-EM-INSTALL-GUIDE
200SM035-V1.6-EM-INSTALL-GUIDERobert Keys
 
BA101 vehicle battery tester user manual
BA101 vehicle battery tester user manualBA101 vehicle battery tester user manual
BA101 vehicle battery tester user manualBuyobdtoolShop
 
Set48 220 1 klc user manual, High frequency DC 48v to AC 220v inverter for Te...
Set48 220 1 klc user manual, High frequency DC 48v to AC 220v inverter for Te...Set48 220 1 klc user manual, High frequency DC 48v to AC 220v inverter for Te...
Set48 220 1 klc user manual, High frequency DC 48v to AC 220v inverter for Te...Edward Setec
 
Vf s15 intruction manual
Vf s15 intruction manualVf s15 intruction manual
Vf s15 intruction manualToàn Huỳnh
 
Etekcity MSR-C600 Digital Multimeter User Manual
Etekcity MSR-C600 Digital Multimeter User ManualEtekcity MSR-C600 Digital Multimeter User Manual
Etekcity MSR-C600 Digital Multimeter User ManualTim Miller
 
Manual co detector-popp_en
Manual co detector-popp_enManual co detector-popp_en
Manual co detector-popp_enDomotica daVinci
 

Similar to Service manual s3 & h1 rev.english (20)

Tx7201 zone monitor module
Tx7201 zone monitor moduleTx7201 zone monitor module
Tx7201 zone monitor module
 
Hướng dẫn sử dụng Testo 435
Hướng dẫn sử dụng Testo 435Hướng dẫn sử dụng Testo 435
Hướng dẫn sử dụng Testo 435
 
Hướng dẫn sử dụng máy đo nhiệt độ bề mặt Testo 435-3
Hướng dẫn sử dụng máy đo nhiệt độ bề mặt Testo 435-3Hướng dẫn sử dụng máy đo nhiệt độ bề mặt Testo 435-3
Hướng dẫn sử dụng máy đo nhiệt độ bề mặt Testo 435-3
 
Hướng dẫn sử dụng Testo 435
Hướng dẫn sử dụng Testo 435Hướng dẫn sử dụng Testo 435
Hướng dẫn sử dụng Testo 435
 
Autel Powerscan PS100 User Manual
Autel Powerscan PS100 User ManualAutel Powerscan PS100 User Manual
Autel Powerscan PS100 User Manual
 
Hướng dẫn sử dụng máy đo đa năng Testo 435
Hướng dẫn sử dụng máy đo đa năng Testo 435Hướng dẫn sử dụng máy đo đa năng Testo 435
Hướng dẫn sử dụng máy đo đa năng Testo 435
 
Hướng dẫn sử dụng Testo 435-3
Hướng dẫn sử dụng Testo 435-3Hướng dẫn sử dụng Testo 435-3
Hướng dẫn sử dụng Testo 435-3
 
Hướng dẫn sử dụng testo 435-3
Hướng dẫn sử dụng  testo 435-3 Hướng dẫn sử dụng  testo 435-3
Hướng dẫn sử dụng testo 435-3
 
Cataloge ge 3.control and_automation_dienhathe.com-4_speed_drive_units_vat200...
Cataloge ge 3.control and_automation_dienhathe.com-4_speed_drive_units_vat200...Cataloge ge 3.control and_automation_dienhathe.com-4_speed_drive_units_vat200...
Cataloge ge 3.control and_automation_dienhathe.com-4_speed_drive_units_vat200...
 
Cataloge ge 3.control and_automation-4_speed_drive_units_vat200_manual_english
Cataloge ge 3.control and_automation-4_speed_drive_units_vat200_manual_englishCataloge ge 3.control and_automation-4_speed_drive_units_vat200_manual_english
Cataloge ge 3.control and_automation-4_speed_drive_units_vat200_manual_english
 
Cataloge ge 3.control and_automation-4_speed_drive_units_avat200_manual_english
Cataloge ge 3.control and_automation-4_speed_drive_units_avat200_manual_englishCataloge ge 3.control and_automation-4_speed_drive_units_avat200_manual_english
Cataloge ge 3.control and_automation-4_speed_drive_units_avat200_manual_english
 
200SM035-V1.6-EM-INSTALL-GUIDE
200SM035-V1.6-EM-INSTALL-GUIDE200SM035-V1.6-EM-INSTALL-GUIDE
200SM035-V1.6-EM-INSTALL-GUIDE
 
BA101 vehicle battery tester user manual
BA101 vehicle battery tester user manualBA101 vehicle battery tester user manual
BA101 vehicle battery tester user manual
 
Charder ms2400
Charder ms2400Charder ms2400
Charder ms2400
 
Set48 220 1 klc user manual, High frequency DC 48v to AC 220v inverter for Te...
Set48 220 1 klc user manual, High frequency DC 48v to AC 220v inverter for Te...Set48 220 1 klc user manual, High frequency DC 48v to AC 220v inverter for Te...
Set48 220 1 klc user manual, High frequency DC 48v to AC 220v inverter for Te...
 
Vf s15 intruction manual
Vf s15 intruction manualVf s15 intruction manual
Vf s15 intruction manual
 
3310 Basic Usuari
3310 Basic Usuari3310 Basic Usuari
3310 Basic Usuari
 
Etekcity MSR-C600 Digital Multimeter User Manual
Etekcity MSR-C600 Digital Multimeter User ManualEtekcity MSR-C600 Digital Multimeter User Manual
Etekcity MSR-C600 Digital Multimeter User Manual
 
Troubleshooting.pptx
Troubleshooting.pptxTroubleshooting.pptx
Troubleshooting.pptx
 
Manual co detector-popp_en
Manual co detector-popp_enManual co detector-popp_en
Manual co detector-popp_en
 

Recently uploaded

Call Girls Hyderabad Just Call 9907093804 Top Class Call Girl Service Available
Call Girls Hyderabad Just Call 9907093804 Top Class Call Girl Service AvailableCall Girls Hyderabad Just Call 9907093804 Top Class Call Girl Service Available
Call Girls Hyderabad Just Call 9907093804 Top Class Call Girl Service AvailableDipal Arora
 
Russian Call Girls Kota * 8250192130 Service starts from just ₹9999 ✅
Russian Call Girls Kota * 8250192130 Service starts from just ₹9999 ✅Russian Call Girls Kota * 8250192130 Service starts from just ₹9999 ✅
Russian Call Girls Kota * 8250192130 Service starts from just ₹9999 ✅gragmanisha42
 
VIP Call Girls Sector 67 Gurgaon Just Call Me 9711199012
VIP Call Girls Sector 67 Gurgaon Just Call Me 9711199012VIP Call Girls Sector 67 Gurgaon Just Call Me 9711199012
VIP Call Girls Sector 67 Gurgaon Just Call Me 9711199012Call Girls Service Gurgaon
 
Udaipur Call Girls 📲 9999965857 Call Girl in Udaipur
Udaipur Call Girls 📲 9999965857 Call Girl in UdaipurUdaipur Call Girls 📲 9999965857 Call Girl in Udaipur
Udaipur Call Girls 📲 9999965857 Call Girl in Udaipurseemahedar019
 
Russian Escorts Aishbagh Road * 9548273370 Naughty Call Girls Service in Lucknow
Russian Escorts Aishbagh Road * 9548273370 Naughty Call Girls Service in LucknowRussian Escorts Aishbagh Road * 9548273370 Naughty Call Girls Service in Lucknow
Russian Escorts Aishbagh Road * 9548273370 Naughty Call Girls Service in Lucknowgragteena
 
Russian Call Girls Gurgaon Swara 9711199012 Independent Escort Service Gurgaon
Russian Call Girls Gurgaon Swara 9711199012 Independent Escort Service GurgaonRussian Call Girls Gurgaon Swara 9711199012 Independent Escort Service Gurgaon
Russian Call Girls Gurgaon Swara 9711199012 Independent Escort Service GurgaonCall Girls Service Gurgaon
 
VIP Call Girl Sector 88 Gurgaon Delhi Just Call Me 9899900591
VIP Call Girl Sector 88 Gurgaon Delhi Just Call Me 9899900591VIP Call Girl Sector 88 Gurgaon Delhi Just Call Me 9899900591
VIP Call Girl Sector 88 Gurgaon Delhi Just Call Me 9899900591adityaroy0215
 
No Advance 9053900678 Chandigarh Call Girls , Indian Call Girls For Full Ni...
No Advance 9053900678 Chandigarh  Call Girls , Indian Call Girls  For Full Ni...No Advance 9053900678 Chandigarh  Call Girls , Indian Call Girls  For Full Ni...
No Advance 9053900678 Chandigarh Call Girls , Indian Call Girls For Full Ni...Vip call girls In Chandigarh
 
Leading transformational change: inner and outer skills
Leading transformational change: inner and outer skillsLeading transformational change: inner and outer skills
Leading transformational change: inner and outer skillsHelenBevan4
 
Basics of Anatomy- Language of Anatomy.pptx
Basics of Anatomy- Language of Anatomy.pptxBasics of Anatomy- Language of Anatomy.pptx
Basics of Anatomy- Language of Anatomy.pptxAyush Gupta
 
💚😋Mumbai Escort Service Call Girls, ₹5000 To 25K With AC💚😋
💚😋Mumbai Escort Service Call Girls, ₹5000 To 25K With AC💚😋💚😋Mumbai Escort Service Call Girls, ₹5000 To 25K With AC💚😋
💚😋Mumbai Escort Service Call Girls, ₹5000 To 25K With AC💚😋Sheetaleventcompany
 
Call Girls Service Chandigarh Grishma ❤️🍑 9907093804 👄🫦 Independent Escort Se...
Call Girls Service Chandigarh Grishma ❤️🍑 9907093804 👄🫦 Independent Escort Se...Call Girls Service Chandigarh Grishma ❤️🍑 9907093804 👄🫦 Independent Escort Se...
Call Girls Service Chandigarh Grishma ❤️🍑 9907093804 👄🫦 Independent Escort Se...High Profile Call Girls Chandigarh Aarushi
 
Call Girls Service Chandigarh Gori WhatsApp ❤7710465962 VIP Call Girls Chandi...
Call Girls Service Chandigarh Gori WhatsApp ❤7710465962 VIP Call Girls Chandi...Call Girls Service Chandigarh Gori WhatsApp ❤7710465962 VIP Call Girls Chandi...
Call Girls Service Chandigarh Gori WhatsApp ❤7710465962 VIP Call Girls Chandi...Niamh verma
 
Vip Kolkata Call Girls Cossipore 👉 8250192130 ❣️💯 Available With Room 24×7
Vip Kolkata Call Girls Cossipore 👉 8250192130 ❣️💯 Available With Room 24×7Vip Kolkata Call Girls Cossipore 👉 8250192130 ❣️💯 Available With Room 24×7
Vip Kolkata Call Girls Cossipore 👉 8250192130 ❣️💯 Available With Room 24×7Miss joya
 
❤️♀️@ Jaipur Call Girls ❤️♀️@ Meghna Jaipur Call Girls Number CRTHNR Call G...
❤️♀️@ Jaipur Call Girls ❤️♀️@ Meghna Jaipur Call Girls Number CRTHNR   Call G...❤️♀️@ Jaipur Call Girls ❤️♀️@ Meghna Jaipur Call Girls Number CRTHNR   Call G...
❤️♀️@ Jaipur Call Girls ❤️♀️@ Meghna Jaipur Call Girls Number CRTHNR Call G...Gfnyt.com
 
Vip sexy Call Girls Service In Sector 137,9999965857 Young Female Escorts Ser...
Vip sexy Call Girls Service In Sector 137,9999965857 Young Female Escorts Ser...Vip sexy Call Girls Service In Sector 137,9999965857 Young Female Escorts Ser...
Vip sexy Call Girls Service In Sector 137,9999965857 Young Female Escorts Ser...Call Girls Noida
 

Recently uploaded (20)

Call Girls Hyderabad Just Call 9907093804 Top Class Call Girl Service Available
Call Girls Hyderabad Just Call 9907093804 Top Class Call Girl Service AvailableCall Girls Hyderabad Just Call 9907093804 Top Class Call Girl Service Available
Call Girls Hyderabad Just Call 9907093804 Top Class Call Girl Service Available
 
Russian Call Girls Kota * 8250192130 Service starts from just ₹9999 ✅
Russian Call Girls Kota * 8250192130 Service starts from just ₹9999 ✅Russian Call Girls Kota * 8250192130 Service starts from just ₹9999 ✅
Russian Call Girls Kota * 8250192130 Service starts from just ₹9999 ✅
 
VIP Call Girls Sector 67 Gurgaon Just Call Me 9711199012
VIP Call Girls Sector 67 Gurgaon Just Call Me 9711199012VIP Call Girls Sector 67 Gurgaon Just Call Me 9711199012
VIP Call Girls Sector 67 Gurgaon Just Call Me 9711199012
 
Udaipur Call Girls 📲 9999965857 Call Girl in Udaipur
Udaipur Call Girls 📲 9999965857 Call Girl in UdaipurUdaipur Call Girls 📲 9999965857 Call Girl in Udaipur
Udaipur Call Girls 📲 9999965857 Call Girl in Udaipur
 
Russian Escorts Aishbagh Road * 9548273370 Naughty Call Girls Service in Lucknow
Russian Escorts Aishbagh Road * 9548273370 Naughty Call Girls Service in LucknowRussian Escorts Aishbagh Road * 9548273370 Naughty Call Girls Service in Lucknow
Russian Escorts Aishbagh Road * 9548273370 Naughty Call Girls Service in Lucknow
 
Russian Call Girls Gurgaon Swara 9711199012 Independent Escort Service Gurgaon
Russian Call Girls Gurgaon Swara 9711199012 Independent Escort Service GurgaonRussian Call Girls Gurgaon Swara 9711199012 Independent Escort Service Gurgaon
Russian Call Girls Gurgaon Swara 9711199012 Independent Escort Service Gurgaon
 
VIP Call Girl Sector 88 Gurgaon Delhi Just Call Me 9899900591
VIP Call Girl Sector 88 Gurgaon Delhi Just Call Me 9899900591VIP Call Girl Sector 88 Gurgaon Delhi Just Call Me 9899900591
VIP Call Girl Sector 88 Gurgaon Delhi Just Call Me 9899900591
 
Russian Call Girls in Dehradun Komal 🔝 7001305949 🔝 📍 Independent Escort Serv...
Russian Call Girls in Dehradun Komal 🔝 7001305949 🔝 📍 Independent Escort Serv...Russian Call Girls in Dehradun Komal 🔝 7001305949 🔝 📍 Independent Escort Serv...
Russian Call Girls in Dehradun Komal 🔝 7001305949 🔝 📍 Independent Escort Serv...
 
No Advance 9053900678 Chandigarh Call Girls , Indian Call Girls For Full Ni...
No Advance 9053900678 Chandigarh  Call Girls , Indian Call Girls  For Full Ni...No Advance 9053900678 Chandigarh  Call Girls , Indian Call Girls  For Full Ni...
No Advance 9053900678 Chandigarh Call Girls , Indian Call Girls For Full Ni...
 
Leading transformational change: inner and outer skills
Leading transformational change: inner and outer skillsLeading transformational change: inner and outer skills
Leading transformational change: inner and outer skills
 
Basics of Anatomy- Language of Anatomy.pptx
Basics of Anatomy- Language of Anatomy.pptxBasics of Anatomy- Language of Anatomy.pptx
Basics of Anatomy- Language of Anatomy.pptx
 
💚😋Mumbai Escort Service Call Girls, ₹5000 To 25K With AC💚😋
💚😋Mumbai Escort Service Call Girls, ₹5000 To 25K With AC💚😋💚😋Mumbai Escort Service Call Girls, ₹5000 To 25K With AC💚😋
💚😋Mumbai Escort Service Call Girls, ₹5000 To 25K With AC💚😋
 
Call Girl Guwahati Aashi 👉 7001305949 👈 🔝 Independent Escort Service Guwahati
Call Girl Guwahati Aashi 👉 7001305949 👈 🔝 Independent Escort Service GuwahatiCall Girl Guwahati Aashi 👉 7001305949 👈 🔝 Independent Escort Service Guwahati
Call Girl Guwahati Aashi 👉 7001305949 👈 🔝 Independent Escort Service Guwahati
 
Call Girls Service Chandigarh Grishma ❤️🍑 9907093804 👄🫦 Independent Escort Se...
Call Girls Service Chandigarh Grishma ❤️🍑 9907093804 👄🫦 Independent Escort Se...Call Girls Service Chandigarh Grishma ❤️🍑 9907093804 👄🫦 Independent Escort Se...
Call Girls Service Chandigarh Grishma ❤️🍑 9907093804 👄🫦 Independent Escort Se...
 
Call Girl Dehradun Aashi 🔝 7001305949 🔝 💃 Independent Escort Service Dehradun
Call Girl Dehradun Aashi 🔝 7001305949 🔝 💃 Independent Escort Service DehradunCall Girl Dehradun Aashi 🔝 7001305949 🔝 💃 Independent Escort Service Dehradun
Call Girl Dehradun Aashi 🔝 7001305949 🔝 💃 Independent Escort Service Dehradun
 
Model Call Girl in Subhash Nagar Delhi reach out to us at 🔝9953056974🔝
Model Call Girl in Subhash Nagar Delhi reach out to us at 🔝9953056974🔝Model Call Girl in Subhash Nagar Delhi reach out to us at 🔝9953056974🔝
Model Call Girl in Subhash Nagar Delhi reach out to us at 🔝9953056974🔝
 
Call Girls Service Chandigarh Gori WhatsApp ❤7710465962 VIP Call Girls Chandi...
Call Girls Service Chandigarh Gori WhatsApp ❤7710465962 VIP Call Girls Chandi...Call Girls Service Chandigarh Gori WhatsApp ❤7710465962 VIP Call Girls Chandi...
Call Girls Service Chandigarh Gori WhatsApp ❤7710465962 VIP Call Girls Chandi...
 
Vip Kolkata Call Girls Cossipore 👉 8250192130 ❣️💯 Available With Room 24×7
Vip Kolkata Call Girls Cossipore 👉 8250192130 ❣️💯 Available With Room 24×7Vip Kolkata Call Girls Cossipore 👉 8250192130 ❣️💯 Available With Room 24×7
Vip Kolkata Call Girls Cossipore 👉 8250192130 ❣️💯 Available With Room 24×7
 
❤️♀️@ Jaipur Call Girls ❤️♀️@ Meghna Jaipur Call Girls Number CRTHNR Call G...
❤️♀️@ Jaipur Call Girls ❤️♀️@ Meghna Jaipur Call Girls Number CRTHNR   Call G...❤️♀️@ Jaipur Call Girls ❤️♀️@ Meghna Jaipur Call Girls Number CRTHNR   Call G...
❤️♀️@ Jaipur Call Girls ❤️♀️@ Meghna Jaipur Call Girls Number CRTHNR Call G...
 
Vip sexy Call Girls Service In Sector 137,9999965857 Young Female Escorts Ser...
Vip sexy Call Girls Service In Sector 137,9999965857 Young Female Escorts Ser...Vip sexy Call Girls Service In Sector 137,9999965857 Young Female Escorts Ser...
Vip sexy Call Girls Service In Sector 137,9999965857 Young Female Escorts Ser...
 

Service manual s3 & h1 rev.english

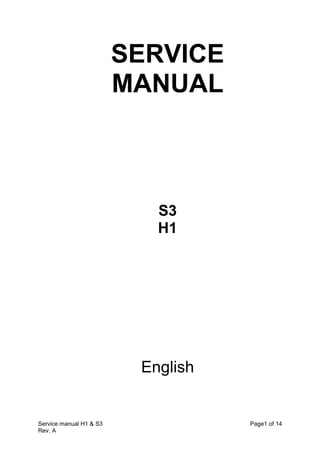
  • 1. Service manual H1 & S3 Page1 of 14 Rev. A SERVICE MANUAL S3 H1 English
  • 2. Service manual H1 & S3 Page2 of 14 Rev. A No part of this publication may be reproduced, transmitted, stored or translated into any language, in any form or through any electronic, magnetic, optical, chemical, manual, physical device or other means, without written consent from Wuhan Pioon Technology Co.,Ltd. Title – Service manual Date – 11th October 2021 Rev. A Wuhan Pioon Technology Co.,Ltd 3rd Floor, Great Wall Park Industrial Center Building, #323 Minzu Avenue, 430223 Wuhan, PEOPLE’S REPUBLIC OF CHINA Tel. +86-27-81783687 E-mail info@pioon.com The device is manufacture in compliance with the provisions of Council Directive 93/42/EEC and 2007/47/CE concerning medical devices. Its compliance is based on the following standards : IEC 60601-1.
  • 3. Service manual H1 & S3 Page3 of 14 Rev. A Index 1 Service procedure ............................................................................................................ 1.1 Rechargeable battery replacing .................................................................................5 1.2 Internal battery replacing............................................................................................6 1.3 Device calibration.......................................................................................................8 1.4 Electrical safety test ................................................................................................. 12 2 Cleaning, maintenance and service................................................................................ 2.1 Cleaning of the device.............................................................................................. 13 2.2 Troubleshooting of simple defects ........................................................................... 13 2.3 Maintenance ............................................................................................................ 14 2.4 Safety check ............................................................................................................ 14 2.5 Technical support..................................................................................................... 14
  • 4. Service manual H1 & S3 Page4 of 14 Rev. A 1 Service procedure The following service performances could be performed on the device: 1. Rechargeable battery replacing (also performable by user); 2. Internal battery replacing; 3. Device calibration; 4. Calibration check; 5. Electrical safety test. These operations (except the first one) must be performed by Authorized Service Center. The illustrations in this service manual are for reference only. There may be some differences in the color and software interface of the material object, and the material object shall prevail.
  • 5. Service manual H1 & S3 Page5 of 14 Rev. A 1.1 Rechargeable battery replacing 1) Unscrew 4 screws and take out the battery. 2) Mount the new battery in the proper house. Tighten the screws. Plug in the power supply, switch on the laser device and charge the battery for at least 1 h . 2 1
  • 6. Service manual H1 & S3 Page6 of 14 Rev. A 1.2 Internal battery replacing Unroll the fiber. Cover the fiber with protective cap. Remove the host. 1) Remove the front panel from the device. Take particular care removing the screws (A, B, C,D,E) shown in the 2 following pictures. Then open the device. 2) Remove the display. E D B A C
  • 7. Service manual H1 & S3 Page7 of 14 Rev. A 3) Replace the battery (model CR 2032).A soldering iron is used to remove and install the battery. 4) install the display. 5) Reassemble the device. Take particular care to the 5 previously shown screws (A, B, C,D,E). 3
  • 8. Service manual H1 & S3 Page8 of 14 Rev. A 6) Align the four locating pins according to the corresponding position in the drawing and press down firmly. 1.3 Device calibration The detailed steps of power calibration can be viewed through video https://youtu.be/ubTiRSZhYTA Connect the device and the power meter, as in the figure below. Use an external power meter and put the handpiece on a distance of 2-3 cm to the head of the power meter. Follow the procedure.(Taking H1 interface as an example, S3 power calibration process is the same) Power Calibration Procedure: A1 A2 A3 A4 B1 B2 B3 B4
  • 9. Service manual H1 & S3 Page9 of 14 Rev. A Step 1: Input the password 03986086 to enter the engineer interface. As shown below Step 2: Click POWR Calibration to enter the power calibration interface. As shown below Note:First, we need to calibrate the threshold, that is, the power value at 0.5W, and then we will calibrate the debugging power step by step. Step 3: Click the SET Threshold button to enter the 0.5w threshold setting interface. As shown below
  • 10. Service manual H1 & S3 Page10 of 14 Rev. A Threshold calibration steps ① Enter the power calibration interface, click ,emit 0.5W, check the actual output power. ② Enter the interface, Based on the default value, adjust the value according to the actual output power.(There is no limit value for downward adjustment, and upward adjustment cannot exceed twice the default value, each adjustment data recommended increase or decrease 1-2, if the value difference is too large, increase or decrease 5-8) Example: 1、If you click 0.5w, the actual light output is 0.4. In the threshold adjustment interface, add 1 to the initial value, and check the actual power again, and so on; 2、If you click 0.5w, the actual light output is 0. In the threshold adjustment interface, add 5 to the initial value, and check the actual power again, and so on; 3、If you click 0.5w, the actual light output is 0.6. In the threshold adjustment interface, decrease 1 from the initial value, and check the actual power again, and so on; 4、If you click 0.5w, the actual light output is 1. In the threshold adjustment interface, decrease 8 from the initial value, and check the actual power again, and so on; Step 4: Return to the power calibration interface, select the power to emit light, fill in the ‘Real’ option with the number on the power meter, and click the CONFIRM button. Repeat this step for each line
  • 11. Service manual H1 & S3 Page11 of 14 Rev. A Step 5: After recording the measured power value, click the ‘Restore’ button, wait for the "bee----" sound, then click ‘All Down’, at this time, the power calibration data issuance process will be displayed. After the process is over, select the power to emit light again, record the re-measured value, and check whether the power is within the error range. If the power re-measured value is within the error range, the calibration is complete. If the power re-measured value is out of the error range, repeat the fourth and fifth steps until the power output is within the error range. Enter the treatment interface, set different wavelengths and powers, and check whether the power input is within the error range. If it is out of range, perform fine-tuning on the power calibration interface until the power output is within the error range, then the power calibration is completed.
  • 12. Service manual H1 & S3 Page12 of 14 Rev. A 1.4 Electrical safety test Use the instrument to perform electrical safety test (class II type B), and consider USB as accessible part. Switch on the electrical safety analyzer and set up the data. Switch on the device. Confirm the setting of the analyzer and begin the test sequence. Print the test result.
  • 13. Service manual H1 & S3 Page13 of 14 Rev. A 2 Cleaning, maintenance and service 2.1 Cleaning of the device Following treatment, switch off the device and disconnect the power cable from the power supply. Clean the device and the accessories with a dry, soft cloth to remove dust from the device. More stubborn spots can be removed with a damp cloth. Please proceed careful not to scratch and damage the foil on the touchscreen. The device may be disinfected only by wiping it. Spray disinfection may allow liquids to penetrate into the device. 2.2 Troubleshooting of simple defects In case of malfunctioning, proceed as follows: First of all, be sure that operation steps have been carried out correctly. The touchscreen of the device remains dark after switching it on. ▪ Check the connection of the power cable and/or check the rechargeable battery. When using an interlock device the laser will not be stopped and blocked after interrupting the circuit. ▪ Check the connection of the interlock device. There is no aiming beam or it does not project a uniform circular pattern. ▪ Check to see if the optical fiber is damaged. If the optical fiber is damaged, replace it with a new one. ▪ Check the connection of the optical fiber is damaged. Self test fails. ▪ Repeat test. ▪ Check the fiber connection.
  • 14. Service manual H1 & S3 Page14 of 14 Rev. A 2.3 Maintenance The device does not require special maintenance. However, the manufacturer recommends taking the following actions at regular intervals: Action Frequency Responsible Check of the optical fiber Before each treatment session System owner Voluntarily check of the optical power Every month System owner Safety checks Every 2 years Authorized Service Center. 2.4 Safety check The following safety checks must be performed every 24 months by a qualified service engineer: Visual inspection of the unit and its accessories for mechanical damage that might impair operation; General function check; Check of the visual and audible indicators; Check the electrical power; Check the power emission of the laser. 2.5 Technical support In case technical support, contact the following address: Wuhan Pioon Technology Co.,Ltd 3rd Floor, Great Wall Park Industrial Center Building, #323 Minzu Avenue, 430223 Wuhan, PEOPLE’S REPUBLIC OF CHINA Phone +86-27-81783687 E-mail info@pioon.com The device may be sent in for repair or for safety inspection only in its original packaging, including all accessories. Wuhan Pioon Technology is the only provider of technical service for its products, unless otherwise indicated by the company. This is to guarantee the product’s safety and for the preservation of the product’s characteristics.