Sentralisasi Manajemen Hotspot Menggunakan Transparent Bridge EoIP over SSTP
Pembahasan ukk-tkj-2016-2017-paket-1
1. --------------------------------------------------------------------------------
--------------------------------------------------------------------------------
SISTEM OPERASI : DEBIAN JESSIE 8.6.0
JENIS : 32 BIT
NAMA PENULIS : EEN PAHLEFI,S.KOM
KONTAK PERSON WA : 081258-353133 (WhatsApp)
KOTAN PERSON LINE : pahlefieen
KONTAK PERSON BBM : 55C6E48F
JENIS PEMBAHASAN : UJIAN KOMPETENSI KEAHLIAN TEKNIK KOMPUTER DAN JARINGAN
TAHUN PELAJARAN : 2016/2017
JENIS PAKET : PAKET 1
--------------------------------------------------------------------------------
--------------------------------------------------------------------------------
----------------INSTALASI DAN CONFIGURASI REPOSITORI
LOKAL---------------------------------------------------------------------------
---------------------------
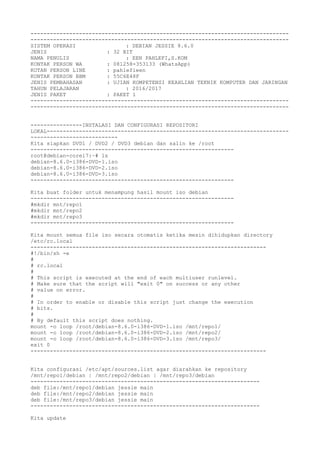
Kita siapkan DVD1 / DVD2 / DVD3 debian dan salin ke /root
---------------------------------------------------------------
root@debian-corei7:~# ls
debian-8.6.0-i386-DVD-1.iso
debian-8.6.0-i386-DVD-2.iso
debian-8.6.0-i386-DVD-3.iso
---------------------------------------------------------------
Kita buat folder untuk menampung hasil mount iso debian
---------------------------------------------------------------
#mkdir mnt/repo1
#mkdir mnt/repo2
#mkdir mnt/repo3
---------------------------------------------------------------
Kita mount semua file iso secara otomatis ketika mesin dihidupkan directory
/etc/rc.local
-------------------------------------------------------------------------
#!/bin/sh -e
#
# rc.local
#
# This script is executed at the end of each multiuser runlevel.
# Make sure that the script will "exit 0" on success or any other
# value on error.
#
# In order to enable or disable this script just change the execution
# bits.
#
# By default this script does nothing.
mount -o loop /root/debian-8.6.0-i386-DVD-1.iso /mnt/repo1/
mount -o loop /root/debian-8.6.0-i386-DVD-2.iso /mnt/repo2/
mount -o loop /root/debian-8.6.0-i386-DVD-3.iso /mnt/repo3/
exit 0
-------------------------------------------------------------------------
Kita configurasi /etc/apt/sources.list agar diarahkan ke repository
/mnt/repo1/debian | /mnt/repo2/debian | /mnt/repo3/debian
-----------------------------------------------------------------------
deb file:/mnt/repo1/debian jessie main
deb file:/mnt/repo2/debian jessie main
deb file:/mnt/repo3/debian jessie main
-----------------------------------------------------------------------
Kita update
2. -----------------------------------------------------------------------
#apt-get update
-----------------------------------------------------------------------
--------------------------------------------------------------------------------
---------------------------------------------------------------------
----------------INSTALASI MODUL SOFTWARE YANG
DIPERLUKAN----------------------------------------------------------------------
-----------------------
--------------------------------------------------------------------------------
---------------------------------------------------------------------
#apt-get install unzip apache2 bind9 mariadb-server php5 phpmyadmin squid3
proftpd-basic iptables-persistent
--------------------------------------------------------------------------------
---------------------------------------------------------------------
--------------------------------------------------------------------------------
---------------------------------------------------------------------
----------------CONFIGURASI IP
ADDRESS-------------------------------------------------------------------------
-----------------------------
Configurasi /etc/network/interface
--------------------------------------------------------------
IP Address Gateway Internet
IP : 192.168.1.1
Subnetmask : 255.255.255.0
#Config
#By
#Een Pahlefi,S.Kom
#Wajib baca
#syarat membangun router, minimal mempunyai 2 interface ethernet
#ethernet 0 > interface yang terhubung ke internet
#ethernet 1 > interface yang terhubung ke jaringan lokal
#interface yang tehubung ke internet
auto eth0
iface eth0 inet static
address 192.168.1.254
netmask 255.255.255.0
gateway 192.168.1.1
#interface yang tehubung ke jaringan lokal
auto eth1
iface eth1 inet static
address 192.168.100.1
netmask 255.255.255.128
#ip virtual untuk eth1:1 > proxy server
auto eth1:1
iface eth1:1 inet static
address 192.168.55.1
netmask 255.255.255.0
--------------------------------------------------------------
--------------------------------------------------------------------------------
---------------------------------------------------------------------
----------------CONFIGURASI
FIREWALL------------------------------------------------------------------------
3. -----------------------------------------
Configurasi debian agar menjadi mode router /etc/sysctl.conf
--------------------------------------------------------------
net.ipv4.ip_forward=1
--------------------------------------------------------------
Configurasi NAT agar client dapat mengakses internet
--------------------------------------------------------------
#iptables -t nat -A POSTROUTING -o eth0 -j MASQUERADE
--------------------------------------------------------------
Kemudian kita simpan agar tidak hilang ketika mesin di restart
--------------------------------------------------------------
#iptables-save > /etc/iptables/rules.v4
--------------------------------------------------------------
----------------CONFIGURASI DNS
SERVER--------------------------------------------------------------------------
------------------------------------
-------------------------------------------------------------
Note : saya asumsikan
http://sekolah.sch.id : 192.168.100.1
http://smkbisa.com : 192.168.55.1
-------------------------------------------------------------
Configurasi /etc/bind/named.conf.local
-------------------------------------------------------------
//
// Do any local configuration here
//
// Consider adding the 1918 zones here, if they are not used in your
// organization
//include "/etc/bind/zones.rfc1918";
zone "sekolah.sch.id" {
type master;
file "/etc/bind/sekolah"; };
zone "smkbisa.com" {
type master;
file "/etc/bind/smkbisa"; };
zone "100.168.192.in-addr.arpa" {
type master;
file "/etc/bind/192"; };
--------------------------------------------------------------
Salin file db.local menjadi sekolah
--------------------------------------------------------------
#cp /etc/bind/db.local /etc/bind/sekolah
--------------------------------------------------------------
Salin file db.local menjadi smkbisa
--------------------------------------------------------------
#cp /etc/bind/db.local /etc/bind/smkbisa
--------------------------------------------------------------
Salin file db.127 menjadi 192
--------------------------------------------------------------
#cp /etc/bind/db.127 /etc/bind/192
4. --------------------------------------------------------------
Configurasi /etc/bind/sekolah
--------------------------------------------------------------
;
; BIND data file for local loopback interface
;
$TTL 604800
@ IN SOA sekolah.sch.id. root.sekolah.sch.id. (
2 ; Serial
604800 ; Refresh
86400 ; Retry
2419200 ; Expire
604800 ) ; Negative Cache TTL
;
@ IN NS sekolah.sch.id.
@ IN A 192.168.100.1
ftp IN A 192.168.100.1
www IN A 192.168.100.1
--------------------------------------------------------------
Configurasi /etc/bind/smkbisa
--------------------------------------------------------------
;
; BIND data file for local loopback interface
;
$TTL 604800
@ IN SOA smkbisa.com. root.smkbisa.com. (
2 ; Serial
604800 ; Refresh
86400 ; Retry
2419200 ; Expire
604800 ) ; Negative Cache TTL
;
@ IN NS smkbisa.com.
@ IN A 192.168.55.1
www IN A 192.168.55.1
--------------------------------------------------------------
Configurasi /etc/bind/192
--------------------------------------------------------------
;
; BIND reverse data file for local loopback interface
;
$TTL 604800
@ IN SOA sekolah.sch.id. root.sekolah.sch.id. (
1 ; Serial
604800 ; Refresh
86400 ; Retry
2419200 ; Expire
604800 ) ; Negative Cache TTL
;
@ IN NS sekolah.sch.id.
1 IN PTR sekolah.sch.id.
--------------------------------------------------------------
Configurasi /etc/bind/named.conf.options
--------------------------------------------------------------
options {
directory "/var/cache/bind";
5. forwarders {
192.168.1.1
8.8.8.8;
8.8.4.4;
};
#dnssec-validation auto; //bawaan nya auto
dnssec-validation no; //
auth-nxdomain no; # conform to RFC1035
listen-on-v6 { any; };
};
--------------------------------------------------------------
Configurasi NAT memaksa agar semua paket yang berasal dari interface eth1 dengan
port 53 (layanan domain) akan di belokan paksa ke dns server (bind)
--------------------------------------------------------------------------------
----------
#iptables -t nat -A PREROUTING -i eth1 -p udp --dport 53 -j REDIRECT --to-port
53
--------------------------------------------------------------------------------
----------
Kemudian kita simpan agar tidak hilang ketika mesin di restart
--------------------------------------------------------------
#iptables-save > /etc/iptables/rules.v4
--------------------------------------------------------------
Pastikan tidak ada kesalahan configurasi bind9
--------------------------------------
#named-checkconf -z
--------------------------------------
Restart bind
--------------------------------------
#/etc/init.d/bind restart
--------------------------------------
Configurasi /etc/resolv.conf
--------------------------------------------------------------
nameserver 192.168.100.1
nameserver 192.168.1.1
--------------------------------------------------------------
--------------------------------------------------------------
Sampai langkah ini,
pastikan nslookup sekolah.sch.id > berhasil
pastikan nslookup smkbisa.com > berhasil
--------------------------------------------------------------
--------------------------------------------------------------------------------
---------------------------------------------------------------------
----------------CONFIGURASI VIRTUAL-
HOST----------------------------------------------------------------------------
----------------------------------
-------------------------------------------------------------
Kita buat 2 folder berbeda yaitu sekolah dan smkbisa
--------------------------------------------------------
7. ------------------------------------------
Kita restart apache
------------------------------------------
#/etc/init.d/apache2 restart
------------------------------------------
--------------------------------------------------------------------------------
-------------------------------------------------------------------------
----------------CONFIGURASI
HTTPS---------------------------------------------------------------------------
---------------------------------------------
--------------------------------------------------------------------------------
-------------------------------------------------------------------------
Sebelum Anda dapat mulai mengkonfigurasi openssl,
Anda harus memastikan HTTP user / group memiliki izin untuk membuat perubahan ke
file /var/www/ ini.
Dalam Debian, pengguna dan kelompok diberi nama www-data.
Membuat mereka pemilik direktori /var/www/ dan semua isinya.
----------------------------------------------------------------
#chown -R www-data:www-data /var/www/
----------------------------------------------------------------
Kita buat folder untuk menaruh file sertifikat
-------------------------------------------
#mkdir /var/www/sertifikat
-------------------------------------------
Kita buat sertifikat ssl
--------------------------------------------------------------------------------
----------------------------------------------------------------------
openssl req -x509 -nodes -days 365 -newkey rsa:2048 -keyout
/var/www/sertifikat/eenpahlefi.key -out /var/www/sertifikat/eenpahlefi.crt
--------------------------------------------------------------------------------
----------------------------------------------------------------------
Kemudian tekan enter saja selanjutnya
--------------------------------------------------------------------------------
----------------------------------------------------------------------
Configurasi /etc/apache2/sites-enabled/sekolah.conf
--------------------------------------------------------------------------------
---------------------------------------------------------------------
#HTTP SERVER
<VirtualHost *:80>
ServerAdmin eenpahlefi@sekolah.sch.id
ServerName sekolah.com
ServerAlias sekolah.com
DocumentRoot /var/www/sekolah
<Directory />
Options FollowSymLinks
AllowOverride None
</Directory>
ErrorLog ${APACHE_LOG_DIR}/error.log
CustomLog ${APACHE_LOG_DIR}/access.log combined
</VirtualHost>
#HTTPS
<VirtualHost *:443>
ServerAdmin eenpahlefi@sekolah.sch.id
ServerName sekolah.sch.id
ServerAlias sekolah.sch.id
DocumentRoot /var/www/sekolah
SSLEngine on
8. SSLCertificateFile /var/www/sertifikat/eenpahlefi.crt
SSLCertificateKeyFile /var/www/sertifikat/eenpahlefi.key
</VirtualHost>
--------------------------------------------------------------------------------
---------------------------------------------------------------------
Configurasi /etc/apache2/sites-enabled/smk.conf
--------------------------------------------------------------------------------
---------------------------------------------------------------------
#HTTP
<VirtualHost *:80>
ServerAdmin eenpahlefi@smkbisa.com
ServerName smkbisa.com
ServerAlias smkbisa.com
DocumentRoot /var/www/smkbisa
<Directory />
Options FollowSymLinks
AllowOverride None
</Directory>
ErrorLog ${APACHE_LOG_DIR}/error.log
CustomLog ${APACHE_LOG_DIR}/access.log combined
</VirtualHost>
#HTTPS
<VirtualHost *:443>
ServerAdmin eenpahlefi@smkbisa.com
ServerName smkbisa.com
ServerAlias smkbisa.com
DocumentRoot /var/www/smkbisa
SSLEngine on
SSLCertificateFile /var/www/sertifikat/eenpahlefi.crt
SSLCertificateKeyFile /var/www/sertifikat/eenpahlefi.key
</VirtualHost>
--------------------------------------------------------------------------------
---------------------------------------------------------------------
Kita nonaktifkan default-ssl.conf
------------------------------------------
#a2dissite default-ssl.conf
------------------------------------------
Kita aktifkan sekolah.conf dan smkbisa.conf
------------------------------------------
#a2ensite sekolah.conf
#a2ensite smkbisa.conf
------------------------------------------
Kita restart apache
------------------------------------------
#/etc/init.d/apache2 restart
------------------------------------------
Kita uji dengan membuka di browser mozila/google chroom
------------------------------------------
https://sekolah.sch.id
https://smkbisa.com
------------------------------------------
--------------------------------------------------------------------------------
--------------------------------------------------------------------
----------------INSTALASI DAN CONFIGURASI
WORDPRESS-----------------------------------------------------------------------
9. -------------------------------
Siapkan wordpress di folder /root
-----------------------------------------------------
root@server-ukk:~# ls
wordpress-4.7.tar.gz
-----------------------------------------------------
Atau bisa juga langsung download versi tar.gz lewat internet ke situs wordpress
nya
-----------------------------------------------------
#wget http://wordpress.org/latest.tar.gz
-----------------------------------------------------
Atau bisa juga langsung download versi unzip lewat internet ke situs wordpress
nya
-----------------------------------------------------
#wget http://wordpress.org/latest.zip
-----------------------------------------------------
Extract file wordpress versi tar.gz yang baru di Download
---------------------------------------------------------------------
#tar -xzvf latest.tar.gz
---------------------------------------------------------------------
Jika Extract file wordpress versi unzip yang baru di Download
---------------------------------------------------------------------
#unzip latest.tar.gz
---------------------------------------------------------------------
Copy seluruh file yang ada dalam folder wordpress ke /var/www/sekolah
-----------------------------------------------------
#cp -r wordpress/* /var/www/sekolah/
---------------------------------------------------------------------
Login menggunakan password root MySQL Anda,
dan kemudian kita perlu membuat database wordpress,
pengguna dalam database itu,
dan memberikan pengguna password baru.
Perlu diingat bahwa semua perintah MySQL harus diakhiri dengan titik koma.
Pertama, mari kita membuat database,
bebas untuk memberikan nama apa pun yang Anda pilih.
Kita akan masuk ke sistem mysql server
-----------------------------------------------------
#mysql -u root -p
-----------------------------------------------------
Kita buat database yang bernama wordpress
-----------------------------------------------------
MariaDB [(none)]> create database wordpress;
Query OK, 1 row affected (0.00 sec)
-----------------------------------------------------
Kita buat pengguna baru di mysql server
----------------------------------------------------
MariaDB [(none)]> create user eenwordpress@localhost;
Query OK, 0 rows affected (0.00 sec)
----------------------------------------------------
Kita buat password baru untuk pengguna
--------------------------------------------------------------------------------
10. --------------
MariaDB [(none)]> set password for eenwordpress@localhost =
password("eenpassword");
Query OK, 0 rows affected (0.00 sec)
--------------------------------------------------------------------------------
--------------
Kita berikan semua hak istimewa untuk pengguna,
dan database yang bernama wordpress
--------------------------------------------------------------------------------
-----------------------------------------
MariaDB [(none)]> grant all privileges on wordpress.* to eenwordpress@localhost
identified by 'eenpassword';
Query OK, 0 rows affected (0.00 sec)
--------------------------------------------------------------------------------
-----------------------------------------
Kita refresh (segarkan) mysql server
----------------------------------------------------
MariaDB [(none)]> flush privileges;
Query OK, 0 rows affected (0.00 sec)
----------------------------------------------------
Jangan lupa mengaktifkan library php-gd
gunanya agar wordpress dapat menampilkan grafik seperti chart
----------------------------------------------------
#apt-get install php5-gd
----------------------------------------------------------------------
Kita salin file yang bernama wp-config-sample.php ke wp-config.php
ke folder /var/www/sekolah
-----------------------------------------------------------------------
#cp /var/www/sekolah/wp-config-sample.php /var/www/sekolah/wp-config.php
-----------------------------------------------------------------------
Sesuaikan nama database, userpengguna, passwordpengguna
Kita edit file /var/www/sekolah/wp-config.php
-----------------------------------------------------------------------
// ** MySQL settings - You can get this info from your web host ** //
/** The name of the database for WordPress */
define('DB_NAME', 'wordpress');
/** MySQL database username */
define('DB_USER', 'eenwordpress');
/** MySQL database password */
define('DB_PASSWORD', 'eenpassword');
---------------------------------------------------------------------
Restart apache server
----------------------------------------------------
#service apache2 restart
----------------------------------------------------
--------------------------------------------------------------------------------
-----------------------------------------------------------------------
----------------INSTALASI DAN CONFIGURASI PROXY
SERVER--------------------------------------------------------------------------
------------------------------------
Install proxy server
-----------------------------------------------------
#apt-get install squid3
11. ------------------------------------------------------
Configurasi NAT memaksa agar semua paket yang berasal dari interface eth1 dengan
port 80 akan di belokan paksa ke squid
--------------------------------------------------------------------------------
----------
#iptables -t nat -A PREROUTING -i eth1 -p tcp --dport 80 -j REDIRECT --to-port
3128
--------------------------------------------------------------------------------
----------
Kita bisa lihat hasil iptables yang berada di NAT beserta counter packet nya
--------------------------------------------------------------------------------
------------------------------------------------
#iptables -t nat -vL
Chain PREROUTING (policy ACCEPT 359 packets, 28153 bytes)
pkts bytes target prot opt in out source destination
158 8136 REDIRECT tcp -- eth1 any anywhere anywhere
tcp dpt:http redir ports 3128
Chain INPUT (policy ACCEPT 429 packets, 26928 bytes)
pkts bytes target prot opt in out source destination
Chain OUTPUT (policy ACCEPT 549 packets, 39656 bytes)
pkts bytes target prot opt in out source destination
Chain POSTROUTING (policy ACCEPT 48 packets, 2840 bytes)
pkts bytes target prot opt in out source destination
589 46177 MASQUERADE all -- any eth0 anywhere anywhere
--------------------------------------------------------------------------------
-------------------------------------------------
Kemudian kita simpan agar tidak hilang ketika mesin di restart
--------------------------------------------------------------
#iptables-save > /etc/iptables/rules.v4
--------------------------------------------------------------
Configurasi /etc/squid3/squid.conf
-------------------------------------------------------
#rule blok situs, letakan paling atas
acl bloksitus url_regex -i "/etc/squid3/urlblok.txt"
http_access deny bloksitus
visible_hostname sekolah.sch.id
acl client src 10.0.0.0/8 #ip private
acl client src 172.16.0.0/12 #ip private
acl client src 192.168.0.0/16 #ip private
http_access allow client
http_port 3128 transparent
------------------------------------------------------
Kita buat daftar situs yang ingin di blokir
-------------------------------------------------------
#nano /etc/squid3/urlblok.txt
-------------------------------------------------------
pokemongo.com
-------------------------------------------------------
Kita bangun kembali stuktur folder baru sesuai tipe directory
-------------------------------------------------------
#squid3 -z
-------------------------------------------------------
12. Kita cek jika ada configurasi squid3 yang salah
-------------------------------------------------------
#squid3 -k parse
-------------------------------------------------------
Kita restart squid3
------------------------------------------------------
# /etc/init.d/squid3 restart
------------------------------------------------------
Catatan : pastikan squid benar2 running
--------------------------------------------------------------------------------
---------------------------------------------------------------------
--------------------------------------------------------------------------------
---------------------------------------------------------------------
----------------CONFIGURASI FTP
SERVER--------------------------------------------------------------------------
-------------------
--------------------------------------------------------------------------------
---------------------------------------------------
Configurasi /etc/proftpd/proftpd.conf
--------------------------------------------------------------------------------
---------------------------------------------------------------------
#Kita juga bisa membuat user anonymous, agar bisa akses tanpa username dan
password
#Perhatikan letak directory nya ya
<Anonymous /home/anonymous>
User ftp
Group nogroup
UserAlias anonymous ftp
DirFakeUser on ftp
DirFakeGroup on ftp
RequireValidShell off
MaxClients 10
DisplayLogin welcom.msg
DisplayChdir .message
</Anonymous>
-------------------------------------------------------------
--------------------------------------------------------------------------------
---------------------------------------------------
Pastikan nama /etc/hostname komputer anda harus sama dengan nama yang ada di
/etc/hosts
-----------------------------------------------------
root@server-ukk:~# cat /etc/hostname
server-ukk
root@server-ukk:~# cat /etc/hosts
127.0.0.1 localhost
192.168.100.1 server-ukk
-----------------------------------------------------
Kita restart proftpd
------------------------------------------------------
# /etc/init.d/roftpdrestart
------------------------------------------------------
Catatan : pastikan proftpd benar2 running
13. Jika sudah selesai, untuk menguji di browser mozila/chroom
-------------------------------------------------------------
ftp://sekolah.sch.id
-------------------------------------------------------------
--------------------------------------------------------------------------------
---------------------------------------------------------------------
--------------------------------------------------------------------------------
---------------------------------------------------------------------
-------------
SELESAI-------------------------------------------------------------------------
--------------------------------------------------------