SlideShare a Scribd company logo
1 of 23
Download to read offline
Part number 47691240
1st
edition English
February 2015
SERVICE MANUAL
Guardian™
SP.295F / Guardian™
SP.300F
Guardian™
SP.345F / Guardian™
SP.400F
Tier 4B (final)
Sprayer
PINYFYM00001 and above
Printed in U.S.A.
© 2015 CNH Industrial America LLC. All Rights Reserved.
New Holland is a trademark registered in the United States and many other countries,
owned by or licensed to CNH Industrial N.V., its subsidiaries or affiliates.
SERVICE MANUAL
SP.295F
SP.300F
SP.345F
SP.400F
47691240 24/02/2015
EN
Contents
INTRODUCTION
Engine....................................................................................... 10
[10.001] Engine and crankcase ............................................................. 10.1
[10.114] Pump drives ........................................................................ 10.2
[10.216] Fuel tanks .......................................................................... 10.3
[10.206] Fuel filters .......................................................................... 10.4
[10.202] Air cleaners and lines .............................................................. 10.5
[10.500] Selective Catalytic Reduction (SCR) exhaust treatment ........................... 10.6
[10.400] Engine cooling system ............................................................. 10.7
[10.414] Fan and drive ...................................................................... 10.8
Front axle system ....................................................................... 25
[25.100] Powered front axle ................................................................. 25.1
Hydrostatic drive......................................................................... 29
[29.218] Pump and motor components...................................................... 29.1
Brakes and controls .................................................................... 33
[33.202] Hydraulic service brakes ........................................................... 33.1
Hydraulic systems....................................................................... 35
[35.000] Hydraulic systems.................................................................. 35.1
[35.300] Reservoir, cooler, and filters........................................................ 35.2
[35.220] Auxiliary hydraulic pump and lines ................................................. 35.3
[35.752] Hydraulic fan drive cooling system................................................. 35.4
[35.610] Machine leveling control system ................................................... 35.5
Pneumatic system ...................................................................... 36
[36.100] Pneumatic system.................................................................. 36.1
[36.908] Pneumatic suspension ............................................................. 36.2
Steering..................................................................................... 41
47691240 24/02/2015
[41.101] Steering control .................................................................... 41.1
[41.216] Cylinders ........................................................................... 41.2
Wheels...................................................................................... 44
[44.511] Front wheels........................................................................ 44.1
[44.520] Rear wheels........................................................................ 44.2
Cab climate control ..................................................................... 50
[50.100] Heating ............................................................................. 50.1
[50.104] Ventilation .......................................................................... 50.2
[50.200] Air conditioning..................................................................... 50.3
Electrical systems....................................................................... 55
[55.000] Electrical system ................................................................... 55.1
[55.100] Harnesses and connectors......................................................... 55.2
[55.015] Engine control system.............................................................. 55.3
[55.201] Engine starting system ............................................................. 55.4
[55.301] Alternator........................................................................... 55.5
[55.302] Battery.............................................................................. 55.6
[55.640] Electronic modules ................................................................. 55.7
[55.050] Heating, Ventilation, and Air-Conditioning (HVAC) control system................. 55.8
[55.047] Steering control system ............................................................ 55.9
Spraying.................................................................................... 78
[78.110] Chemical spraying.................................................................. 78.1
[78.111] Spraying pump ..................................................................... 78.2
[78.120] Foam marking system.............................................................. 78.3
Platform, cab, bodywork, and decals............................................. 90
[90.151] Cab interior......................................................................... 90.1
[90.120] Mechanically-adjusted operator seat............................................... 90.2
[90.100] Engine hood and panels ........................................................... 90.3
47691240 24/02/2015
[90.116] Fenders and guards................................................................ 90.4
47691240 24/02/2015
INTRODUCTION
47691240 24/02/2015
1
INTRODUCTION
Safety rules
Personal safety
This is the safety alert symbol. It is used to alert you to potential personal injury hazards. Obey all
safety messages that follow this symbol to avoid possible death or injury.
Throughout this manual you will find the signal words DANGER, WARNING, and CAUTION followed by special in-
structions. These precautions are intended for the personal safety of you and those working with you.
Read and understand all the safety messages in this manual before you operate or service the machine.
DANGER indicates a hazardous situation that, if not avoided, will result in death or serious injury.
WARNING indicates a hazardous situation that, if not avoided, could result in death or serious injury.
CAUTION indicates a hazardous situation that, if not avoided, could result in minor or moderate injury.
FAILURE TO FOLLOW DANGER, WARNING, AND CAUTION MESSAGES COULD RESULT
IN DEATH OR SERIOUS INJURY.
Machine safety
NOTICE: Notice indicates a situation that, if not avoided, could result in machine or property damage.
Throughout this manual you will find the signal word Notice followed by special instructions to prevent machine or
property damage. The word Notice is used to address practices not related to personal safety.
Information
NOTE: Note indicates additional information that clarifies steps, procedures, or other information in this manual.
Throughout this manual you will find the word Note followed by additional information about a step, procedure, or
other information in the manual. The word Note is not intended to address personal safety or property damage.
47691240 24/02/2015
4
INTRODUCTION
Personal safety
General safety rules
Use caution when operating the machine on slopes. Raised equipment, full tanks and other loads will change the
center of gravity of the machine. The machine can tip or roll over when near ditches and embankments or uneven
surfaces.
Never permit anyone other than the operator to ride on the machine.
Never operate the machine under the influence of alcohol, drugs, or while otherwise impaired.
Pay attention to overhead power lines and hanging obstacles. High voltage lines may require significant clearance
for safety.
Hydraulic oil or diesel fuel leaking under pressure can penetrate the skin, causing serious injury or infection.
• DO NOT use your hand to check for leaks. Use a piece of cardboard or paper.
• Stop engine, remove key and relieve the pressure before connecting or disconnecting fluid lines.
• Make sure all components are in good condition and tighten all connections before starting the engine or pressur-
izing the system.
• If hydraulic fluid or diesel fuel penetrates the skin, seek medical attention immediately.
• Continuous long term contact with hydraulic fluid may cause skin cancer. Avoid long term contact and wash the
skin promptly with soap and water.
Keep clear of moving parts. Loose clothing, jewelry, watches, long hair, and other loose or hanging items can become
entangled in moving parts.
Wear protective equipment when appropriate.
DO NOT attempt to remove material from any part of the machine while it is being operated or components are in
motion.
Make sure all guards and shields are in good condition and properly installed before operating the machine. Never
operate the machine with shields removed. Always close access doors or panels before operating the machine.
Dirty or slippery steps, ladders, walkways, and platforms can cause falls. Make sure these surfaces remain clean and
clear of debris.
A person or pet within the operating area of a machine can be struck or crushed by the machine or its equipment. DO
NOT allow anyone to enter the work area.
Raised equipment and/or loads can fall unexpectedly and crush persons underneath. Never allow anyone to enter
the area underneath raised equipment during operation.
Never operate engine in enclosed spaces as harmful exhaust gases may build up.
Before starting the machine, be sure that all controls are in neutral or park lock position.
Start the engine only from the operator’s seat. If the safety start switch is bypassed, the engine can start with the
transmission in gear. Do not connect or short across terminals on the starter solenoid. Attach jumper cables as
described in the manual. Starting in gear may cause death or serious injury.
Always keep windows, mirrors, all lighting, and Slow Moving Vehicle (SMV) emblem clean to provide the best possible
visibility while operating the machine.
Operate controls only when seated in the operator’s seat, except for those controls expressly intended for use from
other locations.
47691240 24/02/2015
5
INTRODUCTION
Before leaving the machine:
1. Park machine on a firm level surface.
2. Put all controls in neutral or park lock position.
3. Engage park brake. Use wheel chocks if required.
4. Lower all hydraulic equipment — Implements, header, etc.
5. Turn off engine and remove key.
When, due to exceptional circumstances, you would decide to keep the engine running after leaving the operator’s
station, then the following precautions must be followed:
1. Bring the engine to low idle speed.
2. Disengage all drive systems.
3. WARNING
Some components may continue to run down after disengaging drive systems.
Make sure all drive systems are fully disengaged.
Failure to comply could result in death or serious injury.
W0113A
Shift the transmission into neutral.
4. Apply the parking brake.
General maintenance safety
Keep area used for servicing the machine clean and dry. Clean up spilled fluids.
Service machine on a firm level surface.
Install guards and shields after servicing the machine.
Close all access doors and install all panels after servicing the machine.
Do not attempt to clean, lubricate, clear obstructions or make adjustments to the machine while it is in motion or while
the engine is running.
Always make sure working area is clear of tools, parts, other persons and pets before you start operating the machine.
Unsupported hydraulic cylinders can lose pressure and drop the equipment causing a crushing hazard. Do not leave
equipment in a raised position while parked or during service, unless securely supported.
Incorrect towing procedures can cause accidents. Contact your dealer if towing is required.
Stop the engine, remove key and relieve pressure before disconnecting or connecting fluid lines.
Stop the engine and remove key before disconnecting or connecting electrical connections.
Scalding can result from incorrect removal of coolant caps. Cooling system operates under pressure. Hot coolant
can spray out if a cap is removed while the system is hot. Allow system to cool before removing cap. When removing
a cap turn it slowly to allow pressure to escape before completely removing the cap.
Replace damaged or worn tubes, hoses, electrical wiring, etc.
Engine, transmission, exhaust components, and hydraulic lines may become hot during operation. Take care when
servicing such components. Allow surfaces to cool before handling or disconnecting hot components. Wear protective
equipment when appropriate.
When welding, remove all electrical monitors from unit to prevent damage. Always disconnect the battery before
welding on the machine. Always wash your hands after handling battery components.
47691240 24/02/2015
6
SERVICE MANUAL
Engine
SP.295F
SP.300F
SP.345F
SP.400F
47691240 24/02/2015
10
Engine - Engine and crankcase
Engine - Replace - Engine oil and filter
Refer to the Cummins Operation and Maintenance
Manual for all engine maintenance procedures and
maintenance schedules not covered in this manual.
Change the engine oil and filter as described in the
Cummins Operation and Maintenance Manual.
RAIL14SP00872AA 1
47691240 24/02/2015
10.1 [10.001] / 3
Engine - Engine and crankcase
Engine - Remove
1. Two different types of engine are used on Guardian
sprayers.
The sprayer model numbers SP.295F and the SP.300F
use the Cummins QSB engine (1).
The sprayer model numbers SP.345F and SP.400F use
the Cummins QSL engine (2).
2. Move the vehicle to a hard level surface
3. Turn the ignition key to the OFF position. Remove the
key from the ignition.
4. Allow the engine to cool before proceeding.
5. Access the battery disconnect switch located at the left
rear of the vehicle. Turn the switch to the OFF position. RAIL15SP00248FA 1
RAIL15SP00249FA 2
6. Drain the hydraulic reservoir. Refer to Reservoir,
cooler, and filters - Remove (35.300)
7. Drain the engine coolant from the cooling package. Re-
fer to Engine cooling system - Remove (10.400)
8. Remove the engine enclosure panels. Refer to Engine
hood and panels - Remove (90.100)
9. Disconnect and remove the deaeration tank, which is
attached to the SCR mounting enclosure.
10. Remove the SCR system and the mounting enclo-
sure. Refer to Selective Catalytic Reduction (SCR)
muffler and catalyst - Remove (10.500)
11. Remove the air cleaner and the mounting frame. Re-
fer to Air cleaners and lines - Remove (10.202)
12. Remove the Auxiliary pump from the hydrostatic tan-
dem pump assembly. Refer to Auxiliary hydraulic
pump - Remove (35.220)
13. Remove the hydrostatic tandem pump assembly from
the engine.
Refer to Pump - Remove (29.218) for QSB engines.
Refer to Pump - Remove (29.218) for QSL engines.
14. Disconnect the fuel line attached to the engine. Plug
the fuel line and mark the connection point for reat-
tachment.
15. Disconnect any lines connected to the SCR system
from the engine. Plug the lines and mark the connec-
tion points for reattachment.
47691240 24/02/2015
10.1 [10.001] / 4
Engine - Engine and crankcase
16. Disconnect any hydraulic oil lines attached to the en-
gine. This will include the line connected to the cool-
ing fan motor. Plug the lines and mark the connection
points for reattachment.
17. Disconnect any engine coolant lines attached to the
engine. Plug the lines and mark the connection points
for reattachment.
18. Disconnect any air intake lines attached to the engine.
This will include air line attached to the turbocharger,
and lines attached to the pneumatic system. Plug the
lines and mark the connection points for reattachment.
19. Remove the air conditioner compressor from the en-
gine by removing the mounting bolts. Do not evacuate
the air conditioning system. Move the air conditioner
compressor, with lines attached, to the side.
20. Disconnect all electrical connections to the engine.
This will include ground wires, ECM harness, sensor
connections, and system power wires. Tag and mark
the wires and connectors for reattachment.
21. Verify that all attachments and connections to the en-
gine have been removed.
22. Attach a suitable lifting device to the engine lift points.
Support the engine.
23. Access the engine mounting bolts located on the un-
derside of the engine. Two mounting bolts are located
at the right hand side to the engine, and one mounting
bolt is located at the left side of the engine.
24. Loosen the bolts but do not remove completely.
25. Lift the engine slightly and verify full support of the
engine with the lifting device.
26. Remove the engine mounting bolts from the engine.
Lift the engine from its mounting points.
47691240 24/02/2015
10.1 [10.001] / 5
Engine - Engine and crankcase
Engine - Install
1. Two different types of engine are used on Guardian
sprayers.
The sprayer model numbers SP.295F and the SP.300F
use the Cummins QSB engine (1).
The sprayer model numbers SP.345F and SP.400F use
the Cummins QSL engine (2).
RAIL15SP00248FA 1
RAIL15SP00249FA 2
2. Attach the engine to a suitable lifting device. Lift the
engine onto the vehicle and position the engine at its
mounting point on the vehicle frame.
3. Insert the engine mounting blots with flat washers
through the engine mounts and into the engine mount-
ing holes. Do not fully tighten the mounting bolts.
4. Ensure that the engine is fully positioned and secure
on the engine mounts. Tighten the bolts securely.
5. Remove the lifting device from the engine.
6. Connect all electrical connections to the engine. This
will include ground wires, ECM harness, sensor con-
nections, and system power wires.
7. Attach the air conditioner compressor and belt to the
engine using the mounting bolts. Position the compres-
sor and ensure belt tightness. Tighten the bolt securely.
8. Connect all air intake lines to the engine. This will in-
clude air line attached to the turbocharger, and lines
attached to the pneumatic system. Tighten all clamps
securely.
9. Connect all engine coolant lines to the engine. Tighten
all clamps securely.
10. Connect all hydraulic oil lines attached to the engine.
This will include the line connected to the cooling fan
motor. Tighten all clamps securely.
11. Connect any lines connected to the SCR system to
the engine. Tighten all clamps securely.
47691240 24/02/2015
10.1 [10.001] / 6
Engine - Engine and crankcase
12. Connect the fuel line attached to the engine. Tighten
all clamps securely.
13. Attach the hydrostatic tandem pump assembly to the
engine.
Refer to Pump - Install (29.218) for QSB engines.
Refer to Pump - Install (29.218) for QSL engines.
14. Attach the auxiliary pump to the hydrostatic tandem
pump assembly. Refer to Auxiliary hydraulic pump
- Install (35.220)
15. Install the air cleaner and the mounting frame. Refer
to Air cleaners and lines - Install (10.202)
16. Install the SCR system and the mounting enclosure.
Refer to Selective Catalytic Reduction (SCR) muf-
fler and catalyst - Install (10.500)
17. Attach the deaeration tank to the SCR mounting en-
closure. Connect any coolant lines to the engine.
18. Attach the engine enclosure panels to the engine en-
closure frame. Refer to Engine hood and panels -
Install (90.100)
19. Fill the cooling system with proper coolant to the
proper level.
20. Fill the hydraulic reservoir with proper hydraulic oil and
to the proper level.
21. Inspect and ensure that all connections to the engine
are made and secure.
22. Turn the battery disconnect switch to the ON position.
23. Ensure that the fuel tank, and that the Diesel Exhaust
Fluid (DEF) tank are filled to the proper levels
24. Start the vehicle engine and inspect for any leaks or
lose connections. Ensure proper operation of the en-
gine and all connected components.
47691240 24/02/2015
10.1 [10.001] / 7
Engine - Engine and crankcase
Engine support and mounts - Remove - Engine mounts
Prior operation:
Remove compartment engine panels and doors. Refer to Engine hood and panels - Remove (90.100)
NOTE: The applicable end of engine should be lifted slightly to remove/install some hardware in the following proce-
dures.
1. Secure engine to suitable lifting device. Lift engine
slightly to enable removal of the front engine mounts
as follows.
2. There are three mounting points for the engine.
RAIL14SP01913AA 1
3. WARNING
Heavy objects!
Lift and handle all heavy components using lift-
ing equipment with adequate capacity. Always
support units or parts with suitable slings or
hooks. Make sure the work area is clear of all
bystanders.
Failure to comply could result in death or seri-
ous injury.
W0398A
Remove hex bolts, washers, and nuts (1) attaching the
motor mount (2) to the frame.
4. Remove the nut and washer (3) attaching the motor
mount (4) to the frame.
5. Remove the motor mount from the frame by removing
the hex bolt and snubbing washers (5).
6. Secure engine to suitable lifting device. Lift engine
slightly to enable removal of the rear engine mounts
as follows.
NOTE: There are two rear engine mounts, both configured
the same.
RAIL14SP01914AA 2
47691240 24/02/2015
10.1 [10.001] / 8
Engine - Engine and crankcase
7. Remove nuts and washers (1), and the hex bolts and
washers (2) attaching the motor mount (3) to the frame.
Remove the motor mounts from the vehicle.
RAIL14SP01915AA 3
47691240 24/02/2015
10.1 [10.001] / 9
Engine - Engine and crankcase
Engine support and mounts - Install - Engine mounts
1. Secure engine to suitable lifting device. Lift engine
slightly to enable installation of the rear engine mounts.
NOTE: There are two rear engine mounts, both configured
the same.
2. Install the motor mounts (1) onto the frame at the en-
gine mounting points.
3. Lower the engine into place and install the hex bolts
with snubbing washers (2) through the engine mount-
ing holes and then through the motor mounts.
4. Secure the motor mounts and the engine in place using
the nuts and washers (3). Tighten securely.
RAIL14SP01915AA 1
5. Install the front motor mount (1) in to place on the ve-
hicle.
6. Attach the motor mount to the vehicle frame using the
two hex bolts, washers, and nuts (2). Tighten securely.
7. Secure the front end of the engine to the motor mount
by installing the hex bolt and snubber washers (3)
through the motor mount and then through the engine
mounting hole. Secure the motor mount in place using
the washer and nut (4). Tighten securely.
RAIL14SP01914AA 2
47691240 24/02/2015
10.1 [10.001] / 10
Engine - Pump drives
Hydraulic pump drive coupler - Remove - Hydrostatic pump drive
coupler
Prior operation:
Remove the right hand engine compartment enclosure and panels. Refer to Engine hood and panels - Remove
(90.100)
Prior operation:
Apply a vacuum to the hydraulic fluid tank. Refer to Oil reservoir - Service instruction - Tank vacuum procedure
(35.300)
Prior operation:
Remove the Auxiliary pump assembly. Refer to Auxiliary hydraulic pump - Remove (35.220)
1. Park the vehicle on a flat, level surface. Release the
parking brake and lower the suspension completely.
2. Apply the parking brake and swing the right side boom
outward, or raise the boom up and out of the saddle.
3. Shut off the engine, remove the ignition key, and allow
the engine and hydraulic oil to cool.
4. Tag and mark all hydrostatic pump hydraulic hoses.
Record the hose connections and hose routing to aid
in reinstallation of the hoses.
5. Remove all hydraulic hoses, and disconnect any elec-
trical connections from hydrostatic tandem pump set.
6. Cap and plug the lines and fittings. Use plastic covers
to cover lower ports on hydrostatic pump units.
7. Disconnect the cable connection to the ball joint (1) of
the turnbuckle assembly.
8. Disconnect pump turnbuckle (2) from the pump set by
removing the nuts (2). Lift the turnbuckle assembly
from the pump set.
RAIL14SP01911AA 1
9. Attach a suitable lifting device to the hydrostatic tan-
dem pump set (2), ensuring strap routing will evenly
balance the assembly, once lifted. Remove slack from
strapping, but do not lift assembly at this time.
47691240 24/02/2015
10.2 [10.114] / 3
Thank you very much for
your reading. Please Click
Here. Then Get COMPLETE
MANUAL. NO WAITING
NOTE:
If there is no response to
click on the link above,
please download the PDF
document first and then
click on it.
Engine - Pump drives
10. Remove four hex bolts and flat washers (1) secur-
ing hydrostatic tandem pump set to flywheel housing
mounting plate (2).
11. Remove the hydrostatic tandem pump set from fly-
wheel housing mounting plate.
RAIL14SP01910AA 2
12. Use a jack or suitable lifting device and a block, and
position block under engine at flywheel end (13). Do
not lift engine at this time.
RAIL13SP03449AA 3
13. Remove two bolts (7) from flywheel housing mounting
plate (6). Retain hardware for reassembly.
14. Remove twelve (8) hex bolts that secure flywheel
housing mounting plate (6) to engine flywheel hous-
ing. Retain hardware.
15. Using a suitable lifting device, lift engine high enough
for mounting plate (6) to clear frame.
16. Remove flywheel housing mounting plate (6). Retain
plate.
17. Remove eight hex socket head capscrews (9) and
lockwashers (10) that secure the hydrostat coupler
(11) to flywheel and remove coupler. Retain hardware.
Discard coupler.
RAIL13SP01139FA 4
47691240 24/02/2015
10.2 [10.114] / 4
Engine - Pump drives
Hydraulic pump drive coupler - Install - Hydrostatic pump drive
coupler
1. Clean Loctite residue from threads or threaded holes
on retained hardware and components.
2. Apply red LOCTITE® 273 to threads of capscrews and
install new hydrostat coupler (11) to flywheel with eight
hex socket head capscrews (9) and lockwashers (10).
Tighten the capscrews securely.
3. Secure flywheel housing mounting plate (6) to engine
flywheel housing with twelve (8) hex bolts. Tighten the
bolts securely.
4. Lower engine down until mounting plate rests on frame.
RAIL13SP01139FA 1
5. Secure flywheel housing mounting plate (6) with two
bolts (7). Tighten the bolts securely.
6. Reposition hoses and wiring onto guide plate (12) at
bell housing and secure.
7. Using lifting device, position hydrostatic tandem pump
set/auxiliary hydraulic pump assembly (2) onto flywheel
housing mounting plate (6).
NOTE: The splines of the hydrostatic tandem pump set and
the splines on the coupler are difficult to align. It may be
necessary to turn the engine crank by hand with a breaker
bar and socket on the damper end of the engine to assist
in alignment of splines.
8. Secure hydrostatic tandem pump set/auxiliary hy-
draulic pump assembly (2) to flywheel housing mount-
ing plate (6) by installing four hex bolts (3), flat washers
(4), and lockwashers (5).
RAIL13SP01139FA 2
9. Remove lifting device strapping from hydrostatic tan-
dem pump set/auxiliary hydraulic pump assembly.
10. Position pump turnbuckle (1) onto hydrostatic tandem
pump/auxiliary hydraulic pump assembly (2) and in-
stall at ball joint.
11. Uncap and unplug each line/fitting and connect hy-
draulic hoses to applicable connection points. Re-
move tagging on hoses.
NOTE: During the hose reconnecting, new o-rings, or
o-rings in good condition, should be used, and should
be lubricated with Vaseline or motor assembly lube (not
grease).
RAIL13SP01139FA 3
47691240 24/02/2015
10.2 [10.114] / 5
Engine - Pump drives
12. Connect all electrical connections to the applicable
connection points.
13. Release the vacuum form the hydraulic tank. Operate
the engine and check for leaks and proper function of
the system.
47691240 24/02/2015
10.2 [10.114] / 6

More Related Content

Similar to New holland guardian sp.295 f tier 4b (final) sprayer service repair manual (pin yfym00001 and above)

New holland speedrower 130 tier 3 self propelled windrower service repair man...
New holland speedrower 130 tier 3 self propelled windrower service repair man...New holland speedrower 130 tier 3 self propelled windrower service repair man...
New holland speedrower 130 tier 3 self propelled windrower service repair man...fjsjekkdmmemm
 
New holland speedrower 130 tier 3 self propelled windrower service repair man...
New holland speedrower 130 tier 3 self propelled windrower service repair man...New holland speedrower 130 tier 3 self propelled windrower service repair man...
New holland speedrower 130 tier 3 self propelled windrower service repair man...fjjskertgksmemm
 
New holland speedrower 160 tier 4 b (final) self propelled windrower service ...
New holland speedrower 160 tier 4 b (final) self propelled windrower service ...New holland speedrower 160 tier 4 b (final) self propelled windrower service ...
New holland speedrower 160 tier 4 b (final) self propelled windrower service ...fjsekkmmme
 
New holland speedrower 160 tier 4 b (final) self propelled windrower service ...
New holland speedrower 160 tier 4 b (final) self propelled windrower service ...New holland speedrower 160 tier 4 b (final) self propelled windrower service ...
New holland speedrower 160 tier 4 b (final) self propelled windrower service ...usjfjkskefmme
 
New holland speedrower 160 tier 4 b (final) self propelled windrower service ...
New holland speedrower 160 tier 4 b (final) self propelled windrower service ...New holland speedrower 160 tier 4 b (final) self propelled windrower service ...
New holland speedrower 160 tier 4 b (final) self propelled windrower service ...udfjjsekkemm
 
New holland speedrower 160 tier 4 b (final) self propelled windrower service ...
New holland speedrower 160 tier 4 b (final) self propelled windrower service ...New holland speedrower 160 tier 4 b (final) self propelled windrower service ...
New holland speedrower 160 tier 4 b (final) self propelled windrower service ...ufjjskekemem
 
Case ih wd1904 tier 3 self propelled windrower service repair manual [ -yfg67...
Case ih wd1904 tier 3 self propelled windrower service repair manual [ -yfg67...Case ih wd1904 tier 3 self propelled windrower service repair manual [ -yfg67...
Case ih wd1904 tier 3 self propelled windrower service repair manual [ -yfg67...fjjskekfkskemf
 
Case ih wd2304 tier 3 self propelled windrower service repair manual [ -yfg67...
Case ih wd2304 tier 3 self propelled windrower service repair manual [ -yfg67...Case ih wd2304 tier 3 self propelled windrower service repair manual [ -yfg67...
Case ih wd2304 tier 3 self propelled windrower service repair manual [ -yfg67...jfjjsekdmme
 
Case ih wd1904 tier 3 self propelled windrower service repair manual [ -yfg67...
Case ih wd1904 tier 3 self propelled windrower service repair manual [ -yfg67...Case ih wd1904 tier 3 self propelled windrower service repair manual [ -yfg67...
Case ih wd1904 tier 3 self propelled windrower service repair manual [ -yfg67...ifksjejdkemm
 
Case ih wd2304 tier 3 self propelled windrower service repair manual [ -yfg67...
Case ih wd2304 tier 3 self propelled windrower service repair manual [ -yfg67...Case ih wd2304 tier 3 self propelled windrower service repair manual [ -yfg67...
Case ih wd2304 tier 3 self propelled windrower service repair manual [ -yfg67...fjjskertefksmem
 

Similar to New holland guardian sp.295 f tier 4b (final) sprayer service repair manual (pin yfym00001 and above) (10)

New holland speedrower 130 tier 3 self propelled windrower service repair man...
New holland speedrower 130 tier 3 self propelled windrower service repair man...New holland speedrower 130 tier 3 self propelled windrower service repair man...
New holland speedrower 130 tier 3 self propelled windrower service repair man...
 
New holland speedrower 130 tier 3 self propelled windrower service repair man...
New holland speedrower 130 tier 3 self propelled windrower service repair man...New holland speedrower 130 tier 3 self propelled windrower service repair man...
New holland speedrower 130 tier 3 self propelled windrower service repair man...
 
New holland speedrower 160 tier 4 b (final) self propelled windrower service ...
New holland speedrower 160 tier 4 b (final) self propelled windrower service ...New holland speedrower 160 tier 4 b (final) self propelled windrower service ...
New holland speedrower 160 tier 4 b (final) self propelled windrower service ...
 
New holland speedrower 160 tier 4 b (final) self propelled windrower service ...
New holland speedrower 160 tier 4 b (final) self propelled windrower service ...New holland speedrower 160 tier 4 b (final) self propelled windrower service ...
New holland speedrower 160 tier 4 b (final) self propelled windrower service ...
 
Case ih wd1904 tier 3 self propelled windrower service repair manual [ -yfg67...
Case ih wd1904 tier 3 self propelled windrower service repair manual [ -yfg67...Case ih wd1904 tier 3 self propelled windrower service repair manual [ -yfg67...
Case ih wd1904 tier 3 self propelled windrower service repair manual [ -yfg67...
 
Case ih wd2304 tier 3 self propelled windrower service repair manual [ -yfg67...
Case ih wd2304 tier 3 self propelled windrower service repair manual [ -yfg67...Case ih wd2304 tier 3 self propelled windrower service repair manual [ -yfg67...
Case ih wd2304 tier 3 self propelled windrower service repair manual [ -yfg67...
 
Case ih wd1904 tier 3 self propelled windrower service repair manual [ -yfg67...
Case ih wd1904 tier 3 self propelled windrower service repair manual [ -yfg67...Case ih wd1904 tier 3 self propelled windrower service repair manual [ -yfg67...
Case ih wd1904 tier 3 self propelled windrower service repair manual [ -yfg67...
 
Case ih wd2304 tier 3 self propelled windrower service repair manual [ -yfg67...
Case ih wd2304 tier 3 self propelled windrower service repair manual [ -yfg67...Case ih wd2304 tier 3 self propelled windrower service repair manual [ -yfg67...
Case ih wd2304 tier 3 self propelled windrower service repair manual [ -yfg67...
 

More from fuujsjejkekmd

Massey Ferguson MF 2630 F TRACTOR (MADE IN INDIA FOR TURKEY) Parts Catalogue ...
Massey Ferguson MF 2630 F TRACTOR (MADE IN INDIA FOR TURKEY) Parts Catalogue ...Massey Ferguson MF 2630 F TRACTOR (MADE IN INDIA FOR TURKEY) Parts Catalogue ...
Massey Ferguson MF 2630 F TRACTOR (MADE IN INDIA FOR TURKEY) Parts Catalogue ...fuujsjejkekmd
 
Massey Ferguson MF 2625 GE TRACTOR (MADE IN INDIA FOR TURKEY) Parts Catalogue...
Massey Ferguson MF 2625 GE TRACTOR (MADE IN INDIA FOR TURKEY) Parts Catalogue...Massey Ferguson MF 2625 GE TRACTOR (MADE IN INDIA FOR TURKEY) Parts Catalogue...
Massey Ferguson MF 2625 GE TRACTOR (MADE IN INDIA FOR TURKEY) Parts Catalogue...fuujsjejkekmd
 
Massey Ferguson MF 2620 XTRA TRACTOR (MADE IN INDIA FOR TURKEY) Parts Catalog...
Massey Ferguson MF 2620 XTRA TRACTOR (MADE IN INDIA FOR TURKEY) Parts Catalog...Massey Ferguson MF 2620 XTRA TRACTOR (MADE IN INDIA FOR TURKEY) Parts Catalog...
Massey Ferguson MF 2620 XTRA TRACTOR (MADE IN INDIA FOR TURKEY) Parts Catalog...fuujsjejkekmd
 
Massey Ferguson MF 2620 GE TRACTOR (MADE IN INDIA FOR TURKEY) Parts Catalogue...
Massey Ferguson MF 2620 GE TRACTOR (MADE IN INDIA FOR TURKEY) Parts Catalogue...Massey Ferguson MF 2620 GE TRACTOR (MADE IN INDIA FOR TURKEY) Parts Catalogue...
Massey Ferguson MF 2620 GE TRACTOR (MADE IN INDIA FOR TURKEY) Parts Catalogue...fuujsjejkekmd
 
Case ih magnum 310 continuously variable transmission (cvt) tractor service r...
Case ih magnum 310 continuously variable transmission (cvt) tractor service r...Case ih magnum 310 continuously variable transmission (cvt) tractor service r...
Case ih magnum 310 continuously variable transmission (cvt) tractor service r...fuujsjejkekmd
 
Case ih magnum 280 continuously variable transmission (cvt) tractor service r...
Case ih magnum 280 continuously variable transmission (cvt) tractor service r...Case ih magnum 280 continuously variable transmission (cvt) tractor service r...
Case ih magnum 280 continuously variable transmission (cvt) tractor service r...fuujsjejkekmd
 
Case ih luxxum 110 stage iv tractor service repair manual (pin zgsk01001 and ...
Case ih luxxum 110 stage iv tractor service repair manual (pin zgsk01001 and ...Case ih luxxum 110 stage iv tractor service repair manual (pin zgsk01001 and ...
Case ih luxxum 110 stage iv tractor service repair manual (pin zgsk01001 and ...fuujsjejkekmd
 
Case ih farmlift 737 stage iv telescopic handler service repair manual
Case ih farmlift 737 stage iv telescopic handler service repair manualCase ih farmlift 737 stage iv telescopic handler service repair manual
Case ih farmlift 737 stage iv telescopic handler service repair manualfuujsjejkekmd
 
Case ih farmlift 636 stage iv telescopic handler service repair manual
Case ih farmlift 636 stage iv telescopic handler service repair manualCase ih farmlift 636 stage iv telescopic handler service repair manual
Case ih farmlift 636 stage iv telescopic handler service repair manualfuujsjejkekmd
 
Case ih farmlift 635 stage iiib telescopic handler service repair manual
Case ih farmlift 635 stage iiib telescopic handler service repair manualCase ih farmlift 635 stage iiib telescopic handler service repair manual
Case ih farmlift 635 stage iiib telescopic handler service repair manualfuujsjejkekmd
 
Case ih farmlift 633 stage iv telescopic handler service repair manual
Case ih farmlift 633 stage iv telescopic handler service repair manualCase ih farmlift 633 stage iv telescopic handler service repair manual
Case ih farmlift 633 stage iv telescopic handler service repair manualfuujsjejkekmd
 
Case ih farmall 95 tractor service repair manual
Case ih farmall 95 tractor service repair manualCase ih farmall 95 tractor service repair manual
Case ih farmall 95 tractor service repair manualfuujsjejkekmd
 
New holland gt20 garden tractor service repair manual
New holland gt20 garden tractor service repair manualNew holland gt20 garden tractor service repair manual
New holland gt20 garden tractor service repair manualfuujsjejkekmd
 
New holland 6635 tractor service repair manual
New holland 6635 tractor service repair manualNew holland 6635 tractor service repair manual
New holland 6635 tractor service repair manualfuujsjejkekmd
 
Massey ferguson mf 3670 tractor service parts catalogue manual (part number ...
Massey ferguson mf 3670 tractor service parts catalogue manual (part number  ...Massey ferguson mf 3670 tractor service parts catalogue manual (part number  ...
Massey ferguson mf 3670 tractor service parts catalogue manual (part number ...fuujsjejkekmd
 
Massey ferguson mf 3125 tractor service parts catalogue manual (part number ...
Massey ferguson mf 3125 tractor service parts catalogue manual (part number  ...Massey ferguson mf 3125 tractor service parts catalogue manual (part number  ...
Massey ferguson mf 3125 tractor service parts catalogue manual (part number ...fuujsjejkekmd
 
Massey ferguson mf 3070 tractor service parts catalogue manual (part number ...
Massey ferguson mf 3070 tractor service parts catalogue manual (part number  ...Massey ferguson mf 3070 tractor service parts catalogue manual (part number  ...
Massey ferguson mf 3070 tractor service parts catalogue manual (part number ...fuujsjejkekmd
 
Massey ferguson 6470 tractor (tier 3) service parts catalogue manual (part nu...
Massey ferguson 6470 tractor (tier 3) service parts catalogue manual (part nu...Massey ferguson 6470 tractor (tier 3) service parts catalogue manual (part nu...
Massey ferguson 6470 tractor (tier 3) service parts catalogue manual (part nu...fuujsjejkekmd
 
Massey ferguson 6465 tractor (tier 3 sisu engine) service parts catalogue man...
Massey ferguson 6465 tractor (tier 3 sisu engine) service parts catalogue man...Massey ferguson 6465 tractor (tier 3 sisu engine) service parts catalogue man...
Massey ferguson 6465 tractor (tier 3 sisu engine) service parts catalogue man...fuujsjejkekmd
 
Massey ferguson 5450 tractor (tier 3) service parts catalogue manual (part nu...
Massey ferguson 5450 tractor (tier 3) service parts catalogue manual (part nu...Massey ferguson 5450 tractor (tier 3) service parts catalogue manual (part nu...
Massey ferguson 5450 tractor (tier 3) service parts catalogue manual (part nu...fuujsjejkekmd
 

More from fuujsjejkekmd (20)

Massey Ferguson MF 2630 F TRACTOR (MADE IN INDIA FOR TURKEY) Parts Catalogue ...
Massey Ferguson MF 2630 F TRACTOR (MADE IN INDIA FOR TURKEY) Parts Catalogue ...Massey Ferguson MF 2630 F TRACTOR (MADE IN INDIA FOR TURKEY) Parts Catalogue ...
Massey Ferguson MF 2630 F TRACTOR (MADE IN INDIA FOR TURKEY) Parts Catalogue ...
 
Massey Ferguson MF 2625 GE TRACTOR (MADE IN INDIA FOR TURKEY) Parts Catalogue...
Massey Ferguson MF 2625 GE TRACTOR (MADE IN INDIA FOR TURKEY) Parts Catalogue...Massey Ferguson MF 2625 GE TRACTOR (MADE IN INDIA FOR TURKEY) Parts Catalogue...
Massey Ferguson MF 2625 GE TRACTOR (MADE IN INDIA FOR TURKEY) Parts Catalogue...
 
Massey Ferguson MF 2620 XTRA TRACTOR (MADE IN INDIA FOR TURKEY) Parts Catalog...
Massey Ferguson MF 2620 XTRA TRACTOR (MADE IN INDIA FOR TURKEY) Parts Catalog...Massey Ferguson MF 2620 XTRA TRACTOR (MADE IN INDIA FOR TURKEY) Parts Catalog...
Massey Ferguson MF 2620 XTRA TRACTOR (MADE IN INDIA FOR TURKEY) Parts Catalog...
 
Massey Ferguson MF 2620 GE TRACTOR (MADE IN INDIA FOR TURKEY) Parts Catalogue...
Massey Ferguson MF 2620 GE TRACTOR (MADE IN INDIA FOR TURKEY) Parts Catalogue...Massey Ferguson MF 2620 GE TRACTOR (MADE IN INDIA FOR TURKEY) Parts Catalogue...
Massey Ferguson MF 2620 GE TRACTOR (MADE IN INDIA FOR TURKEY) Parts Catalogue...
 
Case ih magnum 310 continuously variable transmission (cvt) tractor service r...
Case ih magnum 310 continuously variable transmission (cvt) tractor service r...Case ih magnum 310 continuously variable transmission (cvt) tractor service r...
Case ih magnum 310 continuously variable transmission (cvt) tractor service r...
 
Case ih magnum 280 continuously variable transmission (cvt) tractor service r...
Case ih magnum 280 continuously variable transmission (cvt) tractor service r...Case ih magnum 280 continuously variable transmission (cvt) tractor service r...
Case ih magnum 280 continuously variable transmission (cvt) tractor service r...
 
Case ih luxxum 110 stage iv tractor service repair manual (pin zgsk01001 and ...
Case ih luxxum 110 stage iv tractor service repair manual (pin zgsk01001 and ...Case ih luxxum 110 stage iv tractor service repair manual (pin zgsk01001 and ...
Case ih luxxum 110 stage iv tractor service repair manual (pin zgsk01001 and ...
 
Case ih farmlift 737 stage iv telescopic handler service repair manual
Case ih farmlift 737 stage iv telescopic handler service repair manualCase ih farmlift 737 stage iv telescopic handler service repair manual
Case ih farmlift 737 stage iv telescopic handler service repair manual
 
Case ih farmlift 636 stage iv telescopic handler service repair manual
Case ih farmlift 636 stage iv telescopic handler service repair manualCase ih farmlift 636 stage iv telescopic handler service repair manual
Case ih farmlift 636 stage iv telescopic handler service repair manual
 
Case ih farmlift 635 stage iiib telescopic handler service repair manual
Case ih farmlift 635 stage iiib telescopic handler service repair manualCase ih farmlift 635 stage iiib telescopic handler service repair manual
Case ih farmlift 635 stage iiib telescopic handler service repair manual
 
Case ih farmlift 633 stage iv telescopic handler service repair manual
Case ih farmlift 633 stage iv telescopic handler service repair manualCase ih farmlift 633 stage iv telescopic handler service repair manual
Case ih farmlift 633 stage iv telescopic handler service repair manual
 
Case ih farmall 95 tractor service repair manual
Case ih farmall 95 tractor service repair manualCase ih farmall 95 tractor service repair manual
Case ih farmall 95 tractor service repair manual
 
New holland gt20 garden tractor service repair manual
New holland gt20 garden tractor service repair manualNew holland gt20 garden tractor service repair manual
New holland gt20 garden tractor service repair manual
 
New holland 6635 tractor service repair manual
New holland 6635 tractor service repair manualNew holland 6635 tractor service repair manual
New holland 6635 tractor service repair manual
 
Massey ferguson mf 3670 tractor service parts catalogue manual (part number ...
Massey ferguson mf 3670 tractor service parts catalogue manual (part number  ...Massey ferguson mf 3670 tractor service parts catalogue manual (part number  ...
Massey ferguson mf 3670 tractor service parts catalogue manual (part number ...
 
Massey ferguson mf 3125 tractor service parts catalogue manual (part number ...
Massey ferguson mf 3125 tractor service parts catalogue manual (part number  ...Massey ferguson mf 3125 tractor service parts catalogue manual (part number  ...
Massey ferguson mf 3125 tractor service parts catalogue manual (part number ...
 
Massey ferguson mf 3070 tractor service parts catalogue manual (part number ...
Massey ferguson mf 3070 tractor service parts catalogue manual (part number  ...Massey ferguson mf 3070 tractor service parts catalogue manual (part number  ...
Massey ferguson mf 3070 tractor service parts catalogue manual (part number ...
 
Massey ferguson 6470 tractor (tier 3) service parts catalogue manual (part nu...
Massey ferguson 6470 tractor (tier 3) service parts catalogue manual (part nu...Massey ferguson 6470 tractor (tier 3) service parts catalogue manual (part nu...
Massey ferguson 6470 tractor (tier 3) service parts catalogue manual (part nu...
 
Massey ferguson 6465 tractor (tier 3 sisu engine) service parts catalogue man...
Massey ferguson 6465 tractor (tier 3 sisu engine) service parts catalogue man...Massey ferguson 6465 tractor (tier 3 sisu engine) service parts catalogue man...
Massey ferguson 6465 tractor (tier 3 sisu engine) service parts catalogue man...
 
Massey ferguson 5450 tractor (tier 3) service parts catalogue manual (part nu...
Massey ferguson 5450 tractor (tier 3) service parts catalogue manual (part nu...Massey ferguson 5450 tractor (tier 3) service parts catalogue manual (part nu...
Massey ferguson 5450 tractor (tier 3) service parts catalogue manual (part nu...
 

Recently uploaded

How To Fix Mercedes Benz Anti-Theft Protection Activation Issue
How To Fix Mercedes Benz Anti-Theft Protection Activation IssueHow To Fix Mercedes Benz Anti-Theft Protection Activation Issue
How To Fix Mercedes Benz Anti-Theft Protection Activation IssueTerry Sayther Automotive
 
Tata_Nexon_brochure tata nexon brochure tata
Tata_Nexon_brochure tata nexon brochure tataTata_Nexon_brochure tata nexon brochure tata
Tata_Nexon_brochure tata nexon brochure tataaritradey27234
 
John deere 425 445 455 Maitenance Manual
John deere 425 445 455 Maitenance ManualJohn deere 425 445 455 Maitenance Manual
John deere 425 445 455 Maitenance ManualExcavator
 
ENJOY Call Girls In Okhla Vihar Delhi Call 9654467111
ENJOY Call Girls In Okhla Vihar Delhi Call 9654467111ENJOY Call Girls In Okhla Vihar Delhi Call 9654467111
ENJOY Call Girls In Okhla Vihar Delhi Call 9654467111Sapana Sha
 
一比一原版(UVic学位证书)维多利亚大学毕业证学历认证买留学回国
一比一原版(UVic学位证书)维多利亚大学毕业证学历认证买留学回国一比一原版(UVic学位证书)维多利亚大学毕业证学历认证买留学回国
一比一原版(UVic学位证书)维多利亚大学毕业证学历认证买留学回国ezgenuh
 
Why Won't Your Subaru Key Come Out Of The Ignition Find Out Here!
Why Won't Your Subaru Key Come Out Of The Ignition Find Out Here!Why Won't Your Subaru Key Come Out Of The Ignition Find Out Here!
Why Won't Your Subaru Key Come Out Of The Ignition Find Out Here!AutoScandia
 
design a four cylinder internal combustion engine
design a four cylinder internal combustion enginedesign a four cylinder internal combustion engine
design a four cylinder internal combustion enginepiyushsingh943161
 
John Deere Tractors 6130M 6140M Diagnostic Manual
John Deere Tractors  6130M 6140M Diagnostic ManualJohn Deere Tractors  6130M 6140M Diagnostic Manual
John Deere Tractors 6130M 6140M Diagnostic ManualExcavator
 
Vip Mumbai Call Girls Mira Road Call On 9920725232 With Body to body massage ...
Vip Mumbai Call Girls Mira Road Call On 9920725232 With Body to body massage ...Vip Mumbai Call Girls Mira Road Call On 9920725232 With Body to body massage ...
Vip Mumbai Call Girls Mira Road Call On 9920725232 With Body to body massage ...amitlee9823
 
Top Rated Call Girls Mumbai Central : 9920725232 We offer Beautiful and sexy ...
Top Rated Call Girls Mumbai Central : 9920725232 We offer Beautiful and sexy ...Top Rated Call Girls Mumbai Central : 9920725232 We offer Beautiful and sexy ...
Top Rated Call Girls Mumbai Central : 9920725232 We offer Beautiful and sexy ...amitlee9823
 
Hyundai World Rally Team in action at 2024 WRC
Hyundai World Rally Team in action at 2024 WRCHyundai World Rally Team in action at 2024 WRC
Hyundai World Rally Team in action at 2024 WRCHyundai Motor Group
 
Call Girls In Kotla Mubarakpur Delhi ❤️8448577510 ⊹Best Escorts Service In 24...
Call Girls In Kotla Mubarakpur Delhi ❤️8448577510 ⊹Best Escorts Service In 24...Call Girls In Kotla Mubarakpur Delhi ❤️8448577510 ⊹Best Escorts Service In 24...
Call Girls In Kotla Mubarakpur Delhi ❤️8448577510 ⊹Best Escorts Service In 24...lizamodels9
 
Call me @ 9892124323 Call Girl in Andheri East With Free Home Delivery
Call me @ 9892124323 Call Girl in Andheri East With Free Home DeliveryCall me @ 9892124323 Call Girl in Andheri East With Free Home Delivery
Call me @ 9892124323 Call Girl in Andheri East With Free Home DeliveryPooja Nehwal
 
Delhi Call Girls Saket 9711199171 ☎✔👌✔ Whatsapp Hard And Sexy Vip Call
Delhi Call Girls Saket 9711199171 ☎✔👌✔ Whatsapp Hard And Sexy Vip CallDelhi Call Girls Saket 9711199171 ☎✔👌✔ Whatsapp Hard And Sexy Vip Call
Delhi Call Girls Saket 9711199171 ☎✔👌✔ Whatsapp Hard And Sexy Vip Callshivangimorya083
 
Call Girls Kadugodi Just Call 👗 7737669865 👗 Top Class Call Girl Service Bang...
Call Girls Kadugodi Just Call 👗 7737669865 👗 Top Class Call Girl Service Bang...Call Girls Kadugodi Just Call 👗 7737669865 👗 Top Class Call Girl Service Bang...
Call Girls Kadugodi Just Call 👗 7737669865 👗 Top Class Call Girl Service Bang...amitlee9823
 
Delhi Call Girls Mayur Vihar 9711199171 ☎✔👌✔ Whatsapp Hard And Sexy Vip Call
Delhi Call Girls Mayur Vihar 9711199171 ☎✔👌✔ Whatsapp Hard And Sexy Vip CallDelhi Call Girls Mayur Vihar 9711199171 ☎✔👌✔ Whatsapp Hard And Sexy Vip Call
Delhi Call Girls Mayur Vihar 9711199171 ☎✔👌✔ Whatsapp Hard And Sexy Vip Callshivangimorya083
 
How To Troubleshoot Mercedes Blind Spot Assist Inoperative Error
How To Troubleshoot Mercedes Blind Spot Assist Inoperative ErrorHow To Troubleshoot Mercedes Blind Spot Assist Inoperative Error
How To Troubleshoot Mercedes Blind Spot Assist Inoperative ErrorAndres Auto Service
 

Recently uploaded (20)

How To Fix Mercedes Benz Anti-Theft Protection Activation Issue
How To Fix Mercedes Benz Anti-Theft Protection Activation IssueHow To Fix Mercedes Benz Anti-Theft Protection Activation Issue
How To Fix Mercedes Benz Anti-Theft Protection Activation Issue
 
Tata_Nexon_brochure tata nexon brochure tata
Tata_Nexon_brochure tata nexon brochure tataTata_Nexon_brochure tata nexon brochure tata
Tata_Nexon_brochure tata nexon brochure tata
 
John deere 425 445 455 Maitenance Manual
John deere 425 445 455 Maitenance ManualJohn deere 425 445 455 Maitenance Manual
John deere 425 445 455 Maitenance Manual
 
(INDIRA) Call Girl Nashik Call Now 8617697112 Nashik Escorts 24x7
(INDIRA) Call Girl Nashik Call Now 8617697112 Nashik Escorts 24x7(INDIRA) Call Girl Nashik Call Now 8617697112 Nashik Escorts 24x7
(INDIRA) Call Girl Nashik Call Now 8617697112 Nashik Escorts 24x7
 
ENJOY Call Girls In Okhla Vihar Delhi Call 9654467111
ENJOY Call Girls In Okhla Vihar Delhi Call 9654467111ENJOY Call Girls In Okhla Vihar Delhi Call 9654467111
ENJOY Call Girls In Okhla Vihar Delhi Call 9654467111
 
一比一原版(UVic学位证书)维多利亚大学毕业证学历认证买留学回国
一比一原版(UVic学位证书)维多利亚大学毕业证学历认证买留学回国一比一原版(UVic学位证书)维多利亚大学毕业证学历认证买留学回国
一比一原版(UVic学位证书)维多利亚大学毕业证学历认证买留学回国
 
Why Won't Your Subaru Key Come Out Of The Ignition Find Out Here!
Why Won't Your Subaru Key Come Out Of The Ignition Find Out Here!Why Won't Your Subaru Key Come Out Of The Ignition Find Out Here!
Why Won't Your Subaru Key Come Out Of The Ignition Find Out Here!
 
design a four cylinder internal combustion engine
design a four cylinder internal combustion enginedesign a four cylinder internal combustion engine
design a four cylinder internal combustion engine
 
John Deere Tractors 6130M 6140M Diagnostic Manual
John Deere Tractors  6130M 6140M Diagnostic ManualJohn Deere Tractors  6130M 6140M Diagnostic Manual
John Deere Tractors 6130M 6140M Diagnostic Manual
 
Vip Mumbai Call Girls Mira Road Call On 9920725232 With Body to body massage ...
Vip Mumbai Call Girls Mira Road Call On 9920725232 With Body to body massage ...Vip Mumbai Call Girls Mira Road Call On 9920725232 With Body to body massage ...
Vip Mumbai Call Girls Mira Road Call On 9920725232 With Body to body massage ...
 
Top Rated Call Girls Mumbai Central : 9920725232 We offer Beautiful and sexy ...
Top Rated Call Girls Mumbai Central : 9920725232 We offer Beautiful and sexy ...Top Rated Call Girls Mumbai Central : 9920725232 We offer Beautiful and sexy ...
Top Rated Call Girls Mumbai Central : 9920725232 We offer Beautiful and sexy ...
 
Hyundai World Rally Team in action at 2024 WRC
Hyundai World Rally Team in action at 2024 WRCHyundai World Rally Team in action at 2024 WRC
Hyundai World Rally Team in action at 2024 WRC
 
Call Girls In Kotla Mubarakpur Delhi ❤️8448577510 ⊹Best Escorts Service In 24...
Call Girls In Kotla Mubarakpur Delhi ❤️8448577510 ⊹Best Escorts Service In 24...Call Girls In Kotla Mubarakpur Delhi ❤️8448577510 ⊹Best Escorts Service In 24...
Call Girls In Kotla Mubarakpur Delhi ❤️8448577510 ⊹Best Escorts Service In 24...
 
Call me @ 9892124323 Call Girl in Andheri East With Free Home Delivery
Call me @ 9892124323 Call Girl in Andheri East With Free Home DeliveryCall me @ 9892124323 Call Girl in Andheri East With Free Home Delivery
Call me @ 9892124323 Call Girl in Andheri East With Free Home Delivery
 
Delhi Call Girls Saket 9711199171 ☎✔👌✔ Whatsapp Hard And Sexy Vip Call
Delhi Call Girls Saket 9711199171 ☎✔👌✔ Whatsapp Hard And Sexy Vip CallDelhi Call Girls Saket 9711199171 ☎✔👌✔ Whatsapp Hard And Sexy Vip Call
Delhi Call Girls Saket 9711199171 ☎✔👌✔ Whatsapp Hard And Sexy Vip Call
 
Call Girls Kadugodi Just Call 👗 7737669865 👗 Top Class Call Girl Service Bang...
Call Girls Kadugodi Just Call 👗 7737669865 👗 Top Class Call Girl Service Bang...Call Girls Kadugodi Just Call 👗 7737669865 👗 Top Class Call Girl Service Bang...
Call Girls Kadugodi Just Call 👗 7737669865 👗 Top Class Call Girl Service Bang...
 
Delhi Call Girls Mayur Vihar 9711199171 ☎✔👌✔ Whatsapp Hard And Sexy Vip Call
Delhi Call Girls Mayur Vihar 9711199171 ☎✔👌✔ Whatsapp Hard And Sexy Vip CallDelhi Call Girls Mayur Vihar 9711199171 ☎✔👌✔ Whatsapp Hard And Sexy Vip Call
Delhi Call Girls Mayur Vihar 9711199171 ☎✔👌✔ Whatsapp Hard And Sexy Vip Call
 
(ISHITA) Call Girls Service Jammu Call Now 8617697112 Jammu Escorts 24x7
(ISHITA) Call Girls Service Jammu Call Now 8617697112 Jammu Escorts 24x7(ISHITA) Call Girls Service Jammu Call Now 8617697112 Jammu Escorts 24x7
(ISHITA) Call Girls Service Jammu Call Now 8617697112 Jammu Escorts 24x7
 
Call Now ≽ 9953056974 ≼🔝 Call Girls In Shankar vihar ≼🔝 Delhi door step delev...
Call Now ≽ 9953056974 ≼🔝 Call Girls In Shankar vihar ≼🔝 Delhi door step delev...Call Now ≽ 9953056974 ≼🔝 Call Girls In Shankar vihar ≼🔝 Delhi door step delev...
Call Now ≽ 9953056974 ≼🔝 Call Girls In Shankar vihar ≼🔝 Delhi door step delev...
 
How To Troubleshoot Mercedes Blind Spot Assist Inoperative Error
How To Troubleshoot Mercedes Blind Spot Assist Inoperative ErrorHow To Troubleshoot Mercedes Blind Spot Assist Inoperative Error
How To Troubleshoot Mercedes Blind Spot Assist Inoperative Error
 

New holland guardian sp.295 f tier 4b (final) sprayer service repair manual (pin yfym00001 and above)

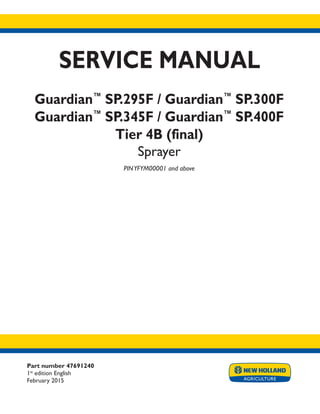
  • 1. Part number 47691240 1st edition English February 2015 SERVICE MANUAL Guardian™ SP.295F / Guardian™ SP.300F Guardian™ SP.345F / Guardian™ SP.400F Tier 4B (final) Sprayer PINYFYM00001 and above Printed in U.S.A. © 2015 CNH Industrial America LLC. All Rights Reserved. New Holland is a trademark registered in the United States and many other countries, owned by or licensed to CNH Industrial N.V., its subsidiaries or affiliates.
  • 3. Contents INTRODUCTION Engine....................................................................................... 10 [10.001] Engine and crankcase ............................................................. 10.1 [10.114] Pump drives ........................................................................ 10.2 [10.216] Fuel tanks .......................................................................... 10.3 [10.206] Fuel filters .......................................................................... 10.4 [10.202] Air cleaners and lines .............................................................. 10.5 [10.500] Selective Catalytic Reduction (SCR) exhaust treatment ........................... 10.6 [10.400] Engine cooling system ............................................................. 10.7 [10.414] Fan and drive ...................................................................... 10.8 Front axle system ....................................................................... 25 [25.100] Powered front axle ................................................................. 25.1 Hydrostatic drive......................................................................... 29 [29.218] Pump and motor components...................................................... 29.1 Brakes and controls .................................................................... 33 [33.202] Hydraulic service brakes ........................................................... 33.1 Hydraulic systems....................................................................... 35 [35.000] Hydraulic systems.................................................................. 35.1 [35.300] Reservoir, cooler, and filters........................................................ 35.2 [35.220] Auxiliary hydraulic pump and lines ................................................. 35.3 [35.752] Hydraulic fan drive cooling system................................................. 35.4 [35.610] Machine leveling control system ................................................... 35.5 Pneumatic system ...................................................................... 36 [36.100] Pneumatic system.................................................................. 36.1 [36.908] Pneumatic suspension ............................................................. 36.2 Steering..................................................................................... 41 47691240 24/02/2015
  • 4. [41.101] Steering control .................................................................... 41.1 [41.216] Cylinders ........................................................................... 41.2 Wheels...................................................................................... 44 [44.511] Front wheels........................................................................ 44.1 [44.520] Rear wheels........................................................................ 44.2 Cab climate control ..................................................................... 50 [50.100] Heating ............................................................................. 50.1 [50.104] Ventilation .......................................................................... 50.2 [50.200] Air conditioning..................................................................... 50.3 Electrical systems....................................................................... 55 [55.000] Electrical system ................................................................... 55.1 [55.100] Harnesses and connectors......................................................... 55.2 [55.015] Engine control system.............................................................. 55.3 [55.201] Engine starting system ............................................................. 55.4 [55.301] Alternator........................................................................... 55.5 [55.302] Battery.............................................................................. 55.6 [55.640] Electronic modules ................................................................. 55.7 [55.050] Heating, Ventilation, and Air-Conditioning (HVAC) control system................. 55.8 [55.047] Steering control system ............................................................ 55.9 Spraying.................................................................................... 78 [78.110] Chemical spraying.................................................................. 78.1 [78.111] Spraying pump ..................................................................... 78.2 [78.120] Foam marking system.............................................................. 78.3 Platform, cab, bodywork, and decals............................................. 90 [90.151] Cab interior......................................................................... 90.1 [90.120] Mechanically-adjusted operator seat............................................... 90.2 [90.100] Engine hood and panels ........................................................... 90.3 47691240 24/02/2015
  • 5. [90.116] Fenders and guards................................................................ 90.4 47691240 24/02/2015
  • 7. INTRODUCTION Safety rules Personal safety This is the safety alert symbol. It is used to alert you to potential personal injury hazards. Obey all safety messages that follow this symbol to avoid possible death or injury. Throughout this manual you will find the signal words DANGER, WARNING, and CAUTION followed by special in- structions. These precautions are intended for the personal safety of you and those working with you. Read and understand all the safety messages in this manual before you operate or service the machine. DANGER indicates a hazardous situation that, if not avoided, will result in death or serious injury. WARNING indicates a hazardous situation that, if not avoided, could result in death or serious injury. CAUTION indicates a hazardous situation that, if not avoided, could result in minor or moderate injury. FAILURE TO FOLLOW DANGER, WARNING, AND CAUTION MESSAGES COULD RESULT IN DEATH OR SERIOUS INJURY. Machine safety NOTICE: Notice indicates a situation that, if not avoided, could result in machine or property damage. Throughout this manual you will find the signal word Notice followed by special instructions to prevent machine or property damage. The word Notice is used to address practices not related to personal safety. Information NOTE: Note indicates additional information that clarifies steps, procedures, or other information in this manual. Throughout this manual you will find the word Note followed by additional information about a step, procedure, or other information in the manual. The word Note is not intended to address personal safety or property damage. 47691240 24/02/2015 4
  • 8. INTRODUCTION Personal safety General safety rules Use caution when operating the machine on slopes. Raised equipment, full tanks and other loads will change the center of gravity of the machine. The machine can tip or roll over when near ditches and embankments or uneven surfaces. Never permit anyone other than the operator to ride on the machine. Never operate the machine under the influence of alcohol, drugs, or while otherwise impaired. Pay attention to overhead power lines and hanging obstacles. High voltage lines may require significant clearance for safety. Hydraulic oil or diesel fuel leaking under pressure can penetrate the skin, causing serious injury or infection. • DO NOT use your hand to check for leaks. Use a piece of cardboard or paper. • Stop engine, remove key and relieve the pressure before connecting or disconnecting fluid lines. • Make sure all components are in good condition and tighten all connections before starting the engine or pressur- izing the system. • If hydraulic fluid or diesel fuel penetrates the skin, seek medical attention immediately. • Continuous long term contact with hydraulic fluid may cause skin cancer. Avoid long term contact and wash the skin promptly with soap and water. Keep clear of moving parts. Loose clothing, jewelry, watches, long hair, and other loose or hanging items can become entangled in moving parts. Wear protective equipment when appropriate. DO NOT attempt to remove material from any part of the machine while it is being operated or components are in motion. Make sure all guards and shields are in good condition and properly installed before operating the machine. Never operate the machine with shields removed. Always close access doors or panels before operating the machine. Dirty or slippery steps, ladders, walkways, and platforms can cause falls. Make sure these surfaces remain clean and clear of debris. A person or pet within the operating area of a machine can be struck or crushed by the machine or its equipment. DO NOT allow anyone to enter the work area. Raised equipment and/or loads can fall unexpectedly and crush persons underneath. Never allow anyone to enter the area underneath raised equipment during operation. Never operate engine in enclosed spaces as harmful exhaust gases may build up. Before starting the machine, be sure that all controls are in neutral or park lock position. Start the engine only from the operator’s seat. If the safety start switch is bypassed, the engine can start with the transmission in gear. Do not connect or short across terminals on the starter solenoid. Attach jumper cables as described in the manual. Starting in gear may cause death or serious injury. Always keep windows, mirrors, all lighting, and Slow Moving Vehicle (SMV) emblem clean to provide the best possible visibility while operating the machine. Operate controls only when seated in the operator’s seat, except for those controls expressly intended for use from other locations. 47691240 24/02/2015 5
  • 9. INTRODUCTION Before leaving the machine: 1. Park machine on a firm level surface. 2. Put all controls in neutral or park lock position. 3. Engage park brake. Use wheel chocks if required. 4. Lower all hydraulic equipment — Implements, header, etc. 5. Turn off engine and remove key. When, due to exceptional circumstances, you would decide to keep the engine running after leaving the operator’s station, then the following precautions must be followed: 1. Bring the engine to low idle speed. 2. Disengage all drive systems. 3. WARNING Some components may continue to run down after disengaging drive systems. Make sure all drive systems are fully disengaged. Failure to comply could result in death or serious injury. W0113A Shift the transmission into neutral. 4. Apply the parking brake. General maintenance safety Keep area used for servicing the machine clean and dry. Clean up spilled fluids. Service machine on a firm level surface. Install guards and shields after servicing the machine. Close all access doors and install all panels after servicing the machine. Do not attempt to clean, lubricate, clear obstructions or make adjustments to the machine while it is in motion or while the engine is running. Always make sure working area is clear of tools, parts, other persons and pets before you start operating the machine. Unsupported hydraulic cylinders can lose pressure and drop the equipment causing a crushing hazard. Do not leave equipment in a raised position while parked or during service, unless securely supported. Incorrect towing procedures can cause accidents. Contact your dealer if towing is required. Stop the engine, remove key and relieve pressure before disconnecting or connecting fluid lines. Stop the engine and remove key before disconnecting or connecting electrical connections. Scalding can result from incorrect removal of coolant caps. Cooling system operates under pressure. Hot coolant can spray out if a cap is removed while the system is hot. Allow system to cool before removing cap. When removing a cap turn it slowly to allow pressure to escape before completely removing the cap. Replace damaged or worn tubes, hoses, electrical wiring, etc. Engine, transmission, exhaust components, and hydraulic lines may become hot during operation. Take care when servicing such components. Allow surfaces to cool before handling or disconnecting hot components. Wear protective equipment when appropriate. When welding, remove all electrical monitors from unit to prevent damage. Always disconnect the battery before welding on the machine. Always wash your hands after handling battery components. 47691240 24/02/2015 6
  • 11. Engine - Engine and crankcase Engine - Replace - Engine oil and filter Refer to the Cummins Operation and Maintenance Manual for all engine maintenance procedures and maintenance schedules not covered in this manual. Change the engine oil and filter as described in the Cummins Operation and Maintenance Manual. RAIL14SP00872AA 1 47691240 24/02/2015 10.1 [10.001] / 3
  • 12. Engine - Engine and crankcase Engine - Remove 1. Two different types of engine are used on Guardian sprayers. The sprayer model numbers SP.295F and the SP.300F use the Cummins QSB engine (1). The sprayer model numbers SP.345F and SP.400F use the Cummins QSL engine (2). 2. Move the vehicle to a hard level surface 3. Turn the ignition key to the OFF position. Remove the key from the ignition. 4. Allow the engine to cool before proceeding. 5. Access the battery disconnect switch located at the left rear of the vehicle. Turn the switch to the OFF position. RAIL15SP00248FA 1 RAIL15SP00249FA 2 6. Drain the hydraulic reservoir. Refer to Reservoir, cooler, and filters - Remove (35.300) 7. Drain the engine coolant from the cooling package. Re- fer to Engine cooling system - Remove (10.400) 8. Remove the engine enclosure panels. Refer to Engine hood and panels - Remove (90.100) 9. Disconnect and remove the deaeration tank, which is attached to the SCR mounting enclosure. 10. Remove the SCR system and the mounting enclo- sure. Refer to Selective Catalytic Reduction (SCR) muffler and catalyst - Remove (10.500) 11. Remove the air cleaner and the mounting frame. Re- fer to Air cleaners and lines - Remove (10.202) 12. Remove the Auxiliary pump from the hydrostatic tan- dem pump assembly. Refer to Auxiliary hydraulic pump - Remove (35.220) 13. Remove the hydrostatic tandem pump assembly from the engine. Refer to Pump - Remove (29.218) for QSB engines. Refer to Pump - Remove (29.218) for QSL engines. 14. Disconnect the fuel line attached to the engine. Plug the fuel line and mark the connection point for reat- tachment. 15. Disconnect any lines connected to the SCR system from the engine. Plug the lines and mark the connec- tion points for reattachment. 47691240 24/02/2015 10.1 [10.001] / 4
  • 13. Engine - Engine and crankcase 16. Disconnect any hydraulic oil lines attached to the en- gine. This will include the line connected to the cool- ing fan motor. Plug the lines and mark the connection points for reattachment. 17. Disconnect any engine coolant lines attached to the engine. Plug the lines and mark the connection points for reattachment. 18. Disconnect any air intake lines attached to the engine. This will include air line attached to the turbocharger, and lines attached to the pneumatic system. Plug the lines and mark the connection points for reattachment. 19. Remove the air conditioner compressor from the en- gine by removing the mounting bolts. Do not evacuate the air conditioning system. Move the air conditioner compressor, with lines attached, to the side. 20. Disconnect all electrical connections to the engine. This will include ground wires, ECM harness, sensor connections, and system power wires. Tag and mark the wires and connectors for reattachment. 21. Verify that all attachments and connections to the en- gine have been removed. 22. Attach a suitable lifting device to the engine lift points. Support the engine. 23. Access the engine mounting bolts located on the un- derside of the engine. Two mounting bolts are located at the right hand side to the engine, and one mounting bolt is located at the left side of the engine. 24. Loosen the bolts but do not remove completely. 25. Lift the engine slightly and verify full support of the engine with the lifting device. 26. Remove the engine mounting bolts from the engine. Lift the engine from its mounting points. 47691240 24/02/2015 10.1 [10.001] / 5
  • 14. Engine - Engine and crankcase Engine - Install 1. Two different types of engine are used on Guardian sprayers. The sprayer model numbers SP.295F and the SP.300F use the Cummins QSB engine (1). The sprayer model numbers SP.345F and SP.400F use the Cummins QSL engine (2). RAIL15SP00248FA 1 RAIL15SP00249FA 2 2. Attach the engine to a suitable lifting device. Lift the engine onto the vehicle and position the engine at its mounting point on the vehicle frame. 3. Insert the engine mounting blots with flat washers through the engine mounts and into the engine mount- ing holes. Do not fully tighten the mounting bolts. 4. Ensure that the engine is fully positioned and secure on the engine mounts. Tighten the bolts securely. 5. Remove the lifting device from the engine. 6. Connect all electrical connections to the engine. This will include ground wires, ECM harness, sensor con- nections, and system power wires. 7. Attach the air conditioner compressor and belt to the engine using the mounting bolts. Position the compres- sor and ensure belt tightness. Tighten the bolt securely. 8. Connect all air intake lines to the engine. This will in- clude air line attached to the turbocharger, and lines attached to the pneumatic system. Tighten all clamps securely. 9. Connect all engine coolant lines to the engine. Tighten all clamps securely. 10. Connect all hydraulic oil lines attached to the engine. This will include the line connected to the cooling fan motor. Tighten all clamps securely. 11. Connect any lines connected to the SCR system to the engine. Tighten all clamps securely. 47691240 24/02/2015 10.1 [10.001] / 6
  • 15. Engine - Engine and crankcase 12. Connect the fuel line attached to the engine. Tighten all clamps securely. 13. Attach the hydrostatic tandem pump assembly to the engine. Refer to Pump - Install (29.218) for QSB engines. Refer to Pump - Install (29.218) for QSL engines. 14. Attach the auxiliary pump to the hydrostatic tandem pump assembly. Refer to Auxiliary hydraulic pump - Install (35.220) 15. Install the air cleaner and the mounting frame. Refer to Air cleaners and lines - Install (10.202) 16. Install the SCR system and the mounting enclosure. Refer to Selective Catalytic Reduction (SCR) muf- fler and catalyst - Install (10.500) 17. Attach the deaeration tank to the SCR mounting en- closure. Connect any coolant lines to the engine. 18. Attach the engine enclosure panels to the engine en- closure frame. Refer to Engine hood and panels - Install (90.100) 19. Fill the cooling system with proper coolant to the proper level. 20. Fill the hydraulic reservoir with proper hydraulic oil and to the proper level. 21. Inspect and ensure that all connections to the engine are made and secure. 22. Turn the battery disconnect switch to the ON position. 23. Ensure that the fuel tank, and that the Diesel Exhaust Fluid (DEF) tank are filled to the proper levels 24. Start the vehicle engine and inspect for any leaks or lose connections. Ensure proper operation of the en- gine and all connected components. 47691240 24/02/2015 10.1 [10.001] / 7
  • 16. Engine - Engine and crankcase Engine support and mounts - Remove - Engine mounts Prior operation: Remove compartment engine panels and doors. Refer to Engine hood and panels - Remove (90.100) NOTE: The applicable end of engine should be lifted slightly to remove/install some hardware in the following proce- dures. 1. Secure engine to suitable lifting device. Lift engine slightly to enable removal of the front engine mounts as follows. 2. There are three mounting points for the engine. RAIL14SP01913AA 1 3. WARNING Heavy objects! Lift and handle all heavy components using lift- ing equipment with adequate capacity. Always support units or parts with suitable slings or hooks. Make sure the work area is clear of all bystanders. Failure to comply could result in death or seri- ous injury. W0398A Remove hex bolts, washers, and nuts (1) attaching the motor mount (2) to the frame. 4. Remove the nut and washer (3) attaching the motor mount (4) to the frame. 5. Remove the motor mount from the frame by removing the hex bolt and snubbing washers (5). 6. Secure engine to suitable lifting device. Lift engine slightly to enable removal of the rear engine mounts as follows. NOTE: There are two rear engine mounts, both configured the same. RAIL14SP01914AA 2 47691240 24/02/2015 10.1 [10.001] / 8
  • 17. Engine - Engine and crankcase 7. Remove nuts and washers (1), and the hex bolts and washers (2) attaching the motor mount (3) to the frame. Remove the motor mounts from the vehicle. RAIL14SP01915AA 3 47691240 24/02/2015 10.1 [10.001] / 9
  • 18. Engine - Engine and crankcase Engine support and mounts - Install - Engine mounts 1. Secure engine to suitable lifting device. Lift engine slightly to enable installation of the rear engine mounts. NOTE: There are two rear engine mounts, both configured the same. 2. Install the motor mounts (1) onto the frame at the en- gine mounting points. 3. Lower the engine into place and install the hex bolts with snubbing washers (2) through the engine mount- ing holes and then through the motor mounts. 4. Secure the motor mounts and the engine in place using the nuts and washers (3). Tighten securely. RAIL14SP01915AA 1 5. Install the front motor mount (1) in to place on the ve- hicle. 6. Attach the motor mount to the vehicle frame using the two hex bolts, washers, and nuts (2). Tighten securely. 7. Secure the front end of the engine to the motor mount by installing the hex bolt and snubber washers (3) through the motor mount and then through the engine mounting hole. Secure the motor mount in place using the washer and nut (4). Tighten securely. RAIL14SP01914AA 2 47691240 24/02/2015 10.1 [10.001] / 10
  • 19. Engine - Pump drives Hydraulic pump drive coupler - Remove - Hydrostatic pump drive coupler Prior operation: Remove the right hand engine compartment enclosure and panels. Refer to Engine hood and panels - Remove (90.100) Prior operation: Apply a vacuum to the hydraulic fluid tank. Refer to Oil reservoir - Service instruction - Tank vacuum procedure (35.300) Prior operation: Remove the Auxiliary pump assembly. Refer to Auxiliary hydraulic pump - Remove (35.220) 1. Park the vehicle on a flat, level surface. Release the parking brake and lower the suspension completely. 2. Apply the parking brake and swing the right side boom outward, or raise the boom up and out of the saddle. 3. Shut off the engine, remove the ignition key, and allow the engine and hydraulic oil to cool. 4. Tag and mark all hydrostatic pump hydraulic hoses. Record the hose connections and hose routing to aid in reinstallation of the hoses. 5. Remove all hydraulic hoses, and disconnect any elec- trical connections from hydrostatic tandem pump set. 6. Cap and plug the lines and fittings. Use plastic covers to cover lower ports on hydrostatic pump units. 7. Disconnect the cable connection to the ball joint (1) of the turnbuckle assembly. 8. Disconnect pump turnbuckle (2) from the pump set by removing the nuts (2). Lift the turnbuckle assembly from the pump set. RAIL14SP01911AA 1 9. Attach a suitable lifting device to the hydrostatic tan- dem pump set (2), ensuring strap routing will evenly balance the assembly, once lifted. Remove slack from strapping, but do not lift assembly at this time. 47691240 24/02/2015 10.2 [10.114] / 3
  • 20. Thank you very much for your reading. Please Click Here. Then Get COMPLETE MANUAL. NO WAITING NOTE: If there is no response to click on the link above, please download the PDF document first and then click on it.
  • 21. Engine - Pump drives 10. Remove four hex bolts and flat washers (1) secur- ing hydrostatic tandem pump set to flywheel housing mounting plate (2). 11. Remove the hydrostatic tandem pump set from fly- wheel housing mounting plate. RAIL14SP01910AA 2 12. Use a jack or suitable lifting device and a block, and position block under engine at flywheel end (13). Do not lift engine at this time. RAIL13SP03449AA 3 13. Remove two bolts (7) from flywheel housing mounting plate (6). Retain hardware for reassembly. 14. Remove twelve (8) hex bolts that secure flywheel housing mounting plate (6) to engine flywheel hous- ing. Retain hardware. 15. Using a suitable lifting device, lift engine high enough for mounting plate (6) to clear frame. 16. Remove flywheel housing mounting plate (6). Retain plate. 17. Remove eight hex socket head capscrews (9) and lockwashers (10) that secure the hydrostat coupler (11) to flywheel and remove coupler. Retain hardware. Discard coupler. RAIL13SP01139FA 4 47691240 24/02/2015 10.2 [10.114] / 4
  • 22. Engine - Pump drives Hydraulic pump drive coupler - Install - Hydrostatic pump drive coupler 1. Clean Loctite residue from threads or threaded holes on retained hardware and components. 2. Apply red LOCTITE® 273 to threads of capscrews and install new hydrostat coupler (11) to flywheel with eight hex socket head capscrews (9) and lockwashers (10). Tighten the capscrews securely. 3. Secure flywheel housing mounting plate (6) to engine flywheel housing with twelve (8) hex bolts. Tighten the bolts securely. 4. Lower engine down until mounting plate rests on frame. RAIL13SP01139FA 1 5. Secure flywheel housing mounting plate (6) with two bolts (7). Tighten the bolts securely. 6. Reposition hoses and wiring onto guide plate (12) at bell housing and secure. 7. Using lifting device, position hydrostatic tandem pump set/auxiliary hydraulic pump assembly (2) onto flywheel housing mounting plate (6). NOTE: The splines of the hydrostatic tandem pump set and the splines on the coupler are difficult to align. It may be necessary to turn the engine crank by hand with a breaker bar and socket on the damper end of the engine to assist in alignment of splines. 8. Secure hydrostatic tandem pump set/auxiliary hy- draulic pump assembly (2) to flywheel housing mount- ing plate (6) by installing four hex bolts (3), flat washers (4), and lockwashers (5). RAIL13SP01139FA 2 9. Remove lifting device strapping from hydrostatic tan- dem pump set/auxiliary hydraulic pump assembly. 10. Position pump turnbuckle (1) onto hydrostatic tandem pump/auxiliary hydraulic pump assembly (2) and in- stall at ball joint. 11. Uncap and unplug each line/fitting and connect hy- draulic hoses to applicable connection points. Re- move tagging on hoses. NOTE: During the hose reconnecting, new o-rings, or o-rings in good condition, should be used, and should be lubricated with Vaseline or motor assembly lube (not grease). RAIL13SP01139FA 3 47691240 24/02/2015 10.2 [10.114] / 5
  • 23. Engine - Pump drives 12. Connect all electrical connections to the applicable connection points. 13. Release the vacuum form the hydraulic tank. Operate the engine and check for leaks and proper function of the system. 47691240 24/02/2015 10.2 [10.114] / 6