SlideShare a Scribd company logo
1 of 20
Download to read offline
Copyright © 2004 JCB SERVICE. All rights reserved. No part of this publication may be reproduced, stored in a retrieval system, or transmitted in any form or by any other means,
electronic, mechanical, photocopying or otherwise, without prior permission from JCB SERVICE.
World Class
Customer Support
9813-1450-2
Publication No.
Issued by JCB Technical Publications, JCB Aftermarket Training, Woodseat, Rocester, Staffordshire, ST14 5BW, England. Tel +44 1889 591300 Fax +44 1889 591400
Service Manual
Side Engine Loadalls
Section 1 - General Information
Section 2 - Care and Safety
Section 3 - Routine Maintenance
Section B - Body and Framework
Section C - Electrics
Section E - Hydraulics
Section F - Transmission
Section G - Brakes
Section H - Steering
Section K - Engine
Section M - Electronic Data Systems
Section F2 - Transmission
Wheels and Tyres
Removal and Replacement
F2-4 F2-4F-02-03 Issue 01
Removal and Replacement
Front Wheels
Important: The wheel and tyre assembly is heavy. Get the
aid of one more person to remove and replace a wheel.
!MWARNING
A raised and badly supported machine can fall on you.
Position the machine on a firm, level surface before
raising one end. Ensure the other end is securely
chocked. Do not rely solely on the machine hydraulics
or jacks to support the machine when working under
it.
Disconnect the battery, to prevent the engine being
started while you are beneath the machine.
GEN-1-1
Removal (one wheel)
1 Park the machine and make it safe. Fit the boom
safety strut. Obey the care and safety procedures.
K Related Topics ( T F2-2)
2 Make sure that the engine cannot be started.
3 Put chocks A under the rear wheels.
4 Loosen the five wheel nuts B by half a turn.
5 Put a jack C under the axle arm. Use the correct jack.
6 Use the jack to lift the machine until the front wheel D
is off the ground.
7 Put chocks E under the axle arm.
8 Hold the wheel D and remove the wheel nuts B.
9 Remove the wheel.
Replacement
Note: Make sure that the mating surfaces of the wheel and
axle hub are clean.
!MWARNING
If, for whatever reason, a wheel stud is renewed, all the
studs for that wheel must be changed as a set, since
the remaining studs may have been damaged.
2-3-2-8
Replacement is the opposite of the removal procedure.
During the replacement procedure do this work also:
– Torque tighten the nuts B.
When the replacement procedure is complete:
– Check the wheel nut torques are correct after every
two hours of machine operation until they stay
correct.
Table 3. Torque Settings
C045590
Fig 1.
Item Nm kgf m lbf ft
B(1)
(1) 550-80 machines
650 66 480
B(2)
(2) Other machines
680 69 500
Section F2 - Transmission
Wheels and Tyres
Removal and Replacement
F2-5 F2-5F-02-03 Issue 01
Rear Wheels
Important: The wheel and tyre assembly is heavy. Get the
aid of one more person to remove and replace a wheel.
!MWARNING
A raised and badly supported machine can fall on you.
Position the machine on a firm, level surface before
raising one end. Ensure the other end is securely
chocked. Do not rely solely on the machine hydraulics
or jacks to support the machine when working under
it.
Disconnect the battery, to prevent the engine being
started while you are beneath the machine.
GEN-1-1
Removal (one wheel)
1 Park the machine and make it safe. Fit the boom
safety strut. Obey the care and safety procedures.
K Related Topics ( T F2-2)
2 Make sure that the engine cannot be started.
3 Put chocks A under the front wheels.
4 Loosen the five wheel nuts B by half of one turn.
5 Put a jack C under the centre of the rear axle. Use the
correct jack.
6 Use the jack to lift the machine until both rear wheels
are off the ground.
7 Put chocks E under each end of the rear axle.
8 Hold the wheel D and remove the wheel nuts.
9 Remove the wheel.
Replacement
Note: Make sure that the mating surfaces of the wheel and
axle hub are clean.
!MWARNING
If, for whatever reason, a wheel stud is renewed, all the
studs for that wheel must be changed as a set, since
the remaining studs may have been damaged.
2-3-2-8
Replacement is the opposite of the removal procedure.
During the replacement procedure do this work also:
– Torque tighten the nuts B.
When the replacement procedure is complete:
– Check the wheel nut torques are correct after every
two hours of machine operation until they stay
correct.
Table 4. Torque Settings
C045590
Fig 2.
Item Nm kgf m lbf ft
B(1)
(1) 550-80 machines
650 66 480
B(2)
(2) Other machines
680 69 500
Section F2 - Transmission
Wheels and Tyres
Removal and Replacement
F2-6 F2-6F-02-03 Issue 01
Wheel Studs
Removal and Replacement
The procedures that follow are for one wheel stud. The
procedures are the same for all the wheel studs.
!MWARNING
If, for whatever reason, a wheel stud is renewed, all the
studs for that wheel must be changed as a set, since
the remaining studs may have been damaged.
2-3-2-8
Removal
1 Remove the wheel from the hub. K Front
Wheels ( T F2-4) K Rear Wheels ( T F2-5)
2 Push out the wheel stud 3-A.
Important: Remove all the wheel studs 3-A and discard
them.
C045650
Fig 3.
Replacement
Important: Examine the wheel stud holes 4-B in the hub
carrier 4-C. If the holes are defective do not use the hub
carrier. Replace the hub carrier with a new one. Refer to
Applications for related axle topics. K Related
Topics ( T F2-2)
1 Put the stud 4-A into the hub carrier hole.
2 Use a nut and washer to pull in the stud 4-A into the
hub carrier 4-C.
3 Examine the stud and make sure it is correctly
installed. If the stud is loose replace the hub carrier 4-
C. Refer to Applications for related axle topics.
K Related Topics ( T F2-2)
C045650-C1
Fig 4.
Section F3 - Transmission
Front Axles
Introduction
F3-1 F3-1F-03-10 Issue 01
Front Axles
Introduction
Table 1. Procedure and Specification Variants
This topic contains information about a machine DEVICE. Make sure you are referring to the correct device. Refer to the
applications table.
Descriptions and procedures relate to the device and not related systems. For information about the systems refer to the
relevant topics.
This topic is intended to help you understand what the device does and how it works. Where applicable it also includes
procedures such as removal and replacement and dismantle and assemble.
K Related Topics ( T F3-2)
K Specifications ( T F3-3)
K SD80 3 Piece Steer Drive Axle ( T F3-3)
K Component Identification ( T F3-4)
K Renewing the Pinion Oil Seal ( T F3-6)
K Removal and Replacement - SD80 Fixed Axle ( T F3-7)
K Removal and Replacement - SD80 Pivot Sway Axle ( T F3-9)(1)
(1) Procedure variant. Make sure you refer to the correct procedure.
K Removal and Replacement - SD80 Trunnion Sway Axle ( T F3-12)(1)
K Dismantle, Inspection and Assembly ( T F3-15)
Procedures, Specifications(1)
(1) The table lists procedure and specification variants and the applicable machine models. Use the table to make sure
you refer to the correct information.
Machine Model Application
540-170
5AF
550-140
5AG
540-140
5AL
550-170
5AM
535-125
HiViz
5AN
535-140
HiViz
5AP
540-200
K Removal and Replacement - SD80 Pivot
Sway Axle ( T F3-9)
K Removal and Replacement - SD80
Trunnion Sway Axle ( T F3-12)
Section F3 - Transmission
Front Axles
Related Topics
F3-2 F3-2F-03-10 Issue 01
Related Topics
Table 2. Related Topics in This Publication
Table 3. Related Topics in Publication 9803/8610, Transmissions
The table lists other topics in the manual that contain information related to this topic. Refer to the applicable
topics to complete your procedures. Where applicable the text in this section contains cross references to this
page to help you find the correct information. Some machines have different systems and devices. Make sure
you refer to the correct topic, refer to Section 1 - Applications.
Sections Topic Titles Sub Titles
1 Applications ALL
2 ALL (Care and Safety)(1)
(1) You must obey all of the relevant care and safety procedures.
ALL
3 Maintenance ALL
F Applications ALL
F Rear Axles Renewing the Pinion Oil Seal
G Service Brakes SYSTEM Bleeding
H Steering SYSTEM Bleeding
H Steering SYSTEM Re-Phasing
The table lists topics in another manual that contain information related to this topic. Refer to the applicable
topics to complete your procedures. Where applicable the text in this section contains cross references to this
page to help you find the correct information. Some machines have different systems and devices. Make sure
you refer to the correct topics, refer to Designations. K Specifications ( T F3-3)
Sections Section Titles Topic Titles
A Axle Hubs 80 Series Hub
B Axle Hub Swivels and Driveshafts 55 Series Hub Swivel and Driveshaft
C Axle Integral Brakes 70 Series Integral Brakes (3 Piece Axles)
D Axle Drive Heads 80 Series Drive Heads (3 Piece Axles)
Section F3 - Transmission
Front Axles
Specifications
F3-3 F3-3F-03-10 Issue 01
Specifications
The axle serial number is stamped on the unit identification
plate A as shown.
Fig 1.
Note: It is essential that the correct ratio axle in
relationship to the gearbox ratio is fitted to the machine. Do
not fit a new axle with a different ratio to the axle being
replaced.
Table 4. SD80 3 Piece Steer Drive Axle
Designations
Hubs 80 Series
Hub swivels and drive shafts 55 Series
Drive head 80 Series 3 piece
Brakes 70 Series Integral Brakes (3 Piece Axles)
Type JCB spiral bevel input with epicyclic hub reduction
Brakes Oil immersed multi-plate discs, located in centre section
Steering Steer rams or power track rod
Section F3 - Transmission
Front Axles
Component Identification
F3-4 F3-4F-03-10 Issue 01
Component Identification
The illustration shows a typical 3 piece steer drive front
axle. K Fig 2. ( T F3-5)
The front axle consists of a centre casing (drivehead) and
two axle arms and swivel wheel hubs.
The drivehead houses the differential gearing and two oil-
immersed disc brake units.
The axle arms house the driveshafts. Specially shaped
spider gears in the differential provide `torque
proportioning'. This means that drive power will be kept on
one wheel if the other is slipping.
The wheel hubs are connected to the halfshafts through
universal joints which drive sun-and-planet gears inside
the hubs.
A Yoke connection to propshaft
B Pinion
C Crownwheel
D Differential unit
Note: Items A, B, C and D form the `drive head' part of
the axle.
E Drive shaft
F Universal coupling
G Reduction gear hub
H Steer swivel trunnion bearings
L Inboard oil-immersed multi-plate disc brakes
M Brake actuating piston
N Hydraulic brake lines
Section F3 - Transmission
Front Axles
Component Identification
F3-5 F3-5F-03-10 Issue 01
Fig2.TypicalSteerDriveFrontAxle
Section F3 - Transmission
Front Axles
Renewing the Pinion Oil Seal
F3-6 F3-6F-03-10 Issue 01
Renewing the Pinion Oil Seal
The front axle pinion oil seal is renewed using the same
procedure as described for the rear axles. K Related
Topics ( T F3-2)
Section F3 - Transmission
Front Axles
Removal and Replacement - SD80 Fixed Axle
F3-7 F3-7F-03-10 Issue 01
Removal and Replacement - SD80 Fixed Axle
!MWARNING
A raised and badly supported machine can fall on you.
Position the machine on a firm, level surface before
raising one end. Ensure the other end is securely
chocked. Do not rely solely on the machine hydraulics
or jacks to support the machine when working under
it.
Disconnect the battery, to prevent the engine being
started while you are beneath the machine.
GEN-1-1
If the boom is raised, make sure the maintenance strut is
fitted. Obey the care and safety procedures. K Related
Topics ( T F3-2)
K Fig 3. ( T F3-8)
Note: Some machines may have shims installed on the
axle mounts. Make sure to note the position and quantity
of these shims before removal. Make sure to retain the
shims and replace them in the correct position when
replacing the axle. There may be an uneven number of
shims between each side of the axle as the shims are used
to adjust the machine height and make it level.
Removal
1 Disconnect the propshaft coupling from the axle by
unscrewing bolts A.
!MWARNING
When the driveshaft is disconnected the park brake
will no longer function. The machine must be securely
blocked to prevent any machine movement before
disconnecting the driveshaft.
TRANS-1-3
2 Disconnect and plug the hydraulic hoses to the steer
rams/ power track rod.
3 Slacken off the roadwheel retaining nuts C then raise
and support the front end of the machine on axle
stands or blocks positioned under the chassis.
Remove the front roadwheels.
4 Remove the front mudguards. Undo the bracket
retaining nuts E at the steering trunnions.
5 Disconnect the brake hose at the axle. Blank off the
exposed connections.
6 Uncouple the steer proximity switch electrical
connector (if fitted).
7 Support the axle on a trolley jack.
8 Unscrew axle mounting nuts D and remove the bolts
and washers.
9 Lower the axle down from the machine.
10 Remove the axle from the machine.
Replacement
Replacement is the opposite of the removal procedure.
During replacement do this work also:
– Bleed the brake system, see Section G - Brakes.
K Related Topics ( T F3-2)
– Refit the road wheels and carry out the tightness
checks as detailed in Section 3 - Routine
Maintenance. K Related Topics ( T F3-2)
– Bleed the steering system, see Section H - Steering.
K Related Topics ( T F3-2)
– Re-phase the steering system, see Section H -
Steering. K Related Topics ( T F3-2)
– Grease the axle pivot trunnions.
Table 5. Torque Settings
Item Nm kgf m lbf ft
A 78 8 57
B 56 5.7 41
C 680 69 500
D (1)
(1) Dry nuts.
969 99 715
D (2)
(2) Nuts with special dry lubricating film.
600 60 440
E 98 10 72
Section F3 - Transmission
Front Axles
Removal and Replacement - SD80 Fixed Axle
F3-8 F3-8F-03-10 Issue 01
Fig 3. SD80 Fixed Axle
E
B
C
A
D
Section F3 - Transmission
Front Axles
Removal and Replacement - SD80 Pivot Sway Axle
F3-9 F3-9F-03-10 Issue 01
Removal and Replacement - SD80 Pivot Sway Axle
!MWARNING
A raised and badly supported machine can fall on you.
Position the machine on a firm, level surface before
raising one end. Ensure the other end is securely
chocked. Do not rely solely on the machine hydraulics
or jacks to support the machine when working under
it.
Disconnect the battery, to prevent the engine being
started while you are beneath the machine.
GEN-1-1
If the boom is raised, make sure the maintenance strut is
fitted. Obey the care and safety procedures.K Related
Topics ( T F3-2)
Removal K Fig 5. ( T F3-11)
Removal
1 Disconnect the propshaft coupling from the axle by
unscrewing bolts A.
!MWARNING
When the driveshaft is disconnected the park brake
will no longer function. The machine must be securely
blocked to prevent any machine movement before
disconnecting the driveshaft.
TRANS-1-3
2 Disconnect and plug the hydraulic hoses to the steer
rams.
3 Slacken off the roadwheel retaining nuts C then raise
and support the front end of the machine on support
stands or blocks positioned under the chassis.
Remove the front roadwheels.
4 Remove the front mudguards. Undo the bracket
retaining nuts K at the steering trunnions.
5 Disconnect the brake hose at the axle. Blank off the
exposed connections.
6 Uncouple the steer proximity switch electrical
connector (if fitted).
7 Undo bolt D and remove pivot pin E.
8 Undo the sway ram pivot bracket mounting bolts H.
Lift away the bracket.
9 Support the axle on a trolley jack.
10 Undo bolt F and remove pivot pin G.
11 Remove the axle from the machine.
Replacement
Replacing is generally the reverse of the removal
sequence.
Replacement is the opposite of the removal procedure.
During replacement do this work also:
– Bleed the brake system, see Section G - Brakes.
K Related Topics ( T F3-2)
– Adjust the sway sight rod M so that the top of the rod
is in line with the top of the tube L when the machine
is horizontal. To adjust this slacken the locknuts N and
screw the sight rod up or down to the correct position.
Tighten the locknuts when the position is correct.
K Fig 4. ( T F3-10)
– Refit the road wheels and carry out the tightness
checks as detailed in Section 3 - Routine
Maintenance. K Related Topics ( T F3-2)
– Bleed the steering system, see Section H - Steering.
K Related Topics ( T F3-2)
– Re-phase the steering system, see Section H -
Steering. K Related Topics ( T F3-2)
– Grease the axle pivot trunnions.
Section F3 - Transmission
Front Axles
Removal and Replacement - SD80 Pivot Sway Axle
F3-10 F3-10F-03-10 Issue 01
C127500
Fig 4.
Table 6. Torque Settings
Item Nm kgf m lbf ft
A 78 8 57
B 56 5.7 41
C 680 69 500
H 969 99 715
K 98 10 72
L
M
N
N
Section F3 - Transmission
Front Axles
Removal and Replacement - SD80 Pivot Sway Axle
F3-11 F3-11F-03-10 Issue 01
Fig 5. SD80 Pivot Sway Axle
K
E
D
G
J
A
B
F
H
C
Section F3 - Transmission
Front Axles
Removal and Replacement - SD80 Trunnion Sway Axle
F3-12 F3-12F-03-10 Issue 01
Removal and Replacement - SD80 Trunnion Sway Axle
!MWARNING
A raised and badly supported machine can fall on you.
Position the machine on a firm, level surface before
raising one end. Ensure the other end is securely
chocked. Do not rely solely on the machine hydraulics
or jacks to support the machine when working under
it.
Disconnect the battery, to prevent the engine being
started while you are beneath the machine.
GEN-1-1
If the boom is raised, make sure the maintenance strut is
fitted. Obey the care and safety procedures.K Related
Topics ( T F3-2)
Removal
1 Disconnect the propshaft coupling from the axle by
unscrewing bolts A.
!MWARNING
When the driveshaft is disconnected the park brake
will no longer function. The machine must be securely
blocked to prevent any machine movement before
disconnecting the driveshaft.
TRANS-1-3
2 Disconnect and plug the hydraulic hoses G to the
power track rod.
3 Slacken off the roadwheel retaining nuts then raise
and support the front end of the machine on support
stands or blocks positioned under the chassis.
Remove the front roadwheels.
4 Remove the front mudguards. Undo the bracket
retaining nuts F at the steering trunnions.
5 Disconnect the brake hose at the axle. Blank off the
exposed connections.
6 Uncouple the steer proximity switch K electrical
connector (if fitted).
7 Undo bolt D and remove pivot pin E.
8 Undo the sway ram pivot bracket mounting bolts H.
Lift away the bracket.
Fig 6.
9 Remove the access plate screws M and lift off the
plate N to get access to the front trunnion bolts.
10 Support the axle on a trolley jack.
11 Undo the six trunnion bolts B and nuts C. The top of
the bolts can be accessed from underneath the boom
as shown at L and below the access cover N.
12 Remove the axle from the machine. Be sure to
retrieve dowels J. If shims are fitted record their
positions. Use some wire to tie the trunnions to the
axle.
C053980
L
M
N
Section F3 - Transmission
Front Axles
Removal and Replacement - SD80 Trunnion Sway Axle
F3-13 F3-13F-03-10 Issue 01
Replacement
Replacement is the opposite of the removal procedure.
During replacement do this work also:
– Bleed the brake system, see Section G - Brakes.
K Related Topics ( T F3-2)
– Adjust the sway sight rod Y so that the top of the rod
is in line with the top of the tube X when the machine
is horizontal. To adjust this slacken the locknuts Z and
screw the sight rod up or down to the correct position.
Tighten the locknuts when the position is correct.
K Fig 7. ( T F3-13)
– Make sure you re-fit dowels J together with any shims
in their original positions.
– Make sure that the axle oscillates freely before final
tightening of the fixing bolts.
– Refit the road wheels and carry out the tightness
checks as detailed in Section 3 - Routine
Maintenance. K Related Topics ( T F3-2)
– Bleed the steering system, see Section H - Steering.
K Related Topics ( T F3-2)
– Re-phase the steering system, see Section H -
Steering. K Related Topics ( T F3-2)
– Grease the axle pivot trunnions.
C127500-C1
Fig 7.
Table 7. Torque Settings
Item Nm kgf m lbf ft
A 78 8 57
B 476 48 352
C 476 48 352
H 600 60 440
F 98 10 72
X
Y
Z
Z
Thank you very much for
your reading. Please Click
Here. Then Get COMPLETE
MANUAL. NO WAITING
NOTE:
If there is no response to
click on the link above,
please download the PDF
document first and then
click on it.
Section F3 - Transmission
Front Axles
Removal and Replacement - SD80 Trunnion Sway Axle
F3-14 F3-14F-03-10 Issue 01
Fig 8. SD80 Trunnion Axle
A312090-C2
F
D
B
G
G J
J
C
J
J
E
K
H
A
A
Section F3 - Transmission
Front Axles
Dismantle, Inspection and Assembly
F3-15 F3-15F-03-10 Issue 01
Dismantle, Inspection and Assembly
Make sure that you identify the axle sub-assemblies
designations correctly. K Specifications ( T F3-3)
The procedures for dismantling, inspection and assembly
are described in the Transmissions Service Manual.
K Related Topics ( T F3-2)

More Related Content

More from fusefjjskekemm

Mc cormick c l europa tier 3 (2008-2015) - rs51 - c65l tractor service repair...
Mc cormick c l europa tier 3 (2008-2015) - rs51 - c65l tractor service repair...Mc cormick c l europa tier 3 (2008-2015) - rs51 - c65l tractor service repair...
Mc cormick c l europa tier 3 (2008-2015) - rs51 - c65l tractor service repair...fusefjjskekemm
 
Komatsu d39 px 21 bulldozer service repair manual sn 1501 and up
Komatsu d39 px 21 bulldozer service repair manual sn 1501 and upKomatsu d39 px 21 bulldozer service repair manual sn 1501 and up
Komatsu d39 px 21 bulldozer service repair manual sn 1501 and upfusefjjskekemm
 
Komatsu d39 ex 21 bulldozer service repair manual sn 1501 and up
Komatsu d39 ex 21 bulldozer service repair manual sn 1501 and upKomatsu d39 ex 21 bulldozer service repair manual sn 1501 and up
Komatsu d39 ex 21 bulldozer service repair manual sn 1501 and upfusefjjskekemm
 
Komatsu d37 px 21 bulldozer service repair manual sn 5501 and up
Komatsu d37 px 21 bulldozer service repair manual sn 5501 and upKomatsu d37 px 21 bulldozer service repair manual sn 5501 and up
Komatsu d37 px 21 bulldozer service repair manual sn 5501 and upfusefjjskekemm
 
Komatsu d37 p 5a dozer bulldozer service repair manual
Komatsu d37 p 5a dozer bulldozer service repair manualKomatsu d37 p 5a dozer bulldozer service repair manual
Komatsu d37 p 5a dozer bulldozer service repair manualfusefjjskekemm
 
Komatsu d37 ex 21 bulldozer service repair manual sn 5501 and up
Komatsu d37 ex 21 bulldozer service repair manual sn 5501 and upKomatsu d37 ex 21 bulldozer service repair manual sn 5501 and up
Komatsu d37 ex 21 bulldozer service repair manual sn 5501 and upfusefjjskekemm
 
Komatsu d37 e 5 dozer bulldozer service repair manual
Komatsu d37 e 5 dozer bulldozer service repair manualKomatsu d37 e 5 dozer bulldozer service repair manual
Komatsu d37 e 5 dozer bulldozer service repair manualfusefjjskekemm
 
Komatsu d31 s 20 dozer bulldozer service repair manual
Komatsu d31 s 20 dozer bulldozer service repair manualKomatsu d31 s 20 dozer bulldozer service repair manual
Komatsu d31 s 20 dozer bulldozer service repair manualfusefjjskekemm
 
Komatsu d31 q 20 dozer bulldozer service repair manual
Komatsu d31 q 20 dozer bulldozer service repair manualKomatsu d31 q 20 dozer bulldozer service repair manual
Komatsu d31 q 20 dozer bulldozer service repair manualfusefjjskekemm
 
Komatsu d31 px 21 bulldozer service repair manual sn 50501 and up
Komatsu d31 px 21 bulldozer service repair manual sn 50501 and upKomatsu d31 px 21 bulldozer service repair manual sn 50501 and up
Komatsu d31 px 21 bulldozer service repair manual sn 50501 and upfusefjjskekemm
 
Komatsu d31 pll 20 dozer bulldozer service repair manual
Komatsu d31 pll 20 dozer bulldozer service repair manualKomatsu d31 pll 20 dozer bulldozer service repair manual
Komatsu d31 pll 20 dozer bulldozer service repair manualfusefjjskekemm
 
John deere 828 d walk behind snowblowers service repair manual (tm1612)
John deere 828 d walk behind snowblowers service repair manual (tm1612)John deere 828 d walk behind snowblowers service repair manual (tm1612)
John deere 828 d walk behind snowblowers service repair manual (tm1612)fusefjjskekemm
 
John deere 826 d walk behind snowblowers service repair manual (tm1612)
John deere 826 d walk behind snowblowers service repair manual (tm1612)John deere 826 d walk behind snowblowers service repair manual (tm1612)
John deere 826 d walk behind snowblowers service repair manual (tm1612)fusefjjskekemm
 
John deere 820 r walk behind tillers service repair manual (tm1687)
John deere 820 r walk behind tillers service repair manual (tm1687)John deere 820 r walk behind tillers service repair manual (tm1687)
John deere 820 r walk behind tillers service repair manual (tm1687)fusefjjskekemm
 
John deere 724 d walk behind snowblowers service repair manual (tm1612)
John deere 724 d walk behind snowblowers service repair manual (tm1612)John deere 724 d walk behind snowblowers service repair manual (tm1612)
John deere 724 d walk behind snowblowers service repair manual (tm1612)fusefjjskekemm
 
John deere 650 ext trail buck utility atv service repair manual (tm2160)
John deere 650 ext trail buck utility atv service repair manual (tm2160)John deere 650 ext trail buck utility atv service repair manual (tm2160)
John deere 650 ext trail buck utility atv service repair manual (tm2160)fusefjjskekemm
 
John deere 650 ex trail buck utility atv service repair manual (tm2160)
John deere 650 ex trail buck utility atv service repair manual (tm2160)John deere 650 ex trail buck utility atv service repair manual (tm2160)
John deere 650 ex trail buck utility atv service repair manual (tm2160)fusefjjskekemm
 
John deere 650 trail buck utility atv service repair manual (tm2160)
John deere 650 trail buck utility atv service repair manual (tm2160)John deere 650 trail buck utility atv service repair manual (tm2160)
John deere 650 trail buck utility atv service repair manual (tm2160)fusefjjskekemm
 
John deere 524 d walk behind snowblowers service repair manual (tm1612)
John deere 524 d walk behind snowblowers service repair manual (tm1612)John deere 524 d walk behind snowblowers service repair manual (tm1612)
John deere 524 d walk behind snowblowers service repair manual (tm1612)fusefjjskekemm
 
John deere 518 r walk behind tillers service repair manual (tm1687)
John deere 518 r walk behind tillers service repair manual (tm1687)John deere 518 r walk behind tillers service repair manual (tm1687)
John deere 518 r walk behind tillers service repair manual (tm1687)fusefjjskekemm
 

More from fusefjjskekemm (20)

Mc cormick c l europa tier 3 (2008-2015) - rs51 - c65l tractor service repair...
Mc cormick c l europa tier 3 (2008-2015) - rs51 - c65l tractor service repair...Mc cormick c l europa tier 3 (2008-2015) - rs51 - c65l tractor service repair...
Mc cormick c l europa tier 3 (2008-2015) - rs51 - c65l tractor service repair...
 
Komatsu d39 px 21 bulldozer service repair manual sn 1501 and up
Komatsu d39 px 21 bulldozer service repair manual sn 1501 and upKomatsu d39 px 21 bulldozer service repair manual sn 1501 and up
Komatsu d39 px 21 bulldozer service repair manual sn 1501 and up
 
Komatsu d39 ex 21 bulldozer service repair manual sn 1501 and up
Komatsu d39 ex 21 bulldozer service repair manual sn 1501 and upKomatsu d39 ex 21 bulldozer service repair manual sn 1501 and up
Komatsu d39 ex 21 bulldozer service repair manual sn 1501 and up
 
Komatsu d37 px 21 bulldozer service repair manual sn 5501 and up
Komatsu d37 px 21 bulldozer service repair manual sn 5501 and upKomatsu d37 px 21 bulldozer service repair manual sn 5501 and up
Komatsu d37 px 21 bulldozer service repair manual sn 5501 and up
 
Komatsu d37 p 5a dozer bulldozer service repair manual
Komatsu d37 p 5a dozer bulldozer service repair manualKomatsu d37 p 5a dozer bulldozer service repair manual
Komatsu d37 p 5a dozer bulldozer service repair manual
 
Komatsu d37 ex 21 bulldozer service repair manual sn 5501 and up
Komatsu d37 ex 21 bulldozer service repair manual sn 5501 and upKomatsu d37 ex 21 bulldozer service repair manual sn 5501 and up
Komatsu d37 ex 21 bulldozer service repair manual sn 5501 and up
 
Komatsu d37 e 5 dozer bulldozer service repair manual
Komatsu d37 e 5 dozer bulldozer service repair manualKomatsu d37 e 5 dozer bulldozer service repair manual
Komatsu d37 e 5 dozer bulldozer service repair manual
 
Komatsu d31 s 20 dozer bulldozer service repair manual
Komatsu d31 s 20 dozer bulldozer service repair manualKomatsu d31 s 20 dozer bulldozer service repair manual
Komatsu d31 s 20 dozer bulldozer service repair manual
 
Komatsu d31 q 20 dozer bulldozer service repair manual
Komatsu d31 q 20 dozer bulldozer service repair manualKomatsu d31 q 20 dozer bulldozer service repair manual
Komatsu d31 q 20 dozer bulldozer service repair manual
 
Komatsu d31 px 21 bulldozer service repair manual sn 50501 and up
Komatsu d31 px 21 bulldozer service repair manual sn 50501 and upKomatsu d31 px 21 bulldozer service repair manual sn 50501 and up
Komatsu d31 px 21 bulldozer service repair manual sn 50501 and up
 
Komatsu d31 pll 20 dozer bulldozer service repair manual
Komatsu d31 pll 20 dozer bulldozer service repair manualKomatsu d31 pll 20 dozer bulldozer service repair manual
Komatsu d31 pll 20 dozer bulldozer service repair manual
 
John deere 828 d walk behind snowblowers service repair manual (tm1612)
John deere 828 d walk behind snowblowers service repair manual (tm1612)John deere 828 d walk behind snowblowers service repair manual (tm1612)
John deere 828 d walk behind snowblowers service repair manual (tm1612)
 
John deere 826 d walk behind snowblowers service repair manual (tm1612)
John deere 826 d walk behind snowblowers service repair manual (tm1612)John deere 826 d walk behind snowblowers service repair manual (tm1612)
John deere 826 d walk behind snowblowers service repair manual (tm1612)
 
John deere 820 r walk behind tillers service repair manual (tm1687)
John deere 820 r walk behind tillers service repair manual (tm1687)John deere 820 r walk behind tillers service repair manual (tm1687)
John deere 820 r walk behind tillers service repair manual (tm1687)
 
John deere 724 d walk behind snowblowers service repair manual (tm1612)
John deere 724 d walk behind snowblowers service repair manual (tm1612)John deere 724 d walk behind snowblowers service repair manual (tm1612)
John deere 724 d walk behind snowblowers service repair manual (tm1612)
 
John deere 650 ext trail buck utility atv service repair manual (tm2160)
John deere 650 ext trail buck utility atv service repair manual (tm2160)John deere 650 ext trail buck utility atv service repair manual (tm2160)
John deere 650 ext trail buck utility atv service repair manual (tm2160)
 
John deere 650 ex trail buck utility atv service repair manual (tm2160)
John deere 650 ex trail buck utility atv service repair manual (tm2160)John deere 650 ex trail buck utility atv service repair manual (tm2160)
John deere 650 ex trail buck utility atv service repair manual (tm2160)
 
John deere 650 trail buck utility atv service repair manual (tm2160)
John deere 650 trail buck utility atv service repair manual (tm2160)John deere 650 trail buck utility atv service repair manual (tm2160)
John deere 650 trail buck utility atv service repair manual (tm2160)
 
John deere 524 d walk behind snowblowers service repair manual (tm1612)
John deere 524 d walk behind snowblowers service repair manual (tm1612)John deere 524 d walk behind snowblowers service repair manual (tm1612)
John deere 524 d walk behind snowblowers service repair manual (tm1612)
 
John deere 518 r walk behind tillers service repair manual (tm1687)
John deere 518 r walk behind tillers service repair manual (tm1687)John deere 518 r walk behind tillers service repair manual (tm1687)
John deere 518 r walk behind tillers service repair manual (tm1687)
 

Recently uploaded

定制昆士兰大学毕业证(本硕)UQ学位证书原版一比一
定制昆士兰大学毕业证(本硕)UQ学位证书原版一比一定制昆士兰大学毕业证(本硕)UQ学位证书原版一比一
定制昆士兰大学毕业证(本硕)UQ学位证书原版一比一fjjhfuubb
 
(8264348440) 🔝 Call Girls In Shaheen Bagh 🔝 Delhi NCR
(8264348440) 🔝 Call Girls In Shaheen Bagh 🔝 Delhi NCR(8264348440) 🔝 Call Girls In Shaheen Bagh 🔝 Delhi NCR
(8264348440) 🔝 Call Girls In Shaheen Bagh 🔝 Delhi NCRsoniya singh
 
办理埃默里大学毕业证Emory毕业证原版一比一
办理埃默里大学毕业证Emory毕业证原版一比一办理埃默里大学毕业证Emory毕业证原版一比一
办理埃默里大学毕业证Emory毕业证原版一比一mkfnjj
 
(COD) ̄Young Call Girls In Dwarka , New Delhi꧁❤ 7042364481❤꧂ Escorts Service i...
(COD) ̄Young Call Girls In Dwarka , New Delhi꧁❤ 7042364481❤꧂ Escorts Service i...(COD) ̄Young Call Girls In Dwarka , New Delhi꧁❤ 7042364481❤꧂ Escorts Service i...
(COD) ̄Young Call Girls In Dwarka , New Delhi꧁❤ 7042364481❤꧂ Escorts Service i...Hot Call Girls In Sector 58 (Noida)
 
Beautiful Vip Call Girls Punjabi Bagh 9711199012 Call /Whatsapps
Beautiful Vip  Call Girls Punjabi Bagh 9711199012 Call /WhatsappsBeautiful Vip  Call Girls Punjabi Bagh 9711199012 Call /Whatsapps
Beautiful Vip Call Girls Punjabi Bagh 9711199012 Call /Whatsappssapnasaifi408
 
BLUE VEHICLES the kids picture show 2024
BLUE VEHICLES the kids picture show 2024BLUE VEHICLES the kids picture show 2024
BLUE VEHICLES the kids picture show 2024AHOhOops1
 
Innovating Manufacturing with CNC Technology
Innovating Manufacturing with CNC TechnologyInnovating Manufacturing with CNC Technology
Innovating Manufacturing with CNC Technologyquickpartslimitlessm
 
UNIT-IV-STEERING, BRAKES AND SUSPENSION SYSTEMS.pptx
UNIT-IV-STEERING, BRAKES AND SUSPENSION SYSTEMS.pptxUNIT-IV-STEERING, BRAKES AND SUSPENSION SYSTEMS.pptx
UNIT-IV-STEERING, BRAKES AND SUSPENSION SYSTEMS.pptxDineshKumar4165
 
Not Sure About VW EGR Valve Health Look For These Symptoms
Not Sure About VW EGR Valve Health Look For These SymptomsNot Sure About VW EGR Valve Health Look For These Symptoms
Not Sure About VW EGR Valve Health Look For These SymptomsFifth Gear Automotive
 
Hauz Khas Call Girls ☎ 7042364481 independent Escorts Service in delhi
Hauz Khas Call Girls ☎ 7042364481 independent Escorts Service in delhiHauz Khas Call Girls ☎ 7042364481 independent Escorts Service in delhi
Hauz Khas Call Girls ☎ 7042364481 independent Escorts Service in delhiHot Call Girls In Sector 58 (Noida)
 
UNIT-III-TRANSMISSION SYSTEMS REAR AXLES
UNIT-III-TRANSMISSION SYSTEMS REAR AXLESUNIT-III-TRANSMISSION SYSTEMS REAR AXLES
UNIT-III-TRANSMISSION SYSTEMS REAR AXLESDineshKumar4165
 
GREEN VEHICLES the kids picture show 2024
GREEN VEHICLES the kids picture show 2024GREEN VEHICLES the kids picture show 2024
GREEN VEHICLES the kids picture show 2024AHOhOops1
 
UNIT-II-ENGINE AUXILIARY SYSTEMS &TURBOCHARGER
UNIT-II-ENGINE AUXILIARY SYSTEMS &TURBOCHARGERUNIT-II-ENGINE AUXILIARY SYSTEMS &TURBOCHARGER
UNIT-II-ENGINE AUXILIARY SYSTEMS &TURBOCHARGERDineshKumar4165
 
John Deere 200lc Excavator Operation And Tests Repair Manual.pdf
John Deere 200lc Excavator Operation And Tests Repair Manual.pdfJohn Deere 200lc Excavator Operation And Tests Repair Manual.pdf
John Deere 200lc Excavator Operation And Tests Repair Manual.pdfExcavator
 
VIP Kolkata Call Girl Kasba 👉 8250192130 Available With Room
VIP Kolkata Call Girl Kasba 👉 8250192130  Available With RoomVIP Kolkata Call Girl Kasba 👉 8250192130  Available With Room
VIP Kolkata Call Girl Kasba 👉 8250192130 Available With Roomdivyansh0kumar0
 
( Best ) Genuine Call Girls In Mandi House =DELHI-| 8377087607
( Best ) Genuine Call Girls In Mandi House =DELHI-| 8377087607( Best ) Genuine Call Girls In Mandi House =DELHI-| 8377087607
( Best ) Genuine Call Girls In Mandi House =DELHI-| 8377087607dollysharma2066
 
Vip Hot🥵 Call Girls Delhi Delhi {9711199012} Avni Thakur 🧡😘 High Profile Girls
Vip Hot🥵 Call Girls Delhi Delhi {9711199012} Avni Thakur 🧡😘 High Profile GirlsVip Hot🥵 Call Girls Delhi Delhi {9711199012} Avni Thakur 🧡😘 High Profile Girls
Vip Hot🥵 Call Girls Delhi Delhi {9711199012} Avni Thakur 🧡😘 High Profile Girlsshivangimorya083
 

Recently uploaded (20)

定制昆士兰大学毕业证(本硕)UQ学位证书原版一比一
定制昆士兰大学毕业证(本硕)UQ学位证书原版一比一定制昆士兰大学毕业证(本硕)UQ学位证书原版一比一
定制昆士兰大学毕业证(本硕)UQ学位证书原版一比一
 
(8264348440) 🔝 Call Girls In Shaheen Bagh 🔝 Delhi NCR
(8264348440) 🔝 Call Girls In Shaheen Bagh 🔝 Delhi NCR(8264348440) 🔝 Call Girls In Shaheen Bagh 🔝 Delhi NCR
(8264348440) 🔝 Call Girls In Shaheen Bagh 🔝 Delhi NCR
 
办理埃默里大学毕业证Emory毕业证原版一比一
办理埃默里大学毕业证Emory毕业证原版一比一办理埃默里大学毕业证Emory毕业证原版一比一
办理埃默里大学毕业证Emory毕业证原版一比一
 
(COD) ̄Young Call Girls In Dwarka , New Delhi꧁❤ 7042364481❤꧂ Escorts Service i...
(COD) ̄Young Call Girls In Dwarka , New Delhi꧁❤ 7042364481❤꧂ Escorts Service i...(COD) ̄Young Call Girls In Dwarka , New Delhi꧁❤ 7042364481❤꧂ Escorts Service i...
(COD) ̄Young Call Girls In Dwarka , New Delhi꧁❤ 7042364481❤꧂ Escorts Service i...
 
Beautiful Vip Call Girls Punjabi Bagh 9711199012 Call /Whatsapps
Beautiful Vip  Call Girls Punjabi Bagh 9711199012 Call /WhatsappsBeautiful Vip  Call Girls Punjabi Bagh 9711199012 Call /Whatsapps
Beautiful Vip Call Girls Punjabi Bagh 9711199012 Call /Whatsapps
 
BLUE VEHICLES the kids picture show 2024
BLUE VEHICLES the kids picture show 2024BLUE VEHICLES the kids picture show 2024
BLUE VEHICLES the kids picture show 2024
 
Innovating Manufacturing with CNC Technology
Innovating Manufacturing with CNC TechnologyInnovating Manufacturing with CNC Technology
Innovating Manufacturing with CNC Technology
 
(NEHA) Call Girls Pushkar Booking Open 8617697112 Pushkar Escorts
(NEHA) Call Girls Pushkar Booking Open 8617697112 Pushkar Escorts(NEHA) Call Girls Pushkar Booking Open 8617697112 Pushkar Escorts
(NEHA) Call Girls Pushkar Booking Open 8617697112 Pushkar Escorts
 
UNIT-IV-STEERING, BRAKES AND SUSPENSION SYSTEMS.pptx
UNIT-IV-STEERING, BRAKES AND SUSPENSION SYSTEMS.pptxUNIT-IV-STEERING, BRAKES AND SUSPENSION SYSTEMS.pptx
UNIT-IV-STEERING, BRAKES AND SUSPENSION SYSTEMS.pptx
 
Not Sure About VW EGR Valve Health Look For These Symptoms
Not Sure About VW EGR Valve Health Look For These SymptomsNot Sure About VW EGR Valve Health Look For These Symptoms
Not Sure About VW EGR Valve Health Look For These Symptoms
 
Hauz Khas Call Girls ☎ 7042364481 independent Escorts Service in delhi
Hauz Khas Call Girls ☎ 7042364481 independent Escorts Service in delhiHauz Khas Call Girls ☎ 7042364481 independent Escorts Service in delhi
Hauz Khas Call Girls ☎ 7042364481 independent Escorts Service in delhi
 
UNIT-III-TRANSMISSION SYSTEMS REAR AXLES
UNIT-III-TRANSMISSION SYSTEMS REAR AXLESUNIT-III-TRANSMISSION SYSTEMS REAR AXLES
UNIT-III-TRANSMISSION SYSTEMS REAR AXLES
 
GREEN VEHICLES the kids picture show 2024
GREEN VEHICLES the kids picture show 2024GREEN VEHICLES the kids picture show 2024
GREEN VEHICLES the kids picture show 2024
 
Call Girls in Shri Niwas Puri Delhi 💯Call Us 🔝9953056974🔝
Call Girls in  Shri Niwas Puri  Delhi 💯Call Us 🔝9953056974🔝Call Girls in  Shri Niwas Puri  Delhi 💯Call Us 🔝9953056974🔝
Call Girls in Shri Niwas Puri Delhi 💯Call Us 🔝9953056974🔝
 
UNIT-II-ENGINE AUXILIARY SYSTEMS &TURBOCHARGER
UNIT-II-ENGINE AUXILIARY SYSTEMS &TURBOCHARGERUNIT-II-ENGINE AUXILIARY SYSTEMS &TURBOCHARGER
UNIT-II-ENGINE AUXILIARY SYSTEMS &TURBOCHARGER
 
John Deere 200lc Excavator Operation And Tests Repair Manual.pdf
John Deere 200lc Excavator Operation And Tests Repair Manual.pdfJohn Deere 200lc Excavator Operation And Tests Repair Manual.pdf
John Deere 200lc Excavator Operation And Tests Repair Manual.pdf
 
VIP Kolkata Call Girl Kasba 👉 8250192130 Available With Room
VIP Kolkata Call Girl Kasba 👉 8250192130  Available With RoomVIP Kolkata Call Girl Kasba 👉 8250192130  Available With Room
VIP Kolkata Call Girl Kasba 👉 8250192130 Available With Room
 
( Best ) Genuine Call Girls In Mandi House =DELHI-| 8377087607
( Best ) Genuine Call Girls In Mandi House =DELHI-| 8377087607( Best ) Genuine Call Girls In Mandi House =DELHI-| 8377087607
( Best ) Genuine Call Girls In Mandi House =DELHI-| 8377087607
 
sauth delhi call girls in Connaught Place🔝 9953056974 🔝 escort Service
sauth delhi call girls in  Connaught Place🔝 9953056974 🔝 escort Servicesauth delhi call girls in  Connaught Place🔝 9953056974 🔝 escort Service
sauth delhi call girls in Connaught Place🔝 9953056974 🔝 escort Service
 
Vip Hot🥵 Call Girls Delhi Delhi {9711199012} Avni Thakur 🧡😘 High Profile Girls
Vip Hot🥵 Call Girls Delhi Delhi {9711199012} Avni Thakur 🧡😘 High Profile GirlsVip Hot🥵 Call Girls Delhi Delhi {9711199012} Avni Thakur 🧡😘 High Profile Girls
Vip Hot🥵 Call Girls Delhi Delhi {9711199012} Avni Thakur 🧡😘 High Profile Girls
 

Jcb 540 170 telescopic handler service repair manual

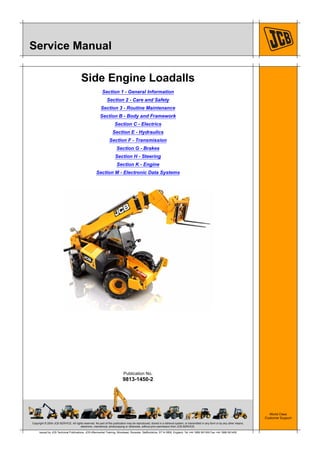
  • 1. Copyright © 2004 JCB SERVICE. All rights reserved. No part of this publication may be reproduced, stored in a retrieval system, or transmitted in any form or by any other means, electronic, mechanical, photocopying or otherwise, without prior permission from JCB SERVICE. World Class Customer Support 9813-1450-2 Publication No. Issued by JCB Technical Publications, JCB Aftermarket Training, Woodseat, Rocester, Staffordshire, ST14 5BW, England. Tel +44 1889 591300 Fax +44 1889 591400 Service Manual Side Engine Loadalls Section 1 - General Information Section 2 - Care and Safety Section 3 - Routine Maintenance Section B - Body and Framework Section C - Electrics Section E - Hydraulics Section F - Transmission Section G - Brakes Section H - Steering Section K - Engine Section M - Electronic Data Systems
  • 2. Section F2 - Transmission Wheels and Tyres Removal and Replacement F2-4 F2-4F-02-03 Issue 01 Removal and Replacement Front Wheels Important: The wheel and tyre assembly is heavy. Get the aid of one more person to remove and replace a wheel. !MWARNING A raised and badly supported machine can fall on you. Position the machine on a firm, level surface before raising one end. Ensure the other end is securely chocked. Do not rely solely on the machine hydraulics or jacks to support the machine when working under it. Disconnect the battery, to prevent the engine being started while you are beneath the machine. GEN-1-1 Removal (one wheel) 1 Park the machine and make it safe. Fit the boom safety strut. Obey the care and safety procedures. K Related Topics ( T F2-2) 2 Make sure that the engine cannot be started. 3 Put chocks A under the rear wheels. 4 Loosen the five wheel nuts B by half a turn. 5 Put a jack C under the axle arm. Use the correct jack. 6 Use the jack to lift the machine until the front wheel D is off the ground. 7 Put chocks E under the axle arm. 8 Hold the wheel D and remove the wheel nuts B. 9 Remove the wheel. Replacement Note: Make sure that the mating surfaces of the wheel and axle hub are clean. !MWARNING If, for whatever reason, a wheel stud is renewed, all the studs for that wheel must be changed as a set, since the remaining studs may have been damaged. 2-3-2-8 Replacement is the opposite of the removal procedure. During the replacement procedure do this work also: – Torque tighten the nuts B. When the replacement procedure is complete: – Check the wheel nut torques are correct after every two hours of machine operation until they stay correct. Table 3. Torque Settings C045590 Fig 1. Item Nm kgf m lbf ft B(1) (1) 550-80 machines 650 66 480 B(2) (2) Other machines 680 69 500
  • 3. Section F2 - Transmission Wheels and Tyres Removal and Replacement F2-5 F2-5F-02-03 Issue 01 Rear Wheels Important: The wheel and tyre assembly is heavy. Get the aid of one more person to remove and replace a wheel. !MWARNING A raised and badly supported machine can fall on you. Position the machine on a firm, level surface before raising one end. Ensure the other end is securely chocked. Do not rely solely on the machine hydraulics or jacks to support the machine when working under it. Disconnect the battery, to prevent the engine being started while you are beneath the machine. GEN-1-1 Removal (one wheel) 1 Park the machine and make it safe. Fit the boom safety strut. Obey the care and safety procedures. K Related Topics ( T F2-2) 2 Make sure that the engine cannot be started. 3 Put chocks A under the front wheels. 4 Loosen the five wheel nuts B by half of one turn. 5 Put a jack C under the centre of the rear axle. Use the correct jack. 6 Use the jack to lift the machine until both rear wheels are off the ground. 7 Put chocks E under each end of the rear axle. 8 Hold the wheel D and remove the wheel nuts. 9 Remove the wheel. Replacement Note: Make sure that the mating surfaces of the wheel and axle hub are clean. !MWARNING If, for whatever reason, a wheel stud is renewed, all the studs for that wheel must be changed as a set, since the remaining studs may have been damaged. 2-3-2-8 Replacement is the opposite of the removal procedure. During the replacement procedure do this work also: – Torque tighten the nuts B. When the replacement procedure is complete: – Check the wheel nut torques are correct after every two hours of machine operation until they stay correct. Table 4. Torque Settings C045590 Fig 2. Item Nm kgf m lbf ft B(1) (1) 550-80 machines 650 66 480 B(2) (2) Other machines 680 69 500
  • 4. Section F2 - Transmission Wheels and Tyres Removal and Replacement F2-6 F2-6F-02-03 Issue 01 Wheel Studs Removal and Replacement The procedures that follow are for one wheel stud. The procedures are the same for all the wheel studs. !MWARNING If, for whatever reason, a wheel stud is renewed, all the studs for that wheel must be changed as a set, since the remaining studs may have been damaged. 2-3-2-8 Removal 1 Remove the wheel from the hub. K Front Wheels ( T F2-4) K Rear Wheels ( T F2-5) 2 Push out the wheel stud 3-A. Important: Remove all the wheel studs 3-A and discard them. C045650 Fig 3. Replacement Important: Examine the wheel stud holes 4-B in the hub carrier 4-C. If the holes are defective do not use the hub carrier. Replace the hub carrier with a new one. Refer to Applications for related axle topics. K Related Topics ( T F2-2) 1 Put the stud 4-A into the hub carrier hole. 2 Use a nut and washer to pull in the stud 4-A into the hub carrier 4-C. 3 Examine the stud and make sure it is correctly installed. If the stud is loose replace the hub carrier 4- C. Refer to Applications for related axle topics. K Related Topics ( T F2-2) C045650-C1 Fig 4.
  • 5. Section F3 - Transmission Front Axles Introduction F3-1 F3-1F-03-10 Issue 01 Front Axles Introduction Table 1. Procedure and Specification Variants This topic contains information about a machine DEVICE. Make sure you are referring to the correct device. Refer to the applications table. Descriptions and procedures relate to the device and not related systems. For information about the systems refer to the relevant topics. This topic is intended to help you understand what the device does and how it works. Where applicable it also includes procedures such as removal and replacement and dismantle and assemble. K Related Topics ( T F3-2) K Specifications ( T F3-3) K SD80 3 Piece Steer Drive Axle ( T F3-3) K Component Identification ( T F3-4) K Renewing the Pinion Oil Seal ( T F3-6) K Removal and Replacement - SD80 Fixed Axle ( T F3-7) K Removal and Replacement - SD80 Pivot Sway Axle ( T F3-9)(1) (1) Procedure variant. Make sure you refer to the correct procedure. K Removal and Replacement - SD80 Trunnion Sway Axle ( T F3-12)(1) K Dismantle, Inspection and Assembly ( T F3-15) Procedures, Specifications(1) (1) The table lists procedure and specification variants and the applicable machine models. Use the table to make sure you refer to the correct information. Machine Model Application 540-170 5AF 550-140 5AG 540-140 5AL 550-170 5AM 535-125 HiViz 5AN 535-140 HiViz 5AP 540-200 K Removal and Replacement - SD80 Pivot Sway Axle ( T F3-9) K Removal and Replacement - SD80 Trunnion Sway Axle ( T F3-12)
  • 6. Section F3 - Transmission Front Axles Related Topics F3-2 F3-2F-03-10 Issue 01 Related Topics Table 2. Related Topics in This Publication Table 3. Related Topics in Publication 9803/8610, Transmissions The table lists other topics in the manual that contain information related to this topic. Refer to the applicable topics to complete your procedures. Where applicable the text in this section contains cross references to this page to help you find the correct information. Some machines have different systems and devices. Make sure you refer to the correct topic, refer to Section 1 - Applications. Sections Topic Titles Sub Titles 1 Applications ALL 2 ALL (Care and Safety)(1) (1) You must obey all of the relevant care and safety procedures. ALL 3 Maintenance ALL F Applications ALL F Rear Axles Renewing the Pinion Oil Seal G Service Brakes SYSTEM Bleeding H Steering SYSTEM Bleeding H Steering SYSTEM Re-Phasing The table lists topics in another manual that contain information related to this topic. Refer to the applicable topics to complete your procedures. Where applicable the text in this section contains cross references to this page to help you find the correct information. Some machines have different systems and devices. Make sure you refer to the correct topics, refer to Designations. K Specifications ( T F3-3) Sections Section Titles Topic Titles A Axle Hubs 80 Series Hub B Axle Hub Swivels and Driveshafts 55 Series Hub Swivel and Driveshaft C Axle Integral Brakes 70 Series Integral Brakes (3 Piece Axles) D Axle Drive Heads 80 Series Drive Heads (3 Piece Axles)
  • 7. Section F3 - Transmission Front Axles Specifications F3-3 F3-3F-03-10 Issue 01 Specifications The axle serial number is stamped on the unit identification plate A as shown. Fig 1. Note: It is essential that the correct ratio axle in relationship to the gearbox ratio is fitted to the machine. Do not fit a new axle with a different ratio to the axle being replaced. Table 4. SD80 3 Piece Steer Drive Axle Designations Hubs 80 Series Hub swivels and drive shafts 55 Series Drive head 80 Series 3 piece Brakes 70 Series Integral Brakes (3 Piece Axles) Type JCB spiral bevel input with epicyclic hub reduction Brakes Oil immersed multi-plate discs, located in centre section Steering Steer rams or power track rod
  • 8. Section F3 - Transmission Front Axles Component Identification F3-4 F3-4F-03-10 Issue 01 Component Identification The illustration shows a typical 3 piece steer drive front axle. K Fig 2. ( T F3-5) The front axle consists of a centre casing (drivehead) and two axle arms and swivel wheel hubs. The drivehead houses the differential gearing and two oil- immersed disc brake units. The axle arms house the driveshafts. Specially shaped spider gears in the differential provide `torque proportioning'. This means that drive power will be kept on one wheel if the other is slipping. The wheel hubs are connected to the halfshafts through universal joints which drive sun-and-planet gears inside the hubs. A Yoke connection to propshaft B Pinion C Crownwheel D Differential unit Note: Items A, B, C and D form the `drive head' part of the axle. E Drive shaft F Universal coupling G Reduction gear hub H Steer swivel trunnion bearings L Inboard oil-immersed multi-plate disc brakes M Brake actuating piston N Hydraulic brake lines
  • 9. Section F3 - Transmission Front Axles Component Identification F3-5 F3-5F-03-10 Issue 01 Fig2.TypicalSteerDriveFrontAxle
  • 10. Section F3 - Transmission Front Axles Renewing the Pinion Oil Seal F3-6 F3-6F-03-10 Issue 01 Renewing the Pinion Oil Seal The front axle pinion oil seal is renewed using the same procedure as described for the rear axles. K Related Topics ( T F3-2)
  • 11. Section F3 - Transmission Front Axles Removal and Replacement - SD80 Fixed Axle F3-7 F3-7F-03-10 Issue 01 Removal and Replacement - SD80 Fixed Axle !MWARNING A raised and badly supported machine can fall on you. Position the machine on a firm, level surface before raising one end. Ensure the other end is securely chocked. Do not rely solely on the machine hydraulics or jacks to support the machine when working under it. Disconnect the battery, to prevent the engine being started while you are beneath the machine. GEN-1-1 If the boom is raised, make sure the maintenance strut is fitted. Obey the care and safety procedures. K Related Topics ( T F3-2) K Fig 3. ( T F3-8) Note: Some machines may have shims installed on the axle mounts. Make sure to note the position and quantity of these shims before removal. Make sure to retain the shims and replace them in the correct position when replacing the axle. There may be an uneven number of shims between each side of the axle as the shims are used to adjust the machine height and make it level. Removal 1 Disconnect the propshaft coupling from the axle by unscrewing bolts A. !MWARNING When the driveshaft is disconnected the park brake will no longer function. The machine must be securely blocked to prevent any machine movement before disconnecting the driveshaft. TRANS-1-3 2 Disconnect and plug the hydraulic hoses to the steer rams/ power track rod. 3 Slacken off the roadwheel retaining nuts C then raise and support the front end of the machine on axle stands or blocks positioned under the chassis. Remove the front roadwheels. 4 Remove the front mudguards. Undo the bracket retaining nuts E at the steering trunnions. 5 Disconnect the brake hose at the axle. Blank off the exposed connections. 6 Uncouple the steer proximity switch electrical connector (if fitted). 7 Support the axle on a trolley jack. 8 Unscrew axle mounting nuts D and remove the bolts and washers. 9 Lower the axle down from the machine. 10 Remove the axle from the machine. Replacement Replacement is the opposite of the removal procedure. During replacement do this work also: – Bleed the brake system, see Section G - Brakes. K Related Topics ( T F3-2) – Refit the road wheels and carry out the tightness checks as detailed in Section 3 - Routine Maintenance. K Related Topics ( T F3-2) – Bleed the steering system, see Section H - Steering. K Related Topics ( T F3-2) – Re-phase the steering system, see Section H - Steering. K Related Topics ( T F3-2) – Grease the axle pivot trunnions. Table 5. Torque Settings Item Nm kgf m lbf ft A 78 8 57 B 56 5.7 41 C 680 69 500 D (1) (1) Dry nuts. 969 99 715 D (2) (2) Nuts with special dry lubricating film. 600 60 440 E 98 10 72
  • 12. Section F3 - Transmission Front Axles Removal and Replacement - SD80 Fixed Axle F3-8 F3-8F-03-10 Issue 01 Fig 3. SD80 Fixed Axle E B C A D
  • 13. Section F3 - Transmission Front Axles Removal and Replacement - SD80 Pivot Sway Axle F3-9 F3-9F-03-10 Issue 01 Removal and Replacement - SD80 Pivot Sway Axle !MWARNING A raised and badly supported machine can fall on you. Position the machine on a firm, level surface before raising one end. Ensure the other end is securely chocked. Do not rely solely on the machine hydraulics or jacks to support the machine when working under it. Disconnect the battery, to prevent the engine being started while you are beneath the machine. GEN-1-1 If the boom is raised, make sure the maintenance strut is fitted. Obey the care and safety procedures.K Related Topics ( T F3-2) Removal K Fig 5. ( T F3-11) Removal 1 Disconnect the propshaft coupling from the axle by unscrewing bolts A. !MWARNING When the driveshaft is disconnected the park brake will no longer function. The machine must be securely blocked to prevent any machine movement before disconnecting the driveshaft. TRANS-1-3 2 Disconnect and plug the hydraulic hoses to the steer rams. 3 Slacken off the roadwheel retaining nuts C then raise and support the front end of the machine on support stands or blocks positioned under the chassis. Remove the front roadwheels. 4 Remove the front mudguards. Undo the bracket retaining nuts K at the steering trunnions. 5 Disconnect the brake hose at the axle. Blank off the exposed connections. 6 Uncouple the steer proximity switch electrical connector (if fitted). 7 Undo bolt D and remove pivot pin E. 8 Undo the sway ram pivot bracket mounting bolts H. Lift away the bracket. 9 Support the axle on a trolley jack. 10 Undo bolt F and remove pivot pin G. 11 Remove the axle from the machine. Replacement Replacing is generally the reverse of the removal sequence. Replacement is the opposite of the removal procedure. During replacement do this work also: – Bleed the brake system, see Section G - Brakes. K Related Topics ( T F3-2) – Adjust the sway sight rod M so that the top of the rod is in line with the top of the tube L when the machine is horizontal. To adjust this slacken the locknuts N and screw the sight rod up or down to the correct position. Tighten the locknuts when the position is correct. K Fig 4. ( T F3-10) – Refit the road wheels and carry out the tightness checks as detailed in Section 3 - Routine Maintenance. K Related Topics ( T F3-2) – Bleed the steering system, see Section H - Steering. K Related Topics ( T F3-2) – Re-phase the steering system, see Section H - Steering. K Related Topics ( T F3-2) – Grease the axle pivot trunnions.
  • 14. Section F3 - Transmission Front Axles Removal and Replacement - SD80 Pivot Sway Axle F3-10 F3-10F-03-10 Issue 01 C127500 Fig 4. Table 6. Torque Settings Item Nm kgf m lbf ft A 78 8 57 B 56 5.7 41 C 680 69 500 H 969 99 715 K 98 10 72 L M N N
  • 15. Section F3 - Transmission Front Axles Removal and Replacement - SD80 Pivot Sway Axle F3-11 F3-11F-03-10 Issue 01 Fig 5. SD80 Pivot Sway Axle K E D G J A B F H C
  • 16. Section F3 - Transmission Front Axles Removal and Replacement - SD80 Trunnion Sway Axle F3-12 F3-12F-03-10 Issue 01 Removal and Replacement - SD80 Trunnion Sway Axle !MWARNING A raised and badly supported machine can fall on you. Position the machine on a firm, level surface before raising one end. Ensure the other end is securely chocked. Do not rely solely on the machine hydraulics or jacks to support the machine when working under it. Disconnect the battery, to prevent the engine being started while you are beneath the machine. GEN-1-1 If the boom is raised, make sure the maintenance strut is fitted. Obey the care and safety procedures.K Related Topics ( T F3-2) Removal 1 Disconnect the propshaft coupling from the axle by unscrewing bolts A. !MWARNING When the driveshaft is disconnected the park brake will no longer function. The machine must be securely blocked to prevent any machine movement before disconnecting the driveshaft. TRANS-1-3 2 Disconnect and plug the hydraulic hoses G to the power track rod. 3 Slacken off the roadwheel retaining nuts then raise and support the front end of the machine on support stands or blocks positioned under the chassis. Remove the front roadwheels. 4 Remove the front mudguards. Undo the bracket retaining nuts F at the steering trunnions. 5 Disconnect the brake hose at the axle. Blank off the exposed connections. 6 Uncouple the steer proximity switch K electrical connector (if fitted). 7 Undo bolt D and remove pivot pin E. 8 Undo the sway ram pivot bracket mounting bolts H. Lift away the bracket. Fig 6. 9 Remove the access plate screws M and lift off the plate N to get access to the front trunnion bolts. 10 Support the axle on a trolley jack. 11 Undo the six trunnion bolts B and nuts C. The top of the bolts can be accessed from underneath the boom as shown at L and below the access cover N. 12 Remove the axle from the machine. Be sure to retrieve dowels J. If shims are fitted record their positions. Use some wire to tie the trunnions to the axle. C053980 L M N
  • 17. Section F3 - Transmission Front Axles Removal and Replacement - SD80 Trunnion Sway Axle F3-13 F3-13F-03-10 Issue 01 Replacement Replacement is the opposite of the removal procedure. During replacement do this work also: – Bleed the brake system, see Section G - Brakes. K Related Topics ( T F3-2) – Adjust the sway sight rod Y so that the top of the rod is in line with the top of the tube X when the machine is horizontal. To adjust this slacken the locknuts Z and screw the sight rod up or down to the correct position. Tighten the locknuts when the position is correct. K Fig 7. ( T F3-13) – Make sure you re-fit dowels J together with any shims in their original positions. – Make sure that the axle oscillates freely before final tightening of the fixing bolts. – Refit the road wheels and carry out the tightness checks as detailed in Section 3 - Routine Maintenance. K Related Topics ( T F3-2) – Bleed the steering system, see Section H - Steering. K Related Topics ( T F3-2) – Re-phase the steering system, see Section H - Steering. K Related Topics ( T F3-2) – Grease the axle pivot trunnions. C127500-C1 Fig 7. Table 7. Torque Settings Item Nm kgf m lbf ft A 78 8 57 B 476 48 352 C 476 48 352 H 600 60 440 F 98 10 72 X Y Z Z
  • 18. Thank you very much for your reading. Please Click Here. Then Get COMPLETE MANUAL. NO WAITING NOTE: If there is no response to click on the link above, please download the PDF document first and then click on it.
  • 19. Section F3 - Transmission Front Axles Removal and Replacement - SD80 Trunnion Sway Axle F3-14 F3-14F-03-10 Issue 01 Fig 8. SD80 Trunnion Axle A312090-C2 F D B G G J J C J J E K H A A
  • 20. Section F3 - Transmission Front Axles Dismantle, Inspection and Assembly F3-15 F3-15F-03-10 Issue 01 Dismantle, Inspection and Assembly Make sure that you identify the axle sub-assemblies designations correctly. K Specifications ( T F3-3) The procedures for dismantling, inspection and assembly are described in the Transmissions Service Manual. K Related Topics ( T F3-2)