SlideShare a Scribd company logo
1 of 18
Download to read offline
0 (01/2014)
Revision:
Part no.:
Technical information for Yale service
centres
This manual is intended solely for the specialized technicians of
the Yale service network
550066261
D849.....
MR14 	 MR16N
MR16 	 MR16HD
MR20 	 MR20HD
MR25
SERVICE
2
INTRODUCTION
IMPORTANT
The Service Manuals are updated regularly, but may not contain the most recent product design modifi-
cations. The updated technical information is in any case available from your nearest authorised Yale®
dealer. The Service Manuals provide the guidelines for correct maintenance and are designed for use by
appropriately trained technicians. Incorrect maintenance or non-compliance with the instructions contained
in this manual could cause damage to property or injury and even death to people.
We therefore recommend that you read this manual carefully and keep it in a good condition so it is always
decipherable and complete.
This manual does not replace the use and maintenance manual, it is a supplement to it.
								 Product support group
SERVICE
3
INTRODUCTION
SECTIONS
This handbook is composed of the following sections:
Section 1: 	 Presentation
Section 2: 	 Installation and settings
Section 3: 	 Diagnostics and measurements
Section 4: 	 Electrical system
Section 5: 	 Hydraulic system
Section 6: 	 Truck base mechanics
Section 7: 	 Mast assembly mechanics
Section 8: 	 Small fork mast mechanics
Section 9: 	 Reduction gear
Section 10:	 Braking system
Section 11: 	 Standard maintenance
Use the sections index with the numbered black bands to go quickly to the desired section.
SYMBOLS
Signals a danger that can cause accidents to people or damage to the machine.
Signals danger due to high temperatures.
Signals important notes or information to take into particular consideration.
Signals disposal/recycling of harmful substances under the protection of current legislation.
INSTALLATION PROCEDURES
For the installation procedures, carry out the reverse procedure to disassembly, observing any notes and
information given for the truck to function properly.
GUIDE TO USING THE MANUAL
SERVICE
4
INTRODUCTION
GENERAL SAFETY RULES
PERSONAL SAFETY
Always wear the personal protective equipment in situations requiring it.
•	
Pay particular attention to the risk of getting crushed due to moving parts, oscillations, material not
•	
properly secured when performing lifting operations or moving loads.
Do not wear any rings, watches, jewellery, loose or hanging items of clothing such as scarves, unbut-
•	
toned jackets or tops with open zippers that can get caught up in moving parts.
Never do any cleaning, lubrication or maintenance work with the battery connected.
•	
Using compressed air to clean the parts, protect yourself with goggles that have side protection. The
•	
maximum air pressure must not exceed 1 bar.
SAFETY AT THE WORKPLACE
Make sure that all the work tools are perfectly efficient and ready for use. Keep the work surfaces clean
•	
and clear of debris that can come into contact with parts of the machine and cause damage.
Make sure you keep sparks, naked lights and cigarettes away from fuels or flammable materials such
•	
as the gas of the batteries and fuels.
Make sure that the work area is ventilated, well illuminated, dry and clean. Remove any puddles of
•	
water or oil stains.
Make sure that the equipment, devices or lifting machinery used is able to sustain the load in a stable
•	
manner.
Never use gasoline, diesel fuel or other flammable liquids such as detergents: instead use non-flammable
•	
and non-toxic trade solvents.
When working outside the garage, move the machine preferably onto the level and block it. If working
•	
on a slope is inevitable, block the machine beforehand and move it onto a level area as soon as pos-
sible with a certain margin of safety.
Disconnect the batteries and label all the controls to signal that work is in progress. Block the machine
•	
and every attachment that has to be raised.
Never perform any servicing on the machine with persons at the controls, unless they are accredited
•	
operators and help with the operation to be performed.
When towing use solely the prescribed coupling points and check that the pins and/or bolts are firmly
•	
secured before pulling. Lift and handle all the heavy parts with lifting equipment of adequate capacity.
Use the lifting eyebolts intended for this purpose. Make sure no one is near the load to be lifted.
Avoid twisting chains or metal ropes.
•	
Do not trust bent or damaged chains or ropes: do not use them for lifting or pulling. Always wear the
•	
safety gloves to handle them.
Do not accumulate rags soaked in grease or oil: they are a great fire hazard. Always put them away
•	
into a closed metal container.
Used oil must be specially collected. It must not be disposed of into normal drainage system pipes.
•	
Special companies can be employed to dispose of or recycle industrial oils according to the laws in
force in individual countries.
When welding is necessary, you must use appropriate safety protection: dark goggles, hard hat, overalls,
•	
gloves, safety footwear. Dark goggles must be worn also by those who are not doing the work if they
remain nearby during the welding.
SERVICE
5
INTRODUCTION
Before using the batteries, make sure that both ends of the cables are connected to the terminals as
•	
prescribed: (+) with (+) and (-) with (-).
Do not short-circuit the terminals.
•	
The gas released when charging is highly flammable. When charging, leave the battery compartment
•	
uncovered for more effective ventilation and take off the plugs.
Never check the battery charge with "jumpers" obtained by putting metal items on the terminals.
•	
Before taking any action, check that no elements are shorted.
•	
Always disconnect the battery before working on the electrical system.
•	
For battery chargers and similar equipment, use solely auxiliary power sources with an effective ground
•	
connection to avoid any electric shocks.
Fluid passing through a very small orifice can be virtually invisible and have sufficient force to penetrate
•	
under the skin; in such cases, having to make a check, use a card or a piece of wood.
Having to check the system pressure, use the specific instruments.
•	
BELTS, ROPES AND SUSPENSION ELEMENTS: USER ADVICE
Keep a record of all the suspension elements used, stating the characteristics of the suspension ele-
•	
ments and the data given on the identification plate .
Never leave belts, cords or suspension elements in use whose identification plate has been lost.
•	
Always use belts, ropes or suspension elements of suitable dimensions. Concerning the suspension
•	
elements, take into consideration the lifting angle and any unbalancing of the load.
The bells on the suspension elements must be sized in proportion to the hook of the overhead travelling
•	
crane and anyhow must be free to move easily.
Always rest the load in the race of the hook.
•	
Never load the tip of the hook.
•	
When lifting, avoid sudden operations that can jerk on the ropes and belts.
•	
Never do any lifting with the ropes and belts twisted.
•	
Knots are not permissible. Always protect the ropes and belts when they come into contact with sharp
•	
edges.
When moving with no load, to prevent impact and accidental hooking, hang the hooks in the bells and
•	
close the safety ones.
Using suspension elements under conditions of unbalanced load
If lifting unbalanced loads it is advised as a precaution to downrate the load capacities of the lifting ele-
ments:
Slings with 2 booms, consider them as corresponding to 1 boom.
•	
Slings with 3 and 4 booms, consider them as corresponding to 2 booms.
•	
Tips for maintenance
Periodically examine the belts, ropes and suspension elements according to current legislation to define
their state of service.
Change them in the following cases:
When the components show: deformation, cracks, hollows, cuts or abrasions.
•	
When the wear of the components exceeds 10% of the original dimensions.
•	
When the sling shows signs of overloading.
•
SERVICE
6
INTRODUCTION
Belt capacity table
Rope capacity table
Colour
Track
(mm)
Working load
capacity (kg)
black 35 500 1000 700 400
purple 50 1000 2000 1400 800
black 50 1500 3000 2100 1200
green 60 2000 4000 2800 1600
yellow 75 3000 6000 4200 2400
grey 120 4000 8000 5600 3200
red 150 5000 10000 7000 4000
brown 180 6000 12000 8400 4800
blue 240 8000 16000 11200 6400
orange 300 10000 20000 14000 8000
Coefficient 1 2 1.4 0.8
Colour
Working load
capacity (kg)
purple 1000 2000 1400 800
green 2000 4000 2800 1600
yellow 3000 6000 4200 2400
grey 4000 8000 5600 3200
red 5000 10000 7000 4000
brown 6000 12000 8400 4800
blue 8000 16000 11200 6400
orange 10000 20000 14000 8000
orange 12000 24000 16800 9600
orange 15000 30000 21000 12000
orange 20000 40000 28000 16000
orange 25000 50000 35000 20000
orange 30000 60000 42000 24000
Coefficient 1 2 1.4 0.8
SERVICE
7
INTRODUCTION
Suspension element capacity table
Colour
Working load
capacity (kg)
purple 1000 1400 2100 2100
green 2000 2800 4200 4200
yellow 3000 3800 6300 6300
grey 4000 5600 8400 8400
red 5000 6600 9800 10500
Coefficient 1 1.4 2.1 2.1
Working load capacity: the working load capacity is calculated with an angle at the
centre of 90°
SERVICE
8
INTRODUCTION
TORQUE SETTINGS FOR SCREWS, NUTS AND FITTINGS
Before disassembling the various parts
and nuts and bolts, read the following
carefully.
To make the threaded matings secure, LOCTITE 270 is
used for tightening the screws.
If it is not possible to unscrew the bolts because this
product has been used, avoid applying extensions to
the tools, instead slightly heat the area (at most 50°C)
so as to eliminate the LOCTITE 270 effect.
In the cases described, reapply LOCTITE 270 during
installation in a moderate quantity (30% of the mating
surface).
The torque setting used for tightening the threaded
couplings is extremely important to make the coupling
secure and the machine safe.
The tables on this page give the classes of bolts normally
used with the relevant torque settings.
Nominal
diameter
TORQUE SETTING Nm
Class 8 Class 10
M3 4 5.2
M4 7 9.15
M5 12.14 14.8
M6 17.2 20.9
M8 31.8 38.1
M10 50.5 60.3
M12 74.2 88.5
M14 101.2 120.8
M16 138.2 164.9
M18 176.6 203.5
M20 225.4 259.7
M22 278.8 321.2
M24 324.8 374.2
M27 422.3 486.5
M30 516.1 594.7
Pre-load N
TORQUE SETTING Nm
Class 5.8 Class 8.8 Class 10.9
M4 0.7 7 3 2400 1.92 1.44 3.07 2.3 4.17 3.13
M5 0.8 8 4 3880 3.88 2.91 6.2 4.65 8.43 6.33
M6 1 10 5 5490 6.58 4.94 10.5 7.9 14.3 10.8
M8 1.25 13 6 9990 16 12 25.6 19.2 34.8 26.1
M8 1 13 6 10700 17.1 12.8 27.4 20.5 37.3 27.9
M10 1.5 16 8 15825 31.7 23.8 51 38 69 52
M10 1.25 16 8 16700 33.4 25.1 53 40.1 73 55
M12 1.75 18 10 23025 55 41.4 88 66 120 90
M12 1.25 18 10 25150 60 45.3 96 72 130 98
M14 2 21 12 31400 88 66 140 105 190 145
M14 1.5 21 12 34125 96 72 155 115 210 155
M16 2 24 14 42850 135 105 220 165 300 225
M16 1.5 24 14 45600 145 110 235 175 320 240
M20 2.5 30 17 66875 270 200 430 320 580 435
M20 1.5 30 17 74250 295 225 475 355 650 485
= with lubricant
SERVICE
9
INTRODUCTION
CORRECT METHOD FOR APPLYING FEMALE FITTINGS
To assure a reliable seal between female fittings and the adapters in this manual, it is necessary to observe
the following procedure, which differs from the one for assembling rigid pipes.
Female fittings without a gasket (metal/metal joint)
Screw on the nut by hand and then, with the aid of a wrench, tighten by another quarter turn.
Female fittings with O-ring
Screw on the nut by hand and then, with the aid of a wrench, tighten by another half turn.
In every case make sure that the pipe is properly aligned before tightening the nut on the adapter.
TORQUE SETTINGS
REVOLVING FEMALE jic 37°
UNF
thread
Size
Torque setting Nm
Nominal torque min / max
7/16-20 -4 15 9 - 21
1/2-20 -5 20 13 - 27
9/16-18 -6 30 18 - 42
3/4-16 -8 50 30 - 70
7/8-14 -10 69 44 - 94
1.1/16-12 -12 98 63 - 133
1.3/16-12 -14 118 73 - 163
1.5/16-12 -16 140 90 - 190
1.5/8-12 -20 210 135 - 285
1.7/8-12 -24 290 200 - 380
2.1/2-12 -32 450 300 - 600
REMOVING FEMALE BSP
UNF
thread
Torque setting Nm
Nominal torque max
G1/4 20 15 - 25
G3/8 34 27 - 41
G1/2 60 42 - 76
G5/8 69 44 - 94
G3/4 115 95 - 135
G1 140 115 - 165
G1.1/4 210 140 - 280
G1.1/2 290 215 - 365
G2 400 300 - 500
METRIC REVOLVING FEMALE
UNF
thread
Outside
diameter
of the pipe
Torque setting Nm
Nominal torque min / max
M 12x1.5 6 20 15 -25
M 14x1.5 8 38 30 - 45
M 16x1.5
8
45 38 - 52
10
M 18x1.5
10
51 43 - 85
12
M 20x1.5 12 58 50 - 65
M 22x1.5
14
74 60 - 88
15
M 24x1.5 16 74 60 - 88
M 26x1.5 18 105 85 - 125
M 30x2
20
135 115 - 155
22
M 36x2
25
166 140 - 192
28
M 42x2 30 240 210 - 270
M 45x2 35 290 255 - 325
M 52x2
38
330 280 - 380
42
REVOLVING FEMALE ORFS
UNF
thread
Size
Torque setting Nm
Nominal torque max.
9/16-18 -4 14 16
11/16-16 -6 24 27
13/16-16 -8 43 47
1-14 -10 60 68
1.3/16-12 -12 90 95
1.3/16-12 -14 90 95
1.7/16-12 -16 125 135
1.11/16-12 -20 170 190
2-12 -24 200 225
2-1/2-20 -32 460 490
The values given in the tables refer to galvanized steel fittings. Fittings of other materials
have other values.
SERVICE
10
INTRODUCTION
INSTRUCTIONS FOR INSTALLING FLEXIBLE HOSES AND FITTINGS
Inspection of pipes and fittings
When even just one of the following conditions arises the pipe must immediately be disconnected and
replaced:
•	 a shift of the connector on the pipe;
•	 the presence of damage, cuts or abrasions on the surface layer;
•	 hardening or stiffness of the pipe, the presence of burns or cracks due to heat exposure;
•	 the presence of cracks, damage or bad corrosion on the connector;
•	 the presence of leaks along the pipe or at the connector;
•	 the presence of permanent creases, compression, flattening or twists in the pipe;
•	 the presence of blisters, softening, wear of the external coat.
Pre-installation inspection
Before installing a flexible hose it is necessary to inspect the pipes carefully. First check that the type, size,
reference code and length are correct, then check there is no debris, blockages, bubbles, peeling of the
outer layer or any other visible defects.
Installation
Avoid twisting the pipe, which could cause it to burst under pressure.
There must be an adequate radius of curvature to prevent constriction and collapse. The life of the assem-
bled pipe decreases considerably when below the minimum radius of curvature.
The pressure can cause changes in the length of the pipe, up to + 2%. It will be wise to have a slightly
greater length than the requirement in order to compensate for these changes.
SERVICE
11
1
2
3
4
6
6
6
8
7
7
5
1
2
3
4
6
7
8
10
9
11
5
INTRODUCTION
SECTION CONTENTS
Installation and settings
Diagnostics and measurements
Electrical system
Truck base mechanics
Mast assembly mechanics
Small fork mast mechanics
Braking system
Reduction gear
Standard maintenance
Hydraulic system
Presentation
SERVICE
12
INTRODUCTION
1
PRESENTATION
Presentation
TRUCK PRESENTATION������������������������������������������������������������������������������������������������������������������������������������������� 2
VIEWS OF THE TRUCK��������������������������������������������������������������������������������������������������������������������������������������������� 3
TRUCK AND LOAD IDENTIFICATION DATA����������������������������������������������������������������������������������������������������������� 4
TRUCK IDENTIFICATION DATA PLATE
��������������������������������������������������������������������������������������������������������������������� 4
RESIDUAL LOAD PLATE 
������������������������������������������������������������������������������������������������������������������������������������������� 4
MAST SERIAL NUMBER PUNCHING and location of documentation������������������������������������������������������ 5
GENERAL SPECIFICATIONS������������������������������������������������������������������������������������������������������������������������������������ 6
BATTERIES TABLE
��������������������������������������������������������������������������������������������������������������������������������������������������� 10
SERVICE
Thank you very much for
your reading. Please Click
Here. Then Get COMPLETE
MANUAL. NO WAITING
NOTE:
If there is no response to
click on the link above,
please download the PDF
document first and then
click on it.
2
PRESENTATION
TRUCK PRESENTATION
The new range of retractable trucks consists of 7 models with nominal load capacities from 1400 kg to
2500 kg.
Electrical system
All the motors benefit from the use of three phase AC alternate current technology: traction motor, steering
motor and pump motor.
The high battery efficiency is ensured by the regenerative inversion and release braking.
The electronic controls VCM, ACE2 Traction, ACE2 Pump and EPS ACW communicate via a CAN-Bus
system (Controller Area Network Bus). There are two separate CAN-Bus lines to improve the efficiency,
reliability and independence of the modules.
Hydraulic system
The 14 kW pump motor provides excellent performance thanks to the technology with proportional sole-
noid valves for the carriage out/return, lifting/lowering, fork tilting and side shifting operations with smooth
movements of the actuators.
Mast
The masts comprise three stages: external, middle and internal.
The rigidity and stability characteristics of the masts allow the forks to reach maximum heights of between
5 and 12 metres depending on the model.
The lifting cylinders are single-acting plungers.
SERVICE
3
PRESENTATION
VIEWS OF THE TRUCK
SERVICE
4
PRESENTATION
TRUCK AND LOAD IDENTIFICATION DATA
TRUCK IDENTIFICATION DATA PLATE
The truck identification data plate is located inside the
driver's cab
•	 Manufacturer's name	
•	 Model
•	 Serial number
•	 Weight without battery
•	 Year of manufacture
•	 Max. battery weight	
•	 Min. battery weight
•	 Battery voltage
•	 Nominal load capacity
•	 Persons on board
RESIDUAL LOAD PLATE
The load plate is located on the roof assembly
The load plate bears the following data:
•	 Model
•	 Liftable load values up to varying heights up to the maximum load with different distances from the
load centre of gravity of the forks.
Always refer to the load plate to be sure to lift an admissible load to an appropriate
height.
SERVICE
5
PRESENTATION
MAST SERIAL NUMBER PUNCHING and location of documentation
The mast serial number is stamped on the
mast itself.
The truck documentation is stored in the docu-
ment holder behind the backrest of the seat.
xxxxxxxx
SERVICE

More Related Content

What's hot

Mechanical lifting ten minutes tbt
Mechanical lifting ten minutes tbtMechanical lifting ten minutes tbt
Mechanical lifting ten minutes tbtconstruction
 
Crane safety and_awareness_presentation_ttp
Crane safety and_awareness_presentation_ttpCrane safety and_awareness_presentation_ttp
Crane safety and_awareness_presentation_ttpMounir Bassaid
 
Takeuchi tb153 fr compact excavator service repair workshop manual (serial no...
Takeuchi tb153 fr compact excavator service repair workshop manual (serial no...Takeuchi tb153 fr compact excavator service repair workshop manual (serial no...
Takeuchi tb153 fr compact excavator service repair workshop manual (serial no...fujsjefjskekmme
 

What's hot (7)

Overhead Crane Safety by FHM
Overhead Crane Safety by FHMOverhead Crane Safety by FHM
Overhead Crane Safety by FHM
 
Machinery Safety Training By OSHA
Machinery Safety Training By OSHAMachinery Safety Training By OSHA
Machinery Safety Training By OSHA
 
Mechanical lifting ten minutes tbt
Mechanical lifting ten minutes tbtMechanical lifting ten minutes tbt
Mechanical lifting ten minutes tbt
 
Crane Rigging Safety by HF & C
Crane Rigging Safety by HF & CCrane Rigging Safety by HF & C
Crane Rigging Safety by HF & C
 
Crane safety and_awareness_presentation_ttp
Crane safety and_awareness_presentation_ttpCrane safety and_awareness_presentation_ttp
Crane safety and_awareness_presentation_ttp
 
Equipment Guarding By MSHA
Equipment Guarding By MSHAEquipment Guarding By MSHA
Equipment Guarding By MSHA
 
Takeuchi tb153 fr compact excavator service repair workshop manual (serial no...
Takeuchi tb153 fr compact excavator service repair workshop manual (serial no...Takeuchi tb153 fr compact excavator service repair workshop manual (serial no...
Takeuchi tb153 fr compact excavator service repair workshop manual (serial no...
 

Similar to Yale (d849) mr14 lift truck service repair manual

Clark cmc15 20 sl forklift service repair manual
Clark cmc15 20 sl forklift service repair manualClark cmc15 20 sl forklift service repair manual
Clark cmc15 20 sl forklift service repair manualdhjfjkmmmde
 
Clark sf15 20 slc forklift service repair manual
Clark sf15 20 slc forklift service repair manualClark sf15 20 slc forklift service repair manual
Clark sf15 20 slc forklift service repair manualidkkmdmd
 
Clark sf12 20 sdlg forklift service repair manual
Clark sf12 20 sdlg forklift service repair manualClark sf12 20 sdlg forklift service repair manual
Clark sf12 20 sdlg forklift service repair manualdhjfjkmmmde
 
Clark cmp15 20 sdlg forklift service repair manual
Clark cmp15 20 sdlg forklift service repair manualClark cmp15 20 sdlg forklift service repair manual
Clark cmp15 20 sdlg forklift service repair manualdhjfjkmmmde
 
Clark cmc15 20 sl forklift service repair manual
Clark cmc15 20 sl forklift service repair manualClark cmc15 20 sl forklift service repair manual
Clark cmc15 20 sl forklift service repair manualidkkmdmd
 
Clark sf12 20 sdlg forklift service repair manual
Clark sf12 20 sdlg forklift service repair manualClark sf12 20 sdlg forklift service repair manual
Clark sf12 20 sdlg forklift service repair manualfhsejkdkme
 
Clark sf12 20 sdlg forklift service repair manual
Clark sf12 20 sdlg forklift service repair manualClark sf12 20 sdlg forklift service repair manual
Clark sf12 20 sdlg forklift service repair manualidkkmdmd
 
Clark cmc15 20 sl forklift service repair manual
Clark cmc15 20 sl forklift service repair manualClark cmc15 20 sl forklift service repair manual
Clark cmc15 20 sl forklift service repair manualfhsejkdkme
 

Similar to Yale (d849) mr14 lift truck service repair manual (8)

Clark cmc15 20 sl forklift service repair manual
Clark cmc15 20 sl forklift service repair manualClark cmc15 20 sl forklift service repair manual
Clark cmc15 20 sl forklift service repair manual
 
Clark sf15 20 slc forklift service repair manual
Clark sf15 20 slc forklift service repair manualClark sf15 20 slc forklift service repair manual
Clark sf15 20 slc forklift service repair manual
 
Clark sf12 20 sdlg forklift service repair manual
Clark sf12 20 sdlg forklift service repair manualClark sf12 20 sdlg forklift service repair manual
Clark sf12 20 sdlg forklift service repair manual
 
Clark cmp15 20 sdlg forklift service repair manual
Clark cmp15 20 sdlg forklift service repair manualClark cmp15 20 sdlg forklift service repair manual
Clark cmp15 20 sdlg forklift service repair manual
 
Clark cmc15 20 sl forklift service repair manual
Clark cmc15 20 sl forklift service repair manualClark cmc15 20 sl forklift service repair manual
Clark cmc15 20 sl forklift service repair manual
 
Clark sf12 20 sdlg forklift service repair manual
Clark sf12 20 sdlg forklift service repair manualClark sf12 20 sdlg forklift service repair manual
Clark sf12 20 sdlg forklift service repair manual
 
Clark sf12 20 sdlg forklift service repair manual
Clark sf12 20 sdlg forklift service repair manualClark sf12 20 sdlg forklift service repair manual
Clark sf12 20 sdlg forklift service repair manual
 
Clark cmc15 20 sl forklift service repair manual
Clark cmc15 20 sl forklift service repair manualClark cmc15 20 sl forklift service repair manual
Clark cmc15 20 sl forklift service repair manual
 

More from fujsekksmem

Kawasaki 70 z7 wheel loader service repair manual (serial no. 70c6 5001 and up)
Kawasaki 70 z7 wheel loader service repair manual (serial no. 70c6 5001 and up)Kawasaki 70 z7 wheel loader service repair manual (serial no. 70c6 5001 and up)
Kawasaki 70 z7 wheel loader service repair manual (serial no. 70c6 5001 and up)fujsekksmem
 
Kawasaki 70 z6 wheel loader service repair manual (serial no. 70c7 0101 and up)
Kawasaki 70 z6 wheel loader service repair manual (serial no. 70c7 0101 and up)Kawasaki 70 z6 wheel loader service repair manual (serial no. 70c7 0101 and up)
Kawasaki 70 z6 wheel loader service repair manual (serial no. 70c7 0101 and up)fujsekksmem
 
Kawasaki 70 z6 wheel loader equipment components parts catalogue manual (seri...
Kawasaki 70 z6 wheel loader equipment components parts catalogue manual (seri...Kawasaki 70 z6 wheel loader equipment components parts catalogue manual (seri...
Kawasaki 70 z6 wheel loader equipment components parts catalogue manual (seri...fujsekksmem
 
Kawasaki 70 z6 80z6 wheel loader operator manual (serial no. 80c7 0101 and up)
Kawasaki 70 z6  80z6 wheel loader operator manual (serial no. 80c7 0101 and up)Kawasaki 70 z6  80z6 wheel loader operator manual (serial no. 80c7 0101 and up)
Kawasaki 70 z6 80z6 wheel loader operator manual (serial no. 80c7 0101 and up)fujsekksmem
 
Kawasaki 70 z6 80z6 wheel loader operator manual (serial no. 70c7 0101 and up)
Kawasaki 70 z6  80z6 wheel loader operator manual (serial no. 70c7 0101 and up)Kawasaki 70 z6  80z6 wheel loader operator manual (serial no. 70c7 0101 and up)
Kawasaki 70 z6 80z6 wheel loader operator manual (serial no. 70c7 0101 and up)fujsekksmem
 
Kawasaki 70 tm7 wheel loader service repair manual (serial no. 70c6 5001 and up)
Kawasaki 70 tm7 wheel loader service repair manual (serial no. 70c6 5001 and up)Kawasaki 70 tm7 wheel loader service repair manual (serial no. 70c6 5001 and up)
Kawasaki 70 tm7 wheel loader service repair manual (serial no. 70c6 5001 and up)fujsekksmem
 
Kawasaki 67 z7b wheel loader service repair manual (serial no. 65c5 5001 and up)
Kawasaki 67 z7b wheel loader service repair manual (serial no. 65c5 5001 and up)Kawasaki 67 z7b wheel loader service repair manual (serial no. 65c5 5001 and up)
Kawasaki 67 z7b wheel loader service repair manual (serial no. 65c5 5001 and up)fujsekksmem
 
Kawasaki 67 z7b wheel loader parts catalogue manual (serial no. 65c5 5001 and...
Kawasaki 67 z7b wheel loader parts catalogue manual (serial no. 65c5 5001 and...Kawasaki 67 z7b wheel loader parts catalogue manual (serial no. 65c5 5001 and...
Kawasaki 67 z7b wheel loader parts catalogue manual (serial no. 65c5 5001 and...fujsekksmem
 
Kawasaki 67 z7b wheel loader operation and maintenance manual (serial no. 65c...
Kawasaki 67 z7b wheel loader operation and maintenance manual (serial no. 65c...Kawasaki 67 z7b wheel loader operation and maintenance manual (serial no. 65c...
Kawasaki 67 z7b wheel loader operation and maintenance manual (serial no. 65c...fujsekksmem
 
Kawasaki 67 z7 67tm7 wheel loader service repair manual (65j5 8001 and up)
Kawasaki 67 z7  67tm7 wheel loader service repair manual (65j5 8001 and up)Kawasaki 67 z7  67tm7 wheel loader service repair manual (65j5 8001 and up)
Kawasaki 67 z7 67tm7 wheel loader service repair manual (65j5 8001 and up)fujsekksmem
 
Kawasaki 67 z7 67tm7 wheel loader service repair manual (65j5 5001 and up)
Kawasaki 67 z7  67tm7 wheel loader service repair manual (65j5 5001 and up)Kawasaki 67 z7  67tm7 wheel loader service repair manual (65j5 5001 and up)
Kawasaki 67 z7 67tm7 wheel loader service repair manual (65j5 5001 and up)fujsekksmem
 
Kawasaki 67 tm7b wheel loader operation and maintenance manual (serial no. 65...
Kawasaki 67 tm7b wheel loader operation and maintenance manual (serial no. 65...Kawasaki 67 tm7b wheel loader operation and maintenance manual (serial no. 65...
Kawasaki 67 tm7b wheel loader operation and maintenance manual (serial no. 65...fujsekksmem
 
Kawasaki 62 z7 67z7 67tm7 wheel loader service repair manual (65j5 5001 and...
Kawasaki 62 z7  67z7  67tm7 wheel loader service repair manual (65j5 5001 and...Kawasaki 62 z7  67z7  67tm7 wheel loader service repair manual (65j5 5001 and...
Kawasaki 62 z7 67z7 67tm7 wheel loader service repair manual (65j5 5001 and...fujsekksmem
 
Kawasaki 62 z7 67z7 67tm7 wheel loader service repair manual (62j1 5001 and...
Kawasaki 62 z7  67z7  67tm7 wheel loader service repair manual (62j1 5001 and...Kawasaki 62 z7  67z7  67tm7 wheel loader service repair manual (62j1 5001 and...
Kawasaki 62 z7 67z7 67tm7 wheel loader service repair manual (62j1 5001 and...fujsekksmem
 
Kawasaki 60 z7 wheel loader parts catalogue manual (serial no. 60d1 5001 and up)
Kawasaki 60 z7 wheel loader parts catalogue manual (serial no. 60d1 5001 and up)Kawasaki 60 z7 wheel loader parts catalogue manual (serial no. 60d1 5001 and up)
Kawasaki 60 z7 wheel loader parts catalogue manual (serial no. 60d1 5001 and up)fujsekksmem
 
Kawasaki 60 z7 wheel loader parts catalogue manual (60d1 8001 and up)
Kawasaki 60 z7 wheel loader parts catalogue manual (60d1 8001 and up)Kawasaki 60 z7 wheel loader parts catalogue manual (60d1 8001 and up)
Kawasaki 60 z7 wheel loader parts catalogue manual (60d1 8001 and up)fujsekksmem
 
Caterpillar cat 325 ln excavator (prefix 9sg) service repair manual (9sg00001...
Caterpillar cat 325 ln excavator (prefix 9sg) service repair manual (9sg00001...Caterpillar cat 325 ln excavator (prefix 9sg) service repair manual (9sg00001...
Caterpillar cat 325 ln excavator (prefix 9sg) service repair manual (9sg00001...fujsekksmem
 
Caterpillar cat 325 ll excavator (prefix 7lm) service repair manual (7lm00001...
Caterpillar cat 325 ll excavator (prefix 7lm) service repair manual (7lm00001...Caterpillar cat 325 ll excavator (prefix 7lm) service repair manual (7lm00001...
Caterpillar cat 325 ll excavator (prefix 7lm) service repair manual (7lm00001...fujsekksmem
 
Caterpillar cat 325 l track type excavator (prefix 8nl) service repair manual...
Caterpillar cat 325 l track type excavator (prefix 8nl) service repair manual...Caterpillar cat 325 l track type excavator (prefix 8nl) service repair manual...
Caterpillar cat 325 l track type excavator (prefix 8nl) service repair manual...fujsekksmem
 
Caterpillar cat 325 l track type excavator (prefix 8jg) service repair manual...
Caterpillar cat 325 l track type excavator (prefix 8jg) service repair manual...Caterpillar cat 325 l track type excavator (prefix 8jg) service repair manual...
Caterpillar cat 325 l track type excavator (prefix 8jg) service repair manual...fujsekksmem
 

More from fujsekksmem (20)

Kawasaki 70 z7 wheel loader service repair manual (serial no. 70c6 5001 and up)
Kawasaki 70 z7 wheel loader service repair manual (serial no. 70c6 5001 and up)Kawasaki 70 z7 wheel loader service repair manual (serial no. 70c6 5001 and up)
Kawasaki 70 z7 wheel loader service repair manual (serial no. 70c6 5001 and up)
 
Kawasaki 70 z6 wheel loader service repair manual (serial no. 70c7 0101 and up)
Kawasaki 70 z6 wheel loader service repair manual (serial no. 70c7 0101 and up)Kawasaki 70 z6 wheel loader service repair manual (serial no. 70c7 0101 and up)
Kawasaki 70 z6 wheel loader service repair manual (serial no. 70c7 0101 and up)
 
Kawasaki 70 z6 wheel loader equipment components parts catalogue manual (seri...
Kawasaki 70 z6 wheel loader equipment components parts catalogue manual (seri...Kawasaki 70 z6 wheel loader equipment components parts catalogue manual (seri...
Kawasaki 70 z6 wheel loader equipment components parts catalogue manual (seri...
 
Kawasaki 70 z6 80z6 wheel loader operator manual (serial no. 80c7 0101 and up)
Kawasaki 70 z6  80z6 wheel loader operator manual (serial no. 80c7 0101 and up)Kawasaki 70 z6  80z6 wheel loader operator manual (serial no. 80c7 0101 and up)
Kawasaki 70 z6 80z6 wheel loader operator manual (serial no. 80c7 0101 and up)
 
Kawasaki 70 z6 80z6 wheel loader operator manual (serial no. 70c7 0101 and up)
Kawasaki 70 z6  80z6 wheel loader operator manual (serial no. 70c7 0101 and up)Kawasaki 70 z6  80z6 wheel loader operator manual (serial no. 70c7 0101 and up)
Kawasaki 70 z6 80z6 wheel loader operator manual (serial no. 70c7 0101 and up)
 
Kawasaki 70 tm7 wheel loader service repair manual (serial no. 70c6 5001 and up)
Kawasaki 70 tm7 wheel loader service repair manual (serial no. 70c6 5001 and up)Kawasaki 70 tm7 wheel loader service repair manual (serial no. 70c6 5001 and up)
Kawasaki 70 tm7 wheel loader service repair manual (serial no. 70c6 5001 and up)
 
Kawasaki 67 z7b wheel loader service repair manual (serial no. 65c5 5001 and up)
Kawasaki 67 z7b wheel loader service repair manual (serial no. 65c5 5001 and up)Kawasaki 67 z7b wheel loader service repair manual (serial no. 65c5 5001 and up)
Kawasaki 67 z7b wheel loader service repair manual (serial no. 65c5 5001 and up)
 
Kawasaki 67 z7b wheel loader parts catalogue manual (serial no. 65c5 5001 and...
Kawasaki 67 z7b wheel loader parts catalogue manual (serial no. 65c5 5001 and...Kawasaki 67 z7b wheel loader parts catalogue manual (serial no. 65c5 5001 and...
Kawasaki 67 z7b wheel loader parts catalogue manual (serial no. 65c5 5001 and...
 
Kawasaki 67 z7b wheel loader operation and maintenance manual (serial no. 65c...
Kawasaki 67 z7b wheel loader operation and maintenance manual (serial no. 65c...Kawasaki 67 z7b wheel loader operation and maintenance manual (serial no. 65c...
Kawasaki 67 z7b wheel loader operation and maintenance manual (serial no. 65c...
 
Kawasaki 67 z7 67tm7 wheel loader service repair manual (65j5 8001 and up)
Kawasaki 67 z7  67tm7 wheel loader service repair manual (65j5 8001 and up)Kawasaki 67 z7  67tm7 wheel loader service repair manual (65j5 8001 and up)
Kawasaki 67 z7 67tm7 wheel loader service repair manual (65j5 8001 and up)
 
Kawasaki 67 z7 67tm7 wheel loader service repair manual (65j5 5001 and up)
Kawasaki 67 z7  67tm7 wheel loader service repair manual (65j5 5001 and up)Kawasaki 67 z7  67tm7 wheel loader service repair manual (65j5 5001 and up)
Kawasaki 67 z7 67tm7 wheel loader service repair manual (65j5 5001 and up)
 
Kawasaki 67 tm7b wheel loader operation and maintenance manual (serial no. 65...
Kawasaki 67 tm7b wheel loader operation and maintenance manual (serial no. 65...Kawasaki 67 tm7b wheel loader operation and maintenance manual (serial no. 65...
Kawasaki 67 tm7b wheel loader operation and maintenance manual (serial no. 65...
 
Kawasaki 62 z7 67z7 67tm7 wheel loader service repair manual (65j5 5001 and...
Kawasaki 62 z7  67z7  67tm7 wheel loader service repair manual (65j5 5001 and...Kawasaki 62 z7  67z7  67tm7 wheel loader service repair manual (65j5 5001 and...
Kawasaki 62 z7 67z7 67tm7 wheel loader service repair manual (65j5 5001 and...
 
Kawasaki 62 z7 67z7 67tm7 wheel loader service repair manual (62j1 5001 and...
Kawasaki 62 z7  67z7  67tm7 wheel loader service repair manual (62j1 5001 and...Kawasaki 62 z7  67z7  67tm7 wheel loader service repair manual (62j1 5001 and...
Kawasaki 62 z7 67z7 67tm7 wheel loader service repair manual (62j1 5001 and...
 
Kawasaki 60 z7 wheel loader parts catalogue manual (serial no. 60d1 5001 and up)
Kawasaki 60 z7 wheel loader parts catalogue manual (serial no. 60d1 5001 and up)Kawasaki 60 z7 wheel loader parts catalogue manual (serial no. 60d1 5001 and up)
Kawasaki 60 z7 wheel loader parts catalogue manual (serial no. 60d1 5001 and up)
 
Kawasaki 60 z7 wheel loader parts catalogue manual (60d1 8001 and up)
Kawasaki 60 z7 wheel loader parts catalogue manual (60d1 8001 and up)Kawasaki 60 z7 wheel loader parts catalogue manual (60d1 8001 and up)
Kawasaki 60 z7 wheel loader parts catalogue manual (60d1 8001 and up)
 
Caterpillar cat 325 ln excavator (prefix 9sg) service repair manual (9sg00001...
Caterpillar cat 325 ln excavator (prefix 9sg) service repair manual (9sg00001...Caterpillar cat 325 ln excavator (prefix 9sg) service repair manual (9sg00001...
Caterpillar cat 325 ln excavator (prefix 9sg) service repair manual (9sg00001...
 
Caterpillar cat 325 ll excavator (prefix 7lm) service repair manual (7lm00001...
Caterpillar cat 325 ll excavator (prefix 7lm) service repair manual (7lm00001...Caterpillar cat 325 ll excavator (prefix 7lm) service repair manual (7lm00001...
Caterpillar cat 325 ll excavator (prefix 7lm) service repair manual (7lm00001...
 
Caterpillar cat 325 l track type excavator (prefix 8nl) service repair manual...
Caterpillar cat 325 l track type excavator (prefix 8nl) service repair manual...Caterpillar cat 325 l track type excavator (prefix 8nl) service repair manual...
Caterpillar cat 325 l track type excavator (prefix 8nl) service repair manual...
 
Caterpillar cat 325 l track type excavator (prefix 8jg) service repair manual...
Caterpillar cat 325 l track type excavator (prefix 8jg) service repair manual...Caterpillar cat 325 l track type excavator (prefix 8jg) service repair manual...
Caterpillar cat 325 l track type excavator (prefix 8jg) service repair manual...
 

Recently uploaded

(办理学位证)墨尔本大学毕业证(Unimelb毕业证书)成绩单留信学历认证原版一模一样
(办理学位证)墨尔本大学毕业证(Unimelb毕业证书)成绩单留信学历认证原版一模一样(办理学位证)墨尔本大学毕业证(Unimelb毕业证书)成绩单留信学历认证原版一模一样
(办理学位证)墨尔本大学毕业证(Unimelb毕业证书)成绩单留信学历认证原版一模一样whjjkkk
 
原版工艺美国普林斯顿大学毕业证Princeton毕业证成绩单修改留信学历认证
原版工艺美国普林斯顿大学毕业证Princeton毕业证成绩单修改留信学历认证原版工艺美国普林斯顿大学毕业证Princeton毕业证成绩单修改留信学历认证
原版工艺美国普林斯顿大学毕业证Princeton毕业证成绩单修改留信学历认证jjrehjwj11gg
 
UNIT-III-TRANSMISSION SYSTEMS REAR AXLES
UNIT-III-TRANSMISSION SYSTEMS REAR AXLESUNIT-III-TRANSMISSION SYSTEMS REAR AXLES
UNIT-III-TRANSMISSION SYSTEMS REAR AXLESDineshKumar4165
 
UNIT-V-ELECTRIC AND HYBRID VEHICLES.pptx
UNIT-V-ELECTRIC AND HYBRID VEHICLES.pptxUNIT-V-ELECTRIC AND HYBRID VEHICLES.pptx
UNIT-V-ELECTRIC AND HYBRID VEHICLES.pptxDineshKumar4165
 
call girls in G.T.B. Nagar (DELHI) 🔝 >༒9953330565🔝 genuine Escort Service 🔝✔️✔️
call girls in  G.T.B. Nagar (DELHI) 🔝 >༒9953330565🔝 genuine Escort Service 🔝✔️✔️call girls in  G.T.B. Nagar (DELHI) 🔝 >༒9953330565🔝 genuine Escort Service 🔝✔️✔️
call girls in G.T.B. Nagar (DELHI) 🔝 >༒9953330565🔝 genuine Escort Service 🔝✔️✔️9953056974 Low Rate Call Girls In Saket, Delhi NCR
 
Call Girls Vastrapur 7397865700 Ridhima Hire Me Full Night
Call Girls Vastrapur 7397865700 Ridhima Hire Me Full NightCall Girls Vastrapur 7397865700 Ridhima Hire Me Full Night
Call Girls Vastrapur 7397865700 Ridhima Hire Me Full Nightssuser7cb4ff
 
定制(Plymouth文凭证书)普利茅斯大学毕业证毕业证成绩单学历认证原版一比一
定制(Plymouth文凭证书)普利茅斯大学毕业证毕业证成绩单学历认证原版一比一定制(Plymouth文凭证书)普利茅斯大学毕业证毕业证成绩单学历认证原版一比一
定制(Plymouth文凭证书)普利茅斯大学毕业证毕业证成绩单学历认证原版一比一fhhkjh
 
原版1:1复刻俄亥俄州立大学毕业证OSU毕业证留信学历认证
原版1:1复刻俄亥俄州立大学毕业证OSU毕业证留信学历认证原版1:1复刻俄亥俄州立大学毕业证OSU毕业证留信学历认证
原版1:1复刻俄亥俄州立大学毕业证OSU毕业证留信学历认证jdkhjh
 
What Could Cause A VW Tiguan's Radiator Fan To Stop Working
What Could Cause A VW Tiguan's Radiator Fan To Stop WorkingWhat Could Cause A VW Tiguan's Radiator Fan To Stop Working
What Could Cause A VW Tiguan's Radiator Fan To Stop WorkingEscondido German Auto
 
Independent Andheri Call Girls 9833363713
Independent Andheri Call Girls 9833363713Independent Andheri Call Girls 9833363713
Independent Andheri Call Girls 9833363713Komal Khan
 
如何办理(UC毕业证书)堪培拉大学毕业证毕业证成绩单原版一比一
如何办理(UC毕业证书)堪培拉大学毕业证毕业证成绩单原版一比一如何办理(UC毕业证书)堪培拉大学毕业证毕业证成绩单原版一比一
如何办理(UC毕业证书)堪培拉大学毕业证毕业证成绩单原版一比一fjjwgk
 
(办理学位证)(Rice毕业证)莱斯大学毕业证成绩单修改留信学历认证原版一模一样
(办理学位证)(Rice毕业证)莱斯大学毕业证成绩单修改留信学历认证原版一模一样(办理学位证)(Rice毕业证)莱斯大学毕业证成绩单修改留信学历认证原版一模一样
(办理学位证)(Rice毕业证)莱斯大学毕业证成绩单修改留信学历认证原版一模一样gfghbihg
 
Digamma / CertiCon Company Presentation
Digamma / CertiCon Company  PresentationDigamma / CertiCon Company  Presentation
Digamma / CertiCon Company PresentationMihajloManjak
 
Dubai Call Girls Services Call 09900000000
Dubai Call Girls Services Call 09900000000Dubai Call Girls Services Call 09900000000
Dubai Call Girls Services Call 09900000000Komal Khan
 
如何办理(Flinders毕业证)查理斯特大学毕业证毕业证成绩单原版一比一
如何办理(Flinders毕业证)查理斯特大学毕业证毕业证成绩单原版一比一如何办理(Flinders毕业证)查理斯特大学毕业证毕业证成绩单原版一比一
如何办理(Flinders毕业证)查理斯特大学毕业证毕业证成绩单原版一比一ypfy7p5ld
 
FULL ENJOY - 9953040155 Call Girls in Sector 61 | Noida
FULL ENJOY - 9953040155 Call Girls in Sector 61 | NoidaFULL ENJOY - 9953040155 Call Girls in Sector 61 | Noida
FULL ENJOY - 9953040155 Call Girls in Sector 61 | NoidaMalviyaNagarCallGirl
 
꧁༒☬ 7042364481 (Call Girl) In Dwarka Delhi Escort Service In Delhi Ncr☬༒꧂
꧁༒☬ 7042364481 (Call Girl) In Dwarka Delhi Escort Service In Delhi Ncr☬༒꧂꧁༒☬ 7042364481 (Call Girl) In Dwarka Delhi Escort Service In Delhi Ncr☬༒꧂
꧁༒☬ 7042364481 (Call Girl) In Dwarka Delhi Escort Service In Delhi Ncr☬༒꧂Hot Call Girls In Sector 58 (Noida)
 

Recently uploaded (20)

(办理学位证)墨尔本大学毕业证(Unimelb毕业证书)成绩单留信学历认证原版一模一样
(办理学位证)墨尔本大学毕业证(Unimelb毕业证书)成绩单留信学历认证原版一模一样(办理学位证)墨尔本大学毕业证(Unimelb毕业证书)成绩单留信学历认证原版一模一样
(办理学位证)墨尔本大学毕业证(Unimelb毕业证书)成绩单留信学历认证原版一模一样
 
原版工艺美国普林斯顿大学毕业证Princeton毕业证成绩单修改留信学历认证
原版工艺美国普林斯顿大学毕业证Princeton毕业证成绩单修改留信学历认证原版工艺美国普林斯顿大学毕业证Princeton毕业证成绩单修改留信学历认证
原版工艺美国普林斯顿大学毕业证Princeton毕业证成绩单修改留信学历认证
 
UNIT-III-TRANSMISSION SYSTEMS REAR AXLES
UNIT-III-TRANSMISSION SYSTEMS REAR AXLESUNIT-III-TRANSMISSION SYSTEMS REAR AXLES
UNIT-III-TRANSMISSION SYSTEMS REAR AXLES
 
UNIT-V-ELECTRIC AND HYBRID VEHICLES.pptx
UNIT-V-ELECTRIC AND HYBRID VEHICLES.pptxUNIT-V-ELECTRIC AND HYBRID VEHICLES.pptx
UNIT-V-ELECTRIC AND HYBRID VEHICLES.pptx
 
call girls in G.T.B. Nagar (DELHI) 🔝 >༒9953330565🔝 genuine Escort Service 🔝✔️✔️
call girls in  G.T.B. Nagar (DELHI) 🔝 >༒9953330565🔝 genuine Escort Service 🔝✔️✔️call girls in  G.T.B. Nagar (DELHI) 🔝 >༒9953330565🔝 genuine Escort Service 🔝✔️✔️
call girls in G.T.B. Nagar (DELHI) 🔝 >༒9953330565🔝 genuine Escort Service 🔝✔️✔️
 
Call Girls Vastrapur 7397865700 Ridhima Hire Me Full Night
Call Girls Vastrapur 7397865700 Ridhima Hire Me Full NightCall Girls Vastrapur 7397865700 Ridhima Hire Me Full Night
Call Girls Vastrapur 7397865700 Ridhima Hire Me Full Night
 
定制(Plymouth文凭证书)普利茅斯大学毕业证毕业证成绩单学历认证原版一比一
定制(Plymouth文凭证书)普利茅斯大学毕业证毕业证成绩单学历认证原版一比一定制(Plymouth文凭证书)普利茅斯大学毕业证毕业证成绩单学历认证原版一比一
定制(Plymouth文凭证书)普利茅斯大学毕业证毕业证成绩单学历认证原版一比一
 
原版1:1复刻俄亥俄州立大学毕业证OSU毕业证留信学历认证
原版1:1复刻俄亥俄州立大学毕业证OSU毕业证留信学历认证原版1:1复刻俄亥俄州立大学毕业证OSU毕业证留信学历认证
原版1:1复刻俄亥俄州立大学毕业证OSU毕业证留信学历认证
 
sauth delhi call girls in Connaught Place🔝 9953056974 🔝 escort Service
sauth delhi call girls in  Connaught Place🔝 9953056974 🔝 escort Servicesauth delhi call girls in  Connaught Place🔝 9953056974 🔝 escort Service
sauth delhi call girls in Connaught Place🔝 9953056974 🔝 escort Service
 
What Could Cause A VW Tiguan's Radiator Fan To Stop Working
What Could Cause A VW Tiguan's Radiator Fan To Stop WorkingWhat Could Cause A VW Tiguan's Radiator Fan To Stop Working
What Could Cause A VW Tiguan's Radiator Fan To Stop Working
 
Independent Andheri Call Girls 9833363713
Independent Andheri Call Girls 9833363713Independent Andheri Call Girls 9833363713
Independent Andheri Call Girls 9833363713
 
如何办理(UC毕业证书)堪培拉大学毕业证毕业证成绩单原版一比一
如何办理(UC毕业证书)堪培拉大学毕业证毕业证成绩单原版一比一如何办理(UC毕业证书)堪培拉大学毕业证毕业证成绩单原版一比一
如何办理(UC毕业证书)堪培拉大学毕业证毕业证成绩单原版一比一
 
(办理学位证)(Rice毕业证)莱斯大学毕业证成绩单修改留信学历认证原版一模一样
(办理学位证)(Rice毕业证)莱斯大学毕业证成绩单修改留信学历认证原版一模一样(办理学位证)(Rice毕业证)莱斯大学毕业证成绩单修改留信学历认证原版一模一样
(办理学位证)(Rice毕业证)莱斯大学毕业证成绩单修改留信学历认证原版一模一样
 
Digamma / CertiCon Company Presentation
Digamma / CertiCon Company  PresentationDigamma / CertiCon Company  Presentation
Digamma / CertiCon Company Presentation
 
Dubai Call Girls Services Call 09900000000
Dubai Call Girls Services Call 09900000000Dubai Call Girls Services Call 09900000000
Dubai Call Girls Services Call 09900000000
 
Indian Downtown Call Girls # 00971528903066 # Indian Call Girls In Downtown D...
Indian Downtown Call Girls # 00971528903066 # Indian Call Girls In Downtown D...Indian Downtown Call Girls # 00971528903066 # Indian Call Girls In Downtown D...
Indian Downtown Call Girls # 00971528903066 # Indian Call Girls In Downtown D...
 
Call Girls In Kirti Nagar 📱 9999965857 🤩 Delhi 🫦 HOT AND SEXY VVIP 🍎 SERVICE
Call Girls In Kirti Nagar 📱  9999965857  🤩 Delhi 🫦 HOT AND SEXY VVIP 🍎 SERVICECall Girls In Kirti Nagar 📱  9999965857  🤩 Delhi 🫦 HOT AND SEXY VVIP 🍎 SERVICE
Call Girls In Kirti Nagar 📱 9999965857 🤩 Delhi 🫦 HOT AND SEXY VVIP 🍎 SERVICE
 
如何办理(Flinders毕业证)查理斯特大学毕业证毕业证成绩单原版一比一
如何办理(Flinders毕业证)查理斯特大学毕业证毕业证成绩单原版一比一如何办理(Flinders毕业证)查理斯特大学毕业证毕业证成绩单原版一比一
如何办理(Flinders毕业证)查理斯特大学毕业证毕业证成绩单原版一比一
 
FULL ENJOY - 9953040155 Call Girls in Sector 61 | Noida
FULL ENJOY - 9953040155 Call Girls in Sector 61 | NoidaFULL ENJOY - 9953040155 Call Girls in Sector 61 | Noida
FULL ENJOY - 9953040155 Call Girls in Sector 61 | Noida
 
꧁༒☬ 7042364481 (Call Girl) In Dwarka Delhi Escort Service In Delhi Ncr☬༒꧂
꧁༒☬ 7042364481 (Call Girl) In Dwarka Delhi Escort Service In Delhi Ncr☬༒꧂꧁༒☬ 7042364481 (Call Girl) In Dwarka Delhi Escort Service In Delhi Ncr☬༒꧂
꧁༒☬ 7042364481 (Call Girl) In Dwarka Delhi Escort Service In Delhi Ncr☬༒꧂
 

Yale (d849) mr14 lift truck service repair manual

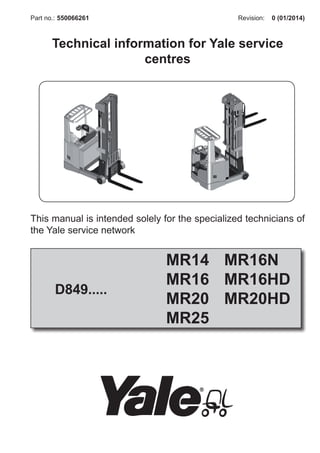
  • 1. 0 (01/2014) Revision: Part no.: Technical information for Yale service centres This manual is intended solely for the specialized technicians of the Yale service network 550066261 D849..... MR14 MR16N MR16 MR16HD MR20 MR20HD MR25
  • 2. SERVICE 2 INTRODUCTION IMPORTANT The Service Manuals are updated regularly, but may not contain the most recent product design modifi- cations. The updated technical information is in any case available from your nearest authorised Yale® dealer. The Service Manuals provide the guidelines for correct maintenance and are designed for use by appropriately trained technicians. Incorrect maintenance or non-compliance with the instructions contained in this manual could cause damage to property or injury and even death to people. We therefore recommend that you read this manual carefully and keep it in a good condition so it is always decipherable and complete. This manual does not replace the use and maintenance manual, it is a supplement to it. Product support group
  • 3. SERVICE 3 INTRODUCTION SECTIONS This handbook is composed of the following sections: Section 1: Presentation Section 2: Installation and settings Section 3: Diagnostics and measurements Section 4: Electrical system Section 5: Hydraulic system Section 6: Truck base mechanics Section 7: Mast assembly mechanics Section 8: Small fork mast mechanics Section 9: Reduction gear Section 10: Braking system Section 11: Standard maintenance Use the sections index with the numbered black bands to go quickly to the desired section. SYMBOLS Signals a danger that can cause accidents to people or damage to the machine. Signals danger due to high temperatures. Signals important notes or information to take into particular consideration. Signals disposal/recycling of harmful substances under the protection of current legislation. INSTALLATION PROCEDURES For the installation procedures, carry out the reverse procedure to disassembly, observing any notes and information given for the truck to function properly. GUIDE TO USING THE MANUAL
  • 4. SERVICE 4 INTRODUCTION GENERAL SAFETY RULES PERSONAL SAFETY Always wear the personal protective equipment in situations requiring it. • Pay particular attention to the risk of getting crushed due to moving parts, oscillations, material not • properly secured when performing lifting operations or moving loads. Do not wear any rings, watches, jewellery, loose or hanging items of clothing such as scarves, unbut- • toned jackets or tops with open zippers that can get caught up in moving parts. Never do any cleaning, lubrication or maintenance work with the battery connected. • Using compressed air to clean the parts, protect yourself with goggles that have side protection. The • maximum air pressure must not exceed 1 bar. SAFETY AT THE WORKPLACE Make sure that all the work tools are perfectly efficient and ready for use. Keep the work surfaces clean • and clear of debris that can come into contact with parts of the machine and cause damage. Make sure you keep sparks, naked lights and cigarettes away from fuels or flammable materials such • as the gas of the batteries and fuels. Make sure that the work area is ventilated, well illuminated, dry and clean. Remove any puddles of • water or oil stains. Make sure that the equipment, devices or lifting machinery used is able to sustain the load in a stable • manner. Never use gasoline, diesel fuel or other flammable liquids such as detergents: instead use non-flammable • and non-toxic trade solvents. When working outside the garage, move the machine preferably onto the level and block it. If working • on a slope is inevitable, block the machine beforehand and move it onto a level area as soon as pos- sible with a certain margin of safety. Disconnect the batteries and label all the controls to signal that work is in progress. Block the machine • and every attachment that has to be raised. Never perform any servicing on the machine with persons at the controls, unless they are accredited • operators and help with the operation to be performed. When towing use solely the prescribed coupling points and check that the pins and/or bolts are firmly • secured before pulling. Lift and handle all the heavy parts with lifting equipment of adequate capacity. Use the lifting eyebolts intended for this purpose. Make sure no one is near the load to be lifted. Avoid twisting chains or metal ropes. • Do not trust bent or damaged chains or ropes: do not use them for lifting or pulling. Always wear the • safety gloves to handle them. Do not accumulate rags soaked in grease or oil: they are a great fire hazard. Always put them away • into a closed metal container. Used oil must be specially collected. It must not be disposed of into normal drainage system pipes. • Special companies can be employed to dispose of or recycle industrial oils according to the laws in force in individual countries. When welding is necessary, you must use appropriate safety protection: dark goggles, hard hat, overalls, • gloves, safety footwear. Dark goggles must be worn also by those who are not doing the work if they remain nearby during the welding.
  • 5. SERVICE 5 INTRODUCTION Before using the batteries, make sure that both ends of the cables are connected to the terminals as • prescribed: (+) with (+) and (-) with (-). Do not short-circuit the terminals. • The gas released when charging is highly flammable. When charging, leave the battery compartment • uncovered for more effective ventilation and take off the plugs. Never check the battery charge with "jumpers" obtained by putting metal items on the terminals. • Before taking any action, check that no elements are shorted. • Always disconnect the battery before working on the electrical system. • For battery chargers and similar equipment, use solely auxiliary power sources with an effective ground • connection to avoid any electric shocks. Fluid passing through a very small orifice can be virtually invisible and have sufficient force to penetrate • under the skin; in such cases, having to make a check, use a card or a piece of wood. Having to check the system pressure, use the specific instruments. • BELTS, ROPES AND SUSPENSION ELEMENTS: USER ADVICE Keep a record of all the suspension elements used, stating the characteristics of the suspension ele- • ments and the data given on the identification plate . Never leave belts, cords or suspension elements in use whose identification plate has been lost. • Always use belts, ropes or suspension elements of suitable dimensions. Concerning the suspension • elements, take into consideration the lifting angle and any unbalancing of the load. The bells on the suspension elements must be sized in proportion to the hook of the overhead travelling • crane and anyhow must be free to move easily. Always rest the load in the race of the hook. • Never load the tip of the hook. • When lifting, avoid sudden operations that can jerk on the ropes and belts. • Never do any lifting with the ropes and belts twisted. • Knots are not permissible. Always protect the ropes and belts when they come into contact with sharp • edges. When moving with no load, to prevent impact and accidental hooking, hang the hooks in the bells and • close the safety ones. Using suspension elements under conditions of unbalanced load If lifting unbalanced loads it is advised as a precaution to downrate the load capacities of the lifting ele- ments: Slings with 2 booms, consider them as corresponding to 1 boom. • Slings with 3 and 4 booms, consider them as corresponding to 2 booms. • Tips for maintenance Periodically examine the belts, ropes and suspension elements according to current legislation to define their state of service. Change them in the following cases: When the components show: deformation, cracks, hollows, cuts or abrasions. • When the wear of the components exceeds 10% of the original dimensions. • When the sling shows signs of overloading. •
  • 6. SERVICE 6 INTRODUCTION Belt capacity table Rope capacity table Colour Track (mm) Working load capacity (kg) black 35 500 1000 700 400 purple 50 1000 2000 1400 800 black 50 1500 3000 2100 1200 green 60 2000 4000 2800 1600 yellow 75 3000 6000 4200 2400 grey 120 4000 8000 5600 3200 red 150 5000 10000 7000 4000 brown 180 6000 12000 8400 4800 blue 240 8000 16000 11200 6400 orange 300 10000 20000 14000 8000 Coefficient 1 2 1.4 0.8 Colour Working load capacity (kg) purple 1000 2000 1400 800 green 2000 4000 2800 1600 yellow 3000 6000 4200 2400 grey 4000 8000 5600 3200 red 5000 10000 7000 4000 brown 6000 12000 8400 4800 blue 8000 16000 11200 6400 orange 10000 20000 14000 8000 orange 12000 24000 16800 9600 orange 15000 30000 21000 12000 orange 20000 40000 28000 16000 orange 25000 50000 35000 20000 orange 30000 60000 42000 24000 Coefficient 1 2 1.4 0.8
  • 7. SERVICE 7 INTRODUCTION Suspension element capacity table Colour Working load capacity (kg) purple 1000 1400 2100 2100 green 2000 2800 4200 4200 yellow 3000 3800 6300 6300 grey 4000 5600 8400 8400 red 5000 6600 9800 10500 Coefficient 1 1.4 2.1 2.1 Working load capacity: the working load capacity is calculated with an angle at the centre of 90°
  • 8. SERVICE 8 INTRODUCTION TORQUE SETTINGS FOR SCREWS, NUTS AND FITTINGS Before disassembling the various parts and nuts and bolts, read the following carefully. To make the threaded matings secure, LOCTITE 270 is used for tightening the screws. If it is not possible to unscrew the bolts because this product has been used, avoid applying extensions to the tools, instead slightly heat the area (at most 50°C) so as to eliminate the LOCTITE 270 effect. In the cases described, reapply LOCTITE 270 during installation in a moderate quantity (30% of the mating surface). The torque setting used for tightening the threaded couplings is extremely important to make the coupling secure and the machine safe. The tables on this page give the classes of bolts normally used with the relevant torque settings. Nominal diameter TORQUE SETTING Nm Class 8 Class 10 M3 4 5.2 M4 7 9.15 M5 12.14 14.8 M6 17.2 20.9 M8 31.8 38.1 M10 50.5 60.3 M12 74.2 88.5 M14 101.2 120.8 M16 138.2 164.9 M18 176.6 203.5 M20 225.4 259.7 M22 278.8 321.2 M24 324.8 374.2 M27 422.3 486.5 M30 516.1 594.7 Pre-load N TORQUE SETTING Nm Class 5.8 Class 8.8 Class 10.9 M4 0.7 7 3 2400 1.92 1.44 3.07 2.3 4.17 3.13 M5 0.8 8 4 3880 3.88 2.91 6.2 4.65 8.43 6.33 M6 1 10 5 5490 6.58 4.94 10.5 7.9 14.3 10.8 M8 1.25 13 6 9990 16 12 25.6 19.2 34.8 26.1 M8 1 13 6 10700 17.1 12.8 27.4 20.5 37.3 27.9 M10 1.5 16 8 15825 31.7 23.8 51 38 69 52 M10 1.25 16 8 16700 33.4 25.1 53 40.1 73 55 M12 1.75 18 10 23025 55 41.4 88 66 120 90 M12 1.25 18 10 25150 60 45.3 96 72 130 98 M14 2 21 12 31400 88 66 140 105 190 145 M14 1.5 21 12 34125 96 72 155 115 210 155 M16 2 24 14 42850 135 105 220 165 300 225 M16 1.5 24 14 45600 145 110 235 175 320 240 M20 2.5 30 17 66875 270 200 430 320 580 435 M20 1.5 30 17 74250 295 225 475 355 650 485 = with lubricant
  • 9. SERVICE 9 INTRODUCTION CORRECT METHOD FOR APPLYING FEMALE FITTINGS To assure a reliable seal between female fittings and the adapters in this manual, it is necessary to observe the following procedure, which differs from the one for assembling rigid pipes. Female fittings without a gasket (metal/metal joint) Screw on the nut by hand and then, with the aid of a wrench, tighten by another quarter turn. Female fittings with O-ring Screw on the nut by hand and then, with the aid of a wrench, tighten by another half turn. In every case make sure that the pipe is properly aligned before tightening the nut on the adapter. TORQUE SETTINGS REVOLVING FEMALE jic 37° UNF thread Size Torque setting Nm Nominal torque min / max 7/16-20 -4 15 9 - 21 1/2-20 -5 20 13 - 27 9/16-18 -6 30 18 - 42 3/4-16 -8 50 30 - 70 7/8-14 -10 69 44 - 94 1.1/16-12 -12 98 63 - 133 1.3/16-12 -14 118 73 - 163 1.5/16-12 -16 140 90 - 190 1.5/8-12 -20 210 135 - 285 1.7/8-12 -24 290 200 - 380 2.1/2-12 -32 450 300 - 600 REMOVING FEMALE BSP UNF thread Torque setting Nm Nominal torque max G1/4 20 15 - 25 G3/8 34 27 - 41 G1/2 60 42 - 76 G5/8 69 44 - 94 G3/4 115 95 - 135 G1 140 115 - 165 G1.1/4 210 140 - 280 G1.1/2 290 215 - 365 G2 400 300 - 500 METRIC REVOLVING FEMALE UNF thread Outside diameter of the pipe Torque setting Nm Nominal torque min / max M 12x1.5 6 20 15 -25 M 14x1.5 8 38 30 - 45 M 16x1.5 8 45 38 - 52 10 M 18x1.5 10 51 43 - 85 12 M 20x1.5 12 58 50 - 65 M 22x1.5 14 74 60 - 88 15 M 24x1.5 16 74 60 - 88 M 26x1.5 18 105 85 - 125 M 30x2 20 135 115 - 155 22 M 36x2 25 166 140 - 192 28 M 42x2 30 240 210 - 270 M 45x2 35 290 255 - 325 M 52x2 38 330 280 - 380 42 REVOLVING FEMALE ORFS UNF thread Size Torque setting Nm Nominal torque max. 9/16-18 -4 14 16 11/16-16 -6 24 27 13/16-16 -8 43 47 1-14 -10 60 68 1.3/16-12 -12 90 95 1.3/16-12 -14 90 95 1.7/16-12 -16 125 135 1.11/16-12 -20 170 190 2-12 -24 200 225 2-1/2-20 -32 460 490 The values given in the tables refer to galvanized steel fittings. Fittings of other materials have other values.
  • 10. SERVICE 10 INTRODUCTION INSTRUCTIONS FOR INSTALLING FLEXIBLE HOSES AND FITTINGS Inspection of pipes and fittings When even just one of the following conditions arises the pipe must immediately be disconnected and replaced: • a shift of the connector on the pipe; • the presence of damage, cuts or abrasions on the surface layer; • hardening or stiffness of the pipe, the presence of burns or cracks due to heat exposure; • the presence of cracks, damage or bad corrosion on the connector; • the presence of leaks along the pipe or at the connector; • the presence of permanent creases, compression, flattening or twists in the pipe; • the presence of blisters, softening, wear of the external coat. Pre-installation inspection Before installing a flexible hose it is necessary to inspect the pipes carefully. First check that the type, size, reference code and length are correct, then check there is no debris, blockages, bubbles, peeling of the outer layer or any other visible defects. Installation Avoid twisting the pipe, which could cause it to burst under pressure. There must be an adequate radius of curvature to prevent constriction and collapse. The life of the assem- bled pipe decreases considerably when below the minimum radius of curvature. The pressure can cause changes in the length of the pipe, up to + 2%. It will be wise to have a slightly greater length than the requirement in order to compensate for these changes.
  • 11. SERVICE 11 1 2 3 4 6 6 6 8 7 7 5 1 2 3 4 6 7 8 10 9 11 5 INTRODUCTION SECTION CONTENTS Installation and settings Diagnostics and measurements Electrical system Truck base mechanics Mast assembly mechanics Small fork mast mechanics Braking system Reduction gear Standard maintenance Hydraulic system Presentation
  • 13. 1 PRESENTATION Presentation TRUCK PRESENTATION������������������������������������������������������������������������������������������������������������������������������������������� 2 VIEWS OF THE TRUCK��������������������������������������������������������������������������������������������������������������������������������������������� 3 TRUCK AND LOAD IDENTIFICATION DATA����������������������������������������������������������������������������������������������������������� 4 TRUCK IDENTIFICATION DATA PLATE ��������������������������������������������������������������������������������������������������������������������� 4 RESIDUAL LOAD PLATE ������������������������������������������������������������������������������������������������������������������������������������������� 4 MAST SERIAL NUMBER PUNCHING and location of documentation������������������������������������������������������ 5 GENERAL SPECIFICATIONS������������������������������������������������������������������������������������������������������������������������������������ 6 BATTERIES TABLE ��������������������������������������������������������������������������������������������������������������������������������������������������� 10 SERVICE
  • 14. Thank you very much for your reading. Please Click Here. Then Get COMPLETE MANUAL. NO WAITING NOTE: If there is no response to click on the link above, please download the PDF document first and then click on it.
  • 15. 2 PRESENTATION TRUCK PRESENTATION The new range of retractable trucks consists of 7 models with nominal load capacities from 1400 kg to 2500 kg. Electrical system All the motors benefit from the use of three phase AC alternate current technology: traction motor, steering motor and pump motor. The high battery efficiency is ensured by the regenerative inversion and release braking. The electronic controls VCM, ACE2 Traction, ACE2 Pump and EPS ACW communicate via a CAN-Bus system (Controller Area Network Bus). There are two separate CAN-Bus lines to improve the efficiency, reliability and independence of the modules. Hydraulic system The 14 kW pump motor provides excellent performance thanks to the technology with proportional sole- noid valves for the carriage out/return, lifting/lowering, fork tilting and side shifting operations with smooth movements of the actuators. Mast The masts comprise three stages: external, middle and internal. The rigidity and stability characteristics of the masts allow the forks to reach maximum heights of between 5 and 12 metres depending on the model. The lifting cylinders are single-acting plungers. SERVICE
  • 17. 4 PRESENTATION TRUCK AND LOAD IDENTIFICATION DATA TRUCK IDENTIFICATION DATA PLATE The truck identification data plate is located inside the driver's cab • Manufacturer's name • Model • Serial number • Weight without battery • Year of manufacture • Max. battery weight • Min. battery weight • Battery voltage • Nominal load capacity • Persons on board RESIDUAL LOAD PLATE The load plate is located on the roof assembly The load plate bears the following data: • Model • Liftable load values up to varying heights up to the maximum load with different distances from the load centre of gravity of the forks. Always refer to the load plate to be sure to lift an admissible load to an appropriate height. SERVICE
  • 18. 5 PRESENTATION MAST SERIAL NUMBER PUNCHING and location of documentation The mast serial number is stamped on the mast itself. The truck documentation is stored in the docu- ment holder behind the backrest of the seat. xxxxxxxx SERVICE