SlideShare a Scribd company logo
1 of 21
Download to read offline
EPX16-20s
Part No. 8037870
Book No. SM-715
Jun. 2005
RATED CAPACITY : 1250~2270kg
SERVICEMANUAL
#40-1,Ungnam-Dong,
changwon-city, Kyungnam,
Korea
TMX12-25
Truck Models Covered by this Manual
This manual consists of “base” module that pertains
to all TMX12-25, ECX16-18 models and other mod-
ules that pertain only to specific models. Manuals
shipped with the truck contain the base module and
the modules specific to the purchased truck.
You may, however, purchase specific modules and
expand your manual to fully cover multiple models.
To do so, order the desired modules as you would
any other Clark part.
Arrangement and Use of this Manual
Clark arranges parts and service procedures by stan-
dardized Groups. In this manual, Groups are similar
to “chapters”. Groups are listed in the indexes on the
next page.
Each Group begins with a table of contents that
shows the Sections contained within the Group.
Lengthy Sections also begin with a table of contents.
Each Group and Section has an identifying name and
number, or “ID”.
Each page also has a unique ID. The page ID con-
sists of three numbers separated by hyphens. The
three numbers represent the Group number, the Sec-
tion number, and the page number. For example,
“00-1-2” on the lower corner of the page indicates
Group 00, Section 1, page 2.
The Group number sometimes has a letter or letters
added to it in parentheses if one or more variations of
the Group exist. For example, if the truck has a stan-
dard transaxle, Group 06 is expressed as “06(S)”; if
the truck has a hydrostatic transmission, Group 06 is
expressed as “06(H)”.
You can quickly locate a specific point in the manual
by using the headers and footers that appear on every
Section page. The following illustration points out
these areas.
This manual is intended for the use of trained service
personnel. Please read Group SA, “Safe Mainte-
nance”, and the Operator’s Manual before working
on or operating the truck.
Group SA, Safe Maintenance
SM 715, Dec ’04 Safety • SA-1-1
Safety Signs and Messages
Safety signs and messages in this manual and on the lift
truck provide instructions and identify specific areas
where potential hazards exist and special precautions
should be taken. Be sure you know and understand the
meaning of these instructions, signs, and messages. Dam-
age to the truck, death, or serious injury to you or other
persons may result if these messages are not followed.
NOTE
This message is used when special informa-
tion, instructions or identification is required
relating to procedures, equipment, tools,
pressures, capacities, and other special data.
IMPORTANT
This message is used when special precau-
tions should be taken to ensure a correct
action or to avoid damage to, or malfunction
of, the truck or a component.
CAUTION
!
This message is used as a reminder of safety
hazards that can result in personal injury if
proper precautions are not taken.
WARNING
!
This message is used when a hazard exists
that can result in injury or death if proper
precautions are not taken.
DANGER
!
This message is used when an extreme haz-
ard exists that can result in injury or death or
serious injury if proper precautions are not
taken.
The above terms have been adopted by Clark Material
Handling Company. The same terms may be used in dif-
ferent context in service literature supplied directly or
indirectly by vendors of truck components..
Safe Maintenance Practices
The following instructions have been prepared from cur-
rent industry and government safety standards applicable
to industrial truck operation and maintenance. These rec-
ommended procedures specify conditions, methods, and
accepted practices that aid in the safe maintenance of
industrial trucks. They are listed here for the reference and
safety of all workers during maintenance operations.
Carefully read and understand these instructions and the
specific maintenance procedures before attempting to do
any repair work.
When in doubt of any maintenance procedure, please con-
tact your local Clark dealer.
1. Powered industrial trucks can become hazardous if
maintenance is neglected. Therefore, suitable mainte-
nance facilities, trained personnel, and procedures
must be provided.
2. Maintenance and inspection of all powered industrial
trucks shall be done in conformance with the manu-
facturer’s recommendations.
3. A scheduled planned maintenance, lubrication, and
inspection program shall be followed.
4. Only trained and authorized personnel shall be per-
mitted to maintain, repair, adjust, and inspect indus-
trial trucks. Work should be performed in accordance
with the manufacturer’s specifications.
5. Properly ventilate work area, vent exhaust fumes, and
keep shop clean and floor dry.
6. Avoid fire hazards and have fire protection equipment
present in the work area. Do not use an open flame to
check for level or leakage of fuel, electrolyte, oil, or
coolant. Do not use open pans of fuel or flammable
cleaning fluids for cleaning parts.
7. Before starting work on truck:
a. Raise drive wheels off of floor and use blocks or
other positive truck positioning devices.
b. Disconnect battery before working on the electri-
cal system.
8. Before working on engine fuel system of gasoline- or
diesel-powered trucks, be sure the fuel shut-off valve
is closed.
Section 1.
Safety
Group SA, Safe Maintenance
SA-1-2 • Safety SM 715, Dec ’04
9. Operation of the truck to check performance must be
conducted in an authorized, safe, clear area.
10. Before starting to drive truck:
a. Be in operating position with seat belt fastened.
b. Be sure parking brake is engaged.
c. Put direction control in neutral.
d. Start engine.
e. Check functioning of direction and speed controls,
steering, brakes, warning devices, and any load
handling attachments.
11. Before leaving truck
a. Stop truck.
b. Put directional control in neutral.
c. Apply the parking brake.
d. Stop the engine by turning off the key switch.
e. Put upright in vertical position and fully lower the
forks or attachment.
f. Put blocks at the wheels if truck is on an incline.
12. Brakes, steering mechanisms, control mechanisms,
warning devices, lights, governors, guards, safety
devices, and frame members must be carefully and
regularly inspected and maintained in a safe operat-
ing condition.
13. Special trucks or devices designed and approved for
hazardous area operation must receive special atten-
tion to ensure that maintenance preserves the origi-
nal, approved, safe-operating features.
14. Fuel systems must be checked for leaks and condi-
tion of parts. Extra special consideration must be
given in the case of a leak in the fuel system. Action
must be taken to prevent the use of the truck until the
leak has been corrected.
15. The truck manufacturer’s capacity, operation, and
maintenance instruction plates, tags, or decals must
be maintained in legible condition.
16. Batteries, motors, controllers, limit switches, protec-
tive devices, electrical conductors, and connections
must be inspected and maintained in conformance
with good practice. Special attention must be paid to
the condition of electrical insulation.
17. To avoid injury to personnel or damage to the equip-
ment, consult the manufacturer’s procedures in
replacing contacts on any battery connection.
18. Industrial trucks must be kept in a clean condition to
minimize fire hazards and help in the detection of
loose or defective parts.
19. Modifications and additions that affect capacity and
safe truck operation must not be done without the
manufacturer’s prior written approval. Capacity, opera-
tion and maintenance instruction plates, tags, or
decals must be changed accordingly. This is an
OSHA requirement.
20. Care must be taken to assure that all replacement
parts, including tires, are interchangeable with the
original parts and of a quality at least equal to that
provided in the original equipment. Parts, including
tires, are to be installed per the manufacturer’s proce-
dures. Always use genuine CLARK or CLARK-
approved parts.
21. Use special care when removing heavy components
from the truck, such as counterweight, seat deck,
upright, etc. Be sure that lifting and handling equip-
ment is of the correct capacity and in good condition.
Also, this removal may upset the stability of the
truck. The frame must always be safely blocked for
major component removal.
NOTE
You should also be familiar with additional
operating and maintenance safety instruc-
tions contained in the following publications:
ASME B56.1 - 1988: Operator Control-Industrial Tow
Tractors (Safety Standard For Powered Industrial Trucks).
Published by: American Society of Mechanical Engineers,
Three Park Avenue, New York, NY10016.
NFPA 505-1982: Fire Safety Standard for Powered Indus-
trial Trucks: Type Designations, Areas of Use, Mainte-
nance and Operation. Available from: National Fire
Protection Assoc., Inc., Batterymarch Park, Quincy, MA
02269.
General Industrial Standards, OSHA 2206: OSHA Safety
and Health Standards (29 CFR 1910), Subpart N-Materi-
als Handling and Storage, Section 1910.178 Powered
Industrial Trucks. For sale by: Superintendent of Docu-
ments, U.S. Government Printing Office, Washington, DC
20402.
Group SA, Safe Maintenance
SM 715, Dec ’04 Lifting, Jacking, and Blocking • SA-2-1
Raising Drive Wheels................................................................. 2
Chaining the Upright in Raised Position.................................. 2
Raising Rear of Truck................................................................. 3
Raising Entire Truck................................................................... 4
Shipping Tie-Down Instructions ............................................... 4
WARNING
!
Lifting or jacking any large piece of equipment such as a fork truck presents obvious hazards.
It must be done with great care and forethought. Consult the truck weight information in
Group 40, Specifications, to ensure that your lifting equipment is of adequate capacity.
Section 2
Lifting, Jacking, and Blocking
Group SA, Safe Maintenance
SA-2-2 • Lifting, Jacking, and Blocking SM 715, Dec ’04
CAUTION
!
To perform these service procedures, first:
. Park truck on a level surface.
. Put the upright in a vertical position and
lower the carriage fully down.
. Return control handle to neutral and turn
key switch OFF.
WARNING
!
Defective equipment can cause accidents. All
tools and lifting equipment must be in good
condition, meet the load capacity require-
ments and have OSHA labels when required.
Tools with defects can fail, causing severe
injury or death.
Raising Drive Wheels
This procedure uses the upright to lift the drive wheels off
the floor.
1. Park the truck safely.
2. Turn key switch ON. Tilt the upright fully back.
3. Put a solid 100 x 100 mm (4 x 4 inch) hardwood
block under the front section of each upright rail. Put
a 3.6 mm (0.125.0.250 inch) steel plate on top of
each block.
4. Tilt the upright fully forward. This will raise the drive
wheels off the floor.
5. Block the truck under the frame behind the drive
wheels with solid blocking.
6. Turn key switch OFF.
7. Check for safe clearance between drive wheels, block
and floor.
8. Check the stability of the truck. Be sure that the
blocks are located securely under the frame before
operating the drive motor or working on truck.
9. Lower the drive wheels to the floor by reversing this
procedure.
. Turn key switch ON.
. Tilt upright fully back.
. Turn key switch OFF.
10. Remove the blocks from under the frame and
upright rails.
Chaining the Upright in Raised Posi-
tion
This procedure provides safe clearance for access from
the front of truck to components on or near the drive axle.
1. Park truck safely.
2. Put blocks at front of and rear of drive wheels.
3. Raise upright carriage.
4. Chain the center inner rail tie bar to the top outer rail
tie bar as shown.
Triple Stage Uprights: Chain the center intermediate
rail tie bar and the lower inner rail tie bar to the top
outer rail tie bar.
5. Reverse the procedure to remove the chains.
WARNING
!
Keep hands, tools, etc. out of upright.
Group SA, Safe Maintenance
SM 715, Dec ’04 Lifting, Jacking, and Blocking • SA-2-3
Raising Rear of Truck
The truck may be raised at the rear by jacking and block-
ing under the frame just beyond the counterweight.
Refer to truck data plate for truck weights.
WARNING
!
An incorrectly installed counterweight can
move or fall unexpectedly. NEVER LIFT OR
BLOCK A TRUCK USING THE COUN-
TERWEIGHT. Failure to follow procedures
outlined in this manual can result in injury or
death.
1. Park truck safely.
2. Put blocks at front and rear of drive wheels.
CAUTION
!
If possible, remove the battery from truck to
reduce weight for added safety and ease of
jacking.
3. Put a floor jack under the frame just beyond the coun-
terweight.
WARNING
!
Never lift the truck by the counterweight.
NOTE
If there is insufficient clearance under frame
for your jack, the truck may first be driven
onto shims, such as 25 x 150 x 300 mm (1 x 6
x 12 in) pieces of board, to increase the truck
frame under-clearance.
4. Jack up one side of the truck about 50 mm (2 in) and
put a block under the frame to hold that elevation.
Then move the jack to the other side and jack and
block it. Continue to alternate the procedure from
side to side, increasing elevation not more than 50
mm (2 in) each time. Raise the truck no higher than
necessary to perform the maintenance work.
Make sure the left and right sides of the truck are
finally blocked in a level working position.
CAUTION
!
Before performing any maintenance work,
check the truck for stable condition on the
blocking by determining that it will not rock
on blocks.
5. When maintenance work is completed, lower the rear
of truck to the floor by reversing the above procedure
and lowering each side of the truck 50 mm (2 in) at a
time:
• Put jack under frame and raise truck.
• Carefully remove blocks and lower truck.
• Remove jack and blocks from drive wheels.
Group SA, Safe Maintenance
SA-2-4 • Lifting, Jacking, and Blocking SM 715, Dec ’04
Raising Entire Truck
Refer to truck data plate for truck weights.
1. Park truck safely. Lower upright fully. If necessary,
drive truck onto boards to increase under-clearance.
WARNING
!
SIDE-TO-SIDE TIPOVER. When jacking
side of truck, be sure upright is lowered fully.
Do not raise one side of the truck more than
about 50 mm (2 in) higher than the other, to
avoid tipping truck over laterally.
END-TO-END TIPOVER. If the upright and
drive axle are removed while the truck is
blocked up, the truck will tip backward due
to the heavy counterweight. Upright and
counterweight must both be removed before
attempting to raise the truck for drive axle
removal. The back of the truck must be sup-
ported by blocking under the steer axle to
prevent movement.
If the counterweight is removed while the
truck is up on blocks, the weight of the
upright and drive axle will cause the truck to
fall forward.
2. Put the jack under side frame, near the center of the
truck.
IMPORTANT
Be sure to put the jack squarely and fully
under the main side structure of the frame.
3. Carefully raise the truck one side at a time, only as
high as necessary to do the maintenance work, and
not more than 150 mm (6 in) total.
4. Put blocks under the side frame, at each side of the
jack. Spread the blocks close to the steer and drive
wheels for maximum stability.
5. If using one jack, lower the truck onto the blocks and
move the jack to the opposite side. Repeat the lifting
procedure.
6. Put the same size blocks under each side of the truck
so it will be leveled.
CAUTION
!
Before performing any maintenance work,
check the truck for stable condition on the
blocking.
7. When maintenance work is completed, lower the
entire truck to the floor by reversing this procedure.
Lower the truck one side at a time, while carefully
removing the blocks. Be sure no tools or equipment
are under the truck or wheels.
NOTE
Depending on jack height, shims under the
tires may be needed for clearance to allow
removal of jack.
Shipping Tie-Down Instructions
1. Front of Truck
a. With Upright and Carriage Installed
• Lower the carriage fully.
• Put a tie-down (e.g., chain) between the carriage
fork bars.
b. Without Upright and Carriage Installed
• Put a chain across the truck floor plate. Protect
truck from chain damage by using covered chain
or protective material under the chain at contact
points.
2. Rear of Truck
• Attach the tie-down to the toe-pin in top of coun-
terweight.
Group SA, Safe Maintenance
SM 715, Dec ’04 Towing • SA-3-1
If your truck is disabled but can be moved freely on its
own wheels without further damage, use the following
procedures to tow the truck safely to a repair area.
WARNING
!
It is important for your safety and to the care
of your lift truck to use the proper equipment
and carefully follow these recommendations
for safe towing.
Do not tow a lift truck if there is a problem
with the brakes or tires, or if the steering
cannot be operated.
Do not tow the disabled truck up or down
ramps or steep inclines.
Do not attempt to tow the disabled truck if
traction or weather conditions are poor.
1. Be sure to apply the parking brake or block the drive
wheels on the disabled truck while working around it.
2. When possible, raise the carriage (forks) on the dis-
abled truck 300 mm (12 in) from the floor or ground.
Secure the carriage on the upright with a chain.
3. Use a truck for towing that is of equal or larger capac-
ity than the disabled truck. Carry a partial load on the
tow truck for improved traction.
4. Check that the counterweight bolts on both trucks are
in place and properly torqued. These bolts are made
of special, high-tensile steel and are not commer-
cially available. When necessary, replace these bolts
only with a genuine Clark replacement part.
5. Use an approved, solid metal tow bar with towing
couplers that connect to the towing pins in the coun-
terweights.
NOTE
DOT-approved towing equipment is available
from your Clark dealer.
6. Release the parking brake on the towed vehicle. Place
directional control lever in neutral.
7. Tow the disabled truck backwards. An operator must
be on the disabled truck.
CAUTION
!
The power steering and braking will not
operate on the disabled truck. The steering
handwheel will be difficult to turn and the
service brakes will require additional pedal
force.
8. Tow the truck slowly. Careful towing is necessary to
prevent injury to personnel or damage to the disabled
truck. The truck should be towed at a speed of less
than 8 kph (5 mph, or a moderate walking speed)
with a driver in place and steering the disabled truck.
IMPORTANT
Do not lift the disabled truck or any wheels
off the floor while the truck is being towed.
9. Park the disabled truck in authorized areas only. Fully
lower the forks on the floor, leave the directional
control in neutral, turn the key switch to OFF, and
engage the parking brake. Remove the key and, when
necessary, block the wheels to prevent the truck from
rolling.
WARNING
!
Always engage the parking brake when park-
ing a lift truck. The truck can roll and cause
injury or death to personnel near it.
Section 3
Towing
Group 25/26, Steering
SM 715, Jun ’05 ➀ Steering System Specifications and Description • 25-1-1
Specifications
Steering System Type: Load sensing hydrostatic power
steering with variable ratio.(TMX Truck)
Steering System Type: Dynamic signal load sensing
steering with variable ratio.(EPX Truck)
Steering System Relief Pressure Setting: 8340-8830 kPa
(1210-1280 psi).
Steer Cylinder Type: Double acting, piston-type.
Steer Axle: Single wheel (optional dual-wheel) mounted
on trunnion at center rear of truck.
Service Intervals
Check the steering system relief pressure annually or after
every 2000 hours of operation. Make a visual inspection
of steering control unit hydraulic fittings periodically to
ensure that the fittings are tight with no leakage.
Fastener Torques
Steering Handwheel Nut: 35-40 N.m (25.5-29.5 ft-lb)
Steering Column Cover Hex Bolts: 2-3 N.m (18-27 in.lb;
1.5-2.25 ft-lb)
Directional Control Base Lock Nut: 0.8-1 N.m (7-9 in.lb;
0.6-0.75 ft-lb)
Directional Control Base Flange Capscrew: 3.5-4.0 N.m
(2.5-2.9 ft-lb)
Ignition Switch Ring Nut: 10-14 N.m (7.3-10.3 ft-lb)
Tilt Lock Assembly Base-to-Cowl Bolts: 20-25 N.m
(14.8-18.5 ft-lb)
Orbitrol Bracket Bolts: 34-38 N.m (25-28 ft-lb)
Lower Column Assembly Base-to-Steering Gear Bolts:
34-38 N.m (25-28 ft-lb)
Universal Joint Pinch Bolt: 25-30 N.m (18.5-22 ft-lb)
Wiring Harness Bracket Bolts: 11-13 N.m (8-9.5 ft-lb)
Description
All truck models have a hydrostatic power steering sys-
tem, which is supplied with oil pressure from the main
hydraulic system pump. The steering handwheel operates
the power steering gear (steering control valve) shown on
page 2, which directs oil flow to the steering cylinder on
the steer axle. The steering cylinder operates the steering
linkage and steer wheel described on page 3.
A steering system pressure relief valve, contained in the
steer gear assembly, prevents over-pressurization of the
steering system. The pressure relief setting can be tested
using the gaugeinserted into the pressure line into the
steering gear.
The steering gear shaft is connected to the handwheel by
means of a jointed shaft. When the steering handwheel
turns, it causes the steering gear’s spool valve to shift from
its closed neutral position to a “turn” position. This shift-
ing of the spool directs flow to one end or other of the
steering cylinder, depending on the direction of the turn.
The amount of flow, and the sharpness of the turn, depend
on how far the handwheel is rotated. The more rapidly the
handwheel turns, the more quickly the flow, and the turn,
occur.
The low pressure oil from the opposite side of the steering
cylinder is returned through the opposite port in the steer-
ing gear.
As the steering handwheel stops turning, centering springs
in the valve automatically center the spool, stopping the
flow of oil to the cylinder.
Stops in the steer cylinder limit the how far the steer
wheels can be turned. It takes 5 turns of the hand wheel to
turn from stop to stop.
In the event of a pump failure, the steering gear acts as a
limited emergency steering pump powered by manual
rotation of the handwheel. An internal check valve auto-
matically closes to divert the manually-generated oil flow
to the proper port of the steer cylinder. The handwheel
turning effort is considerably higher, however, than with
power steering.
Section 1
Steering System Specifications and Description
Group 25/26, Steering
25-1-2 • Steering System Specifications and Description SM 715, Dec ’04
The column tilt-lock mechanism allows the operator to
adjust the steering column. The column tilt lever knob
releases the adjustment setting and the column returns to
the up position by the use of springs. The tilt lock mecha-
nism, the directional control lever, and the ignition switch
are protected by the steering column cover.
The column cover can be removed for service to steering
column components. The entire column can be removed
for service or replacement. The steering gear, attached to
the base of the column, can be removed without disassem-
bling the other parts of the steering column.
Steer Column and Steer Valve
Horn Button
Column
Directional Control Lever
Assembly
Tilt Lock
Horn
Contact
Ring
Ignition Switch
Wiring Harness
Directional
Control Switch
Wiring Harness
Tilt Lock
Assembly
Boot
Steer Valve
(hydraulic lines on
page 4)
Key
Switch
Hand Wheel
Group 25/26, Steering
SM 715, Jun ’05 Steering System Specifications and Description • 25-1-3
(TMX Truck)
The steer cylinder rod operates a drag link which pivots
the steer trunnion and steer wheel mounted to it.
A sensor mounted above the steer trunnion shaft, signals
the position of the wheel to the electronic control, which
then creates a speed differential between the two drive
motors to facilitate cornering.
Steer Linkage(TMX Truck)
Steer Trunnion
Bearings
Steer Trunnion
Mounting Plate
Steer Drag Link
Steer Trunnion
Steer Wheel and Bearings
Steer
Cylinder
(hydraulic
lines on
page 4)
Steer Angle Sensor
Assembly
Group 25/26, Steering
25-1-4 • Steering System Specifications and Description SM 715, Jun ’05
Steer Axle assembly(EPX Truck)
Silent block
Steer Axle
Assembly
Group 25/26, Steering
SM 715, Jun ’05 ➀ Steering System Specifications and Description • 25-1-5
Steer Angle Sensor Removal and
Replacement
Removal of entire assembly. Replacement is reverse
order:
A. Potentiometer wires.
B. Fastener and washer
C. Bracket/Assembly
NOTE
Potentiometer shaft holder (G) and fastener
may remain on steer axle. NOTE Potentiome-
ter (E) wire leads should point toward front
of truck,.
Removal and replacement (reverse order) of potentiome-
ter only. Replacement is reverse order:
A. Potentiometer wires.
D. Cable clamp
F. Locknut
E. Potentiometer
(EPX Truck)
TMX Truck
Torque to 40 - 45 N-M
(30 - 33 lbs-ft)
Torque to 20 - 30 N-M
(15-22 lbs-f t)
H : Steering sensor
I : Fastener
J : Steer Magnet
Group 25/26, Steering
25-1-6 • Steering System Specifications and Description SM 715, Jun ’05 ➀
Hydraulic Connections in Steering System(TMX)
Hydraulic Connections in Steering System(EPX)
Group 25/26, Steering
SM 715, Dec ’04 Steering System Troubleshooting • 25-2-1
No steering
• Hydraulic fluid level very low.
• Air in hydraulic oil.
• Steering column sections not connected properly.
• Hose broken.
• Hydraulic pump contaminated or defective.
• Priority valve spool stuck.(EPX)
Hard steering
• Hydraulic fluid level low.
• Air in hydraulic oil.
• Steering gear contaminated or defective.
• Relief valve setting too low; adjust or replace.
• System leaking.
• Incorrect tire pressure.
• Axle load too heavy.
• U-joint misalignment.
• Lack of lubrication.
• Defective steering gear.
• Spring in priority valve broken.(EPX)
High number of handwheel turns
• Steering cylinder seal leakage.
• Worn steering gear.
Steering handwheel spins freely
• Air in system (cavitation).
• Low oil supply.
• Steering column detached from steering gear.
• Defective steering gear.
Jerky steering
• Steering gear malfunction because of worn parts or
contamination. Steering gear may require over-
haul.
Truck turns in wrong direction
• Hydraulic lines not installed correctly.
Handwheel kickback
• Check valve faulty (or not in system).
Slow steering response
• Oil viscosity too high.
• Contaminated or defective steering gear.
Chatter conditions
• Loose mountings or linkage. Make certain all
mounting fasteners and other linkage is tight.
• Pressure relief valve set too low and is out of
adjustment; adjust or replace the relief valve.
• nsufficient pump flow. Check pump for leaks and
see Group 29, Section 3.
Unsatisfactory steering in either direction
• Air in system due to excessive wear in steering cyl-
inder. Check for air in system. Excessive noise or
foamy condition of hydraulic fluid indicates aera-
tion. Check that air is not entering the system
through poor threads, cracked, split, or worn hoses,
bad pump seals, bad O-rings, bad gaskets, or loose
connections on intake side of pump. Worn cylin-
ders result in leakage past the piston. Overhaul (see
Group 25, Section 7) or replace the steer cylinder.
• Incorrect system pressure due to worn pump.
Replace the relief valve or repair or replace the
pump (see Group 29).
Section 2
Steering System Troubleshooting
Group 25/26, Steering
25-2-2 • Steering System Troubleshooting SM 715, Dec ’04
Noise during turns
• Worn bearing(s) in steering arm; replace bearings.
• Worn pin in steering knuckle; replace pin.
• Worn bearings in steering knuckle; replace bear-
ings.
• Steering knuckle is loose; tighten castle nut.
Constant noise from steering axle
• Loose or worn hub bearing cones. Adjust or
replace hub bearing cones. Replace bearing cones
and bearing cups as a set.
Fluctuating pressure
• Faulty operation of relief valve. Fluctuating pres-
sure or loss of pressure in the system is usually
caused by scales, chips, sludge, or filings that have
lodged between the relief valve and seat. A dam-
aged spring or worn valve may also be the cause of
the trouble. Flush and refill the system and replace
the hydraulic return line filter element. If condition
still exists, replace the relief valve.
Low pressure at the pump
• Refer to the pump troubleshooting and overhaul
procedures in Group 29.
Low pressure at the steering gear
• Refer to Section 5, “Steering Gear Overhaul.”Low
pressure at the steer cylinder
• Seals worn out at piston rod end of steer cylinder;
replace seals.(TMX)
Steer cylinder rod binding or sticking
• Binding of linkage. With hydraulic flow shut off
from the cylinder and the rod end uncoupled, the
rod should slide freely in or out by hand. If the pis-
ton is binding, overhaul or replace the cylinder.
Thank you very much for
your reading. Please Click
Here. Then Get COMPLETE
MANUAL. NO WAITING
NOTE:
If there is no response to
click on the link above,
please download the PDF
document first and then
click on it.
Group 25, Steering
SM 715, Jun ’05 ➀ Steering Column and Component Removal and Replacement • 25-3-1
Steering Column and Component Removal ................................................... 2
Key Switch Removal ...........................................................................................2
Hand Wheel, Horn Contact Ring, and Directional Control Assembly Removal .2
Column Tilt Lock Assembly Removal ................................................................4
Steering Gear and Lower Steering Column Removal. .........................................4
Steering Column and Component Replacement ............................................ 6
Steering Gear and Lower Steering Column Replacement ...................................6
Column Tilt Lock Assembly Replacement. .........................................................7
Directional Control Assembly Reassembly..........................................................7
Directional Control Assembly and Key Switch Replacement .............................8
Steering Hand Wheel Replacement......................................................................9
IMPORTANT
Before removing any component for overhaul, make sure the
correct repair parts, seals, and gasket sets are available.
Typical Steering Column Assembly
Wire Harness
Key Switch &Turn Signal SW
Wire Harness
Directional Control SW
Direction Control Assembly
Tilt Lock Assembly
Tilt Lock Assembly Boot
Direction Control & Turn Signal Assy
Turn Signal Assy(EPG ONLY)
Key Switch
Horn contact Ring
Column Lower Cover
Lock Nut
Section 3
Steering Column and Component Removal and Replacement
Group 25, Steering
25-3-2 • Steering Column and Component Removal and Replacement SM 715, Jun ’05
CAUTION
!
SAFE PARKING. Before working on truck:
1. Park truck on a hard, level, and solid
surface, such as a concrete floor with no
gaps or breaks.
2. Put upright in vertical position and fully
lower the forks or attachment.
3. Put all controls in neutral. Turn key
switch OFF and remove key.
4. Apply the parking brake and block the
wheels.
Steering Column and Component
Removal
Use the following steps to disassemble the steering col-
umn for service to the:
• Key Switch
• Horn Button
• Directional Control Lever Assembly
• Column Tilt Lock Assembly
• Upper and Lower Steer Column
• Steering Gear.
Determine which component requires service and check
the procedure for removing that component. Read the pro-
cedure completely before beginning disassembly.
Key Switch Removal
1. Disconnect the battery.
2. Remove the four socket head bolts holding the two
halves of the column cover together. The directional
control assembly and the key switch are exposed.
3. Remove the lock ring nut securing the key switch to
the lower cover. Label all wires and terminals for cor-
rect reconnection when reassembling.
Hand Wheel, Horn Contact Ring, and
Directional Control Assembly Removal
1. Disconnect the battery.
2. Gently pry the horn button from the steering hand
wheel hub using a small, flat-bladed screw driver.
3. Disconnect the horn wire from the steer column and
unplug the horn contact wires from the terminal on
the bottom of the horn button.
4. Remove the nut holding the hand wheel to the steer-
ing column.
5. Use a wheel puller to remove the hand wheel from
the steering column. Hand wheel has two M8X1.25
threaded inserts in the hub for this purpose.
Group 25, Steering
SM 715, Dec ’04 Steering Column and Component Removal and Replacement • 25-3-3
6. Unplug the horn contact ring wire from the terminal
on the bottom of the handwheel.
7. Using a 2.5 mm allen wrench, remove the four socket
head bolts holding the two halves of the column
cover together. Remove the top cover. Gently pull the
bottom cover away.
NOTE
Use care when removing the bottom cover as
the ignition switch wiring is attached.
8. Remove the horn contact ring. Unplug the wire from
the terminal on the bottom of the ring.
9. Lift the directional control lever and boot off the
diecast base.
10. Unplug wires from directional switches. Label all
wires and terminals for correct connection when
reassembling. Remove the direction control switches
by removing the mounting screws on the base.
Directional Control Lever Detent Spring Removal
11. If not already disassembled, remove the four socket
bolts holding the two sides of the column cover
together. Remove the top cover.
12. Pry the two retainer clips from the posts on the direc-
tional control base securing the detent spring. Lift
spring off posts.

More Related Content

More from fhsejkdkme

Kubota bx2350 tractor parts catalogue manual
Kubota bx2350 tractor parts catalogue manualKubota bx2350 tractor parts catalogue manual
Kubota bx2350 tractor parts catalogue manualfhsejkdkme
 
Kubota b1820 tractor parts catalogue manual
Kubota b1820 tractor parts catalogue manualKubota b1820 tractor parts catalogue manual
Kubota b1820 tractor parts catalogue manualfhsejkdkme
 
Kubota b1620 tractor parts catalogue manual
Kubota b1620 tractor parts catalogue manualKubota b1620 tractor parts catalogue manual
Kubota b1620 tractor parts catalogue manualfhsejkdkme
 
Kubota b1220 tractor parts catalogue manual
Kubota b1220 tractor parts catalogue manualKubota b1220 tractor parts catalogue manual
Kubota b1220 tractor parts catalogue manualfhsejkdkme
 
Fiat kobelco sl30 b skid steer loader service repair manual
Fiat kobelco sl30 b skid steer loader service repair manualFiat kobelco sl30 b skid steer loader service repair manual
Fiat kobelco sl30 b skid steer loader service repair manualfhsejkdkme
 
Fiat kobelco ex95 w mini wheel excavator service repair manual
Fiat kobelco ex95 w mini wheel excavator service repair manualFiat kobelco ex95 w mini wheel excavator service repair manual
Fiat kobelco ex95 w mini wheel excavator service repair manualfhsejkdkme
 
Fiat kobelco e80 mini crawler excavator service repair manual
Fiat kobelco e80 mini crawler excavator service repair manualFiat kobelco e80 mini crawler excavator service repair manual
Fiat kobelco e80 mini crawler excavator service repair manualfhsejkdkme
 
Fiat kobelco e50.2 sr mini crawler excavator service repair manual
Fiat kobelco e50.2 sr mini crawler excavator service repair manualFiat kobelco e50.2 sr mini crawler excavator service repair manual
Fiat kobelco e50.2 sr mini crawler excavator service repair manualfhsejkdkme
 
Fiat kobelco e45.2 sr mini crawler excavator service repair manual
Fiat kobelco e45.2 sr mini crawler excavator service repair manualFiat kobelco e45.2 sr mini crawler excavator service repair manual
Fiat kobelco e45.2 sr mini crawler excavator service repair manualfhsejkdkme
 
Fiat kobelco e40.2 sr mini crawler excavator service repair manual
Fiat kobelco e40.2 sr mini crawler excavator service repair manualFiat kobelco e40.2 sr mini crawler excavator service repair manual
Fiat kobelco e40.2 sr mini crawler excavator service repair manualfhsejkdkme
 
Fiat kobelco e35.2 sr mini crawler excavator service repair manual
Fiat kobelco e35.2 sr mini crawler excavator service repair manualFiat kobelco e35.2 sr mini crawler excavator service repair manual
Fiat kobelco e35.2 sr mini crawler excavator service repair manualfhsejkdkme
 
Fiat kobelco e30.2 sr mini crawler excavator service repair manual
Fiat kobelco e30.2 sr mini crawler excavator service repair manualFiat kobelco e30.2 sr mini crawler excavator service repair manual
Fiat kobelco e30.2 sr mini crawler excavator service repair manualfhsejkdkme
 
Fiat kobelco e25 sr mini crawler excavator service repair manual
Fiat kobelco e25 sr mini crawler excavator service repair manualFiat kobelco e25 sr mini crawler excavator service repair manual
Fiat kobelco e25 sr mini crawler excavator service repair manualfhsejkdkme
 
Fiat kobelco e22 sr mini crawler excavator service repair manual
Fiat kobelco e22 sr mini crawler excavator service repair manualFiat kobelco e22 sr mini crawler excavator service repair manual
Fiat kobelco e22 sr mini crawler excavator service repair manualfhsejkdkme
 
Fiat kobelco e20 sr mini crawler excavator service repair manual
Fiat kobelco e20 sr mini crawler excavator service repair manualFiat kobelco e20 sr mini crawler excavator service repair manual
Fiat kobelco e20 sr mini crawler excavator service repair manualfhsejkdkme
 
Clark sf50 75s dl forklift service repair manual
Clark sf50 75s dl forklift service repair manualClark sf50 75s dl forklift service repair manual
Clark sf50 75s dl forklift service repair manualfhsejkdkme
 
Clark sf35 45 dl forklift service repair manual
Clark sf35 45 dl forklift service repair manualClark sf35 45 dl forklift service repair manual
Clark sf35 45 dl forklift service repair manualfhsejkdkme
 
Clark sf15 20 slc forklift service repair manual
Clark sf15 20 slc forklift service repair manualClark sf15 20 slc forklift service repair manual
Clark sf15 20 slc forklift service repair manualfhsejkdkme
 
Clark sf12 20 sdlg forklift service repair manual
Clark sf12 20 sdlg forklift service repair manualClark sf12 20 sdlg forklift service repair manual
Clark sf12 20 sdlg forklift service repair manualfhsejkdkme
 
Clark ns246 forklift service repair manual
Clark ns246 forklift service repair manualClark ns246 forklift service repair manual
Clark ns246 forklift service repair manualfhsejkdkme
 

More from fhsejkdkme (20)

Kubota bx2350 tractor parts catalogue manual
Kubota bx2350 tractor parts catalogue manualKubota bx2350 tractor parts catalogue manual
Kubota bx2350 tractor parts catalogue manual
 
Kubota b1820 tractor parts catalogue manual
Kubota b1820 tractor parts catalogue manualKubota b1820 tractor parts catalogue manual
Kubota b1820 tractor parts catalogue manual
 
Kubota b1620 tractor parts catalogue manual
Kubota b1620 tractor parts catalogue manualKubota b1620 tractor parts catalogue manual
Kubota b1620 tractor parts catalogue manual
 
Kubota b1220 tractor parts catalogue manual
Kubota b1220 tractor parts catalogue manualKubota b1220 tractor parts catalogue manual
Kubota b1220 tractor parts catalogue manual
 
Fiat kobelco sl30 b skid steer loader service repair manual
Fiat kobelco sl30 b skid steer loader service repair manualFiat kobelco sl30 b skid steer loader service repair manual
Fiat kobelco sl30 b skid steer loader service repair manual
 
Fiat kobelco ex95 w mini wheel excavator service repair manual
Fiat kobelco ex95 w mini wheel excavator service repair manualFiat kobelco ex95 w mini wheel excavator service repair manual
Fiat kobelco ex95 w mini wheel excavator service repair manual
 
Fiat kobelco e80 mini crawler excavator service repair manual
Fiat kobelco e80 mini crawler excavator service repair manualFiat kobelco e80 mini crawler excavator service repair manual
Fiat kobelco e80 mini crawler excavator service repair manual
 
Fiat kobelco e50.2 sr mini crawler excavator service repair manual
Fiat kobelco e50.2 sr mini crawler excavator service repair manualFiat kobelco e50.2 sr mini crawler excavator service repair manual
Fiat kobelco e50.2 sr mini crawler excavator service repair manual
 
Fiat kobelco e45.2 sr mini crawler excavator service repair manual
Fiat kobelco e45.2 sr mini crawler excavator service repair manualFiat kobelco e45.2 sr mini crawler excavator service repair manual
Fiat kobelco e45.2 sr mini crawler excavator service repair manual
 
Fiat kobelco e40.2 sr mini crawler excavator service repair manual
Fiat kobelco e40.2 sr mini crawler excavator service repair manualFiat kobelco e40.2 sr mini crawler excavator service repair manual
Fiat kobelco e40.2 sr mini crawler excavator service repair manual
 
Fiat kobelco e35.2 sr mini crawler excavator service repair manual
Fiat kobelco e35.2 sr mini crawler excavator service repair manualFiat kobelco e35.2 sr mini crawler excavator service repair manual
Fiat kobelco e35.2 sr mini crawler excavator service repair manual
 
Fiat kobelco e30.2 sr mini crawler excavator service repair manual
Fiat kobelco e30.2 sr mini crawler excavator service repair manualFiat kobelco e30.2 sr mini crawler excavator service repair manual
Fiat kobelco e30.2 sr mini crawler excavator service repair manual
 
Fiat kobelco e25 sr mini crawler excavator service repair manual
Fiat kobelco e25 sr mini crawler excavator service repair manualFiat kobelco e25 sr mini crawler excavator service repair manual
Fiat kobelco e25 sr mini crawler excavator service repair manual
 
Fiat kobelco e22 sr mini crawler excavator service repair manual
Fiat kobelco e22 sr mini crawler excavator service repair manualFiat kobelco e22 sr mini crawler excavator service repair manual
Fiat kobelco e22 sr mini crawler excavator service repair manual
 
Fiat kobelco e20 sr mini crawler excavator service repair manual
Fiat kobelco e20 sr mini crawler excavator service repair manualFiat kobelco e20 sr mini crawler excavator service repair manual
Fiat kobelco e20 sr mini crawler excavator service repair manual
 
Clark sf50 75s dl forklift service repair manual
Clark sf50 75s dl forklift service repair manualClark sf50 75s dl forklift service repair manual
Clark sf50 75s dl forklift service repair manual
 
Clark sf35 45 dl forklift service repair manual
Clark sf35 45 dl forklift service repair manualClark sf35 45 dl forklift service repair manual
Clark sf35 45 dl forklift service repair manual
 
Clark sf15 20 slc forklift service repair manual
Clark sf15 20 slc forklift service repair manualClark sf15 20 slc forklift service repair manual
Clark sf15 20 slc forklift service repair manual
 
Clark sf12 20 sdlg forklift service repair manual
Clark sf12 20 sdlg forklift service repair manualClark sf12 20 sdlg forklift service repair manual
Clark sf12 20 sdlg forklift service repair manual
 
Clark ns246 forklift service repair manual
Clark ns246 forklift service repair manualClark ns246 forklift service repair manual
Clark ns246 forklift service repair manual
 

Recently uploaded

Vip Hot🥵 Call Girls Delhi Delhi {9711199012} Avni Thakur 🧡😘 High Profile Girls
Vip Hot🥵 Call Girls Delhi Delhi {9711199012} Avni Thakur 🧡😘 High Profile GirlsVip Hot🥵 Call Girls Delhi Delhi {9711199012} Avni Thakur 🧡😘 High Profile Girls
Vip Hot🥵 Call Girls Delhi Delhi {9711199012} Avni Thakur 🧡😘 High Profile Girlsshivangimorya083
 
The 10th anniversary, Hyundai World Rally Team's amazing journey
The 10th anniversary, Hyundai World Rally Team's amazing journeyThe 10th anniversary, Hyundai World Rally Team's amazing journey
The 10th anniversary, Hyundai World Rally Team's amazing journeyHyundai Motor Group
 
83778-77756 ( HER.SELF ) Brings Call Girls In Laxmi Nagar
83778-77756 ( HER.SELF ) Brings Call Girls In Laxmi Nagar83778-77756 ( HER.SELF ) Brings Call Girls In Laxmi Nagar
83778-77756 ( HER.SELF ) Brings Call Girls In Laxmi Nagardollysharma2066
 
加拿大温尼伯大学毕业证(UBC毕业证书)成绩单原版一比一
加拿大温尼伯大学毕业证(UBC毕业证书)成绩单原版一比一加拿大温尼伯大学毕业证(UBC毕业证书)成绩单原版一比一
加拿大温尼伯大学毕业证(UBC毕业证书)成绩单原版一比一nsrmw5ykn
 
BLUE VEHICLES the kids picture show 2024
BLUE VEHICLES the kids picture show 2024BLUE VEHICLES the kids picture show 2024
BLUE VEHICLES the kids picture show 2024AHOhOops1
 
Call me @ 9892124323 Call Girl in Andheri East With Free Home Delivery
Call me @ 9892124323 Call Girl in Andheri East With Free Home DeliveryCall me @ 9892124323 Call Girl in Andheri East With Free Home Delivery
Call me @ 9892124323 Call Girl in Andheri East With Free Home DeliveryPooja Nehwal
 
FULL ENJOY - 9953040155 Call Girls in Sector 61 | Noida
FULL ENJOY - 9953040155 Call Girls in Sector 61 | NoidaFULL ENJOY - 9953040155 Call Girls in Sector 61 | Noida
FULL ENJOY - 9953040155 Call Girls in Sector 61 | NoidaMalviyaNagarCallGirl
 
Delhi Call Girls Saket 9711199171 ☎✔👌✔ Whatsapp Hard And Sexy Vip Call
Delhi Call Girls Saket 9711199171 ☎✔👌✔ Whatsapp Hard And Sexy Vip CallDelhi Call Girls Saket 9711199171 ☎✔👌✔ Whatsapp Hard And Sexy Vip Call
Delhi Call Girls Saket 9711199171 ☎✔👌✔ Whatsapp Hard And Sexy Vip Callshivangimorya083
 
꧁ ୨ Call Girls In Radisson Blu Plaza Delhi Airport, New Delhi ❀7042364481❀ Es...
꧁ ୨ Call Girls In Radisson Blu Plaza Delhi Airport, New Delhi ❀7042364481❀ Es...꧁ ୨ Call Girls In Radisson Blu Plaza Delhi Airport, New Delhi ❀7042364481❀ Es...
꧁ ୨ Call Girls In Radisson Blu Plaza Delhi Airport, New Delhi ❀7042364481❀ Es...Hot Call Girls In Sector 58 (Noida)
 
How To Fix Mercedes Benz Anti-Theft Protection Activation Issue
How To Fix Mercedes Benz Anti-Theft Protection Activation IssueHow To Fix Mercedes Benz Anti-Theft Protection Activation Issue
How To Fix Mercedes Benz Anti-Theft Protection Activation IssueTerry Sayther Automotive
 
VIP Russian Call Girls in Jamshedpur Deepika 8250192130 Independent Escort Se...
VIP Russian Call Girls in Jamshedpur Deepika 8250192130 Independent Escort Se...VIP Russian Call Girls in Jamshedpur Deepika 8250192130 Independent Escort Se...
VIP Russian Call Girls in Jamshedpur Deepika 8250192130 Independent Escort Se...Suhani Kapoor
 
Introduction of Basic of Paint Technology
Introduction of Basic of Paint TechnologyIntroduction of Basic of Paint Technology
Introduction of Basic of Paint TechnologyRaghavendraMishra19
 
ENJOY Call Girls In Okhla Vihar Delhi Call 9654467111
ENJOY Call Girls In Okhla Vihar Delhi Call 9654467111ENJOY Call Girls In Okhla Vihar Delhi Call 9654467111
ENJOY Call Girls In Okhla Vihar Delhi Call 9654467111Sapana Sha
 
Delhi Call Girls Saket 9711199171 ☎✔👌✔ Full night Service for more than 1 person
Delhi Call Girls Saket 9711199171 ☎✔👌✔ Full night Service for more than 1 personDelhi Call Girls Saket 9711199171 ☎✔👌✔ Full night Service for more than 1 person
Delhi Call Girls Saket 9711199171 ☎✔👌✔ Full night Service for more than 1 personshivangimorya083
 
Russian Call Girls Delhi Indirapuram {9711199171} Aarvi Gupta ✌️Independent ...
Russian  Call Girls Delhi Indirapuram {9711199171} Aarvi Gupta ✌️Independent ...Russian  Call Girls Delhi Indirapuram {9711199171} Aarvi Gupta ✌️Independent ...
Russian Call Girls Delhi Indirapuram {9711199171} Aarvi Gupta ✌️Independent ...shivangimorya083
 
Delhi Call Girls Vikaspuri 9711199171 ☎✔👌✔ Whatsapp Hard And Sexy Vip Call
Delhi Call Girls Vikaspuri 9711199171 ☎✔👌✔ Whatsapp Hard And Sexy Vip CallDelhi Call Girls Vikaspuri 9711199171 ☎✔👌✔ Whatsapp Hard And Sexy Vip Call
Delhi Call Girls Vikaspuri 9711199171 ☎✔👌✔ Whatsapp Hard And Sexy Vip Callshivangimorya083
 
GREEN VEHICLES the kids picture show 2024
GREEN VEHICLES the kids picture show 2024GREEN VEHICLES the kids picture show 2024
GREEN VEHICLES the kids picture show 2024AHOhOops1
 
Hot And Sexy 🥵 Call Girls Delhi Daryaganj {9711199171} Ira Malik High class G...
Hot And Sexy 🥵 Call Girls Delhi Daryaganj {9711199171} Ira Malik High class G...Hot And Sexy 🥵 Call Girls Delhi Daryaganj {9711199171} Ira Malik High class G...
Hot And Sexy 🥵 Call Girls Delhi Daryaganj {9711199171} Ira Malik High class G...shivangimorya083
 

Recently uploaded (20)

Hotel Escorts Sushant Golf City - 9548273370 Call Girls Service in Lucknow, c...
Hotel Escorts Sushant Golf City - 9548273370 Call Girls Service in Lucknow, c...Hotel Escorts Sushant Golf City - 9548273370 Call Girls Service in Lucknow, c...
Hotel Escorts Sushant Golf City - 9548273370 Call Girls Service in Lucknow, c...
 
Vip Hot🥵 Call Girls Delhi Delhi {9711199012} Avni Thakur 🧡😘 High Profile Girls
Vip Hot🥵 Call Girls Delhi Delhi {9711199012} Avni Thakur 🧡😘 High Profile GirlsVip Hot🥵 Call Girls Delhi Delhi {9711199012} Avni Thakur 🧡😘 High Profile Girls
Vip Hot🥵 Call Girls Delhi Delhi {9711199012} Avni Thakur 🧡😘 High Profile Girls
 
The 10th anniversary, Hyundai World Rally Team's amazing journey
The 10th anniversary, Hyundai World Rally Team's amazing journeyThe 10th anniversary, Hyundai World Rally Team's amazing journey
The 10th anniversary, Hyundai World Rally Team's amazing journey
 
83778-77756 ( HER.SELF ) Brings Call Girls In Laxmi Nagar
83778-77756 ( HER.SELF ) Brings Call Girls In Laxmi Nagar83778-77756 ( HER.SELF ) Brings Call Girls In Laxmi Nagar
83778-77756 ( HER.SELF ) Brings Call Girls In Laxmi Nagar
 
Call Girls In Kirti Nagar 7042364481 Escort Service 24x7 Delhi
Call Girls In Kirti Nagar 7042364481 Escort Service 24x7 DelhiCall Girls In Kirti Nagar 7042364481 Escort Service 24x7 Delhi
Call Girls In Kirti Nagar 7042364481 Escort Service 24x7 Delhi
 
加拿大温尼伯大学毕业证(UBC毕业证书)成绩单原版一比一
加拿大温尼伯大学毕业证(UBC毕业证书)成绩单原版一比一加拿大温尼伯大学毕业证(UBC毕业证书)成绩单原版一比一
加拿大温尼伯大学毕业证(UBC毕业证书)成绩单原版一比一
 
BLUE VEHICLES the kids picture show 2024
BLUE VEHICLES the kids picture show 2024BLUE VEHICLES the kids picture show 2024
BLUE VEHICLES the kids picture show 2024
 
Call me @ 9892124323 Call Girl in Andheri East With Free Home Delivery
Call me @ 9892124323 Call Girl in Andheri East With Free Home DeliveryCall me @ 9892124323 Call Girl in Andheri East With Free Home Delivery
Call me @ 9892124323 Call Girl in Andheri East With Free Home Delivery
 
FULL ENJOY - 9953040155 Call Girls in Sector 61 | Noida
FULL ENJOY - 9953040155 Call Girls in Sector 61 | NoidaFULL ENJOY - 9953040155 Call Girls in Sector 61 | Noida
FULL ENJOY - 9953040155 Call Girls in Sector 61 | Noida
 
Delhi Call Girls Saket 9711199171 ☎✔👌✔ Whatsapp Hard And Sexy Vip Call
Delhi Call Girls Saket 9711199171 ☎✔👌✔ Whatsapp Hard And Sexy Vip CallDelhi Call Girls Saket 9711199171 ☎✔👌✔ Whatsapp Hard And Sexy Vip Call
Delhi Call Girls Saket 9711199171 ☎✔👌✔ Whatsapp Hard And Sexy Vip Call
 
꧁ ୨ Call Girls In Radisson Blu Plaza Delhi Airport, New Delhi ❀7042364481❀ Es...
꧁ ୨ Call Girls In Radisson Blu Plaza Delhi Airport, New Delhi ❀7042364481❀ Es...꧁ ୨ Call Girls In Radisson Blu Plaza Delhi Airport, New Delhi ❀7042364481❀ Es...
꧁ ୨ Call Girls In Radisson Blu Plaza Delhi Airport, New Delhi ❀7042364481❀ Es...
 
How To Fix Mercedes Benz Anti-Theft Protection Activation Issue
How To Fix Mercedes Benz Anti-Theft Protection Activation IssueHow To Fix Mercedes Benz Anti-Theft Protection Activation Issue
How To Fix Mercedes Benz Anti-Theft Protection Activation Issue
 
VIP Russian Call Girls in Jamshedpur Deepika 8250192130 Independent Escort Se...
VIP Russian Call Girls in Jamshedpur Deepika 8250192130 Independent Escort Se...VIP Russian Call Girls in Jamshedpur Deepika 8250192130 Independent Escort Se...
VIP Russian Call Girls in Jamshedpur Deepika 8250192130 Independent Escort Se...
 
Introduction of Basic of Paint Technology
Introduction of Basic of Paint TechnologyIntroduction of Basic of Paint Technology
Introduction of Basic of Paint Technology
 
ENJOY Call Girls In Okhla Vihar Delhi Call 9654467111
ENJOY Call Girls In Okhla Vihar Delhi Call 9654467111ENJOY Call Girls In Okhla Vihar Delhi Call 9654467111
ENJOY Call Girls In Okhla Vihar Delhi Call 9654467111
 
Delhi Call Girls Saket 9711199171 ☎✔👌✔ Full night Service for more than 1 person
Delhi Call Girls Saket 9711199171 ☎✔👌✔ Full night Service for more than 1 personDelhi Call Girls Saket 9711199171 ☎✔👌✔ Full night Service for more than 1 person
Delhi Call Girls Saket 9711199171 ☎✔👌✔ Full night Service for more than 1 person
 
Russian Call Girls Delhi Indirapuram {9711199171} Aarvi Gupta ✌️Independent ...
Russian  Call Girls Delhi Indirapuram {9711199171} Aarvi Gupta ✌️Independent ...Russian  Call Girls Delhi Indirapuram {9711199171} Aarvi Gupta ✌️Independent ...
Russian Call Girls Delhi Indirapuram {9711199171} Aarvi Gupta ✌️Independent ...
 
Delhi Call Girls Vikaspuri 9711199171 ☎✔👌✔ Whatsapp Hard And Sexy Vip Call
Delhi Call Girls Vikaspuri 9711199171 ☎✔👌✔ Whatsapp Hard And Sexy Vip CallDelhi Call Girls Vikaspuri 9711199171 ☎✔👌✔ Whatsapp Hard And Sexy Vip Call
Delhi Call Girls Vikaspuri 9711199171 ☎✔👌✔ Whatsapp Hard And Sexy Vip Call
 
GREEN VEHICLES the kids picture show 2024
GREEN VEHICLES the kids picture show 2024GREEN VEHICLES the kids picture show 2024
GREEN VEHICLES the kids picture show 2024
 
Hot And Sexy 🥵 Call Girls Delhi Daryaganj {9711199171} Ira Malik High class G...
Hot And Sexy 🥵 Call Girls Delhi Daryaganj {9711199171} Ira Malik High class G...Hot And Sexy 🥵 Call Girls Delhi Daryaganj {9711199171} Ira Malik High class G...
Hot And Sexy 🥵 Call Girls Delhi Daryaganj {9711199171} Ira Malik High class G...
 

Clark tmx12 25 forklift service repair manual

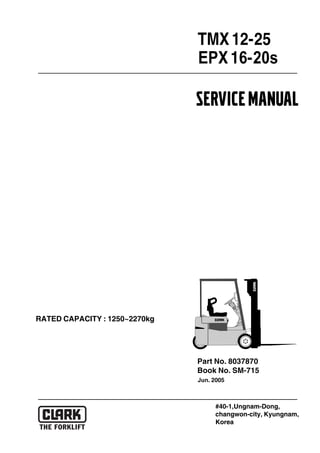
  • 1. EPX16-20s Part No. 8037870 Book No. SM-715 Jun. 2005 RATED CAPACITY : 1250~2270kg SERVICEMANUAL #40-1,Ungnam-Dong, changwon-city, Kyungnam, Korea TMX12-25
  • 2. Truck Models Covered by this Manual This manual consists of “base” module that pertains to all TMX12-25, ECX16-18 models and other mod- ules that pertain only to specific models. Manuals shipped with the truck contain the base module and the modules specific to the purchased truck. You may, however, purchase specific modules and expand your manual to fully cover multiple models. To do so, order the desired modules as you would any other Clark part. Arrangement and Use of this Manual Clark arranges parts and service procedures by stan- dardized Groups. In this manual, Groups are similar to “chapters”. Groups are listed in the indexes on the next page. Each Group begins with a table of contents that shows the Sections contained within the Group. Lengthy Sections also begin with a table of contents. Each Group and Section has an identifying name and number, or “ID”. Each page also has a unique ID. The page ID con- sists of three numbers separated by hyphens. The three numbers represent the Group number, the Sec- tion number, and the page number. For example, “00-1-2” on the lower corner of the page indicates Group 00, Section 1, page 2. The Group number sometimes has a letter or letters added to it in parentheses if one or more variations of the Group exist. For example, if the truck has a stan- dard transaxle, Group 06 is expressed as “06(S)”; if the truck has a hydrostatic transmission, Group 06 is expressed as “06(H)”. You can quickly locate a specific point in the manual by using the headers and footers that appear on every Section page. The following illustration points out these areas. This manual is intended for the use of trained service personnel. Please read Group SA, “Safe Mainte- nance”, and the Operator’s Manual before working on or operating the truck.
  • 3. Group SA, Safe Maintenance SM 715, Dec ’04 Safety • SA-1-1 Safety Signs and Messages Safety signs and messages in this manual and on the lift truck provide instructions and identify specific areas where potential hazards exist and special precautions should be taken. Be sure you know and understand the meaning of these instructions, signs, and messages. Dam- age to the truck, death, or serious injury to you or other persons may result if these messages are not followed. NOTE This message is used when special informa- tion, instructions or identification is required relating to procedures, equipment, tools, pressures, capacities, and other special data. IMPORTANT This message is used when special precau- tions should be taken to ensure a correct action or to avoid damage to, or malfunction of, the truck or a component. CAUTION ! This message is used as a reminder of safety hazards that can result in personal injury if proper precautions are not taken. WARNING ! This message is used when a hazard exists that can result in injury or death if proper precautions are not taken. DANGER ! This message is used when an extreme haz- ard exists that can result in injury or death or serious injury if proper precautions are not taken. The above terms have been adopted by Clark Material Handling Company. The same terms may be used in dif- ferent context in service literature supplied directly or indirectly by vendors of truck components.. Safe Maintenance Practices The following instructions have been prepared from cur- rent industry and government safety standards applicable to industrial truck operation and maintenance. These rec- ommended procedures specify conditions, methods, and accepted practices that aid in the safe maintenance of industrial trucks. They are listed here for the reference and safety of all workers during maintenance operations. Carefully read and understand these instructions and the specific maintenance procedures before attempting to do any repair work. When in doubt of any maintenance procedure, please con- tact your local Clark dealer. 1. Powered industrial trucks can become hazardous if maintenance is neglected. Therefore, suitable mainte- nance facilities, trained personnel, and procedures must be provided. 2. Maintenance and inspection of all powered industrial trucks shall be done in conformance with the manu- facturer’s recommendations. 3. A scheduled planned maintenance, lubrication, and inspection program shall be followed. 4. Only trained and authorized personnel shall be per- mitted to maintain, repair, adjust, and inspect indus- trial trucks. Work should be performed in accordance with the manufacturer’s specifications. 5. Properly ventilate work area, vent exhaust fumes, and keep shop clean and floor dry. 6. Avoid fire hazards and have fire protection equipment present in the work area. Do not use an open flame to check for level or leakage of fuel, electrolyte, oil, or coolant. Do not use open pans of fuel or flammable cleaning fluids for cleaning parts. 7. Before starting work on truck: a. Raise drive wheels off of floor and use blocks or other positive truck positioning devices. b. Disconnect battery before working on the electri- cal system. 8. Before working on engine fuel system of gasoline- or diesel-powered trucks, be sure the fuel shut-off valve is closed. Section 1. Safety
  • 4. Group SA, Safe Maintenance SA-1-2 • Safety SM 715, Dec ’04 9. Operation of the truck to check performance must be conducted in an authorized, safe, clear area. 10. Before starting to drive truck: a. Be in operating position with seat belt fastened. b. Be sure parking brake is engaged. c. Put direction control in neutral. d. Start engine. e. Check functioning of direction and speed controls, steering, brakes, warning devices, and any load handling attachments. 11. Before leaving truck a. Stop truck. b. Put directional control in neutral. c. Apply the parking brake. d. Stop the engine by turning off the key switch. e. Put upright in vertical position and fully lower the forks or attachment. f. Put blocks at the wheels if truck is on an incline. 12. Brakes, steering mechanisms, control mechanisms, warning devices, lights, governors, guards, safety devices, and frame members must be carefully and regularly inspected and maintained in a safe operat- ing condition. 13. Special trucks or devices designed and approved for hazardous area operation must receive special atten- tion to ensure that maintenance preserves the origi- nal, approved, safe-operating features. 14. Fuel systems must be checked for leaks and condi- tion of parts. Extra special consideration must be given in the case of a leak in the fuel system. Action must be taken to prevent the use of the truck until the leak has been corrected. 15. The truck manufacturer’s capacity, operation, and maintenance instruction plates, tags, or decals must be maintained in legible condition. 16. Batteries, motors, controllers, limit switches, protec- tive devices, electrical conductors, and connections must be inspected and maintained in conformance with good practice. Special attention must be paid to the condition of electrical insulation. 17. To avoid injury to personnel or damage to the equip- ment, consult the manufacturer’s procedures in replacing contacts on any battery connection. 18. Industrial trucks must be kept in a clean condition to minimize fire hazards and help in the detection of loose or defective parts. 19. Modifications and additions that affect capacity and safe truck operation must not be done without the manufacturer’s prior written approval. Capacity, opera- tion and maintenance instruction plates, tags, or decals must be changed accordingly. This is an OSHA requirement. 20. Care must be taken to assure that all replacement parts, including tires, are interchangeable with the original parts and of a quality at least equal to that provided in the original equipment. Parts, including tires, are to be installed per the manufacturer’s proce- dures. Always use genuine CLARK or CLARK- approved parts. 21. Use special care when removing heavy components from the truck, such as counterweight, seat deck, upright, etc. Be sure that lifting and handling equip- ment is of the correct capacity and in good condition. Also, this removal may upset the stability of the truck. The frame must always be safely blocked for major component removal. NOTE You should also be familiar with additional operating and maintenance safety instruc- tions contained in the following publications: ASME B56.1 - 1988: Operator Control-Industrial Tow Tractors (Safety Standard For Powered Industrial Trucks). Published by: American Society of Mechanical Engineers, Three Park Avenue, New York, NY10016. NFPA 505-1982: Fire Safety Standard for Powered Indus- trial Trucks: Type Designations, Areas of Use, Mainte- nance and Operation. Available from: National Fire Protection Assoc., Inc., Batterymarch Park, Quincy, MA 02269. General Industrial Standards, OSHA 2206: OSHA Safety and Health Standards (29 CFR 1910), Subpart N-Materi- als Handling and Storage, Section 1910.178 Powered Industrial Trucks. For sale by: Superintendent of Docu- ments, U.S. Government Printing Office, Washington, DC 20402.
  • 5. Group SA, Safe Maintenance SM 715, Dec ’04 Lifting, Jacking, and Blocking • SA-2-1 Raising Drive Wheels................................................................. 2 Chaining the Upright in Raised Position.................................. 2 Raising Rear of Truck................................................................. 3 Raising Entire Truck................................................................... 4 Shipping Tie-Down Instructions ............................................... 4 WARNING ! Lifting or jacking any large piece of equipment such as a fork truck presents obvious hazards. It must be done with great care and forethought. Consult the truck weight information in Group 40, Specifications, to ensure that your lifting equipment is of adequate capacity. Section 2 Lifting, Jacking, and Blocking
  • 6. Group SA, Safe Maintenance SA-2-2 • Lifting, Jacking, and Blocking SM 715, Dec ’04 CAUTION ! To perform these service procedures, first: . Park truck on a level surface. . Put the upright in a vertical position and lower the carriage fully down. . Return control handle to neutral and turn key switch OFF. WARNING ! Defective equipment can cause accidents. All tools and lifting equipment must be in good condition, meet the load capacity require- ments and have OSHA labels when required. Tools with defects can fail, causing severe injury or death. Raising Drive Wheels This procedure uses the upright to lift the drive wheels off the floor. 1. Park the truck safely. 2. Turn key switch ON. Tilt the upright fully back. 3. Put a solid 100 x 100 mm (4 x 4 inch) hardwood block under the front section of each upright rail. Put a 3.6 mm (0.125.0.250 inch) steel plate on top of each block. 4. Tilt the upright fully forward. This will raise the drive wheels off the floor. 5. Block the truck under the frame behind the drive wheels with solid blocking. 6. Turn key switch OFF. 7. Check for safe clearance between drive wheels, block and floor. 8. Check the stability of the truck. Be sure that the blocks are located securely under the frame before operating the drive motor or working on truck. 9. Lower the drive wheels to the floor by reversing this procedure. . Turn key switch ON. . Tilt upright fully back. . Turn key switch OFF. 10. Remove the blocks from under the frame and upright rails. Chaining the Upright in Raised Posi- tion This procedure provides safe clearance for access from the front of truck to components on or near the drive axle. 1. Park truck safely. 2. Put blocks at front of and rear of drive wheels. 3. Raise upright carriage. 4. Chain the center inner rail tie bar to the top outer rail tie bar as shown. Triple Stage Uprights: Chain the center intermediate rail tie bar and the lower inner rail tie bar to the top outer rail tie bar. 5. Reverse the procedure to remove the chains. WARNING ! Keep hands, tools, etc. out of upright.
  • 7. Group SA, Safe Maintenance SM 715, Dec ’04 Lifting, Jacking, and Blocking • SA-2-3 Raising Rear of Truck The truck may be raised at the rear by jacking and block- ing under the frame just beyond the counterweight. Refer to truck data plate for truck weights. WARNING ! An incorrectly installed counterweight can move or fall unexpectedly. NEVER LIFT OR BLOCK A TRUCK USING THE COUN- TERWEIGHT. Failure to follow procedures outlined in this manual can result in injury or death. 1. Park truck safely. 2. Put blocks at front and rear of drive wheels. CAUTION ! If possible, remove the battery from truck to reduce weight for added safety and ease of jacking. 3. Put a floor jack under the frame just beyond the coun- terweight. WARNING ! Never lift the truck by the counterweight. NOTE If there is insufficient clearance under frame for your jack, the truck may first be driven onto shims, such as 25 x 150 x 300 mm (1 x 6 x 12 in) pieces of board, to increase the truck frame under-clearance. 4. Jack up one side of the truck about 50 mm (2 in) and put a block under the frame to hold that elevation. Then move the jack to the other side and jack and block it. Continue to alternate the procedure from side to side, increasing elevation not more than 50 mm (2 in) each time. Raise the truck no higher than necessary to perform the maintenance work. Make sure the left and right sides of the truck are finally blocked in a level working position. CAUTION ! Before performing any maintenance work, check the truck for stable condition on the blocking by determining that it will not rock on blocks. 5. When maintenance work is completed, lower the rear of truck to the floor by reversing the above procedure and lowering each side of the truck 50 mm (2 in) at a time: • Put jack under frame and raise truck. • Carefully remove blocks and lower truck. • Remove jack and blocks from drive wheels.
  • 8. Group SA, Safe Maintenance SA-2-4 • Lifting, Jacking, and Blocking SM 715, Dec ’04 Raising Entire Truck Refer to truck data plate for truck weights. 1. Park truck safely. Lower upright fully. If necessary, drive truck onto boards to increase under-clearance. WARNING ! SIDE-TO-SIDE TIPOVER. When jacking side of truck, be sure upright is lowered fully. Do not raise one side of the truck more than about 50 mm (2 in) higher than the other, to avoid tipping truck over laterally. END-TO-END TIPOVER. If the upright and drive axle are removed while the truck is blocked up, the truck will tip backward due to the heavy counterweight. Upright and counterweight must both be removed before attempting to raise the truck for drive axle removal. The back of the truck must be sup- ported by blocking under the steer axle to prevent movement. If the counterweight is removed while the truck is up on blocks, the weight of the upright and drive axle will cause the truck to fall forward. 2. Put the jack under side frame, near the center of the truck. IMPORTANT Be sure to put the jack squarely and fully under the main side structure of the frame. 3. Carefully raise the truck one side at a time, only as high as necessary to do the maintenance work, and not more than 150 mm (6 in) total. 4. Put blocks under the side frame, at each side of the jack. Spread the blocks close to the steer and drive wheels for maximum stability. 5. If using one jack, lower the truck onto the blocks and move the jack to the opposite side. Repeat the lifting procedure. 6. Put the same size blocks under each side of the truck so it will be leveled. CAUTION ! Before performing any maintenance work, check the truck for stable condition on the blocking. 7. When maintenance work is completed, lower the entire truck to the floor by reversing this procedure. Lower the truck one side at a time, while carefully removing the blocks. Be sure no tools or equipment are under the truck or wheels. NOTE Depending on jack height, shims under the tires may be needed for clearance to allow removal of jack. Shipping Tie-Down Instructions 1. Front of Truck a. With Upright and Carriage Installed • Lower the carriage fully. • Put a tie-down (e.g., chain) between the carriage fork bars. b. Without Upright and Carriage Installed • Put a chain across the truck floor plate. Protect truck from chain damage by using covered chain or protective material under the chain at contact points. 2. Rear of Truck • Attach the tie-down to the toe-pin in top of coun- terweight.
  • 9. Group SA, Safe Maintenance SM 715, Dec ’04 Towing • SA-3-1 If your truck is disabled but can be moved freely on its own wheels without further damage, use the following procedures to tow the truck safely to a repair area. WARNING ! It is important for your safety and to the care of your lift truck to use the proper equipment and carefully follow these recommendations for safe towing. Do not tow a lift truck if there is a problem with the brakes or tires, or if the steering cannot be operated. Do not tow the disabled truck up or down ramps or steep inclines. Do not attempt to tow the disabled truck if traction or weather conditions are poor. 1. Be sure to apply the parking brake or block the drive wheels on the disabled truck while working around it. 2. When possible, raise the carriage (forks) on the dis- abled truck 300 mm (12 in) from the floor or ground. Secure the carriage on the upright with a chain. 3. Use a truck for towing that is of equal or larger capac- ity than the disabled truck. Carry a partial load on the tow truck for improved traction. 4. Check that the counterweight bolts on both trucks are in place and properly torqued. These bolts are made of special, high-tensile steel and are not commer- cially available. When necessary, replace these bolts only with a genuine Clark replacement part. 5. Use an approved, solid metal tow bar with towing couplers that connect to the towing pins in the coun- terweights. NOTE DOT-approved towing equipment is available from your Clark dealer. 6. Release the parking brake on the towed vehicle. Place directional control lever in neutral. 7. Tow the disabled truck backwards. An operator must be on the disabled truck. CAUTION ! The power steering and braking will not operate on the disabled truck. The steering handwheel will be difficult to turn and the service brakes will require additional pedal force. 8. Tow the truck slowly. Careful towing is necessary to prevent injury to personnel or damage to the disabled truck. The truck should be towed at a speed of less than 8 kph (5 mph, or a moderate walking speed) with a driver in place and steering the disabled truck. IMPORTANT Do not lift the disabled truck or any wheels off the floor while the truck is being towed. 9. Park the disabled truck in authorized areas only. Fully lower the forks on the floor, leave the directional control in neutral, turn the key switch to OFF, and engage the parking brake. Remove the key and, when necessary, block the wheels to prevent the truck from rolling. WARNING ! Always engage the parking brake when park- ing a lift truck. The truck can roll and cause injury or death to personnel near it. Section 3 Towing
  • 10. Group 25/26, Steering SM 715, Jun ’05 ➀ Steering System Specifications and Description • 25-1-1 Specifications Steering System Type: Load sensing hydrostatic power steering with variable ratio.(TMX Truck) Steering System Type: Dynamic signal load sensing steering with variable ratio.(EPX Truck) Steering System Relief Pressure Setting: 8340-8830 kPa (1210-1280 psi). Steer Cylinder Type: Double acting, piston-type. Steer Axle: Single wheel (optional dual-wheel) mounted on trunnion at center rear of truck. Service Intervals Check the steering system relief pressure annually or after every 2000 hours of operation. Make a visual inspection of steering control unit hydraulic fittings periodically to ensure that the fittings are tight with no leakage. Fastener Torques Steering Handwheel Nut: 35-40 N.m (25.5-29.5 ft-lb) Steering Column Cover Hex Bolts: 2-3 N.m (18-27 in.lb; 1.5-2.25 ft-lb) Directional Control Base Lock Nut: 0.8-1 N.m (7-9 in.lb; 0.6-0.75 ft-lb) Directional Control Base Flange Capscrew: 3.5-4.0 N.m (2.5-2.9 ft-lb) Ignition Switch Ring Nut: 10-14 N.m (7.3-10.3 ft-lb) Tilt Lock Assembly Base-to-Cowl Bolts: 20-25 N.m (14.8-18.5 ft-lb) Orbitrol Bracket Bolts: 34-38 N.m (25-28 ft-lb) Lower Column Assembly Base-to-Steering Gear Bolts: 34-38 N.m (25-28 ft-lb) Universal Joint Pinch Bolt: 25-30 N.m (18.5-22 ft-lb) Wiring Harness Bracket Bolts: 11-13 N.m (8-9.5 ft-lb) Description All truck models have a hydrostatic power steering sys- tem, which is supplied with oil pressure from the main hydraulic system pump. The steering handwheel operates the power steering gear (steering control valve) shown on page 2, which directs oil flow to the steering cylinder on the steer axle. The steering cylinder operates the steering linkage and steer wheel described on page 3. A steering system pressure relief valve, contained in the steer gear assembly, prevents over-pressurization of the steering system. The pressure relief setting can be tested using the gaugeinserted into the pressure line into the steering gear. The steering gear shaft is connected to the handwheel by means of a jointed shaft. When the steering handwheel turns, it causes the steering gear’s spool valve to shift from its closed neutral position to a “turn” position. This shift- ing of the spool directs flow to one end or other of the steering cylinder, depending on the direction of the turn. The amount of flow, and the sharpness of the turn, depend on how far the handwheel is rotated. The more rapidly the handwheel turns, the more quickly the flow, and the turn, occur. The low pressure oil from the opposite side of the steering cylinder is returned through the opposite port in the steer- ing gear. As the steering handwheel stops turning, centering springs in the valve automatically center the spool, stopping the flow of oil to the cylinder. Stops in the steer cylinder limit the how far the steer wheels can be turned. It takes 5 turns of the hand wheel to turn from stop to stop. In the event of a pump failure, the steering gear acts as a limited emergency steering pump powered by manual rotation of the handwheel. An internal check valve auto- matically closes to divert the manually-generated oil flow to the proper port of the steer cylinder. The handwheel turning effort is considerably higher, however, than with power steering. Section 1 Steering System Specifications and Description
  • 11. Group 25/26, Steering 25-1-2 • Steering System Specifications and Description SM 715, Dec ’04 The column tilt-lock mechanism allows the operator to adjust the steering column. The column tilt lever knob releases the adjustment setting and the column returns to the up position by the use of springs. The tilt lock mecha- nism, the directional control lever, and the ignition switch are protected by the steering column cover. The column cover can be removed for service to steering column components. The entire column can be removed for service or replacement. The steering gear, attached to the base of the column, can be removed without disassem- bling the other parts of the steering column. Steer Column and Steer Valve Horn Button Column Directional Control Lever Assembly Tilt Lock Horn Contact Ring Ignition Switch Wiring Harness Directional Control Switch Wiring Harness Tilt Lock Assembly Boot Steer Valve (hydraulic lines on page 4) Key Switch Hand Wheel
  • 12. Group 25/26, Steering SM 715, Jun ’05 Steering System Specifications and Description • 25-1-3 (TMX Truck) The steer cylinder rod operates a drag link which pivots the steer trunnion and steer wheel mounted to it. A sensor mounted above the steer trunnion shaft, signals the position of the wheel to the electronic control, which then creates a speed differential between the two drive motors to facilitate cornering. Steer Linkage(TMX Truck) Steer Trunnion Bearings Steer Trunnion Mounting Plate Steer Drag Link Steer Trunnion Steer Wheel and Bearings Steer Cylinder (hydraulic lines on page 4) Steer Angle Sensor Assembly
  • 13. Group 25/26, Steering 25-1-4 • Steering System Specifications and Description SM 715, Jun ’05 Steer Axle assembly(EPX Truck) Silent block Steer Axle Assembly
  • 14. Group 25/26, Steering SM 715, Jun ’05 ➀ Steering System Specifications and Description • 25-1-5 Steer Angle Sensor Removal and Replacement Removal of entire assembly. Replacement is reverse order: A. Potentiometer wires. B. Fastener and washer C. Bracket/Assembly NOTE Potentiometer shaft holder (G) and fastener may remain on steer axle. NOTE Potentiome- ter (E) wire leads should point toward front of truck,. Removal and replacement (reverse order) of potentiome- ter only. Replacement is reverse order: A. Potentiometer wires. D. Cable clamp F. Locknut E. Potentiometer (EPX Truck) TMX Truck Torque to 40 - 45 N-M (30 - 33 lbs-ft) Torque to 20 - 30 N-M (15-22 lbs-f t) H : Steering sensor I : Fastener J : Steer Magnet
  • 15. Group 25/26, Steering 25-1-6 • Steering System Specifications and Description SM 715, Jun ’05 ➀ Hydraulic Connections in Steering System(TMX) Hydraulic Connections in Steering System(EPX)
  • 16. Group 25/26, Steering SM 715, Dec ’04 Steering System Troubleshooting • 25-2-1 No steering • Hydraulic fluid level very low. • Air in hydraulic oil. • Steering column sections not connected properly. • Hose broken. • Hydraulic pump contaminated or defective. • Priority valve spool stuck.(EPX) Hard steering • Hydraulic fluid level low. • Air in hydraulic oil. • Steering gear contaminated or defective. • Relief valve setting too low; adjust or replace. • System leaking. • Incorrect tire pressure. • Axle load too heavy. • U-joint misalignment. • Lack of lubrication. • Defective steering gear. • Spring in priority valve broken.(EPX) High number of handwheel turns • Steering cylinder seal leakage. • Worn steering gear. Steering handwheel spins freely • Air in system (cavitation). • Low oil supply. • Steering column detached from steering gear. • Defective steering gear. Jerky steering • Steering gear malfunction because of worn parts or contamination. Steering gear may require over- haul. Truck turns in wrong direction • Hydraulic lines not installed correctly. Handwheel kickback • Check valve faulty (or not in system). Slow steering response • Oil viscosity too high. • Contaminated or defective steering gear. Chatter conditions • Loose mountings or linkage. Make certain all mounting fasteners and other linkage is tight. • Pressure relief valve set too low and is out of adjustment; adjust or replace the relief valve. • nsufficient pump flow. Check pump for leaks and see Group 29, Section 3. Unsatisfactory steering in either direction • Air in system due to excessive wear in steering cyl- inder. Check for air in system. Excessive noise or foamy condition of hydraulic fluid indicates aera- tion. Check that air is not entering the system through poor threads, cracked, split, or worn hoses, bad pump seals, bad O-rings, bad gaskets, or loose connections on intake side of pump. Worn cylin- ders result in leakage past the piston. Overhaul (see Group 25, Section 7) or replace the steer cylinder. • Incorrect system pressure due to worn pump. Replace the relief valve or repair or replace the pump (see Group 29). Section 2 Steering System Troubleshooting
  • 17. Group 25/26, Steering 25-2-2 • Steering System Troubleshooting SM 715, Dec ’04 Noise during turns • Worn bearing(s) in steering arm; replace bearings. • Worn pin in steering knuckle; replace pin. • Worn bearings in steering knuckle; replace bear- ings. • Steering knuckle is loose; tighten castle nut. Constant noise from steering axle • Loose or worn hub bearing cones. Adjust or replace hub bearing cones. Replace bearing cones and bearing cups as a set. Fluctuating pressure • Faulty operation of relief valve. Fluctuating pres- sure or loss of pressure in the system is usually caused by scales, chips, sludge, or filings that have lodged between the relief valve and seat. A dam- aged spring or worn valve may also be the cause of the trouble. Flush and refill the system and replace the hydraulic return line filter element. If condition still exists, replace the relief valve. Low pressure at the pump • Refer to the pump troubleshooting and overhaul procedures in Group 29. Low pressure at the steering gear • Refer to Section 5, “Steering Gear Overhaul.”Low pressure at the steer cylinder • Seals worn out at piston rod end of steer cylinder; replace seals.(TMX) Steer cylinder rod binding or sticking • Binding of linkage. With hydraulic flow shut off from the cylinder and the rod end uncoupled, the rod should slide freely in or out by hand. If the pis- ton is binding, overhaul or replace the cylinder.
  • 18. Thank you very much for your reading. Please Click Here. Then Get COMPLETE MANUAL. NO WAITING NOTE: If there is no response to click on the link above, please download the PDF document first and then click on it.
  • 19. Group 25, Steering SM 715, Jun ’05 ➀ Steering Column and Component Removal and Replacement • 25-3-1 Steering Column and Component Removal ................................................... 2 Key Switch Removal ...........................................................................................2 Hand Wheel, Horn Contact Ring, and Directional Control Assembly Removal .2 Column Tilt Lock Assembly Removal ................................................................4 Steering Gear and Lower Steering Column Removal. .........................................4 Steering Column and Component Replacement ............................................ 6 Steering Gear and Lower Steering Column Replacement ...................................6 Column Tilt Lock Assembly Replacement. .........................................................7 Directional Control Assembly Reassembly..........................................................7 Directional Control Assembly and Key Switch Replacement .............................8 Steering Hand Wheel Replacement......................................................................9 IMPORTANT Before removing any component for overhaul, make sure the correct repair parts, seals, and gasket sets are available. Typical Steering Column Assembly Wire Harness Key Switch &Turn Signal SW Wire Harness Directional Control SW Direction Control Assembly Tilt Lock Assembly Tilt Lock Assembly Boot Direction Control & Turn Signal Assy Turn Signal Assy(EPG ONLY) Key Switch Horn contact Ring Column Lower Cover Lock Nut Section 3 Steering Column and Component Removal and Replacement
  • 20. Group 25, Steering 25-3-2 • Steering Column and Component Removal and Replacement SM 715, Jun ’05 CAUTION ! SAFE PARKING. Before working on truck: 1. Park truck on a hard, level, and solid surface, such as a concrete floor with no gaps or breaks. 2. Put upright in vertical position and fully lower the forks or attachment. 3. Put all controls in neutral. Turn key switch OFF and remove key. 4. Apply the parking brake and block the wheels. Steering Column and Component Removal Use the following steps to disassemble the steering col- umn for service to the: • Key Switch • Horn Button • Directional Control Lever Assembly • Column Tilt Lock Assembly • Upper and Lower Steer Column • Steering Gear. Determine which component requires service and check the procedure for removing that component. Read the pro- cedure completely before beginning disassembly. Key Switch Removal 1. Disconnect the battery. 2. Remove the four socket head bolts holding the two halves of the column cover together. The directional control assembly and the key switch are exposed. 3. Remove the lock ring nut securing the key switch to the lower cover. Label all wires and terminals for cor- rect reconnection when reassembling. Hand Wheel, Horn Contact Ring, and Directional Control Assembly Removal 1. Disconnect the battery. 2. Gently pry the horn button from the steering hand wheel hub using a small, flat-bladed screw driver. 3. Disconnect the horn wire from the steer column and unplug the horn contact wires from the terminal on the bottom of the horn button. 4. Remove the nut holding the hand wheel to the steer- ing column. 5. Use a wheel puller to remove the hand wheel from the steering column. Hand wheel has two M8X1.25 threaded inserts in the hub for this purpose.
  • 21. Group 25, Steering SM 715, Dec ’04 Steering Column and Component Removal and Replacement • 25-3-3 6. Unplug the horn contact ring wire from the terminal on the bottom of the handwheel. 7. Using a 2.5 mm allen wrench, remove the four socket head bolts holding the two halves of the column cover together. Remove the top cover. Gently pull the bottom cover away. NOTE Use care when removing the bottom cover as the ignition switch wiring is attached. 8. Remove the horn contact ring. Unplug the wire from the terminal on the bottom of the ring. 9. Lift the directional control lever and boot off the diecast base. 10. Unplug wires from directional switches. Label all wires and terminals for correct connection when reassembling. Remove the direction control switches by removing the mounting screws on the base. Directional Control Lever Detent Spring Removal 11. If not already disassembled, remove the four socket bolts holding the two sides of the column cover together. Remove the top cover. 12. Pry the two retainer clips from the posts on the direc- tional control base securing the detent spring. Lift spring off posts.