SlideShare a Scribd company logo
1 of 21
Download to read offline
Copyrighted Material
Intended for CLARK dealers only
Do not sell or distribute
SM=606
GPX 35/40/503
Copyrighted Material
Intended for CLARK dealers only
Do not sell or distribute
The GPX 35/50E service manual includes applicable sections from SM593 (footers on these
pages remain unchanged). The SM606 also contains new overhaul information for the GM
Vortec V-6 engine (See Group 00 Section 2) and new truck specifications (See Group 40
Section 2).
Service
Manual
SM606
GPX 35/40/50E
ClRM conpany
MaterhI l&uldllng
Copyrighted Material
Intended for CLARK dealers only
Do not sell or distribute
Pictorial Index
Group23 -
Group 25
Group 02
Group 00
Group 01
Group 26
r Group 32 N- Group 34
Group 38 1
Group 20
Group 22
Group 06
LGroup29
Group 30
Group 40
--f@
Group 14
SM 593, JAN ‘93
Copyrighted Material
Intended for CLARK dealers only
Do not sell or distribute
CONTENTS
Group
00
00
00
00
01
01
01
01
01
02
02
02
02
02
02
06
06
06
06
06
14
14
14
14
20
20
20
20
20
22
22
22
Contents of this Manual
Section
1
2
3
1
2
2
1
2
Description
INTRODUCTION
Safety
Planned Maintenance
ENGINES
Engine Removal
Diesel Workshop Manual
Gas/LPG Workshop Manual
COOLING SYSTEM
Troubleshooting
Cooling System Testing and Maintenance
Fan Belt Replacement
Radiator Removal
FUEL SYSTEM
Fuel Pump Pressure -Test
The lMPC0 Fuel System
Carburetor Overhaul
Velocity Governor Overhaul
Removal of IMPCO Vaporizing System
TRANSMISSION
Transmission Checks
Draining and Refill
Transmission Removal
Transmission Overhaul
ELECTRICAL SYSTEM
Wiring Color Code
Wiring Diagrams
Electrical Checks
DRIVE AXLE
Axle End Lubrication
Axle End Removal
Axle Ends Overhaul
Differential Overhaul
WHEELS AND TIRES
Lifting, Jacking, and Blocking
Wheels and Tires Mounting
(continued on next page)
SM 593,JAN ‘93 0 Clark Material Handling Company 1993 Contents-l
Copyrighted Material
Intended for CLARK dealers only
Do not sell or distribute
Group Section Description
23
23
23
23
23
23
23
23
25
25
25
25
26
26
26
26
26
26
26
29
29
29
30
30
30
30
30
32
32
32
32
34
34
34
34
34
34
34
34
38
38
40
40
40
40
40
4-o
1
2
3
1
2
1
2
3
1
BRAKING/INCHING SYSTEM
System Description/Troubleshooting
Brake and Inching System Bleeding
Brake and Inching Pedals Adjustment
Master Cylinder Overhaul
Power Booster Overhaul
Brake Caliper Overhaul
Parking Brake
STEERING COLUMN AND GEAR
Troubleshooting
Steering Column and Gear Removal
Char-Lynn Steering Control Unit (Steering gear)
STEER AXLE
Steer Axle Removal
Steer Axle Overhaul
Steering System Adjustment
Steer Cylinder Removal
Steer Axle Wheel Bearings
Steer Cylinder Overhaul
HYDRAULIC SUMP, FILTERS, AND PUMP
Hydraulic Sump and Filters
Hydraulic Pump Troubleshooting & Overhaul (Vane Type)
HYDRAULIC VALVE/LIFT CIRCUIT
Hydraulic System Pressure Check
Hydraulic Valve Overhaul
Hydraulic Valves
Hydraulic Schematic
TILT CYLINDERS
Tilt Cylinder Removal
Tilt Cylinder Overhaul
Tilt Lock Valve
UPRIGHTS
Troubleshooting and Visual Inspection
Operational Checks
Carriage Check and Adjsutment
Upright Check and Adjustment
Cylinder Repair
Lift Chain Maintenance
Upright Removal and Replacement
COUNTERWEIGHTS
Counterweight Removal and Installation
SPECIFICATIONS
Namplates/Decals
General Specifications
PM Inspection and Drivers Daily Inspection Forms
Recommended Lubricants & Lubricant Specifications
Lubrication Intervals
Contents-2 SM 593, JAN ‘93
Copyrighted Material
Intended for CLARK dealers only
Do not sell or distribute
INTRODUCTION
INTRODUCTION
Safety ................................................................................. Section 1
Planned Maintenance ........................................................ Section 2
SM 593, JAN ‘93 Introduction
Copyrighted Material
Intended for CLARK dealers only
Do not sell or distribute
Cl!ARK Introduction
Safety
Safety Signs and Messages ................................................................................... 2
User Safe Maintenance Practices ........................................................................ 2
SM593, Jan ‘93 Safety-l
Copyrighted Material
Intended for CLARK dealers only
Do not sell or distribute
Introduction Cl!YRK
Safety Signs and Messages
Safety signs and messages are placed in this manual
and also on the lift truck to provide instructions and
to identify specific areas where potential hazards
exist and special precautions should be taken. Be
sure you know and understand the meaning of these
instructions, signs, and messages. Damage to the
truck, death, or serious injury to you or other persons
may result if these messages are not followed.
NOTICE
This message is used when special in-
formation, instructions or identifica-
tion is required relating to procedures,
equipment, tools, pressures, capacities
and other special data.
IMPORTANT
This message is used when special pre-
cautions should he taken to ensure a
correct action or to avoid damage to
or malfunction of the truck or a com-
ponent.
A! CAUTION
This message is used as a reminder of
safety hazards which can result in per-
sonal injury if proper precautions are
not taken.
A WARNING
This message is used when a hazard
exists which can result in injury or
death if proper precautions are not
taken.
A DANGER
This message is used when an extreme
hazard exists which can result in in-
jury or death. or serious injury if
proper precautions are not taken.
NOTE: The above terms have been adopted by
Clark Material Handling Company. The same terms
may be used in different context in service literature
supplied directly or indirectly by vendors of truck
components.
User Safe Maintenance
Practices
The following instructions have been prepared from
current industry and government safety standards
applicable to industrial truck operation and mainte-
nance. These recommended procedures specify con-
ditions, methods, and accepted practices that aid in
the safe maintenance of industrial trucks. They are
listed here for the reference and safety of all workers
during maintenance operations. Carefully read and
understand these instructions and the specific main-
tenance procedures before attempting to do any re-
pair work.
When in doubt of any maintenance procedure, please
contact your local Clark dealer.
1.
2.
3.
Powered industrial trucks can become haz-
ardous if maintenance is neglected. There-
fore, suitable maintenance facilities, trained
personnel, and procedures must be provided.
Maintenance and inspection of all powered
industrial trucks shall be done in conform-
ance with the manufacturer’s recommenda-
tions.
A scheduled planned maintenance, lubrica-
tion, and inspection program shall be fol-
lowed.
Safety-2 SM 593, Jan ‘93
Copyrighted Material
Intended for CLARK dealers only
Do not sell or distribute
CMRK Introduction
4. Only trained and authorized personnel shall
be permitted to maintain, repair, adjust, and
inspect industrial trucks. Work should be
performed in accordance with the
manufacturer’s specifications.
5. Properly ventilate work area, vent exhaust
fumes, and keep shop clean and floor dry.
6. Avoid fire hazards and have fire protection
equipment present in the work area. Do not
use an open flame to check for level or leak-
age of fuel, electrolyte, or coolant. Do not use
open pans of fuel or flammable cleaning
fluids for cleaning parts.
7. Before starting work on truck:
a. Raise drive wheels off of floor or discon-
nect power source and use blocks or other
positive truck positioning devices.
b. Disconnect battery before working on the
electrical system.
8. Before working on engine fuel system of
gasoline- or diesel-powered trucks, be sure
the fuel shut-off valve is closed.
9. Operation of the truck to check performance
must be conducted in an authorized, safe,
clear area.
10. Before starting to drive truck:
a. Be in operating position.
b. Be sure parking brake is engaged.
c. Put direction control in neutral.
d. Start engine.
e. Check functioning of direction and speed
controls, steering, brakes, warning de-
vices, and any load handling attachments.
11. Before leaving ttruck
a. Stop truck.
b. Put directional control in neutral.
c. Apply the parking brake.
12.
13.
14.
15.
16.
17.
18.
19.
d. Stop the engine by turning off the ignition
circuit.
e. Put blocks at the wheels if truck is on an
incline.
Brakes, steering mechanisms, control mecha-
nisms, warning devices, lights, governors,
guards, safety devices, and frame members
must be carefully and regularly inspected and
maintained in a safe operating condition.
Special trucks or devices designed and ap-
proved for hazardous area operation must
receive special attention to ensure that main-
tenance preserves the original, approved, safe-
operating features.
Fuel systems must be checked for leaks and
condition of parts. Extra special consider-
ation must be given in the case of a leak in the
fuel system. Action must be taken to prevent
the use of the truck until the leak has been
corrected.
The truck manufacturer’s capacity, opera-
tion, andmaintenance instruction plates, tags,
or decals must be maintained in legible con-
dition.
Batteries, motors, controllers, limit switches,
protective devices, electrical conductors, and
connections must be inspected and main-
tained in conformance with good practice.
Special attention must be paid to the condi-
tion of electrical insulation.
To avoid injury to personnel or damage to the
equipment, consult the manufacturer’s pro-
cedures in replacing contacts on any battery
connection.
Industrial trucks must be kept in a clean
condition to minimize fire hazards and help in
the detection of loose or defective parts.
Modifications and additions that affect ca-
pacity and safe truck operation must not be
done without the manufacturer’s prior writ-
ten approval. Capacity, operation and main-
SM 593, Jan ‘93 Safety-3
Copyrighted Material
Intended for CLARK dealers only
Do not sell or distribute
Introduction Cl!!lRK
20.
21.
tenance instruction plates, tags, or decals must
be changed accordingly.
Care must be taken to assure that all replace-
ment parts, including tires, are interchange-
able with the original parts and of a quality at
least equal to that provided in the original
equipment. Parts, including tires, are to be
installed per the manufacturer’s procedures.
Always use genuine CLARK or CLARK-
approved parts.
Use special care when removing heavy com-
ponents from the truck, such as counterweight,
seat deck, upright, etc. Be sure that lifting and
handling equipment is of the correct capacity
and in good condition.
NOTICE
You should also be familiar with addi-
tional operating and maintenance
safety instructions contained in the fol-
lowing publications:
ANSI/ASME B56.1 - 1988 Operator Control-Indus-
trial Tow Tractors (Safety Standard For Powered
Industrial Trucks). Published by: Society of Me-
chanical Engineers, United Engineering Center, 345
E. 47th Street, New York, NY 10017.
NFPA 5051982: Fire Safety Standard for Powered
Industrial Trucks: Type Designations, Areas of Use,
Maintenance and Operation. Available from: Na-
tional Fire Protection Assoc., Inc., Batterymarch Park,
Quincy, MA 02269.
General Industrial Standards, OSHA 2206: OSHA
Safety and Health Standards (29 CFR 1910), Sub-
part N-Materials Handling and Storage, Section
1910.178 Powered Industrial Trucks. For sale by:
Superintendent of Documents, U.S. Government
Printing Offtce, Washington, DC 20402.
Safety-4 SM 593, Jan ‘93
Copyrighted Material
Intended for CLARK dealers only
Do not sell or distribute
Introduction
Section 2. Planned Maintenance
PM Report Form .................................................................................................. 2
Visual Inspection .................................................................................................. 2
Forks ................................................................................................................................. .3
Wheels and Tires .............................................................................................................. .4
Brake and Inching Pedal Freeplay .................................................................................... .4
Functional Tests ................................................................................................... 4
Key/Start Switch ................................................................................................................ 4
Battery Light ...................................................................................................................... 5
Fuel Light .......................................................................................................................... 5
Engine Oil Pressure Light ................................................................................................ .5
Coolant Temperature Light ............................................................................................... 5
Brake Malfunction Light ................................................................................................... 5
Air Filter Restriction Light ................................................................................................ 5
Transmission Temperature Light ..................................................................................... .5
Hydraulic Filter Restriction Light .................................................................................... -5
Parking Brake Light .......................................................................................................... 5
Hour Meter ........................................................................................................................ 6
Accelerator, Service Brake, Parking Brake, and Inching ..................................................
Lift Mechanisms and Controls ..........................................................................................
z
Auxiliary Controls ............................................................................................................. 7
Steering System ................................................................................................................. 7
Shift Control and Brakes ................................................................................................... 7
Under the Hood .................................................................................................... 8
Belts and Hoses ................................................................................................................ .8
Engine Air Cleaner ........................................................................................................... .8
Battery ............................................................................................................................... 8
Engine Cooling System .....................................................................................................
Engine Oil .......................................................................................................................... ;
Engine Oil and Filter Change ............................................................................................ 9
Hydraulic Sump Tank ...................................................................................................... 10
Hydraulic Fluid and Filter Change ..................................................................................
Sump Tank Breather ........................................................................................................
:i
Transmission Fluid Check ............................................................................................... 10
Truck Chassis Inspection and Lubrication ..................................................... 11
Air Cleaning ........................................................................................................ 11
Upright and Tilt Cylinder Lubrication ....................................... ..................... 11
Critical Fastener Torque Checks ...................................................................... 12
Lift Chain Maintenance ..................................................................................... 12
Lift Chain Adjustment Check.. ........................................................................................ 12
Lift Chain Inspection and Measurement ......................................................................... 13
Lift Chain Lubrication ..................................................................................................... 13
Lift Chain Inspection and Wear Criteria ......................................................................... 13
Lift Chain Replacement ................................................................................................... 13
SM 593, Jan ‘93 Planned Maintenance-l
Copyrighted Material
Intended for CLARK dealers only
Do not sell or distribute
Introduction El!YRK
PM Report Form
A planned maintenance program of regular, routine
inspections and lubrication is important for long life
and trouble-free operation of your lift truck. Make
and keep records of your inspections. Use these
records to help establish the correct PM intervals for
your application and to indicate maintenance re-
quired to prevent major problems from occurring
during operation.
As an aid in performing and documenting your PM
inspections, Clark has prepared a “Gas, LPG or
Diesel Planned Maintenance Report” form. Copies
of this form may be obtained from your authorized
Clark dealer. We recommend that you use this form
as a checklist and to make a record of your inspec-
tion and truck condition.
The periodic maintenance procedures outlined in
this manual are intended to be used with the PM
report form. They are arranged in groupings of main-
tenance work that are done in a logical and efficient
sequence.
A check mark or entry is made on the PM Report
Form when the PM is performed. Please note the
special coding system for indicating the importance
of needed repairs and/or adjustments.
When you have finished the PM inspections, be sure
to give a copy of the report to the designated author-
ity or the person responsible for lift truck mainte-
nance.
A
1. CAUTION
Do not make repairs or adjustments
unless authorized to do so.
Disconnect the battery ground cable (-) from the
engine or frame before working on electrical com-
ponents. Always wear safety glasses. Wear a safety
(hard) hat in industrial plants and in special areas
where protection is necessary or required. Remove
alljewelry (watch, rings, bracelets, etc.) before work-
ing on the truck.
Visual Inspection
First, perform a visual inspection of the lift truck and
its components. Walk around the truck and take note
of any obvious damage and maintenance problems.
Check for loose fasteners and fittings.
Check to be sure all capacity, safety, and warning
plates and decals are attached and legible.
NOTICE
Do not operate a lift truck with dam-
aged or missing decals and nameplates.
Replace them immediately. They con-
tain important information.
Inspect the truck before and after starting engine for
any signs of external leakage: fuel, engine oil or
coolant, transmission fluid, etc.
Check for hydraulic oil leaks and loose fittings. DO
NOT USE BARE HANDS TO CHECK. Oil may
be hot or under pressure.
A! CAUTION
Hydraulic Fluid Pressure. Do not use
your hands to check for hydraulic leak-
age. Fluid under pressure can pen-
etrate your skin and cause serious in-
jury.
Planned Maintenance-2 SM 593, Jan ‘93
Copyrighted Material
Intended for CLARK dealers only
Do not sell or distribute
CMRK Introduction
Be sure that the driver’s overhead guard and any
other safety devices are in place, undamaged
and attached securely.
Check the overhead guard for damage. Be sure
that it is properly positioned and all mounting
fasteners are in place and tight.
Inspect the welds on the carriage and upright for
cracks. Report any cracks noted immediately.
Be sure that the mounting fasteners are in place
and tight.
Inspect the upright assembly: rails, carriage
rollers, lift chains, lift and tilt cylinders. Look
for obvious wear and maintenance problems,
damaged or missing parts. Check for any loose
parts or fittings. Check for leaks, any damaged
or loose rollers and rail wear (metal flaking).
Carefully check the lift chains for wear, rust and
corrosion, cracked or broken links, stretching,
etc. Check that the lift and carriage chains are
correctly adjusted to have equal tension. Check
that the lift chain anchor fasteners and locking
means are in place and tight.
Be sure all safety guards and chain retainers are
in place and not damaged. Inspect the carriage
stops and cylinder retainer bolts. Check all
welded connections.
Inspect all lift line hydraulic connections for
leaks. Check the lift cylinder rods for wear
marks, grooves and scratches. Check the cylin-
der seals for leaks.
Forks
Inspect the load forks for cracks, breaks, bending
and wear. The fork top surface should be level and
even with each other. The height difference be-
tween both fork tips should be no more that 3% of
the fork length.
A WARNING
If the fork blade at the heel is worn
down by more than 10 percent, the
load capacity is reduced and the fork
must be replaced.
Inspect the forks for twists and bends. Put a 2” thick
metal block, at least 4” wide by 24” long on the
blade of the fork with the 4” surface against the
blade. Put a 24” carpenters square on the top of the
block and against the shank. Check the fork 20”
above the blade to make sure it is not bent more than
1 inch maximum.
If the fork blades are obviously bent or damaged,
they must be repaired or replaced before the truck is
put into operation.
Inspect the fork locking pins for damage. Rein-
sert them and note whether they fit properly.
SM 593, Jan ‘93 Planned Maintenance-3
Copyrighted Material
Intended for CLARK dealers only
Do not sell or distribute
Introduction CMRK
Wheels and Tires Brake and Inching Pedal Freeplay
Check the condition of the drive and steer wheels
and tires. Remove objects that are embedded in the
tread. Inspect the tires for excessive wear or breaks
or “chunking out”.
Press down on the brake pedal with your hand to
check for freeplay. The freeplay should be approxi-
mately 0.31 inch @mm). Adjust freeplay as de-
scribed in Group 23, if necessary.
Check inching pedal freeplay as with the brake pedal,
and adjust if necessary.
Check all wheel lug nuts or bolts to be sure none are
loose or missing. Have missing bolts or lug nuts
replaced and tightened to correct torque before
operating truck. (See “Torque Specifications” in
Group 40.)
A WARNING
Check tire pressure from a position facing
the tread of the tire, not the side. Use a long
handled gauge to keep your body away from
the side. If tires are low, do not add air.
Check with a mechanic. The tire may re-
quire removal and repair. Incorrect (low)
tire pressure can reduce stability of your lift
truck. See Group 40, Section 2, “Specifica-
tion,” for proper inflation pressure.
Functional Tests
Be sure that:
l Parking brake is applied.
l Directional control is in “N” (neutral).
Test the horn, lights and all other safety equipment
and accessories. Be sure they are properly mounted
and working correctly.
Press the horn button to check horn function. If the
horn or any other part does not operate, report the
failure and have it repaired before the truck is put in
operation.
Now prepare to startthe truck so that you can test
gauges, accelerator service and parking brakes, all
hydraulic controls, directional controls, and steering
system. All controls must operate freely and return
to neutral properly.
Key/Start Switch
A 3-position switch is standard equipment.
Check the operation of the neutral start switch by
placing direction control le-
.:.... “:L..:::.,::.. ver in forward or reverse and
‘p_‘y.
,.:.::;:;‘:ic:.,.::y
‘:$.,:;;;,
.:..:X.i:
@
turning key switch to START
,:::.
i ...__......
‘$i ‘!,
‘i,):‘I::
position. Starter must not en_
gage until direction control le-
ver is moved to NEUTRAL
position.
As you start the engine, check the instrument panel
lights. The oil pressure and battery lights should
come on when the key reaches the on position. The
other lights should come on as the engine is crank-
ing over.
To start engine, rotate the key clockwise. Release to
“run” position when engine starts. The “anti-
Planned Maintenance-4 SM 593, Jan ‘93
Copyrighted Material
Intended for CLARK dealers only
Do not sell or distribute
Cl!YRK Introduction
restart” feature requires that the key be returned to
the “off’ position before it can again be turned to
“start.” If engine does not start on the first attempt,
do not re-engage the starter until engine comes to a
complete stop (approximately 5 seconds). After the
engine starts, let it warm up until it runs evenly.
Familiarize yourself with the functions of the lights
and hour meter. Check them periodically as you
operate the truck.
Battery Light
When lit. indicates that batten,
is discharging.
Fuel Light
When lit, indicates that fuel tank
is low or empty.
Engine Oil Pressure Light
When lit, indicates inadequate
f3 engine oil pressure. Lights
when key/start switch is turned
to “run” and “start” positions.
It should go out shortly after
engine starts. If light does not go out or if it comes
on during truck operation, you should immediately
shut down the engine until the cause is located and
corrected.
Coolant Temperature Light
When lit, indicates engine cool-
ant temperature is too high. Shut
truck down until trouble can be
located and corrected.
Brake.Malfunction Light
When lit, indicates low pres-
sure in the brake system. Shut
the truck down until the trouble
can be located and corrected.
Air Filter Restriction Light
When lit, indicates that air filter
is blocked. Shut truck down
and replace filter element.
Transmission Temperature Light
When lit, indicates converter
oil temperature is too high. Shift
to a lower range. If light stays
on, shut truck down until
trouble can be located and cor-
rected.
Hydraulic Filter Restriction Light
When lit, indicates that hydrau-
lit filter is blocked. Shut truck
down and replace filter element.
Parking Brake Light
When lit, indicates that the
parking brake is applied.
SM 593, Jan ‘93 Planned Maintenance-5
Copyrighted Material
Intended for CLARK dealers only
Do not sell or distribute
Introduction ELSRK’
Hour Meter Lift Mechanisms and Controls
Check the hour meter for operation with the engine
running. Report any malfunction. 1.
2.
Check the function of the lift system and
controls with the hydraulic pump (engine)
running.
Write the hour meter reading
on the PM report form.
Accelerator, Service Brake, Parking
Brake, and Inching
1.
2.
3.
4.
Push the brake pedal down fully and hold.
The brakes should apply before the pedal
reaches the floorplate. If the pedal continues
to creep downwards, report the failure imme-
diately. DO NOT OPERATE THE TRUCK
UNTIL THE BRAKES ARE REPAIRED.
Make sure the truck accelerates smoothly.
Depress the inching pedal and depress the
accelerator to see if the transmission disen-
gages properly.
Check the function of the parking brake.
Apply and then put truck in gear and acceler-
ate to insure that brake holds. Park the truck
on a grade and apply the parking brake. The
parking brake should hold a lift truck with
rated load on a 15% grade.
A! CAUTION
Do not operate a lift truck if the ser-
vice or parking brakes are not operat-
ing properly.
3.
Pull back on the tilt control lever and hold
until the upright reaches the full back tilt
position. Push forward on the lever to return
the upright to the vertical position. Release
the lever.
A ! CAUTION
Be sure that there is adequate over-
head clearance before raising the up-
right.
Pull back on the lift control lever and raise the
fork carriage to full height. Watch the up-
right assembly as it rises. All movements of
the upright, fork carriage, and lift chains
must be even and smooth, without binding or
jerking. Watch for chain wobble or loose-
ness; the chains should have equal tension
and move smoothly without noticeable
wobble. Release the lever.
If the maximum fork height is not reached,
this indicates there is an inadequate (low) oil
level in the hydraulic sump tank or severe
binding within the upright.
4. Push forward on the lift control lever. Watch
the upright as it lowers. When the forks reach
the floor, release the lever.
Planned Maintenance-6 SM 593, Jan ‘93
Copyrighted Material
Intended for CLARK dealers only
Do not sell or distribute
Introduction
Auxiliary Controls
If your lift truck is equipped with an attachment, test
the control lever for correct function and briefly
operate the attachment.
Steering System
The steering system, steer axle and steering linkage
on your truck should be inspected periodically for
abnormal looseness and damage, leaking seals, etc.
Also, be alert for any
changes in steering action.
Hard steering, excessive
freeplay (looseness) or un-
usual sound when turning
or maneuvering indicates a
need for inspection or servicing.
Check the steering system by moving the steering
handwheel in a full right turn and then in a full left
turn. Return the handwheel (steer wheels) to the
straight-ahead position. The steering system com-
ponents should operate smoothly when the steering
wheel is turned.
Never operate a truck which has a steering sys-
tem fault.
A WARNING
Fasten your seat belt before driving
the truck.
Shift Control and Brakes
Check and make sure that the travel area is clear in
front of the truck.
1.
2.
Push firmly on the brake pedal. Release the
parking brake. Move the directional control
lever from “N” (neutral) to FORWARD travel
position.
Remove your right foot from the brake pedal
and put it on the accelerator pedal. Push down
until the truck moves slowly forward. Re-
move your foot from the accelerator pedal
and push down on the brake pedal to stop the
3.
truck. The brakes should apply smoothly and
equally.
Be sure the travel area is clear behind the
truck. Put the directional control lever in the
REVERSE travel position. Push down on
the accelerator pedal until the truck moves
slowly in the reverse direction. Remove your
foot from the accelerator pedal and push
down on the brake pedal to stop the truck.
The brakes should apply smoothly and
equally.
When you have completed the operational tests,
park and leave truck according to standard shut-
down procedures. Be sure to make a record of all
maintenance and operating problems you find.
SM 593, Jan ‘93 Planned Maintenance-7
Thank you very much for
your reading. Please Click
Here. Then Get COMPLETE
MANUAL. NO WAITING
NOTE:
If there is no response to
click on the link above,
please download the PDF
document first and then
click on it.
Copyrighted Material
Intended for CLARK dealers only
Do not sell or distribute
Introduction CLSRK
Under the Hood
Check fluid levels and other components within the
engine compartment. Unlatch and open the hood to
access the engine compartment.
/ ! CAUTION
To avoid the possibility of personal
injury, never work in engine com-
partment with engine running except
when absolutely necessary to check or
make adjustments. Take extreme care
to keep hands, tools and loose cloth-
ing, etc., away from fan and drive
belts. Also remove watches, bracelets
and rings.
Belts and Hoses
Inspect the engine coolant hoses and fan belt(s).
Look for leaking and obvious damage, worn (frayed)
condition, breaks, etc., which could cause failure
during operation.
Engine Air Cleaner
Check the engine air cleaner for damage and con-
tamination (excessive dirt buildup and clogging).
Check for correct mounting attachments of the air
cleaner. Be sure that the air cleaner hose is securely
connected (not loose or leaking). Fan or cone shaped
dust deposits on tube or hose surfaces indicate a
leak.
Change or service the air cleaner element every 50
to 250 operating hours, depending upon your appli-
cation. Air cleaner service intervals may also be
determined by the air restriction indicator.
Battery
Inspect the battery for any damage, cracks, leaking
condition, etc. If the terminals are corroded, clean
and protect them with CLARK Battery Saver (avail-
able from your Clark dealer). If your battery has
removable cell caps, check to be sure the cells are all
filled. If necessary, refill with distilled water.
Engine Cooling System
Check coolant level in the coolant recovery bottle on
a daily basis. The level should be between the mini-
mum and maximum marks on the bottle when the
engine is warm.
- Max
- Min
Check radiator coolant level (on a daily basis in
high-cycle applications):
1. Remove the radiator cap, only when the en-
gine is cold. First turn the cap slowly to
release pressure that may be in the radiator.
Then push the cap down fully and turn to
release and remove the cap.
A ! CAUTION
STEAM. Do not remove the radiator
cap when the radiator is hot. Steam
from the radiator will cause severe
burns.
Planned Maintenance-8 SM 593, Jan ‘93
Copyrighted Material
Intended for CLARK dealers only
Do not sell or distribute
Introduction
Never remove the radiator cap while the engine is
running. Stop the engine and wait until it has cooled.
Even then, use extreme care when removing the cap
from the radiator. It is good safety practice to use a
shop cloth to cover the radiator cap while it is being
removed. Wrap the cloth around the cap and turn it
slowly to the first stop. Step back while the pressure
is released from the cooling system.
2. When you are sure all the pressure has been
released, press down on the cap, with the
cloth in place, turn and remove it. Stand clear
of the radiator opening; hot coolant may splash
out. Failure to follow these instructions could
result in serious personal injury from hot
coolant or steam blowout and/or damage to
the cooling system or engine.
3. The correct FULL level is the bottom edge of
the filler neck.
Fill
Level -
I II Overflow
If level is low, add a 50/50 mixture of speci-
fied coolant and water to the correct fill level.
If you have to add coolant more than once a
month or if you have to add more than one
quart at a time, check the cooling system for
leaks.
4. Inspect the coolant for condition. Look for
excessive contamination or rust or oil in the
coolant solution. Check the PM time interval
for need to change coolant.
5. Check condition of radiator cap rubber seal
and radiator filler neck for damage. Be sure
they are clean. Check overflow hose for
clogging or damage.
NOTICE
Your lift truck cooling system is filled
with a factory-installed solution of
50% water and 50% permanent-type
anti-freeze containing rust and corro-
sion inhibitors. You should leave it in
year around. Plain water may be used
only in an emergency, but replace it
with the specified coolant as soon as
possible to avoid damage to the sys-
tem. With only water in the system,
do not let the engine run hot. Do not
use alcohol or methanol antifreeze.
Engine Oil
With the truck level and the engine shut-down for at
least 2 minutes, check the engine oil level.
Locate the engine oil dipstick (at left side of engine).
Pull the dipstick out, wipe it with a clean wiper and
reinsert it fully into the dipstick tube. Remove the
dipstick and check oil level.
Acceptable Range
GasILPGICNG Engine Oil Dipstick
Diesel Engine Oil Dipstick
It is normal to add some oil between oil changes.
Keep the oil level above the ADD mark on the
dipstick by adding oil as required. DO NOT OVER-
FILL. Use the correct oil as specified under Lubri-
cant Specifications.
SM 593, Jan ‘93 Planned Maintenance-9
Copyrighted Material
Intended for CLARK dealers only
Do not sell or distribute
Introduction Cl!ARK
Engine Oil and Filter Change
It is recommended to:
. Drain and replace the engine crankcase oil ev-
ery 50 to 250 operating hours. See NOTICE
below.
.
.
Replace the engine oil filter every oil change.
Remove the oil pan drain plug to drain old oil,
after truck has been in operation and engine
(oil) is hot (at operating temperature).
NOTICE
The time interval for changing en-
gine oil will depend upon your appli-
cation and operating conditions. To
determine the correct schedule for
your truck it is suggested that you
periodically submit engine oil samples
to a commercial laboratory for analy-
sis of the condition of the oil.
Oil performance designation: To help achieve
proper engine performance and durability, use only
engine lubricating oils of the proper quality. These
oils also help promote engine efficiency which re-
sults in improved fuel economy. A symbol has been
developed by the API (American Petroleum Insti-
tute) to help you select the proper engine oil. It
should be included on the oil container you pur-
chase. For diesel engines, CLARK recommends
that you use motor oil that meets API Service Classi-
fication CE/SF. CC/CD or CD/SF oils can be used
in areas where CE oil is not available.
Hydraulic Sump Tank
Check the hydraulic sump tank fluid level. Correct
fluid level is important for proper system operation.
Low fluid level can cause pump damage. Overfill-
ing can cause loss of fluid or lift system malfunction.
Hydraulic fluid expands as its temperature rises.
Therefore, it is preferable to check the fluid level at
operating temperature (after approximately 30 min-
utes of truck operation). To check the fluid level,
first park the truck on a level surface and apply the
parking brake. Put the upright in a vertical position
and lower the fork carriage fully down. Pull the
dipstick out, (attached to the sump breather) wipe it
with a clean wiper and reinsert it. Remove dipstick
and check oil level. Keep the oil level above the
LOW mark on the dipstick by adding recommended
hydraulic fluid only, as required. DO NOT OVER-
FILL.
Check the condition of the hydraulic fluid (age, color
or clarity, contamination). Change (replace) the oil
as necessary.
Hydraulic Fluid and Filter Change
Drain and replace the hydraulic sump fluid every
2000 operating hours.
(Severe service or adverse conditions may require
more frequent fluid change). Replace the hydraulic
oil filter elements at every oil change. Remove,
clean, and reinstall the hydraulic and steer system
suction line screens at first PM and every 500 hours
thereafter. Check for-leaks after installation of the
filters. Also, check that the hydraulic line connec-
tions at the filter adapter are tightened correctly.
Sump Tank Breather
Remove the sump tank fill cap/breather and inspect
for excessive (obvious) contamination and damage.
Clean or replace the fill cap/breather, per recom-
mended PM schedule or as required by operating
conditions.
Transmission Fluid Check
Before making check, run engine until unit is at
operating temperature. This is important as trans-
mission oil temperature should be 200 degrees F and
the engine water jacket should be at operating tem-
perature
Planned Maintenance-10 SM 593, Jan ‘93

More Related Content

More from ufjjskekkmed

Takeuchi tl230 track loader parts catalogue manual (serial no. 223100001 and up)
Takeuchi tl230 track loader parts catalogue manual (serial no. 223100001 and up)Takeuchi tl230 track loader parts catalogue manual (serial no. 223100001 and up)
Takeuchi tl230 track loader parts catalogue manual (serial no. 223100001 and up)ufjjskekkmed
 
Takeuchi tl230 track loader parts catalogue manual (serial no. 223000001 and up)
Takeuchi tl230 track loader parts catalogue manual (serial no. 223000001 and up)Takeuchi tl230 track loader parts catalogue manual (serial no. 223000001 and up)
Takeuchi tl230 track loader parts catalogue manual (serial no. 223000001 and up)ufjjskekkmed
 
Takeuchi tl230 track loader operator manual serial no. 223000859 and up
Takeuchi tl230 track loader operator manual serial no. 223000859 and upTakeuchi tl230 track loader operator manual serial no. 223000859 and up
Takeuchi tl230 track loader operator manual serial no. 223000859 and upufjjskekkmed
 
New holland 9070 l grape harvester service repair manual
New holland 9070 l grape harvester service repair manualNew holland 9070 l grape harvester service repair manual
New holland 9070 l grape harvester service repair manualufjjskekkmed
 
New holland 9070 grape harvester service repair manual
New holland 9070 grape harvester service repair manualNew holland 9070 grape harvester service repair manual
New holland 9070 grape harvester service repair manualufjjskekkmed
 
New holland 9050 ll grape harvester service repair manual
New holland 9050 ll grape harvester service repair manualNew holland 9050 ll grape harvester service repair manual
New holland 9050 ll grape harvester service repair manualufjjskekkmed
 
New holland 9050 l high grape harvester service repair manual
New holland 9050 l high grape harvester service repair manualNew holland 9050 l high grape harvester service repair manual
New holland 9050 l high grape harvester service repair manualufjjskekkmed
 
New holland 9050 l grape harvester service repair manual
New holland 9050 l grape harvester service repair manualNew holland 9050 l grape harvester service repair manual
New holland 9050 l grape harvester service repair manualufjjskekkmed
 
Jcb 950 rough terrain fork lift service repair manual serial no. 1483230 onwards
Jcb 950 rough terrain fork lift service repair manual serial no. 1483230 onwardsJcb 950 rough terrain fork lift service repair manual serial no. 1483230 onwards
Jcb 950 rough terrain fork lift service repair manual serial no. 1483230 onwardsufjjskekkmed
 
Jcb 940 rough terrain fork lift service repair manual serial no. 1280000 onwards
Jcb 940 rough terrain fork lift service repair manual serial no. 1280000 onwardsJcb 940 rough terrain fork lift service repair manual serial no. 1280000 onwards
Jcb 940 rough terrain fork lift service repair manual serial no. 1280000 onwardsufjjskekkmed
 
Daewoo doosan dx19 compact excavator service repair manual (sn dbmb3 y8avf0e1...
Daewoo doosan dx19 compact excavator service repair manual (sn dbmb3 y8avf0e1...Daewoo doosan dx19 compact excavator service repair manual (sn dbmb3 y8avf0e1...
Daewoo doosan dx19 compact excavator service repair manual (sn dbmb3 y8avf0e1...ufjjskekkmed
 
Clark gpx 50 e forklift service repair manual
Clark gpx 50 e forklift service repair manualClark gpx 50 e forklift service repair manual
Clark gpx 50 e forklift service repair manualufjjskekkmed
 
Clark gpx 40 forklift service repair manual
Clark gpx 40 forklift service repair manualClark gpx 40 forklift service repair manual
Clark gpx 40 forklift service repair manualufjjskekkmed
 
Caterpillar cat m314 f wheeled excavator (prefix fb4) service repair manual (...
Caterpillar cat m314 f wheeled excavator (prefix fb4) service repair manual (...Caterpillar cat m314 f wheeled excavator (prefix fb4) service repair manual (...
Caterpillar cat m314 f wheeled excavator (prefix fb4) service repair manual (...ufjjskekkmed
 
Caterpillar cat m314 f wheeled excavator (prefix f4a) service repair manual (...
Caterpillar cat m314 f wheeled excavator (prefix f4a) service repair manual (...Caterpillar cat m314 f wheeled excavator (prefix f4a) service repair manual (...
Caterpillar cat m314 f wheeled excavator (prefix f4a) service repair manual (...ufjjskekkmed
 
Caterpillar cat d11 r track type tractor (prefix aaf) service repair manual (...
Caterpillar cat d11 r track type tractor (prefix aaf) service repair manual (...Caterpillar cat d11 r track type tractor (prefix aaf) service repair manual (...
Caterpillar cat d11 r track type tractor (prefix aaf) service repair manual (...ufjjskekkmed
 
Caterpillar cat d11 r track type tractor (prefix 9xr) service repair manual (...
Caterpillar cat d11 r track type tractor (prefix 9xr) service repair manual (...Caterpillar cat d11 r track type tractor (prefix 9xr) service repair manual (...
Caterpillar cat d11 r track type tractor (prefix 9xr) service repair manual (...ufjjskekkmed
 
Caterpillar cat d11 r track type tractor (prefix 9tr) service repair manual (...
Caterpillar cat d11 r track type tractor (prefix 9tr) service repair manual (...Caterpillar cat d11 r track type tractor (prefix 9tr) service repair manual (...
Caterpillar cat d11 r track type tractor (prefix 9tr) service repair manual (...ufjjskekkmed
 
Caterpillar cat 320 d2 excavator (prefix mdj) service repair manual (mdj00001...
Caterpillar cat 320 d2 excavator (prefix mdj) service repair manual (mdj00001...Caterpillar cat 320 d2 excavator (prefix mdj) service repair manual (mdj00001...
Caterpillar cat 320 d2 excavator (prefix mdj) service repair manual (mdj00001...ufjjskekkmed
 
Caterpillar cat 305 e mini hydraulic excavator (prefix xsc) service repair ma...
Caterpillar cat 305 e mini hydraulic excavator (prefix xsc) service repair ma...Caterpillar cat 305 e mini hydraulic excavator (prefix xsc) service repair ma...
Caterpillar cat 305 e mini hydraulic excavator (prefix xsc) service repair ma...ufjjskekkmed
 

More from ufjjskekkmed (20)

Takeuchi tl230 track loader parts catalogue manual (serial no. 223100001 and up)
Takeuchi tl230 track loader parts catalogue manual (serial no. 223100001 and up)Takeuchi tl230 track loader parts catalogue manual (serial no. 223100001 and up)
Takeuchi tl230 track loader parts catalogue manual (serial no. 223100001 and up)
 
Takeuchi tl230 track loader parts catalogue manual (serial no. 223000001 and up)
Takeuchi tl230 track loader parts catalogue manual (serial no. 223000001 and up)Takeuchi tl230 track loader parts catalogue manual (serial no. 223000001 and up)
Takeuchi tl230 track loader parts catalogue manual (serial no. 223000001 and up)
 
Takeuchi tl230 track loader operator manual serial no. 223000859 and up
Takeuchi tl230 track loader operator manual serial no. 223000859 and upTakeuchi tl230 track loader operator manual serial no. 223000859 and up
Takeuchi tl230 track loader operator manual serial no. 223000859 and up
 
New holland 9070 l grape harvester service repair manual
New holland 9070 l grape harvester service repair manualNew holland 9070 l grape harvester service repair manual
New holland 9070 l grape harvester service repair manual
 
New holland 9070 grape harvester service repair manual
New holland 9070 grape harvester service repair manualNew holland 9070 grape harvester service repair manual
New holland 9070 grape harvester service repair manual
 
New holland 9050 ll grape harvester service repair manual
New holland 9050 ll grape harvester service repair manualNew holland 9050 ll grape harvester service repair manual
New holland 9050 ll grape harvester service repair manual
 
New holland 9050 l high grape harvester service repair manual
New holland 9050 l high grape harvester service repair manualNew holland 9050 l high grape harvester service repair manual
New holland 9050 l high grape harvester service repair manual
 
New holland 9050 l grape harvester service repair manual
New holland 9050 l grape harvester service repair manualNew holland 9050 l grape harvester service repair manual
New holland 9050 l grape harvester service repair manual
 
Jcb 950 rough terrain fork lift service repair manual serial no. 1483230 onwards
Jcb 950 rough terrain fork lift service repair manual serial no. 1483230 onwardsJcb 950 rough terrain fork lift service repair manual serial no. 1483230 onwards
Jcb 950 rough terrain fork lift service repair manual serial no. 1483230 onwards
 
Jcb 940 rough terrain fork lift service repair manual serial no. 1280000 onwards
Jcb 940 rough terrain fork lift service repair manual serial no. 1280000 onwardsJcb 940 rough terrain fork lift service repair manual serial no. 1280000 onwards
Jcb 940 rough terrain fork lift service repair manual serial no. 1280000 onwards
 
Daewoo doosan dx19 compact excavator service repair manual (sn dbmb3 y8avf0e1...
Daewoo doosan dx19 compact excavator service repair manual (sn dbmb3 y8avf0e1...Daewoo doosan dx19 compact excavator service repair manual (sn dbmb3 y8avf0e1...
Daewoo doosan dx19 compact excavator service repair manual (sn dbmb3 y8avf0e1...
 
Clark gpx 50 e forklift service repair manual
Clark gpx 50 e forklift service repair manualClark gpx 50 e forklift service repair manual
Clark gpx 50 e forklift service repair manual
 
Clark gpx 40 forklift service repair manual
Clark gpx 40 forklift service repair manualClark gpx 40 forklift service repair manual
Clark gpx 40 forklift service repair manual
 
Caterpillar cat m314 f wheeled excavator (prefix fb4) service repair manual (...
Caterpillar cat m314 f wheeled excavator (prefix fb4) service repair manual (...Caterpillar cat m314 f wheeled excavator (prefix fb4) service repair manual (...
Caterpillar cat m314 f wheeled excavator (prefix fb4) service repair manual (...
 
Caterpillar cat m314 f wheeled excavator (prefix f4a) service repair manual (...
Caterpillar cat m314 f wheeled excavator (prefix f4a) service repair manual (...Caterpillar cat m314 f wheeled excavator (prefix f4a) service repair manual (...
Caterpillar cat m314 f wheeled excavator (prefix f4a) service repair manual (...
 
Caterpillar cat d11 r track type tractor (prefix aaf) service repair manual (...
Caterpillar cat d11 r track type tractor (prefix aaf) service repair manual (...Caterpillar cat d11 r track type tractor (prefix aaf) service repair manual (...
Caterpillar cat d11 r track type tractor (prefix aaf) service repair manual (...
 
Caterpillar cat d11 r track type tractor (prefix 9xr) service repair manual (...
Caterpillar cat d11 r track type tractor (prefix 9xr) service repair manual (...Caterpillar cat d11 r track type tractor (prefix 9xr) service repair manual (...
Caterpillar cat d11 r track type tractor (prefix 9xr) service repair manual (...
 
Caterpillar cat d11 r track type tractor (prefix 9tr) service repair manual (...
Caterpillar cat d11 r track type tractor (prefix 9tr) service repair manual (...Caterpillar cat d11 r track type tractor (prefix 9tr) service repair manual (...
Caterpillar cat d11 r track type tractor (prefix 9tr) service repair manual (...
 
Caterpillar cat 320 d2 excavator (prefix mdj) service repair manual (mdj00001...
Caterpillar cat 320 d2 excavator (prefix mdj) service repair manual (mdj00001...Caterpillar cat 320 d2 excavator (prefix mdj) service repair manual (mdj00001...
Caterpillar cat 320 d2 excavator (prefix mdj) service repair manual (mdj00001...
 
Caterpillar cat 305 e mini hydraulic excavator (prefix xsc) service repair ma...
Caterpillar cat 305 e mini hydraulic excavator (prefix xsc) service repair ma...Caterpillar cat 305 e mini hydraulic excavator (prefix xsc) service repair ma...
Caterpillar cat 305 e mini hydraulic excavator (prefix xsc) service repair ma...
 

Recently uploaded

Call Girls Kanakapura Road Just Call 👗 7737669865 👗 Top Class Call Girl Servi...
Call Girls Kanakapura Road Just Call 👗 7737669865 👗 Top Class Call Girl Servi...Call Girls Kanakapura Road Just Call 👗 7737669865 👗 Top Class Call Girl Servi...
Call Girls Kanakapura Road Just Call 👗 7737669865 👗 Top Class Call Girl Servi...amitlee9823
 
Call Girls Bangalore Just Call 👗 7737669865 👗 Top Class Call Girl Service Ban...
Call Girls Bangalore Just Call 👗 7737669865 👗 Top Class Call Girl Service Ban...Call Girls Bangalore Just Call 👗 7737669865 👗 Top Class Call Girl Service Ban...
Call Girls Bangalore Just Call 👗 7737669865 👗 Top Class Call Girl Service Ban...amitlee9823
 
Vip Hot Call Girls 🫤 Mahipalpur ➡️ 9711199171 ➡️ Delhi 🫦 Whatsapp Number
Vip Hot Call Girls 🫤 Mahipalpur ➡️ 9711199171 ➡️ Delhi 🫦 Whatsapp NumberVip Hot Call Girls 🫤 Mahipalpur ➡️ 9711199171 ➡️ Delhi 🫦 Whatsapp Number
Vip Hot Call Girls 🫤 Mahipalpur ➡️ 9711199171 ➡️ Delhi 🫦 Whatsapp Numberkumarajju5765
 
Bangalore Call Girls: 🍓 7737669865 🍓 High Profile Model Escorts | Bangalore E...
Bangalore Call Girls: 🍓 7737669865 🍓 High Profile Model Escorts | Bangalore E...Bangalore Call Girls: 🍓 7737669865 🍓 High Profile Model Escorts | Bangalore E...
Bangalore Call Girls: 🍓 7737669865 🍓 High Profile Model Escorts | Bangalore E...amitlee9823
 
Why Won't Your Subaru Key Come Out Of The Ignition Find Out Here!
Why Won't Your Subaru Key Come Out Of The Ignition Find Out Here!Why Won't Your Subaru Key Come Out Of The Ignition Find Out Here!
Why Won't Your Subaru Key Come Out Of The Ignition Find Out Here!AutoScandia
 
Chapter-1.3-Four-Basic-Computer-periods.pptx
Chapter-1.3-Four-Basic-Computer-periods.pptxChapter-1.3-Four-Basic-Computer-periods.pptx
Chapter-1.3-Four-Basic-Computer-periods.pptxAnjieVillarba1
 
What Could Cause Your Subaru's Touch Screen To Stop Working
What Could Cause Your Subaru's Touch Screen To Stop WorkingWhat Could Cause Your Subaru's Touch Screen To Stop Working
What Could Cause Your Subaru's Touch Screen To Stop WorkingBruce Cox Imports
 
Lucknow 💋 (Genuine) Escort Service Lucknow | Service-oriented sexy call girls...
Lucknow 💋 (Genuine) Escort Service Lucknow | Service-oriented sexy call girls...Lucknow 💋 (Genuine) Escort Service Lucknow | Service-oriented sexy call girls...
Lucknow 💋 (Genuine) Escort Service Lucknow | Service-oriented sexy call girls...anilsa9823
 
Call me @ 9892124323 Call Girl in Andheri East With Free Home Delivery
Call me @ 9892124323 Call Girl in Andheri East With Free Home DeliveryCall me @ 9892124323 Call Girl in Andheri East With Free Home Delivery
Call me @ 9892124323 Call Girl in Andheri East With Free Home DeliveryPooja Nehwal
 
What Causes BMW Chassis Stabilization Malfunction Warning To Appear
What Causes BMW Chassis Stabilization Malfunction Warning To AppearWhat Causes BMW Chassis Stabilization Malfunction Warning To Appear
What Causes BMW Chassis Stabilization Malfunction Warning To AppearJCL Automotive
 
John deere 425 445 455 Maitenance Manual
John deere 425 445 455 Maitenance ManualJohn deere 425 445 455 Maitenance Manual
John deere 425 445 455 Maitenance ManualExcavator
 
Delhi Call Girls Mayur Vihar 9711199171 ☎✔👌✔ Whatsapp Hard And Sexy Vip Call
Delhi Call Girls Mayur Vihar 9711199171 ☎✔👌✔ Whatsapp Hard And Sexy Vip CallDelhi Call Girls Mayur Vihar 9711199171 ☎✔👌✔ Whatsapp Hard And Sexy Vip Call
Delhi Call Girls Mayur Vihar 9711199171 ☎✔👌✔ Whatsapp Hard And Sexy Vip Callshivangimorya083
 
Delhi Call Girls Saket 9711199171 ☎✔👌✔ Whatsapp Hard And Sexy Vip Call
Delhi Call Girls Saket 9711199171 ☎✔👌✔ Whatsapp Hard And Sexy Vip CallDelhi Call Girls Saket 9711199171 ☎✔👌✔ Whatsapp Hard And Sexy Vip Call
Delhi Call Girls Saket 9711199171 ☎✔👌✔ Whatsapp Hard And Sexy Vip Callshivangimorya083
 
一比一原版(PU学位证书)普渡大学毕业证学历认证加急办理
一比一原版(PU学位证书)普渡大学毕业证学历认证加急办理一比一原版(PU学位证书)普渡大学毕业证学历认证加急办理
一比一原版(PU学位证书)普渡大学毕业证学历认证加急办理ezgenuh
 
9990611130 Find & Book Russian Call Girls In Vijay Nagar
9990611130 Find & Book Russian Call Girls In Vijay Nagar9990611130 Find & Book Russian Call Girls In Vijay Nagar
9990611130 Find & Book Russian Call Girls In Vijay NagarGenuineGirls
 
如何办理麦考瑞大学毕业证(MQU毕业证书)成绩单原版一比一
如何办理麦考瑞大学毕业证(MQU毕业证书)成绩单原版一比一如何办理麦考瑞大学毕业证(MQU毕业证书)成绩单原版一比一
如何办理麦考瑞大学毕业证(MQU毕业证书)成绩单原版一比一ozave
 
83778-77756 ( HER.SELF ) Brings Call Girls In Laxmi Nagar
83778-77756 ( HER.SELF ) Brings Call Girls In Laxmi Nagar83778-77756 ( HER.SELF ) Brings Call Girls In Laxmi Nagar
83778-77756 ( HER.SELF ) Brings Call Girls In Laxmi Nagardollysharma2066
 
Call Girls Kadugodi Just Call 👗 7737669865 👗 Top Class Call Girl Service Bang...
Call Girls Kadugodi Just Call 👗 7737669865 👗 Top Class Call Girl Service Bang...Call Girls Kadugodi Just Call 👗 7737669865 👗 Top Class Call Girl Service Bang...
Call Girls Kadugodi Just Call 👗 7737669865 👗 Top Class Call Girl Service Bang...amitlee9823
 
Business Bay Escorts $#$ O56521286O $#$ Escort Service In Business Bay Dubai
Business Bay Escorts $#$ O56521286O $#$ Escort Service In Business Bay DubaiBusiness Bay Escorts $#$ O56521286O $#$ Escort Service In Business Bay Dubai
Business Bay Escorts $#$ O56521286O $#$ Escort Service In Business Bay DubaiAroojKhan71
 

Recently uploaded (20)

Call Girls Kanakapura Road Just Call 👗 7737669865 👗 Top Class Call Girl Servi...
Call Girls Kanakapura Road Just Call 👗 7737669865 👗 Top Class Call Girl Servi...Call Girls Kanakapura Road Just Call 👗 7737669865 👗 Top Class Call Girl Servi...
Call Girls Kanakapura Road Just Call 👗 7737669865 👗 Top Class Call Girl Servi...
 
Call Now ≽ 9953056974 ≼🔝 Call Girls In Shankar vihar ≼🔝 Delhi door step delev...
Call Now ≽ 9953056974 ≼🔝 Call Girls In Shankar vihar ≼🔝 Delhi door step delev...Call Now ≽ 9953056974 ≼🔝 Call Girls In Shankar vihar ≼🔝 Delhi door step delev...
Call Now ≽ 9953056974 ≼🔝 Call Girls In Shankar vihar ≼🔝 Delhi door step delev...
 
Call Girls Bangalore Just Call 👗 7737669865 👗 Top Class Call Girl Service Ban...
Call Girls Bangalore Just Call 👗 7737669865 👗 Top Class Call Girl Service Ban...Call Girls Bangalore Just Call 👗 7737669865 👗 Top Class Call Girl Service Ban...
Call Girls Bangalore Just Call 👗 7737669865 👗 Top Class Call Girl Service Ban...
 
Vip Hot Call Girls 🫤 Mahipalpur ➡️ 9711199171 ➡️ Delhi 🫦 Whatsapp Number
Vip Hot Call Girls 🫤 Mahipalpur ➡️ 9711199171 ➡️ Delhi 🫦 Whatsapp NumberVip Hot Call Girls 🫤 Mahipalpur ➡️ 9711199171 ➡️ Delhi 🫦 Whatsapp Number
Vip Hot Call Girls 🫤 Mahipalpur ➡️ 9711199171 ➡️ Delhi 🫦 Whatsapp Number
 
Bangalore Call Girls: 🍓 7737669865 🍓 High Profile Model Escorts | Bangalore E...
Bangalore Call Girls: 🍓 7737669865 🍓 High Profile Model Escorts | Bangalore E...Bangalore Call Girls: 🍓 7737669865 🍓 High Profile Model Escorts | Bangalore E...
Bangalore Call Girls: 🍓 7737669865 🍓 High Profile Model Escorts | Bangalore E...
 
Why Won't Your Subaru Key Come Out Of The Ignition Find Out Here!
Why Won't Your Subaru Key Come Out Of The Ignition Find Out Here!Why Won't Your Subaru Key Come Out Of The Ignition Find Out Here!
Why Won't Your Subaru Key Come Out Of The Ignition Find Out Here!
 
Chapter-1.3-Four-Basic-Computer-periods.pptx
Chapter-1.3-Four-Basic-Computer-periods.pptxChapter-1.3-Four-Basic-Computer-periods.pptx
Chapter-1.3-Four-Basic-Computer-periods.pptx
 
What Could Cause Your Subaru's Touch Screen To Stop Working
What Could Cause Your Subaru's Touch Screen To Stop WorkingWhat Could Cause Your Subaru's Touch Screen To Stop Working
What Could Cause Your Subaru's Touch Screen To Stop Working
 
Lucknow 💋 (Genuine) Escort Service Lucknow | Service-oriented sexy call girls...
Lucknow 💋 (Genuine) Escort Service Lucknow | Service-oriented sexy call girls...Lucknow 💋 (Genuine) Escort Service Lucknow | Service-oriented sexy call girls...
Lucknow 💋 (Genuine) Escort Service Lucknow | Service-oriented sexy call girls...
 
Call me @ 9892124323 Call Girl in Andheri East With Free Home Delivery
Call me @ 9892124323 Call Girl in Andheri East With Free Home DeliveryCall me @ 9892124323 Call Girl in Andheri East With Free Home Delivery
Call me @ 9892124323 Call Girl in Andheri East With Free Home Delivery
 
What Causes BMW Chassis Stabilization Malfunction Warning To Appear
What Causes BMW Chassis Stabilization Malfunction Warning To AppearWhat Causes BMW Chassis Stabilization Malfunction Warning To Appear
What Causes BMW Chassis Stabilization Malfunction Warning To Appear
 
John deere 425 445 455 Maitenance Manual
John deere 425 445 455 Maitenance ManualJohn deere 425 445 455 Maitenance Manual
John deere 425 445 455 Maitenance Manual
 
Delhi Call Girls Mayur Vihar 9711199171 ☎✔👌✔ Whatsapp Hard And Sexy Vip Call
Delhi Call Girls Mayur Vihar 9711199171 ☎✔👌✔ Whatsapp Hard And Sexy Vip CallDelhi Call Girls Mayur Vihar 9711199171 ☎✔👌✔ Whatsapp Hard And Sexy Vip Call
Delhi Call Girls Mayur Vihar 9711199171 ☎✔👌✔ Whatsapp Hard And Sexy Vip Call
 
Delhi Call Girls Saket 9711199171 ☎✔👌✔ Whatsapp Hard And Sexy Vip Call
Delhi Call Girls Saket 9711199171 ☎✔👌✔ Whatsapp Hard And Sexy Vip CallDelhi Call Girls Saket 9711199171 ☎✔👌✔ Whatsapp Hard And Sexy Vip Call
Delhi Call Girls Saket 9711199171 ☎✔👌✔ Whatsapp Hard And Sexy Vip Call
 
一比一原版(PU学位证书)普渡大学毕业证学历认证加急办理
一比一原版(PU学位证书)普渡大学毕业证学历认证加急办理一比一原版(PU学位证书)普渡大学毕业证学历认证加急办理
一比一原版(PU学位证书)普渡大学毕业证学历认证加急办理
 
9990611130 Find & Book Russian Call Girls In Vijay Nagar
9990611130 Find & Book Russian Call Girls In Vijay Nagar9990611130 Find & Book Russian Call Girls In Vijay Nagar
9990611130 Find & Book Russian Call Girls In Vijay Nagar
 
如何办理麦考瑞大学毕业证(MQU毕业证书)成绩单原版一比一
如何办理麦考瑞大学毕业证(MQU毕业证书)成绩单原版一比一如何办理麦考瑞大学毕业证(MQU毕业证书)成绩单原版一比一
如何办理麦考瑞大学毕业证(MQU毕业证书)成绩单原版一比一
 
83778-77756 ( HER.SELF ) Brings Call Girls In Laxmi Nagar
83778-77756 ( HER.SELF ) Brings Call Girls In Laxmi Nagar83778-77756 ( HER.SELF ) Brings Call Girls In Laxmi Nagar
83778-77756 ( HER.SELF ) Brings Call Girls In Laxmi Nagar
 
Call Girls Kadugodi Just Call 👗 7737669865 👗 Top Class Call Girl Service Bang...
Call Girls Kadugodi Just Call 👗 7737669865 👗 Top Class Call Girl Service Bang...Call Girls Kadugodi Just Call 👗 7737669865 👗 Top Class Call Girl Service Bang...
Call Girls Kadugodi Just Call 👗 7737669865 👗 Top Class Call Girl Service Bang...
 
Business Bay Escorts $#$ O56521286O $#$ Escort Service In Business Bay Dubai
Business Bay Escorts $#$ O56521286O $#$ Escort Service In Business Bay DubaiBusiness Bay Escorts $#$ O56521286O $#$ Escort Service In Business Bay Dubai
Business Bay Escorts $#$ O56521286O $#$ Escort Service In Business Bay Dubai
 

CLARK Service Manual SM606 Guide

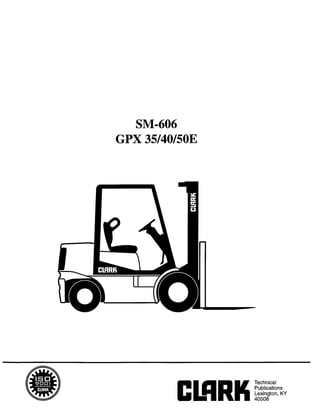
  • 1. Copyrighted Material Intended for CLARK dealers only Do not sell or distribute SM=606 GPX 35/40/503
  • 2. Copyrighted Material Intended for CLARK dealers only Do not sell or distribute The GPX 35/50E service manual includes applicable sections from SM593 (footers on these pages remain unchanged). The SM606 also contains new overhaul information for the GM Vortec V-6 engine (See Group 00 Section 2) and new truck specifications (See Group 40 Section 2). Service Manual SM606 GPX 35/40/50E ClRM conpany MaterhI l&uldllng
  • 3. Copyrighted Material Intended for CLARK dealers only Do not sell or distribute Pictorial Index Group23 - Group 25 Group 02 Group 00 Group 01 Group 26 r Group 32 N- Group 34 Group 38 1 Group 20 Group 22 Group 06 LGroup29 Group 30 Group 40 --f@ Group 14 SM 593, JAN ‘93
  • 4. Copyrighted Material Intended for CLARK dealers only Do not sell or distribute CONTENTS Group 00 00 00 00 01 01 01 01 01 02 02 02 02 02 02 06 06 06 06 06 14 14 14 14 20 20 20 20 20 22 22 22 Contents of this Manual Section 1 2 3 1 2 2 1 2 Description INTRODUCTION Safety Planned Maintenance ENGINES Engine Removal Diesel Workshop Manual Gas/LPG Workshop Manual COOLING SYSTEM Troubleshooting Cooling System Testing and Maintenance Fan Belt Replacement Radiator Removal FUEL SYSTEM Fuel Pump Pressure -Test The lMPC0 Fuel System Carburetor Overhaul Velocity Governor Overhaul Removal of IMPCO Vaporizing System TRANSMISSION Transmission Checks Draining and Refill Transmission Removal Transmission Overhaul ELECTRICAL SYSTEM Wiring Color Code Wiring Diagrams Electrical Checks DRIVE AXLE Axle End Lubrication Axle End Removal Axle Ends Overhaul Differential Overhaul WHEELS AND TIRES Lifting, Jacking, and Blocking Wheels and Tires Mounting (continued on next page) SM 593,JAN ‘93 0 Clark Material Handling Company 1993 Contents-l
  • 5. Copyrighted Material Intended for CLARK dealers only Do not sell or distribute Group Section Description 23 23 23 23 23 23 23 23 25 25 25 25 26 26 26 26 26 26 26 29 29 29 30 30 30 30 30 32 32 32 32 34 34 34 34 34 34 34 34 38 38 40 40 40 40 40 4-o 1 2 3 1 2 1 2 3 1 BRAKING/INCHING SYSTEM System Description/Troubleshooting Brake and Inching System Bleeding Brake and Inching Pedals Adjustment Master Cylinder Overhaul Power Booster Overhaul Brake Caliper Overhaul Parking Brake STEERING COLUMN AND GEAR Troubleshooting Steering Column and Gear Removal Char-Lynn Steering Control Unit (Steering gear) STEER AXLE Steer Axle Removal Steer Axle Overhaul Steering System Adjustment Steer Cylinder Removal Steer Axle Wheel Bearings Steer Cylinder Overhaul HYDRAULIC SUMP, FILTERS, AND PUMP Hydraulic Sump and Filters Hydraulic Pump Troubleshooting & Overhaul (Vane Type) HYDRAULIC VALVE/LIFT CIRCUIT Hydraulic System Pressure Check Hydraulic Valve Overhaul Hydraulic Valves Hydraulic Schematic TILT CYLINDERS Tilt Cylinder Removal Tilt Cylinder Overhaul Tilt Lock Valve UPRIGHTS Troubleshooting and Visual Inspection Operational Checks Carriage Check and Adjsutment Upright Check and Adjustment Cylinder Repair Lift Chain Maintenance Upright Removal and Replacement COUNTERWEIGHTS Counterweight Removal and Installation SPECIFICATIONS Namplates/Decals General Specifications PM Inspection and Drivers Daily Inspection Forms Recommended Lubricants & Lubricant Specifications Lubrication Intervals Contents-2 SM 593, JAN ‘93
  • 6. Copyrighted Material Intended for CLARK dealers only Do not sell or distribute INTRODUCTION INTRODUCTION Safety ................................................................................. Section 1 Planned Maintenance ........................................................ Section 2 SM 593, JAN ‘93 Introduction
  • 7. Copyrighted Material Intended for CLARK dealers only Do not sell or distribute Cl!ARK Introduction Safety Safety Signs and Messages ................................................................................... 2 User Safe Maintenance Practices ........................................................................ 2 SM593, Jan ‘93 Safety-l
  • 8. Copyrighted Material Intended for CLARK dealers only Do not sell or distribute Introduction Cl!YRK Safety Signs and Messages Safety signs and messages are placed in this manual and also on the lift truck to provide instructions and to identify specific areas where potential hazards exist and special precautions should be taken. Be sure you know and understand the meaning of these instructions, signs, and messages. Damage to the truck, death, or serious injury to you or other persons may result if these messages are not followed. NOTICE This message is used when special in- formation, instructions or identifica- tion is required relating to procedures, equipment, tools, pressures, capacities and other special data. IMPORTANT This message is used when special pre- cautions should he taken to ensure a correct action or to avoid damage to or malfunction of the truck or a com- ponent. A! CAUTION This message is used as a reminder of safety hazards which can result in per- sonal injury if proper precautions are not taken. A WARNING This message is used when a hazard exists which can result in injury or death if proper precautions are not taken. A DANGER This message is used when an extreme hazard exists which can result in in- jury or death. or serious injury if proper precautions are not taken. NOTE: The above terms have been adopted by Clark Material Handling Company. The same terms may be used in different context in service literature supplied directly or indirectly by vendors of truck components. User Safe Maintenance Practices The following instructions have been prepared from current industry and government safety standards applicable to industrial truck operation and mainte- nance. These recommended procedures specify con- ditions, methods, and accepted practices that aid in the safe maintenance of industrial trucks. They are listed here for the reference and safety of all workers during maintenance operations. Carefully read and understand these instructions and the specific main- tenance procedures before attempting to do any re- pair work. When in doubt of any maintenance procedure, please contact your local Clark dealer. 1. 2. 3. Powered industrial trucks can become haz- ardous if maintenance is neglected. There- fore, suitable maintenance facilities, trained personnel, and procedures must be provided. Maintenance and inspection of all powered industrial trucks shall be done in conform- ance with the manufacturer’s recommenda- tions. A scheduled planned maintenance, lubrica- tion, and inspection program shall be fol- lowed. Safety-2 SM 593, Jan ‘93
  • 9. Copyrighted Material Intended for CLARK dealers only Do not sell or distribute CMRK Introduction 4. Only trained and authorized personnel shall be permitted to maintain, repair, adjust, and inspect industrial trucks. Work should be performed in accordance with the manufacturer’s specifications. 5. Properly ventilate work area, vent exhaust fumes, and keep shop clean and floor dry. 6. Avoid fire hazards and have fire protection equipment present in the work area. Do not use an open flame to check for level or leak- age of fuel, electrolyte, or coolant. Do not use open pans of fuel or flammable cleaning fluids for cleaning parts. 7. Before starting work on truck: a. Raise drive wheels off of floor or discon- nect power source and use blocks or other positive truck positioning devices. b. Disconnect battery before working on the electrical system. 8. Before working on engine fuel system of gasoline- or diesel-powered trucks, be sure the fuel shut-off valve is closed. 9. Operation of the truck to check performance must be conducted in an authorized, safe, clear area. 10. Before starting to drive truck: a. Be in operating position. b. Be sure parking brake is engaged. c. Put direction control in neutral. d. Start engine. e. Check functioning of direction and speed controls, steering, brakes, warning de- vices, and any load handling attachments. 11. Before leaving ttruck a. Stop truck. b. Put directional control in neutral. c. Apply the parking brake. 12. 13. 14. 15. 16. 17. 18. 19. d. Stop the engine by turning off the ignition circuit. e. Put blocks at the wheels if truck is on an incline. Brakes, steering mechanisms, control mecha- nisms, warning devices, lights, governors, guards, safety devices, and frame members must be carefully and regularly inspected and maintained in a safe operating condition. Special trucks or devices designed and ap- proved for hazardous area operation must receive special attention to ensure that main- tenance preserves the original, approved, safe- operating features. Fuel systems must be checked for leaks and condition of parts. Extra special consider- ation must be given in the case of a leak in the fuel system. Action must be taken to prevent the use of the truck until the leak has been corrected. The truck manufacturer’s capacity, opera- tion, andmaintenance instruction plates, tags, or decals must be maintained in legible con- dition. Batteries, motors, controllers, limit switches, protective devices, electrical conductors, and connections must be inspected and main- tained in conformance with good practice. Special attention must be paid to the condi- tion of electrical insulation. To avoid injury to personnel or damage to the equipment, consult the manufacturer’s pro- cedures in replacing contacts on any battery connection. Industrial trucks must be kept in a clean condition to minimize fire hazards and help in the detection of loose or defective parts. Modifications and additions that affect ca- pacity and safe truck operation must not be done without the manufacturer’s prior writ- ten approval. Capacity, operation and main- SM 593, Jan ‘93 Safety-3
  • 10. Copyrighted Material Intended for CLARK dealers only Do not sell or distribute Introduction Cl!!lRK 20. 21. tenance instruction plates, tags, or decals must be changed accordingly. Care must be taken to assure that all replace- ment parts, including tires, are interchange- able with the original parts and of a quality at least equal to that provided in the original equipment. Parts, including tires, are to be installed per the manufacturer’s procedures. Always use genuine CLARK or CLARK- approved parts. Use special care when removing heavy com- ponents from the truck, such as counterweight, seat deck, upright, etc. Be sure that lifting and handling equipment is of the correct capacity and in good condition. NOTICE You should also be familiar with addi- tional operating and maintenance safety instructions contained in the fol- lowing publications: ANSI/ASME B56.1 - 1988 Operator Control-Indus- trial Tow Tractors (Safety Standard For Powered Industrial Trucks). Published by: Society of Me- chanical Engineers, United Engineering Center, 345 E. 47th Street, New York, NY 10017. NFPA 5051982: Fire Safety Standard for Powered Industrial Trucks: Type Designations, Areas of Use, Maintenance and Operation. Available from: Na- tional Fire Protection Assoc., Inc., Batterymarch Park, Quincy, MA 02269. General Industrial Standards, OSHA 2206: OSHA Safety and Health Standards (29 CFR 1910), Sub- part N-Materials Handling and Storage, Section 1910.178 Powered Industrial Trucks. For sale by: Superintendent of Documents, U.S. Government Printing Offtce, Washington, DC 20402. Safety-4 SM 593, Jan ‘93
  • 11. Copyrighted Material Intended for CLARK dealers only Do not sell or distribute Introduction Section 2. Planned Maintenance PM Report Form .................................................................................................. 2 Visual Inspection .................................................................................................. 2 Forks ................................................................................................................................. .3 Wheels and Tires .............................................................................................................. .4 Brake and Inching Pedal Freeplay .................................................................................... .4 Functional Tests ................................................................................................... 4 Key/Start Switch ................................................................................................................ 4 Battery Light ...................................................................................................................... 5 Fuel Light .......................................................................................................................... 5 Engine Oil Pressure Light ................................................................................................ .5 Coolant Temperature Light ............................................................................................... 5 Brake Malfunction Light ................................................................................................... 5 Air Filter Restriction Light ................................................................................................ 5 Transmission Temperature Light ..................................................................................... .5 Hydraulic Filter Restriction Light .................................................................................... -5 Parking Brake Light .......................................................................................................... 5 Hour Meter ........................................................................................................................ 6 Accelerator, Service Brake, Parking Brake, and Inching .................................................. Lift Mechanisms and Controls .......................................................................................... z Auxiliary Controls ............................................................................................................. 7 Steering System ................................................................................................................. 7 Shift Control and Brakes ................................................................................................... 7 Under the Hood .................................................................................................... 8 Belts and Hoses ................................................................................................................ .8 Engine Air Cleaner ........................................................................................................... .8 Battery ............................................................................................................................... 8 Engine Cooling System ..................................................................................................... Engine Oil .......................................................................................................................... ; Engine Oil and Filter Change ............................................................................................ 9 Hydraulic Sump Tank ...................................................................................................... 10 Hydraulic Fluid and Filter Change .................................................................................. Sump Tank Breather ........................................................................................................ :i Transmission Fluid Check ............................................................................................... 10 Truck Chassis Inspection and Lubrication ..................................................... 11 Air Cleaning ........................................................................................................ 11 Upright and Tilt Cylinder Lubrication ....................................... ..................... 11 Critical Fastener Torque Checks ...................................................................... 12 Lift Chain Maintenance ..................................................................................... 12 Lift Chain Adjustment Check.. ........................................................................................ 12 Lift Chain Inspection and Measurement ......................................................................... 13 Lift Chain Lubrication ..................................................................................................... 13 Lift Chain Inspection and Wear Criteria ......................................................................... 13 Lift Chain Replacement ................................................................................................... 13 SM 593, Jan ‘93 Planned Maintenance-l
  • 12. Copyrighted Material Intended for CLARK dealers only Do not sell or distribute Introduction El!YRK PM Report Form A planned maintenance program of regular, routine inspections and lubrication is important for long life and trouble-free operation of your lift truck. Make and keep records of your inspections. Use these records to help establish the correct PM intervals for your application and to indicate maintenance re- quired to prevent major problems from occurring during operation. As an aid in performing and documenting your PM inspections, Clark has prepared a “Gas, LPG or Diesel Planned Maintenance Report” form. Copies of this form may be obtained from your authorized Clark dealer. We recommend that you use this form as a checklist and to make a record of your inspec- tion and truck condition. The periodic maintenance procedures outlined in this manual are intended to be used with the PM report form. They are arranged in groupings of main- tenance work that are done in a logical and efficient sequence. A check mark or entry is made on the PM Report Form when the PM is performed. Please note the special coding system for indicating the importance of needed repairs and/or adjustments. When you have finished the PM inspections, be sure to give a copy of the report to the designated author- ity or the person responsible for lift truck mainte- nance. A 1. CAUTION Do not make repairs or adjustments unless authorized to do so. Disconnect the battery ground cable (-) from the engine or frame before working on electrical com- ponents. Always wear safety glasses. Wear a safety (hard) hat in industrial plants and in special areas where protection is necessary or required. Remove alljewelry (watch, rings, bracelets, etc.) before work- ing on the truck. Visual Inspection First, perform a visual inspection of the lift truck and its components. Walk around the truck and take note of any obvious damage and maintenance problems. Check for loose fasteners and fittings. Check to be sure all capacity, safety, and warning plates and decals are attached and legible. NOTICE Do not operate a lift truck with dam- aged or missing decals and nameplates. Replace them immediately. They con- tain important information. Inspect the truck before and after starting engine for any signs of external leakage: fuel, engine oil or coolant, transmission fluid, etc. Check for hydraulic oil leaks and loose fittings. DO NOT USE BARE HANDS TO CHECK. Oil may be hot or under pressure. A! CAUTION Hydraulic Fluid Pressure. Do not use your hands to check for hydraulic leak- age. Fluid under pressure can pen- etrate your skin and cause serious in- jury. Planned Maintenance-2 SM 593, Jan ‘93
  • 13. Copyrighted Material Intended for CLARK dealers only Do not sell or distribute CMRK Introduction Be sure that the driver’s overhead guard and any other safety devices are in place, undamaged and attached securely. Check the overhead guard for damage. Be sure that it is properly positioned and all mounting fasteners are in place and tight. Inspect the welds on the carriage and upright for cracks. Report any cracks noted immediately. Be sure that the mounting fasteners are in place and tight. Inspect the upright assembly: rails, carriage rollers, lift chains, lift and tilt cylinders. Look for obvious wear and maintenance problems, damaged or missing parts. Check for any loose parts or fittings. Check for leaks, any damaged or loose rollers and rail wear (metal flaking). Carefully check the lift chains for wear, rust and corrosion, cracked or broken links, stretching, etc. Check that the lift and carriage chains are correctly adjusted to have equal tension. Check that the lift chain anchor fasteners and locking means are in place and tight. Be sure all safety guards and chain retainers are in place and not damaged. Inspect the carriage stops and cylinder retainer bolts. Check all welded connections. Inspect all lift line hydraulic connections for leaks. Check the lift cylinder rods for wear marks, grooves and scratches. Check the cylin- der seals for leaks. Forks Inspect the load forks for cracks, breaks, bending and wear. The fork top surface should be level and even with each other. The height difference be- tween both fork tips should be no more that 3% of the fork length. A WARNING If the fork blade at the heel is worn down by more than 10 percent, the load capacity is reduced and the fork must be replaced. Inspect the forks for twists and bends. Put a 2” thick metal block, at least 4” wide by 24” long on the blade of the fork with the 4” surface against the blade. Put a 24” carpenters square on the top of the block and against the shank. Check the fork 20” above the blade to make sure it is not bent more than 1 inch maximum. If the fork blades are obviously bent or damaged, they must be repaired or replaced before the truck is put into operation. Inspect the fork locking pins for damage. Rein- sert them and note whether they fit properly. SM 593, Jan ‘93 Planned Maintenance-3
  • 14. Copyrighted Material Intended for CLARK dealers only Do not sell or distribute Introduction CMRK Wheels and Tires Brake and Inching Pedal Freeplay Check the condition of the drive and steer wheels and tires. Remove objects that are embedded in the tread. Inspect the tires for excessive wear or breaks or “chunking out”. Press down on the brake pedal with your hand to check for freeplay. The freeplay should be approxi- mately 0.31 inch @mm). Adjust freeplay as de- scribed in Group 23, if necessary. Check inching pedal freeplay as with the brake pedal, and adjust if necessary. Check all wheel lug nuts or bolts to be sure none are loose or missing. Have missing bolts or lug nuts replaced and tightened to correct torque before operating truck. (See “Torque Specifications” in Group 40.) A WARNING Check tire pressure from a position facing the tread of the tire, not the side. Use a long handled gauge to keep your body away from the side. If tires are low, do not add air. Check with a mechanic. The tire may re- quire removal and repair. Incorrect (low) tire pressure can reduce stability of your lift truck. See Group 40, Section 2, “Specifica- tion,” for proper inflation pressure. Functional Tests Be sure that: l Parking brake is applied. l Directional control is in “N” (neutral). Test the horn, lights and all other safety equipment and accessories. Be sure they are properly mounted and working correctly. Press the horn button to check horn function. If the horn or any other part does not operate, report the failure and have it repaired before the truck is put in operation. Now prepare to startthe truck so that you can test gauges, accelerator service and parking brakes, all hydraulic controls, directional controls, and steering system. All controls must operate freely and return to neutral properly. Key/Start Switch A 3-position switch is standard equipment. Check the operation of the neutral start switch by placing direction control le- .:.... “:L..:::.,::.. ver in forward or reverse and ‘p_‘y. ,.:.::;:;‘:ic:.,.::y ‘:$.,:;;;, .:..:X.i: @ turning key switch to START ,:::. i ...__...... ‘$i ‘!, ‘i,):‘I:: position. Starter must not en_ gage until direction control le- ver is moved to NEUTRAL position. As you start the engine, check the instrument panel lights. The oil pressure and battery lights should come on when the key reaches the on position. The other lights should come on as the engine is crank- ing over. To start engine, rotate the key clockwise. Release to “run” position when engine starts. The “anti- Planned Maintenance-4 SM 593, Jan ‘93
  • 15. Copyrighted Material Intended for CLARK dealers only Do not sell or distribute Cl!YRK Introduction restart” feature requires that the key be returned to the “off’ position before it can again be turned to “start.” If engine does not start on the first attempt, do not re-engage the starter until engine comes to a complete stop (approximately 5 seconds). After the engine starts, let it warm up until it runs evenly. Familiarize yourself with the functions of the lights and hour meter. Check them periodically as you operate the truck. Battery Light When lit. indicates that batten, is discharging. Fuel Light When lit, indicates that fuel tank is low or empty. Engine Oil Pressure Light When lit, indicates inadequate f3 engine oil pressure. Lights when key/start switch is turned to “run” and “start” positions. It should go out shortly after engine starts. If light does not go out or if it comes on during truck operation, you should immediately shut down the engine until the cause is located and corrected. Coolant Temperature Light When lit, indicates engine cool- ant temperature is too high. Shut truck down until trouble can be located and corrected. Brake.Malfunction Light When lit, indicates low pres- sure in the brake system. Shut the truck down until the trouble can be located and corrected. Air Filter Restriction Light When lit, indicates that air filter is blocked. Shut truck down and replace filter element. Transmission Temperature Light When lit, indicates converter oil temperature is too high. Shift to a lower range. If light stays on, shut truck down until trouble can be located and cor- rected. Hydraulic Filter Restriction Light When lit, indicates that hydrau- lit filter is blocked. Shut truck down and replace filter element. Parking Brake Light When lit, indicates that the parking brake is applied. SM 593, Jan ‘93 Planned Maintenance-5
  • 16. Copyrighted Material Intended for CLARK dealers only Do not sell or distribute Introduction ELSRK’ Hour Meter Lift Mechanisms and Controls Check the hour meter for operation with the engine running. Report any malfunction. 1. 2. Check the function of the lift system and controls with the hydraulic pump (engine) running. Write the hour meter reading on the PM report form. Accelerator, Service Brake, Parking Brake, and Inching 1. 2. 3. 4. Push the brake pedal down fully and hold. The brakes should apply before the pedal reaches the floorplate. If the pedal continues to creep downwards, report the failure imme- diately. DO NOT OPERATE THE TRUCK UNTIL THE BRAKES ARE REPAIRED. Make sure the truck accelerates smoothly. Depress the inching pedal and depress the accelerator to see if the transmission disen- gages properly. Check the function of the parking brake. Apply and then put truck in gear and acceler- ate to insure that brake holds. Park the truck on a grade and apply the parking brake. The parking brake should hold a lift truck with rated load on a 15% grade. A! CAUTION Do not operate a lift truck if the ser- vice or parking brakes are not operat- ing properly. 3. Pull back on the tilt control lever and hold until the upright reaches the full back tilt position. Push forward on the lever to return the upright to the vertical position. Release the lever. A ! CAUTION Be sure that there is adequate over- head clearance before raising the up- right. Pull back on the lift control lever and raise the fork carriage to full height. Watch the up- right assembly as it rises. All movements of the upright, fork carriage, and lift chains must be even and smooth, without binding or jerking. Watch for chain wobble or loose- ness; the chains should have equal tension and move smoothly without noticeable wobble. Release the lever. If the maximum fork height is not reached, this indicates there is an inadequate (low) oil level in the hydraulic sump tank or severe binding within the upright. 4. Push forward on the lift control lever. Watch the upright as it lowers. When the forks reach the floor, release the lever. Planned Maintenance-6 SM 593, Jan ‘93
  • 17. Copyrighted Material Intended for CLARK dealers only Do not sell or distribute Introduction Auxiliary Controls If your lift truck is equipped with an attachment, test the control lever for correct function and briefly operate the attachment. Steering System The steering system, steer axle and steering linkage on your truck should be inspected periodically for abnormal looseness and damage, leaking seals, etc. Also, be alert for any changes in steering action. Hard steering, excessive freeplay (looseness) or un- usual sound when turning or maneuvering indicates a need for inspection or servicing. Check the steering system by moving the steering handwheel in a full right turn and then in a full left turn. Return the handwheel (steer wheels) to the straight-ahead position. The steering system com- ponents should operate smoothly when the steering wheel is turned. Never operate a truck which has a steering sys- tem fault. A WARNING Fasten your seat belt before driving the truck. Shift Control and Brakes Check and make sure that the travel area is clear in front of the truck. 1. 2. Push firmly on the brake pedal. Release the parking brake. Move the directional control lever from “N” (neutral) to FORWARD travel position. Remove your right foot from the brake pedal and put it on the accelerator pedal. Push down until the truck moves slowly forward. Re- move your foot from the accelerator pedal and push down on the brake pedal to stop the 3. truck. The brakes should apply smoothly and equally. Be sure the travel area is clear behind the truck. Put the directional control lever in the REVERSE travel position. Push down on the accelerator pedal until the truck moves slowly in the reverse direction. Remove your foot from the accelerator pedal and push down on the brake pedal to stop the truck. The brakes should apply smoothly and equally. When you have completed the operational tests, park and leave truck according to standard shut- down procedures. Be sure to make a record of all maintenance and operating problems you find. SM 593, Jan ‘93 Planned Maintenance-7
  • 18. Thank you very much for your reading. Please Click Here. Then Get COMPLETE MANUAL. NO WAITING NOTE: If there is no response to click on the link above, please download the PDF document first and then click on it.
  • 19. Copyrighted Material Intended for CLARK dealers only Do not sell or distribute Introduction CLSRK Under the Hood Check fluid levels and other components within the engine compartment. Unlatch and open the hood to access the engine compartment. / ! CAUTION To avoid the possibility of personal injury, never work in engine com- partment with engine running except when absolutely necessary to check or make adjustments. Take extreme care to keep hands, tools and loose cloth- ing, etc., away from fan and drive belts. Also remove watches, bracelets and rings. Belts and Hoses Inspect the engine coolant hoses and fan belt(s). Look for leaking and obvious damage, worn (frayed) condition, breaks, etc., which could cause failure during operation. Engine Air Cleaner Check the engine air cleaner for damage and con- tamination (excessive dirt buildup and clogging). Check for correct mounting attachments of the air cleaner. Be sure that the air cleaner hose is securely connected (not loose or leaking). Fan or cone shaped dust deposits on tube or hose surfaces indicate a leak. Change or service the air cleaner element every 50 to 250 operating hours, depending upon your appli- cation. Air cleaner service intervals may also be determined by the air restriction indicator. Battery Inspect the battery for any damage, cracks, leaking condition, etc. If the terminals are corroded, clean and protect them with CLARK Battery Saver (avail- able from your Clark dealer). If your battery has removable cell caps, check to be sure the cells are all filled. If necessary, refill with distilled water. Engine Cooling System Check coolant level in the coolant recovery bottle on a daily basis. The level should be between the mini- mum and maximum marks on the bottle when the engine is warm. - Max - Min Check radiator coolant level (on a daily basis in high-cycle applications): 1. Remove the radiator cap, only when the en- gine is cold. First turn the cap slowly to release pressure that may be in the radiator. Then push the cap down fully and turn to release and remove the cap. A ! CAUTION STEAM. Do not remove the radiator cap when the radiator is hot. Steam from the radiator will cause severe burns. Planned Maintenance-8 SM 593, Jan ‘93
  • 20. Copyrighted Material Intended for CLARK dealers only Do not sell or distribute Introduction Never remove the radiator cap while the engine is running. Stop the engine and wait until it has cooled. Even then, use extreme care when removing the cap from the radiator. It is good safety practice to use a shop cloth to cover the radiator cap while it is being removed. Wrap the cloth around the cap and turn it slowly to the first stop. Step back while the pressure is released from the cooling system. 2. When you are sure all the pressure has been released, press down on the cap, with the cloth in place, turn and remove it. Stand clear of the radiator opening; hot coolant may splash out. Failure to follow these instructions could result in serious personal injury from hot coolant or steam blowout and/or damage to the cooling system or engine. 3. The correct FULL level is the bottom edge of the filler neck. Fill Level - I II Overflow If level is low, add a 50/50 mixture of speci- fied coolant and water to the correct fill level. If you have to add coolant more than once a month or if you have to add more than one quart at a time, check the cooling system for leaks. 4. Inspect the coolant for condition. Look for excessive contamination or rust or oil in the coolant solution. Check the PM time interval for need to change coolant. 5. Check condition of radiator cap rubber seal and radiator filler neck for damage. Be sure they are clean. Check overflow hose for clogging or damage. NOTICE Your lift truck cooling system is filled with a factory-installed solution of 50% water and 50% permanent-type anti-freeze containing rust and corro- sion inhibitors. You should leave it in year around. Plain water may be used only in an emergency, but replace it with the specified coolant as soon as possible to avoid damage to the sys- tem. With only water in the system, do not let the engine run hot. Do not use alcohol or methanol antifreeze. Engine Oil With the truck level and the engine shut-down for at least 2 minutes, check the engine oil level. Locate the engine oil dipstick (at left side of engine). Pull the dipstick out, wipe it with a clean wiper and reinsert it fully into the dipstick tube. Remove the dipstick and check oil level. Acceptable Range GasILPGICNG Engine Oil Dipstick Diesel Engine Oil Dipstick It is normal to add some oil between oil changes. Keep the oil level above the ADD mark on the dipstick by adding oil as required. DO NOT OVER- FILL. Use the correct oil as specified under Lubri- cant Specifications. SM 593, Jan ‘93 Planned Maintenance-9
  • 21. Copyrighted Material Intended for CLARK dealers only Do not sell or distribute Introduction Cl!ARK Engine Oil and Filter Change It is recommended to: . Drain and replace the engine crankcase oil ev- ery 50 to 250 operating hours. See NOTICE below. . . Replace the engine oil filter every oil change. Remove the oil pan drain plug to drain old oil, after truck has been in operation and engine (oil) is hot (at operating temperature). NOTICE The time interval for changing en- gine oil will depend upon your appli- cation and operating conditions. To determine the correct schedule for your truck it is suggested that you periodically submit engine oil samples to a commercial laboratory for analy- sis of the condition of the oil. Oil performance designation: To help achieve proper engine performance and durability, use only engine lubricating oils of the proper quality. These oils also help promote engine efficiency which re- sults in improved fuel economy. A symbol has been developed by the API (American Petroleum Insti- tute) to help you select the proper engine oil. It should be included on the oil container you pur- chase. For diesel engines, CLARK recommends that you use motor oil that meets API Service Classi- fication CE/SF. CC/CD or CD/SF oils can be used in areas where CE oil is not available. Hydraulic Sump Tank Check the hydraulic sump tank fluid level. Correct fluid level is important for proper system operation. Low fluid level can cause pump damage. Overfill- ing can cause loss of fluid or lift system malfunction. Hydraulic fluid expands as its temperature rises. Therefore, it is preferable to check the fluid level at operating temperature (after approximately 30 min- utes of truck operation). To check the fluid level, first park the truck on a level surface and apply the parking brake. Put the upright in a vertical position and lower the fork carriage fully down. Pull the dipstick out, (attached to the sump breather) wipe it with a clean wiper and reinsert it. Remove dipstick and check oil level. Keep the oil level above the LOW mark on the dipstick by adding recommended hydraulic fluid only, as required. DO NOT OVER- FILL. Check the condition of the hydraulic fluid (age, color or clarity, contamination). Change (replace) the oil as necessary. Hydraulic Fluid and Filter Change Drain and replace the hydraulic sump fluid every 2000 operating hours. (Severe service or adverse conditions may require more frequent fluid change). Replace the hydraulic oil filter elements at every oil change. Remove, clean, and reinstall the hydraulic and steer system suction line screens at first PM and every 500 hours thereafter. Check for-leaks after installation of the filters. Also, check that the hydraulic line connec- tions at the filter adapter are tightened correctly. Sump Tank Breather Remove the sump tank fill cap/breather and inspect for excessive (obvious) contamination and damage. Clean or replace the fill cap/breather, per recom- mended PM schedule or as required by operating conditions. Transmission Fluid Check Before making check, run engine until unit is at operating temperature. This is important as trans- mission oil temperature should be 200 degrees F and the engine water jacket should be at operating tem- perature Planned Maintenance-10 SM 593, Jan ‘93