1. Page 1
Workshop 4: Creating Dashboards
Introduction
Thisworkshop’spurpose is todemonstrate the capabilitiesof IBMCognosWorkspace. Cognos
Workspace isa webbasedtool whichallowsuserstouse existingIBMCognosreportsto build
sophisticatedinteractive workspace whichhelpfacilitate collaborative decisionmaking.
Workspace Scenario
The Purchasingdepartmenthascome to youwitha requestfora dashboardthat containscontentfrom
reportsthat have beenpreviously builtforthem. Theirgoal isto give usersaninteractive environment
witha selectnumberof purchasingreports.Theywouldalsoliketohave a complete view of Invoice
data such as totalsand payeeswaitingtobe paidout inboth a listreportand graphical chart ona single
page.
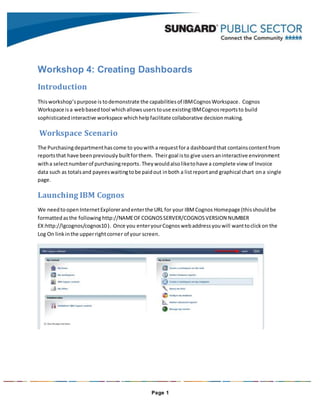
Launching IBM Cognos
We needtoopenInternetExplorerandenterthe URL for your IBMCognos Homepage (thisshouldbe
formattedasthe following http://NAMEOFCOGNOSSERVER/COGNOSVERSION NUMBER
EX:http://lgcognos/cognos10). Once you enteryourCognoswebaddressyouwill wanttoclickon the
Log On linkinthe upperrightcorner of your screen.
2. Page 2
Start Cognos Workspace
Once we are loggedintoIBMCognos. ClickonLaunch in the upperrightcorner to opena pull-down
menu,thenclickCognosWorkspace.
Create New
WhenopeningCognos Workspace,youwill be presentedwiththe optiontoCreate New orOpen
Existing.
Create New
3. Page 3
Build the Dashboard
You shouldnowbe lookingata screensimilartothe screenshotbelow,andare readyto beginbuilding
the dashboard.
1. ExpandPublicFolders
a. ExpandCognosTraining
b. ExpandDashboardWorkshop
Add Content to the Dashboard
We are ready to addcontentto our dashboard.
2. Select,dragand drop the ‘Purchase RequestPendingApproval’report.
4. Page 4
Whendraggingoverthisreportwe are essentiallyselectingthisreporttobe part of our dashboardand
will give usa constantlive view.
The Purchase RequestPendingApproval reportisdisplayingall currentpurchase requeststhathave
beensavedandare inthe pendingapproval stage. The reportshowsinformationsuchasthe userswho
initialedthe purchase request,total amount,vendorname,etc.
a. Your Workspace shouldlooksimilartothis.
3. Clickon the Toolbox tabon the bottomrightof the workspace.
5. Page 5
a. Select,dragand dropthe ‘SelectValue Filter’ widgetbelow the report.
b. Afterdroppingthe ‘SelectValue Filter’thisyouwill see the ‘Properties –SelectValue
Filter’ screenappear,asshown below (#4).
4. The SelectValue Filterallows userstofiltereitherpartsof or the entire dashboard basedonthe
valuesselectedinthe filter.We will configure the propertiesaslisted.
1. Data Item:PORequested By
2. Use onlythe followingvalues: Onlycheckthe PurchasingUsersindatabase
3. Numberitemthatcan be selected: Multiple values
4. Style:List
5. Showdescriptive text: PleaseSelectaPurchasingUser
6. Finallyclick once complete
6. Page 6
There Toolbox tabisthe locationwhere all the Toolsforthe dashboardpage are held. Whenadding
anythingotherthanreportcontent,youwill goto the toolbox. One of manytoolsavailable are
insertingawebpage to allowa userto accessa business relatedpage directlyfromtheirdashboard
insteadof havingtoopenan additional browserwindow.
5. Select,dragand dropthe ‘Total AmountWP’Chart.
a. Your Workspace shouldlooksimilartothis.
7. Page 7
6. Select,dragand dropthe ‘InvoicesReadyforPayment’ report.
a. Your Workspace should now looksimilartothis.
8. Page 8
7. Clickon the Toolbox tabon the bottomrightof the workspace.
a. Select,dragand dropthe ‘SliderFilter’widgetbelow the report.
9. Page 9
1. The SliderFilterissimilarinthe waythatotherdata filtersworkbutitsunique sliding
functionalityallowsuserstofiltereitherasingle ormultiplereportswithin the dashboardbased
on the valuesselectedinthe rangerof the sliderfilter.We willconfigure the properties forthis
filteraslisted below.
1. Data Item:Invoice Amount
2. From: LowestValue To:HighestValue
3. Style:Range of values
4. Displayvaluesasfilterlabels:Checked
5. Showdescriptive text: SelectInvoice Range Amount
6. Finallyclick once complete
10. Page 10
1. Your Workspace shouldnow looksimilartothis.
Personalizing your Workspace
Once the desiredcontentisavailableonyourworkspace,youhave the optionto customize itslayout
and style toyour appropriate business.
1. In the ribbonbar,click Layoutand Style thenclickonEditWorkspace Style.
11. Page 11
a. Nowyoucan change the backgroundcolorfor youworkspace canvasor applya
backgroundimage.
b. Clickthe dropdownmenuarrow inthe Color selectionbox.
c. Click on Set Color.
12. Page 12
d. Selectacolor fromthe palette touse as yourbackgroundcolor.The SetColor
popup will disappearandyourselectedcolorwill be availableinthe Preview
screen.
Clickon the Widgetstab.
13. Page 13
Thisscreengivesyouthe abilitytomodifythe appearance of ALLwidgetsonyourworkspace at one
time. Settingschangedhere are universallyappliedtoALLWidgetsonALL Tabs
Your Final Workspace shouldnowlooksimilartothis.
14. Page 14
Clickon the dropdowntoSave your Workspace inyourappropriate folderlocation,forlateraccess.
Thisnow concludesthe workshop.Youmaynow close the browserwindow.