
Recommended
More Related Content
Similar to How to master in Laparoscopic SuturingDRTVR.pptx
Similar to How to master in Laparoscopic SuturingDRTVR.pptx (20)
More from Varunraju9
Recently uploaded
Recently uploaded (20)
How to master in Laparoscopic SuturingDRTVR.pptx
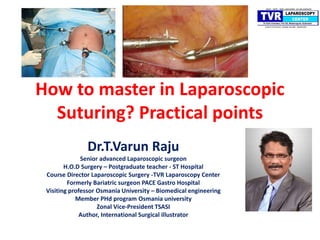
- 1. How to master in Laparoscopic Suturing? Practical points Dr.T.Varun Raju Senior advanced Laparoscopic surgeon H.O.D Surgery – Postgraduate teacher - ST Hospital Course Director Laparoscopic Surgery -TVR Laparoscopy Center Formerly Bariatric surgeon PACE Gastro Hospital Visiting professor Osmania University – Biomedical engineering Member PHd program Osmania university Zonal Vice-President TSASI Author, International Surgical illustrator
- 2. Learning Objectives #Working knowledge of Suturing Equipments #Ergonomics for Suturing #Tissue approximation – Intra corporeal Suturing – Extra corporeal Suturing – Staplers in Laparoscopy
- 3. Headings • 1.Open surgeon to Laparoscopic surgeon • 2.Ergonamics • 3.Instruments & Staplers • 4.Suture materials • 5.Entry and retrieval of the needle • 6.Intra corporeal suturing and extra carporeal loops • 7.Types of knots • 8.Dos ,Don’ts and alternatives • 9.Learning curve • 10.Take home message
- 4. 1.Open surgeon to Laparoscopic surgeon
- 6. 1.High degree of freedom 2,Work in line with visual axis 3.3-Dimentional Direct vision 4.Direct tactile feedback 1. Less degrees of freedom 2.2-dimentional vision 3.Loss of depth perception 4.View is not under control of the surgeon 5.Fulcrum effect 6.Decoupling of the visual & motor axes 7.Static posture ERGONAMICS DURING OPEN & LAPAROSCOPIC SURGERIES • OPEN SURGERY LAPAROSCOPIC SURGERY
- 7. 2.Ergonamics
- 8. • Straight Line principle • • Triangulation • Manipulation angle • Elevation angle • Low lying table • Gaze down view
- 9. Ideal Relaxed Position • Straight head, in the axis of the trunk, without rotation or extension of the cervical spine. • Shoulders in a relaxed and neutral position - arms alongside the body - elbows bent to 70 to 90 degrees - forearms in an horizontal or slightly descending axis- -hands pronated (physiological resting position). • Hands and fingers lightly grip the handles/ handpiece . •Waist line table •Gaze down view of monitor •Straight line principle •Triangulation.
- 10. • Base Ball Diamond Concept & Triangulation Monitor
- 12. Practical points • Surgeons should slowly learn these techniques. • They will develop their confidence once capable of suturing inside the abdominal cavity and as a result conversion rate will also decrease. • Many automatic laparoscopic suturing devices are invented for intracorporeal suturing but none of them are substitutes for manual laparoscopic suturing
- 13. Practical points • The flat grasping surface makes it possible to turn the needle in all directions as in conventional surgery. • Dome-shaped indentation at the tip automatically orients the needle in a particular& makes it easier to grasp the needle. • Laparoscopic knotting and suturing should be learned on a good quality endo trainer.
- 15. Needle holder
- 16. Self riding needle holder
- 17. Needle holders
- 18. Robotic needle holder #5mm needle holder #Expensive #Fit all hand sizes and one-handed operation. #Bidirectional flexion and unlimited rotation #Can access difficult to reach areas in the abdominal cavity .# Reusable, space-saving, and easy to use
- 19. Knot pushers
- 23. Barbed sutures Barbed suture is a self anchoring suture at approximately every 1 mm of tissue. There is a uniform distribution of wound tension across the suture line without the trouble and required skill of tying a knot.
- 25. 5.Entry and retrieval of the needle
- 26. Three ways • Through a port site - insert a less than 48mm curved needle through a 5- mm incision directly into cavity. • The suture is grasped 2 cm above the swedge of the needle and introduced directly through a 5-mm incision.
- 27. Directly through the incision Grasp the suture 2 cm above the swedge and insert through the incision under direct visualization with the laparoscope
- 28. 2nd technique • Through the cannula Curved needles smaller than 36 mm may be passed through the 12- mm cannula sleeve. • The suture is grasped 2 cm above the swedge of the needle and introduced directly through the cannula.
- 30. 3d technique • Through the abdominal wall • When a larger needle is required, it may be inserted percutaeously through the abdominal wall. • The suprapubic area generally has less fat and is suitable for insertion of the needle.
- 32. 6.Intra corporeal suturing and extra carporeal loops
- 33. Basic Suturing Tips 1.“Move the ground” means to change the location of targeted organs or tissues in order to suture them more efficiently. 2. Check whether the angle is correct by rotating the needle driver with a needle. Alternatively hold it vertically by twisting your needle driver just before closing blade of driver.
- 34. Suture management • 1) Always work within a specified small area. “Pull a thread, grab a needle” means to bring the suture and needle into a confined work-space, rather than using a large area while suturing. • 2) Move the forceps linearly to “grab” a suture or a needle. • 3) While “reeling” or drawing the suture, monitor the short tail more than the length of suture to avoid the short end pulling through. • 4) When reeling in the suture, pull it with a long “stride.”
- 35. Ligation • consists of three elements; 1) Creating a straight length of suture, 2) Throwing a loop, and 3) Securing the knot.
- 36. Ligation • 1) Making the suture straight There are ways to make a suture straight. One is the “The Pyramid position” • It is suitable for winding the suture with a needle driver • Align the suture and needle holder and wind the suture by twisting the needle holder with the straightened thread as the axis.
- 37. 2) Winding the loop • An ideal loop is created by taking a suture with a dissector and looping the suture around the needle driver. • This is ideally achieved with a short tail and a big loop. • Daily training of circulating a dissector clockwise and counterclockwise alternately more and more quickly without scratching the instruments together will train the surgeon to throw elegant knots.
- 38. 3) Tighten the knot • Do it firmly Feel the haptic sensation and use a sliding knot and surgeon’s knot effectively.
- 39. Handling the needle • In laparoscopic surgeries, Surgeons must be able to correctly grasp a needle at a perpendicular angle. Correct and quick grasping techniques are needed.
- 40. Pivot point
- 41. Grasping techniques • Direct • One can change the direction of a needle by using a dissector to adjust it and re-egrasping the needle with the needle driver. • Use both instruments to correctly adjust the angle to 90 degrees. • “Dancing Needle” 1. Hold the thread 15 mm above the swedge of the needle with a needle driver. 2. Grasp the middle of the needle gently with a dissector. 3. Pull the thread by the needle driver to adjust the needle to the proper angle.
- 42. Grasping techniques • “Wake me up” Insert the needle driver with its tip open between a needle and the tissue below. Then, close the tip slowly while pushing the tissue away from the needle.
- 43. Grasping techniques • Stab Stick a needle into non-vascular area of peritoneum to change the direction of needle by drawing the suture to adjust the angle • “Roll” Pick up the suture with the needle driver and roll it to adjust the needle to the desired right-angle position.
- 44. 7.Types of knots
- 45. Techniques for Laproscopic Surgeon’s Knot • The Surgeon’s Knot is one of the most important techniques for ligating tissues securely. After the first loop is thrown, a second loop is wound in the same direction before grasping the tail and securing the knot. • A square knot is a double loop in which the first throw is around a needle-driver’s shaft clockwise and the second throw around the needle-driver’s shaft counterclockwise. This creates a knot that allows for sliding versatility along the suture.
- 46. • “Moon walk” • Barber King • “Thumbs up” • “Funky fishing” • “Screw Driver”
- 48. Sliding (Slip) Knot Technique • “Sliding Knot” is a convenient method for ligating tissues securely by sliding the knot along the suture. Before securing the knot, make a square knot • Make a square knot • Release the lock of the knot by a dissector. • Slide the knot to the ligation point and secure the tissues
- 49. 8.Dos ,Don’ts and alternatives
- 50. • 1.Do practice by training with a mentor • 2.Do have a complete knowledge on laparoscopic equipment • 3.Do follow the ergonomics • 4.Do invest on standard instruments 1.Don’t loose patience 2.Don’tbe panicky when there is bleeding 3.Don’t become a patient with wrong posture 4.Don’tchange your assisting staff frequently
- 51. 9.Learning curve
- 52. Laparoscopic suturing learning curve in an open versus closed box trainer S. P. Rodrigues, T. Horeman, M. S. H. Blomjous, E. Hiemstra, J. J. van den Dobbelsteen, and F. W. Jansen Surg Endosc. 2016; 30: 315–322 • In conclusion, novices benefit from starting their training of difficult basic laparoscopic skills, such as suturing, in a transparent box trainer under direct vision. • It takes them less time, and they get less frustrated by the training with the same end result on their economy of movements and tissue handling skills. • Furthermore, it is a cheap adjustment to the standard box trainer setup, making it possible to provide trainees with their own training setup for the start of their basic laparoscopic skills training.
- 53. Learning curve • Only five articles (55%) provided a precise cut‐off value to see proficiency in the learning curve, ranging from 13 to 200 laparoscopic cholecystectomies. • For a surgeon with basic laparoscopic training, around 13– 15 cases are required initially to become well versed with both TEP and TAPP and there is no significant difference in the learning curve between the two procedures
- 54. Stapplers • Staplers: Types & Sizes Gastric Bypass Anterior Resection Types Linear staplers. Circular staplers. Color codes White - small gut. Blue / Gold - stomach (except pylorus). Green - pylorus / redo surgery. • Guidelines for Staple Anastomosis •Port positions for stapling •Stay sutures for tensioning •Enterotomy positioning and size •Positioning and angulations of the stapler prior to closure •Checking staple line •Complete closure of residual opening
- 55. 10.Take home message • 1.Learn the basics of laparoscopic equipment • 2.Identify the mentors and work under their gidence • 3.Practice –Practice –Practice • 4.Follow the ergonomic principles and be healthy • 5.Get your endotrainer and at home practice the suturing techniques • 6.Instead of easy devices/loops, start suturing in all the cases • 7.Invest on the quality equipment & instruments • 8.Use all the available techniques for the best approximation of the tissues
- 56. REFERENCES • Nezhat C, Nezhat F, Nezhat CH. Nezhat's Video-Assisted and Robotic-Assisted Laparoscopy • with DVD. 4th edition. New York: Cambridge University Press, 2013. Takayasu K, Yoshida K, Mishima T, Watanabe M, Matsuda T, Kinoshita H. Upper body position analysis of different experience level surgeons during laparoscopic suturing maneuvers using optical motion capture. Am J Surg. 2019 Jan;217(1):12-16. • Lim S, Ghosh S, Niklewski P, Roy S. Laparoscopic Suturing as a Barrier to Broader Adoption of Laparoscopic Surgery. JSLS. 2017 Jul-Sep;21(3)
- 57. Videos
- 58. THANK YOU !