
Recommended
More Related Content
Viewers also liked
Viewers also liked (20)
Fol
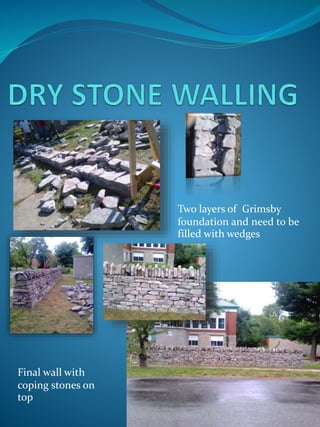
- 1. Two layers of Grimsby foundation and need to be filled with wedges Final wall with coping stones on top
- 2. STAINED GLASS These colored glasses were cut into shape, and the centre piece was painted then scratch into heart on one side, and place it in the kiln for hours. Working on the other side of the glass with stained, in here I applied only on within the heart, so that it gives me this yellow effect. Each piece was wrapped with copper foil then held together by soldering . The last I applied patina on so that it has that worn out-look
- 3. RESTORING OLD WINDOWS Old putty and paint were scraped and glasses were removed- both broken and unbroken. Applied shellac then new putty and place back the glass with little pressure ,then glazing pins were applied. Broken glasses were replaced with new cut ones and white powder was used to clean the glass from putty.
- 4. PLASTER Making molding After the wall get plastered , we ran mold along the wall , but mold can’t run in the corners , that’s why it has to be fixed by hand
- 5. Masonry and stone carving Top view Side view Touched a bit on lettering
- 6. STONE BRICK MORTAR We didn’t use string here , but we used spirit level instead.
- 7. RESTORATION CARPENTRY Tool box Door frame Mortise and tenon Assemble the joints by pegs.
- 8. 2nd year Window conservation Removing old putty Replacing the deteriorated part
- 10. Timber Frame shed roof project Mortise and tenon joint, bracing the post to the beam
- 11. Art Du Trait
- 12. Art Du Trait Assembly model of king post,hip, rafters,principal rafters,purlins,and cleats
- 13. Visiting West block East block Stone conservation
- 14. Visiting west block Classmates and instructor (Keith Blade) on West Block New replaced Copper roof
- 15. Third year project , design and model making