Equine Radiography Techniques & Positioning Guide
•Download as ODP, PDF•
5 likes•526 views

This document provides guidelines for positioning horses and acquiring quality radiographic images. It discusses restraint, safety precautions, positioning techniques, and tips for different limb and whole body views. Standard lateromedial, dorsopalmar and oblique views are described for the limbs, including markers and beam angulation. Dental, stifle, elbow and shoulder views are also outlined. Safety for the horse and humans is emphasized, including use of protective equipment and sedation if needed. Proper technique, anatomy knowledge and practice are advised to obtain diagnostic radiographs.

Recommended
Recommended
More Related Content
What's hot
What's hot (20)
Viewers also liked
Viewers also liked (17)
Similar to Equine Radiography Techniques & Positioning Guide
Similar to Equine Radiography Techniques & Positioning Guide (20)
Recently uploaded
Recently uploaded (20)
Equine Radiography Techniques & Positioning Guide
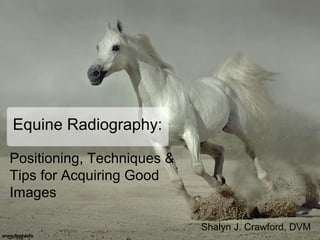
- 1. Equine Radiography: Positioning, Techniques & Tips for Acquiring Good Images Shalyn J. Crawford, DVM
- 2. Images • Unless otherwise indicated, all positioning photographs included in this lecture have been reproduced with permission from Christine Garloff's presentation Large Animal Radiology Digital X-ray of the Front and Hind Limb • All anatomical model and unlabeled radiographic views drawn from Iowa State University College of Veterinary Medicine Horse Limb Anatomy free resource website. Accessed web 9 Aug 2015
- 3. Restraint & Safety • Horse holder preferred to cross tie • Opposite front limb held up, or ipsilateral front limb held up • Twitch • Sedation: – Xylazine 150mg – Detomidine 3mg • ALL individuals wearing lead aprons and monitoring badges, plate holder lead gloves – Make sure to provide owner with lead apron • Use an inanimate plate holder and tripod whenever possible
- 4. Radiation Safety Aids X100S Tripod Stand. Digital Image. Pacific Northwest X-ray. Pacific Northwest X-ray. Web. 9 Aug 2015. TOMAHAWK Portable Cassette/CR-Plate Holder/Positioner. Digital Image. MinXray. MinXray. Web. 9 Aug 2015.
- 5. Positioning • Standing square • Level solid ground surface • Stand horse on blocks L and R to level • Stand out of direct or bright light to see collimator guide light • Position horse so cords can reach both L and R sides • Adequate power supply
- 6. Positioning Aids Redden Offset Lateral & D.P. X-Ray Positioning Block. Digital Image. Nanric. Nanric. Web. 9 Aug 2015. Redden navicular xray block. Digital Image. Nanric. Nanric. Web. 9 Aug 2015. EZ BLOX strap-on xray blocks. Digital Image. EDSS Hoof Care Products. Equine Digital Support Systems. Web. 9 Aug 2015.
- 7. Technique • Varying – plain film, CR, DR • Contact generator manufacturer for technique chart • Know focal distance for your generator – Use the retractable tape measure!! • Collimate, collimate, collimate...collimate • Tip – always place the plate as close to the anatomy of interest as possible • Tip (80kVp/15mA generators) – shorten focal distance to improve penetration • Tip – if images are dark enough but grainy, cut kVp 15% and increase mAs ~20%.
- 9. Adjusting Image Technique ● Too dark? Decrease mAS by half ● Too bright? Increase mAS by 2 ● Too much contrast? Increase kVp ● Too little contrast? Decrease kVp ● Too noisy (grainy)? Increase kVp
- 10. Technique Cont. • Use positioning markers – Custom LF, RF, LH, RH markers – Can use coin or paper clip in a pinch – Dorsal hoof wall markers: barium, horse shoe nail, wire • Patient preparation – Clean visible dirt/mud from limbs – Foot prep: • Remove shoes • Clean dirt/mud from bottom and outside of hoof • Lightly pare sole if necessary • Pack frog sulci with play-doh
- 12. Markers • Markers always to be placed dorsal or lateral to the anatomy • Affix to plate with velcro tabs or duct tape • Tip – to only move the marker once take film series in order of DP, DLPMO, DMPLO, then LM • Tip – if taking a two foot series, stand horse one foot on block and one on tunnel. Take the tunnel series of one foot and the DP and LM of the other foot then switch blocks only once
- 13. Know Thy Anatomy • Sample resources: – Iowa State University interactive horse limb anatomy (free!) • http://vetmed.iastate.edu/limbanatomy/horse.html – Virtual Radiography of the Horse (free) • http://www.3d-it.vet.ed.ac.uk/xrayhandbook/webpages/horse.html – Clayton, Flood & Rosenstein, Clinical Anatomy of the Horse ~$120 – The Glass Horse, Elements of the Equine Distal Limb ~$50 • http://www.3dglasshorse.com/default.asp – Horse Anatomy: Equine 3D, app for iOS & Android ~$10
- 14. P3 Lateromedial (LM) • Position: weight bearing on blocks • Casette: against medial aspect of limb on ground, perpendicular to limb • Beam: centered at mid coronary band with heel bulbs visually superimposed, generator on the ground • Use dorsal hoof wall markers for rotation/sinking eval
- 15. P3 Dorsopalmar (DP) • Position: weight bearing on blocks • Casette: on ground palmar/plantar aspect of limb, perpendicular to limb • Beam: parallel to ground, centered at coronary band • Make sure to radiograph in reference to the hoof, if horse toes out place on block accordingly and direct beam straight at toe
- 16. P3 Dorsolateral-Palmaromedial Oblique (DLPMO), Dorsomedial-Palmarolateral Oblique (DMPLO) • Position: weight bearing on tunnel • Casette: in tunnel • Beam: 60°PrDi, 45° off DP (either lateral or medial), just distal to coronary band
- 17. P3 Dorso-Proximal Palmaro-Distal Oblique Views (D65Pr-PaDiO, Solar Margin and Dorsal Navicular) • Position: weight bearing on tunnel • Casette: inside tunnel • Beam: centered 2cm above dorsal coronary band 60-65° angle • This view can also be taken with foot on Redden block and beam parallel to ground • Increase mAs to view navicular bone, decrease mAs to not burn through solar margin
- 18. P3 Palmaroproximal-Dorsodistal Oblique (PaPr-DDiO, Navicular skyline) • Position: weight bearing on tunnel with limb placed caudally • Casette: in tunnel • Beam: 50-55°PaPr centered just above heel bulbs 50-55°
- 19. Fetlock Lateromedial (LM) • Position: weight bearing • Casette: medial to limb, perpendicular to ground • Beam: parallel to floor, centered on PIP joint • Distal condyles of cannon bone should be superimposed in a true lateral
- 20. Fetlock Dorsopalmar/plantar (DP) • Position: weight bearing • Casette: palmar/plantar aspect of limb, on ground parallel to pastern • Beam: 20° proximally angled • Proximal sesamoids should be offset proximally from joint when viewing radiograph • Ergot is clearly visible in this view
- 21. Oblique Views Oblique Views and Large Animal Distal Limb Normal Anatomy, Anderson K L, 2011 D-L-P-M D-M-P-L Lateral structures will be viewed/highlighted on the palmar/plantar aspect of the radiograph Medial structures will be viewed/highlighted on the palmar/plantar aspect of the radiograph Markers always placed laterally
- 22. Fetlock Dorsolateral-Palmaromedial Oblique (DLPMO), Dorsomedial-Palmarolateral Oblique (DMPLO) • Position: weight bearing • Casette: palmaro/plantaro-medial or lateral to limb, parallel to pastern • Beam: 45° off DP (medial or lateral) centered at fetlock joint • Proximal sesamoid of interest should be clearly offset
- 23. Fetlock Flexed Lateromedial • Position: held in flexion – Tip – hold toe of foot with one gloved hand and the plate with the opposite hand • Casette: medial and parallel to limb • Beam: parallel to ground/perpendicular to limb, centered at PIP joint • Make sure to have generator and computer settings set before having plate/limb holder get in position
- 24. MC/MT II & IV (Splint bones) Dorsolateral-Palmaromedial Oblique (DLPMO), Dorsomedial-Palmarolateral Oblique (DMPLO) • Position: weight bearing • Casette: palmaro/plantaro- lateral or medial to limb • Beam: 45° off DP (medial or lateral) centered at area of interest on splint bone • Decrease mAs to not overexpose the delicate splint bones • To offset MC/MT IV → DLPMO/PMDLO • To offset MC/MT II → DMPLO/PLDMO
- 25. Carpus Lateromedial (LM) • Position: weight bearing • Casette: medial to limb, perpendicular to ground • Beam: parallel to floor, centered on mid-carpus
- 26. Carpus Dorsopalmar (DP) • Position: weight bearing • Casette: palmar aspect of limb, perpendicular to ground • Beam: parallel to floor, centered mid-carpus
- 27. Carpus Dorsolateral-Palmaromedial Oblique (DLPMO), Dorsomedial-Palmarolateral Oblique (DMPLO) • Position: weight bearing • Casette: palmaromedial/lateral to limb • Beam: parallel to floor, 30° off LM or ML, centered mid-carpus
- 28. Carpus Flexed Lateromedial • Position: held in flexion 60° – Tip – hold toe of foot with one gloved hand and the plate with the opposite hand • Casette: medial and parallel to limb • Beam: parallel to ground/perpendicular to limb, centered between proximal and distal row of carpal bones • Make sure to have generator and computer settings set before having plate/limb holder get in position
- 29. Carpus Skyline Views (proximal and distal rows) • Position: held in flexion – Hold limb in flexion and push forward to expose distal row of carpal bones • Casette: plate held against dorsal aspect of cannon with carpus centered • Beam: steep dorsoproximal-palmarodistal angle downward standing in front of the horse, adjust angle to focus on proximal vs distal row of carpal bones Distal – ulnar, 4th , 3rd , 2nd Proximal – ulnar, intermediate, radial
- 30. Tarsus Lateromedial (LM) • Position: weight bearing • Casette: medial to limb, perpendicular to ground • Beam: parallel to floor, centered proximal intertarsal joint
- 31. Tarsus Dorsoplantar (DP) • Position: weight bearing • Casette: plantar aspect of limb, perpendicular to ground • Beam: slightly proximodistal angle, centered proximal intertarsal joint
- 32. Tarsus Dorsolateral-Plantaromedial Oblique (DLPMO), Dorsomedial-Plantarolateral Oblique (DMPLO) • Position: weight bearing • Casette: plantaromedial/lateral to limb • Beam: parallel to floor, 45° off DP, centered proximal intertarsal joint DMPLO DLPMO
- 35. Stifle Lateromedial (LM) • Position: weight bearing • Casette: medial to limb, as dorsal as possible – Move slowly and carefully as horse's can be very sensitive to the plate in this area!! • Beam: parallel to floor, centered stifle joint • Femoral condyles should be superimposed • Make sure to get the entire patella and proximal tibia in the image; if your plate is too small/horse too large you may have to take two views to image all of the anatomy
- 36. Stifle Lateromedial (LM) • Position: weight bearing • Casette: medial to limb, as dorsal as possible – Move slowly and carefully as horse's can be very sensitive to the plate in this area!! • Beam: parallel to floor, centered stifle joint • Femoral condyles should be superimposed • Make sure to get the entire patella and proximal tibia in the image; if your plate is too small/horse too large you may have to take two views to image all of the anatomy
- 37. Stifle Caudolateral-Craniomedial Oblique (CdLCrMO) • Position: weight bearing • Casette: held against dorsomedial aspect of stifle • Beam: centered at stifle 30° caudolateral (from true lateral) • Medial femoral condyle should be clearly visible
- 38. Stifle Caudocranial (CdCr) • Position: weight bearing • Casette: held against dorsal aspect of limb centered at patella • Beam: stand directly behind the horse (CAUTION) with generator held close to hindquarters, angle proximodistally (downward) aiming for middle of joint
- 39. Humeroradial Joint (Elbow) • Medial-lateral (ML): – Position: weight bearing or limb held extended forward (more motion) – Casette: against lateral aspect elbow – Beam: directed medial-lateral Love, N. Equine Appendicular Radiology [SlideShare slides]. Retrieved from ://radfileshare.cvm.ncsu.edu/VMB976/setup/eqpositioning.pdf
- 40. Humeroradial Joint (Elbow) • Craniocaudal (CrCd): – Position: weight bearing or limb held up with radius parallel to floor – Casette: against caudal aspect elbow – Beam: centered elbow joint, for standing view may need to direct beam slightly caudodistally Love, N. Equine Appendicular Radiology [SlideShare slides]. Retrieved from ://radfileshare.cvm.ncsu.edu/VMB976/setup/eqpositioning.pdf
- 41. Selected Dental Radiographs • Tip – helps to have horse markedly sedate and resting head on a stand, tall trash can, hay bales, etc. to minimize motion • Tip – use a rope halter, no metal fittings • Remember! plate MUST be closest to the anatomy of interest • Incisor block can be used for oblique views • Can use malleable metal probe to mark draining facial tracts or contrast material
- 42. Dental Radiographs Cont. • LM – plate L or R of head depending on anatomy of interest, beam centered near rostral aspect facial crest • DV – plate against mandible, beam perpendicular centered near rostral facial crest • DV oblique (for viewing maxillary tooth roots) – beam centered rostral facial crest, angled 30-45° (from lat) dorsal-ventral • VD oblique (for viewing mandibular tooth roots) – beam centered ventral edge mandible, angled 45- 60° (from lat) ventral-dorsal
- 43. Maxillary cheek teeth are highlighted – which view was taken?
- 44. Scapulohumeral Joint (Shoulder) • Requires higher output machine due to large soft tissue mass • Medial-lateral view: – Position: holder extends front limb of interest as far out in front of the horse's body as possible – Casette: held against lateral aspect shoulder – Beam: directed medial-lateral – Try to superimpose shoulder joint over trachea to reduce soft tissue overlap
- 45. Love, N. Equine Appendicular Radiology [SlideShare slides]. Retrieved from ://radfileshare.cvm.ncsu.edu/VMB976/setup/eqpositioning.pdf
- 46. Temporomandibular Joint (TMJ) - R45°V30°L-CdDO ● Position: Standing with head extended on head stand ● Casette: Dorsal aspect of poll/occipital protuberance, 15° angle centered on TMJ of interest ● Beam: Directed 30° lateral to DV, 45° rostroventral- caudodorsal angle Positioning of the head on the post and the placement of the cassette holder, From: Ebling, A.McKnight, A., Seiler, G., & Kircher, P. (2009). A Complementary Projection of the Equine Temporomandibular Joint. Veterinary Radiology and Ultrasound 50 (4) 388.
- 47. References Butler, Janet A. Clinical Radiology of the Horse. Oxford, UK: Wiley-Blackwell Pub., 2008. Print. Ebling, Alessia J., Alexia L. Mcknight, Gabriela Seiler, and Patrick R. Kircher. "A Complementary Radiographic Projection Of The Equine Temporomandibular Joint." Veterinary Radiology & Ultrasound 50.4 (2009): 385-91. Print. Griffin, Cleet. "EQ8 Dental Imaging." Proc. of Western Veterinary Conference, Las Vegas. Web.O'Brien, Timothy R. O'Brien's Radiology for the Equine Ambulatory Practitioner. Jackson, WY: Teton NewMedia, 2005. Print. Redden, R. F. "The Equine Foot In-Depth: Clinical and Radiographic Examination of the Equine Foot." 49th Annual Convention of the American Association of Equine Practitioners, 2003. New Orleans. 21 Nov. 2003. Web. 1 Aug. 2015. Thrall, Donald E. Textbook of Veterinary Diagnostic Radiology. St. Louis, MO: Saunders Elsevier, 2007. Print.