
Recommended
More Related Content
What's hot
What's hot (19)
Similar to Flow-FX Flow Screw ~ Surgical Technique Guide
Similar to Flow-FX Flow Screw ~ Surgical Technique Guide (20)
Recently uploaded
Recently uploaded (20)
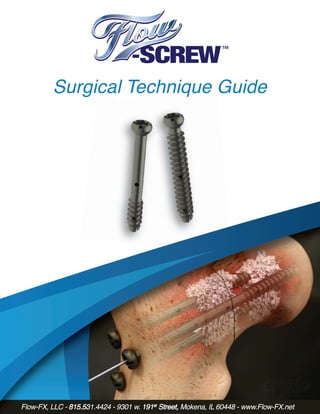
Flow-FX Flow Screw ~ Surgical Technique Guide
- 1. FX, LLC - 815.531.4424 - 19110 Darvin Drive, Mokena, IL 60448 - www.Flow-FX.net Surgical Technique GuideSurgical Technique GuideSurgical Technique GuideSurgical Technique GuideSurgical Technique GuideSurgical Technique GuideSurgical Technique Guide Flow-FX, LLC - 815.531.4424 - 9301 w. 191 Street, Mokena, IL 60448 - www.Flow-FX.netFlow-FX, LLC - 815.531.4424 - 9301 w. 191 Street, Mokena, IL 60448 - www.Flow-FX.netStreet, Mokena, IL 60448 - www.Flow-FX.netStreet, Mokena, IL 60448 - www.Flow-FX.netStreet, Mokena, IL 60448 - www.Flow-FX.net
- 3. mplant Overview 1 mplant Features and Benefits 2 strument Overview 3 urgical Technique 5 1. Fracture Reduction 5 2. Screw Prep 5 3. Screw Placement 7 4. Flow-Screw™ - Delivery of Bone Void Filler 7 5. Close 8 struction for Use 9 Contents Implant Overview 1 Implant Features and Benefits 2 Instrument Overview 3 Surgical Technique 5 1. Fracture Reduction 5 2. Screw Prep 5 3. Screw Placement 7 4. Flow-Screw™ - Delivery of Bone Void Filler 7 5. Close 8 Instruction for Use 9 Contents
- 4. Washer 13mm Flow-Screw™ | 1 Implant OVERVIEW STG-102 Rev C Washer 13mm 6.5mm, Partially Threaded - Short 6.5mm, Partially Threaded - Long 6.5mm, Fully Threaded 7.3mm, Partially Threaded - Short 7.3mm, Partially Threaded - Long 7.3mm, Fully Threaded Flow-Screw™ | 1 Implant OVERVIEW 30-150mm (5mm Increments) 45-150mm (5mm Increments) 20-60mm (5mm Increments) 30-150mm (5mm Increments) 45-150mm (5mm Increments) 20-60mm (5mm Increments) Partially Threaded - Short Diameter x Length 3.5mm x 10-60mm *2mm increments 4.5mm x 10-60mm *2mm increments 5.5mm x 30-120mm *5mm increments 6.5mm x 30-150mm *5mm increments 7.3mm x 30-150mm *5mm increments 3.5mm x 10-60mm *2mm increments 4.5mm x 10-60mm *2mm increments 5.5mm x 30-120mm *5mm increments 6.5mm x 45-150mm *5mm increments 7.3mm x 45-150mm *5mm increments Diameter x Length Diameter x Length 3.5mm x 10-60mm *2mm increments 4.5mm x 10-60mm *2mm increments 5.5mm x 20-120mm *5mm increments 6.5mm x 20-60mm *5mm increments 7.3mm x 20-150mm *5mm increments Partially Threaded - Long Fully Threaded
- 5. The patented Flow-Screw System with the Flow-Fx Side-Port Cannula enables precise delivery of bone void filler throughout the body. Cannulated, fenestrated screws available in 7.3mm, 6.5mm, 5.5mm, 4.5mm and 3.5mm in partially threaded and fully threaded versions. Aggressive thread and wide range of lengths make it appropriate for most situations. A capable stand-alone fixation system, Flow-Screw can work alongside other systems for improved outcomes. Biologics Era has officially begun, allowing dramatic alterations in orthopedic re care, just in time to address the steadily rising number of osteoporotic fractures ll as complex non-healing fractures. Flow-Screw™ | 2 Features & BENEFITS The patented Flow-Screw System with the Flow-Fx Side-Port Cannula enables precise delivery of bone void filler throughout the body. Cannulated, fenestrated screws available in 7.3mm, 6.5mm, 5.5mm, 4.5mm and 3.5mm in partially threaded and fully threaded versions. Aggressive thread and wide range of lengths make it appropriate for most situations. A capable stand-alone fixation system, Flow-Screw can work alongside other systems for improved outcomes. The Biologics Era has officially begun, allowing dramatic alterations in orthopedic fracture care, just in time to address the steadily rising number of osteoporotic fractures as well as complex non-healing fractures. Flow-Screw™ | 2 Features & BENEFITS STG-102 Rev C
- 6. Surgical Flow-Screw™ | 3 Parallel Guide-Wire Guide Multiple Guide-Wire Guide Angled Guide-Wire Guide Washer Sheath T-Handle Driver Handle Side-Port Cannula Countersink Cannulated Screw Sheath TECHNIQUETECHNIQUE Countersink Surgical Flow-Screw™ | 3 Parallel Guide-Wire Guide Multiple Guide-Wire Guide Angled Guide-Wire Guide Washer Sheath T-Handle Driver Handle Side-Port Cannula Cannulated Screw Sheath TECHNIQUETECHNIQUE STG-102 Rev C
- 7. Flow-Screw™ | 4 Threaded Guide-wire Guide-Wire Guide Trocar Guide-Wire Guide Screw-Length Gauge SPC Plunger Drill, Cannulated Tap, Cannulated Screw Driver Screw Driver Bolt Flow-Screw™ | 4 Threaded Guide-wire Guide-Wire Guide Trocar Guide-Wire Guide Screw-Length Gauge Drill, Cannulated Tap, Cannulated Screw Driver Screw Driver Bolt SPC Plunger IO Adapters - Short and Long HMT Adapter Screw Driver STG-102 Rev C
- 8. 2. Determine the screw diameter proper for the indication. (Some instruments vary with screw diameter) Sets include 3.5, 4.5, 5.5, 6.5, and 7.3mm diameter screws of varying lengths and thread length Fracture Reduction Cannulated Screw Prep 3. Incise for the cannulated screw. The incision will be approximately 1-2cm depending on anatomy and screw size 4. Install the cannulated screw guide-wire Choose the correct guide-wire for the screw diameter Choose the correct guide-wire guide for the application Drive the guide-wire through the guide using a surgical drill with guide-wire attachment until the proper depth is reached (using fluoroscopy as needed) Remove the guide-wire guide when complete 1. Reduce the fracture as required Angle Guide Multiple Guide-Wire Guide Parallel Guide-Wire Guide Fracture Reduction Surgical TECHNIQUETECHNIQUE Screw Diameter (mm) Guide-wire Diameter (mm) Guide-wire Drill Cannula Pilot hole (mm) 3.5 4.5 5.5 6.5 7.3 102-30-00 102-30-00 102-30-01 102-30-02 102-30-02 102-01-00 102-01-01 102-01-02 102-01-03 102-01-03 Taps 102-02-00 102-02-01 102-02-02 102-02-03 102-02-04 102-50-00 102-50-00 102-50-01 102-50-02 102-50-02 1.5 1.5 2.0 2.8 2.8 2.4 3.0 3.6 4.8 4.8 Flow-Screw™ | 5 Surgical TECHNIQUETECHNIQUE STG-102 Rev C
- 9. Cannulated Screw Prep (cont) 5. Measure the cannulated screw length. Measure the distance from the tip of the guide-wire to the bone surface by sliding the cannulated screw length gauge over the guide-wire until it contacts the bone and reading the number adjacent to the back end of the guide-wire Remove cannulated screw length gauge when complete 6. Drill the cannulated screw. Attach the correct size drill bit to the surgical drill. Drill to the desired depth. Remove the cannulated screw drill 7. Tap and countersink for the Flow-screw (optional). Attach the T-Handle to the correct size tap Tap over the guide-wire Remove the tap Countersink if indicated Cannulated Screw Prep (cont) 5. Measure the cannulated screw length. Measure the distance from the tip of the guide-wireMeasure the distance from the tip of the guide-wire Flow-Screw™ | 6STG-102 Rev C
- 10. 8. Install the cannulated Flow-Screw. Fasten the correct diameter and length using Flow-Screw Driver bolt to the cannulated screw driver Attach the Driver Handle (or the T-Handle) to the driver Install the cannulated Flow-Screw, watching carefully for guide wire migration. Apply washer as needed Remove the Handle (or optionally remove the entire driver/fastener if BVF delivery is not needed) Remove the guide-wire unless IO adapter usage is planned Cannulated Screw Placement If delivery of Flow-FX BVF is indicated adjacent to a joint, injection of up to 4cc of radiopaque contrast through the Flow-Screw is recommended to confirm joint surface integrity. If the articular surface is compromised, extreme care should be taken if BVF delivery is chosen, to prevent leakage into joint. do not use contrast in patients with known allergy. 9. Prepare the BVF. The Flow-Screw can also be used for the delivery of injectable bone void fillers capable of being delivered via a 16 gauge needle Prepare the BVF per the manufacturer’s instructions Attach BVF syringe to the side-port cannula when complete Non-precision delivery of BVF- Thread IO adapter onto screw head with "finger tightness". Remove guide wire. Attach BVF syringe and inject. Detach syringe using Kocher clamp for countertorque to prevent adapter from unthreading. Remove IO adapter when complete and clean BVF off of screw head if needed. Guide wire can be used as plunger to clear screw cannulation Cannulated Flow Screw - Delivery of Bone Void Filler (BVF) Washer Sheath Option Flow-Screw™ | 7 Surgical TECHNIQUETECHNIQUE 8. Install the cannulated Flow-Screw. Fasten the correct diameter and length cannulated Flow-Screw to the correct cannulated screw driver. Attach the Driver Handle (or the T-Handle) to the driver. Install the cannulated Flow-Screw. Remove the Handle (or optionally remove the entire driver/fastener). Remove the guide-wire. Cannulated Screw Placement 9. Prepare the BVF. The Flow-Screw can also be used for the delivery of injectable bone void fille capable of being delivered via a 16 gauge needle. Prepare the BVF per the manufacturer’s instructions. Attach BVF syringe to the side-port cannula when complete. Cannulated Flow Screw - Delivery of Bone Void Filler (BVF) Washer Sheath Option Flow-Screw™ | 7 Surgical TECHNIQUETECHNIQUE STG-102 Rev C
- 11. Dispense the BVF. Insert the side-port cannula into the driver/ fastener (or directly into the screw head cannulation). Slide the side-port cannula in until the tip is just past the void to be filled. The depth of the side-port cannula can be judged under imaging as the cannula is radiopaque. The BVF will flow out of the side-port cannula in all directions in the vicinity of the tip and into the void through the nearest fenestrations in the screw. Plunge the BVF (5.5/6.5/7.3mm only). Remove the syringe and replace it with the side-port plunger. Dispense the BVF that remains in the cannula by pressing the plunger forward until it comes to the end of the cannula. Remove the side-port plunger and side-port cannula. Remove the driver/fastener (if present). Clean the BVF from the cannulated screw head and bone exterior. Close. e ulated Flow Screw - Delivery of BVF (cont) Flow-Screw™ | 8 Precision Delivery of BVF- use another same sized Flow-Screw to determine desired depth of side-port cannula and apply sterile tape or surgical marker to show depth. Attach BVF syringe to side-port cannula and insert to desired depth before injecting 10. Dispense the BVF Insert the side-port cannula into the driver/ fastener (or directly into the screw head cannulation) Slide the side-port cannula in until the tip is just past the void to be filled. The depth of the side-port cannula can also be judged under imaging as the cannula is radiopaque. The BVF will flow out of the side-port cannula in all directions in the vicinity of the tip and into the void through the nearest fenestrations in the screw Note: the 3.5/4.5mm Side port cannulas are delicate and easily bent. Care must be taken with these instruments and IO adapter is recommended if non-precision delivery will suffice 11. Plunge the BVF (5.5/6.5/7.3mm only). Remove the syringe and replace it with the side-port plunger Dispense the BVF that remains in the cannula by pressing the plunger forward until it comes to the end of the cannula Remove the side-port plunger and side-port cannula Flow-Screw can also be plunged with a guide wire if desired 12. Remove the driver/fastener (if present) 13. Clean the BVF from the cannulated screw head and bone exterior 14. Close Close Cannulated Flow Screw - Delivery of BVF (cont) Precision Delivery of BVF- use another same sized Flow-Screw to determine desired depth of side-port cannula and apply sterile tape or surgical marker to show depth. Attach BVF syringe to side-port cannula fastener (or directly into the screw head cannulation) Slide the side-port cannula in until the tip is just past the void to be filled. The depth of the side-port cannula can also be judged under imaging as the cannula is radiopaque. The BVF will flow out of the side-port cannula in all directions in the vicinity of the tip and into the void through the nearest fenestrations in the Flow-Screw™ | 8 Precision Delivery of BVF- use another same sized Flow-Screw to determine desired depth of side-port Cannulated Flow Screw - Delivery of BVF (cont) Precision Delivery of BVF- use another same sized Flow-Screw to determine desired depth of side-port Cannulated Flow Screw - Delivery of BVF (cont) STG-102 Rev C
- 12. Effective February 2018 IFU-102 rev C IFU-102 revC !"#$ %&'()$ *+, * -.//0".1)2*&'()$*&341)5 * Instructions for Use DESCRIPTION The Flow-FX Flow-Screw is designed as a Cannulated Screw systemforthefixationofavarietyoffracturesandiscomposedofa cortical screw and accompanying instruments. The Flow-Screw can also be used for the delivery of injectable bone void fillers capableofbeingdeliveredviaa16-gaugeneedle.TheFlow-Screw isnot designedtobecoupledtoothermetal implants. INDICATIONS The Flow-Screw is intended for the fixation of bone fractures and bone reconstructions. When used for these indications, the Flow- Screw can also be used to deliver injectable bone void fillers to a surgical site to treat fractures throughout the skeletal anatomy as deemedappropriatebythesurgeon. MATERIALS TheFlow-Screwimplantcomponentsaremadeoftitaniumalloy(Ti- 6Al-4V) conformingto ASTM F136 or stainless steel conformingto ASTMF138orASTMF2229. CONTRAINDICATIONS • Insufficient quantity or quality of bone, conditions that retardhealing(not including pathological fractures) andconditions causingpoor bloodsupply. • Foreign body sensitivity. Where material sensitivity is suspected, appropriate tests should be made and sensitivity ruled out prior to implantation. • Any active or suspected latent infection or marked local inflammation in or about the affected area. • Compromised vascularity that would inhibit adequate blood supply to the fracture or the operative site. • Material sensitivity documented or suspected. • Patients having inadequate tissue coverage over the operativesite. • Implant utilization that would interfere with anatomical structures or physiological performance. • Any mental or neuromuscular disorder which would create an unacceptable risk of fixation failure or complications in postoperative care. • Use of contrast media in patients with a known contraindicationtocontrast. • Other medical or surgical conditions which would precludethepotential benefit of surgery. • Spinal fracturefixation. • Use with Polymethyl methacrylate(PMMA). WARNINGS • Forprofessionaluseonly. • Do not use this system without fully reading the instructionsfor use. • The surgeon should be familiar with the general principles and technique of treating fractures using cannulated screws. • The surgeon should be familiar with the general principles and technique of delivering bone void filler using the Flow-Screw system. The bone void filler must be used within the timeframedesignatedinitslabeling. • Surgeonsshouldfollowthesurgical technique. • Selectionofthecorrectscrewdiameterandlengthisvery important. Determination of the alignment of the fractured bones shouldbedoneusingfluoroscopy and/or designatedgauges. • If delivery of a bone void filler is required in an area adjacenttoajoint,injectionof4ccofradiopaquecontrastthroughthe side port cannula is recommended to confirm the integrity of the articular surface.Ifthearticular surfaceisnot intact, deliveryof bone voidfillerinthatareaisnotrecommended. • Patients should be cautioned against significant load bearing prior to good callus formation. Patients who are either noncompliant orpredisposedtodelayedunionornon-union,must have auxiliarysupport. • Periodic x-rays are recommended for at least six months to detect any changes in position, nonunion, loosening, bendingor crackingof components. • Patientsshouldbecautionedthat evenafter complete healing there is a higher risk for re-fractures while the screw is in position. • Postoperative care and physical therapy should be structuredtoprevent excessiveloadingofthe operatedextremity. • The implant system has not been evaluated for safety andcompatibilityintheMRenvironment,norhasitbeentestedfor heating or migrationintheMRenvironment. • Most parts, excepting specially packaged disposable kits, are delivered non-sterile. These must be sterilized prior to surgeryin accordancewiththeSterilizationSection. • Flow-Screwisnotindicatedforfixationorattachmentto theposteriorelements(pedicles)ofthecervical,thoracic,orlumbar spine. • Flow-Screw implants should only be used for delivery ofbonevoidfillersthathavebeenvalidatedforusewiththedevice. PRECAUTIONS/INSPECTION • TheFlow-Screwimplants,theguide-wire, IO Adapter and the Side Port Cannula for the application of bone void filler are one-time use. The IO Adapter, Side Port Cannula, and Guidewire will be disposed of in accordance with local requirements. The implants are intended to remain in the patient. • The Flow-Screw Instrument set, with exception of the intended to be reusable and will be cleaned and sterilized in accordance with theSterilizationSection. • The Side Port Cannula has been demonstrated to IO Adapter Side, Port Cannula and Trocar-Tipped Guidewire, is Flow-Screw™ | 9 STG-102 Rev C IFU-102 rerer vC !"#"#" $#$# %&%&%'()$ *+ *+ *,+,+ * -.//0".1)2*&'()$*&341)5 * Instructions fofof r Use
- 13. Effective February 2018 IFU-102 rev C survive 5 steam sterilization cycles but should be examined for structural integritybeforeuse. • Proper handling and storage of the system components is mandatory. Damage or alterations may produce stresses and cause defects, which could become the focal point for failure. • Allimplantsandinstrumentsmustbeinspectedpriorto use for any damage. Do not use if damage exceeds normal standardsfor implants andinstruments. ADVERSEEFFECTS The adverse events include but are not limited to: • Implantsmaymigrate,causepainorstressshieldbone even after afracturehashealed. • Pain, discomfort, nerveor soft tissuedamageetc. • Metal sensitivityor allergies. • Trauma. • A pulmonary embolism may result from using this implant withaninjectable bonevoidfiller. STERILITY The Side Port Cannula, the Trocar-Tipped Guide-Wires, and intraosseous IO adaptersare single use instruments and should bediscardedafter eachuse. Cleaning Scope These cleaning instructions apply to the orthopedic surgical implants and instruments used to prepare the bone and implant the Flow-Screw Cannulated Screw implant set. The Side Port Cannula, the Trocar-Tipped Guide-Wires, and the intraosseous IO adapters are single use instruments and should be discarded aftereach use. BoththeImplantsandtheInstruments arecontainedinthesame case/tray. TheImplantsarefurther contained withinthe casein a screwcaddy.Theintentistocleantheimplantswithintheir caddy separately from the instruments. Implant cleaning may be automated. Instruments are recommended to be cleaned manually. Warnings and Limitations Automated cleaning may not be effective. A thorough, manual cleaning process is recommended. Cleaningagentswithchlorineorchlorideastheactiveingredientare corrosive to stainless steel and must not be used. Enzymatic and cleaningagentswithneutral pHarerecommended. Repeated processing, according to these instructions, has minimal effect onFlow-Screwreusablemanual instruments. End of life is normallydetermined by wear and damage dueto use. Instructions at Point of Use Separate any nested instruments and disassemble any instruments that can be disassembled without using tools. There arenoinstrumentsthatwillrequiredisassemblyusingtools.Please refer to the surgical tray graphics for the expected state of disassembly. Remove excess body fluids and tissue with a disposable, non- shedding wipe and cover with a damp cloth or submerge in a basin of sterile water. Body fluids and tissue should not be allowedto dry on instruments prior to cleaning. Containment / Transportation Universal precautionsfor handlingcontaminated/bio-hazardous materialsshouldbeobserved. Instruments and implants should be cleaned within 30 minutes of usetominimizethe potential for drying prior to cleaning. Manual Cleaning Procedure 1. Prepareneutral pHenzymeandcleaningagentsat the use-dilutionandtemperaturerecommendedbythemanufacturer. 2. Completely submerge the instrument in enzyme solutionandallowittosoakfor20minutes.Useasoft-bristledbrush to gently clean the device (paying close attention to all threads, crevicesandotherhard-to-cleanareas)untilallvisiblesoilhasbeen removed. Any instruments with lumens or cannulas should be cleaned with a long, narrow, soft-bristled brush (i.e. pipe cleaner brush). Theenzymesolutionshouldbechangedwhenit becomes grosslycontaminated. 3. Remove the device from the enzyme solution and rinse in purified water (from one or any combination of the following processes: ultra-filter, RO, DI and/or distilled) for a minimumof3minutes.Thoroughlyflushlumens,holesandother difficult to reach areas. 4. Preparetheneutral pH cleaning(detergent) solution and placeinasonicationunit. 5. Completely submerge device in cleaning solution and sonicatefor 10minutes,preferablyat 45-50kHz. 6. Rinse instrument in purified water (from one or any combination of the following processes: ultra-filter, RO, DI and/or distilled)thoroughlyforatleast3minutes oruntilthereisnosignofbloodorsoilintherinsestream. 7. Repeat steps 5 and 6 with freshly prepared cleaning solutionuntiltheinstrumentsarethoroughlyclean. 8. Dryinstrument withaclean, disposable, absorbent, non- sheddingwipe. Automated Cleaning Procedure Automated washer/disinfector systems are not recommended as thesolecleaningmethodfor complexsurgical instruments. These instruments should be cleaned following the manual cleaning procedureabove.Anautomatedsystemmaybeusedasafollow- upmethod but isnot required. Automated washer/disinfector systems are recommended for cleaning the Flow-Screw implants within their screw caddy. For effective automated cleaning of the screw caddy, remove the tray cover,removetheremovablescrewcaddies. Disinfection Disinfectionisonlyacceptable asanadjunct tofull sterilizationfor reusable surgical instruments. Seesterilizationsectionbelow. Inspection / Function Testing 1. Carefully inspect eachinstrument and implant to ensure thatthereisnovisiblecontaminationandthatallvisiblebloodandsoil has been removed. If visible contamination is evident, repeat the W Flow-Screw™ | 10STG-102 Rev C
- 14. Effective February 2018 IFU-102 rev C ManualCleaningProcedureabove. 2.! Visually inspect for damage and/or wear, corrosion, pitting, discolorationor separationof parts. Ifthereisanyevidenceof damage,donotusetheinstrumentorimplant. 3.! Check the action of moving parts (such as hinges and box-locks)toensuresmoothoperationthroughouttheintendedrange ofmotion. 4.! Checkinstrumentswithlongslenderfeatures(particularly rotatinginstruments)fordistortion. 5.! Wheninstrumentsformpart of alarger assembly, check thatthedevicesassemblereadilywithmatingcomponents. Inspection / Function Testing Failure Ifaninstrumentfailsinspectionorafunctionaltestduetoimproper cleaning, repeat the cleaning procedure. If the instrument continuestofailafter repeated cleanings, discardtheinstrument. If an instrument fails inspection or a functional test due to wear or damage, discardtheinstrument. Maintenance Lubricate hinges, threads and other moving parts with a commercialwater-basedsurgicalgradeinstrumentlubricant(such asinstrument milk) toreducefriction andwear. Packaging 1.! Individually – a standard polyethylene/Tyvek (or equivalent)sterilizationpouchoftheappropriatesizemaybeusedfor single instruments. Ensure that the pack is large enough to contain theinstrumentwithoutstressingthesealsortearingthepackaging. 2.! InSets-setsofinstrumentsmaybeloadedintodedicated instrumenttraysor general purposesterilizationtraysfor sterilization. If applicable, use standard medical grade steam sterilization wrap followingtheAAMIwrapmethod(ANSI/AAMIST79-2010). Sterilization Scope Both the implants within their caddies and the instruments are intended to be sterilizedtogether intheir case/tray. The following steam sterilization method should be performed: PROCEDURE FRACTIONATED VACUUM PROCEDURE ExposureTime 4 minutes Temperature 132°C DryingTime 30 minutes STORAGEINSTRUCTIONS 1.! Implants and instruments should be stored at room temperature. 2.! Sterile, packaged instruments should be stored in a designated, limited access area that is well ventilated and provides protectionfrom dust,moisture,insects,vermin, andtemperatureand humidityextremes. 3.! Sterileinstrument packagesshouldbeexaminedclosely prior to opening to ensure that there has been no loss of package integrity. These instructions have been validated by Flow-FX, LLC as being capable of preparing manual orthopaedic surgical instruments for re- use. It is the responsibility of the reprocessor to ensure that reprocessing is performed using the appropriate equipment and materials, and those personnel in the reprocessing facility have been adequatelytrainedinordertoachievethedesiredresult.Anydeviation by the reprocessor from these instructions should be properly evaluatedfor effectivenesstoavoidpotentialadverseconsequences. CAUTION Federal law restricts this device to sale by or on order of a physician. MANUFACTURER: Flow-FX,LLC 9301W.191st St. Mokena,Il60448 Phone:(815)531-4424 www.flow-fx.net Flow-Screw™ | 11 STG-102 Rev C
- 16. Flow-FX, LLC 9301 w. 191st Street Mokena, IL 60448 P. 815.531.4424 ©2017 by Flow-FX, LLC. Products referenced with TM are trademarks of Flow-Fx. STG-102 Rev C Patented - www.Flow-Fx.net Flow-FX, LLC 9301 w. 191st Street Mokena, IL 60448 P. 815.531.4424 ©2017 by Flow-FX, LLC.©2017 by Flow-FX, LLC.© Products referenced with TM are trademarks of Flow-Fx. STG-102 Rev C Patented - www.Flow-Fx.net Flow-FX, LLC 19110 Darvin Drive Mokena, IL 60448 P. 815.531.4424 ©2016 by Flow-FX, LLC. Products referenced with TM are trademarks of Flow-Fx. STG-102 Rev B Patented - www.Flow-Fx.net