1. 3
6
2
5
1
4
7
TV Armor, LLC. //365 Faraday Ave. Jackson NJ 08527 //TV-Armor.com
Carefully remove packaging. Do not use a sharp
object.
Remove the mounting frame from inside the
enclosure. The TV can still be installed if you like.
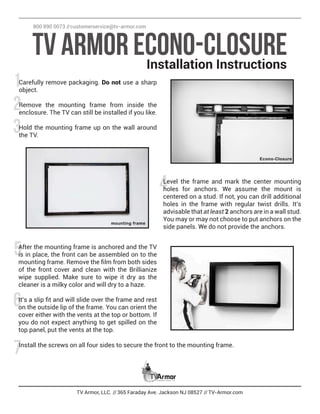
Hold the mounting frame up on the wall around
the TV.
TV Armor Econo-ClosureInstallation Instructions
800 890 0073 //customerservice@tv-armor.com
Level the frame and mark the center mounting
holes for anchors. We assume the mount is
centered on a stud. If not, you can drill additional
holes in the frame with regular twist drills. It’s
advisable that at least 2 anchors are in a wall stud.
You may or may not choose to put anchors on the
side panels. We do not provide the anchors.
After the mounting frame is anchored and the TV
is in place, the front can be assembled on to the
mounting frame. Remove the film from both sides
of the front cover and clean with the Brillianize
wipe supplied. Make sure to wipe it dry as the
cleaner is a milky color and will dry to a haze.
It’s a slip fit and will slide over the frame and rest
on the outside lip of the frame. You can orient the
cover either with the vents at the top or bottom. If
you do not expect anything to get spilled on the
top panel, put the vents at the top.
Install the screws on all four sides to secure the front to the mounting frame.