MITSUBISHI ELECTRIC SPLIT-TYPE
•
0 likes•466 views

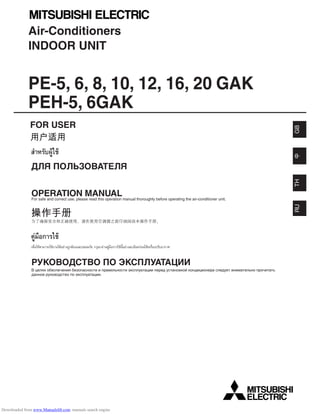
Air-Conditioners INDOOR UNIT PE-5, 6, 8, 10, 12, 16, 20 GAK PEH-5, 6GAK FOR USER
![2
GBDFSWINLEP 2 [Fig. 2.0.1]
A Air outlet
B Air inlet
C Air filter (optional part)
[Fig. 2.0.2]
A
B
C
A LCD remote controller
A
5
A
C
B
D
[Fig. 5.0.1]
A Air outlet C Air filter (optional part)
B Air inlet D Air filter handle
Downloaded from www.Manualslib.com manuals search engine](data:image/gif;base64,R0lGODlhAQABAIAAAAAAAP///yH5BAEAAAAALAAAAAABAAEAAAIBRAA7)
Recommended
More Related Content
Similar to MITSUBISHI ELECTRIC SPLIT-TYPE
Similar to MITSUBISHI ELECTRIC SPLIT-TYPE (20)
More from MUSTAFA AHMED ABDULJABBAR
More from MUSTAFA AHMED ABDULJABBAR (20)
MITSUBISHI ELECTRIC SPLIT-TYPE
- 1. Air-Conditioners INDOOR UNIT PE-5, 6, 8, 10, 12, 16, 20 GAK PEH-5, 6GAK FOR USER OPERATION MANUALFor safe and correct use, please read this operation manual thoroughly before operating the air-conditioner unit. GBTH ДЛЯ ПОЛЬЗОВАТЕЛЯ РУКОВОДСТВО ПО ЭКСПЛУАТАЦИИ В целях обеспечения безопасности и правильности эксплуатации перед установкой кондиционера следует внимательно прочитать данное руководство по эксплуатации. RU Downloaded from www.Manualslib.com manuals search engine
- 2. 2 GBDFSWINLEP 2 [Fig. 2.0.1] A Air outlet B Air inlet C Air filter (optional part) [Fig. 2.0.2] A B C A LCD remote controller A 5 A C B D [Fig. 5.0.1] A Air outlet C Air filter (optional part) B Air inlet D Air filter handle Downloaded from www.Manualslib.com manuals search engine
- 3. 3 GBDFINLESWP 1. Safety precautions 1) Outdoor unit Warning: • The outdoor unit must be installed on a stable, level surface, in a place where there is no accumulation of snow, leaves or rubbish. • Do not stand on, or place any items on the unit.You may fall down or the item may fall, causing injury. Caution: The outdoor unit should be installed in a location where air and noise emit- ted by the unit will not disturb the neighbours. 2) Indoor unit Warning: The indoor unit should be securely installed. If the unit is loosely mounted, it may fall, causing injury. 3) Remote controller Warning: The remote controller should be installed in such a way that children cannot play with it. 4) Drain hose Caution: Make sure that the drain hose is installed so that drainage can go ahead smoothly. Incorrect installation may result in water leakage, causing dam- age to furniture. 5) Power line, fuse or circuit breaker Warning: • Make sure that the unit is powered by a dedicated line. Other appliances connected to the same line could cause an overload. • Make sure that there is a main power switch. • Be sure to adhere to the unit’s voltage and fuse or circuit breaker ratings. Never use a piece of wire or a fuse with a higher rating than the one specified. 6) Grounding Caution: • The unit must be properly grounded. Never connect the grounding wire to a gas pipe, water pipe, lightning conductor or telephone grounding wire. If the unit is not grounded properly, electric shock may result. • Check frequently that the ground wire from the outdoor unit is properly connected to both the unit’s ground terminal and the grounding elec- trode. s Before operating the unit, make sure you read all the “Safety precautions”. s “Safety precautions” lists important points about safety. Please be sure to follow them. Symbols used in the text Warning: Describes precautions that should be observed to avoid the risk of injury or death to the user. Caution: Describes precautions that should be observed to prevent damage to the unit. Symbols put on the unit : Indicates an action that must be avoided. : Indicates that important instructions must be followed. : Indicates a part which must be grounded. : Beware of electric shock. (This symbol is displayed on the main unit label.) <Color: yellow> Warning: Carefully read the labels affixed to the main unit. 1.1. Installation s After you have read this manual, keep it and the Installation Manual in a safe place for easy reference whenever a question arises. If the unit is going to be operated by another person, make sure that this manual is given to him or her. Warning: • The unit should not be installed by the user. Ask the dealer or an author- ized company to install the unit. If the unit is installed improperly, water leakage, electric shock or fire may result. • Use only accessories authorized by Mitsubishi Electric and ask your dealer or an authorized company to install them. If accessories are in- stalled improperly, water leakage, electric shock or fire may result. • The Installation Manual details the suggested installation method. Any structural alteration necessary for installation must comply with local building code requirements. • Never repair the unit or transfer it to another site by yourself. If repair is performed improperly, water leakage, electric shock or fire may result. If you need to have the unit repaired or moved, consult your dealer. • The appliance is not intended for use by young children or infirm per- sons without supervision. • Young children should be supervised to ensure that they do not play with the appliance. Contents 1. Safety precautions ...................................................................................... 3 1.1. Installation ................................................................................. 3 1.2. During operation ........................................................................ 4 1.3. Disposing of the unit .................................................................. 4 2. Names and functions of various parts ........................................................ 4 3. Operation .................................................................................................... 5 3.1. Switching the unit ON/OFF........................................................ 6 3.2. Mode select ............................................................................... 6 3.3. Selecting a temperature TEMP. ................................................ 6 3.4. Selecting a fan speed ........................................................ 6 3.5. Setting the day of the week and time ........................................ 6 3.6. Using the timer .......................................................................... 7 3.7. Locking the remote controller buttons (Operation function limit controller) ................................................................................ 10 3.8. Other indications ..................................................................... 10 4. The smart way to use ............................................................................... 11 5. Caring for the machine ............................................................................. 11 6. Troubleshooting ......................................................................................... 12 7. Installation and transferring works, and checking ..................................... 13 8. Specifications ............................................................................................ 13 Downloaded from www.Manualslib.com manuals search engine
- 4. 4 GBDFINLESWP 2. Names and functions of various parts Indoor unit • Air inlet: Return the indoor air. • Filter: Air filter is not provided within the unit. However, simple filter is available as optional part to remove visible dust and dirt. If air purification is one of the conditions required for use, consult with your dealer. (For details on how to clean, refer to page 11.) • Air outlet: Blow the cooled air into the room. Model PE-5, 6, 8, 10, 12, 16, 20, PEH-5, 6 [Ceiling concealed type] [Fig. 2.0.1] (P.2) A Air outlet B Air inlet C Air filter (optional part) LCD remote Controller • Check out your remote controller. Different controllers are used for different systems. [Fig. 2.0.2] (P.2) A LCD remote controller 1.2. During operation Caution: • Do not use any sharp object to push the buttons, as this may damage the remote controller. • Do not twist or tug on the remote controller cord as this may damage the remote controller and cause malfunction. • Never remove the upper case of the remote controller. It is dangerous to remove the upper case of the remote controller and touch the printed circuit boards inside. Doing so can result in fire and failure. • Never wipe the remote controller with benzene, thinner, chemical rags, etc. Doing so can result in discoloration and failure. To remove heavy stains, soak a cloth in neutral detergent mixed with water, wring it out thoroughly, wipe the stains off, and wipe again with a dry cloth. • Never block or cover the indoor or outdoor unit’s intakes or outlets.Tall items of furniture underneath the indoor unit, or bulky items such as large boxes placed close to the outdoor unit will reduce the unit’s effi- ciency. Warning: • Do not splash water over the unit and do not touch the unit with wet hands. An electric shock may result. • Do not spray combustible gas close to the unit. Fire may result. • Do not place a gas heater or any other open-flame appliance where it will be exposed to the air discharged from the unit. Incomplete combustion may result. Warning: • Do not remove the front panel or the fan guard from the outdoor unit when it is running.You could be injured if you touch rotating, hot or high- voltage parts. • Never insert fingers, sticks etc. into the intakes or outlets, otherwise in- jury may result, since the fan inside the unit rotates at high speed. Exer- cise particular care when children are present. • If you detect odd smells, stop using the unit, turn off the power switch and consult your dealer. Otherwise, a breakdown, electric shock or fire may result. • When you notice exceptionally abnormal noise or vibration, stop opera- tion, turn off the power switch, and contact your dealer. • Do not over-cool. The most suitable inside temperature is one that is within 5 °C of the outside temperature. • Do not leave handicapped people or infants sitting or standing in the path of the airflow from the air-conditioner.This could cause health prob- lems. Caution: • Do not direct the airflow at plants or caged pets. • Ventilate the room frequently. If the unit is operated continuously in a closed room for a long period of time, the air will become stale. In case of failure Warning: • Never remodel the air conditioner. Consult your dealer for any repair serv- ice. Improper repair work can result in water leakage, electric shock, fire, etc. • If the remote controller displays an error indication, the air conditioner does not run, or there is any abnormality, stop operation and contact your dealer. Leaving the unit as it is under such conditions can result in fire or failure. • If the power breaker is frequently activated, get in touch with your dealer. Leaving it as it is can result in fire or failure. • If the refrigeration gas blows out or leaks, stop the operation of the air conditioner, thoroughly ventilate the room, and contact your dealer. Leav- ing the unit as it is can result in accidents due to oxygen deficiency. When the air conditioner is not to be used for a long time • If the air conditioner is not to be used for a long time due to a seasonal change, etc., run it for 4 - 5 hours with the air blowing until the inside is completely dry. Failing to do so can result in the growth of unhygienic, unhealthy mold in scattered areas throughout the room. • When it is not to be used for an extended time, keep the [power supply] turned OFF. If the power supply is kept on, several watts or several tens of watts will be wasted. Also, the accumulation of dust, etc., can result in fire. • Keep the power switched ON for more than 12 hours before starting op- eration. Do not turn the power supply OFF during seasons of heavy use. Doing so can result in failure. 1.3. Disposing of the unit Warning: When you need to dispose of the unit, consult your dealer. If pipes are re- moved incorrectly, refrigerant (fluorocarbon gas) may blow out and come into contact with your skin, causing injury. Releasing refrigerant into the atmosphere also damages the environment. Downloaded from www.Manualslib.com manuals search engine
- 5. 5 GBDFINLESWP PAR-21MAA ON/OFF FILTER CHECK OPERATION CLEAR TEST TEMP. MENU BACK DAYMONITOR/SET CLOCK ON/OFF 1 4 5 67 8 9 0 A B C 2 3 ˚F˚C ˚F˚C ERROR CODE AFTER TIMER TIME SUN MON TUE WED THU FRI SAT ON OFF Hr AFTER FILTER FUNCTION ONLY1Hr. WEEKLY SIMPLE AUTO OFF A C D E F G H J K MI L N O P B 1 Set Temperature buttons Down Up 2 Timer Menu button (Monitor/Set button) 3 Mode button (Return button) 4 Set Time buttons Back Ahead 5 Timer On/Off button (Set Day button) 6 Louver button ( Operation button) To preceding operation number. 7 Ventilation button ( Operation button) To next operation number. 8 ON/OFF button 9 Fan Speed button Opening the door. 0 Filter button (<Enter> button) A Test Run button B Check button (Clear button) C Airflow Up/Down button Notes: • If you press a button for a feature that is not installed at the indoor unit, the remote controller will display the “Not Available” message. • If you are using the remote controller to drive multiple indoor units, this message will appear only if the feature is not present at the parent unit. • Never expose the remote controller to direct sunlight. Doing so can re- sult in the erroneous measurement of room temperature. • Never place any obstacle around the lower right-hand section of the re- mote controller. Doing so can result in the erroneous measurement of room temperature. A Day-of-Week Shows the current day of the week. Time/Timer Display Shows the current time, unless the simple or Auto Off timer is set. If the simple or Auto Off timer is set, shows the time remaining. B “Sensor” indication Displayed when the remote controller sensor is used. C Identifies the current operation Shows the operating mode, etc. * Multilanguage display is supported. D “Centrally Controlled” indicator Indicates that operation of the remote controller has been prohibited by a main controller. E “Timer Is Off” indicator Indicates that the timer is off. F Temperature Setting Shows the target temperature. G Up/Down Air Direction indicator The indicator shows the direction of the outcoming airflow. H “One Hour Only” indicator Displayed if the airflow is set to weak and downward during COOL or DRY mode. (Opera- tion varies according to model.) The indicator goes off after one hour, at which time the airflow direction also changes. I Louver display Indicates the action of the swing louver. Does not appear if the louver is stationary. J Room Temperature display Shows the room temperature. K (Power On indicator) Indicates that the power is on. L Ventilation indicator Appears when the unit is running in Ventilation mode. M Fan Speed indicator Shows the selected fan speed. N “Locked” indicator Indicates that remote controller buttons have been locked. O “Clean The Filter” indicator Comes on when it is time to clean the filter. P Timer indicators The indicator comes on if the corresponding timer is set. Note: • For purposes of this explanation, all parts of the display are shown as lit. During actual operation, only the relevant items will be lit. Remote controller-Button Remote controller-Display 3. Operation • In case of using LCD remote controller, refer this operation manual or remote controller operation manual to operate the unit. Downloaded from www.Manualslib.com manuals search engine
- 6. 6 GBDFINLESWP Before starting operation • Start running after the “PLEASE WAIT” display has disappeared.The “PLEASE WAIT” display briefly appears on the B display (max. 3 minutes) when the power is turned on and after a power failure. This does not indicate any failure of the air conditioner. 3.1. Switching the unit ON/OFF sssss To start an operation: 1. Press the ON/OFF button 1. The ON indicator A should light up. sssss To stop an operation: 1. Press the ON/OFF button 1 again. The ON indicator A goes off. • The power supply should not be turned off while the air conditioner is in use. This can cause the unit to break down. • Even if you press the ON/OFF button immediately after shutting down the op- eration in progress, the air conditioner will not start for about three minutes. This is to prevent the internal components from being damaged. • If the operation stops due to a power failure, the unit will not automatically restart until the power has been restored. Press the ON/OFF button to restart. 3.2. Mode select 1. If the unit is off, press the ON/OFF button 1 to turn it on. The ON indicator A should light up. 2. Press the operation mode ( ) button 2 and select the operation mode. B (COOL) Cooling mode (FAN) Fan mode For cooling Press the 22222 [operation mode] button and bring up the “ COOL” display. For fan Press the 22222 [operation mode] button and bring up the “ FAN” display. • The fan operation functions to circulate the air in the room. • The temperature of the room cannot be set by fan operation. Caution: Never expose your body directly to cool air for a long time. Excessive expo- sure to cool air is bad for your health, and should therefore be avoided. Caution: • When the air conditioner is used together with burners, thoroughly ven- tilate the area. Insufficient ventilation can result in accidents due to oxy- gen deficiency. • Never place a burner at a place where it is exposed to the airflow from the air conditioner. Doing so can result in imperfect combustion of the burner. 3.3. Selecting a temperature TEMP. s To decrease the room temperature: 1. Press button 3 to set the desired temperature. The selected temperature C is displayed. • Each time you press the button, the temperature value decreases by 1 °C. sssss To increase the room temperature: 1. Press button 3 to set the desired temperature. The selected temperature C is displayed. • Each time you press the button, the temperature value increases by 1 °C. • Available temperature ranges are as follows: Cooling: 19 - 30 °C • The display flashes either 8 °C - 39 °C to inform you if the room temperature E is lower or higher than the displayed temperature. If the temperature is below 8 °C or above 39 °C, the corresponding value (8 °C or 39 °C) will blink on the display. 3.4. Selecting a fan speed 1. Press button 4 to select a desired fan speed. • Each time you press the button, available options change with the display D on the remote controller, as shown below. 3.5. Setting the day of the week and time ■ Use this screen to change the current day of the week and time setting. ˚C ˚C SIMPLE PAR-21MAA ON/OFF FILTER CHECK OPERATION CLEAR TEST TEMP. MENU BACK DAYMONITOR/SET CLOCK ON/OFF 2 3 B C 1 4 A D E Day of the Week & Time display ˚C ˚C TIME SUN PAR-21MAA ON/OFF FILTER CHECK OPERATION CLEAR TEST TEMP. MENU BACK DAYMONITOR/SET CLOCK ON/OFF 2 4 9 1 As Fan speed 2-stage Remote controller display Low High ▼ ▼ Model PE (H)-5, 6 PE-8, 10, 12 1-stagePE-16, 20 No display Downloaded from www.Manualslib.com manuals search engine
- 7. 7 GBDFINLESWP Shows the selected operation (ON or OFF) * Does not appear if operation is not set. ˚C SUN ON WEEKLY 6 7 5 Shows the temperature setting * Does not appear if tempera- ture is not set. Shows the time setting s How to Set the Weekly Timer 1. Be sure that you are at a standard control screen, and that the weekly timer indicator 1 is shown in the display. 2. Press the Timer Menu button B, so that the “Set Up” appears on the screen (at 2). (Note that each press of the button toggles the display between “Set Up” and “Monitor”.) 3. Press the Timer On/Off (Set Day) button 9 to set the day. Each press ad- vances the display at 3 to the next setting, in the following sequence: “Sun Mon Tues Wed Thurs Fri Sat” → “Sun” → ... → “Fri” → “Sat” → “Sun Mon Tues Wed Thurs Fri Sat”... 4. Press the or Operation button (7 or 8) as necessary to select the appropriate operation number (1 to 8) 4. * Your inputs at Steps 3 and 4 will select one of the cells from the matrix illustrated below. (The remote-controller display at left shows how the display would appear when setting Operation 1 for Sunday to the values indicated below.) Setup Matrix Note: By setting the day to “Sun Mon Tues Wed Thurs Fri Sat”, you can set the same operation to be carried out at the same time every day. (Example: Operation 2 above, which is the same for all days of the week.) s Setting the Weekly Timer 5. Press the appropriate Set Time button A as necessary to set the desired time (at 5). * As you hold the button down, the time first increments in minute inter- vals, then in ten-minute intervals, and then in one-hour intervals. 6. Press the ON/OFF button 1 to select the desired operation (ON or OFF), at 6. * Each press changes the next setting, in the following sequence: No dis- play (no setting) → “ON” → “OFF” 7. Press the appropriate Set Temperature button 3 to set the desired tem- perature (at 7). * Each press changes the setting, in the following sequence: No display (no setting) ⇔ 24 ⇔ 25 ⇔ ... ⇔ 29 ⇔ 30 ⇔ 12 ⇔ ... ⇔ 23 ⇔ No display. (Available range: The range for the setting is 12 °C to 30 °C. The actual range over which the temperature can be controlled, however, will vary according to the type of the connected unit.) 8. After making the appropriate settings at Steps 5, 6 and 7, press the Filter button 4 to lock in the values. To clear the currently set values for the selected operation, press and quickly release the Check (Clear) button 1 once. * The displayed time setting will change to “—:—”, and the On/Off and temperature settings will all disappear. (To clear all weekly timer settings at once, hold down the Check (Clear) button 0 for two seconds or more. The display will begin flashing, indi- cating that all settings have been cleared.) Notes: • It can be set regardless of the operation of the indoor unit. • The day and time will not appear if clock use has been disabled at Func- tion Selection of remote controller, refer to Installation Manual. s How to Set the Day of the Week and Time... 1. Press the or Set Time button A to show display 2. 2. Press the Timer On/Off (Set Day) button 9 to set the day. * Each press advances the day shown at 3 : Sun → Mon → ... → Fri → Sat. 3. Press the appropriate Set Time button A as necessary to set the time. * As you hold the button down, the time (at 4) will increment first in minute intervals, then in ten-minute intervals, and then in one-hour intervals. 4. After making the appropriate settings at Steps 2 and 3, press the Filter button 4 to lock in the values. Note: • Your new entries at Steps 2 and 3 will be cancelled if you press the Mode (Return) button 22222 before pressing the Filter button 44444. 5. Press the Mode (Return) button 2 to complete the setting procedure.This will return the display to the standard control screen, where 1 will now show the newly set day and time. Note: • Remote controller is equipped with a simplified clock with a precision of about + or - one minute per month. 3.6. Using the timer This section explains how to set and use the timer.You can use Function Selection of remote controller to select which of three types of timer to use: 1 Weekly timer, 2 Simple timer, or 3 Auto Off timer. For information about how to set the Function Selection of remote controller, refer to Installation Manual. 3.6.1. Using the Weekly Timer ■ The weekly timer can be used to set up to eight operations for each day of the week. • Each operation may consist of any of the following: ON/OFF time together with a temperature setting, or ON/OFF time only, or temperature setting only. • When the current time reaches a time set at this timer, the air conditioner carries out the action set by the timer. ■ Time setting resolution for this timer is 1 minute. Notes: *1. Weekly Timer/Simple Timer/Auto Off Timer cannot be used at the same time. *2. The weekly timer will not operate when any of the following conditions is in effect. The timer feature is off; the system is in an malfunction state; a test run is in progress; the remote controller is undergoing self-check or remote controller check; the user is in the process of setting a function ; the user is in the process of setting the timer; the user is in the process of setting the current day of the week or time; the system is under central control. (Specifically, the system will not carry out operations (unit on, unit off, or temperature setting) that are prohibited during these conditions.) Time Setting Day of the Week Setting TIME SUN 2 3 4 Operation No. Day Setting ˚C SUN ON WEEKLY PAR-21MAA ON/OFF FILTER CHECK OPERATION CLEAR TEST TEMP. MENU BACK DAYMONITOR/SET CLOCK ON/OFF 2 4 2 3 A 9 78 0 4 1 3 B 1 Op No. Sunday Monday ··· Saturday • 8:30 • ON • 23 °C • 10:00 • OFF • 10:00 • OFF • 10:00 • OFF • 10:00 • OFF ▲ <Operation 1 settings for Sunday> Start the air conditioner at 8:30, with the tem- perature set to 23 °C. <Operation 2 settings for every day> Turn off the air condi- tioner at 10:00. ▲ No. 1 No. 2 ··· No. 8 Downloaded from www.Manualslib.com manuals search engine
- 8. 8 GBDFINLESWP Note: Your new entries will be cancelled if you press the Mode (Return) button 22222 before pressing the Filter button 44444. If you have set two or more different operations for exactly the same time, only the operation with the highest Operation No. will be carried out. 9. Repeat Steps 3 to 8 as necessary to fill as many of the available cells as you wish. 10.Press the mode (Return) button 2 to return to the standard control screen and complete the setting procedure. 11.To activate the timer, press the Timer On/Off button 9, so that the “Timer Off” indication disappears from the screen. Be sure that the “Timer Off” indication is no longer displayed. * If there are no timer settings, the “Timer Off” indication will flash on the screen. s How to View the Weekly Timer Settings 1. Be sure that the weekly timer indicator is visible on the screen (at 1). 2. Press the Timer Menu button B so that “Monitor” is indicated on the screen (at 8). 3. Press the Timer On/Off (Set Day) button 9 as necessary to select the day you wish to view. 4. Press the or Operation button (7 or 8) as necessary to change the timer operation shown on the display (at 9). * Each press will advance to the next timer operation, in order of time set- ting. 5. To close the monitor and return to the standard control screen, press the Mode (Return) button 2. s To Turn Off the Weekly Timer Press the Timer On/Off button 9 so that “Timer Off” appears at 0. s To Turn On the Weekly Timer Press the Timer On/Off button 9 so that the “Timer Off” indication (at 0) goes dark. 3.6.2. Using the Simple Timer ■ You can set the simple timer in any of three ways. • Start time only: The air conditioner starts when the set time has elapsed. • Stop time only: The air conditioner stops when the set time has elapsed. • Start & stop times: The air conditioner starts and stops at the respective elapsed times. ■ The simple timer (start and stop) can be set only once within a 72-hour pe- riod. The time setting is made in hour increments. Notes: *1. Weekly Timer/Simple Timer/Auto Off Timer cannot be used at the same time. *2. The simple timer will not operate when any of the following conditions is in effect. The timer is off;the system is in malfunction state;a test run is in progress; the remote controller is undergoing self-check or remote controller check; the user is in the process of selecting a function; the user is in the proc- ess of setting the timer; the system is under central control. (Under these conditions, On/Off operation is prohibited.) ˚C ˚C TIME SUN WEEKLY 0 ˚C ˚C TIME SUN WEEKLY 0 Timer Settings ˚C TIMER SUN ON OFF WEEKLY 1 98 s How to Set the Simple Timer 1. Be sure that you are at a standard control screen, and that the simple timer indicator is visible in the display (at 1). When something other than the Simple Timer is displayed, set it to SIMPLE TIMER using the function selection of remote controller (see Installation Manual). 2. Press the Timer Menu button B, so that the “Set Up” appears on the screen (at 2). (Note that each press of the button toggles the display between “Set Up” and “Monitor”.) 3. Press the ON/OFF button 1 to display the current ON or OFF simple timer setting. Press the button once to display the time remaining to ON, and then again to display the time remaining to OFF. (The ON/OFF indication appears at 3). • “ON” timer: The air conditioner will start operation when the specified number of hours has elapsed. • “OFF” timer: The air conditioner will stop operation when the specified number of hours has elapsed. 4. With “ON” or “OFF” showing at 3: Press the appropriate Set Time button A as necessary to set the hours to ON (if “ON” is displayed) or the hours to OFF (if “OFF” is displayed) at 4. • Available Range: 1 to 72 hours 5. To set both the ON and OFF times, repeat Steps 3 and 4. * Note that ON and OFF times cannot be set to the same value. 6. To clear the current ON or OFF setting: Display the ON or OFF setting (see step 3) and then press the Check (Clear) button 0 so that the time setting clears to “—” at 4. (If you want to use only an ON setting or only an OFF setting, be sure that the setting you do not wish to use is shown as “—”.) 7. After completing steps 3 to 6 above, press the Filter button 4 to lock in the value. Note: Your new settings will be cancelled if you press the Mode (Return) button 22222 before pressing the Filter button 44444. 8. Press the Mode (Return) button 2 to return to the standard control screen. 9. Press the Timer On/Off button 9 to start the timer countdown. When the timer is running, the timer value is visible on the display. Be sure that the timer value is visible and appropriate. s Viewing the Current Simple Timer Settings 1. Be sure that the simple timer indicator is visible on the screen (at 1). 2. Press theTimer Menu button B, so that the “Monitor” appears on the screen (at 5). • If the ON or OFF simple timer is running, the current timer value will appear at 6. • If ON and OFF values have both been set, the two values appear alter- nately. 3. Press the Mode (Return) button 2 to close the monitor display and return to the standard control screen. s To Turn Off the Simple Timer... Press the Timer On/Off button 9 so that the timer setting no longer appears on the screen (at 7). s To Turn On the Simple Timer... Press the Timer On/Off button 9 so that the timer setting becomes visible at 7. ONHr AFTER SIMPLE 4 1 3 2 Action (On or Off) * “— —” is displayed if there is no setting. Timer Setting TIMER ON OFF Hr AFTER SIMPLE 1 65 Timer Setting ˚C ˚C SIMPLE 7 ˚C ˚C ONHr AFTER SIMPLE 7ONHr AFTER SIMPLE PAR-21MAA ON/OFF FILTER CHECK OPERATION CLEAR TEST TEMP. MENU BACK DAYMONITOR/SET CLOCK ON/OFF 2 A 9 0 4 1 B Downloaded from www.Manualslib.com manuals search engine
- 9. 9 GBDFINLESWP ˚C ˚C AUTO OFF6 7 AUTO OFF 7 ˚C ˚C AFTER OFF AUTO OFF6 7 AFTER TIMER OFF AUTO OFF 5 1 4 Timer Setting Examples If ON and OFF times have both been set at the simple timer, operation and display are as indicated below. Example 1: Start the timer, with ON time set sooner than OFF time ON Setting: 3 hours OFF Setting: 7 hours Example 2: Start the timer, with OFF time is sooner than ON time ON Setting: 5 hours OFF Setting: 2 hours 3.6.3. Using the Auto Off Timer ■ This timer begins countdown when the air conditioner starts, and shuts the air conditioner off when the set time has elapsed. ■ Available settings run from 30 minutes to 4 hours, in 30-minute intervals. Notes: *1. Weekly Timer/Simple Timer/Auto Off Timer cannot be used at the same time. *2. The Auto Off timer will not operate when any of the following conditions is in effect. The timer is off;the system is in malfunction state;a test run is in progress; the remote controller is undergoing self-check or remote controller check; the user is in the process of selecting a function; the user is in the proc- ess of setting the timer; the system is under central control. (Under these conditions, On/Off operation is prohibited.) s How to Set the Auto Off Timer 1. Be sure that you are at a standard control screen, and that the Auto Off timer indicator is visible in the display (at 1). AFTER OFF AUTO OFF PAR-21MAA ON/OFF FILTER CHECK OPERATION CLEAR TEST TEMP. MENU BACK DAYMONITOR/SET CLOCK ON/OFF 2 A 9 4 B AFTER OFF AUTO OFF 3 1 2 Timer Setting ONHr AFTER SIMPLE ˚C ˚C OFF Hr AFTER SIMPLE SIMPLE ▲ ▲ At 3 hours after timer start At Timer Start At 7 hours after timer start Display shows the tim- er’s ON setting (hours remaining to ON). Display changes to show the timer’s OFF setting (hours remain- ing to OFF). The time displayed is OFF set- ting (7 hours) – ON setting (3 hours) = 4 hours. The air conditioner goes off, and will re- main off until someone restarts it. ˚C ˚C OFF Hr AFTER SIMPLE ONHr AFTER SIMPLE ˚C ˚C SIMPLE ▲ ▲ At 2 hours after timer start At Timer Start At 5 hours after timer start Display shows the tim- er’s OFF setting (hours remaining to OFF). Display changes to show the timer’s ON setting (hours remain- ing to ON). The time displayed is ON set- ting (5 hours) – OFF setting (2 hours) = 3 hours. The air conditioner comes on, and will continue to run until someone turns it off. When something other than the Auto Off Timer is displayed, set it to AUTO OFF TIMER using the function selection of remote controller (see Installa- tion Manual). 2. Hold down the Timer Menu button B for 3 seconds, so that the “Set Up” appears on the screen (at 2). (Note that each press of the button toggles the display between “Set Up” and “Monitor”.) 3. Press the appropriate Set Time button A as necessary to set the OFF time (at 3). 4. Press the Filter button 4 to lock in the setting. Note: Your entry will be cancelled if you press the Mode (Return) button 22222 before pressing the Filter button 44444. 5. Press the Mode (Return) button 2 to complete the setting procedure and return to the standard control screen. 6. If the air conditioner is already running, the timer starts countdown immedi- ately. Be sure to check that the timer setting appears correctly on the display. s Checking the Current Auto Off Timer Setting 1. Be sure that the “Auto Off” is visible on the screen (at 1). 2. Hold down the Timer Menu button B for 3 seconds, so that “Monitor” is indicated on the screen (at 4). • The timer remaining to shutdown appears at 5. 3. To close the monitor and return to the standard control screen, press the Mode (Return) button 2. s To Turn Off the Auto Off Timer... ● Hold down the Timer On/Off button 9 for 3 seconds, so that “Timer Off” ap- pears (at 6) and the timer value (at 7) disappears. ● Alternatively, turn off the air conditioner itself.The timer value (at 7) will disap- pear from the screen. s To Turn On the Auto Off Timer... ● Hold down the Timer On/Off button 9 for 3 seconds. The “Timer Off “ indica- tion disappears (at 6), and the timer setting comes on the display (at 7). ● Alternatively, turn on the air conditioner. The timer value will appear at 7. Downloaded from www.Manualslib.com manuals search engine
- 10. 10 GBDFINLESWP ON/OFFTEMP. ˚C ˚C FILTER ON/OFFTEMP. ˚C ˚C 3.8.2. Flashing Mode Indicator ■ When flashes continuously Displayed when another indoor unit connected to the outdoor unit is already operating in a different operation mode. Match with the operation mode of the other indoor unit. ■ When mode switched after display flashes Displayed when operation mode is restricted for each season by central con- troller, etc. Use another operation mode. 3.8.3. Flashing “Filter” ■ Indicates that the filter needs cleaning. Clean the filter. ■ When resetting “FILTER” display When the [FILTER] button is pressed two times successively after cleaning the filter, the display goes off and is reset. 3.8.4. Flashing Error Codes ● If the ON lamp and error code are both flashing:This means that the air condi- tioner is out of order and operation has been stopped (and cannot resume). Take note of the indicated unit number and error code, then switch off the power to the air conditioner and call your dealer or servicer. ● If only the error code is flashing (while the ON lamp remains lit): Operation is continuing, but there may be a problem with the system.In this case, you should note down the error code and then call your dealer or servicer for advice. * If you have entered contact number to be called in the event of a problem, push the Check button to display it on the screen. (You can set this up under Function Selection of remote controller. For information, refer to Installation Manual) ON/OFFTEMP. ˚C ˚C 3.7. Locking the remote controller buttons (Operation function limit controller) ■ If you wish, you can lock the remote controller buttons.You can use the Func- tion Selection of remote controller to select which type of lock to use. (For information about selecting the lock type, see Installation Manual). Specifically, you can use either of the following two lock types. 1 Lock All Buttons: Locks all of the buttons on the remote controller. 2 Lock All Except ON/OFF: Locks all buttons other than the ON/OFF button. Note: The “Locked” indicator appears on the screen to indicate that buttons are currently locked. s How to Lock the Buttons 1. While holding down the Filter button 4, press and hold down the ON/OFF button 1 for 2 seconds. The “Locked” indication appears on the screen (at 1), indicating that the lock is now engaged. * If locking has been disabled in Function Selection of remote controller, the screen will display the “Not Available” message when you press the buttons as described above. • If you press a locked button, the “Locked” indication (at 1) will blink on the display. s How to Unlock the Buttons 1. While holding down the Filter button 4, press and hold down the ON/OFF button 1 for 2 seconds—so that the “Locked” indication disappears from the screen (at 1). 3.8. Other indications 3.8.1. Centrally Controlled ● Displayed when operation is controlled by central controller, etc. Restricted operations are shown below. • ON/OFF (including timer operation) • Operation mode • Set temperature Note: May also be individually restricted. ˚C ˚C 1 ˚C ˚C FUNCTION 1 ˚C ˚C FUNCTION 1 ˚C ˚C TIME SUN FUNCTION PAR-21MAA ON/OFF FILTER CHECK OPERATION CLEAR TEST TEMP. MENU BACK DAYMONITOR/SET CLOCK ON/OFF 4 1 1 Lock Indicator ON/OFF ˚C ˚C ERROR CODE Error Code ON/OFF ERROR CODE Indoor Unit No. Error Code ON lamp (Flashing) ON/OFF CALL:XXXX XXX:XXX When the Check button is pressed: If you have entered contact number to be called in the event of a problem, the screen displays this number. (You can set this up under Function Selection of remote controller. For information, refer to Installation Manual.) Downloaded from www.Manualslib.com manuals search engine
- 11. 11 GBDFINLESWP Even minimal steps to care for your air conditioner can help make its use far more effective in terms of air-conditioning effect, electricity charges, etc. Set the right room temperature • In cooling operation, a temperature difference of about 5 °C between indoors and outdoors is optimum. • If the room temperature is raised by 1 °C during air-cooling operation, about 10 % electric power can be saved. • Excessive cooling is bad for health.It also results in the waste of electric power. Clean the filter thoroughly • Air filter is not provided within the unit, however filter (optional part) must be installed in the return air. • If the screen of the air filter becomes clogged, the airflow and air-conditioning effect can be significantly reduced. Further, if the condition is left unattended, failure can result. It is particularly important to clean the filter at the beginning of the cooling and heating seasons. (When profuse dust and dirt have accu- mulated, clean the filter thoroughly.) 4. The smart way to use 5. Caring for the machine Always have filter maintenance performed by a service person. Before care-taking, turn the power supply OFF. Caution: • Before you start cleaning, stop operation and turn OFF the power supply. Remember that the fan is rotating inside at high speed, posing a serious risk of injury. • Indoor units are not equipped with filters. However, filter (optional part) must be installed in the return air to remove the dust of sucked-in air. (The standard filter should normally be cleaned once a week, and the long-life filter at the beginning of each season.) How to clean • Clear dust away lightly or clean it up with a vacuum cleaner. In the case of severe staining, wash the filter in lukewarm water mixed with dissolved neutral detergent or water, and then rinse off the detergent completely. After washing, dry it and fix it back into place. Caution: • Do not dry the filter by exposing it to direct sunlight or warming it using fire, etc. Doing so can result in the deformation of the filter. • Washing it in hot water (more than 50 degree C) can also result in defor- mation. Prevent intrusion of heat during air-cooling • To prevent the intrusion of heat during cooling operation, provide a curtain or a blind on the window to block out direct sunlight. Also, do not open the entrance or exit except in cases of dire necessity. Carry out ventilation sometimes • Since the air periodically gets dirty in a room that is kept closed for a long time, ventilation is sometimes necessary. When gas appliances are used together with the air conditioner, special precautions must be taken. If the “LOSSNAY” ventilation unit developed by our company is used, you can perform ventilation with less waste. For details on this unit, consult with your dealer. Caution: Never pour water or flammable sprays onto the air conditioner. Cleaning using these methods can result in the failure of the air conditioner, electric shock, or fire. Replacement of filter [Fig. 5.0.1] (P.2) A Air outlet B Air inlet C Air filter (optional part) D Air filter handle (1) The air filter (optional part) should be located at the air inlet (rear side of the unit). (2) Lift the air filter handles and pull the filter towards you. (3) If you are going to use an air inlet conduit, remove the air filter. In this case, an air filter must be prepared locally and installed at the intake grille. Downloaded from www.Manualslib.com manuals search engine
- 12. 12 GBDFINLESWP 6. Troubleshooting Before you call out a repair man, check the following table to see whether there is a simple solution to your problem. ● Unit does not cool very well. • Clean the filter. (Dust and debris that collects in the filter will decrease air- flow.) • Check the temperature setting and adjust it if necessary. • Increase the space surrounding the outdoor unit. Is the air intake or air outlet blocked? • Is a window or door open? ● There is a “swishing” noise that occurs from the unit when water flows. • This sound is made when refrigerant inside of the unit is flowing or refilling. ● A ticking noise is heard from inside of the unit. • This sound is made when internal parts of the unit expand or contract when the temperature changes. ● An odor is detected in the room. • This is caused when the unit expels odors that have been absorbed from the walls, carpets, furniture or clothing. ● A white mist is expelled from the indoor unit. • This may occur just after the unit is turned on when a high level of humidity is present in the room. ● Water or moisture is expelled from the outdoor unit. • This occurs to expel water or moisture that may have collected in the pipes or around piping fixtures. • This occurs to dispel water from the heat exchanger. ● The indicators of the remote controller do not light up when operated. • Turn on the power switch. “ ” will be displayed. ● indicator is displayed in the remote controller. • The start and stop or operation mode or set temperature functions of the remote controller are not available when the indicator is lit. ● The start and stop functions are not available just after restarting the unit. • Wait about three minutes (operation has stopped to prevent damage to the air conditioner). ● Unit does not start immediately. • Wait until the unit restarts automatically. The compressor may hesitate re- suming because a three-minute resume prevention circuit is incorporated in the outdoor unit for protection of the compressor. ● The unit started even though the start/stop button was not pushed. • Is the timer on? Press the start/stop button to stop the unit. • Was a distant command sent from the remote controller? Find out if the remote controller was used. • Is the indicator lit? Find out if the remote controller was used. ● The unit stopped even though the start/stop button was not pushed. • Is the timer on? Press the start/stop button to restart the unit. • Was a distant command sent from the remote controller? Find out if the remote controller was used. • Is the indicator lit? Find out if the remote controller was used. ● “PLEASE WAIT” is displayed in the remote controller. • An automatic startup test is being performed (will last for about two minutes). ● An error code is displayed in the remote controller. • A self-diagnostic function is being performed to preserve the air conditioner. * Do not attempt to make repairs yourself. Turn the main switch off and contact the dealer from whom you bought the air conditioner. Provide him or her with the name of the unit and the information displayed in the re- mote controller. If none of the above apply, turn the main switch off and contact the dealer from whom you bought the air-conditioner, telling him the model name and the nature of the problem. Do not try to fix the unit yourself. In any of the following cases, turn off the main power switch and contact your local dealer for service: • The operation lamp (on the main unit) flashes. • The switches do not work properly. • The circuit breaker trips frequently (or the fuse blows frequently). • Water has accidentally been splashed into the unit. • Water leaks from the unit. • Something is accidentally dropped into the air-conditioner. • An unusual noise is heard during operation. The following do not indicate any malfunction: Odours: smells such as tobacco or cosmetic odours may persist after they have been sucked into the unit. Sound of liquid flowing inside indoor unit: this can occur during or after operation and is simply the sound of refrigerant being circulated inside the unit. Ticking sound coming from indoor unit: this can occur when cooling has just begun or has just stopped. It is caused by the indoor unit shrinking or expanding slightly due to the change in temperature. NOTE: The refrigerant charged in the air conditioner is safe. Refrigerant normally does not leak, however, if refrigerant gas leaks indoors, and comes into contact with the fire of a fan heater, space heater, stove, etc., harmful substances will be generated. Be sure to ask the service representative whether there is refrigerant leakage or not when repairs are carried out. Downloaded from www.Manualslib.com manuals search engine
- 13. 13 GBDFINLESWP 8. Specifications Notes: Refer to the product nameplate attached to the unit for the electrical specifications. Rating conditions (cooling) Indoor: 27 °C DB, 19 °C WB Outdoor: 35 °C DB Rating conditions (heating) Indoor: 20 °C DB Outdoor: 7 °C DB, 6 °C WB 7. Installation and transferring works, and checking Regarding place for installation Consult with your dealer for details on installation and transferring the installation. Caution: Never install the air conditioner where there is a risk of leakage of flammable gas. If gas leaks and accumulates around the unit, fire can result. Never install the air conditioner at the following place: • where there is much machine oil • near ocean and beach areas where there is much salt • where humidity is high • where there are hot springs nearby • where there is much sulfureted gas • where there is a high-frequency processing machinery (a high-frequency welder, etc.) • where acid solution is frequently used • where special sprays are frequently used • Install the indoor unit horizontally. Otherwise, water leakage can result. • Take sufficient measures against noise when installing the air conditioners at hospitals or communication-related businesses. If the air conditioner is used in any of the above-mentioned environments, frequent operational failure can be expected. It is advisable to avoid these types of installa- tion sites. For further details, consult with your dealer. Regarding electrical work Caution: • The electrical work must be undertaken by a person who is qualified as an electric engineer according to local regulations and the instruction given in the installation manual with the absolute use of exclusive cir- cuits. The use of other products with the power source can result in burnt- out beakers and fuses. • Never connect the grounding wire to a gas pipe, water pipe, arrester, or telephone grounding wire. For details, consult with your dealer. • In some types of installation sites, the installation of an earth leakage breaker is mandatory. For details, consult with your dealer. Regarding transfer of installation • When removing and reinstalling the air conditioner when you enlarge your home, remodel, or move, consult with your dealer in advance to ascertain the cost of the professional engineering work required for transferring the installa- tion. Caution: When moving or reinstalling the air conditioner, consult with your dealer. Defective installation can result in electric shock, fire, etc. Regarding noise • In installing work, choose a place that can fully bear the weight of the air con- ditioner, and where noise and vibration can be reduced. • Choose a place where cool or warm air and noise from the outdoor air outlet of the air conditioner do not inconvenience the neighbours. • If any alien object is placed near the outdoor air outlet of the air conditioner, decreased performance and increased noise can result. Avoid placing any obstacles adjacent to the air outlet. • If the air conditioner produces any abnormal sound, consult with your dealer. Maintenance and inspection • If the air conditioner is used throughout several seasons, the insides can get dirty, reducing the performance. Depending upon the conditions of usage, foul odors can be generated and drainage can deteriorate due to dust and dirt, etc. Ceiling concealed type (Refrigerant R22) Cooling capacity Gross kW Net kW Net kW Voltage V Frequency Hz Height mm Width mm Depth mm 12.1 11.2 — PE-5GAK 3000/2400 46/42 (-SP: 48/45) 15.7 14.8 — PE-6GAK 3300/2640 21.6 20.6 — PE-8GAK 3900/3120 1400 26.7 25.6 (-SP: 25.5) — PE-10GAK 4800/3840 50/46 (-SP: 52/49) 1600 30.8 29.6 — PE-12GAK 5400/4320 51/48 400 1600 634 43.2 41.7 — PE-16GAK 7200 52 53.4 50.6 — PE-20GAK 9600 53 Indoor unit Model name Power supply External static pressure Pa Airflow rate (Hi/Lo) m3 /h Noise level (Hi/Lo) dB(A) Outdoor model Net weight kg 56 PU-5YAKD PU-5YJSA 59 PU-6YAKD PU-6YJSA 70 PU-8YAKD 77 PU-10YAKD 77 PU-12YAKD 130 PU-8YAKD × 2 133 PU-10YAKD × 2 ~ 220, 230, 240 3N ~ 380, 400, 415 50 100 (-SP: 150) 150 49/45 (-SP: 51/48) 400 595 1947 764634 1180 Heating capacity 100 12.1 11.2 15.5 PEH-5GAK 3000/2400 46/42 (-SP: 48/45) 15.7 14.8 18.5 PEH-6GAK 3300/2640 49/45 (-SP: 51/48) 100 (-SP: 150) 400 1180 634 ~ 220, 230, 240 56 PUH-5YKSA 59 PUH-6YKSA Downloaded from www.Manualslib.com manuals search engine
- 14. 14 GBDFINLESWP 1. 安全注意事項 1) 室外机組 警告: • 室外机必須安裝在平穩的表面上﹐并保証本机上并沒有雪、樹葉或垃圾堆積。 • 請勿站立或放置任何物品在本机上。以免因失足或物品的掉落而受傷。 注意: 室外机應安裝在本机排放的气体和噪音不會影響鄰居之處。 2) 室內机組 警告: 室內机必須安裝牢固。如果机組安裝不牢固﹐机組可能會翻落并引致受傷。 3) 遙控器 警告: 遙控器必須安裝在小孩不能触及的地方。 4) 排水軟管 注意: 确保已安裝排水管且排水正常。不正确的安裝可能會因漏水而導致家具損坏。 5) 電源線、保險絲或電路斷路器 警告: • 确保本机由專用電線供電。如果其它設備連到相同的電線﹐則可能引致過載。 • 确保裝有主電源開關。 • 确保使用机組規定的電壓和保險絲或電路斷路器額定值。 切勿使用額定值大于指定額定值的電線或保險絲。 6) 接地 注意: • 本机必須正确接地。切勿將接地線連接到煤气管、自來水管、避雷針或電話接 地線。如果机組接地不當﹐則可能導致触電。 • 請經常檢查室外机組的接地線﹐并确定它已正确連接到机組的接地端子和接地 電极。 sssss 在操作本机之前﹐務必閱讀所有的“安全注意事項”。 sssss “安全注意事項”列出了有關安全的重要事項。請務必遵守。 本手冊正文使用的符號 警告: 說明應注意事項﹐以防止用戶受到傷害或死亡的危險。 注意: 說明應注意事項﹐以防止机組損坏。 本手冊插圖中所用的符號 : 表示應該避免的操作。 : 表示必須遵守的重要說明。 : 表示必須接地的組件。 : 小心触電。(此符號顯示在主机的標簽上。) <顏色:黃色> 警告: 請仔細閱讀貼在主机上的各种標簽。 1.1. 安裝 sssss 閱讀本手冊后﹐將本手冊和安裝手冊一起妥善存放以便在出現問題時進行參考。 如果本机將由另一名人員操作﹐請确保將本手冊交給他們。 警告: • 用戶切勿嘗試自行安裝本机。請要求經銷商或授權公司安裝本机。如果本机安 裝不當﹐可能會導致漏水、触電或火災。 • 請僅使用三菱電机公司授權的部件﹐并要求經銷商或授權公司進行安裝。如果 配件安裝不當﹐可能會導致漏水、触電或火災。 • 本安裝手冊詳細介紹建議的安裝方法。任何在安裝時需要的結构變動必須符合 當地建筑條例的要求。 • 用戶切勿嘗試自行修理本机或將其搬往另一個位置。如果修理不當﹐可能會導 致漏水、触電或火災。如果需要修理或搬動本机﹐請咨詢經銷商。 • 在沒有監督的情況下﹐幼童或老弱人士不應操作本設備。 • 請監督幼童﹐以确保他們不會玩弄本設備。 目錄 1. 安全注意事項 ....................................................14 1.1. 安裝 ..................................................14 1.2. 運行時 ................................................15 1.3. 機器拆除 ..............................................15 2. 各部份的名稱和功能 ..............................................15 3. 操作 ............................................................16 3.1. 開關機組 ..............................................17 3.2. 模式選擇 ..............................................17 3.3. 選擇溫度 TEMP. .......................................17 3.4. 選擇風扇轉速 .....................................17 3.5. 設置一周日子和時間 ....................................17 3.6. 使用定時器 ............................................18 3.7. 鎖定遙控器按鈕(操作功能限制控制器) ..................21 3.8. 其它指示 ..............................................21 4. 有效的使用方法 ..................................................22 5. 機器護理 ........................................................22 6. 故障檢修 ........................................................23 7. 安裝和遷移作業及檢查 ............................................24 8. 規格 ............................................................24 Downloaded from www.Manualslib.com manuals search engine
- 15. 15 GBDFINLESWP 2. 各部份的名稱和功能 室內机 • 進气口:送回室內空气。 • 過濾网:本机內并不提供空气過濾网。然而﹐本机內置選件的簡單過濾网可去 除可見的塵埃和污垢。如果使用机組的其中一個要求是淨化空气﹐請与經銷商 聯系。(有關如何清洁的詳細資料﹐請參見第22頁。) • 出气口:把冷气吹進室內。 PE-5、6、8、10、12、16、20型號、PEH-5、6型號 [天花板內藏式] [Fig. 2.0.1] (P.2) A 出气口 B 進气口 C 空气過濾网(選件) 液晶遙控器 • 檢查您的遙控器。 不同的遙控器用于不同的系統。 [Fig. 2.0.2] (P.2) A 液晶遙控器 1.2. 運行時 注意: • 請勿使用任何尖銳物刺按鈕﹐這可能會損坏遙控器。 • 請勿扭曲或拖拽遙控器的電線﹐因為這可能會損坏遙控器而導致失靈。 • 切勿拆掉遙控器的上蓋。拆掉遙控器的上蓋和触摸內部電路板是很危險的。這 樣可能會導致火災和故障。 • 切勿使用苯、稀釋劑和化學抹布等擦拭遙控器。這樣可能造成褪色和故障。要 去除明顯的污點﹐用中性清洁劑与水的混合液浸濕布料﹐擰干水后﹐用其擦掉 污點﹐然后再用干布擦拭一遍。 • 切勿阻塞或蓋住室內或室外机的進气口或出气口。室內机下方的高大家具或放 置在室外机附近的大箱子等笨重物品會降低本机的性能。 警告: • 請勿將水濺到本机上及用濕手触摸本机。否則可能會導致触電。 • 請勿在本机附近噴射易燃气体。否則可能導致火災。 • 請勿將煤气取暖爐或任何其它燃燒裝置放在本机排气處。否則可能造成燃燒不 良。 警告: • 本机運行時﹐請勿從室外机拆下前面板或風扇護罩。如果触摸運轉件、發熱或 高壓部件﹐可能導致傷害。 • 由于本机內的風扇轉速很高﹐切勿將手指、棍棒等物伸入進气口或出气口﹐否 則可能造成人身傷害。有小孩在場時更要特別小心。 • 如果聞到异味﹐請停止使用本机﹐切斷電源開關并咨詢經銷商。否則﹐可能引 起故障、触電或火災。 • 當發現明顯的异常噪音或振動時﹐請停止運行﹐切斷電源開關并聯系經銷商。 • 請勿使房間過冷。最合适的室內溫度應与室外溫度相差不超過5℃。 • 請勿讓殘疾人或嬰儿坐或站在空調器的气流通道中。這會影響健康。 注意: • 請勿讓气流經過室內植物或籠中寵物。 • 室內要經常通風。如果本机在密封的房間內長時間持續運行﹐則室內空气可能 變得混濁。 出現故障時 警告: • 切勿改裝空調器。有關任何修理服務﹐請咨詢經銷商。修理不當可能引致漏 水、触電、火災等。 • 如果遙控器顯示錯誤指示、空調器不運行或有任何异常出現時﹐請關閉本机并 聯系經銷商。如果在這些情況下仍然讓本机繼續運行﹐則可能引致火災或故障。 • 如果電源斷路器經常啟動﹐則請聯系經銷商。如果不加處理﹐可能引致火災或 故障。 • 如果制冷气体吹出或泄漏﹐請停止運行空調器﹐徹底進行室內通風﹐并聯系您 的經銷商。如果不加處理﹐可能因缺氧引起意外事故。 當長時間不使用空調器時 • 如果空調器由于季節變換等因素長時間不使用﹐則應在送風狀況下讓空調器運 行4∼5小時﹐直到本机內部完全干燥。如果不這樣做﹐會造成整個室內各個角 落出現不衛生和不健康的霉點。 • 當本机長時間不使用時﹐請將[電源]開關轉至OFF。 如果一直處于通電狀態﹐可能會浪費數瓦或數十瓦的電力。而且還會因灰塵等 的堆積而導致火災。 • 開始運行前12個小時就先將電源開關切換到ON。在頻繁使用空調器的季節﹐請 勿將電源開關切換至OFF。這樣會造成故障。 1.3. 机器拆除 警告: 需要拆除机器時﹐請咨詢經銷商。如果管道拆除不當﹐制冷劑(碳氟气)溢出可能 會接触到皮膚而引起傷害。將制冷劑排到大气中還會污染環境。 Downloaded from www.Manualslib.com manuals search engine
- 16. 16 GBDFINLESWP PAR-21MAA ON/OFF FILTER CHECK OPERATION CLEAR TEST TEMP. MENU BACK DAYMONITOR/SET CLOCK ON/OFF 1 4 5 67 8 9 0 A B C 2 3 ûFûC ûFûC ERROR CODE AFTER TIMER TIME SUN MON TUE WED THU FRI SAT ON OFF Hr AFTER FILTER FUNCTION ONLY1Hr. WEEKLY SIMPLE AUTO OFF A C D E F G H J K MI L N O P B 1 設置溫度按鈕 降溫 升溫 2 定時器菜單按鈕(監視器/設置按鈕) 3 模式按鈕(返回按鈕) 4 設置時間按鈕 后退 前進 5 定時器開/關按鈕(設置日子按鈕) 6 風向按鈕( 操作按鈕) 到前一個操作號。 7 通風按鈕( 操作按鈕) 到下一個操作號。 8 開/關按鈕 9 風扇轉速按鈕 打開滑門。 0 過濾网 按鈕(<輸入>按鈕) A 測試運行按鈕 B 校驗按鈕(清除按鈕) C 气流朝上/朝下按鈕 備注: • 如果按下的按鈕在室內机上沒有安裝的功能﹐則遙控器會顯示“不可用”消息。 • 如果您正使用遙控器驅動多個室內机﹐則只要母机組沒有此功能﹐就會出現此 消息。 • 切勿讓陽光直接照射遙控器。這樣會導致測量室溫出錯。 • 切勿在遙控器右手下側放置任何障礙物。這樣會導致測量室溫出錯。 A 一周日子 顯示本周當前的日子。 時間/定時器顯示 除非設定了簡單或自動關閉定時器﹐否則顯示當前時間。 如果設置了簡單或自動關閉定時器﹐則顯示剩余的時間。 B “傳感器”指示 當使用遙控器傳感器時顯示。 C 標識當前的操作 顯示操作模式等。 * 支持多語言顯示。 D “中央控制”指示器 表示主控制器已停止遙控器操作。 E “定時器關”指示器 表示定時器處于關閉狀態。 F 溫度設置 顯示目標溫度。 G 朝上/朝下气流方向指示器 指示器 顯示了出口气流的方向。 H “僅一小時”指示器 如果在制冷或除濕模式期間將气流設置為弱和朝下﹐則顯示本項。(各种机型的操作方法 各有不同。) 指示器在一個小時后關閉﹐同時改變气流方向。 I 風向顯示 表示風葉在上下擺動。如果風葉固定不動﹐則不顯示。 J 室溫顯示 顯示室溫。 K (電源接通指示器) 指示電源接通。 L 通風指示器 當机組在通風模式下運行時顯示。 M 風扇轉速指示器 顯示選定的風扇轉速。 N “鎖定”指示器 指示遙控器按鈕已被鎖定。 O “清洗過濾网”指示器 到時間清洗過濾网時會顯示本項。 P 定時器指示器 如果設置了相應的定時器﹐則顯示本項。 備注: • 為了說明用途﹐顯示屏的所有部分都顯示為點亮。實際運行時﹐只有相應的部 分被點亮。 遙控器按鈕 遙控器顯示 3. 操作 • 使用液晶遙控器時﹐請參閱本操作手冊或遙控器操作手冊來操作本机。 Downloaded from www.Manualslib.com manuals search engine
- 17. 17 GBDFINLESWP 開始操作之前 • “PLEASE WAIT”顯示消失后開始運行。當電源接通和電源出故障后﹐在 B 只 顯示“PLEASE WAIT”(最長3分鐘)。這并非表示空調器有任何故障。 3.1. 開關机組 s 開始運行: 1. 按下ON/OFF按鈕 1。 ON指示器 A 應點亮。 s 停止運行: 1. 再次按下ON/OFF按鈕 1。 ON指示器 A 熄滅。 • 當空調器正在使用時﹐請勿切斷電源。這會導致本机故障。 • 即使關閉正在進行的操作后﹐立即按下ON/OFF按鈕﹐空調器也不會在3分鐘以內 啟動。這是為了防止內部組件損坏。 • 如果由于電源故障停止運行﹐那么除非重新恢复電源﹐否則机組不會自動重新 啟動。按下ON/OFF按鈕重新啟動。 3.2. 模式選擇 1. 如果机組處于停止運行狀態﹐請按下ON/OFF按鈕 1 啟動机組。 ON指示器 A 應點亮。 2. 按下運行模式( )按鈕 2 并選擇操作模式。 B (COOL) 制冷模式 (FAN) 風扇模式 制冷 按下 22222 [運行模式]按鈕并出現“ COOL”顯示。 風扇 按下 22222 [運行模式]按鈕并出現“ FAN”顯示。 • 風扇操作的功能是令室內空气流通。 • 通過風扇操作無法設置室內溫度。 注意: 切勿長時間將身体直接暴露到冷空气中。過度暴露在冷空气下對健康有害﹐因此應 盡量避免。 注意: • 當空調器与火爐一起使用時﹐請對所在區域徹底通風。如果通風不良﹐則可能 會導致缺氧事故。 • 切勿將火爐放在空調器气流經過的位置。 這樣做會造成火爐燃燒不良。 3.3. 選擇溫度 TEMP. sssss 降低室內溫度: 1. 按下 按鈕 3 選擇想要的溫度。 顯示所選的溫度 C。 • 每次按下按鈕時﹐溫度值按1℃遞減。 s 提高室內溫度: 1. 按下 按鈕 3 選擇想要的溫度。 顯示所選的溫度 C。 • 每次按下按鈕時﹐溫度值按1℃遞增。 • 可用的溫度范圍如下所示: 制冷:19 - 30℃ • 在8℃ - 39℃時顯示會閃爍通知您室內溫度 E 是低于還是高于所顯示的溫 度。如果溫度低于8℃或高于39℃﹐顯示屏上相應的值(8℃或39℃)將閃動。 3.4. 選擇風扇轉速 1. 按下 按鈕 4 選擇所需的風扇轉速。 • 每次按下按鈕時﹐可用的選項隨着遙控器上的顯示 D 而變化﹐如下所示。 3.5. 設置一周日子和時間 ■ 使用本屏幕改變本周當前的日子和時間設置。 ûC ûC SIMPLE PAR-21MAA ON/OFF FILTER CHECK OPERATION CLEAR TEST TEMP. MENU BACK DAYMONITOR/SET CLOCK ON/OFF 2 3 B C 1 4 A D E 本周日子和時間 顯示 ûC ûC TIME SUN PAR-21MAA ON/OFF FILTER CHECK OPERATION CLEAR TEST TEMP. MENU BACK DAYMONITOR/SET CLOCK ON/OFF 2 4 9 1 A s 風扇轉速 2段 遙控器顯示 低 高 ▼ ▼ 型號 PE(H)-5, 6, PE-8, 10, 12 1段PE-16, 20 無顯示 Downloaded from www.Manualslib.com manuals search engine
- 18. 18 GBDFINLESWP sssss 如何設置一周定時器 1. 确保處于標准控制屏幕﹐且一周定時器指示器 1 如顯示屏所示。 2. 按下定時器菜單按鈕 B﹐在屏幕(如 2)上出現“設置”。 (請注意﹐每次按下按鈕都會令顯示屏在“設置”和“監視器”之間切 換。) 3. 按下定時器開/關(設置日子)按鈕 9 來設置日子。每次按下都會令 3 上的顯示到下一個設置﹐順序為:“星期日、星期一、星期二、星期三、星 期四、星期五、星期六”→“星期日”→ ...→“星期五”→ “星期六” → “星期日、星期一、星期二、星期三、星期四、星期五、星期六”... 4. 根据需要按下 或 操作按鈕(7或8)來選擇相應的操作號 (1到8)4。 * 在第3和第4步的輸入將從下圖所示的矩陣中選擇其中一個單元。(左邊的 遙控器顯示屏會顯示當把星期日的操作1設置為如下所示的值) 設置矩陣 備注: 通過將日子設置為“星期日、星期一、星期二、星期三、星期四、星期五、星期 六”﹐您可以選擇每天同一時間要執行的相同操作。 (示例:上述操作2將在一星期的每天執行。) sssss 設置一周定時器 5. 根据需要按下合适的設置時間按鈕 A 來設置所需的時間(如 5)。 * 當按下該按鈕時﹐時間開始以1分鐘為間隔遞增﹐然后以10分鐘為間隔遞 增﹐最后以1小時為間隔遞增。 6. 按下ON/OFF按鈕 1 來選擇想要執行的操作(ON或OFF)﹐如 6。 * 每次按下都會改變下一個設置﹐順序如下:無顯示(沒有設置)→ “ON” →“OFF” 7. 按相應的設置溫度按鈕 3 來設置所需的溫度(如 7)。 * 每次按下都會改變下一個設置﹐順序如下:無顯示(沒有設置)⇔ 24 ⇔ 25 ⇔ ... ⇔ 29 ⇔ 30 ⇔ 12 ⇔ ... ⇔ 23 ⇔ 無顯示。 (适用范圍:設置的范圍是12℃到30℃。超過實際范圍的溫度可以控制﹐ 但是會因相連接的單元類型有所區分。) 8. 在第5步、第6步、第7步做出相應的設置后﹐按下過濾网 按鈕 4 鎖定 在這些值上。 若要為選中的操作清除當前設置值﹐按下并快速松開校驗(清除)按鈕 1。 * 顯示的時間設置將更改為“—:—”﹐而開/關和溫度設置全部消失。 (若要立即清除所有一周定時器設置﹐按住兩秒以上檢查(清除)按鈕 0。顯示開始閃爍﹐指示所有設置已經被清除。) 備注: • 不管室內机進行的是何种操作﹐都可以設置此項。 • 如果在遙控器的功能選擇上設定時鐘為無效﹐則不會顯示日子和時間﹐請參見 安裝手冊。 sssss 如何設置本周日子和時間...... 1. 按下 或 設置時間按鈕 A 來顯示 2。 2. 按下定時器開/關(設置日子)按鈕 9 來設置日子。 * 按一下就會前進一天﹐如 3 : 星期日 → 星期一 → ... → 星期五 → 星 期六。 3. 根据需要按下相應的設置時間按鈕 A 來設置時間。 * 當按住該按鈕時﹐時間(如 4)開始以1分鐘為間隔遞增﹐然后以10分鐘為 間隔遞增﹐最后以1小時為間隔遞增。 4. 在第2步和第3步做出合适的設置后﹐按下過濾网 按鈕 4 鎖定時間值。 備注: • 如果在按下過濾网 按鈕 4 之前按下模式(返回)按鈕 2 ﹐則取消第2步 和第3步的新設置。 5. 按下模式(返回)按鈕 2 來完成設置過程。這將使顯示返回標准控制屏幕﹐ 其中 1 將顯示剛剛設置的日子和時間。 備注: • 遙控器具有簡化的時鐘﹐精度大約 + 或 -﹐每月誤差在1分鐘。 3.6. 使用定時器 本節講述如何設置和使用定時器。您可以使用遙控器的功能選擇來選擇要使用三种 定時器類型中的哪一种:1 一周定時器﹐2 簡單定時器或 3 自動關閉定時器。 有關如何設置遙控器功能選擇的資料﹐請參見安裝手冊。 3.6.1. 使用一周定時器 ■ 一周定時器可用于對一周中的7日設置最多8种操作。 • 每种操作可能由以下任何部分組成:開/關時間与溫度設置、僅開/關時間或 僅溫度設置。 • 當前時間到達本定時器設置的時間時﹐空調器執行定時器設置的動作。 ■ 本定時器的時間設置分辨率為1分鐘。 備注: *1. 一周定時器/簡單定時器/自動關閉定時器不可同時使用。 *2. 當出現以下任一种情況時﹐一周定時器不會運行。 定時器功能被關閉;系統處于故障狀態;正在進行測試運行;遙控器正在自檢 或遙控器檢驗;用戶正在設置某項功能;用戶正在設置定時器;用戶正在設置 本周當前的日子或時間;系統處于中央控制狀態。(在這些情況下不能使用的 操作(机器開啟、机器關閉或溫度設置)﹐系統絕不會執行。) 設置時間 設置本周日子 TIME SUN 2 3 4 操作號 日子設置 ûC SUN ON WEEKLY PAR-21MAA ON/OFF FILTER CHECK OPERATION CLEAR TEST TEMP. MENU BACK DAYMONITOR/SET CLOCK ON/OFF 2 4 2 3 A 9 78 0 4 1 3 B 1 操作號 星期日 星期一 摽 星期六 •8:30 •ON •23℃ •10:00 •OFF •10:00 •OFF •10:00 •OFF •10:00 •OFF ▲ <星期日的操作1設置> 在8:30啟動空調器﹐溫 度設置為23°C。 <每天的操作2設置> 在10:00關閉空調器。 ▲ 1 2 ··· 8 顯示選中的操作(ON或OFF) * 如果操作未設置﹐則不顯示。 ûC SUN ON WEEKLY 6 7 5 顯示溫度設置 * 如果溫度未設置﹐則不顯 示。 顯示時間設置 Downloaded from www.Manualslib.com manuals search engine
- 19. 19 GBDFINLESWP 備注: 如果在按下過濾网 按鈕 44444 之前按下模式(返回)按鈕 22222﹐則取消新設置。 如果正好在相同的時間設置兩個或兩個以上不同的操作﹐則只可以執行具有最高操 作號的操作。 9. 如有需要﹐重复第3步到第8步﹐根据所需輸入更多的設置。 10. 按下模式(返回)按鈕 2 返回到標准控制屏幕并完成設置步驟。 11. 若要啟動定時器﹐則按下定時器開/關按鈕 9﹐以便“定時器關閉”指 示從屏幕上消失。确保“定時器關閉”指示不再顯示。 * 如果沒有任何定時器設置﹐則“定時器關閉”指示將在屏幕上閃爍。 sssss 如何查看一周定時器設置 1. 确保在屏幕上可見一周定時器指示器(如 1)。 2. 按下定時器菜單按鈕 B﹐屏幕上便顯示“Monitor”(監視器)(如 8)。 3. 如有需要﹐請按下定時器開/關(設置日子)按鈕 9 以選擇您要查看的日 子。 4. 需要時按下 或 操作按鈕( 7 或 8 )來更改顯示屏上顯示 的定時器操作(如 9)。 * 每次按下會按照時間設置的順序前進到下一個定時器操作。 5. 若要關閉監視器和返回標准控制屏幕﹐請按下模式(返回)按鈕 2。 sssss 若要關閉一周定時器 按下定時器開/關按鈕 9﹐在 0 便會顯示“Timer Off”(定時器關閉)。 sssss 若要開啟一周定時器 按下定時器開/關按鈕 9﹐在 0 便會顯示“Timer Off”(定時器關閉)指示。 3.6.2. 使用簡單定時器 ■ 可以按3种方式設置簡單定時器。 • 僅啟動時間: 設置的時間過去后﹐空調器啟動。 • 僅關閉時間: 設置的時間過去后﹐空調器關閉。 • 開始与關閉時間: 分別的時間過去后﹐空調器啟動和關閉。 ■ 簡單定時器(啟動和關閉)只可以在72小時內設置一次。 設置時間以小時為增量。 備注: *1. 一周定時器/簡單定時器/自動關閉定時器不可同時使用。 *2. 當出現以下任何一种情況時﹐簡單定時器不能運行。 定時器被關閉;系統處于故障狀態;正在進行測試運行;遙控器正在自檢或遙 控器檢驗;用戶正在選擇某項功能;用戶正在設置定時器;系統處于中央控制 狀態。(在這些情況下﹐不能使用ON/OFF操作。) ûC ûC TIME SUN WEEKLY 0 ûC ûC TIME SUN WEEKLY 0 sssss 如何設置簡單定時器 1. 确保處于標准控制屏幕﹐且在顯示屏上可見簡單定時器指示器(如 1)。 當顯示簡單定時器之外的其它內容時﹐使用遙控器的功能選擇將其設置為簡 單定時器(參見安裝手冊)。 2. 按下定時器菜單按鈕 B﹐在屏幕(如 2)上出現“Set Up”(設置)。(請注意﹐ 每次按下按鈕都會令顯示屏在“Set Up”(設置)和“Monitor”(監視器)之間切 換。) 3. 按下開/關按鈕 1 顯示簡單定時器的設置當前為ON或OFF。按一次按鈕﹐ 將顯示剩余的時間為ON﹐然后再次將剩余的時間顯示為OFF。(ON/OFF指示如 3 所示)。 •“ON”定時器: 當指定的小時數過去后﹐空調器將開始運行。 •“OFF”定時器: 當指定的小時數過去后﹐空調器將停止運行。 4. 當顯示“ON”或“OFF”時(如 3 ):如有需要﹐按下合适的設置時間按 鈕 A﹐將小時設置為ON(如果顯示“ON”)或將小時設置為OFF(如果顯示 “OFF”)(如 4)。 • 适用范圍:1∼72個小時 5. 若要同時設置ON和OFF時間﹐請重复第3步和第4步。 * 請注意﹐ON和OFF時間不可設置為相同的值。 6. 若要清除當前的ON或OFF設置:顯示ON或OFF設置(參見第3步)﹐然后按下校 驗(清除)按鈕 0 ﹐以便將時間設置清除為“—”]如 4)。(如果您 只想使用ON設置或只想使用OFF設置﹐則要确保您不想使用的設置如“—”所 示。) 7. 完成上述第3步到第6步后﹐按下過濾网 按鈕 4 鎖定該值。 備注: 如果在按下過濾网 按鈕 4 之前按下模式(返回)按鈕 2﹐則取消新的設 置。 8. 按下模式(返回)按鈕 2 以返回到標准控制屏幕。 9. 按下定時器開/關按鈕 9 以開始定時器計時。當定時器正在運行時﹐在顯 示屏上可見定時器值。确保定時器值可見且恰當。 sssss 查看當前的簡單定時器設置 1. 确保在屏幕上可見簡單定時器指示器(如 1)。 2. 按下定時器菜單按鈕 B﹐在屏幕(如 5)上出現“監視器”。 • 如果ON或OFF簡單定時器正在運行﹐則當前定時器值如 6 所示。 • 如果ON和OFF值已經同時設置﹐則兩個值輪流顯示。 3. 按下模式(返回)按鈕 2 以關閉監視器顯示并返回到標准控制屏幕。 sssss 若要關閉簡單定時器... 按下定時器開/關按鈕 9﹐定時器設置便不再顯示在屏幕上(如 7)。 sssss 若要開啟簡單定時器... 按下定時器開/關按鈕 9﹐定時器設置便可見﹐如 7。 ONHr AFTER SIMPLE 4 1 3 2 操作(啟動或關閉) * 如果沒有設置﹐則顯示 “— —”。 定時器設置 TIMER ON OFF Hr AFTER SIMPLE 1 65 定時器設置 ûC ûC SIMPLE 7 ûC ûC ONHr AFTER SIMPLE 7 ONHr AFTER SIMPLE PAR-21MAA ON/OFF FILTER CHECK OPERATION CLEAR TEST TEMP. MENU BACK DAYMONITOR/SET CLOCK ON/OFF 2 A 9 0 4 1 B 定時器設置 ûC TIMER SUN ON OFF WEEKLY 1 98 Downloaded from www.Manualslib.com manuals search engine
- 20. 20 GBDFINLESWP 2. 按住定時器菜單按鈕 B 達3秒鐘﹐在屏幕(如 2 )上出現“Set Up” (設置)。 (請注意﹐每次按下按鈕都會令顯示屏在“Set Up”(設置)和 “Monitor”(監視器)之間切換。) 3. 根据需要按下合适的設置時間按鈕 A 來設置OFF時間 (如 3 )。 4. 按下過濾網 按鈕 4 以鎖定該設置。 備注: 如果在按下過濾网 按鈕 44444 之前按下模式(返回)按鈕 22222﹐則會取消您的設 置。 5. 按下模式(返回)按鈕 2 以完成設置步驟﹐并返回到標准控制屏幕。 6. 如果空調器已經運行﹐則定時器立即開始計時。确保檢查顯示屏上定時器設 置正确地顯示。 sssss 檢查當前的自動關閉定時器設置 1. 确保在屏幕上可見“AUTO OFF”(自動關閉)(如 1)。 2. 按住定時器菜單按鈕 B 達3秒鐘﹐在屏幕(如 4)上便會出現“Monitor” (監視器)。 • 關机的定時器剩余時間如 5 所示。 3. 若要關閉監視器和返回標准控制屏幕﹐請按下模式(返回)按鈕 2。 sssss 若要關閉自動關閉定時器... ● 按住定時器開/關按鈕 9 達3秒鐘﹐“Timer Off”(定時器關閉)便會出現 (如 6)且定時器值(如 7)消失。 ● 或者﹐自行關閉空調器。定時器值(如 7)將從屏幕上消失。 sssss 若要開啟自動關閉定時器... ● 按住定時器開/關按鈕 9 達3秒鐘。“Timer Off”(定時器關閉)指示消失 (如 6)﹐且定時器設置出現在顯示屏上(如 7)。 ● 或者﹐開啟空調器。定時器值將顯示﹐如 7。 ûC ûC AUTO OFF6 7 AUTO OFF 7 ûC ûC AFTER OFF AUTO OFF6 7 示例 如果ON和OFF時間已經在簡單定時器上同時設置﹐則操作和顯示如下所示。 示例1: 啟動定時器﹐設置比OFF時間短的ON時間 ON設置: 3小時 OFF設置: 7小時 示例2: 啟動定時器﹐OFF時間比ON時間短 ON設置: 5小時 OFF設置: 2小時 3.6.3. 使用自動關閉定時器 ■ 當空調器啟動時定時器開始計時﹐當設置的時間過去后﹐關閉空調器。 ■ 适用的設置范圍為30分鐘到4小時﹐以30分鐘為間隔。 備注: *1. 一周定時器/簡單定時器/自動關閉定時器不可同時使用。 *2. 當出現以下任何一种情況時﹐自動關閉定時器不能運行。 定時器功能被關閉;系統處于故障狀態;正在進行測試運行;遙控器正在自檢 或遙控器檢驗;用戶正在設置某項功能;用戶正在設置定時器;用戶正在設置 本周當前的日子或時間;系統處于中央控制狀態。(在這些情況下﹐不能使用 ON/OFF操作。) sssss 如何設置自動關閉定時器 1. 确保處于標准控制屏幕﹐且在顯示屏上可見自動關閉定時器指示器(如 1) 當顯示自動關閉定時器之外的其它內容時﹐使用遙控器的“功能選擇”將其 設置為自動關閉定時器(參見安裝手冊)。 AFTER OFF AUTO OFF PAR-21MAA ON/OFF FILTER CHECK OPERATION CLEAR TEST TEMP. MENU BACK DAYMONITOR/SET CLOCK ON/OFF 2 A 9 4 B AFTER OFF AUTO OFF 3 1 2 定時器設置 ONHr AFTER SIMPLE ûC ûC OFF Hr AFTER SIMPLE SIMPLE ▲ ▲ 定時器啟動后 3小時 定時器啟動時 定時器啟動后 7小時 顯示屏顯示定時器的 ON設置(距离ON的剩 余小時)。 顯示屏更改為顯示定 時器的OFF設置(距离 OFF的剩余小時)。顯 示的時間是OFF設置 (7小時)- ON設置 (3小時)= 4小時。 空調器關閉﹐且在重 新啟動空調器之前一 直保持關閉。 ûC ûC OFF Hr AFTER SIMPLE ONHr AFTER SIMPLE ûC ûC SIMPLE ▲ ▲ 定時器啟動后 2小時 定時器啟動時 定時器啟動后 5小時 顯示屏顯示定時器的 OFF設置(距离OFF的 剩余小時)。 顯示屏更改為顯示定 時器的O N 設置(距离 O N的剩余小時)。顯 示的時間是ON設置(5 小時)- OFF設置(2小 時)= 3小時。 空調器開啟﹐且在關 閉空調器之前持續運 行。 AFTER TIMER OFF AUTO OFF 5 1 4 定時器設置 Downloaded from www.Manualslib.com manuals search engine
- 21. 21 GBDFINLESWP ON/OFF ERROR CODE 錯誤代碼 室內机號 ON指示燈 (閃爍) ON/OFFTEMP. ûC ûC ON/OFFTEMP. ûC ûC FILTER ON/OFFTEMP. ûC ûC 3.7. 鎖定遙控器按鈕(操作功能限制控制器) ■ 如有需要﹐可以鎖定遙控器按鈕。您可以使用遙控器的功能選擇來選擇要使用 的鎖定類型。(有關選擇鎖定類型的資料﹐請參見安裝手冊)。 具体來說﹐您可以使用以下任何一個鎖定類型。 1 鎖定所有按鈕: 鎖定遙控器上的所有按鈕。 2 鎖定除ON/OFF之外的所有按鈕: 鎖定除ON/OFF按鈕之外的所有按鈕。 備注: “已鎖定”指示器出現在屏幕上﹐表示按鈕目前已鎖定。 sssss 如何鎖定按鈕 1. 當按下過濾网按鈕 4 時﹐按住ON/OFF按鈕 1 達2秒鐘。“已鎖定”指示 出現在屏幕上(如 1)﹐表示現在已鎖定。 * 如果已經在遙控器的功能選擇中停用了鎖定﹐則當您按下上述按鈕時﹐屏 幕將顯示“不可用”消息。 • 如果您按下一個已鎖定的按鈕﹐則“已鎖定”指示將在顯示屏上閃動(如 1)。 sssss 如何把按鈕解鎖 1. 當按下過濾网按鈕 4 時﹐按住ON/OFF按鈕 1 達2秒鐘﹐以便讓“已鎖定” 指示從屏幕上消失(如 1)。 3.8. 其它指示 3.8.1. 中央控制 ● 由中央控制器等控制操作時顯示。 限制操作顯示如下。 • 開/關(包括定時器操作) • 運行模式 • 設置溫度 備注: 個別地會受到限制。 ûC ûC 1 ûC ûC FUNCTION 1 ûC ûC FUNCTION 1 ûC ûC TIME SUN FUNCTION PAR-21MAA ON/OFF FILTER CHECK OPERATION CLEAR TEST TEMP. MENU BACK DAYMONITOR/SET CLOCK ON/OFF 4 1 1 鎖定指示器 ON/OFF CALL:XXXX XXX:XXX 當按下校驗按鈕時: ON/OFF ˚C ˚C ERROR CODE 錯誤代碼 3.8.2. 閃爍模式指示器 ■ 當持續閃爍時 當与室外机連接的另一台室內机已經按不同的運行模式運行時顯示。 与另一台室內机的運行相匹配。 ■ 顯示屏閃爍后切換模式時 當運行模式因季節不同由中央控制器進行限制等情況時顯示。 使用另一個運行模式。 3.8.3. 閃爍的“FILTER” ■ 指示過濾网需要清洗。 清洗過濾网。 ■ 當复位“FILTER”(過濾网)顯示屏時 清洗過濾器后連續按下兩次[FILTER]按鈕時﹐顯示屏關閉并被复位。 3.8.4. 閃爍錯誤代碼 ● 如果ON指示燈和錯誤代碼同時閃爍:這表示空調器出現故障﹐并且運行已經停 止(無法重新啟動)。注意顯示的單元號和錯誤代碼﹐然后切斷空調器的電源 并致電經銷商和維修商。 ● 如果只有錯誤代碼閃爍(同時ON指示燈保持點亮):運行仍在繼續﹐但系統可 能已經出現故障。這种情況下﹐你應該記下錯誤代碼并致電經銷商和服務商。 * 如果已經輸入了在出現問題時該撥打的聯系電話號碼﹐請按下校驗按鈕將該電 話號碼顯示在屏幕上。(您可以在遙控器的功能選擇下設置此項。有關資料﹐ 請參閱安裝手冊) 如果已經輸入了在出現問題時該撥打的聯系電話號碼﹐則屏幕顯示此號碼。(您可以 在遙控器的功能選擇下設置此項。有關資料﹐請參閱安裝手冊。) Downloaded from www.Manualslib.com manuals search engine
- 22. 22 GBDFINLESWP 只需采用最少的步驟維護您的空調器﹐就可以使得它在空調效果和耗電量等方面的 效率更高。 設置正确的室內溫度 • 制冷運行時﹐室內和室外的溫差最好在5℃之內。 • 在制冷運行時﹐如果把室內溫度提高1℃﹐則大約可以節省10%的電量。 • 太冷對健康有害。同時也浪費電力。 徹底清洗過濾网 • 本机內未附帶空气過濾网﹐但是過濾网(選件)必須安裝在回風區。 • 如果空气過濾网的表面被堵塞﹐則出風和空調效果會明顯降低。此外﹐如果不 處理這种情況﹐則可能引起故障。在使用制冷和制熱功能的季節初期﹐清洗過 濾网最為重要。(當過濾网已經堆積了大量灰塵和污垢時﹐要徹底清洗它。) 4. 有效的使用方法 5. 机器護理 務必由維修人員進行濾网維護。 維護之前﹐請先將電源關掉。 注意: • 開始清洗前﹐必先停止運行并將電源關掉。請緊記机組內風扇正在高速旋轉﹐ 如不注意可能會造成嚴重傷害。 • 室內机未配置過濾网。但是﹐過濾网(選件)必須安裝在回風區﹐以除去吸入 气体中的灰塵。(通常﹐標准過濾网應每周清洗一次﹐而長期使用的過濾网應 在每個季節的開始進行清洗。) 如何清洗 • 小心地掃除灰塵或用吸塵器進行清洁。如果出現明顯的污點﹐可以用含有中性 洗滌劑的暖水溶液或清水來洗滌過濾网﹐然后將洗滌劑沖洗干淨。清洗后﹐晾 干并將其安裝回原來的位置。 注意: • 晾干時請勿將過濾网直接暴露在陽光下或用火等熱源將它烘干。這樣會造成過 濾网變形。 • 在熱水(50攝氏度以上)中清洗也會造成過濾网變形。 在制冷運行時要避免熱气進入 • 為避免在制冷運行時有熱气進入﹐可使用窗帘或百葉窗以防止陽光直接照射。 另外﹐除非是在不得已的情況下﹐否則請勿打開大門或出口。 間中進行通風 • 因為在長時間密封的室內空气每隔一段時間會變得污濁﹐所以需要間中進行通 風。當煤气裝置与空調器一起使用時﹐必須采取特別措施。如果使用本公司開 發的“LOSSNAY”通風裝置﹐進行通風時浪費電力會較少。有關此裝置的詳細資 料﹐請咨詢經銷商。 注意: 切勿向空調器潑水或使用易燃噴霧。使用這些方法清洗可能導致空調器故障、触電 或火災。 更換過濾网 [Fig. 5.0.1] (P.2) A 出气口 B 進气口 C 空气過濾网(選件) D 空气過濾网手柄 (1) 空气過濾网(選件)位于進气口(机組后側)。 (2) 提起空气過濾网手柄﹐并朝自己方向拉出過濾网。 (3) 如果您准備使用進气口導管﹐請先拆掉空气過濾网。這种情況下﹐必須在本地 另購空气過濾网﹐然后安裝在進气柵格上。 Downloaded from www.Manualslib.com manuals search engine
- 23. 23 GBDFINLESWP 6. 故障檢修 在致電維修人員之前﹐先檢查下表以查看是否有簡單的解決方案可以解決您的問 題。 ● 机組制冷效果不佳。 • 清洗過濾网。(過濾网內堆積的灰塵和碎屑會減少空气流量。) • 有需要時請檢查溫度設置并調節溫度。 • 增加室外机周圍的空間。 進气口或出气口是否被堵塞? • 窗戶或門是否已打開? ● 机組內是否出現水流動時“嗖嗖”的噪音。 • 當机組內的制冷劑流動或重新填滿時會發出這种聲音。 ● 机組內可听到滴答聲。 • 因溫度變化引起机組內部零件膨脹或收縮時﹐會發出這种聲音。 ● 在室內聞到异味。 • 這是由于机組排出從牆壁、地毯、家具或衣服中吸收的气味。 ● 室內机排出白色的薄霧。 • 室內濕度高時﹐這种情況可能會在剛剛啟動机組后出現。 ● 室外机排出水和濕气。 • 管道或管道裝置附近積有水分或濕气時﹐便會將它們排出。 • 熱轉換器中的水也會排出。 ● 操作時遙控器的指示燈不點亮。 • 開啟電源開關。將顯示“ ”。 ● 在遙控器上顯示 指示器。 • 當 指示器點亮時﹐遙控器的啟動和關閉、運行模式或溫度設置功能將無 法使用。 ● 剛剛重新啟動机組后啟動和關閉功能將無法使用。 • 要等待大約3分鐘(停止運行﹐以避免損坏空調器)。 ● 机組不會立即啟動。 • 等待机組自動重啟。因為室外机中包含3分鐘重新啟動預防電路﹐以此來保護 壓縮机﹐因此壓縮机會停頓一段時間后再重新啟動。 ● 即使啟動/停止按鈕未被按下﹐机組也會啟動。 • 定時器是否開啟? 按下啟動/停止按鈕令机組停止運行。 • 是否從遙控器發送的遙控指令? 請找出是否使用了遙控器。 • 指示器是否已點亮? 請找出是否使用了遙控器。 ● 即使啟動/停止按鈕未被按下﹐机組也會停止。 • 定時器是否開啟? 按下啟動/停止按鈕以重啟机組。 • 是否是從遙控器發送的遙控指令? 請找出是否使用了遙控器。 • 指示器是否已點亮? 請找出是否使用了遙控器。 ● 在遙控器上顯示“PLEASE WAIT”。 • 正在執行自動啟動測試(將持續大約2分鐘)。 ● 在遙控器上顯示錯誤代碼。 • 正執行自我診斷功能以保護空調器。 * 請勿嘗試自行修理。切斷主電源開關并聯系購買空調器的經銷商。向他們 提供机組名稱和遙控器上顯示的信息。 如果以上解決措施都不适用﹐則切斷主電源開關并聯系購買空調器的經銷商﹐告訴他型號和出現的故障特點。請勿嘗試自行修理机組。 出現以下任何一种情況時﹐切斷主電源開關﹐并聯系當地經銷商要求提供售后服務: • 運行指示燈(在主机組上)閃爍。 • 開關無法正常工作。 • 電路斷路器頻繁跳閘(或保險絲經常燒斷)。 • 把水意外地濺到机組內。 • 机組中漏水。 • 某些物品意外掉入空調器中。 • 運行期間听到不正常的噪音。 以下情況并非表示任何故障: 气味:香煙或裝修异味吸入机組后﹐可能會存在一段較長的時間。 室內机中液体流動的聲音:運行期間或之后出現這种聲音﹐可能只是制冷劑在机組內循環流動的聲音。 室內机傳出的滴答聲:剛剛開始制冷或剛剛停止制冷時會听到這种聲音。這是由于溫度變化﹐室內机輕微膨脹和收縮引起的。 備注: 空調器內注入的制冷劑是安全的。制冷劑通常不會泄漏﹐但是如果制冷气体泄漏到室內﹐且接触到風扇加熱器、空間加熱器和爐子等的火焰時﹐會產生有害物質。 當開始修理工作時﹐務必詢問維修人員制冷劑是否出現泄漏。 Downloaded from www.Manualslib.com manuals search engine
- 24. 24 GBDFINLESWP 8. 規格 7. 安裝和遷移作業及檢查 有關安裝的位置 有關安裝和遷移安裝的更多資料﹐請咨詢經銷商。 注意: 切勿將空調器安裝在可能有燃燒性气体泄漏的位置。 如果煤气泄漏且在机組周圍累積﹐可能引起火災。 切勿在以下場所安裝空調器: • 布滿机油的場所 • 靠近海洋和海灘等多鹽的場所 • 濕度很高的場所 • 附近有溫泉的場所 • 布滿硫磺气体的場所 • 有高頻處理机械的場所(如高頻焊接机等) • 經常使用酸性溶劑的場所 • 經常使用特殊噴霧的場所 • 請水平安裝室內机。否則可能引致漏水。 • 當在醫院和進行通信相關業務的場所安裝空調器時﹐請采取足夠的防噪音措施。 如果在上述任一种環境中使用空調器﹐則可能机組會經常發生運行故障。建議應避 開這類安裝場所。 有關更多資料﹐請咨詢經銷商。 有關電气工作 注意: • 電气工作必須由合格的電气工程師﹐根据本地規定和安裝手冊中的說明進行﹐ 并應使用專用電路。使用同一個電源線路可能引起斷路器跳閘和保險絲燒毀。 • 切勿將接地線連接到煤气管、自來水管、避雷器或電話接地線。有關詳細資料﹐ 請咨詢經銷商。 • 在某些安裝場所﹐接地漏電斷路器的安裝是強制性規定的。有關詳細資料﹐請 咨詢經銷商。 有關遷移安裝 • 如果您的房屋因擴建、改建或搬家的情況要拆除和重新安裝空調器﹐請事前向 經銷商咨詢﹐了解移机所需的專業工程費用。 注意: 當移動或重新安裝空調器時﹐請咨詢您的經銷商。如果安裝不當可能會引致触電、 火災等危險事故。 有關噪音 • 進行安裝工作時﹐應選擇一處可以完全承受空調器重量的場所﹐以及能減少噪 音和振動的位置。 • 選擇的場所要避免從空調器室外机出气口發出的冷气或熱气以及噪音影響鄰居。 • 如果將任何障礙物放在空調器的室外机出气口﹐會造成性能下降和噪音增加。 因此﹐請避免在出气口附近放置任何障礙物。 • 如果空調器出現任何异常聲音﹐請咨詢經銷商。 維護和檢查 • 如果連續几個季節使用空調器﹐則机組內可能會因污物積聚而性能下降。 根据不同的使用條件﹐灰塵和污垢等可能會引起臭味或使排水能力變差。 備注: 有關電气規格﹐請參見貼在机組上的產品標示牌。 室內額定條件(制冷):27℃ DB, 19℃ WB 室外:35℃ DB 室內額定條件(制熱):20℃ DB 室外:7℃ DB, 6℃ WB 尺寸 天花板內藏式(制冷劑R22) 制冷量 總計 kW 淨值 kW 淨值 kW 電壓 V 頻率 Hz 高 mm 寬 mm 深 mm 12.1 11.2 — PE-5GAK 3000/2400 46/42 (-SP: 48/45) 15.7 14.8 — PE-6GAK 3300/2640 21.6 20.6 — PE-8GAK 3900/3120 1400 26.7 25.6 (-SP: 25.5) — PE-10GAK 4800/3840 50/46 (-SP: 52/49) 1600 30.8 29.6 — PE-12GAK 5400/4320 51/48 400 1600 634 43.2 41.7 — PE-16GAK 7200 52 53.4 50.6 — PE-20GAK 9600 53 室內机 型號 電源 外部靜壓 Pa 气流速率(最高/最低) m3 /h 噪音等級(最高/最低) dB(A) 室外機型 淨重 kg 56 PU-5YAKD PU-5YJSA 59 PU-6YAKD PU-6YJSA 70 PU-8YAKD 77 PU-10YAKD 77 PU-12YAKD 130 PU-8YAKD × 2 133 PU-10YAKD × 2 220, 230, 240 3N 380, 400, 415 50 100 (-SP: 150) 150 49/45 (-SP: 51/48) 400 595 1947 764634 1180 制熱量 100 12.1 11.2 15.5 PEH-5GAK 3000/2400 46/42 (-SP: 48/45) 15.7 14.8 18.5 PEH-6GAK 3300/2640 49/45 (-SP: 51/48) 100 (-SP: 150) 400 1180 634 220, 230, 240 56 PUH-5YKSA 59 PUH-6YKSA Downloaded from www.Manualslib.com manuals search engine