SlideShare a Scribd company logo
1 of 12
Download to read offline
BEFORE OPERATING YOUR VACUUM, PLEASE READ THESE INSTRUCTIONS CAREFULLY.
947-1562 EA-02444 48599
2100
Important Safety Instructions
When using an electrical appliance, basic precautions should always be followed, including the following:
READ ALL INSTRUCTIONS BEFORE USING THISVACUUM CLEANER
For Household Use
WARNING
To reduce the risk of fire, electrical shock, or injury:
• Do not leave appliance when plugged in. Unplug from outlet when not in use and before servicing.
• Do not use outdoors or on wet surfaces.
• Do not allow to be used as a toy. Close attention is necessary when used by or near children.
• Use only as described in this manual. Use only manufacturer’s recommended attachments.
• Do not use with damaged cord or plug. If appliance is not working as it should, has been dropped, damaged, left
outdoors, or dropped into water, return it to a service center.
• Do not pull or carry by cord, use cord as a handle, close door on cord, or pull cord around sharp edges or
corners. Do not run appliance over cord. Keep cord away from heated surfaces.
• Do not unplug by pulling on cord. To unplug, grasp the plug, not the cord.
• Do not handle plug or appliance with wet hands.
• Do not put any object into openings. Do not use with any opening blocked; keep free of dust, lint, hair, or other
materials that may reduce airflow.
• Keep hair, loose clothing, fingers, and all parts of body away from openings and moving parts.
• Do not pick up anything that is burning or smoking, such as cigarettes, matches, or hot ashes.
• Do not use without having dustbag and/or filter in place.
• Turn off all controls before unplugging.
• Use extra care when cleaning on stairs.
• Do not use to pick up flammable or combustible liquids such as gasoline. Do not use in areas where such liquids
may be present.
• Do not use if any electrical wire is damaged, cut, or punctured. Avoid picking up sharp objects.
• Turn off appliance before connecting or disconnecting hose or power attachments.
• Hold plug when rewinding onto cord reel. Do not allow plug to whip when rewinding.
• Unplug before connecting non-electrical mechanical accessories.
• This appliance has a polarized plug (one blade is wider that the other). This plug will fit in a polarized outlet only
one way. If the plug does not fit fully in the outlet, reverse the plug. If it still does not fit, contact a qualified
electrician to install the proper outlet. Do not change the plug in any way. Do not use adapters.
Save These Instructions
Fill in and Save
Stand your new 2100 cleaner upright and locate the serial number on the bottom side near the front wheel. Write it
here and retain it for future reference.
Serial No. ____________________________________________ Model No. ______________________________________
Date of Purchase __________________________________________________________________________________________
2
3
Introducing the
21OO by Electrolux®
Vacuum Cleaner
The 2100 vacuum cleaner is a durable and versatile cleaning system designed for
convenience, ease of operation, and consumer safety.
The 2100 is equipped with specially designed fans and a powerful motor manufactured
to give the highest level of cleaning power. Its lightweight, sturdy construction is
designed to give years of quiet, trouble-free service. Wide-track wheels allow it
to glide smoothly over the deepest carpets. Vinyl wrap-around end and side
bumpers protect furniture from damage.
A control dial allows selection of the type of cleaning best suited to the
environment being cleaned. Together with a variety of attachments, this cleaner
provides the versatility needed to efficiently clean all types of floors and surfaces.
Features
(located under exhaust air diffuser)
Sheath
Power
Nozzle
Electric Hose
Combination
dust brush/
upholstery tool Filter bags
Crevice Tool
Sidekick®
(Optional)
Steel wand
4
Wand and Hose Assembly
To install the power hose, align arrow (A) on hose with those on the
suction end of cleaner. Insert hose until it clicks. To remove, press release
tab (B) and pull hose out. Slip small accessories on end of wand or directly
on hose handle and twist slightly to secure.
CAUTION: Turn cleaner OFF before connecting or disconnecting wands and power nozzle.
To assemble wand, insert the lower wand, large end first, into sheath until latches engage (Fig. A). NOTE: Before assem-
bling wand, check that the electric cord connector at end of sheath is properly positioned in its receptacle (Fig. B).
To connect hose handgrip to the sheath wand, align electrical connections on underside of sheath wand and hose
handgrip, and insert until latch clicks (Fig. C). To remove, press latch and pull wand out (Fig. D).
Crevice tool for
narrow spaces.
Shown for dusting. Reversed for fabrics.
(A) Alignment
Mark
(B) Release Tab
Fig. A
Fig. C
Fig. B
Fig. D
Wand and Hose Assembly
To attach power nozzle, slide end of wand into elbow on nozzle (Fig. E). Plug cord on power nozzle into connector in
sheath (Fig. F). To disassemble unplug cord, press release button and pull wand out.
CAUTION: Turn appliance off before connecting or disconnecting power nozzle.
Information Panel
For normal running only the Green Power Symbol Is Illuminated.
Overheating Protection
The motor of this cleaner shuts off when the cleaner temperature rises above proper operating temperature. This
prevents damage from overheating, and prolongs cleaning power.
• If the cleaner shuts off, turn cleaner OFF and disconnect power cord.
• Check the wand, hose and power nozzle for blockage.
• With the power cord disconnected from outlet, allow the machine to cool for approximately 30 minutes before
using again.
• After cleaner returns to proper temperature, plug cord in, turn cleaner on, and resume cleaning.
5
Bag Change - Symbol will
illuminate and cleaner will
shut off. Replace filter bag,
reset ON/OFF switch.
Bag Check - Should you
attempt to operate cleaner
without a filter bag, the unit
will not start, and the bag
check symbol will appear.
Simply open the front cover
and insert a new filter bag; the
unit will then start.
Power - When not
illuminated, check
power source.
Overheating Protection -
See below.
Fig. E Fig. F
Operation
To connect the power cord, pull the cord out to the length required (Fig. G). A yellow band on the power cord indicates
the limit of extension. Do not pull the cord beyond that point. Connect the plug into wall outlet. The green control light
will illuminate to indicate that power is available. The cordwinder automatically rewinds the cord when given a light
tug. Holding onto the plug, feed the power cord slowly into the unit; do not allow the cord to whip into cordwinder.
To start the cleaner, gently press the toe switch on top of the unit (Fig. H). To stop the machine, press the toe switch
again. Always switch the cleaner off before disconnecting power cord.
Adjust the control dial for type of cleaning required (Fig. I). For normal conditions the dial should be set to NORMAL.
When vacuuming fine dust, set the dial to 1. When vacuuming larger particles, set the dial to 5. Open the suction
control to reduce suction for gentle cleaning of delicate fabrics, lightweight rugs, lamps shades or net curtains. The
suction control should always be open when using the crevice tool (Fig. J).
Use of Standard Attachments
Attach the combination tool to handgrip to clean deeply into all
types of upholstered furniture and fabrics (Fig. K). Adjust wings on
nozzle to match furniture contours (Fig. L). The combination tool
is ideal for cleaning automobile upholstery, blankets, pillows,
mattresses, and clothing. For curtains and draperies, reduce the
suction strength and attach the combination tool to the wand for
better reach.
Reverse the combination tool on wand to clean baseboards without
bending or stretching. With the round brush on the end of the
handgrip, remove dust from delicate articles or carved furniture
contours (Fig. M).
Use the crevice tool on the end of the handgrip to get
into crevices of upholstered furniture and other hard-to-reach
areas. Using the nozzle on the end of the wand, clean hot air regis-
ters without kneeling or stooping. Remember to open the suction
control knob when using the crevice tool (Fig. N).
Fig. G Fig. H
Fig. I
Fig. K
Fig. M
Fig. L
Fig. N
Fig. J
Using the Power Nozzle
Use the power nozzle for every type of dry floor cleaning. It maneuvers easily around furniture and right up to walls,
providing superior edge cleaning and two-sided corner cleaning (Fig. O).
• Setting the switch to “I” engages the high speed brush to dig embedded grit from carpets and whisk up dust and
dirt from hard surface floors (Fig. P).
• To clean delicate rugs or highly polished parquet floors set the switch to “O”. The brush disengages and only the
cleaner’s suction is used (Fig. Q).
• If an object becomes clogged in the power nozzle it will automatically shut off. To restart power nozzle follow
these instructions:
Fig. R Turn the cleaner off and unplug power nozzle cord.
Fig. S If the object is caught in the revolving brush turn the
power nozzle over and gently remove the caught object
from the brush.
Fig. T If the object is caught further in the unit detach the wand
and remove the object through the elbow.
Fig. U Reattach the wand and power nozzle cord. Reset circuit
breaker button and turn cleaner on.
7
Fig. R
Fig. S
ON
“I”
OFF
“O”
Fig. T Fig. U
Fig. O Fig. P Fig. Q
8
Maintenance
Follow the steps listed below in order to ensure peak cleaning performance.
• Vacuum brushes with end of hose handle after use.
• Wipe tools occasionally with damp cloth or sponge and mild detergent.
• Change bags and/or filters regularly. The air filter should be replaced after each use of six filter bags.
• Periodically check revolving brushes for build-up of lint, hair, or other foreign material and remove as necessary.
• Store cleaner in dry area; never outdoors.
• Have cleaner checked periodically by an authorized Aerus™ service center.
To replace air filters
• Slide accessories off of accessory clip.
• Gently press filter cover latch and lift off the exhaust air diffuser (Fig. V).
• Lift air filter out and replace with a new one (Fig. W).
• Engage the two tabs on the front of the exhaust air diffuser in the matching openings on the canister and snap
into place.
To clear clogged hose
• Slide accessories off of accessory clip.
• Gently press filter cover release and lift off the exhaust air diffuser (Fig. V).
• Lift air filter out (Fig. W).
• Attach machine end of hose into blower outlet hose receptacle.
• Place handle end of hose into a container. Turn the cleaner on and blow object into container (Fig. X).
• Once hose is clear, press the release on blower outlet hose receptacle and pull hose out.
• Reinstall air filter, engage the two tabs on the exhaust air diffuser (Fig. V) in the matching openings on the
canister and snap into place.
Fig. V Fig. W
Fig. X
9
To replace filter bags
Protect your Warranty! Always use genuine Aerus™ high-efficiency,
four-ply, self-sealing filter bags. Used exclusively, the Aerus™ filter bag will
promote longer motor life and more efficient cleaner operation. Be sure the
filter bag is in place before operating the machine.
When it is time to change filter bags, the bag change indicator on the
information panel lights and the cleaner shuts off. The cleaner controls this
function automatically and is regulated by the control dial setting.
NOTE: The filter bag may not appear completely full when vacuuming fine
dirt because this type of dirt clogs the pores of the bag more quickly than
coarse dirt. However, it is still time to change the filter bag in order to
restore cleaning efficiency.
• Stand the machine on its end and press the front cover release.
• As the cover is opened, the filter bag seals itself for removal (Fig. Y).
• Throw the old bag away - never attempt to re-use filter bags.
• Install a new filter bag and close the cover (Fig. Z).
Storage
For best performance, carefully store cleaner in a dry place. Do not store outdoors. Slide crevice tool and
combination dust brush/upholstery tool onto the accessory clip on canister (Fig. AA). Use the hook on end of the sheath
to store the wand and power nozzle as a unit (Fig. BB).
Fig. Y
Fig. Z
Fig. AA
Fig. BB
10
Using Sidekick® (optional accessory)
To further your cleaning capabilities, we offer an outstanding vacuum cleaner
accessory (optional). The Sidekick® accessory is a revolutionary tool powered
by its own motor that combines superior cleaning action with easy maneuver-
ability. The Sidekick® has a trim design that allows cleaning in hard-to-reach
areas like stairs, car interiors, bathrooms, upholstery, and mattresses, better
and more efficiently than ever before.
The switch on the Sidekick® has two positions:
• Setting the switch to “I” turns the Sidekick® ON.
• Setting the switch to “O” turns the Sidekick® OFF.
CAUTION: Turn cleaner OFF before connecting or disconnecting Sidekick®.
ASSEMBLY
• Turn cleaner OFF and unplug cord from outlet.
• Disconnect wand or power nozzle attachment from hose.
• Turn Sidekick® switch to OFF position.
• Align Sidekick® and hose connections and slip Sidekick® onto handgrip until
it snaps into place (Fig. CC).
• Plug power cord into outlet, turn machine ON, turn Sidekick® ON and
resume cleaning. To remove Sidekick®, turn Sidekick® OFF, turn cleaner
OFF, unplug power cord, press release, and pull Sidekick® off handgrip.
CAUGHT OBJECTS
If an object becomes clogged in the Sidekick®, immediately turn it OFF. To restart, follow these instructions.
• Turn cleaner OFF and unplug power cord from wall outlet.
• Remove caught object from Sidekick®.
• If the object is caught in the revolving brush turn the Sidekick® over and gently remove the caught object
from the brush.
• If the object is caught further in the unit detach the handgrip and remove the object through the rear of
the unit.
• After obstructions are cleared, plug power cord into outlet, turn cleaner ON, turn Sidekick® ON and
resume cleaning.
CAUTION: To prevent Sidekick® motor from overheating, do not use if vacuum cleaner motor shuts OFF.
WARNING: Keep hands away from Sidekick® brush while in use and when turning cleaner, or Sidekick®, ON or OFF.
MAINTENANCE
Follow the steps listed below in order to ensure peak cleaning performance.
• Vacuum brushes with end of hose handle after use.
• Wipe tools occasionally with damp cloth or sponge and mild detergent.
• Periodically check revolving brushes for build-up of lint, hair, or other foreign material and remove as necessary.
• Store Sidekick® in dry area; never outdoors.
• Have Sidekick® checked periodically by an authorized Aerus™ service facility.
by Electrolux
Fig. CC
Limited 5 Year Warranty
What is Covered by this Warranty - Aerus warrants its products to the consumer, subject to the conditions below,
against defects in workmanship or material, provided that the products are returned to an Aeurs location within the
following time period: 2100 by Electrolux®
including motor and fan unit; all attachments and accessories - within
5 years of date of purchase.
How to Obtain Warranty Service - Upon contacting and returning, at consumer’s sole cost and expense, the product
with proof of purchase showing purchase date to an Aerus location within the above time period, Aerus will repair or
replace, without charge and within a reasonable period of time, any part which its examination shall
disclose to be defective in workmanship or material and return the product to the consumer. If Aerus is unable to repair
the product after a reasonable number of attempts, Aerus will provide either a refund of the purchase price or a
replacement unit, at the company’s option.
What is Not Covered by this Warranty - This product is intended for household use only. Ordinary wear and tear shall
not be considered a defect in workmanship or material. This warranty does not apply to loss or damage caused by
accident, fire, abuse, misuse, modification, misapplication, or commercial use, or by any repairs other than those
provided by an authorized Aerus location. The warranty with respect to the motor and fan unit is null and void if
it is damaged as a result of vacuuming damp or wet surfaces, or dirt leakage through a filter bag other than an
Aerus filterbag.
Exclusion of Other Warranties and Conditions - EXCEPT AS PROVIDED HEREIN, AERUS MAKES NO REPRESENTATION
OR WARRANTY OF ANY KIND. ALL OTHER WARRANTIES OF ANY KIND, EXPRESS OR IMPLIED, ARE HEREBY
EXPRESSLY DISCLAIMED, INCLUDING ANY IMPLIED WARRANTY OF MERCHANTABILITY OR FITNESS FOR A
PARTICULAR PURPOSE.
Limitation of Liability for Special, Incidental or Consequential Damages - AERUS SHALL NOT IN ANY CASE BE LIABLE
FOR SPECIAL, INCIDENTAL OR CONSEQUENTIAL DAMAGES ARISING FROM BREACH OF EXPRESS OR IMPLIED WAR-
RANTIES, CONDITIONS, GUARANTEES OR REPRESENTATIONS, BREACH OF CONTRACT NEGLIGENCE OR ANY OTHER
LEGAL THEORY. Such excluded damages include, but are not limited to, loss of profits or revenue and loss of the use
of the product.
For U.S. Application Only - This warranty gives you specific legal rights, and you may also have other rights which
vary from state to state. Some states do not allow limitations on warranties, or on remedies for breach. In such states,
the above limitations may not apply to you.
For Canadian Application Only - Exclusion of Subsequent Owners: Except as otherwise required by applicable
legislation, this warranty is not transferable. This warranty gives you specific legal rights and you may also have other
rights which vary from province to province. Some provinces and territories do not allow limitations on warranties, or
on remedies for breach. In such provinces or territories, the above limitations may not apply to you.
If any provision of this warranty or part thereof is held by a court of competent jurisdiction to be invalid, illegal or
unenforceable, the validity, legality and enforceability of the remaining provisions or parts thereof will not in any way
be affected or impaired within the jurisdiction of that court. This entire warranty shall continue to be valid, legal and
enforceable in any jurisdiction where a similar determination has not been made.
11
For information regarding the use of this product, please call our toll-free hotline:
1-800-243-9078
Visit our website at www.aerusonline.com
AERUS LLC
5956 Sherry Lane, Suite 1500 Dallas, Texas 75225
©2002 Aerus LLC
3rd Qtr. 2003
Service
For prompt service, call your Aerus representative or the nearest Aerus location listed in your telephone directory.
Your authorized Aerus location offers you the best in service both during and after the warranty period, as well as gen-
uine Aerus parts and supplies
Every effort is made to ensure that customers receive an up-to-date instruction manual on the use of Aerus™ products;
however, from time to time, modifications to our products may without notice make the information contained herein
subject to alteration.
All power units of the Aerus™ Home Care System are certified by the Canadian Standards Association and listed by
Underwriters Laboratories Incorporated.

More Related Content

Similar to Electrolux 1200

Electrolux EWF12480W User Manual
Electrolux EWF12480W User ManualElectrolux EWF12480W User Manual
Electrolux EWF12480W User Manualdegarden
 
John deere e gator utility vehicle service repair manual (tm1766)
John deere e gator utility vehicle service repair manual (tm1766)John deere e gator utility vehicle service repair manual (tm1766)
John deere e gator utility vehicle service repair manual (tm1766)fsjefjskekmm
 
John deere e gator utility vehicle service repair manual (tm1766)
John deere e gator utility vehicle service repair manual (tm1766)John deere e gator utility vehicle service repair manual (tm1766)
John deere e gator utility vehicle service repair manual (tm1766)fusjefjskekmem
 
John deere e gator utility vehicle service repair manual (tm1766)
John deere e gator utility vehicle service repair manual (tm1766)John deere e gator utility vehicle service repair manual (tm1766)
John deere e gator utility vehicle service repair manual (tm1766)fusjejkdkmse
 
John deere e gator utility vehicle service repair manual (tm1766)
John deere e gator utility vehicle service repair manual (tm1766)John deere e gator utility vehicle service repair manual (tm1766)
John deere e gator utility vehicle service repair manual (tm1766)fjjskekdmmme
 
John deere e gator utility vehicle service repair manual (tm1766)
John deere e gator utility vehicle service repair manual (tm1766)John deere e gator utility vehicle service repair manual (tm1766)
John deere e gator utility vehicle service repair manual (tm1766)ujfjjdkkkkmm
 
Smartwash | Smart Toilets | Buy Online Bathroom Accessories | Smartwash-UserM...
Smartwash | Smart Toilets | Buy Online Bathroom Accessories | Smartwash-UserM...Smartwash | Smart Toilets | Buy Online Bathroom Accessories | Smartwash-UserM...
Smartwash | Smart Toilets | Buy Online Bathroom Accessories | Smartwash-UserM...smartwash world
 
109173RevARNHPUC
109173RevARNHPUC109173RevARNHPUC
109173RevARNHPUCAndrea Wall
 
Volvo ew55 b compact wheel excavator service repair manual
Volvo ew55 b compact wheel excavator service repair manualVolvo ew55 b compact wheel excavator service repair manual
Volvo ew55 b compact wheel excavator service repair manualfhsjejfksemm
 
Yale (e857) mo25 lift truck service repair manual
Yale (e857) mo25 lift truck service repair manualYale (e857) mo25 lift truck service repair manual
Yale (e857) mo25 lift truck service repair manualfhjskemme
 
Yale (e857) mo20 p lift truck service repair manual
Yale (e857) mo20 p lift truck service repair manualYale (e857) mo20 p lift truck service repair manual
Yale (e857) mo20 p lift truck service repair manualfhjsjkdmemm
 
Yale (e857) mo50 t lift truck service repair manual
Yale (e857) mo50 t lift truck service repair manualYale (e857) mo50 t lift truck service repair manual
Yale (e857) mo50 t lift truck service repair manualfjksekmdme
 
E8e23164 8ba8-41b2-a4c8-e6cec41f4602
E8e23164 8ba8-41b2-a4c8-e6cec41f4602E8e23164 8ba8-41b2-a4c8-e6cec41f4602
E8e23164 8ba8-41b2-a4c8-e6cec41f4602Buu TRUONG
 
Effective heat installation guide
Effective heat installation guideEffective heat installation guide
Effective heat installation guidejaydeedee
 

Similar to Electrolux 1200 (20)

C100 zone1 en
C100 zone1 enC100 zone1 en
C100 zone1 en
 
Gurin Steam Inhaler
Gurin Steam InhalerGurin Steam Inhaler
Gurin Steam Inhaler
 
Electrolux EWF12480W User Manual
Electrolux EWF12480W User ManualElectrolux EWF12480W User Manual
Electrolux EWF12480W User Manual
 
John deere e gator utility vehicle service repair manual (tm1766)
John deere e gator utility vehicle service repair manual (tm1766)John deere e gator utility vehicle service repair manual (tm1766)
John deere e gator utility vehicle service repair manual (tm1766)
 
John deere e gator utility vehicle service repair manual (tm1766)
John deere e gator utility vehicle service repair manual (tm1766)John deere e gator utility vehicle service repair manual (tm1766)
John deere e gator utility vehicle service repair manual (tm1766)
 
John deere e gator utility vehicle service repair manual (tm1766)
John deere e gator utility vehicle service repair manual (tm1766)John deere e gator utility vehicle service repair manual (tm1766)
John deere e gator utility vehicle service repair manual (tm1766)
 
John deere e gator utility vehicle service repair manual (tm1766)
John deere e gator utility vehicle service repair manual (tm1766)John deere e gator utility vehicle service repair manual (tm1766)
John deere e gator utility vehicle service repair manual (tm1766)
 
John deere e gator utility vehicle service repair manual (tm1766)
John deere e gator utility vehicle service repair manual (tm1766)John deere e gator utility vehicle service repair manual (tm1766)
John deere e gator utility vehicle service repair manual (tm1766)
 
Máy cắt sắt Makita mt241 (2)
Máy cắt sắt Makita mt241 (2)Máy cắt sắt Makita mt241 (2)
Máy cắt sắt Makita mt241 (2)
 
Carrier inverter Split System
Carrier inverter Split System Carrier inverter Split System
Carrier inverter Split System
 
Smartwash | Smart Toilets | Buy Online Bathroom Accessories | Smartwash-UserM...
Smartwash | Smart Toilets | Buy Online Bathroom Accessories | Smartwash-UserM...Smartwash | Smart Toilets | Buy Online Bathroom Accessories | Smartwash-UserM...
Smartwash | Smart Toilets | Buy Online Bathroom Accessories | Smartwash-UserM...
 
109173RevARNHPUC
109173RevARNHPUC109173RevARNHPUC
109173RevARNHPUC
 
Volvo ew55 b compact wheel excavator service repair manual
Volvo ew55 b compact wheel excavator service repair manualVolvo ew55 b compact wheel excavator service repair manual
Volvo ew55 b compact wheel excavator service repair manual
 
Yale (e857) mo25 lift truck service repair manual
Yale (e857) mo25 lift truck service repair manualYale (e857) mo25 lift truck service repair manual
Yale (e857) mo25 lift truck service repair manual
 
Yale (e857) mo20 p lift truck service repair manual
Yale (e857) mo20 p lift truck service repair manualYale (e857) mo20 p lift truck service repair manual
Yale (e857) mo20 p lift truck service repair manual
 
Yale (e857) mo50 t lift truck service repair manual
Yale (e857) mo50 t lift truck service repair manualYale (e857) mo50 t lift truck service repair manual
Yale (e857) mo50 t lift truck service repair manual
 
Hướng dẫn sử dụng máy tạo ẩm Boneco U650
Hướng dẫn sử dụng máy tạo ẩm Boneco U650Hướng dẫn sử dụng máy tạo ẩm Boneco U650
Hướng dẫn sử dụng máy tạo ẩm Boneco U650
 
E8e23164 8ba8-41b2-a4c8-e6cec41f4602
E8e23164 8ba8-41b2-a4c8-e6cec41f4602E8e23164 8ba8-41b2-a4c8-e6cec41f4602
E8e23164 8ba8-41b2-a4c8-e6cec41f4602
 
Effective heat installation guide
Effective heat installation guideEffective heat installation guide
Effective heat installation guide
 
Use of tools chs
Use of tools chsUse of tools chs
Use of tools chs
 

Recently uploaded

怎样办理斯威本科技大学毕业证(SUT毕业证书)成绩单留信认证
怎样办理斯威本科技大学毕业证(SUT毕业证书)成绩单留信认证怎样办理斯威本科技大学毕业证(SUT毕业证书)成绩单留信认证
怎样办理斯威本科技大学毕业证(SUT毕业证书)成绩单留信认证tufbav
 
Top Rated Pune Call Girls Shirwal ⟟ 6297143586 ⟟ Call Me For Genuine Sex Ser...
Top Rated  Pune Call Girls Shirwal ⟟ 6297143586 ⟟ Call Me For Genuine Sex Ser...Top Rated  Pune Call Girls Shirwal ⟟ 6297143586 ⟟ Call Me For Genuine Sex Ser...
Top Rated Pune Call Girls Shirwal ⟟ 6297143586 ⟟ Call Me For Genuine Sex Ser...Call Girls in Nagpur High Profile
 
Book Paid Lohegaon Call Girls Pune 8250192130Low Budget Full Independent High...
Book Paid Lohegaon Call Girls Pune 8250192130Low Budget Full Independent High...Book Paid Lohegaon Call Girls Pune 8250192130Low Budget Full Independent High...
Book Paid Lohegaon Call Girls Pune 8250192130Low Budget Full Independent High...ranjana rawat
 
怎样办理维多利亚大学毕业证(UVic毕业证书)成绩单留信认证
怎样办理维多利亚大学毕业证(UVic毕业证书)成绩单留信认证怎样办理维多利亚大学毕业证(UVic毕业证书)成绩单留信认证
怎样办理维多利亚大学毕业证(UVic毕业证书)成绩单留信认证tufbav
 
Call Girls in Vashi Escorts Services - 7738631006
Call Girls in Vashi Escorts Services - 7738631006Call Girls in Vashi Escorts Services - 7738631006
Call Girls in Vashi Escorts Services - 7738631006Pooja Nehwal
 
Deira Dubai Escorts +0561951007 Escort Service in Dubai by Dubai Escort Girls
Deira Dubai Escorts +0561951007 Escort Service in Dubai by Dubai Escort GirlsDeira Dubai Escorts +0561951007 Escort Service in Dubai by Dubai Escort Girls
Deira Dubai Escorts +0561951007 Escort Service in Dubai by Dubai Escort GirlsEscorts Call Girls
 
(👉Ridhima)👉VIP Model Call Girls Mulund ( Mumbai) Call ON 9967824496 Starting ...
(👉Ridhima)👉VIP Model Call Girls Mulund ( Mumbai) Call ON 9967824496 Starting ...(👉Ridhima)👉VIP Model Call Girls Mulund ( Mumbai) Call ON 9967824496 Starting ...
(👉Ridhima)👉VIP Model Call Girls Mulund ( Mumbai) Call ON 9967824496 Starting ...motiram463
 
Shikrapur Call Girls Most Awaited Fun 6297143586 High Profiles young Beautie...
Shikrapur Call Girls Most Awaited Fun  6297143586 High Profiles young Beautie...Shikrapur Call Girls Most Awaited Fun  6297143586 High Profiles young Beautie...
Shikrapur Call Girls Most Awaited Fun 6297143586 High Profiles young Beautie...tanu pandey
 
➥🔝 7737669865 🔝▻ Vijayawada Call-girls in Women Seeking Men 🔝Vijayawada🔝 E...
➥🔝 7737669865 🔝▻ Vijayawada Call-girls in Women Seeking Men  🔝Vijayawada🔝   E...➥🔝 7737669865 🔝▻ Vijayawada Call-girls in Women Seeking Men  🔝Vijayawada🔝   E...
➥🔝 7737669865 🔝▻ Vijayawada Call-girls in Women Seeking Men 🔝Vijayawada🔝 E...amitlee9823
 
Call Girls Chikhali Call Me 7737669865 Budget Friendly No Advance Booking
Call Girls Chikhali Call Me 7737669865 Budget Friendly No Advance BookingCall Girls Chikhali Call Me 7737669865 Budget Friendly No Advance Booking
Call Girls Chikhali Call Me 7737669865 Budget Friendly No Advance Bookingroncy bisnoi
 
Vip Mumbai Call Girls Kalyan Call On 9920725232 With Body to body massage wit...
Vip Mumbai Call Girls Kalyan Call On 9920725232 With Body to body massage wit...Vip Mumbai Call Girls Kalyan Call On 9920725232 With Body to body massage wit...
Vip Mumbai Call Girls Kalyan Call On 9920725232 With Body to body massage wit...amitlee9823
 
Top Rated Pune Call Girls Ravet ⟟ 6297143586 ⟟ Call Me For Genuine Sex Servi...
Top Rated  Pune Call Girls Ravet ⟟ 6297143586 ⟟ Call Me For Genuine Sex Servi...Top Rated  Pune Call Girls Ravet ⟟ 6297143586 ⟟ Call Me For Genuine Sex Servi...
Top Rated Pune Call Girls Ravet ⟟ 6297143586 ⟟ Call Me For Genuine Sex Servi...Call Girls in Nagpur High Profile
 
HLH PPT.ppt very important topic to discuss
HLH PPT.ppt very important topic to discussHLH PPT.ppt very important topic to discuss
HLH PPT.ppt very important topic to discussDrMSajidNoor
 
➥🔝 7737669865 🔝▻ kakinada Call-girls in Women Seeking Men 🔝kakinada🔝 Escor...
➥🔝 7737669865 🔝▻ kakinada Call-girls in Women Seeking Men  🔝kakinada🔝   Escor...➥🔝 7737669865 🔝▻ kakinada Call-girls in Women Seeking Men  🔝kakinada🔝   Escor...
➥🔝 7737669865 🔝▻ kakinada Call-girls in Women Seeking Men 🔝kakinada🔝 Escor...amitlee9823
 
Call Girls Pimple Saudagar Call Me 7737669865 Budget Friendly No Advance Booking
Call Girls Pimple Saudagar Call Me 7737669865 Budget Friendly No Advance BookingCall Girls Pimple Saudagar Call Me 7737669865 Budget Friendly No Advance Booking
Call Girls Pimple Saudagar Call Me 7737669865 Budget Friendly No Advance Bookingroncy bisnoi
 
Top Rated Pune Call Girls Katraj ⟟ 6297143586 ⟟ Call Me For Genuine Sex Serv...
Top Rated  Pune Call Girls Katraj ⟟ 6297143586 ⟟ Call Me For Genuine Sex Serv...Top Rated  Pune Call Girls Katraj ⟟ 6297143586 ⟟ Call Me For Genuine Sex Serv...
Top Rated Pune Call Girls Katraj ⟟ 6297143586 ⟟ Call Me For Genuine Sex Serv...Call Girls in Nagpur High Profile
 
Escorts Service Sanjay Nagar ☎ 7737669865☎ Book Your One night Stand (Bangalore)
Escorts Service Sanjay Nagar ☎ 7737669865☎ Book Your One night Stand (Bangalore)Escorts Service Sanjay Nagar ☎ 7737669865☎ Book Your One night Stand (Bangalore)
Escorts Service Sanjay Nagar ☎ 7737669865☎ Book Your One night Stand (Bangalore)amitlee9823
 

Recently uploaded (20)

怎样办理斯威本科技大学毕业证(SUT毕业证书)成绩单留信认证
怎样办理斯威本科技大学毕业证(SUT毕业证书)成绩单留信认证怎样办理斯威本科技大学毕业证(SUT毕业证书)成绩单留信认证
怎样办理斯威本科技大学毕业证(SUT毕业证书)成绩单留信认证
 
Top Rated Pune Call Girls Shirwal ⟟ 6297143586 ⟟ Call Me For Genuine Sex Ser...
Top Rated  Pune Call Girls Shirwal ⟟ 6297143586 ⟟ Call Me For Genuine Sex Ser...Top Rated  Pune Call Girls Shirwal ⟟ 6297143586 ⟟ Call Me For Genuine Sex Ser...
Top Rated Pune Call Girls Shirwal ⟟ 6297143586 ⟟ Call Me For Genuine Sex Ser...
 
Book Paid Lohegaon Call Girls Pune 8250192130Low Budget Full Independent High...
Book Paid Lohegaon Call Girls Pune 8250192130Low Budget Full Independent High...Book Paid Lohegaon Call Girls Pune 8250192130Low Budget Full Independent High...
Book Paid Lohegaon Call Girls Pune 8250192130Low Budget Full Independent High...
 
CHEAP Call Girls in Mayapuri (-DELHI )🔝 9953056974🔝(=)/CALL GIRLS SERVICE
CHEAP Call Girls in Mayapuri  (-DELHI )🔝 9953056974🔝(=)/CALL GIRLS SERVICECHEAP Call Girls in Mayapuri  (-DELHI )🔝 9953056974🔝(=)/CALL GIRLS SERVICE
CHEAP Call Girls in Mayapuri (-DELHI )🔝 9953056974🔝(=)/CALL GIRLS SERVICE
 
怎样办理维多利亚大学毕业证(UVic毕业证书)成绩单留信认证
怎样办理维多利亚大学毕业证(UVic毕业证书)成绩单留信认证怎样办理维多利亚大学毕业证(UVic毕业证书)成绩单留信认证
怎样办理维多利亚大学毕业证(UVic毕业证书)成绩单留信认证
 
CHEAP Call Girls in Hauz Quazi (-DELHI )🔝 9953056974🔝(=)/CALL GIRLS SERVICE
CHEAP Call Girls in Hauz Quazi  (-DELHI )🔝 9953056974🔝(=)/CALL GIRLS SERVICECHEAP Call Girls in Hauz Quazi  (-DELHI )🔝 9953056974🔝(=)/CALL GIRLS SERVICE
CHEAP Call Girls in Hauz Quazi (-DELHI )🔝 9953056974🔝(=)/CALL GIRLS SERVICE
 
Call Girls in Vashi Escorts Services - 7738631006
Call Girls in Vashi Escorts Services - 7738631006Call Girls in Vashi Escorts Services - 7738631006
Call Girls in Vashi Escorts Services - 7738631006
 
Deira Dubai Escorts +0561951007 Escort Service in Dubai by Dubai Escort Girls
Deira Dubai Escorts +0561951007 Escort Service in Dubai by Dubai Escort GirlsDeira Dubai Escorts +0561951007 Escort Service in Dubai by Dubai Escort Girls
Deira Dubai Escorts +0561951007 Escort Service in Dubai by Dubai Escort Girls
 
(👉Ridhima)👉VIP Model Call Girls Mulund ( Mumbai) Call ON 9967824496 Starting ...
(👉Ridhima)👉VIP Model Call Girls Mulund ( Mumbai) Call ON 9967824496 Starting ...(👉Ridhima)👉VIP Model Call Girls Mulund ( Mumbai) Call ON 9967824496 Starting ...
(👉Ridhima)👉VIP Model Call Girls Mulund ( Mumbai) Call ON 9967824496 Starting ...
 
Shikrapur Call Girls Most Awaited Fun 6297143586 High Profiles young Beautie...
Shikrapur Call Girls Most Awaited Fun  6297143586 High Profiles young Beautie...Shikrapur Call Girls Most Awaited Fun  6297143586 High Profiles young Beautie...
Shikrapur Call Girls Most Awaited Fun 6297143586 High Profiles young Beautie...
 
➥🔝 7737669865 🔝▻ Vijayawada Call-girls in Women Seeking Men 🔝Vijayawada🔝 E...
➥🔝 7737669865 🔝▻ Vijayawada Call-girls in Women Seeking Men  🔝Vijayawada🔝   E...➥🔝 7737669865 🔝▻ Vijayawada Call-girls in Women Seeking Men  🔝Vijayawada🔝   E...
➥🔝 7737669865 🔝▻ Vijayawada Call-girls in Women Seeking Men 🔝Vijayawada🔝 E...
 
Call Girls Chikhali Call Me 7737669865 Budget Friendly No Advance Booking
Call Girls Chikhali Call Me 7737669865 Budget Friendly No Advance BookingCall Girls Chikhali Call Me 7737669865 Budget Friendly No Advance Booking
Call Girls Chikhali Call Me 7737669865 Budget Friendly No Advance Booking
 
Vip Mumbai Call Girls Kalyan Call On 9920725232 With Body to body massage wit...
Vip Mumbai Call Girls Kalyan Call On 9920725232 With Body to body massage wit...Vip Mumbai Call Girls Kalyan Call On 9920725232 With Body to body massage wit...
Vip Mumbai Call Girls Kalyan Call On 9920725232 With Body to body massage wit...
 
Top Rated Pune Call Girls Ravet ⟟ 6297143586 ⟟ Call Me For Genuine Sex Servi...
Top Rated  Pune Call Girls Ravet ⟟ 6297143586 ⟟ Call Me For Genuine Sex Servi...Top Rated  Pune Call Girls Ravet ⟟ 6297143586 ⟟ Call Me For Genuine Sex Servi...
Top Rated Pune Call Girls Ravet ⟟ 6297143586 ⟟ Call Me For Genuine Sex Servi...
 
(ISHITA) Call Girls Service Aurangabad Call Now 8617697112 Aurangabad Escorts...
(ISHITA) Call Girls Service Aurangabad Call Now 8617697112 Aurangabad Escorts...(ISHITA) Call Girls Service Aurangabad Call Now 8617697112 Aurangabad Escorts...
(ISHITA) Call Girls Service Aurangabad Call Now 8617697112 Aurangabad Escorts...
 
HLH PPT.ppt very important topic to discuss
HLH PPT.ppt very important topic to discussHLH PPT.ppt very important topic to discuss
HLH PPT.ppt very important topic to discuss
 
➥🔝 7737669865 🔝▻ kakinada Call-girls in Women Seeking Men 🔝kakinada🔝 Escor...
➥🔝 7737669865 🔝▻ kakinada Call-girls in Women Seeking Men  🔝kakinada🔝   Escor...➥🔝 7737669865 🔝▻ kakinada Call-girls in Women Seeking Men  🔝kakinada🔝   Escor...
➥🔝 7737669865 🔝▻ kakinada Call-girls in Women Seeking Men 🔝kakinada🔝 Escor...
 
Call Girls Pimple Saudagar Call Me 7737669865 Budget Friendly No Advance Booking
Call Girls Pimple Saudagar Call Me 7737669865 Budget Friendly No Advance BookingCall Girls Pimple Saudagar Call Me 7737669865 Budget Friendly No Advance Booking
Call Girls Pimple Saudagar Call Me 7737669865 Budget Friendly No Advance Booking
 
Top Rated Pune Call Girls Katraj ⟟ 6297143586 ⟟ Call Me For Genuine Sex Serv...
Top Rated  Pune Call Girls Katraj ⟟ 6297143586 ⟟ Call Me For Genuine Sex Serv...Top Rated  Pune Call Girls Katraj ⟟ 6297143586 ⟟ Call Me For Genuine Sex Serv...
Top Rated Pune Call Girls Katraj ⟟ 6297143586 ⟟ Call Me For Genuine Sex Serv...
 
Escorts Service Sanjay Nagar ☎ 7737669865☎ Book Your One night Stand (Bangalore)
Escorts Service Sanjay Nagar ☎ 7737669865☎ Book Your One night Stand (Bangalore)Escorts Service Sanjay Nagar ☎ 7737669865☎ Book Your One night Stand (Bangalore)
Escorts Service Sanjay Nagar ☎ 7737669865☎ Book Your One night Stand (Bangalore)
 

Electrolux 1200

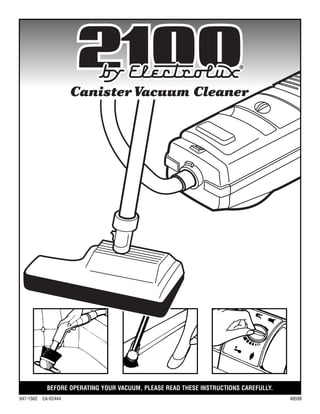
  • 1. BEFORE OPERATING YOUR VACUUM, PLEASE READ THESE INSTRUCTIONS CAREFULLY. 947-1562 EA-02444 48599 2100
  • 2. Important Safety Instructions When using an electrical appliance, basic precautions should always be followed, including the following: READ ALL INSTRUCTIONS BEFORE USING THISVACUUM CLEANER For Household Use WARNING To reduce the risk of fire, electrical shock, or injury: • Do not leave appliance when plugged in. Unplug from outlet when not in use and before servicing. • Do not use outdoors or on wet surfaces. • Do not allow to be used as a toy. Close attention is necessary when used by or near children. • Use only as described in this manual. Use only manufacturer’s recommended attachments. • Do not use with damaged cord or plug. If appliance is not working as it should, has been dropped, damaged, left outdoors, or dropped into water, return it to a service center. • Do not pull or carry by cord, use cord as a handle, close door on cord, or pull cord around sharp edges or corners. Do not run appliance over cord. Keep cord away from heated surfaces. • Do not unplug by pulling on cord. To unplug, grasp the plug, not the cord. • Do not handle plug or appliance with wet hands. • Do not put any object into openings. Do not use with any opening blocked; keep free of dust, lint, hair, or other materials that may reduce airflow. • Keep hair, loose clothing, fingers, and all parts of body away from openings and moving parts. • Do not pick up anything that is burning or smoking, such as cigarettes, matches, or hot ashes. • Do not use without having dustbag and/or filter in place. • Turn off all controls before unplugging. • Use extra care when cleaning on stairs. • Do not use to pick up flammable or combustible liquids such as gasoline. Do not use in areas where such liquids may be present. • Do not use if any electrical wire is damaged, cut, or punctured. Avoid picking up sharp objects. • Turn off appliance before connecting or disconnecting hose or power attachments. • Hold plug when rewinding onto cord reel. Do not allow plug to whip when rewinding. • Unplug before connecting non-electrical mechanical accessories. • This appliance has a polarized plug (one blade is wider that the other). This plug will fit in a polarized outlet only one way. If the plug does not fit fully in the outlet, reverse the plug. If it still does not fit, contact a qualified electrician to install the proper outlet. Do not change the plug in any way. Do not use adapters. Save These Instructions Fill in and Save Stand your new 2100 cleaner upright and locate the serial number on the bottom side near the front wheel. Write it here and retain it for future reference. Serial No. ____________________________________________ Model No. ______________________________________ Date of Purchase __________________________________________________________________________________________ 2
  • 3. 3 Introducing the 21OO by Electrolux® Vacuum Cleaner The 2100 vacuum cleaner is a durable and versatile cleaning system designed for convenience, ease of operation, and consumer safety. The 2100 is equipped with specially designed fans and a powerful motor manufactured to give the highest level of cleaning power. Its lightweight, sturdy construction is designed to give years of quiet, trouble-free service. Wide-track wheels allow it to glide smoothly over the deepest carpets. Vinyl wrap-around end and side bumpers protect furniture from damage. A control dial allows selection of the type of cleaning best suited to the environment being cleaned. Together with a variety of attachments, this cleaner provides the versatility needed to efficiently clean all types of floors and surfaces. Features (located under exhaust air diffuser) Sheath Power Nozzle Electric Hose Combination dust brush/ upholstery tool Filter bags Crevice Tool Sidekick® (Optional) Steel wand
  • 4. 4 Wand and Hose Assembly To install the power hose, align arrow (A) on hose with those on the suction end of cleaner. Insert hose until it clicks. To remove, press release tab (B) and pull hose out. Slip small accessories on end of wand or directly on hose handle and twist slightly to secure. CAUTION: Turn cleaner OFF before connecting or disconnecting wands and power nozzle. To assemble wand, insert the lower wand, large end first, into sheath until latches engage (Fig. A). NOTE: Before assem- bling wand, check that the electric cord connector at end of sheath is properly positioned in its receptacle (Fig. B). To connect hose handgrip to the sheath wand, align electrical connections on underside of sheath wand and hose handgrip, and insert until latch clicks (Fig. C). To remove, press latch and pull wand out (Fig. D). Crevice tool for narrow spaces. Shown for dusting. Reversed for fabrics. (A) Alignment Mark (B) Release Tab Fig. A Fig. C Fig. B Fig. D
  • 5. Wand and Hose Assembly To attach power nozzle, slide end of wand into elbow on nozzle (Fig. E). Plug cord on power nozzle into connector in sheath (Fig. F). To disassemble unplug cord, press release button and pull wand out. CAUTION: Turn appliance off before connecting or disconnecting power nozzle. Information Panel For normal running only the Green Power Symbol Is Illuminated. Overheating Protection The motor of this cleaner shuts off when the cleaner temperature rises above proper operating temperature. This prevents damage from overheating, and prolongs cleaning power. • If the cleaner shuts off, turn cleaner OFF and disconnect power cord. • Check the wand, hose and power nozzle for blockage. • With the power cord disconnected from outlet, allow the machine to cool for approximately 30 minutes before using again. • After cleaner returns to proper temperature, plug cord in, turn cleaner on, and resume cleaning. 5 Bag Change - Symbol will illuminate and cleaner will shut off. Replace filter bag, reset ON/OFF switch. Bag Check - Should you attempt to operate cleaner without a filter bag, the unit will not start, and the bag check symbol will appear. Simply open the front cover and insert a new filter bag; the unit will then start. Power - When not illuminated, check power source. Overheating Protection - See below. Fig. E Fig. F
  • 6. Operation To connect the power cord, pull the cord out to the length required (Fig. G). A yellow band on the power cord indicates the limit of extension. Do not pull the cord beyond that point. Connect the plug into wall outlet. The green control light will illuminate to indicate that power is available. The cordwinder automatically rewinds the cord when given a light tug. Holding onto the plug, feed the power cord slowly into the unit; do not allow the cord to whip into cordwinder. To start the cleaner, gently press the toe switch on top of the unit (Fig. H). To stop the machine, press the toe switch again. Always switch the cleaner off before disconnecting power cord. Adjust the control dial for type of cleaning required (Fig. I). For normal conditions the dial should be set to NORMAL. When vacuuming fine dust, set the dial to 1. When vacuuming larger particles, set the dial to 5. Open the suction control to reduce suction for gentle cleaning of delicate fabrics, lightweight rugs, lamps shades or net curtains. The suction control should always be open when using the crevice tool (Fig. J). Use of Standard Attachments Attach the combination tool to handgrip to clean deeply into all types of upholstered furniture and fabrics (Fig. K). Adjust wings on nozzle to match furniture contours (Fig. L). The combination tool is ideal for cleaning automobile upholstery, blankets, pillows, mattresses, and clothing. For curtains and draperies, reduce the suction strength and attach the combination tool to the wand for better reach. Reverse the combination tool on wand to clean baseboards without bending or stretching. With the round brush on the end of the handgrip, remove dust from delicate articles or carved furniture contours (Fig. M). Use the crevice tool on the end of the handgrip to get into crevices of upholstered furniture and other hard-to-reach areas. Using the nozzle on the end of the wand, clean hot air regis- ters without kneeling or stooping. Remember to open the suction control knob when using the crevice tool (Fig. N). Fig. G Fig. H Fig. I Fig. K Fig. M Fig. L Fig. N Fig. J
  • 7. Using the Power Nozzle Use the power nozzle for every type of dry floor cleaning. It maneuvers easily around furniture and right up to walls, providing superior edge cleaning and two-sided corner cleaning (Fig. O). • Setting the switch to “I” engages the high speed brush to dig embedded grit from carpets and whisk up dust and dirt from hard surface floors (Fig. P). • To clean delicate rugs or highly polished parquet floors set the switch to “O”. The brush disengages and only the cleaner’s suction is used (Fig. Q). • If an object becomes clogged in the power nozzle it will automatically shut off. To restart power nozzle follow these instructions: Fig. R Turn the cleaner off and unplug power nozzle cord. Fig. S If the object is caught in the revolving brush turn the power nozzle over and gently remove the caught object from the brush. Fig. T If the object is caught further in the unit detach the wand and remove the object through the elbow. Fig. U Reattach the wand and power nozzle cord. Reset circuit breaker button and turn cleaner on. 7 Fig. R Fig. S ON “I” OFF “O” Fig. T Fig. U Fig. O Fig. P Fig. Q
  • 8. 8 Maintenance Follow the steps listed below in order to ensure peak cleaning performance. • Vacuum brushes with end of hose handle after use. • Wipe tools occasionally with damp cloth or sponge and mild detergent. • Change bags and/or filters regularly. The air filter should be replaced after each use of six filter bags. • Periodically check revolving brushes for build-up of lint, hair, or other foreign material and remove as necessary. • Store cleaner in dry area; never outdoors. • Have cleaner checked periodically by an authorized Aerus™ service center. To replace air filters • Slide accessories off of accessory clip. • Gently press filter cover latch and lift off the exhaust air diffuser (Fig. V). • Lift air filter out and replace with a new one (Fig. W). • Engage the two tabs on the front of the exhaust air diffuser in the matching openings on the canister and snap into place. To clear clogged hose • Slide accessories off of accessory clip. • Gently press filter cover release and lift off the exhaust air diffuser (Fig. V). • Lift air filter out (Fig. W). • Attach machine end of hose into blower outlet hose receptacle. • Place handle end of hose into a container. Turn the cleaner on and blow object into container (Fig. X). • Once hose is clear, press the release on blower outlet hose receptacle and pull hose out. • Reinstall air filter, engage the two tabs on the exhaust air diffuser (Fig. V) in the matching openings on the canister and snap into place. Fig. V Fig. W Fig. X
  • 9. 9 To replace filter bags Protect your Warranty! Always use genuine Aerus™ high-efficiency, four-ply, self-sealing filter bags. Used exclusively, the Aerus™ filter bag will promote longer motor life and more efficient cleaner operation. Be sure the filter bag is in place before operating the machine. When it is time to change filter bags, the bag change indicator on the information panel lights and the cleaner shuts off. The cleaner controls this function automatically and is regulated by the control dial setting. NOTE: The filter bag may not appear completely full when vacuuming fine dirt because this type of dirt clogs the pores of the bag more quickly than coarse dirt. However, it is still time to change the filter bag in order to restore cleaning efficiency. • Stand the machine on its end and press the front cover release. • As the cover is opened, the filter bag seals itself for removal (Fig. Y). • Throw the old bag away - never attempt to re-use filter bags. • Install a new filter bag and close the cover (Fig. Z). Storage For best performance, carefully store cleaner in a dry place. Do not store outdoors. Slide crevice tool and combination dust brush/upholstery tool onto the accessory clip on canister (Fig. AA). Use the hook on end of the sheath to store the wand and power nozzle as a unit (Fig. BB). Fig. Y Fig. Z Fig. AA Fig. BB
  • 10. 10 Using Sidekick® (optional accessory) To further your cleaning capabilities, we offer an outstanding vacuum cleaner accessory (optional). The Sidekick® accessory is a revolutionary tool powered by its own motor that combines superior cleaning action with easy maneuver- ability. The Sidekick® has a trim design that allows cleaning in hard-to-reach areas like stairs, car interiors, bathrooms, upholstery, and mattresses, better and more efficiently than ever before. The switch on the Sidekick® has two positions: • Setting the switch to “I” turns the Sidekick® ON. • Setting the switch to “O” turns the Sidekick® OFF. CAUTION: Turn cleaner OFF before connecting or disconnecting Sidekick®. ASSEMBLY • Turn cleaner OFF and unplug cord from outlet. • Disconnect wand or power nozzle attachment from hose. • Turn Sidekick® switch to OFF position. • Align Sidekick® and hose connections and slip Sidekick® onto handgrip until it snaps into place (Fig. CC). • Plug power cord into outlet, turn machine ON, turn Sidekick® ON and resume cleaning. To remove Sidekick®, turn Sidekick® OFF, turn cleaner OFF, unplug power cord, press release, and pull Sidekick® off handgrip. CAUGHT OBJECTS If an object becomes clogged in the Sidekick®, immediately turn it OFF. To restart, follow these instructions. • Turn cleaner OFF and unplug power cord from wall outlet. • Remove caught object from Sidekick®. • If the object is caught in the revolving brush turn the Sidekick® over and gently remove the caught object from the brush. • If the object is caught further in the unit detach the handgrip and remove the object through the rear of the unit. • After obstructions are cleared, plug power cord into outlet, turn cleaner ON, turn Sidekick® ON and resume cleaning. CAUTION: To prevent Sidekick® motor from overheating, do not use if vacuum cleaner motor shuts OFF. WARNING: Keep hands away from Sidekick® brush while in use and when turning cleaner, or Sidekick®, ON or OFF. MAINTENANCE Follow the steps listed below in order to ensure peak cleaning performance. • Vacuum brushes with end of hose handle after use. • Wipe tools occasionally with damp cloth or sponge and mild detergent. • Periodically check revolving brushes for build-up of lint, hair, or other foreign material and remove as necessary. • Store Sidekick® in dry area; never outdoors. • Have Sidekick® checked periodically by an authorized Aerus™ service facility. by Electrolux Fig. CC
  • 11. Limited 5 Year Warranty What is Covered by this Warranty - Aerus warrants its products to the consumer, subject to the conditions below, against defects in workmanship or material, provided that the products are returned to an Aeurs location within the following time period: 2100 by Electrolux® including motor and fan unit; all attachments and accessories - within 5 years of date of purchase. How to Obtain Warranty Service - Upon contacting and returning, at consumer’s sole cost and expense, the product with proof of purchase showing purchase date to an Aerus location within the above time period, Aerus will repair or replace, without charge and within a reasonable period of time, any part which its examination shall disclose to be defective in workmanship or material and return the product to the consumer. If Aerus is unable to repair the product after a reasonable number of attempts, Aerus will provide either a refund of the purchase price or a replacement unit, at the company’s option. What is Not Covered by this Warranty - This product is intended for household use only. Ordinary wear and tear shall not be considered a defect in workmanship or material. This warranty does not apply to loss or damage caused by accident, fire, abuse, misuse, modification, misapplication, or commercial use, or by any repairs other than those provided by an authorized Aerus location. The warranty with respect to the motor and fan unit is null and void if it is damaged as a result of vacuuming damp or wet surfaces, or dirt leakage through a filter bag other than an Aerus filterbag. Exclusion of Other Warranties and Conditions - EXCEPT AS PROVIDED HEREIN, AERUS MAKES NO REPRESENTATION OR WARRANTY OF ANY KIND. ALL OTHER WARRANTIES OF ANY KIND, EXPRESS OR IMPLIED, ARE HEREBY EXPRESSLY DISCLAIMED, INCLUDING ANY IMPLIED WARRANTY OF MERCHANTABILITY OR FITNESS FOR A PARTICULAR PURPOSE. Limitation of Liability for Special, Incidental or Consequential Damages - AERUS SHALL NOT IN ANY CASE BE LIABLE FOR SPECIAL, INCIDENTAL OR CONSEQUENTIAL DAMAGES ARISING FROM BREACH OF EXPRESS OR IMPLIED WAR- RANTIES, CONDITIONS, GUARANTEES OR REPRESENTATIONS, BREACH OF CONTRACT NEGLIGENCE OR ANY OTHER LEGAL THEORY. Such excluded damages include, but are not limited to, loss of profits or revenue and loss of the use of the product. For U.S. Application Only - This warranty gives you specific legal rights, and you may also have other rights which vary from state to state. Some states do not allow limitations on warranties, or on remedies for breach. In such states, the above limitations may not apply to you. For Canadian Application Only - Exclusion of Subsequent Owners: Except as otherwise required by applicable legislation, this warranty is not transferable. This warranty gives you specific legal rights and you may also have other rights which vary from province to province. Some provinces and territories do not allow limitations on warranties, or on remedies for breach. In such provinces or territories, the above limitations may not apply to you. If any provision of this warranty or part thereof is held by a court of competent jurisdiction to be invalid, illegal or unenforceable, the validity, legality and enforceability of the remaining provisions or parts thereof will not in any way be affected or impaired within the jurisdiction of that court. This entire warranty shall continue to be valid, legal and enforceable in any jurisdiction where a similar determination has not been made. 11
  • 12. For information regarding the use of this product, please call our toll-free hotline: 1-800-243-9078 Visit our website at www.aerusonline.com AERUS LLC 5956 Sherry Lane, Suite 1500 Dallas, Texas 75225 ©2002 Aerus LLC 3rd Qtr. 2003 Service For prompt service, call your Aerus representative or the nearest Aerus location listed in your telephone directory. Your authorized Aerus location offers you the best in service both during and after the warranty period, as well as gen- uine Aerus parts and supplies Every effort is made to ensure that customers receive an up-to-date instruction manual on the use of Aerus™ products; however, from time to time, modifications to our products may without notice make the information contained herein subject to alteration. All power units of the Aerus™ Home Care System are certified by the Canadian Standards Association and listed by Underwriters Laboratories Incorporated.