1. 1
Creating a PDF within eCopy PDF Pro
Office is as simple as opening a file.
1. Choose File > Open.
Note: Within MS Office applications, you can also click on
the PDF Menu buttons to create PDF files, create and email
PDF files, and access create PDF settings .
3. Click on the Touchup Object Tool icon to
make changes to objects and object.
1. Open a PDF in eCopy PDF Pro Office and
click on the Convert PDF button.
2. Change Files Of Type field to “All Files”.
Batch creation allows users to convert
multiple files at the same time.
3. Select the file and click Open.
1. Click File > New PDF, and select Create
Multiple Files.
`
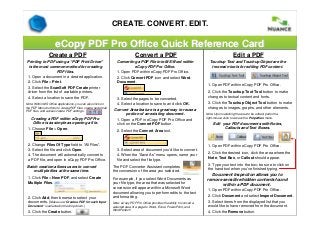
eCopy PDF Pro Office Quick Reference CardeCopy PDF Pro Office Quick Reference Card
CREATE. CONVERT. EDIT.
Create a PDF
Printing to PDF using a “PDF Print Driver”
is the most common method for creating
PDF files.
1. Open a document in a desired application.
2. Click Add, then browse to select your
documents. (Make sure “Create a PDF for each Input
Document” is selected in the drop down.)
3. Click the Create button.
Convert a PDF
Converting a PDF File into MS Word within
eCopy PDF Pro Office.
1. Open PDF within eCopy PDF Pro Office.
2. Click Convert PDF icon and select Word
Document.
4. Select a location to save to and click OK.
Convert Area feature is a great way to reuse a
portion of an existing document.
3. Select area of document you’d like to convert.
4. When the “Save As” menu opens, name your
file and select the file type.
Edit a PDF
Touchup Text and Touchup Object are the
two main tools for editing PDF content.
1. Open PDF within eCopy PDF Pro Office.
2. Click the Touchup Text Tool button to make
changes to textual content and fonts.
Edit your PDF documents with Notes,
Callouts and Text Boxes.
1. Open PDF within eCopy PDF Pro Office.
2. Click the desired icon, click the area where the
Note, Text Box, or Callout should appear.
3. Type your text into the box; be sure to click on
the hand tool when you’ve finished typing.
Document Inspection allows you to
remove sensitive/hidden contents found
within a PDF document.
2. Click Document and select Inspect Document.
1. Open PDF within eCopy PDF Pro Office.
3. Select items from the displayed list that you
would like to have removed from the document.
4. Click the Remove button.
2. Click File > Print.
The PDF Converter Assistant completes
the conversion of the area you selected.
For example, if you select Word Documents as
your file type, the area that was selected for
conversion will appear within a Microsoft Word
document allowing you to perform edits to the text
and formatting.
Note: eCopy PDF Pro Office provides the ability to convert a
selected area of a page to Word, Excel, PowerPoint, and
WordPerfect!
2. Select the Convert Area tool.
Note: Upon selecting the area to be edited, perform a
right-mouse click to access the Properties menu.
3. Click the Touchup Object Tool button to make
changes to images, graphs, and other elements.
4. Select a location to save the PDF.
3. Select the ScanSoft PDF Create printer
driver from the list of available printers.
3. Select the pages to be converted.
4. The document will automatically convert to
a PDF file, and open in eCopy PDF Pro Office.
2. 2
3. Click on the Touchup Object Tool icon to
make changes to objects and object.
eCopy PDF Pro Office Quick Reference CardeCopy PDF Pro Office Quick Reference Card
ASSEMBLE. SECURE. SEARCH.
Assemble a PDF
Using the Document Assembly view allows
pages of a document to be easily
assembled and inserted with simple Drag
and Drop control.
1. Open a multi-page document in eCopy PDF
Pro Office.
Document Splitting allows a user to choose
from 8 different splitting methods to split
large documents into smaller segments.
3. Select the appropriate Split Document
settings, select a folder to save the split files,
and click OK.
Secure a PDF
There are a variety of methods for securing PDF
documents, including password security,
certificate security, encryption, digital
signatures, redaction, and metadata removal.
3. Click and drag the cursor to draw a box over the
a defined area.
4. Click on Document > Redaction > Apply
Redaction.
Search a PDF
Using the intelligent “Looks Like” Search
capability provides the option to quickly find
content, like phone numbers, email addresses,
and social security numbers, via an
alphanumeric pattern rather than exact text.
1. Open PDF within eCopy PDF Pro Office.
2. Select Edit > Search from the Menu bar.
3. Select the Looks Like Search Pattern radio
button.
2. Select Document > Redaction > Search and
Redact.
1. Open PDF within eCopy PDF Pro Office.
4. Click Search & Redact button.
4. Select a predefined pattern from the drop-down
Menu.
2. Select View > Document Assembly.
Note: Hovering over this area will display a preview of how the
area will look when the redaction is applied.
3. Click on a page number to drag and drop the
page to a different location within the document.
Using the Document Assembly toolbar, you can
Insert, Replace, Delete, and Extract pages.
Note: Non-PDF files can be selectively inserted using the
Page Assembly icon in the Tool Bar while in the Document
Assembly view. Non-PDF’s will be automatically converted
to PDF prior to being inserted into the document.
2. Click on Document > Split Document.
1. Open a multi-page document in eCopy PDF
Pro Office.
1. Open a PDF file within eCopy PDF Pro Office.
Redaction
2. Click on Document > Redaction >
Mark Redaction.
Security
1. Open a PDF file within eCopy PDF Pro Office.
2. Click on Document > Security >
Secure Document.
3. Click on an available security theme and perform
a right mouse-click to access a shortcut menu.
4. Click on Apply
Security Theme.
Security Schemes can be created in which document
passwords, restrictions, encryption, and permissions
can be defined.
Predefined Pattern
5. Click Search.
Looks Like Search & Redaction
3. Enter search text, select a predefined pattern, or
create a customized pattern.
6. Click on Mark Selected Results for Redaction.
Redaction is the blacking out of sensitive text or
pictures from a PDF file. The redaction tool allows
you to create text redactions (by highlighting words)
or zone redactions (by drawing boxes).
5. From the search results, choose to Select All or
select single words to redact.
7. Click on Document > Redaction > Apply
Redaction.