1. 1
Jacob Cunningham
Normalbus
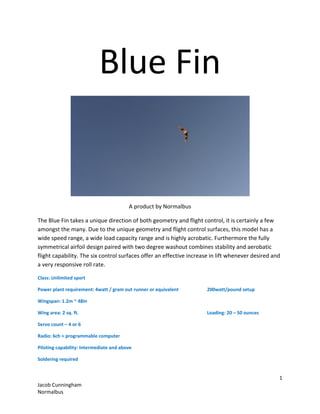
Blue Fin
A product by Normalbus
The Blue Fin takes a unique direction of both geometry and flight control, it is certainly a few
amongst the many. Due to the unique geometry and flight control surfaces, this model has a
wide speed range, a wide load capacity range and is highly acrobatic. Furthermore the fully
symmetrical airfoil design paired with two degree washout combines stability and aerobatic
flight capability. The six control surfaces offer an effective increase in lift whenever desired and
a very responsive roll rate.
Class: Unlimited sport
Power plant requirement: 4watt / gram out runner or equivalent 200watt/pound setup
Wingspan: 1.2m ~ 48in
Wing area: 2 sq. ft. Loading: 20 – 50 ounces
Servo count – 4 or 6
Radio: 6ch + programmable computer
Piloting capability: Intermediate and above
Soldering required
3. 3
Jacob Cunningham
Normalbus
Construction
To attach the main wings to the stick pod, you will need to create incisions roughly where the
lines are on the bottom of the wings. It is imperative to cut as close to the internal structure as
possible however to not exceed the depth of the wing itself. The cantilevered wing mounts
should be smaller in height than the thickness of the wing. Below are images to explain the
attachment process.
Here we see the base of the right wing panel the red rectangles indicate the area which will be removed.
This is a wing mount there are two per stick-pod constituting four cantilevered attachment points.
4. 4
Jacob Cunningham
Normalbus
Here is a much simpler view, note that this airfoil section indicates an inverted wing. In this case we are
looking at the root chord of the right wing panel. In these three images we see the product before the
procedure, then the slots for the cantilevered members removed and then finally the cantilevered
members installed in the wing flush with the surface of the wing. The bottom surface of course. This
ensures proper alignment. The shape of the airfoil may change however this is planned, the airfoil is
expected to bend in order to achieve proper mounting based on the bottom surfaces of each
cantilevered member.
5. 5
Jacob Cunningham
Normalbus
Not only does this wing mounting method ensure proper wing alignment in regards to each wing panel
as well as in regards to the thrust line, but this also ensures that the wings will operate correctly while in
flight. If you notice the profile along the span of each wing panel seems to go downwards, this is due to
the washout which is what allows the aircraft to perform tight turns without stalling.
6. 6
Jacob Cunningham
Normalbus
Before attaching the upper deck to the tops of both wing mounts as well as the right angle firewall
supports, you should install your electronic equipment. The design offers a wide array of combinations
for equipment setup regarding the aircraft electronics as well as fpv equipment. The large battery bay
allows for various battery sizes to be used which can physically fit in the bay.
Below are the electronics used in my model (GT-17)
Battery: 2250mAh 3S1P ( 11.1V) 65C Thunder power
Servo: 6 HXT-900
ESC: 36A Castle Creations Thunderbird
Motor: AXI 2808/16 – 7x5 APC E
Receiver: Hitec 8ch Supreme dual conversion
SBEC: (for 6 servo models) Castle Creations 10A SBEC
7. 7
Jacob Cunningham
Normalbus
Placement of electronic components
It should be noted that the double decker style stick-pod has three separate bays governed by
the location of the wing mounts. The front is the most spacious hence this is the logical
placement for a battery. The generous space allows a variety of battery combinations.
The center section is meant to house the receiver since this is where the servo wires will most
likely exit the wings.
The last section, the section between the firewall and the last wing mount houses both ESC and
FPV video transmitter as well as the SBEC. Perhaps the FPV video transmitter does not belong
here because of all the electronic noise that may result from either the SBEC or ESC.
Alternatively one can basically attach the electronics wherever he or she so chooses, I have
flown either setup successfully though it may be possible to induce a slight yaw if the drag
resulting from the abused electronic placement becomes rather large.
8. 8
Jacob Cunningham
Normalbus
Mounting the motor
The double decker style stick-pod comes with a pre-drilled hole which gives enough room to
ensure that the shaft of whatever motor is used does not rub against the firewall mount. The
firewall is not wide enough to accommodate the entire area of an X – type firewall mount,
hence it is optimized to have the x-mount mounted vertically in the orientation of a plus
symbol.
You can see that the firewall will not fit entirely on the firewall mount however this is ok, the
two screws alone are enough to hold the motor to the aircraft.
10. 10
Jacob Cunningham
Normalbus
Programming
Four servo program
Regardless of whether there are physically four servos present in the aircraft or six, it is possible to control
the aircraft with a four servo program. With six servos, you would simply need to parallel wire the four inner
servos. This way you can use a 6ch computer radio to operate 6 servos at once.
The program I use now requires flapperon, Vtail, land and one master to slave command. This is done
with a Hitec Eclipse 7 radio. First with the servos in the neutral position with all of the control surfaces leveled, we
begin programming by first noting the proper channel placement of each servo into the receiver. Below is a basic
schematic:
Notice that channels six and one are not next to a servo, this is to indicate that the four servos in the
center are parallel wired suffice it to say that channel six would run the two left inner servos while channel one
would run the two right inner servos or alternatively channel six and one would run only 1 servo each.
With these servos in their proper receiver slots, we first enter the programming mode of our transmitter
then enable the following: VTAL, FLPN, and a PMX mix, specifically Ch 1 master, Ch 4 slave. In order to have full roll
this program must be engaged, that is if you have a button or simply creating the program activates the mix, then
that is what you need to do. If only the outer servos turn or the inner servos turn in a roll, the roll will not nearly be
as responsive, furthermore may result in a crash from the adverse yaw. This enables the gull wing to operate all six
flight surfaces in unison for a roll while allowing the four inner flaps to drop while the elevons rise for a flap flight
effect. This effect usually requires some programming on how far the flaps engage and how much the elevons
engage. This varies with every radio, consult your manual.
11. 11
Jacob Cunningham
Normalbus
Alternatively one can fly the gull wing with less programming, in particular if you don’t have an easy to
reach flap engage button or if you can’t use flaps at all. If you have these following functions, then you can fly the
Blue Fin: FLPR, ELVN, PMX1, PMX2. In this alternative program the function “VTAL “ is replaced by the function
“ELVN” This may seem contradicting however due to the placement of the servos in this alternative setup, the flap
function would not work.
The primary difference is that you can’t use flaps for landing. This is because flapperon usually uses ch 1
and 6 in opposite but equal locations on the main wing that is two ailerons for example hence in our picture ch’s 1
and 6 are right next to each other so flaps would not work. The six flight surfaces still work in unison for roll and
the two outboard elevons work for pitch. Here the image is different in the channel selection.
What moves to perform what maneuver?
The six flying surfaces operate together to perform a roll while only the outermost control
surfaces (elevons) move to control pitch. Of course when performing a bank while climbing the
roll and pitch controls are mixed, this is done by the radio.
To perform a left roll, the three surfaces on the left should deflect upwards while the three
surfaces on the right should deflect downwards.
To climb the two farthest control surfaces should both deflect upwards or downwards
depending on whether you are climbing or descending.
12. 12
Jacob Cunningham
Normalbus
Angle Deflection
Below is a chart of angle deflections for landing and cruise. Roll control is dictated by DR, EPA and
mechanical linkage setup. Also note the chart which distinguishes what the letters stand for. Note that these
angles are measured from the top hinge line. Of course since the deflections are mirror images, there is no need
for another column of cells.
Addressing adverse yaw
One important detail to note is the proper deflection of the control surfaces for roll. It is possible to
produce more drag than lift thereby inducing a yaw instead of a roll in the opposite direction of the intended turn.
To fix this you simply program the EPA values of each servo to deflect less upwards than down. So for example if
executing a left turn, the deflection of the left flapperon servos should be less than the deflection of the right
flapperon servos that is, +80% vs. -100% respectively.
Since all six flying surfaces are moving in a roll, it should also be noted that the surfaces should “washout”
even when performing maneuvers such as a roll. What does this mean? Well there should be the greatest
deflection at the root than the tip, therefore the deflection rates should decrease going from the center of the
aircraft outwards. So for example (note: these aren’t literal numbers) if going from A to C we have EPA rates of
100%, 80% and 60% that would give the effect of a “washing-out” chord.
Cruise
Deflection
( Degrees )
( A ) Main flapperon 0
( B ) Outer flapperon 0
( C ) Elevon 7
Land
Deflection
( Degrees )
( A ) Main flapperon -19
( B ) Outer flapperon -21
( C ) Elevon 10
13. 13
Jacob Cunningham
Normalbus
Flying the Blue Fin
So now with the Blue Fin programmed, the center of gravity achieved correctly as well as a thrust line that
is appropriate for proper flight, you are now ready to fly.
Takeoff is easy, first grasp the aircraft by placing your radio-free hand on the leading edge of the outer
wing panel. I’d also suggest watching the film on how to launch the Blue. Engage the flaps in full deflection and
apply full power, release upwards without imparting a spin, though a small amount is acceptable. Once safe height
has been achieved, disengage the flaps and perform basic maneuvers to trim the aircraft and get used to the
controls. Take this time to note how responsive or un-responsive the aircraft may be due to your programmed
setup / build. Make proper adjustments and enjoy the flight.
Fun maneuvers
So now that you are confident with the Blue Fin’s controls and are confident that you have mastered the
basic flight controls, it’s now time to have some fun.
An exponential climb occurs when flying full speed in level flight and lift is suddenly immensely increased,
this can be done by engaging the flaps at the right minute. First get a feel for the aircraft at full speed and level
flight, to have a pleasing effect try this at an altitude of say 20 feet, if not 10 feet. After getting a feel for the
aircraft in a full speed level flight, come around for a pass from your right to your left. When the aircraft is just
about to pass you, engage the flaps for landing and watch the aircraft perform an exponential climb, disengage the
flaps when the aircraft is perpendicular to the ground. Depending on your setup you may have the capability of
flying vertically without a problem, while still climbing, try a few snap rolls. Your aircraft should have plenty of
potential energy coming in from a dive and plenty of kinetic energy while in the exponential climb.
If you are really confident you can even try to purposely lose control of the Blue Fin. Since the Blue Fin has
no vertical stabilizers, it is in theory easy for the aircraft to lose control, especially since it possesses no electronic
stabilization. So next time you perform an exponential climb, try shutting off the engine at a sufficient altitude and
watch the Blue Fin tumble out of control. After the Blue Fin has fallen a sufficient height, one can easily regain
control by deploying the flaps and applying power. Take care not to do this too low to the ground (below 30 feet).
With a wing loading of less than 20oz / sq. ft. and a power to weight ratio of roughly 200 w/lb this maneuver can
be safely performed at 30 feet however it requires at tentative piloting and risk. There isn’t much to be gained
form this maneuver.
Lastly for more information email normalbus@gmail.com or visit the website http://normalbus.com this
site does not exist yet, won’t exist until after September of 2012. Further watch videos on YouTube under
Normalbus here you may find take off demonstrations and other related videos to the Blue Fin such as impulse
testing and previous flights of previous models. Alternatively there are other videos related to other Normalbus
designs.
Enjoy this aircraft and feel free to consult me for any help or difficulty you may face. I am more than
happy to help.
Written: Aug 23, 2012 Proofread by Hans