SlideShare a Scribd company logo
1 of 34
Download to read offline
Operating manual
az
High-Flow high performance liquid fertiliser application
MG4477
BAG0115.0 08.12
Printed in Germany
Please read this operating ma-
nual before commissioning.
Keep it in a safe place
for future use!
en
2 HighFlow BAG0115.0 08.12
Reading the instruction
Manual and following it should seem to be in-
convenient and superfluous as it is not
enough to hear from others and to realize that a
machine is good, to buy it and to believe that now
everything should work by itself. The person in
question would not only harm himself but also
make the mistake of blaming the machine for pos-
sible failures instead of himself. In order to en-
sure success one should enter the mind of a thing,
make himself familiar with every part of the ma-
chine and get acquainted with how it's handled.
Only in this way could you be satisfied both with
the machine and with yourself. This goal is the
purpose of this instruction manual.
Leipzig-Plagwitz 1872.
Identification data
HighFlow BAG0115.0 08.12 3
Identification data
Enter the machine identification data here. You will find the identifica-
tion data on the type plate.
Machine identification number:
(ten-digit)
Type: HighFlow
Permissible system pressure (bar) Maximum 200 bar
Year of manufacture:
Factory:
Basic weight (kg):
Permissible total weight (kg):
Maximum load (kg):
Manufacturer's address
AMAZONEN-WERKE
H. DREYER GmbH & Co. KG
Postfach 51
D-49202
Tel.:
Fax:
E-mail:
Hasbergen, Germany
+ 49 (0)5405 501-0
+ 49 (0)5405 501-234
amazone@amazone.de
Spare part orders
Spare parts lists are freely accessible in the spare parts portal at
www.amazone.de.
Please send orders to your AMAZONE dealer.
Formalities of the operating manual
Document number: MG4477
Compilation date: 08.12
 Copyright AMAZONEN-WERKE H. DREYER GmbH & Co. KG, 2012
All rights reserved.
Reprinting, even of extracts, is only possible with the approval of
AMAZONEN-WERKE H. DREYER GmbH & Co. KG.
Foreword
4 HighFlow BAG0115.0 08.12
Foreword
Dear Customer,
You have chosen one of the quality products from the wide product
range of AMAZONEN-WERKE, H. DREYER GmbH & Co. KG. We
thank you for your confidence in our products.
On receiving the machine, check to see if it has been damaged during
transport or if parts are missing. Using the delivery note, check that
the machine has been delivered in full, including any special equip-
ment ordered. Damage can only be rectified if problems are signalled
immediately.
Before commissioning, read and understand this operating manual,
and particularly the safety information. Only after careful reading will
you be able to benefit from the full scope of your newly purchased
machine.
Please ensure that all the machine operators have read this operating
manual before the machine is commissioned.
Should you have problems or queries, please consult this operating
manual or give us a call.
Regular maintenance and timely replacement of worn or damaged
parts increases the lifespan of your machine.
User evaluation
Dear Reader,
We update our operating manuals regularly. Your suggestions for
improvement help us to create ever more user-friendly manuals. Send
us your suggestions by fax.
AMAZONEN-WERKE
H. DREYER GmbH & Co. KG
Postfach 51
D-49202
Tel.:
Fax:
E-mail:
Hasbergen, Germany
+ 49 (0)5405 501-0
+ 49 (0)5405 501-234
amazone@amazone.de
Table of Contents
HighFlow BAG0115.0 08.12 5
1 Structure and function ................................................................................6
1.1 Function ...................................................................................................................................6
1.2 Structure HighFlow Pantera.....................................................................................................6
1.3 Structure HighFlow UX ............................................................................................................7
1.4 Switch tap HighFlow ................................................................................................................8
1.5 Control box with switch ............................................................................................................8
1.6 Liquid circuit .............................................................................................................................9
2 Operation HighFlow...................................................................................11
3 Cleaning the sprayer .................................................................................13
3.1 Cleaning UX...........................................................................................................................14
3.1.1 Cleaning the sprayer with the tank empty..............................................................................14
3.1.2 Cleaning the sprayer with a full tank (work interruption)........................................................16
3.1.3 Cleaning the suction filter when tank is full............................................................................17
3.1.4 Cleaning the pressure filter when the tank is full ...................................................................18
3.2 UX with comfort equipment / clean Pantera (AMATRON).....................................................19
3.2.1 Dilute the spray liquid with rinsing water................................................................................20
3.2.2 Cleaning the sprayer with the tank empty..............................................................................20
3.2.3 Cleaning the sprayer with the tank filled (work interruption)..................................................22
3.2.4 Cleaning the suction filter when tank is filled.........................................................................23
3.3 UX with comfort equipment / clean Pantera (ISOBUS) .........................................................24
3.3.1 Dilute the spray liquid with rinsing water................................................................................25
3.3.2 Cleaning the sprayer with the tank empty..............................................................................26
3.3.3 Cleaning the sprayer with the tank filled (work interruption)..................................................28
3.3.4 Cleaning the suction filter when tank is filled.........................................................................29
3.4 Draining the final residues .....................................................................................................30
3.5 Cleaning the suction filter when tank is empty.......................................................................31
3.6 Cleaning the pressure filter when the tank is empty..............................................................31
3.7 Cleaning the sprayer during a critical agent change .............................................................32
Structure and function
6 HighFlow BAG0115.0 08.12
1 Structure and function
1.1 Function
 Spray rate can be increased (optional) for applying liquid fertil-
iser. The maximum spray rate can be increased to up to
400 l/min.
 The agitator pump is used here to increase the spray rate, and is
not (or only partly) used as a drive for the agitator.
 The high-performance liquid fertilisation is switched on and off
via the operating terminal and the HighFlow switch tap.
1.2 Structure HighFlow Pantera
X High-Flow spray line
switch tap
Y Switch tap for non-return
lock
Z Switch tap for agitator /
draining residue
1. Spraying pump
2. Agitator pump
3. Pressure relief valve
4. Control valve for agitator pump
spray rate
5. Additional pressure filter
6. Drain hose
7. Control box
Structure and function
HighFlow BAG0115.0 08.12 7
1.3 Structure HighFlow UX
X. High-Flow spray line switch tap
Y. Switch tap for agitator / draining residue
Z. Switch tap for non-return lock
1. Spraying pump
2. Agitator pump
3. Pressure relief valve
4. Control valve for agitator pump spray rate
5. Additional pressure filter
6. Drain hose
7. Control box
Structure and function
8 HighFlow BAG0115.0 08.12
1.4 Switch tap HighFlow
Switch tap HighFlow X
 Position I: HighFlow - spray line ON
 Position 0: HighFlow - spray line OFF (main
agitator ON)
Switch tap for non-return lock Y
 Position I: HighFlow - spray line open (for
HighFlow - mode)
 Position 0: HighFlow- spray line closed
Agitator switch tap Z
 max: additional agitators, one at most.
 0: additional agitator completely off, maxi-
mum spray rate.
The switch tap divides the flow rate
into agitator and HighFlow. It can be
set anywhere between positions A and
B.
 Position A: Drain HighFlow - equipment.
1.5 Control box with switch
 Position A: HighFlow ON
 Position B: HighFlow OFF
Structure and function
HighFlow BAG0115.0 08.12 9
1.6 Liquid circuit
HighFlow:
Structure and function
10 HighFlow BAG0115.0 08.12
HighFlow with comfort equipment:
(X) High-Flow spray line switch tap
(Y) Switch tap for non-return lock
(Z) Switch tap for agitator / draining residue
(1) Pressure relief valve
(2) Control valve for agitator pump spray rate
(3) Pressure filter HighFlow
(4) Additional agitator HighFlow
(5) Flow meter 3
(6) Control box
Operation HighFlow
HighFlow BAG0115.0 08.12 11
2 Operation HighFlow
Proceed as follows to switch on the HighFlow and thereby increase
the maximum spray rate:
1. Operating terminal: machine data menu:
 HighFlow: on / .
AMA-
TRON
ISOBUS
2. Switch on the dashboard to position A.
3. High-Flow switch tap X to position I.
4. Open return stop switch tap Y, position I.
5. Set agitator switch tap Z between 0 and
maximum.
Operation HighFlow
12 HighFlow BAG0115.0 08.12
6. If necessary, select the spray line switch tap
of both spray lines..
(1) One setting tap for each partial width:
a Spraying via both spray lines using
trailing hoses
b Spraying using standard spray lines
c Spraying only via the 2nd spray line
Comfort equipment: automatic agitator control is not possible in High-
Flow mode.
For normal spraying operation:
1. Operating terminal: HighFlow off.
2. Switch on the dashboard to position B.
3. Close return stop switch tap Y, position B
4. Switch tap HighFlow X to position B.
The operating terminal indicates the
incorrect spray rate with the HighFlow
when:
 the HighFlow is switched on / off
incorrectly on the operating ter-
minal.
 the switch on the dashboard is
incorrectly on position A / B.
Cleaning the sprayer
HighFlow BAG0115.0 08.12 13
3 Cleaning the sprayer
WARNING
Crop damage caused by spray liquid left in the lines after chang-
ing the preparation.
After using the machine, with or without HighFlow, the HighFlow fluid
path as well as the main agitator fluid path have to be cleaned.
 Clean the spray liquid tank on a daily basis!
 The flushing water tank must be filled completely.
 The cleaning process should be carried out in a threefold reduc-
tion procedure.
Cleaning the sprayer
14 HighFlow BAG0115.0 08.12
3.1 Cleaning UX
3.1.1 Cleaning the sprayer with the tank empty
Cleaning cycle A
1. Activate the pump, adjust pump speed to
450 rpm.
2. Manually move suction chest G to position
.
3. Move the pressure gauge switch tap A to
position .
4. Move switch tap X to position 0.
5. Open the agitator I completely.
 Flush the agitator with 10% of the flushing
water supply.
6. Switch off agitator I.
DUS: Spray lines are flushed auto-
matically. Use 10 % of the flushing
water supply for this purpose.
7. Move the pressure gauge switch tap A to
position .
8. Open switch tap B.
 Carry out the internal cleaning with 10% of
the flushing water supply.
9. Close switch tap B.
10. Manually move suction chest G to position
.
11. Move the pressure gauge switch tap A to
position .
12. Spread the diluted residues on the area
already treated while driving.
13. Switch the sprayer off and back on again
several times for a few seconds via the on-
board computer.
The valves and the return lines are
flushed by this switching on and off.
 Keep spreading the diluted residues until
only air comes out of the nozzles.
Cleaning the sprayer
HighFlow BAG0115.0 08.12 15
Cleaning cycle B
14. Manually move suction chest G to position
.
15. Move switch tap X to position I.
16. Open the agitator I and Z completely.
 Flush the agitator with 10% of the flushing
water supply
17. Switch off agitator I and Z.
DUS: Spray lines are flushed auto-
matically. Use 10 % of the flushing
water supply for this purpose.
18. Move the pressure gauge switch tap A to
position .
19. Open switch tap B.
 Carry out the internal cleaning with 10% of
the flushing water supply.
20. Close switch tap B.
21. Manually move suction chest G to position
.
22. Move the pressure gauge switch tap A to
position .
23. Spread the diluted residues on the area
already treated while driving.
24. Switch the sprayer off and back on again
several times for a few seconds via the on-
board computer.
The valves and the return lines are
flushed by this switching on and off.
 Keep spreading the diluted residues until
only air comes out of the nozzles.
Repeat the cleaning cycle B.
Clean internally using the rest of the flushing
water supply and then discharge until only the
final residue remains.
25. Drain the final residue, see page 30.
26. Clean the suction filter and pressure filter,
see page 31, 31.
Cleaning the sprayer
16 HighFlow BAG0115.0 08.12
3.1.2 Cleaning the sprayer with a full tank (work interruption)
If spraying operations must be interrupted because of bad weather, by
all means clean the suction chest (suction filter, pumps, pressure
controller) and the spray line.
1. Interrupt pump operation.
2. Switch off agitator (e) Z, I.
3. Manually move suction chest G to position
.
4. Activate the pump, adjust pump speed to
450 rpm.
Without nozzle control:
5. Spread at least 50 litres of flushing water
over an untreated area while driving.
 The sprayer is cleaned with flushing water.
 Tank, agitators are not clean
 The spray liquid concentration in the
tank is unchanged.
With nozzle control:
 The sprayer is cleaned with flushing water.
This is done using two litres of flushing wa-
ter per metre of working width (observe the
filling level).
6. Switch on the sprayers for a short period.
 The nozzles are flushed.
7. Switch the pump off immediately because
the agent concentration drops.
 Tank, agitators are not clean
 The spray liquid concentration in the
tank has changed.
Continuing the spraying operation
Before continuing with the spraying operation, activate the pump for
five minutes at 540 min-1
and switch on the agitators completely.
Cleaning the sprayer
HighFlow BAG0115.0 08.12 17
3.1.3 Cleaning the suction filter when tank is full
1. Activate the pump, adjust pump speed to
300 rpm.
2. Manually move suction chest G to position
.
Attention: The Cam Lock Coupling must be
mounted on the suction port.
3. Move the pressure gauge switch tap A to
position .
4. Open switch tap L.
5. Open agitator H completely.
6. Unscrew the cover of the suction filter (2).
7. Activate the relief valve on the suction filter
(1).
8. Remove the cover (3) with suction filter and
clean with water.
9. Reassemble the suction filter in the reverse
sequence.
10. Check the filter cover for leaks.
Cleaning the sprayer
18 HighFlow BAG0115.0 08.12
3.1.4 Cleaning the pressure filter when the tank is full
1. Manually move suction chest G to position
.
2. Close switch tap Y.
3. Move switch tap I to position .
4. Move switch tap Z to position A.
 Drain the residue into the pressure filter.
5. Undo the sleeve nuts.
6. Remove the pressure filter and clean with
water.
7. Refill the pressure filter.
8. Check the screw connection for leaks.
9. Move switch tap I to position 0.
10. Switch tap Z between 0 and maximum.
11. Open switch tap Y again.
Cleaning the sprayer
HighFlow BAG0115.0 08.12 19
3.2 UX with comfort equipment / clean Pantera (AMATRON)
Calling up the Comfort package menu
Switch between spraying/flushing
Dilute the spray liquid
Switch cleaning on/off
Agitator automatic/manual
Increase agitator intensity
Decrease agitator intensity
The Comfort package enables the intake side to
be switched using
 the AMATRON+
,
 the button on the control terminal (1).
Remote-controllable settings:
 Spraying (position A)
 Flushing/diluting (position B)
 Filling via suction coupling (position C, in
filling menu only)
Cleaning the sprayer
20 HighFlow BAG0115.0 08.12
3.2.1 Dilute the spray liquid with rinsing water
1. Start dilution.
 Flushing water is fed to the tank via the
auxiliary agitator.
2. Observe the fill level of the tank.
3. End dilution.
For a machine with a pressure circula-
tion system (DUS), the spray line is
flushed. When spraying is restarted,
two to five minutes pass before con-
centrated spray liquid can be sprayed.
3.2.2 Cleaning the sprayer with the tank empty
Cleaning cycle A
Cleaning:
Prerequisite: Fill level of the tank < 1% (tank
empty if possible).
1. Move switch tap X to position 0.
2. Run the pump with 450 rpm.
3. Start cleaning.
 Main and auxiliary agitator are flushed, tank
inside cleaning switched on.
 When the fill level of the tank is 4%, clean-
ing is cancelled automatically.
For machines equipped with a pres-
sure circulation system (DUS), the
spray line is also cleaned automati-
cally.
Empty tank:
4. Switch on spraying.
Spread the diluted residues on the area
already treated while driving.
Switch sprayers on/off at least ten times
while in motion.
 Keep spreading the diluted residues until
only air comes out of the nozzles.
5. Switch off spraying.
Cleaning the sprayer
HighFlow BAG0115.0 08.12 21
Cleaning cycle B
Cleaning:
1. Move switch tap X to position I.
2. Open agitator Z completely.
3. Reinigung starten.
 Both ancillary agitators are flushed, tank
cleaning is switched on.
 When the fill level of the tank is 4%, clean-
ing is cancelled automatically.
 Flush the agitators with 10% of the flushing
water supply.
Empty tank:
4. Switch on spraying.
Spread the diluted residues on the area
already treated while driving.
Switch sprayers on/off at least ten times
while in motion.
 Keep spreading the diluted residues until
only air comes out of the nozzles.
5. Switch off spraying.
Repeat the cleaning cycle B.
Clean internally using the rest of the flushing
water supply and then discharge until only the
final residue remains.
6. Drain the final residue, see page 30.
7. Clean the suction filter and pressure filter,
see page 31, 31.
Cleaning the sprayer
22 HighFlow BAG0115.0 08.12
3.2.3 Cleaning the sprayer with the tank filled (work interruption)
1. Switch the intake side to flushing.
 Flushing water is sucked in, close agitators.
You can also switch between spray-
ing/flushing using the key on the oper-
ating panel.
Machines without pressure circulation sys-
tem DUS:
2. Switch on spraying.
The spray lines and nozzles are flushed with
flushing water.
3. Switch off spraying.
4. Switch off the pump drive.
5. Switch the intake side back to spray-
ing.
 Tank, agitators are not clean
 The spray liquid concentration in the
tank is unchanged.
Machines with pressure circulation system
DUS:
2. Wait until 2 litres of rinsing water have
rinsed through the lines per meter working
width.
3. Briefly switch spraying on to clean
the nozzles.
4. Switch off spraying.
5. Switch off the pump drive.
6. Switch the intake side back to spray-
ing.
 Tank, agitators are not clean!
 The spray liquid concentration in the
tank has changed.
Cleaning the sprayer
HighFlow BAG0115.0 08.12 23
3.2.4 Cleaning the suction filter when tank is filled
To clean the suction filter when the tank is full,
the filling menu must be called up.
1. Call up the filling menu.
2. Attach the sealing cap to the suction cou-
pling.
3. Pressure gauge switch tap in position
4. Switch to filling using the button on the in-
take side.
 The contents of the filter cup are sucked
out.
5. Unscrew the cover of the suction filter.
6. Activate the relief valve on the suction filter.
7. Remove the cover with suction filter and
clean using water.
8. Reassemble the suction filter in the reverse
sequence.
9. Check the filter cover for leaks.
10. Switch to spraying using the button on the
intake side.
11. Pressure gauge switch tap in position
Cleaning the sprayer
24 HighFlow BAG0115.0 08.12
3.3 UX with comfort equipment / clean Pantera (ISOBUS)
Calling up the Comfort package menu!
Switch between spraying/flushing
Dilute the spray liquid
Switch cleaning on/off
Agitator automatic/manual
Increase agitator intensity
Decrease agitator intensity
The Comfort package enables the intake side to
be switched using:
 The operating terminal,
 The button on the control terminal (1).
Remote-controllable settings:
 Spraying (position A)
 Flushing/diluting (position B)
 Filling via suction coupling (position C, in
filling menu only)
Cleaning the sprayer
HighFlow BAG0115.0 08.12 25
3.3.1 Dilute the spray liquid with rinsing water
1. Start dilution.
 Flushing water is fed to the tank via the
auxiliary agitator.
2. Observe the fill level of the tank.
3. End dilution.
For a machine with a pressure circula-
tion system (DUS), the spray line is
flushed. When spraying is restarted,
two to five minutes pass before con-
centrated spray liquid can be sprayed.
Cleaning the sprayer
26 HighFlow BAG0115.0 08.12
3.3.2 Cleaning the sprayer with the tank empty
Cleaning cycle A
Cleaning:
Prerequisite: Fill level of the tank < 1% (tank
empty if possible).
1. Move switch tap Xto position 0.
2. Run the pump with 450 rpm.
3. Start cleaning.
 Main and auxiliary agitator are flushed, tank
inside cleaning switched on.
 When the fill level of the tank is 4%, clean-
ing is cancelled automatically.
For machines equipped with a pres-
sure circulation system (DUS), the
spray line is also cleaned automati-
cally.
Empty tank:
4. Switch on spraying.
Spread the diluted residues on the area
already treated while driving.
Switch sprayers on/off at least ten times
while in motion.
 Keep spreading the diluted residues until
only air comes out of the nozzles.
5. Switch off spraying.
Cleaning the sprayer
HighFlow BAG0115.0 08.12 27
Cleaning cycle B
Cleaning:
1. Move switch tap Xto position I.
2. Open agitator Z completely.
3. Start cleaning.
 Both ancillary agitators are flushed, tank
cleaning is switched on.
 When the fill level of the tank is 4%, clean-
ing is cancelled automatically.
 Flush the agitators with 10% of the flushing
water supply.
Empty tank:
4. Switch on spraying
Spread the diluted residues on the area
already treated while driving.
Switch sprayers on/off at least ten times
while in motion n.
 Keep spreading the diluted residues until
only air comes out of the nozzles.
5. Switch off spraying.
Repeat the cleaning cycle B.
Clean internally using the rest of the flushing
water supply and then discharge until only the
final residue remains.
6. Drain the final residue, see page 30.
7. Clean the suction filter and pressure filter,
see page 31, 31.
Cleaning the sprayer
28 HighFlow BAG0115.0 08.12
3.3.3 Cleaning the sprayer with the tank filled (work interruption)
1. Switch the intake side to flushing.
 Flushing water is sucked in, close agitators
You can also switch between spray-
ing/flushing using the key on the oper-
ating panel.
Machines without pressure circulation sys-
tem DUS:
2. Switch on spraying.
 The spray lines and nozzles are flushed
with flushing water.
3. Switch off spraying.
4. Switch off the pump drive.
5. Switch the intake side back to spray-
ing.
 Tank, agitators are not clean
 The spray liquid concentration in the
tank is unchanged.
Machines with pressure circulation system
DUS:
2. Wait until 2 litres of rinsing water have
rinsed through the lines per meter working
width.
3. Briefly switch spraying on to clean
the nozzles.
4. Switch off spraying.
5. Switch off the pump drive.
6. Switch the intake side back to spray-
ing.
 Tank, agitators are not clean!
 The spray liquid concentration in the
tank has changed.
Cleaning the sprayer
HighFlow BAG0115.0 08.12 29
3.3.4 Cleaning the suction filter when tank is filled
To clean the suction filter when the tank is full,
the filling menu must be called up.
1. Call up the filling menu.
2. Attach the sealing cap to the suction cou-
pling.
3. Pressure gauge switch tap in position
4. Switch to filling using the button on the in-
take side.
 The contents of the filter cup are sucked
out.
5. Unscrew the cover of the suction filter.
6. Activate the relief valve on the suction filter.
7. Remove the cover with suction filter and
clean using water.
8. Reassemble the suction filter in the reverse
sequence.
9. Check the filter cover for leaks.
10. Switch to spraying using the button on the
intake side.
11. Pressure gauge switch tap in position
Cleaning the sprayer
30 HighFlow BAG0115.0 08.12
3.4 Draining the final residues
 On the field: Spread the final residues over the field.
 In the courtyard:
 Place a suitable collecting container under the drain open-
ing of the suction chest and the drain hose for the pressure
filter and collect the final residues.
 Dispose of the collected spray liquid residue in accordance
with the corresponding legal guidelines.
 Collect the spray liquid residues in suitable containers.
1. Switch off the pump.
2. Manually move suction chest G to position
.
3. Move switch tap I to position .
4. Open switch tap Z.
5. Open stop tap K öffnen.
 Drain the technical residue.
6. Close switch tap K again
move switch tap I to position 0.
Close switch tap Z.
WARNING
Frost damage!
Over the winter period, drain the remaining residue from the sprayer
too.
Cleaning the sprayer
HighFlow BAG0115.0 08.12 31
3.5 Cleaning the suction filter when tank is empty
Clean the suction filter on a daily basis after cleaning the field sprayer.
1. Unscrew the cover of the suction filter (2).
2. Remove the cover with suction filter (3) and
clean with water.
3. Reassemble the suction filter in the reverse
sequence.
4. Check the filter housing for leaks.
3.6 Cleaning the pressure filter when the tank is empty
1. Undo the sleeve nuts.
2. Remove both pressure filters and clean with
water.
3. Refill the pressure filter.
4. Check the screw connection for leaks..
Cleaning the sprayer
32 HighFlow BAG0115.0 08.12
3.7 Cleaning the sprayer during a critical agent change
1. Clean the sprayer in three runs as always.
2. Fill up the flushing water tank.
3. Clean the sprayer, two runs.
4. If the sprayer has been previously filled via the pressure connec-
tor:
Clean the induction bowl using the spray pistol and extract the
content of the induction bowl.
5. Drain the final residue, see page 30.
6. By all means, clean the suction filter and pressure filter.
7. Clean the sprayer, one run.
8. Drain the final residue, see page 30.
HighFlow BAG0115.0 08.12 33
H. DREYER GmbH & Co. KG
Postfach 51
D-49202 Hasbergen-Gaste
Germany
Tel.: + 49 (0) 5405 501-0
Telefax: + 49 (0) 5405 501-234
e-mail: amazone@amazone.de
http:// www.amazone.de
Plants: D-27794 Hude  D-04249 Leipzig  F-57602 Forbach
Branches in England and France
Manufacturers of mineral fertiliser spreaders, field sprayers, seed drills, soil cultivation machines, mul-
tipurpose warehouses and communal units

More Related Content

Similar to Amazon fertiliser high flow

Takeuchi tb290 hydraulic excavator operator manual (serial no. 190200001 and up)
Takeuchi tb290 hydraulic excavator operator manual (serial no. 190200001 and up)Takeuchi tb290 hydraulic excavator operator manual (serial no. 190200001 and up)
Takeuchi tb290 hydraulic excavator operator manual (serial no. 190200001 and up)ufjjjsefkksmem
 
Takeuchi tb1140 series2 hydraulic excavator operator manual serial no. 514400...
Takeuchi tb1140 series2 hydraulic excavator operator manual serial no. 514400...Takeuchi tb1140 series2 hydraulic excavator operator manual serial no. 514400...
Takeuchi tb1140 series2 hydraulic excavator operator manual serial no. 514400...jfdjjskekksemm
 
Takeuchi tb1140 series2 hydraulic excavator operator manual serial no. 514400...
Takeuchi tb1140 series2 hydraulic excavator operator manual serial no. 514400...Takeuchi tb1140 series2 hydraulic excavator operator manual serial no. 514400...
Takeuchi tb1140 series2 hydraulic excavator operator manual serial no. 514400...dfujskeksmefm
 
Takeuchi tb1140 series2 hydraulic excavator operator manual serial no. 514400...
Takeuchi tb1140 series2 hydraulic excavator operator manual serial no. 514400...Takeuchi tb1140 series2 hydraulic excavator operator manual serial no. 514400...
Takeuchi tb1140 series2 hydraulic excavator operator manual serial no. 514400...jfdjjskekksemm
 
Takeuchi tb280 fr hydraulic excavator operator manual (serial no. 178500002 a...
Takeuchi tb280 fr hydraulic excavator operator manual (serial no. 178500002 a...Takeuchi tb280 fr hydraulic excavator operator manual (serial no. 178500002 a...
Takeuchi tb280 fr hydraulic excavator operator manual (serial no. 178500002 a...jfjedkmsmem
 
Takeuchi tb280 fr hydraulic excavator operator manual (serial no. 178500002 a...
Takeuchi tb280 fr hydraulic excavator operator manual (serial no. 178500002 a...Takeuchi tb280 fr hydraulic excavator operator manual (serial no. 178500002 a...
Takeuchi tb280 fr hydraulic excavator operator manual (serial no. 178500002 a...ufjjjsefkksmem
 
Takeuchi tl8 tl10 tl12 track loader operator manual
Takeuchi tl8 tl10 tl12 track loader operator manualTakeuchi tl8 tl10 tl12 track loader operator manual
Takeuchi tl8 tl10 tl12 track loader operator manualjfksekksmem
 
Takeuchi tl8 tl10 tl12 track loader operator manual
Takeuchi tl8 tl10 tl12 track loader operator manualTakeuchi tl8 tl10 tl12 track loader operator manual
Takeuchi tl8 tl10 tl12 track loader operator manualfjskemedcdmme
 
Takeuchi tl8 tl10 tl12 track loader operator manual
Takeuchi tl8 tl10 tl12 track loader operator manualTakeuchi tl8 tl10 tl12 track loader operator manual
Takeuchi tl8 tl10 tl12 track loader operator manualfujsjefjkskemm
 
Takeuchi tb285 hydraulic excavator operator manual (tb285 serial no. 185000...
Takeuchi tb285 hydraulic excavator operator manual (tb285   serial no. 185000...Takeuchi tb285 hydraulic excavator operator manual (tb285   serial no. 185000...
Takeuchi tb285 hydraulic excavator operator manual (tb285 serial no. 185000...jfjedkmsmem
 
Takeuchi tb290 hydraulic excavator operator manual (tb290 serial no. 190000...
Takeuchi tb290 hydraulic excavator operator manual (tb290   serial no. 190000...Takeuchi tb290 hydraulic excavator operator manual (tb290   serial no. 190000...
Takeuchi tb290 hydraulic excavator operator manual (tb290 serial no. 190000...jfjedkmsmem
 
Takeuchi tb290 hydraulic excavator operator manual (tb290 serial no. 190000...
Takeuchi tb290 hydraulic excavator operator manual (tb290   serial no. 190000...Takeuchi tb290 hydraulic excavator operator manual (tb290   serial no. 190000...
Takeuchi tb290 hydraulic excavator operator manual (tb290 serial no. 190000...ufjjjsefkksmem
 
Takeuchi tb285 hydraulic excavator operator manual (tb285 serial no. 185000...
Takeuchi tb285 hydraulic excavator operator manual (tb285   serial no. 185000...Takeuchi tb285 hydraulic excavator operator manual (tb285   serial no. 185000...
Takeuchi tb285 hydraulic excavator operator manual (tb285 serial no. 185000...ufjjjsefkksmem
 
Application manual of 3 d sublimation vacuum machine
Application manual of 3 d sublimation vacuum machineApplication manual of 3 d sublimation vacuum machine
Application manual of 3 d sublimation vacuum machineBestsub
 
Takeuchi tb219 mini excavator operator manual (serial no. 121900285 and up)
Takeuchi tb219 mini excavator operator manual (serial no. 121900285 and up)Takeuchi tb219 mini excavator operator manual (serial no. 121900285 and up)
Takeuchi tb219 mini excavator operator manual (serial no. 121900285 and up)dufjsfjkskekem
 
Takeuchi tb219 mini excavator operator manual (serial no. 121900285 and up)
Takeuchi tb219 mini excavator operator manual (serial no. 121900285 and up)Takeuchi tb219 mini excavator operator manual (serial no. 121900285 and up)
Takeuchi tb219 mini excavator operator manual (serial no. 121900285 and up)jfjskeksemm
 
Takeuchi tl230 track loader operator manual (serial no. 223100002 and up)
Takeuchi tl230 track loader operator manual (serial no. 223100002 and up)Takeuchi tl230 track loader operator manual (serial no. 223100002 and up)
Takeuchi tl230 track loader operator manual (serial no. 223100002 and up)jfjksekkmsemm
 
Takeuchi tb250 mini excavator operator manual serial no. 125000004 and up
Takeuchi tb250 mini excavator operator manual serial no. 125000004 and upTakeuchi tb250 mini excavator operator manual serial no. 125000004 and up
Takeuchi tb250 mini excavator operator manual serial no. 125000004 and upfjjsjefkskemme
 
Takeuchi tb250 mini excavator operator manual serial no. 125000004 and up
Takeuchi tb250 mini excavator operator manual serial no. 125000004 and upTakeuchi tb250 mini excavator operator manual serial no. 125000004 and up
Takeuchi tb250 mini excavator operator manual serial no. 125000004 and upfujsjefjskekmme
 

Similar to Amazon fertiliser high flow (20)

Takeuchi tb290 hydraulic excavator operator manual (serial no. 190200001 and up)
Takeuchi tb290 hydraulic excavator operator manual (serial no. 190200001 and up)Takeuchi tb290 hydraulic excavator operator manual (serial no. 190200001 and up)
Takeuchi tb290 hydraulic excavator operator manual (serial no. 190200001 and up)
 
Takeuchi tb1140 series2 hydraulic excavator operator manual serial no. 514400...
Takeuchi tb1140 series2 hydraulic excavator operator manual serial no. 514400...Takeuchi tb1140 series2 hydraulic excavator operator manual serial no. 514400...
Takeuchi tb1140 series2 hydraulic excavator operator manual serial no. 514400...
 
Takeuchi tb1140 series2 hydraulic excavator operator manual serial no. 514400...
Takeuchi tb1140 series2 hydraulic excavator operator manual serial no. 514400...Takeuchi tb1140 series2 hydraulic excavator operator manual serial no. 514400...
Takeuchi tb1140 series2 hydraulic excavator operator manual serial no. 514400...
 
Takeuchi tb280 fr hydraulic excavator operator manual (serial no. 178500002 a...
Takeuchi tb280 fr hydraulic excavator operator manual (serial no. 178500002 a...Takeuchi tb280 fr hydraulic excavator operator manual (serial no. 178500002 a...
Takeuchi tb280 fr hydraulic excavator operator manual (serial no. 178500002 a...
 
Takeuchi tb280 fr hydraulic excavator operator manual (serial no. 178500002 a...
Takeuchi tb280 fr hydraulic excavator operator manual (serial no. 178500002 a...Takeuchi tb280 fr hydraulic excavator operator manual (serial no. 178500002 a...
Takeuchi tb280 fr hydraulic excavator operator manual (serial no. 178500002 a...
 
Takeuchi tl8 tl10 tl12 track loader operator manual
Takeuchi tl8 tl10 tl12 track loader operator manualTakeuchi tl8 tl10 tl12 track loader operator manual
Takeuchi tl8 tl10 tl12 track loader operator manual
 
Takeuchi tl8 tl10 tl12 track loader operator manual
Takeuchi tl8 tl10 tl12 track loader operator manualTakeuchi tl8 tl10 tl12 track loader operator manual
Takeuchi tl8 tl10 tl12 track loader operator manual
 
Takeuchi tl8 tl10 tl12 track loader operator manual
Takeuchi tl8 tl10 tl12 track loader operator manualTakeuchi tl8 tl10 tl12 track loader operator manual
Takeuchi tl8 tl10 tl12 track loader operator manual
 
Takeuchi tb285 hydraulic excavator operator manual (tb285 serial no. 185000...
Takeuchi tb285 hydraulic excavator operator manual (tb285   serial no. 185000...Takeuchi tb285 hydraulic excavator operator manual (tb285   serial no. 185000...
Takeuchi tb285 hydraulic excavator operator manual (tb285 serial no. 185000...
 
Takeuchi tb290 hydraulic excavator operator manual (tb290 serial no. 190000...
Takeuchi tb290 hydraulic excavator operator manual (tb290   serial no. 190000...Takeuchi tb290 hydraulic excavator operator manual (tb290   serial no. 190000...
Takeuchi tb290 hydraulic excavator operator manual (tb290 serial no. 190000...
 
Takeuchi tb290 hydraulic excavator operator manual (tb290 serial no. 190000...
Takeuchi tb290 hydraulic excavator operator manual (tb290   serial no. 190000...Takeuchi tb290 hydraulic excavator operator manual (tb290   serial no. 190000...
Takeuchi tb290 hydraulic excavator operator manual (tb290 serial no. 190000...
 
Takeuchi tb285 hydraulic excavator operator manual (tb285 serial no. 185000...
Takeuchi tb285 hydraulic excavator operator manual (tb285   serial no. 185000...Takeuchi tb285 hydraulic excavator operator manual (tb285   serial no. 185000...
Takeuchi tb285 hydraulic excavator operator manual (tb285 serial no. 185000...
 
Application manual of 3 d sublimation vacuum machine
Application manual of 3 d sublimation vacuum machineApplication manual of 3 d sublimation vacuum machine
Application manual of 3 d sublimation vacuum machine
 
Takeuchi tb219 mini excavator operator manual (serial no. 121900285 and up)
Takeuchi tb219 mini excavator operator manual (serial no. 121900285 and up)Takeuchi tb219 mini excavator operator manual (serial no. 121900285 and up)
Takeuchi tb219 mini excavator operator manual (serial no. 121900285 and up)
 
Takeuchi tb219 mini excavator operator manual (serial no. 121900285 and up)
Takeuchi tb219 mini excavator operator manual (serial no. 121900285 and up)Takeuchi tb219 mini excavator operator manual (serial no. 121900285 and up)
Takeuchi tb219 mini excavator operator manual (serial no. 121900285 and up)
 
Takeuchi tl230 track loader operator manual (serial no. 223100002 and up)
Takeuchi tl230 track loader operator manual (serial no. 223100002 and up)Takeuchi tl230 track loader operator manual (serial no. 223100002 and up)
Takeuchi tl230 track loader operator manual (serial no. 223100002 and up)
 
Takeuchi tb250 mini excavator operator manual serial no. 125000004 and up
Takeuchi tb250 mini excavator operator manual serial no. 125000004 and upTakeuchi tb250 mini excavator operator manual serial no. 125000004 and up
Takeuchi tb250 mini excavator operator manual serial no. 125000004 and up
 
Takeuchi tb250 mini excavator operator manual serial no. 125000004 and up
Takeuchi tb250 mini excavator operator manual serial no. 125000004 and upTakeuchi tb250 mini excavator operator manual serial no. 125000004 and up
Takeuchi tb250 mini excavator operator manual serial no. 125000004 and up
 

Recently uploaded

一比一原版(Temple毕业证书)美国天普大学毕业证成绩单原件一模一样
一比一原版(Temple毕业证书)美国天普大学毕业证成绩单原件一模一样一比一原版(Temple毕业证书)美国天普大学毕业证成绩单原件一模一样
一比一原版(Temple毕业证书)美国天普大学毕业证成绩单原件一模一样fsdfdsgf
 
出售伯明翰大学毕业证研究生文凭证书原版质量
出售伯明翰大学毕业证研究生文凭证书原版质量出售伯明翰大学毕业证研究生文凭证书原版质量
出售伯明翰大学毕业证研究生文凭证书原版质量kthcah
 
Microscope of ppt for botany major this is a project
Microscope of ppt for botany major this is a projectMicroscope of ppt for botany major this is a project
Microscope of ppt for botany major this is a projectarpitakhairwar123
 
Access to Rural Charging by David Skakel
Access to Rural Charging by David SkakelAccess to Rural Charging by David Skakel
Access to Rural Charging by David SkakelForth
 
一比一原版北雷克斯学院毕业证成绩单原件一模一样
一比一原版北雷克斯学院毕业证成绩单原件一模一样一比一原版北雷克斯学院毕业证成绩单原件一模一样
一比一原版北雷克斯学院毕业证成绩单原件一模一样CC
 
mechanical vibrations pebbles.pptbbbbbbbbx
mechanical vibrations pebbles.pptbbbbbbbbxmechanical vibrations pebbles.pptbbbbbbbbx
mechanical vibrations pebbles.pptbbbbbbbbxjoshuaclack73
 
5 Signs Your VW Key Fob Battery Needs Replacement
5 Signs Your VW Key Fob Battery Needs Replacement5 Signs Your VW Key Fob Battery Needs Replacement
5 Signs Your VW Key Fob Battery Needs ReplacementSanta Barbara Autowerks
 
Preparing for Transportation Electrification: The Electric Coop Perspective
Preparing for Transportation Electrification: The Electric Coop PerspectivePreparing for Transportation Electrification: The Electric Coop Perspective
Preparing for Transportation Electrification: The Electric Coop PerspectiveForth
 
原版定做(ncl学位证书)英国纽卡斯尔大学毕业证文凭学历证书-国外学历学位认证
原版定做(ncl学位证书)英国纽卡斯尔大学毕业证文凭学历证书-国外学历学位认证原版定做(ncl学位证书)英国纽卡斯尔大学毕业证文凭学历证书-国外学历学位认证
原版定做(ncl学位证书)英国纽卡斯尔大学毕业证文凭学历证书-国外学历学位认证eehzz
 
一比一原版(CCA毕业证书)加利福尼亚艺术学院毕业证成绩单原件一模一样
一比一原版(CCA毕业证书)加利福尼亚艺术学院毕业证成绩单原件一模一样一比一原版(CCA毕业证书)加利福尼亚艺术学院毕业证成绩单原件一模一样
一比一原版(CCA毕业证书)加利福尼亚艺术学院毕业证成绩单原件一模一样zovambe
 
一比一原版英国哈珀亚当斯大学毕业证如何办理
一比一原版英国哈珀亚当斯大学毕业证如何办理一比一原版英国哈珀亚当斯大学毕业证如何办理
一比一原版英国哈珀亚当斯大学毕业证如何办理AS
 
Benefits of Load Planning in Fleet Management
Benefits of Load Planning in Fleet ManagementBenefits of Load Planning in Fleet Management
Benefits of Load Planning in Fleet Managementjennifermiller8137
 
What Might Be Behind Your Mercedes' Inoperative Cruise Control
What Might Be Behind Your Mercedes' Inoperative Cruise ControlWhat Might Be Behind Your Mercedes' Inoperative Cruise Control
What Might Be Behind Your Mercedes' Inoperative Cruise ControlM Service Inc
 
一比一原版(McMaste毕业证书)加拿大麦克马斯特大学毕业证成绩单原件一模一样
一比一原版(McMaste毕业证书)加拿大麦克马斯特大学毕业证成绩单原件一模一样一比一原版(McMaste毕业证书)加拿大麦克马斯特大学毕业证成绩单原件一模一样
一比一原版(McMaste毕业证书)加拿大麦克马斯特大学毕业证成绩单原件一模一样AD
 
EV Charging Resources and Technical Assistance for Rural Communities and Trib...
EV Charging Resources and Technical Assistance for Rural Communities and Trib...EV Charging Resources and Technical Assistance for Rural Communities and Trib...
EV Charging Resources and Technical Assistance for Rural Communities and Trib...Forth
 
Auto Glass Repair in Redwood City What to Do When Disaster Strikes.pdf
Auto Glass Repair in Redwood City What to Do When Disaster Strikes.pdfAuto Glass Repair in Redwood City What to Do When Disaster Strikes.pdf
Auto Glass Repair in Redwood City What to Do When Disaster Strikes.pdfDuran's Auto Glass
 
What Could Cause Your Audi To Keep Cutting Out
What Could Cause Your Audi To Keep Cutting OutWhat Could Cause Your Audi To Keep Cutting Out
What Could Cause Your Audi To Keep Cutting OutEuroautomotive
 
Toyota Yaris service manual Free.pdf Toyota Yaris Service manual
Toyota Yaris service manual Free.pdf  Toyota Yaris Service manualToyota Yaris service manual Free.pdf  Toyota Yaris Service manual
Toyota Yaris service manual Free.pdf Toyota Yaris Service manualAutocarmanuals.com
 
如何办理澳洲南澳大学毕业证(UniSA毕业证书)成绩单本科学位证原版一比一
如何办理澳洲南澳大学毕业证(UniSA毕业证书)成绩单本科学位证原版一比一如何办理澳洲南澳大学毕业证(UniSA毕业证书)成绩单本科学位证原版一比一
如何办理澳洲南澳大学毕业证(UniSA毕业证书)成绩单本科学位证原版一比一0uyfyq0q4
 
一比一原版(Cumbria毕业证书)英国坎布里亚大学毕业证成绩单学位证书
一比一原版(Cumbria毕业证书)英国坎布里亚大学毕业证成绩单学位证书一比一原版(Cumbria毕业证书)英国坎布里亚大学毕业证成绩单学位证书
一比一原版(Cumbria毕业证书)英国坎布里亚大学毕业证成绩单学位证书AD
 

Recently uploaded (20)

一比一原版(Temple毕业证书)美国天普大学毕业证成绩单原件一模一样
一比一原版(Temple毕业证书)美国天普大学毕业证成绩单原件一模一样一比一原版(Temple毕业证书)美国天普大学毕业证成绩单原件一模一样
一比一原版(Temple毕业证书)美国天普大学毕业证成绩单原件一模一样
 
出售伯明翰大学毕业证研究生文凭证书原版质量
出售伯明翰大学毕业证研究生文凭证书原版质量出售伯明翰大学毕业证研究生文凭证书原版质量
出售伯明翰大学毕业证研究生文凭证书原版质量
 
Microscope of ppt for botany major this is a project
Microscope of ppt for botany major this is a projectMicroscope of ppt for botany major this is a project
Microscope of ppt for botany major this is a project
 
Access to Rural Charging by David Skakel
Access to Rural Charging by David SkakelAccess to Rural Charging by David Skakel
Access to Rural Charging by David Skakel
 
一比一原版北雷克斯学院毕业证成绩单原件一模一样
一比一原版北雷克斯学院毕业证成绩单原件一模一样一比一原版北雷克斯学院毕业证成绩单原件一模一样
一比一原版北雷克斯学院毕业证成绩单原件一模一样
 
mechanical vibrations pebbles.pptbbbbbbbbx
mechanical vibrations pebbles.pptbbbbbbbbxmechanical vibrations pebbles.pptbbbbbbbbx
mechanical vibrations pebbles.pptbbbbbbbbx
 
5 Signs Your VW Key Fob Battery Needs Replacement
5 Signs Your VW Key Fob Battery Needs Replacement5 Signs Your VW Key Fob Battery Needs Replacement
5 Signs Your VW Key Fob Battery Needs Replacement
 
Preparing for Transportation Electrification: The Electric Coop Perspective
Preparing for Transportation Electrification: The Electric Coop PerspectivePreparing for Transportation Electrification: The Electric Coop Perspective
Preparing for Transportation Electrification: The Electric Coop Perspective
 
原版定做(ncl学位证书)英国纽卡斯尔大学毕业证文凭学历证书-国外学历学位认证
原版定做(ncl学位证书)英国纽卡斯尔大学毕业证文凭学历证书-国外学历学位认证原版定做(ncl学位证书)英国纽卡斯尔大学毕业证文凭学历证书-国外学历学位认证
原版定做(ncl学位证书)英国纽卡斯尔大学毕业证文凭学历证书-国外学历学位认证
 
一比一原版(CCA毕业证书)加利福尼亚艺术学院毕业证成绩单原件一模一样
一比一原版(CCA毕业证书)加利福尼亚艺术学院毕业证成绩单原件一模一样一比一原版(CCA毕业证书)加利福尼亚艺术学院毕业证成绩单原件一模一样
一比一原版(CCA毕业证书)加利福尼亚艺术学院毕业证成绩单原件一模一样
 
一比一原版英国哈珀亚当斯大学毕业证如何办理
一比一原版英国哈珀亚当斯大学毕业证如何办理一比一原版英国哈珀亚当斯大学毕业证如何办理
一比一原版英国哈珀亚当斯大学毕业证如何办理
 
Benefits of Load Planning in Fleet Management
Benefits of Load Planning in Fleet ManagementBenefits of Load Planning in Fleet Management
Benefits of Load Planning in Fleet Management
 
What Might Be Behind Your Mercedes' Inoperative Cruise Control
What Might Be Behind Your Mercedes' Inoperative Cruise ControlWhat Might Be Behind Your Mercedes' Inoperative Cruise Control
What Might Be Behind Your Mercedes' Inoperative Cruise Control
 
一比一原版(McMaste毕业证书)加拿大麦克马斯特大学毕业证成绩单原件一模一样
一比一原版(McMaste毕业证书)加拿大麦克马斯特大学毕业证成绩单原件一模一样一比一原版(McMaste毕业证书)加拿大麦克马斯特大学毕业证成绩单原件一模一样
一比一原版(McMaste毕业证书)加拿大麦克马斯特大学毕业证成绩单原件一模一样
 
EV Charging Resources and Technical Assistance for Rural Communities and Trib...
EV Charging Resources and Technical Assistance for Rural Communities and Trib...EV Charging Resources and Technical Assistance for Rural Communities and Trib...
EV Charging Resources and Technical Assistance for Rural Communities and Trib...
 
Auto Glass Repair in Redwood City What to Do When Disaster Strikes.pdf
Auto Glass Repair in Redwood City What to Do When Disaster Strikes.pdfAuto Glass Repair in Redwood City What to Do When Disaster Strikes.pdf
Auto Glass Repair in Redwood City What to Do When Disaster Strikes.pdf
 
What Could Cause Your Audi To Keep Cutting Out
What Could Cause Your Audi To Keep Cutting OutWhat Could Cause Your Audi To Keep Cutting Out
What Could Cause Your Audi To Keep Cutting Out
 
Toyota Yaris service manual Free.pdf Toyota Yaris Service manual
Toyota Yaris service manual Free.pdf  Toyota Yaris Service manualToyota Yaris service manual Free.pdf  Toyota Yaris Service manual
Toyota Yaris service manual Free.pdf Toyota Yaris Service manual
 
如何办理澳洲南澳大学毕业证(UniSA毕业证书)成绩单本科学位证原版一比一
如何办理澳洲南澳大学毕业证(UniSA毕业证书)成绩单本科学位证原版一比一如何办理澳洲南澳大学毕业证(UniSA毕业证书)成绩单本科学位证原版一比一
如何办理澳洲南澳大学毕业证(UniSA毕业证书)成绩单本科学位证原版一比一
 
一比一原版(Cumbria毕业证书)英国坎布里亚大学毕业证成绩单学位证书
一比一原版(Cumbria毕业证书)英国坎布里亚大学毕业证成绩单学位证书一比一原版(Cumbria毕业证书)英国坎布里亚大学毕业证成绩单学位证书
一比一原版(Cumbria毕业证书)英国坎布里亚大学毕业证成绩单学位证书
 

Amazon fertiliser high flow

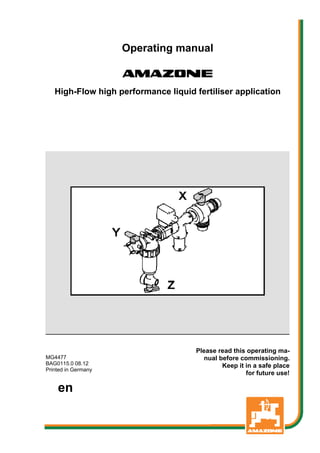
  • 1. Operating manual az High-Flow high performance liquid fertiliser application MG4477 BAG0115.0 08.12 Printed in Germany Please read this operating ma- nual before commissioning. Keep it in a safe place for future use! en
  • 2. 2 HighFlow BAG0115.0 08.12 Reading the instruction Manual and following it should seem to be in- convenient and superfluous as it is not enough to hear from others and to realize that a machine is good, to buy it and to believe that now everything should work by itself. The person in question would not only harm himself but also make the mistake of blaming the machine for pos- sible failures instead of himself. In order to en- sure success one should enter the mind of a thing, make himself familiar with every part of the ma- chine and get acquainted with how it's handled. Only in this way could you be satisfied both with the machine and with yourself. This goal is the purpose of this instruction manual. Leipzig-Plagwitz 1872.
  • 3. Identification data HighFlow BAG0115.0 08.12 3 Identification data Enter the machine identification data here. You will find the identifica- tion data on the type plate. Machine identification number: (ten-digit) Type: HighFlow Permissible system pressure (bar) Maximum 200 bar Year of manufacture: Factory: Basic weight (kg): Permissible total weight (kg): Maximum load (kg): Manufacturer's address AMAZONEN-WERKE H. DREYER GmbH & Co. KG Postfach 51 D-49202 Tel.: Fax: E-mail: Hasbergen, Germany + 49 (0)5405 501-0 + 49 (0)5405 501-234 amazone@amazone.de Spare part orders Spare parts lists are freely accessible in the spare parts portal at www.amazone.de. Please send orders to your AMAZONE dealer. Formalities of the operating manual Document number: MG4477 Compilation date: 08.12  Copyright AMAZONEN-WERKE H. DREYER GmbH & Co. KG, 2012 All rights reserved. Reprinting, even of extracts, is only possible with the approval of AMAZONEN-WERKE H. DREYER GmbH & Co. KG.
  • 4. Foreword 4 HighFlow BAG0115.0 08.12 Foreword Dear Customer, You have chosen one of the quality products from the wide product range of AMAZONEN-WERKE, H. DREYER GmbH & Co. KG. We thank you for your confidence in our products. On receiving the machine, check to see if it has been damaged during transport or if parts are missing. Using the delivery note, check that the machine has been delivered in full, including any special equip- ment ordered. Damage can only be rectified if problems are signalled immediately. Before commissioning, read and understand this operating manual, and particularly the safety information. Only after careful reading will you be able to benefit from the full scope of your newly purchased machine. Please ensure that all the machine operators have read this operating manual before the machine is commissioned. Should you have problems or queries, please consult this operating manual or give us a call. Regular maintenance and timely replacement of worn or damaged parts increases the lifespan of your machine. User evaluation Dear Reader, We update our operating manuals regularly. Your suggestions for improvement help us to create ever more user-friendly manuals. Send us your suggestions by fax. AMAZONEN-WERKE H. DREYER GmbH & Co. KG Postfach 51 D-49202 Tel.: Fax: E-mail: Hasbergen, Germany + 49 (0)5405 501-0 + 49 (0)5405 501-234 amazone@amazone.de
  • 5. Table of Contents HighFlow BAG0115.0 08.12 5 1 Structure and function ................................................................................6 1.1 Function ...................................................................................................................................6 1.2 Structure HighFlow Pantera.....................................................................................................6 1.3 Structure HighFlow UX ............................................................................................................7 1.4 Switch tap HighFlow ................................................................................................................8 1.5 Control box with switch ............................................................................................................8 1.6 Liquid circuit .............................................................................................................................9 2 Operation HighFlow...................................................................................11 3 Cleaning the sprayer .................................................................................13 3.1 Cleaning UX...........................................................................................................................14 3.1.1 Cleaning the sprayer with the tank empty..............................................................................14 3.1.2 Cleaning the sprayer with a full tank (work interruption)........................................................16 3.1.3 Cleaning the suction filter when tank is full............................................................................17 3.1.4 Cleaning the pressure filter when the tank is full ...................................................................18 3.2 UX with comfort equipment / clean Pantera (AMATRON).....................................................19 3.2.1 Dilute the spray liquid with rinsing water................................................................................20 3.2.2 Cleaning the sprayer with the tank empty..............................................................................20 3.2.3 Cleaning the sprayer with the tank filled (work interruption)..................................................22 3.2.4 Cleaning the suction filter when tank is filled.........................................................................23 3.3 UX with comfort equipment / clean Pantera (ISOBUS) .........................................................24 3.3.1 Dilute the spray liquid with rinsing water................................................................................25 3.3.2 Cleaning the sprayer with the tank empty..............................................................................26 3.3.3 Cleaning the sprayer with the tank filled (work interruption)..................................................28 3.3.4 Cleaning the suction filter when tank is filled.........................................................................29 3.4 Draining the final residues .....................................................................................................30 3.5 Cleaning the suction filter when tank is empty.......................................................................31 3.6 Cleaning the pressure filter when the tank is empty..............................................................31 3.7 Cleaning the sprayer during a critical agent change .............................................................32
  • 6. Structure and function 6 HighFlow BAG0115.0 08.12 1 Structure and function 1.1 Function  Spray rate can be increased (optional) for applying liquid fertil- iser. The maximum spray rate can be increased to up to 400 l/min.  The agitator pump is used here to increase the spray rate, and is not (or only partly) used as a drive for the agitator.  The high-performance liquid fertilisation is switched on and off via the operating terminal and the HighFlow switch tap. 1.2 Structure HighFlow Pantera X High-Flow spray line switch tap Y Switch tap for non-return lock Z Switch tap for agitator / draining residue 1. Spraying pump 2. Agitator pump 3. Pressure relief valve 4. Control valve for agitator pump spray rate 5. Additional pressure filter 6. Drain hose 7. Control box
  • 7. Structure and function HighFlow BAG0115.0 08.12 7 1.3 Structure HighFlow UX X. High-Flow spray line switch tap Y. Switch tap for agitator / draining residue Z. Switch tap for non-return lock 1. Spraying pump 2. Agitator pump 3. Pressure relief valve 4. Control valve for agitator pump spray rate 5. Additional pressure filter 6. Drain hose 7. Control box
  • 8. Structure and function 8 HighFlow BAG0115.0 08.12 1.4 Switch tap HighFlow Switch tap HighFlow X  Position I: HighFlow - spray line ON  Position 0: HighFlow - spray line OFF (main agitator ON) Switch tap for non-return lock Y  Position I: HighFlow - spray line open (for HighFlow - mode)  Position 0: HighFlow- spray line closed Agitator switch tap Z  max: additional agitators, one at most.  0: additional agitator completely off, maxi- mum spray rate. The switch tap divides the flow rate into agitator and HighFlow. It can be set anywhere between positions A and B.  Position A: Drain HighFlow - equipment. 1.5 Control box with switch  Position A: HighFlow ON  Position B: HighFlow OFF
  • 9. Structure and function HighFlow BAG0115.0 08.12 9 1.6 Liquid circuit HighFlow:
  • 10. Structure and function 10 HighFlow BAG0115.0 08.12 HighFlow with comfort equipment: (X) High-Flow spray line switch tap (Y) Switch tap for non-return lock (Z) Switch tap for agitator / draining residue (1) Pressure relief valve (2) Control valve for agitator pump spray rate (3) Pressure filter HighFlow (4) Additional agitator HighFlow (5) Flow meter 3 (6) Control box
  • 11. Operation HighFlow HighFlow BAG0115.0 08.12 11 2 Operation HighFlow Proceed as follows to switch on the HighFlow and thereby increase the maximum spray rate: 1. Operating terminal: machine data menu:  HighFlow: on / . AMA- TRON ISOBUS 2. Switch on the dashboard to position A. 3. High-Flow switch tap X to position I. 4. Open return stop switch tap Y, position I. 5. Set agitator switch tap Z between 0 and maximum.
  • 12. Operation HighFlow 12 HighFlow BAG0115.0 08.12 6. If necessary, select the spray line switch tap of both spray lines.. (1) One setting tap for each partial width: a Spraying via both spray lines using trailing hoses b Spraying using standard spray lines c Spraying only via the 2nd spray line Comfort equipment: automatic agitator control is not possible in High- Flow mode. For normal spraying operation: 1. Operating terminal: HighFlow off. 2. Switch on the dashboard to position B. 3. Close return stop switch tap Y, position B 4. Switch tap HighFlow X to position B. The operating terminal indicates the incorrect spray rate with the HighFlow when:  the HighFlow is switched on / off incorrectly on the operating ter- minal.  the switch on the dashboard is incorrectly on position A / B.
  • 13. Cleaning the sprayer HighFlow BAG0115.0 08.12 13 3 Cleaning the sprayer WARNING Crop damage caused by spray liquid left in the lines after chang- ing the preparation. After using the machine, with or without HighFlow, the HighFlow fluid path as well as the main agitator fluid path have to be cleaned.  Clean the spray liquid tank on a daily basis!  The flushing water tank must be filled completely.  The cleaning process should be carried out in a threefold reduc- tion procedure.
  • 14. Cleaning the sprayer 14 HighFlow BAG0115.0 08.12 3.1 Cleaning UX 3.1.1 Cleaning the sprayer with the tank empty Cleaning cycle A 1. Activate the pump, adjust pump speed to 450 rpm. 2. Manually move suction chest G to position . 3. Move the pressure gauge switch tap A to position . 4. Move switch tap X to position 0. 5. Open the agitator I completely.  Flush the agitator with 10% of the flushing water supply. 6. Switch off agitator I. DUS: Spray lines are flushed auto- matically. Use 10 % of the flushing water supply for this purpose. 7. Move the pressure gauge switch tap A to position . 8. Open switch tap B.  Carry out the internal cleaning with 10% of the flushing water supply. 9. Close switch tap B. 10. Manually move suction chest G to position . 11. Move the pressure gauge switch tap A to position . 12. Spread the diluted residues on the area already treated while driving. 13. Switch the sprayer off and back on again several times for a few seconds via the on- board computer. The valves and the return lines are flushed by this switching on and off.  Keep spreading the diluted residues until only air comes out of the nozzles.
  • 15. Cleaning the sprayer HighFlow BAG0115.0 08.12 15 Cleaning cycle B 14. Manually move suction chest G to position . 15. Move switch tap X to position I. 16. Open the agitator I and Z completely.  Flush the agitator with 10% of the flushing water supply 17. Switch off agitator I and Z. DUS: Spray lines are flushed auto- matically. Use 10 % of the flushing water supply for this purpose. 18. Move the pressure gauge switch tap A to position . 19. Open switch tap B.  Carry out the internal cleaning with 10% of the flushing water supply. 20. Close switch tap B. 21. Manually move suction chest G to position . 22. Move the pressure gauge switch tap A to position . 23. Spread the diluted residues on the area already treated while driving. 24. Switch the sprayer off and back on again several times for a few seconds via the on- board computer. The valves and the return lines are flushed by this switching on and off.  Keep spreading the diluted residues until only air comes out of the nozzles. Repeat the cleaning cycle B. Clean internally using the rest of the flushing water supply and then discharge until only the final residue remains. 25. Drain the final residue, see page 30. 26. Clean the suction filter and pressure filter, see page 31, 31.
  • 16. Cleaning the sprayer 16 HighFlow BAG0115.0 08.12 3.1.2 Cleaning the sprayer with a full tank (work interruption) If spraying operations must be interrupted because of bad weather, by all means clean the suction chest (suction filter, pumps, pressure controller) and the spray line. 1. Interrupt pump operation. 2. Switch off agitator (e) Z, I. 3. Manually move suction chest G to position . 4. Activate the pump, adjust pump speed to 450 rpm. Without nozzle control: 5. Spread at least 50 litres of flushing water over an untreated area while driving.  The sprayer is cleaned with flushing water.  Tank, agitators are not clean  The spray liquid concentration in the tank is unchanged. With nozzle control:  The sprayer is cleaned with flushing water. This is done using two litres of flushing wa- ter per metre of working width (observe the filling level). 6. Switch on the sprayers for a short period.  The nozzles are flushed. 7. Switch the pump off immediately because the agent concentration drops.  Tank, agitators are not clean  The spray liquid concentration in the tank has changed. Continuing the spraying operation Before continuing with the spraying operation, activate the pump for five minutes at 540 min-1 and switch on the agitators completely.
  • 17. Cleaning the sprayer HighFlow BAG0115.0 08.12 17 3.1.3 Cleaning the suction filter when tank is full 1. Activate the pump, adjust pump speed to 300 rpm. 2. Manually move suction chest G to position . Attention: The Cam Lock Coupling must be mounted on the suction port. 3. Move the pressure gauge switch tap A to position . 4. Open switch tap L. 5. Open agitator H completely. 6. Unscrew the cover of the suction filter (2). 7. Activate the relief valve on the suction filter (1). 8. Remove the cover (3) with suction filter and clean with water. 9. Reassemble the suction filter in the reverse sequence. 10. Check the filter cover for leaks.
  • 18. Cleaning the sprayer 18 HighFlow BAG0115.0 08.12 3.1.4 Cleaning the pressure filter when the tank is full 1. Manually move suction chest G to position . 2. Close switch tap Y. 3. Move switch tap I to position . 4. Move switch tap Z to position A.  Drain the residue into the pressure filter. 5. Undo the sleeve nuts. 6. Remove the pressure filter and clean with water. 7. Refill the pressure filter. 8. Check the screw connection for leaks. 9. Move switch tap I to position 0. 10. Switch tap Z between 0 and maximum. 11. Open switch tap Y again.
  • 19. Cleaning the sprayer HighFlow BAG0115.0 08.12 19 3.2 UX with comfort equipment / clean Pantera (AMATRON) Calling up the Comfort package menu Switch between spraying/flushing Dilute the spray liquid Switch cleaning on/off Agitator automatic/manual Increase agitator intensity Decrease agitator intensity The Comfort package enables the intake side to be switched using  the AMATRON+ ,  the button on the control terminal (1). Remote-controllable settings:  Spraying (position A)  Flushing/diluting (position B)  Filling via suction coupling (position C, in filling menu only)
  • 20. Cleaning the sprayer 20 HighFlow BAG0115.0 08.12 3.2.1 Dilute the spray liquid with rinsing water 1. Start dilution.  Flushing water is fed to the tank via the auxiliary agitator. 2. Observe the fill level of the tank. 3. End dilution. For a machine with a pressure circula- tion system (DUS), the spray line is flushed. When spraying is restarted, two to five minutes pass before con- centrated spray liquid can be sprayed. 3.2.2 Cleaning the sprayer with the tank empty Cleaning cycle A Cleaning: Prerequisite: Fill level of the tank < 1% (tank empty if possible). 1. Move switch tap X to position 0. 2. Run the pump with 450 rpm. 3. Start cleaning.  Main and auxiliary agitator are flushed, tank inside cleaning switched on.  When the fill level of the tank is 4%, clean- ing is cancelled automatically. For machines equipped with a pres- sure circulation system (DUS), the spray line is also cleaned automati- cally. Empty tank: 4. Switch on spraying. Spread the diluted residues on the area already treated while driving. Switch sprayers on/off at least ten times while in motion.  Keep spreading the diluted residues until only air comes out of the nozzles. 5. Switch off spraying.
  • 21. Cleaning the sprayer HighFlow BAG0115.0 08.12 21 Cleaning cycle B Cleaning: 1. Move switch tap X to position I. 2. Open agitator Z completely. 3. Reinigung starten.  Both ancillary agitators are flushed, tank cleaning is switched on.  When the fill level of the tank is 4%, clean- ing is cancelled automatically.  Flush the agitators with 10% of the flushing water supply. Empty tank: 4. Switch on spraying. Spread the diluted residues on the area already treated while driving. Switch sprayers on/off at least ten times while in motion.  Keep spreading the diluted residues until only air comes out of the nozzles. 5. Switch off spraying. Repeat the cleaning cycle B. Clean internally using the rest of the flushing water supply and then discharge until only the final residue remains. 6. Drain the final residue, see page 30. 7. Clean the suction filter and pressure filter, see page 31, 31.
  • 22. Cleaning the sprayer 22 HighFlow BAG0115.0 08.12 3.2.3 Cleaning the sprayer with the tank filled (work interruption) 1. Switch the intake side to flushing.  Flushing water is sucked in, close agitators. You can also switch between spray- ing/flushing using the key on the oper- ating panel. Machines without pressure circulation sys- tem DUS: 2. Switch on spraying. The spray lines and nozzles are flushed with flushing water. 3. Switch off spraying. 4. Switch off the pump drive. 5. Switch the intake side back to spray- ing.  Tank, agitators are not clean  The spray liquid concentration in the tank is unchanged. Machines with pressure circulation system DUS: 2. Wait until 2 litres of rinsing water have rinsed through the lines per meter working width. 3. Briefly switch spraying on to clean the nozzles. 4. Switch off spraying. 5. Switch off the pump drive. 6. Switch the intake side back to spray- ing.  Tank, agitators are not clean!  The spray liquid concentration in the tank has changed.
  • 23. Cleaning the sprayer HighFlow BAG0115.0 08.12 23 3.2.4 Cleaning the suction filter when tank is filled To clean the suction filter when the tank is full, the filling menu must be called up. 1. Call up the filling menu. 2. Attach the sealing cap to the suction cou- pling. 3. Pressure gauge switch tap in position 4. Switch to filling using the button on the in- take side.  The contents of the filter cup are sucked out. 5. Unscrew the cover of the suction filter. 6. Activate the relief valve on the suction filter. 7. Remove the cover with suction filter and clean using water. 8. Reassemble the suction filter in the reverse sequence. 9. Check the filter cover for leaks. 10. Switch to spraying using the button on the intake side. 11. Pressure gauge switch tap in position
  • 24. Cleaning the sprayer 24 HighFlow BAG0115.0 08.12 3.3 UX with comfort equipment / clean Pantera (ISOBUS) Calling up the Comfort package menu! Switch between spraying/flushing Dilute the spray liquid Switch cleaning on/off Agitator automatic/manual Increase agitator intensity Decrease agitator intensity The Comfort package enables the intake side to be switched using:  The operating terminal,  The button on the control terminal (1). Remote-controllable settings:  Spraying (position A)  Flushing/diluting (position B)  Filling via suction coupling (position C, in filling menu only)
  • 25. Cleaning the sprayer HighFlow BAG0115.0 08.12 25 3.3.1 Dilute the spray liquid with rinsing water 1. Start dilution.  Flushing water is fed to the tank via the auxiliary agitator. 2. Observe the fill level of the tank. 3. End dilution. For a machine with a pressure circula- tion system (DUS), the spray line is flushed. When spraying is restarted, two to five minutes pass before con- centrated spray liquid can be sprayed.
  • 26. Cleaning the sprayer 26 HighFlow BAG0115.0 08.12 3.3.2 Cleaning the sprayer with the tank empty Cleaning cycle A Cleaning: Prerequisite: Fill level of the tank < 1% (tank empty if possible). 1. Move switch tap Xto position 0. 2. Run the pump with 450 rpm. 3. Start cleaning.  Main and auxiliary agitator are flushed, tank inside cleaning switched on.  When the fill level of the tank is 4%, clean- ing is cancelled automatically. For machines equipped with a pres- sure circulation system (DUS), the spray line is also cleaned automati- cally. Empty tank: 4. Switch on spraying. Spread the diluted residues on the area already treated while driving. Switch sprayers on/off at least ten times while in motion.  Keep spreading the diluted residues until only air comes out of the nozzles. 5. Switch off spraying.
  • 27. Cleaning the sprayer HighFlow BAG0115.0 08.12 27 Cleaning cycle B Cleaning: 1. Move switch tap Xto position I. 2. Open agitator Z completely. 3. Start cleaning.  Both ancillary agitators are flushed, tank cleaning is switched on.  When the fill level of the tank is 4%, clean- ing is cancelled automatically.  Flush the agitators with 10% of the flushing water supply. Empty tank: 4. Switch on spraying Spread the diluted residues on the area already treated while driving. Switch sprayers on/off at least ten times while in motion n.  Keep spreading the diluted residues until only air comes out of the nozzles. 5. Switch off spraying. Repeat the cleaning cycle B. Clean internally using the rest of the flushing water supply and then discharge until only the final residue remains. 6. Drain the final residue, see page 30. 7. Clean the suction filter and pressure filter, see page 31, 31.
  • 28. Cleaning the sprayer 28 HighFlow BAG0115.0 08.12 3.3.3 Cleaning the sprayer with the tank filled (work interruption) 1. Switch the intake side to flushing.  Flushing water is sucked in, close agitators You can also switch between spray- ing/flushing using the key on the oper- ating panel. Machines without pressure circulation sys- tem DUS: 2. Switch on spraying.  The spray lines and nozzles are flushed with flushing water. 3. Switch off spraying. 4. Switch off the pump drive. 5. Switch the intake side back to spray- ing.  Tank, agitators are not clean  The spray liquid concentration in the tank is unchanged. Machines with pressure circulation system DUS: 2. Wait until 2 litres of rinsing water have rinsed through the lines per meter working width. 3. Briefly switch spraying on to clean the nozzles. 4. Switch off spraying. 5. Switch off the pump drive. 6. Switch the intake side back to spray- ing.  Tank, agitators are not clean!  The spray liquid concentration in the tank has changed.
  • 29. Cleaning the sprayer HighFlow BAG0115.0 08.12 29 3.3.4 Cleaning the suction filter when tank is filled To clean the suction filter when the tank is full, the filling menu must be called up. 1. Call up the filling menu. 2. Attach the sealing cap to the suction cou- pling. 3. Pressure gauge switch tap in position 4. Switch to filling using the button on the in- take side.  The contents of the filter cup are sucked out. 5. Unscrew the cover of the suction filter. 6. Activate the relief valve on the suction filter. 7. Remove the cover with suction filter and clean using water. 8. Reassemble the suction filter in the reverse sequence. 9. Check the filter cover for leaks. 10. Switch to spraying using the button on the intake side. 11. Pressure gauge switch tap in position
  • 30. Cleaning the sprayer 30 HighFlow BAG0115.0 08.12 3.4 Draining the final residues  On the field: Spread the final residues over the field.  In the courtyard:  Place a suitable collecting container under the drain open- ing of the suction chest and the drain hose for the pressure filter and collect the final residues.  Dispose of the collected spray liquid residue in accordance with the corresponding legal guidelines.  Collect the spray liquid residues in suitable containers. 1. Switch off the pump. 2. Manually move suction chest G to position . 3. Move switch tap I to position . 4. Open switch tap Z. 5. Open stop tap K öffnen.  Drain the technical residue. 6. Close switch tap K again move switch tap I to position 0. Close switch tap Z. WARNING Frost damage! Over the winter period, drain the remaining residue from the sprayer too.
  • 31. Cleaning the sprayer HighFlow BAG0115.0 08.12 31 3.5 Cleaning the suction filter when tank is empty Clean the suction filter on a daily basis after cleaning the field sprayer. 1. Unscrew the cover of the suction filter (2). 2. Remove the cover with suction filter (3) and clean with water. 3. Reassemble the suction filter in the reverse sequence. 4. Check the filter housing for leaks. 3.6 Cleaning the pressure filter when the tank is empty 1. Undo the sleeve nuts. 2. Remove both pressure filters and clean with water. 3. Refill the pressure filter. 4. Check the screw connection for leaks..
  • 32. Cleaning the sprayer 32 HighFlow BAG0115.0 08.12 3.7 Cleaning the sprayer during a critical agent change 1. Clean the sprayer in three runs as always. 2. Fill up the flushing water tank. 3. Clean the sprayer, two runs. 4. If the sprayer has been previously filled via the pressure connec- tor: Clean the induction bowl using the spray pistol and extract the content of the induction bowl. 5. Drain the final residue, see page 30. 6. By all means, clean the suction filter and pressure filter. 7. Clean the sprayer, one run. 8. Drain the final residue, see page 30.
  • 34. H. DREYER GmbH & Co. KG Postfach 51 D-49202 Hasbergen-Gaste Germany Tel.: + 49 (0) 5405 501-0 Telefax: + 49 (0) 5405 501-234 e-mail: amazone@amazone.de http:// www.amazone.de Plants: D-27794 Hude  D-04249 Leipzig  F-57602 Forbach Branches in England and France Manufacturers of mineral fertiliser spreaders, field sprayers, seed drills, soil cultivation machines, mul- tipurpose warehouses and communal units