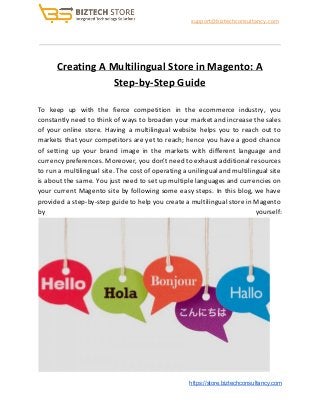
Creating A Multilingual Store in Magento: A Step-by-Step Guide
•
1 like•231 views

Follow these step-by-step guide to easily create a multilingual store in magento and also automate most of the language translation work to make the process easier. More Details: https://store.biztechconsultancy.com/magento2-language-translator-extension.htm

Recommended
Recommended
More Related Content
More from Biztech Store
More from Biztech Store (16)
Recently uploaded
Recently uploaded (20)
Creating A Multilingual Store in Magento: A Step-by-Step Guide
- 1. support@biztechconsultancy.com Creating A Multilingual Store in Magento: A Step-by-Step Guide To keep up with the fierce competition in the ecommerce industry, you constantly need to think of ways to broaden your market and increase the sales of your online store. Having a multilingual website helps you to reach out to markets that your competitors are yet to reach; hence you have a good chance of setting up your brand image in the markets with different language and currency preferences. Moreover, you don’t need to exhaust additional resources to run a multilingual site. The cost of operating a unilingual and multilingual site is about the same. You just need to set up multiple languages and currencies on your current Magento site by following some easy steps. In this blog, we have provided a step-by-step guide to help you create a multilingual store in Magento by yourself: https://store.biztechconsultancy.com
- 2. support@biztechconsultancy.com Step 1: Download Language Packages The first step would be to download the relevant language package(s) you require to setup your website in. Visit Magento Connect store for available translations. From the array of packages available, choose the ones that are suitable to your needs. After selecting and downloading it, you will get a file in the .gzip format. Open it to access the folder app. Upload the folders design and locale to add the unique files relating to the language you have downloaded. Now, you can move to create the new store view. Step 2: Add a new store view To display your website in different languages, you will require adding a store view for each of the languages. If you had installed Magento without the sample data, only English language would be preconfigured as your default language. In case of installation with sample data, it will have three store views namely French, German, and English. But you still need to download the corresponding language pack to display the frontend in that particular language. Follow the following steps to add a new store view: ● Login to your admin panel ● Go to ‘System’, and further to ‘Configuration’, reach for ‘Manage stores’. ● Click on ‘Create Store View’ on the top left. ● Once you are redirected to the ‘New Store View’ page, enter the field name and code. For example, if you want to create a Swedish store, write Swedish. ● Save the store view. Now your store had been created. The creation of a store doesn’t show up your website in the selected language. You need to configure the store by installing the language pack or by translating the default text strings manually. https://store.biztechconsultancy.com
- 3. support@biztechconsultancy.com Step 3: Install and Configure the Language Package(s) The language pack is equipped with the translation files of the of the default text that appears on the front-end of your website. Before these translations reflect on your site, you will need to change the locale settings. Let’s see how to do this: ● Go to ‘System’ and then ‘Configuration’. ● You will find the ‘Current Configuration Scope’ in the upper left corner. Select the store view for the language you want to configure. ● Go to the General section on the left. Expand the ‘Locale Options’ ● Unmark the ‘Use Website’ check box that appears besides the options and set the drop down menu to the preferred language. ● Click on the ‘Save Config’ button on the top corner. To change the language of your back-end functions, go to the bottom of the admin panel, then to the ‘Interface Locale’ drop down menu, and choose the language. Magento has a default in-built tool that helps you translate default text strings. If you don’t want to go for the language package and translate it yourself using this tool, follow the given instructions: ● Go to ‘System’ >> ‘Configuration’ ● Click on ‘Developer’ which you will find in the ‘Advanced’ menu. ● Click on ‘Translate Inline’. ● If you want to translate the text in the front end, save the ‘Enabled for Frontend’ option to ‘Yes’. ● If you want to translate the text in the back end, save the ‘Enabled for Admin’ option to ‘Yes’. ● ‘Save configurations’ and move towards editing the translations by using the tool. https://store.biztechconsultancy.com
- 4. support@biztechconsultancy.com Step 4: Change the product descriptions and categories For each of the store views, you will need to change the descriptions and categories of the products. Follow the given instructions to complete the process: ● From the admin panel, go to ‘Catalog’ menu, and then select ‘Manage Products’ from the options provided. ● Find the product and click on the ‘Edit’ button. ● Go to product settings and select the store view from ‘Choose Store View’, unmark the ‘Use Default Value’ and change the value for the option. ● Click on ‘Save’ or Save and continue Edit’. You can edit the categories by following the same process from ‘Manage Categories’. Bypass Step 3 & 4: Use a Language Translator Extension If you don’t want to manually install all the language packs and modify all the product descriptions and categories on your own, you could simply this process with this language translator extension. It is a bestselling language translator extension from Biztech and is available for both Magento and Magento 2. With this extension you can translate product details, category details, CMS pages content, product reviews, search strings, etc either one by one or all in one go. Step 5: Set Up multiple currencies and currency exchange rates You are expanding your business to geographical locations beyond national boundaries, so along with their native language; you need to show them their respective currencies as well. Here’s how you can setup multiple currencies for your store: ● Go to ‘System’, and then ‘Configuration’. ● Mark ‘Default Config’ for ‘Current Configuration Scope’. https://store.biztechconsultancy.com
- 5. support@biztechconsultancy.com ● Go to ‘Currency Setup And select your ‘Default Display Currency’ e.g. U.S Dollar. ● Now, choose the currency options you want to provide on your site. ● Click on ‘Save Config’. Now, to set up currency exchange rates, ● Go to ‘System’ >> ‘Manage Currency Rates’ ● Import the required currency rates by clicking on ‘Import’. ● Click on ‘Save Currency Rates’. You are now done setting up your multilingual site. Clear the cache by going to Admin panel > Navigation System > Cache management. Refresh your site, change the store view and go through a test to see if it works fine. You are now ready to generate more revenues from your ecommerce store. https://store.biztechconsultancy.com