SlideShare a Scribd company logo
1 of 19
Download to read offline
FARALLON USA, INC.
DIVER PROPULSION VEHICLES
Mk7-E
INSTRUCTION and
MAINTENANCE MANUAL
***All information in this operator’s manual must be read and
the operator must be familiar with all of the functions and
safety warnings prior to use of the vehicle.
2
CAUTION:
DO NOT
SPIN
PROPELLER
OUT OF
WATER!!!
Doing so will cause damage to shaft seal
and will void any and all warranties!!!!!
3
TABLE OF CONTENTS
Introduction to DPV Diving ............................................ 3
Warnings ............................................................................. 4
Preparation For Use ............................................................ 5
Assembly of the Mk7-E ……………................................. 8
How to Ride ........................................................................ 9
Care of Vehicle .................................................................. 10
Battery Charging and Replacement .................................... 11
Electrical System ............................................................... 12
Trouble Shooting ............................................................... 13
Maintenance ....................................................................... 14
Warranty Limitations and Conditions ................................ 15
DPV Maintenance Log ....................................................... 16
Battery Maintenance ........................................................... 17
Vehicle Diagram ....................................................... Fold-Out
Warranty Registration .......................................................... 18
Articles ................................................................................ 19
INTRODUCTION TO DPV DIVING
4
Congratulations on your purchase of the world’s most
advanced Diver Propulsion Vehicle. You now have the
freedom and access to survey, explore, search and
video an entirely new universe and have a great deal
of fun doing it!
Along with these new freedoms however come new
responsibilities. Use of a Diver Propulsion Vehicle
requires careful observance of all diving rules and
regulations. Included in this and particularly
important in DPV use, is the observance of ascent and
descent rates. You should always use your normal
ascent and descent rates as taught by your certifying
agency. A DPV is NOT to be used for more rapid
ascents. Close attention to direction, distance and air
supply must also be maintained as the vehicle will
allow you to travel greater distances on a single dive
than normal means of propulsion.
Once again, congratulations on your purchase and we
know that you will have many exciting and wonderful
experiences with your vehicle as long as you practice
safe diving techniques and perform regular
maintenance on your unit.
5
WARNINGS
THESE MUST BE REVIEWED PRIOR TO USE!
WARNING: DO NOT operate a FARALLON DPV unless you are a certified
diver and have been trained in the use of diver propulsion vehicles.
WARNING: DO NOT operate your FARALLON DPV until all pre-dive and
operational checks have been successfully completed.
WARNING: DO NOT exceed industry standards for ascent and descent rates.
WARNING: DO NOT operate your FARALLON DPV in conditions and/or
environments that you are not trained for and/or that exceed your
level of expertise and training.
WARNING: DIVING in excess of industry standards for maximum depths is
not endorsed by FARALLON USA, Inc.
WARNING: THE FARALLON DPV is heavy out of the water. Use recognized
lifting procedures and/or solicit assistance when moving your
FARALLON DPV to and from the water.
WARNING: Should the vehicle flood during operation, it will become extremely
heavy and should be abandoned if it is too heavy for ascending.
WARNING: COMPLETELY remove the batteries from the battery compartment
prior to charging. Do not charge batteries in a confined space as this
may lead to explosion causing serious injury or death.
WARNING: DO NOT smoke or initiate open flame in the vicinity of batteries
under charge as this may lead to explosion causing serious injury or
death.
WARNING: DO NOT place hands or any articles in the propeller area at any time.
PREPARATION FOR USE
6
-fold out diagram on page 18 prior to reading-
FEATURES:
Your new Mk7-E has several advanced features which you must familiarize yourself with
prior to use. Warnings regarding each function and procedure must be reviewed.
Main System On/Off Switch:
The Mk7-E is equipped with a Main System “On/Off” switch (17) which is located on
the front plate of the handle assembly. This switch activates the electronics in the unit
making the unit operational. The switch is in the “On” position when moved to the far
right position. This switch should remain in the far left position when the vehicle is not
in use.
WARNING: NEVER depress either motor enable switch while the main
system switch, located adjacent to the indicator panel, is in the
“On” position; unless the vehicle is submerged and you are in the
proper riding position! Doing so will cause the propeller to spin
creating a potential hazard to equipment or body.
Keep hands clear of propeller area at all times.
Dual Motor Enable Triggers: (Parts 7 and 8 on the illustration)
Located on the lower portion of either handle is a motor enable trigger (7)(8) which
activate the unit. One of these triggers must be depressed to make the unit operational.
The release of both triggers will disable the vehicle causing it to stop immediately.
During operation these triggers may be alternately held to maintain comfort or to free a
needed hand.
Cruise Control Feature: (Parts 6 and 9 on the illustration)
Located on the upper portion of each handle grip are the speed control operating triggers
(6)(9). The upper RIGHT trigger (6) is the “Up” speed control which, when depressed
together with one or both motor enable trigger(s), will run the speed up digitally to any
speed desired by the operator. It is not necessary to “click” the trigger to increase speed.
When the maximum r.p.m. is attained the “Maximum Speed” indicator light (Red LED)
(20) will illuminate. The trigger can then be released and the speed will be maintained.
7
The speed is reduced by depressing the upper LEFT trigger or the “down” speed control
trigger (9) located on the upper portion of the left handle. (Or by releasing both motor
enabler triggers or by moving the Main On/Off switch (17) to the “OFF” position). The
“down” speed trigger will run the speed down to zero speed which will be indicated by a
green light being illuminated (21). When the light comes on, the down speed trigger may
be released to maintain zero speed.
Either speed control trigger, “up” or “down”, may be released at any time to maintain
desired speed. Additionally, both motor enable switches may be released at any time to
cease operation of the vehicle.
Pre-dive Electronics Function Test:
WARNING: DO NOT depress the motor enabler switches (7)(8) while performing the
following checks.
Prior to use, the “up” and “down” speed functions can be checked by operating the speed
control triggers WITHOUT depressing the motor enabler triggers. Switch the main
system “On/Off” switch to the “ON” position. Depress the “up” speed control until the
maximum speed indicator light (red LED) comes on. Then release the “up” speed trigger
and depress the “down” speed trigger until the minimum speed indicator (green LED) is
illuminated.
If the LED lights on the speed indicator do not function during this pre-dive system
check, check the following:
If the top green light on the battery status indicator (see “Battery Status Indicator) is not
illuminated check the Main System “On/Off” switch to ensure it is in the “ON” position.
Then check the battery connection at the bulkhead (10), the battery terminals and the
batteries themselves for adequate charge status. If the problem remains check the
electronics system connection at the bulkhead (12). If the unit still does not respond
return the unit to the dealer for service.
Battery Status Indicator:
8
Your Mk7-E is equipped with a “battery status” indicator display located in the center of
the handle assembly (18). This LED display monitors your battery charge status as
recommended by the battery manufacturer. When the Main System switch is turned to
the “ON” position the top green LED should be visible indicating a charge of
approximately 30% to 100% available. Due to the non-linear discharge nature of the
batteries, the different color LED lights do not represent the discharge in 13 increments,
rather the lights move through their sequence during the final 30 minutes of the life of the
battery charge. The operator should run the unit in a protected environment to get
familiarized with the LED movements and corresponding run times. Medium speed runs
will typically see a 30 minute run time when the LED lights begin to move. When you
reach the minimum recommended charge a warning light (19) will begin to flash
indicating that the unit should be deactivated and supplied with a fresh set of batteries or
returned to re-charge the existing battery pack. (See Cautions and Warnings regarding
Battery Replacement and Charging Page 11.)
________________________________________________________________________
ASSEMBLY OF YOUR DIVER PROPULSION VEHICLE
9
Now that you have familiarized yourself with the operational features, it is time to
prepare your new Mk7-E for use. Open the unit by disengaging the body joint clips (13)
located on the outer housing. After separating the two sections, carefully slide the battery
pack into the battery tray (23) and secure with securing bracket (24).
NOTE: It is very important that the thumb securing screws for the battery stop bracket
are properly installed.
Place the two sections close together and plug in the electronic connector (22). When this
connector is secured plug the battery lead connector (16) into the bulkhead battery
receiver (10).
MAKE SURE THE “O” RING ON THE BODY JOINT IS LUBRICATED WITH A
THIN COATING OF SILICONE GREASE. THIS WILL PROTECT THE SEAL AND
EASE THE ASSEMBLY OF THE TWO SECTIONS.
Slide the two sections together and secure all body latches on the body joint closing the
opposing latches in pairs.
To attach the saddle slide the tube into the collar located on the propeller shroud. Secure
the saddle by sliding the clevis pin through the collar and into the saddle tube locking it
in place with the cotter pin.
ASSEMBLY TIP: Place the front housing slightly elevated at the joint area when
preparing to assemble. When the unit is properly assembled run operational tests on the
electronics as described on page 6.
________________________________________________________________________
RIDING YOUR DIVER PROPULSION VEHICLE
10
Enter the water with your vehicle. Check for bubbles around the display panel on the
main handle assembly, around the propeller and around the main body joint. If the
bubbles do not stop within a minute after submersing the vehicle remove the vehicle
immediately and check the security of the seals. This must be done each time the unit is
placed into the water.
Once you have determined that the seals are working properly, proceed with riding
instructions.
Place your legs on either side of the Saddle (25) and slide under the “T” bar portion of
the saddle until the bar is comfortably between your legs. Hold both handles and check
that your equipment is clear of the propeller shroud and guard (26). It is highly
recommended that a wet suit or skin be worn to avoid having loose clothing pulled into
the propeller. Additionally, your mask, weight belt strap and regulator should be checked
for position and security.
Turn the Main System switch (17) to the “ON” position and look for your battery status
and minimum speed indication. If the lights are both green, depress one or both motor
enabler trigger(s), (7)(8) and the “up” speed trigger (6) and obtain a comfortable speed
setting. If the light on the low speed indicator is not illuminated, depress the “down”
speed trigger until the light is illuminated and then proceed to depress the motor enable
and “up” speed triggers. Maintain maximum parallel position to the vehicle for the most
efficient riding position. Pulling your body forward may increase your operating
efficiency.
NOTE: The vehicle is steered by the operator’s body positioning and fin movements.
These maneuvers should be practiced in shallow water and at slow speeds until the
operator is proficient in the operation of the vehicle. It is recommended that operator be
experienced in the operation of a DPV prior to open water use.
WARNING: Should the vehicle begin to flood it must be turned off immediately.
The unit should be abandoned if it becomes too heavy causing problems with your
buoyancy. As a precaution, a lift bag may be carried (120 lb. of lift) to prevent the
loss of the vehicle in this situation.
TIPS FOR USE OF THE VEHICLE ON A BOAT:
The first step when planning a boat dive with the Mk7-E is to inform the boat captain
prior to your arrival at the boat. Let the captain know the physical size of the unit and
11
your space requirements. The captain will greatly appreciate this information prior to the
dive date. It is good to get the specifications of the boat at this time also so that you may
plan your dive with the Mk7-E.
The unit should be equipped with a 25 foot long tether line. When the boat arrives at the
dive site you should connect the tether line immediately and lower the unit into the water.
Make certain that the unit is lowered down current from the boat. In the ocean the unit
will sink only slightly. You may now proceed with preparing your dive equipment as
with any standard dive, being cautious to secure lose or dangling lines.
Once in the water, grab the vehicle and assume the proper riding position, making certain
that all of your equipment is clear of the propeller guard. Release the vehicle from the
tether and proceed with your dive.
Following the dive and following standard safety accent rates, re-attach the vehicle to the
tether line. Make sure that the main system “On/Off” switch is in the “Off” position at
this time. This should put you at approximately 20 feet a good place to do a safety stop.
Once you are on the boat remove your gear and pull the unit to the side of the boat or to
the platform. With the help of a buddy diver lift the vehicle carefully onto the boat deck
and secure for travel to the next dive or back to the dock. If you are going to use the
vehicle for a second dive, check the battery status prior to placing the unit back into the
water.
CARE OF THE VEHICLE AFTER EACH USE
Following the use of the vehicle, several steps should be taken to ensure proper storage or
battery replacement. The exterior housing, trigger areas and shaft area must be
rinsed with fresh water to protect the seals and hardware. The main body joint
should then be wiped dry to prevent water from entering the battery compartment when
the unit is opened. The unit should then be opened (fore and aft sections separated and
the battery and electronics connectors disconnected) and the batteries completely
removed for charging or replacement. The battery compartment should be inspected at
this time for signs of leakage.
The unit should be stored with the fore and aft sections assembled with main body O ring
removed and placed in the front housing for storage. The batteries should be stored
separately and fully charged.
BATTERY CHARGING and REPLACEMENT
WARNING: Charging batteries while they are located in vehicle may produce off-
gassing which could lead to an explosion causing death or serious
12
injury.
The Farallon MK7E is equipped with a 24 Volt Battery Pack. Using the Farallon battery
charger there is no need to change any of the wire harness configuration.
The operator should remove the battery completely from the front housing by first
disconnecting the cable from the bulkhead. Second, the battery stop bracket (24) should
be removed and the batteries carefully pulled completely out of the housing. Prior to
charging, batteries should be inspected for cracks and potential leaks. If cracks are
observed the battery should no longer be used. The Farallon charger may then be
connected directly to the battery plug and turned on to charge.
WARNING: The battery should be allowed to remain in a well ventilated area for a
minimum of one (1) hour after being taken off charge!
1. Batteries:
The Farallon Mk7E uses (2) 12 volt, 18 amp/hr, rechargeable, sealed lead acid
batteries wired as a 24 volt pack which has no memory, thereby making it
possible to recharge on less than full discharge. The operator should always store
the batteries fully charged.
2. Charge Time:
Using the supplied Farallon brand charger 6hours are required to obtain a 90%
charge. Using the Farallon CVCC-6 charger only 6 hours are required to
obtain a full charge. Faster chargers are available from other manufacturers
but these may deplete the cycles in the batteries and void the warranty. A
100% charge (24 hours) is recommended to maintain the life of the batteries
and to produce maximum usable run time for your DPV.
3. Battery Tray Removal and Installation:
Should the battery tray need to be removed from the housing for any reason the
following steps should be taken. First, remove the securing screw located in the
front of the tray. Next, turn the tray counter clockwise (approximately 45° angle)
and very slowly pull the tray out, being careful not to catch the electronics cable
coming out from the front housing. Reverse the process to replace the battery
tray.
ELECTRICAL SYSTEM
13
Your Mk7-E is equipped with a fully digital electronic speed control and monitoring
system designed for ease of use and durability. The electrical system incorporates the use
of two printed circuit boards; one for control and one for monitoring. The control board
is located in the sealed aft section compartment and the display board is located behind
the indicator panel on the handle assembly. Neither board shall be removed or repaired
except by an authorized Farallon dealer or by Farallon USA, Inc.
Anti-fouling (Current Limiting) Feature:
The system is also equipped with an anti-fouling feature which will protect the motor and
electronics in the event of an overload caused by a locked propeller or other overload
condition. In the event of one of these conditions the control board will automatically
shut down the system when it detects an unusually high current draw by the motor.
If this should occur during operation your vehicle will shut down. The operator should
turn the vehicle’s main system switch “OFF” immediately. Any obstruction should then
be cleared from the propeller. The operator can then resume the riding position and turn
the vehicle to the “ON” position. The vehicle at this time will have automatically re-set
itself to the lowest speed.
If the system does not re-set there may be an electrical problem and the vehicle should be
returned to the manufacturer or abandoned in the event of an emergency.
________________________________________________________________________
TROUBLE SHOOTING
Problem Cause Solution
14
Unit Not Turned On Move On/Off Switch to
“ON” Position
Motor Enable Switch not Depress Motor Enable
Depressed Switch
Motor will not run Batteries Discharged Recharge Batteries
Battery Terminal Secure Connection
Connections
Battery Lead Connection Secure Connection
Electronic Lead Connection Secure Connection
Fuse Blown Replace Fuse
Malfunctioning Electronics Return to Dealer
Propeller is obstructed Remove obstruction
Motor runs but Loose propeller screw Tighten/Replace propeller
propeller does not turn screw
Drive Train problems Return to Dealer
Failed View Port Seal Return to Dealer
Moisture has entered
the battery Failed Body Joint O ring Replace/Grease main joint O
compartment ring
Failed Body Clip Replace Body Clip
Moisture has entered Failed Shaft Seal Return to Dealer
the motor
compartment Failed Bulkhead Seal Return to Dealer
MAINTENANCE
15
The Farallon DPV requires regular maintenance to keep it operating properly and to
maintain the maximum life of the vehicle.
1. Batteries:
Batteries should be replaced every 200 cycles or sooner if a 60% discharge level is
repeatedly exceeded. The batteries should be checked for cracks or other physical
damage and should be replaced immediately if a problem exists.
2. Catalyzers:
The catalyzers absorb the hydrogen gases expelled by batteries during operation. While
your unit is equipped with batteries that do not off-gas during normal operation, these
catalyzers are provided as an extra safety precaution and should be replaced every 2 years
or immediately if they become cracked or damaged. They are located on the far end of
the battery tray. (See battery tray removal)
3. Propeller:
The propeller should be replaced when damaged to ensure the most efficient operation of
your vehicle.
4. Printed Circuit Boards:
The printed circuit boards should not be replaced by the operator as this will result in the
voiding of the warranty. The boards should be kept in their respective housings and
returned to the dealer. There is no regular maintenance scheduled for the printed
circuitry boards.
5. Seals:
The shaft seal on the Mk7-E should be inspected regularly and replaced every two (2)
years depending upon use or sooner if a problem is detected. The main body “O” ring
should be inspected prior to each dive for cuts or other deformities and should be free of
all sand, hair and other foreign substances. The “O” ring should be replaced
approximately every twenty-five uses.
WARRANTY CONDITIONS
16
All Farallon USA, Inc. products are warranted, to the original purchaser only, against any
material and manufacturing defects for a period of one (1) year from the date of purchase, under
normal scuba use and with proper care and maintenance as required in the Farallon DPV
Instruction and Service Manual. Defective products should be returned prepaid directly to
Farallon USA, Inc. Farallon USA, Inc. will, at its discretion, repair or replace such products, and
will return to customer prepaid.
This warranty covers the following specific components:
1. Main body housing
2. Control housings
3. Propeller shroud
4. Propeller Shaft
The following items are excluded from coverage in the warranty:
1. Printed Circuit Boards
2. Batteries
3. Battery Charger
4. Main Housing Coating
5. Propeller
6. Shaft Seal
The printed circuit boards are covered by a 90 day manufacturers warranty. The other
exceptions listed above may be covered by a manufacturers warranty. Any returns for warranty
service must be accompanied by the original sales receipt and a copy of the owner’s portion of
the warranty registration card.
This warranty does not apply and may be rendered completely null and void in the event of
misuse, abuse, overcharging of batteries, deep discharge of batteries, flooding due to neglect,
tampering, lack of care and maintenance, improper storage, or unauthorized service.
Modification or repair by anyone other than a Farallon authorized service dealer will void
the warranty. Farallon will not be responsible for the recovery or replacement of the product in
the event of loss or theft. Farallon, its distributors and retailers make no warranties express or
implied, with respect to this product or its owner’s guide except those stated in the preceding
paragraphs. By purchasing this product you agree and understand that in no event will Farallon
USA, its distributors or retailers, be held liable for any personal injury resulting from its
operation, or for any other damages whether direct, indirect, incidental, or consequential, even if
Farallon is advised of such damages. Some states do not allow the exclusion or limitation of
implied warranties or liabilities for incidental or consequential damages, so the above limitation
may not apply to you.
• An extended warranty up to 36 months is available. Contact your nearest dealer or Farallon
USA, Inc. for more information.
FARALLON DPV USE AND MAINTENANCE LOG
Serial number __________________________________________________________
17
Date of Purchase _______________________________________________________
Purchased From ________________________________________________________
Date: _______________ Dive Location: __________________ Time: ____________
Maintenance Performed: ___________________________________________________
________________________________________________________________________
________________________________________________________________________
________________________________________________________________________
FARALLON DPV BATTERY CHARGING AND
MAINTENANCE LOG
DATE:__________________
18
START TIME:_____________________ END TIME:_______________________
DATE:__________________
START TIME:_____________________ END TIME:_______________________
DATE:__________________
START TIME:_____________________ END TIME:_______________________
DATE:__________________
START TIME:_____________________ END TIME:_______________________
DATE:__________________
START TIME:_____________________ END TIME:_______________________
DATE:__________________
START TIME:_____________________ END TIME:_______________________
DATE:__________________
START TIME:_____________________ END TIME:_______________________
DATE:__________________
START TIME:_____________________ END TIME:_______________________
DATE:__________________
START TIME:_____________________ END TIME:_______________________
DATE:__________________
START TIME:_____________________ END TIME:_______________________
DATE:__________________
START TIME:_____________________ END TIME:_______________________
DATE:__________________
START TIME:_____________________ END TIME:_______________________
DATE:__________________
START TIME:_____________________ END TIME:_______________________
FARALLON Mk DPV WARRANTY REGISTRATION
19
You must read your Farallon Instruction and Maintenance Manual and complete and sign
this warranty registration and return within thirty (30) days of date of purchase for your
warranty to be validated.
Please Type or Print:
Date of Purchase: __________ Serial Number: ____________ Model: _____________
===============================================================
=
By signing below, I attest that I have read the Mk8/Mk-S/Mk7-E Owners Manual and I
thoroughly understand the risks involved with operating the Mk8/Mk8-S/Mk7-E Diver
Propulsion Vehicle.
______________________________________ ____________________________
Signature Date
===============================================================
=
Customer Name: _________________________________________________________
Address: ________________________________________________________________
City: ___________________________ State: _________ Zip: ___________________
Phone: (____)____________________ Fax: (_____)____________________________
Purchase Price: ________________________
===============================================================
=
Where did you purchase your Farallon Mk DPV?
________________________________
Occupation: _________________________ Type of Diving:______________________
Will the DPV be used for ___ Business ___ Pleasure ___ Both
-----------------------------------------------------------------------------------------------------------
--
CUT ALONG DOTTED LINE RETAIN LOWER PORTION FOR YOUR RECORDS
FARALLON DPV WARRANTY REGISTRATION
Date Purchased: ______________________ Serial Number: ______________________
Farallon USA, Inc., P.O. Box 450505, Atlanta, GA 31145

More Related Content

What's hot

ZS - 0332 - Komandant Mark - CAROBNA KNJIGA
ZS - 0332 - Komandant Mark - CAROBNA KNJIGAZS - 0332 - Komandant Mark - CAROBNA KNJIGA
ZS - 0332 - Komandant Mark - CAROBNA KNJIGAStripovizijacom
 
Diagrama DDEC II Cabina.pdf
Diagrama DDEC II Cabina.pdfDiagrama DDEC II Cabina.pdf
Diagrama DDEC II Cabina.pdfEDUARDO COLIN
 
ZS - 0097 - Komandant Mark - PLAMENA GROBNICA
ZS - 0097 - Komandant Mark - PLAMENA GROBNICAZS - 0097 - Komandant Mark - PLAMENA GROBNICA
ZS - 0097 - Komandant Mark - PLAMENA GROBNICAStripovizijacom
 
Mitsubishi fgc15 n forklift trucks chassis, mast and options service repair m...
Mitsubishi fgc15 n forklift trucks chassis, mast and options service repair m...Mitsubishi fgc15 n forklift trucks chassis, mast and options service repair m...
Mitsubishi fgc15 n forklift trucks chassis, mast and options service repair m...jksjdmd
 
Farallon Scooter DPV Manual mk5-mk6
Farallon Scooter DPV Manual mk5-mk6Farallon Scooter DPV Manual mk5-mk6
Farallon Scooter DPV Manual mk5-mk6Atlantic Scuba
 
JCB 426 WHEELED LOADER Service Repair Manual SN:531001
JCB 426 WHEELED LOADER Service Repair Manual SN:531001JCB 426 WHEELED LOADER Service Repair Manual SN:531001
JCB 426 WHEELED LOADER Service Repair Manual SN:531001fujsjejfkekmd
 
I Decided to Live as Me - English Translation by Kim Soo-Hyun (z-lib.org).pdf
I Decided to Live as Me - English Translation by Kim Soo-Hyun (z-lib.org).pdfI Decided to Live as Me - English Translation by Kim Soo-Hyun (z-lib.org).pdf
I Decided to Live as Me - English Translation by Kim Soo-Hyun (z-lib.org).pdfCrsnaAnasco
 
Nissan 2.4 pick up (2)
Nissan 2.4 pick up (2)Nissan 2.4 pick up (2)
Nissan 2.4 pick up (2)tumotormx
 
Zagor VC OP 015 - Mračna predskazanja
Zagor VC OP 015 - Mračna predskazanjaZagor VC OP 015 - Mračna predskazanja
Zagor VC OP 015 - Mračna predskazanjaStripovizijacom
 
Komatsu WA470-3 Wheel Loader Service Repair Manual SN: WA470H20051 and up
Komatsu WA470-3 Wheel Loader Service Repair Manual SN: WA470H20051 and upKomatsu WA470-3 Wheel Loader Service Repair Manual SN: WA470H20051 and up
Komatsu WA470-3 Wheel Loader Service Repair Manual SN: WA470H20051 and upfusjfjjsekkdmm
 
Cummins qsx 15 parts catalog
Cummins qsx 15 parts catalogCummins qsx 15 parts catalog
Cummins qsx 15 parts catalogArvind Negi
 
Project Safety Officer Approval Letter
Project Safety Officer Approval LetterProject Safety Officer Approval Letter
Project Safety Officer Approval LetterGijo Joyce
 
Manual Circuito Eléctrico Renault 9 - [Amigos Renault 9 Argentina]
Manual Circuito Eléctrico Renault 9 - [Amigos Renault 9 Argentina]Manual Circuito Eléctrico Renault 9 - [Amigos Renault 9 Argentina]
Manual Circuito Eléctrico Renault 9 - [Amigos Renault 9 Argentina]AmigosRenault9Arg
 
มังกรหยกภาค2 อินทรีจ้าวยุทธจักร เล่ม4
มังกรหยกภาค2 อินทรีจ้าวยุทธจักร เล่ม4มังกรหยกภาค2 อินทรีจ้าวยุทธจักร เล่ม4
มังกรหยกภาค2 อินทรีจ้าวยุทธจักร เล่ม4sornblog2u
 
Zagor - 010 - prolaz na sjeverozapad part 1
Zagor - 010 - prolaz na sjeverozapad part 1Zagor - 010 - prolaz na sjeverozapad part 1
Zagor - 010 - prolaz na sjeverozapad part 1Blagojce Treneski
 
CATERPILLAR CAT GP50K FORKLIFT LIFT TRUCKS CHASSIS AND MAST Service Repair Ma...
CATERPILLAR CAT GP50K FORKLIFT LIFT TRUCKS CHASSIS AND MAST Service Repair Ma...CATERPILLAR CAT GP50K FORKLIFT LIFT TRUCKS CHASSIS AND MAST Service Repair Ma...
CATERPILLAR CAT GP50K FORKLIFT LIFT TRUCKS CHASSIS AND MAST Service Repair Ma...jkskmdkemde
 
Zagor Extra 300 - Utvrda cudovista
Zagor Extra 300 - Utvrda cudovistaZagor Extra 300 - Utvrda cudovista
Zagor Extra 300 - Utvrda cudovistaStripovizijacom
 
Zagor VC OP 050 Šumske priče.pdf
Zagor VC OP 050 Šumske priče.pdfZagor VC OP 050 Šumske priče.pdf
Zagor VC OP 050 Šumske priče.pdfStripovizijacom
 
CATERPILLAR CAT EP16NT FORKLIFT LIFT TRUCK Service Repair Manual
CATERPILLAR CAT EP16NT FORKLIFT LIFT TRUCK Service Repair ManualCATERPILLAR CAT EP16NT FORKLIFT LIFT TRUCK Service Repair Manual
CATERPILLAR CAT EP16NT FORKLIFT LIFT TRUCK Service Repair Manualkjmsfm eiokid
 

What's hot (20)

ZS - 0332 - Komandant Mark - CAROBNA KNJIGA
ZS - 0332 - Komandant Mark - CAROBNA KNJIGAZS - 0332 - Komandant Mark - CAROBNA KNJIGA
ZS - 0332 - Komandant Mark - CAROBNA KNJIGA
 
Diagrama DDEC II Cabina.pdf
Diagrama DDEC II Cabina.pdfDiagrama DDEC II Cabina.pdf
Diagrama DDEC II Cabina.pdf
 
ZS - 0097 - Komandant Mark - PLAMENA GROBNICA
ZS - 0097 - Komandant Mark - PLAMENA GROBNICAZS - 0097 - Komandant Mark - PLAMENA GROBNICA
ZS - 0097 - Komandant Mark - PLAMENA GROBNICA
 
02. clasificacion parte 2
02. clasificacion parte 202. clasificacion parte 2
02. clasificacion parte 2
 
Mitsubishi fgc15 n forklift trucks chassis, mast and options service repair m...
Mitsubishi fgc15 n forklift trucks chassis, mast and options service repair m...Mitsubishi fgc15 n forklift trucks chassis, mast and options service repair m...
Mitsubishi fgc15 n forklift trucks chassis, mast and options service repair m...
 
Farallon Scooter DPV Manual mk5-mk6
Farallon Scooter DPV Manual mk5-mk6Farallon Scooter DPV Manual mk5-mk6
Farallon Scooter DPV Manual mk5-mk6
 
JCB 426 WHEELED LOADER Service Repair Manual SN:531001
JCB 426 WHEELED LOADER Service Repair Manual SN:531001JCB 426 WHEELED LOADER Service Repair Manual SN:531001
JCB 426 WHEELED LOADER Service Repair Manual SN:531001
 
I Decided to Live as Me - English Translation by Kim Soo-Hyun (z-lib.org).pdf
I Decided to Live as Me - English Translation by Kim Soo-Hyun (z-lib.org).pdfI Decided to Live as Me - English Translation by Kim Soo-Hyun (z-lib.org).pdf
I Decided to Live as Me - English Translation by Kim Soo-Hyun (z-lib.org).pdf
 
Nissan 2.4 pick up (2)
Nissan 2.4 pick up (2)Nissan 2.4 pick up (2)
Nissan 2.4 pick up (2)
 
Zagor VC OP 015 - Mračna predskazanja
Zagor VC OP 015 - Mračna predskazanjaZagor VC OP 015 - Mračna predskazanja
Zagor VC OP 015 - Mračna predskazanja
 
Komatsu WA470-3 Wheel Loader Service Repair Manual SN: WA470H20051 and up
Komatsu WA470-3 Wheel Loader Service Repair Manual SN: WA470H20051 and upKomatsu WA470-3 Wheel Loader Service Repair Manual SN: WA470H20051 and up
Komatsu WA470-3 Wheel Loader Service Repair Manual SN: WA470H20051 and up
 
Cummins qsx 15 parts catalog
Cummins qsx 15 parts catalogCummins qsx 15 parts catalog
Cummins qsx 15 parts catalog
 
Project Safety Officer Approval Letter
Project Safety Officer Approval LetterProject Safety Officer Approval Letter
Project Safety Officer Approval Letter
 
Manual Circuito Eléctrico Renault 9 - [Amigos Renault 9 Argentina]
Manual Circuito Eléctrico Renault 9 - [Amigos Renault 9 Argentina]Manual Circuito Eléctrico Renault 9 - [Amigos Renault 9 Argentina]
Manual Circuito Eléctrico Renault 9 - [Amigos Renault 9 Argentina]
 
มังกรหยกภาค2 อินทรีจ้าวยุทธจักร เล่ม4
มังกรหยกภาค2 อินทรีจ้าวยุทธจักร เล่ม4มังกรหยกภาค2 อินทรีจ้าวยุทธจักร เล่ม4
มังกรหยกภาค2 อินทรีจ้าวยุทธจักร เล่ม4
 
Zagor - 010 - prolaz na sjeverozapad part 1
Zagor - 010 - prolaz na sjeverozapad part 1Zagor - 010 - prolaz na sjeverozapad part 1
Zagor - 010 - prolaz na sjeverozapad part 1
 
CATERPILLAR CAT GP50K FORKLIFT LIFT TRUCKS CHASSIS AND MAST Service Repair Ma...
CATERPILLAR CAT GP50K FORKLIFT LIFT TRUCKS CHASSIS AND MAST Service Repair Ma...CATERPILLAR CAT GP50K FORKLIFT LIFT TRUCKS CHASSIS AND MAST Service Repair Ma...
CATERPILLAR CAT GP50K FORKLIFT LIFT TRUCKS CHASSIS AND MAST Service Repair Ma...
 
Zagor Extra 300 - Utvrda cudovista
Zagor Extra 300 - Utvrda cudovistaZagor Extra 300 - Utvrda cudovista
Zagor Extra 300 - Utvrda cudovista
 
Zagor VC OP 050 Šumske priče.pdf
Zagor VC OP 050 Šumske priče.pdfZagor VC OP 050 Šumske priče.pdf
Zagor VC OP 050 Šumske priče.pdf
 
CATERPILLAR CAT EP16NT FORKLIFT LIFT TRUCK Service Repair Manual
CATERPILLAR CAT EP16NT FORKLIFT LIFT TRUCK Service Repair ManualCATERPILLAR CAT EP16NT FORKLIFT LIFT TRUCK Service Repair Manual
CATERPILLAR CAT EP16NT FORKLIFT LIFT TRUCK Service Repair Manual
 

Similar to Farallon Scooter DPV 2003 08-23 manual-mk-7_e

P382000ownershandbook 1210540777493112-8
P382000ownershandbook 1210540777493112-8P382000ownershandbook 1210540777493112-8
P382000ownershandbook 1210540777493112-8Lynne Posedel
 
02 th!nk neighbor
02 th!nk neighbor02 th!nk neighbor
02 th!nk neighborrukford
 
Manual supra carrier
Manual supra carrierManual supra carrier
Manual supra carrierAlbert Flores
 
Case ih dx21 tractor service repair manual
Case ih dx21 tractor service repair manualCase ih dx21 tractor service repair manual
Case ih dx21 tractor service repair manualfujjsefksekmem
 
New holland l175 skid steer loader service repair manual
New holland l175 skid steer loader service repair manualNew holland l175 skid steer loader service repair manual
New holland l175 skid steer loader service repair manualfjsefksemmm
 
New holland c175 compact track loader service repair manual
New holland c175 compact track loader service repair manualNew holland c175 compact track loader service repair manual
New holland c175 compact track loader service repair manualfjskeksemm
 
Grand vitara en ingles
Grand vitara en inglesGrand vitara en ingles
Grand vitara en inglesRonald Garcia
 
New holland l150 skid steer loader service repair manual
New holland l150 skid steer loader service repair manualNew holland l150 skid steer loader service repair manual
New holland l150 skid steer loader service repair manualfkjsekksmem
 
New holland l150 skid steer loader service repair manual
New holland l150 skid steer loader service repair manualNew holland l150 skid steer loader service repair manual
New holland l150 skid steer loader service repair manualfjskekfseik
 
New holland l140 skid steer loader service repair manual
New holland l140 skid steer loader service repair manualNew holland l140 skid steer loader service repair manual
New holland l140 skid steer loader service repair manualfjskefkemms
 
Rvcf qig v.00 en 24.11.08
Rvcf qig v.00 en 24.11.08Rvcf qig v.00 en 24.11.08
Rvcf qig v.00 en 24.11.08cesar martinez
 
Innova 5568 Pro-Timing Light User Manual
Innova 5568 Pro-Timing Light User ManualInnova 5568 Pro-Timing Light User Manual
Innova 5568 Pro-Timing Light User ManualTim Miller
 
Clark ewp45 forklift service repair manual
Clark ewp45 forklift service repair manualClark ewp45 forklift service repair manual
Clark ewp45 forklift service repair manualjfdjskmdmme
 
Clark ewp45 forklift service repair manual
Clark ewp45 forklift service repair manualClark ewp45 forklift service repair manual
Clark ewp45 forklift service repair manualfhsjejkdm
 
Clark ewp45 forklift service repair manual
Clark ewp45 forklift service repair manualClark ewp45 forklift service repair manual
Clark ewp45 forklift service repair manualdikskekmdmdm
 
Opel Blazer Owners Manual
Opel Blazer Owners ManualOpel Blazer Owners Manual
Opel Blazer Owners ManualAndry BY Bangun
 
KWANG YANG MOTOR CO.,LTD UXV 450i 2015 Owner Manual
KWANG YANG MOTOR CO.,LTD UXV 450i 2015 Owner ManualKWANG YANG MOTOR CO.,LTD UXV 450i 2015 Owner Manual
KWANG YANG MOTOR CO.,LTD UXV 450i 2015 Owner ManualRimsky Cheng
 
New holland l175 skid steer loader service repair manual
New holland l175 skid steer loader service repair manualNew holland l175 skid steer loader service repair manual
New holland l175 skid steer loader service repair manualfusjejfkskeme
 
New Holland C175 Compact Track Loader Service Repair Manual
New Holland C175 Compact Track Loader Service Repair ManualNew Holland C175 Compact Track Loader Service Repair Manual
New Holland C175 Compact Track Loader Service Repair Manualfujdfjjjsekdkemme
 

Similar to Farallon Scooter DPV 2003 08-23 manual-mk-7_e (20)

P382000ownershandbook 1210540777493112-8
P382000ownershandbook 1210540777493112-8P382000ownershandbook 1210540777493112-8
P382000ownershandbook 1210540777493112-8
 
02 th!nk neighbor
02 th!nk neighbor02 th!nk neighbor
02 th!nk neighbor
 
Manual supra carrier
Manual supra carrierManual supra carrier
Manual supra carrier
 
Case ih dx21 tractor service repair manual
Case ih dx21 tractor service repair manualCase ih dx21 tractor service repair manual
Case ih dx21 tractor service repair manual
 
Lf 3810
Lf 3810Lf 3810
Lf 3810
 
New holland l175 skid steer loader service repair manual
New holland l175 skid steer loader service repair manualNew holland l175 skid steer loader service repair manual
New holland l175 skid steer loader service repair manual
 
New holland c175 compact track loader service repair manual
New holland c175 compact track loader service repair manualNew holland c175 compact track loader service repair manual
New holland c175 compact track loader service repair manual
 
Grand vitara en ingles
Grand vitara en inglesGrand vitara en ingles
Grand vitara en ingles
 
New holland l150 skid steer loader service repair manual
New holland l150 skid steer loader service repair manualNew holland l150 skid steer loader service repair manual
New holland l150 skid steer loader service repair manual
 
New holland l150 skid steer loader service repair manual
New holland l150 skid steer loader service repair manualNew holland l150 skid steer loader service repair manual
New holland l150 skid steer loader service repair manual
 
New holland l140 skid steer loader service repair manual
New holland l140 skid steer loader service repair manualNew holland l140 skid steer loader service repair manual
New holland l140 skid steer loader service repair manual
 
Rvcf qig v.00 en 24.11.08
Rvcf qig v.00 en 24.11.08Rvcf qig v.00 en 24.11.08
Rvcf qig v.00 en 24.11.08
 
Innova 5568 Pro-Timing Light User Manual
Innova 5568 Pro-Timing Light User ManualInnova 5568 Pro-Timing Light User Manual
Innova 5568 Pro-Timing Light User Manual
 
Clark ewp45 forklift service repair manual
Clark ewp45 forklift service repair manualClark ewp45 forklift service repair manual
Clark ewp45 forklift service repair manual
 
Clark ewp45 forklift service repair manual
Clark ewp45 forklift service repair manualClark ewp45 forklift service repair manual
Clark ewp45 forklift service repair manual
 
Clark ewp45 forklift service repair manual
Clark ewp45 forklift service repair manualClark ewp45 forklift service repair manual
Clark ewp45 forklift service repair manual
 
Opel Blazer Owners Manual
Opel Blazer Owners ManualOpel Blazer Owners Manual
Opel Blazer Owners Manual
 
KWANG YANG MOTOR CO.,LTD UXV 450i 2015 Owner Manual
KWANG YANG MOTOR CO.,LTD UXV 450i 2015 Owner ManualKWANG YANG MOTOR CO.,LTD UXV 450i 2015 Owner Manual
KWANG YANG MOTOR CO.,LTD UXV 450i 2015 Owner Manual
 
New holland l175 skid steer loader service repair manual
New holland l175 skid steer loader service repair manualNew holland l175 skid steer loader service repair manual
New holland l175 skid steer loader service repair manual
 
New Holland C175 Compact Track Loader Service Repair Manual
New Holland C175 Compact Track Loader Service Repair ManualNew Holland C175 Compact Track Loader Service Repair Manual
New Holland C175 Compact Track Loader Service Repair Manual
 

More from Atlantic Scuba

Soprassub 2016 17 full catalogue
Soprassub 2016 17 full catalogueSoprassub 2016 17 full catalogue
Soprassub 2016 17 full catalogueAtlantic Scuba
 
Sopras Aapnea catalogue
Sopras Aapnea catalogue  Sopras Aapnea catalogue
Sopras Aapnea catalogue Atlantic Scuba
 
Siebe Gorman Oxygen pump manual
Siebe Gorman Oxygen pump manualSiebe Gorman Oxygen pump manual
Siebe Gorman Oxygen pump manualAtlantic Scuba
 
sv Andromeda's history
sv Andromeda's historysv Andromeda's history
sv Andromeda's historyAtlantic Scuba
 
Scubafest RIB Dive Timings 2015
Scubafest RIB Dive Timings 2015Scubafest RIB Dive Timings 2015
Scubafest RIB Dive Timings 2015Atlantic Scuba
 
Imass October 2013 Newsletter
Imass October 2013 NewsletterImass October 2013 Newsletter
Imass October 2013 NewsletterAtlantic Scuba
 
Sopras Sub catalogue 2014/15 Available from Atlantic Scuba in the UK
Sopras Sub catalogue 2014/15 Available from Atlantic Scuba in the UKSopras Sub catalogue 2014/15 Available from Atlantic Scuba in the UK
Sopras Sub catalogue 2014/15 Available from Atlantic Scuba in the UKAtlantic Scuba
 
Tecline V2 regulators available from Atlantic Scuba in the UK
Tecline V2 regulators available from Atlantic Scuba in the UKTecline V2 regulators available from Atlantic Scuba in the UK
Tecline V2 regulators available from Atlantic Scuba in the UKAtlantic Scuba
 
Tecline Diving Equipment available from Atlantic Scuba in the UK
Tecline Diving Equipment available from Atlantic Scuba in the UKTecline Diving Equipment available from Atlantic Scuba in the UK
Tecline Diving Equipment available from Atlantic Scuba in the UKAtlantic Scuba
 
Snorkel Falmouth Rev.2
Snorkel Falmouth Rev.2Snorkel Falmouth Rev.2
Snorkel Falmouth Rev.2Atlantic Scuba
 
Falmouth's wreck dives
Falmouth's wreck divesFalmouth's wreck dives
Falmouth's wreck divesAtlantic Scuba
 
Baby Lobster release 15th March 2014 press release.
Baby Lobster release 15th March 2014 press release.Baby Lobster release 15th March 2014 press release.
Baby Lobster release 15th March 2014 press release.Atlantic Scuba
 
SS Ponus shipwreck in Falmouth Bay Cornwall
SS Ponus shipwreck in Falmouth Bay CornwallSS Ponus shipwreck in Falmouth Bay Cornwall
SS Ponus shipwreck in Falmouth Bay CornwallAtlantic Scuba
 
IMASS September 2012 Newsletter
IMASS September 2012 NewsletterIMASS September 2012 Newsletter
IMASS September 2012 NewsletterAtlantic Scuba
 
Siebe Gorman Oxygen Pump Manual
Siebe Gorman Oxygen Pump ManualSiebe Gorman Oxygen Pump Manual
Siebe Gorman Oxygen Pump ManualAtlantic Scuba
 
Lobster release - press release.
Lobster release - press release.Lobster release - press release.
Lobster release - press release.Atlantic Scuba
 
Kayak diving course page 1-3
Kayak diving course page 1-3Kayak diving course page 1-3
Kayak diving course page 1-3Atlantic Scuba
 

More from Atlantic Scuba (20)

Soprassub 2016 17 full catalogue
Soprassub 2016 17 full catalogueSoprassub 2016 17 full catalogue
Soprassub 2016 17 full catalogue
 
Sopras Aapnea catalogue
Sopras Aapnea catalogue  Sopras Aapnea catalogue
Sopras Aapnea catalogue
 
Sopras Tek Catalouge
Sopras Tek CatalougeSopras Tek Catalouge
Sopras Tek Catalouge
 
Siebe Gorman Oxygen pump manual
Siebe Gorman Oxygen pump manualSiebe Gorman Oxygen pump manual
Siebe Gorman Oxygen pump manual
 
sv Andromeda's history
sv Andromeda's historysv Andromeda's history
sv Andromeda's history
 
Scubafest RIB Dive Timings 2015
Scubafest RIB Dive Timings 2015Scubafest RIB Dive Timings 2015
Scubafest RIB Dive Timings 2015
 
Imass October 2013 Newsletter
Imass October 2013 NewsletterImass October 2013 Newsletter
Imass October 2013 Newsletter
 
Sopras Sub catalogue 2014/15 Available from Atlantic Scuba in the UK
Sopras Sub catalogue 2014/15 Available from Atlantic Scuba in the UKSopras Sub catalogue 2014/15 Available from Atlantic Scuba in the UK
Sopras Sub catalogue 2014/15 Available from Atlantic Scuba in the UK
 
Tecline V2 regulators available from Atlantic Scuba in the UK
Tecline V2 regulators available from Atlantic Scuba in the UKTecline V2 regulators available from Atlantic Scuba in the UK
Tecline V2 regulators available from Atlantic Scuba in the UK
 
Tecline Diving Equipment available from Atlantic Scuba in the UK
Tecline Diving Equipment available from Atlantic Scuba in the UKTecline Diving Equipment available from Atlantic Scuba in the UK
Tecline Diving Equipment available from Atlantic Scuba in the UK
 
Snorkel Falmouth Rev.2
Snorkel Falmouth Rev.2Snorkel Falmouth Rev.2
Snorkel Falmouth Rev.2
 
Falmouth's reef dives
Falmouth's reef divesFalmouth's reef dives
Falmouth's reef dives
 
Falmouth's wreck dives
Falmouth's wreck divesFalmouth's wreck dives
Falmouth's wreck dives
 
Baby Lobster release 15th March 2014 press release.
Baby Lobster release 15th March 2014 press release.Baby Lobster release 15th March 2014 press release.
Baby Lobster release 15th March 2014 press release.
 
SS Ponus shipwreck in Falmouth Bay Cornwall
SS Ponus shipwreck in Falmouth Bay CornwallSS Ponus shipwreck in Falmouth Bay Cornwall
SS Ponus shipwreck in Falmouth Bay Cornwall
 
Fanny story
Fanny storyFanny story
Fanny story
 
IMASS September 2012 Newsletter
IMASS September 2012 NewsletterIMASS September 2012 Newsletter
IMASS September 2012 Newsletter
 
Siebe Gorman Oxygen Pump Manual
Siebe Gorman Oxygen Pump ManualSiebe Gorman Oxygen Pump Manual
Siebe Gorman Oxygen Pump Manual
 
Lobster release - press release.
Lobster release - press release.Lobster release - press release.
Lobster release - press release.
 
Kayak diving course page 1-3
Kayak diving course page 1-3Kayak diving course page 1-3
Kayak diving course page 1-3
 

Recently uploaded

VIP Kolkata Call Girl Liluah 👉 8250192130 Available With Room
VIP Kolkata Call Girl Liluah 👉 8250192130  Available With RoomVIP Kolkata Call Girl Liluah 👉 8250192130  Available With Room
VIP Kolkata Call Girl Liluah 👉 8250192130 Available With Roomdivyansh0kumar0
 
JORNADA 4 LIGA MURO 2024TUXTEPEC1234.pdf
JORNADA 4 LIGA MURO 2024TUXTEPEC1234.pdfJORNADA 4 LIGA MURO 2024TUXTEPEC1234.pdf
JORNADA 4 LIGA MURO 2024TUXTEPEC1234.pdfArturo Pacheco Alvarez
 
Tableaux 9ème étape circuit fédéral 2024
Tableaux 9ème étape circuit fédéral 2024Tableaux 9ème étape circuit fédéral 2024
Tableaux 9ème étape circuit fédéral 2024HechemLaameri
 
Resultados del Campeonato mundial de Marcha por equipos Antalya 2024
Resultados del Campeonato mundial de Marcha por equipos Antalya 2024Resultados del Campeonato mundial de Marcha por equipos Antalya 2024
Resultados del Campeonato mundial de Marcha por equipos Antalya 2024Judith Chuquipul
 
Chennai Call Girls Anna Nagar Phone 🍆 8250192130 👅 celebrity escorts service
Chennai Call Girls Anna Nagar Phone 🍆 8250192130 👅 celebrity escorts serviceChennai Call Girls Anna Nagar Phone 🍆 8250192130 👅 celebrity escorts service
Chennai Call Girls Anna Nagar Phone 🍆 8250192130 👅 celebrity escorts servicevipmodelshub1
 
08448380779 Call Girls In Lajpat Nagar Women Seeking Men
08448380779 Call Girls In Lajpat Nagar Women Seeking Men08448380779 Call Girls In Lajpat Nagar Women Seeking Men
08448380779 Call Girls In Lajpat Nagar Women Seeking MenDelhi Call girls
 
Call Girls in Dhaula Kuan 💯Call Us 🔝8264348440🔝
Call Girls in Dhaula Kuan 💯Call Us 🔝8264348440🔝Call Girls in Dhaula Kuan 💯Call Us 🔝8264348440🔝
Call Girls in Dhaula Kuan 💯Call Us 🔝8264348440🔝soniya singh
 
Interpreting the Secrets of Milan Night Chart
Interpreting the Secrets of Milan Night ChartInterpreting the Secrets of Milan Night Chart
Interpreting the Secrets of Milan Night ChartChart Kalyan
 
CALL ON ➥8923113531 🔝Call Girls Telibagh Lucknow best Night Fun service 🧣
CALL ON ➥8923113531 🔝Call Girls Telibagh Lucknow best Night Fun service  🧣CALL ON ➥8923113531 🔝Call Girls Telibagh Lucknow best Night Fun service  🧣
CALL ON ➥8923113531 🔝Call Girls Telibagh Lucknow best Night Fun service 🧣anilsa9823
 
Croatia vs Albania Clash of Euro Cup 2024 Squad Preparations and Euro Cup Dre...
Croatia vs Albania Clash of Euro Cup 2024 Squad Preparations and Euro Cup Dre...Croatia vs Albania Clash of Euro Cup 2024 Squad Preparations and Euro Cup Dre...
Croatia vs Albania Clash of Euro Cup 2024 Squad Preparations and Euro Cup Dre...Eticketing.co
 
Serbia vs England Vanja Milinkovic-Savic's Stellar Performance in Euro 2024 P...
Serbia vs England Vanja Milinkovic-Savic's Stellar Performance in Euro 2024 P...Serbia vs England Vanja Milinkovic-Savic's Stellar Performance in Euro 2024 P...
Serbia vs England Vanja Milinkovic-Savic's Stellar Performance in Euro 2024 P...Eticketing.co
 
ppt on Myself, Occupation and my Interest
ppt on Myself, Occupation and my Interestppt on Myself, Occupation and my Interest
ppt on Myself, Occupation and my InterestNagaissenValaydum
 
办理学位证(KCL文凭证书)伦敦国王学院毕业证成绩单原版一模一样
办理学位证(KCL文凭证书)伦敦国王学院毕业证成绩单原版一模一样办理学位证(KCL文凭证书)伦敦国王学院毕业证成绩单原版一模一样
办理学位证(KCL文凭证书)伦敦国王学院毕业证成绩单原版一模一样7pn7zv3i
 
CALL ON ➥8923113531 🔝Call Girls Saharaganj Lucknow best Female service 🦺
CALL ON ➥8923113531 🔝Call Girls Saharaganj Lucknow best Female service  🦺CALL ON ➥8923113531 🔝Call Girls Saharaganj Lucknow best Female service  🦺
CALL ON ➥8923113531 🔝Call Girls Saharaganj Lucknow best Female service 🦺anilsa9823
 
Stunning ➥8448380779▻ Call Girls In Delhi Cantt Delhi NCR
Stunning ➥8448380779▻ Call Girls In Delhi Cantt Delhi NCRStunning ➥8448380779▻ Call Girls In Delhi Cantt Delhi NCR
Stunning ➥8448380779▻ Call Girls In Delhi Cantt Delhi NCRDelhi Call girls
 
大学假文凭《原版英国Imperial文凭》帝国理工学院毕业证制作成绩单修改
大学假文凭《原版英国Imperial文凭》帝国理工学院毕业证制作成绩单修改大学假文凭《原版英国Imperial文凭》帝国理工学院毕业证制作成绩单修改
大学假文凭《原版英国Imperial文凭》帝国理工学院毕业证制作成绩单修改atducpo
 

Recently uploaded (20)

Call Girls In RK Puram 📱 9999965857 🤩 Delhi 🫦 HOT AND SEXY VVIP 🍎 SERVICE
Call Girls In RK Puram 📱  9999965857  🤩 Delhi 🫦 HOT AND SEXY VVIP 🍎 SERVICECall Girls In RK Puram 📱  9999965857  🤩 Delhi 🫦 HOT AND SEXY VVIP 🍎 SERVICE
Call Girls In RK Puram 📱 9999965857 🤩 Delhi 🫦 HOT AND SEXY VVIP 🍎 SERVICE
 
VIP Kolkata Call Girl Liluah 👉 8250192130 Available With Room
VIP Kolkata Call Girl Liluah 👉 8250192130  Available With RoomVIP Kolkata Call Girl Liluah 👉 8250192130  Available With Room
VIP Kolkata Call Girl Liluah 👉 8250192130 Available With Room
 
JORNADA 4 LIGA MURO 2024TUXTEPEC1234.pdf
JORNADA 4 LIGA MURO 2024TUXTEPEC1234.pdfJORNADA 4 LIGA MURO 2024TUXTEPEC1234.pdf
JORNADA 4 LIGA MURO 2024TUXTEPEC1234.pdf
 
Tableaux 9ème étape circuit fédéral 2024
Tableaux 9ème étape circuit fédéral 2024Tableaux 9ème étape circuit fédéral 2024
Tableaux 9ème étape circuit fédéral 2024
 
Resultados del Campeonato mundial de Marcha por equipos Antalya 2024
Resultados del Campeonato mundial de Marcha por equipos Antalya 2024Resultados del Campeonato mundial de Marcha por equipos Antalya 2024
Resultados del Campeonato mundial de Marcha por equipos Antalya 2024
 
Chennai Call Girls Anna Nagar Phone 🍆 8250192130 👅 celebrity escorts service
Chennai Call Girls Anna Nagar Phone 🍆 8250192130 👅 celebrity escorts serviceChennai Call Girls Anna Nagar Phone 🍆 8250192130 👅 celebrity escorts service
Chennai Call Girls Anna Nagar Phone 🍆 8250192130 👅 celebrity escorts service
 
08448380779 Call Girls In Lajpat Nagar Women Seeking Men
08448380779 Call Girls In Lajpat Nagar Women Seeking Men08448380779 Call Girls In Lajpat Nagar Women Seeking Men
08448380779 Call Girls In Lajpat Nagar Women Seeking Men
 
Call Girls in Dhaula Kuan 💯Call Us 🔝8264348440🔝
Call Girls in Dhaula Kuan 💯Call Us 🔝8264348440🔝Call Girls in Dhaula Kuan 💯Call Us 🔝8264348440🔝
Call Girls in Dhaula Kuan 💯Call Us 🔝8264348440🔝
 
FULL ENJOY Call Girls In Savitri Nagar (Delhi) Call Us 9953056974
FULL ENJOY Call Girls In  Savitri Nagar (Delhi) Call Us 9953056974FULL ENJOY Call Girls In  Savitri Nagar (Delhi) Call Us 9953056974
FULL ENJOY Call Girls In Savitri Nagar (Delhi) Call Us 9953056974
 
Interpreting the Secrets of Milan Night Chart
Interpreting the Secrets of Milan Night ChartInterpreting the Secrets of Milan Night Chart
Interpreting the Secrets of Milan Night Chart
 
CALL ON ➥8923113531 🔝Call Girls Telibagh Lucknow best Night Fun service 🧣
CALL ON ➥8923113531 🔝Call Girls Telibagh Lucknow best Night Fun service  🧣CALL ON ➥8923113531 🔝Call Girls Telibagh Lucknow best Night Fun service  🧣
CALL ON ➥8923113531 🔝Call Girls Telibagh Lucknow best Night Fun service 🧣
 
Call Girls 🫤 Paharganj ➡️ 9999965857 ➡️ Delhi 🫦 Russian Escorts FULL ENJOY
Call Girls 🫤 Paharganj ➡️ 9999965857  ➡️ Delhi 🫦  Russian Escorts FULL ENJOYCall Girls 🫤 Paharganj ➡️ 9999965857  ➡️ Delhi 🫦  Russian Escorts FULL ENJOY
Call Girls 🫤 Paharganj ➡️ 9999965857 ➡️ Delhi 🫦 Russian Escorts FULL ENJOY
 
Croatia vs Albania Clash of Euro Cup 2024 Squad Preparations and Euro Cup Dre...
Croatia vs Albania Clash of Euro Cup 2024 Squad Preparations and Euro Cup Dre...Croatia vs Albania Clash of Euro Cup 2024 Squad Preparations and Euro Cup Dre...
Croatia vs Albania Clash of Euro Cup 2024 Squad Preparations and Euro Cup Dre...
 
Serbia vs England Vanja Milinkovic-Savic's Stellar Performance in Euro 2024 P...
Serbia vs England Vanja Milinkovic-Savic's Stellar Performance in Euro 2024 P...Serbia vs England Vanja Milinkovic-Savic's Stellar Performance in Euro 2024 P...
Serbia vs England Vanja Milinkovic-Savic's Stellar Performance in Euro 2024 P...
 
ppt on Myself, Occupation and my Interest
ppt on Myself, Occupation and my Interestppt on Myself, Occupation and my Interest
ppt on Myself, Occupation and my Interest
 
办理学位证(KCL文凭证书)伦敦国王学院毕业证成绩单原版一模一样
办理学位证(KCL文凭证书)伦敦国王学院毕业证成绩单原版一模一样办理学位证(KCL文凭证书)伦敦国王学院毕业证成绩单原版一模一样
办理学位证(KCL文凭证书)伦敦国王学院毕业证成绩单原版一模一样
 
CALL ON ➥8923113531 🔝Call Girls Saharaganj Lucknow best Female service 🦺
CALL ON ➥8923113531 🔝Call Girls Saharaganj Lucknow best Female service  🦺CALL ON ➥8923113531 🔝Call Girls Saharaganj Lucknow best Female service  🦺
CALL ON ➥8923113531 🔝Call Girls Saharaganj Lucknow best Female service 🦺
 
Call Girls 🫤 Malviya Nagar ➡️ 9999965857 ➡️ Delhi 🫦 Russian Escorts FULL ENJOY
Call Girls 🫤 Malviya Nagar ➡️ 9999965857  ➡️ Delhi 🫦  Russian Escorts FULL ENJOYCall Girls 🫤 Malviya Nagar ➡️ 9999965857  ➡️ Delhi 🫦  Russian Escorts FULL ENJOY
Call Girls 🫤 Malviya Nagar ➡️ 9999965857 ➡️ Delhi 🫦 Russian Escorts FULL ENJOY
 
Stunning ➥8448380779▻ Call Girls In Delhi Cantt Delhi NCR
Stunning ➥8448380779▻ Call Girls In Delhi Cantt Delhi NCRStunning ➥8448380779▻ Call Girls In Delhi Cantt Delhi NCR
Stunning ➥8448380779▻ Call Girls In Delhi Cantt Delhi NCR
 
大学假文凭《原版英国Imperial文凭》帝国理工学院毕业证制作成绩单修改
大学假文凭《原版英国Imperial文凭》帝国理工学院毕业证制作成绩单修改大学假文凭《原版英国Imperial文凭》帝国理工学院毕业证制作成绩单修改
大学假文凭《原版英国Imperial文凭》帝国理工学院毕业证制作成绩单修改
 

Farallon Scooter DPV 2003 08-23 manual-mk-7_e

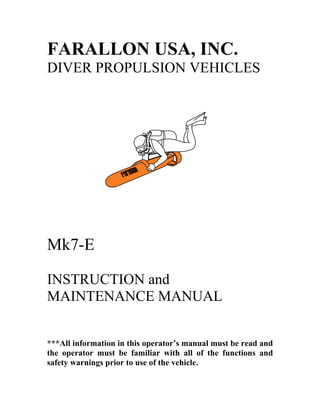
  • 1. FARALLON USA, INC. DIVER PROPULSION VEHICLES Mk7-E INSTRUCTION and MAINTENANCE MANUAL ***All information in this operator’s manual must be read and the operator must be familiar with all of the functions and safety warnings prior to use of the vehicle.
  • 2. 2 CAUTION: DO NOT SPIN PROPELLER OUT OF WATER!!! Doing so will cause damage to shaft seal and will void any and all warranties!!!!!
  • 3. 3 TABLE OF CONTENTS Introduction to DPV Diving ............................................ 3 Warnings ............................................................................. 4 Preparation For Use ............................................................ 5 Assembly of the Mk7-E ……………................................. 8 How to Ride ........................................................................ 9 Care of Vehicle .................................................................. 10 Battery Charging and Replacement .................................... 11 Electrical System ............................................................... 12 Trouble Shooting ............................................................... 13 Maintenance ....................................................................... 14 Warranty Limitations and Conditions ................................ 15 DPV Maintenance Log ....................................................... 16 Battery Maintenance ........................................................... 17 Vehicle Diagram ....................................................... Fold-Out Warranty Registration .......................................................... 18 Articles ................................................................................ 19 INTRODUCTION TO DPV DIVING
  • 4. 4 Congratulations on your purchase of the world’s most advanced Diver Propulsion Vehicle. You now have the freedom and access to survey, explore, search and video an entirely new universe and have a great deal of fun doing it! Along with these new freedoms however come new responsibilities. Use of a Diver Propulsion Vehicle requires careful observance of all diving rules and regulations. Included in this and particularly important in DPV use, is the observance of ascent and descent rates. You should always use your normal ascent and descent rates as taught by your certifying agency. A DPV is NOT to be used for more rapid ascents. Close attention to direction, distance and air supply must also be maintained as the vehicle will allow you to travel greater distances on a single dive than normal means of propulsion. Once again, congratulations on your purchase and we know that you will have many exciting and wonderful experiences with your vehicle as long as you practice safe diving techniques and perform regular maintenance on your unit.
  • 5. 5 WARNINGS THESE MUST BE REVIEWED PRIOR TO USE! WARNING: DO NOT operate a FARALLON DPV unless you are a certified diver and have been trained in the use of diver propulsion vehicles. WARNING: DO NOT operate your FARALLON DPV until all pre-dive and operational checks have been successfully completed. WARNING: DO NOT exceed industry standards for ascent and descent rates. WARNING: DO NOT operate your FARALLON DPV in conditions and/or environments that you are not trained for and/or that exceed your level of expertise and training. WARNING: DIVING in excess of industry standards for maximum depths is not endorsed by FARALLON USA, Inc. WARNING: THE FARALLON DPV is heavy out of the water. Use recognized lifting procedures and/or solicit assistance when moving your FARALLON DPV to and from the water. WARNING: Should the vehicle flood during operation, it will become extremely heavy and should be abandoned if it is too heavy for ascending. WARNING: COMPLETELY remove the batteries from the battery compartment prior to charging. Do not charge batteries in a confined space as this may lead to explosion causing serious injury or death. WARNING: DO NOT smoke or initiate open flame in the vicinity of batteries under charge as this may lead to explosion causing serious injury or death. WARNING: DO NOT place hands or any articles in the propeller area at any time. PREPARATION FOR USE
  • 6. 6 -fold out diagram on page 18 prior to reading- FEATURES: Your new Mk7-E has several advanced features which you must familiarize yourself with prior to use. Warnings regarding each function and procedure must be reviewed. Main System On/Off Switch: The Mk7-E is equipped with a Main System “On/Off” switch (17) which is located on the front plate of the handle assembly. This switch activates the electronics in the unit making the unit operational. The switch is in the “On” position when moved to the far right position. This switch should remain in the far left position when the vehicle is not in use. WARNING: NEVER depress either motor enable switch while the main system switch, located adjacent to the indicator panel, is in the “On” position; unless the vehicle is submerged and you are in the proper riding position! Doing so will cause the propeller to spin creating a potential hazard to equipment or body. Keep hands clear of propeller area at all times. Dual Motor Enable Triggers: (Parts 7 and 8 on the illustration) Located on the lower portion of either handle is a motor enable trigger (7)(8) which activate the unit. One of these triggers must be depressed to make the unit operational. The release of both triggers will disable the vehicle causing it to stop immediately. During operation these triggers may be alternately held to maintain comfort or to free a needed hand. Cruise Control Feature: (Parts 6 and 9 on the illustration) Located on the upper portion of each handle grip are the speed control operating triggers (6)(9). The upper RIGHT trigger (6) is the “Up” speed control which, when depressed together with one or both motor enable trigger(s), will run the speed up digitally to any speed desired by the operator. It is not necessary to “click” the trigger to increase speed. When the maximum r.p.m. is attained the “Maximum Speed” indicator light (Red LED) (20) will illuminate. The trigger can then be released and the speed will be maintained.
  • 7. 7 The speed is reduced by depressing the upper LEFT trigger or the “down” speed control trigger (9) located on the upper portion of the left handle. (Or by releasing both motor enabler triggers or by moving the Main On/Off switch (17) to the “OFF” position). The “down” speed trigger will run the speed down to zero speed which will be indicated by a green light being illuminated (21). When the light comes on, the down speed trigger may be released to maintain zero speed. Either speed control trigger, “up” or “down”, may be released at any time to maintain desired speed. Additionally, both motor enable switches may be released at any time to cease operation of the vehicle. Pre-dive Electronics Function Test: WARNING: DO NOT depress the motor enabler switches (7)(8) while performing the following checks. Prior to use, the “up” and “down” speed functions can be checked by operating the speed control triggers WITHOUT depressing the motor enabler triggers. Switch the main system “On/Off” switch to the “ON” position. Depress the “up” speed control until the maximum speed indicator light (red LED) comes on. Then release the “up” speed trigger and depress the “down” speed trigger until the minimum speed indicator (green LED) is illuminated. If the LED lights on the speed indicator do not function during this pre-dive system check, check the following: If the top green light on the battery status indicator (see “Battery Status Indicator) is not illuminated check the Main System “On/Off” switch to ensure it is in the “ON” position. Then check the battery connection at the bulkhead (10), the battery terminals and the batteries themselves for adequate charge status. If the problem remains check the electronics system connection at the bulkhead (12). If the unit still does not respond return the unit to the dealer for service. Battery Status Indicator:
  • 8. 8 Your Mk7-E is equipped with a “battery status” indicator display located in the center of the handle assembly (18). This LED display monitors your battery charge status as recommended by the battery manufacturer. When the Main System switch is turned to the “ON” position the top green LED should be visible indicating a charge of approximately 30% to 100% available. Due to the non-linear discharge nature of the batteries, the different color LED lights do not represent the discharge in 13 increments, rather the lights move through their sequence during the final 30 minutes of the life of the battery charge. The operator should run the unit in a protected environment to get familiarized with the LED movements and corresponding run times. Medium speed runs will typically see a 30 minute run time when the LED lights begin to move. When you reach the minimum recommended charge a warning light (19) will begin to flash indicating that the unit should be deactivated and supplied with a fresh set of batteries or returned to re-charge the existing battery pack. (See Cautions and Warnings regarding Battery Replacement and Charging Page 11.) ________________________________________________________________________ ASSEMBLY OF YOUR DIVER PROPULSION VEHICLE
  • 9. 9 Now that you have familiarized yourself with the operational features, it is time to prepare your new Mk7-E for use. Open the unit by disengaging the body joint clips (13) located on the outer housing. After separating the two sections, carefully slide the battery pack into the battery tray (23) and secure with securing bracket (24). NOTE: It is very important that the thumb securing screws for the battery stop bracket are properly installed. Place the two sections close together and plug in the electronic connector (22). When this connector is secured plug the battery lead connector (16) into the bulkhead battery receiver (10). MAKE SURE THE “O” RING ON THE BODY JOINT IS LUBRICATED WITH A THIN COATING OF SILICONE GREASE. THIS WILL PROTECT THE SEAL AND EASE THE ASSEMBLY OF THE TWO SECTIONS. Slide the two sections together and secure all body latches on the body joint closing the opposing latches in pairs. To attach the saddle slide the tube into the collar located on the propeller shroud. Secure the saddle by sliding the clevis pin through the collar and into the saddle tube locking it in place with the cotter pin. ASSEMBLY TIP: Place the front housing slightly elevated at the joint area when preparing to assemble. When the unit is properly assembled run operational tests on the electronics as described on page 6. ________________________________________________________________________ RIDING YOUR DIVER PROPULSION VEHICLE
  • 10. 10 Enter the water with your vehicle. Check for bubbles around the display panel on the main handle assembly, around the propeller and around the main body joint. If the bubbles do not stop within a minute after submersing the vehicle remove the vehicle immediately and check the security of the seals. This must be done each time the unit is placed into the water. Once you have determined that the seals are working properly, proceed with riding instructions. Place your legs on either side of the Saddle (25) and slide under the “T” bar portion of the saddle until the bar is comfortably between your legs. Hold both handles and check that your equipment is clear of the propeller shroud and guard (26). It is highly recommended that a wet suit or skin be worn to avoid having loose clothing pulled into the propeller. Additionally, your mask, weight belt strap and regulator should be checked for position and security. Turn the Main System switch (17) to the “ON” position and look for your battery status and minimum speed indication. If the lights are both green, depress one or both motor enabler trigger(s), (7)(8) and the “up” speed trigger (6) and obtain a comfortable speed setting. If the light on the low speed indicator is not illuminated, depress the “down” speed trigger until the light is illuminated and then proceed to depress the motor enable and “up” speed triggers. Maintain maximum parallel position to the vehicle for the most efficient riding position. Pulling your body forward may increase your operating efficiency. NOTE: The vehicle is steered by the operator’s body positioning and fin movements. These maneuvers should be practiced in shallow water and at slow speeds until the operator is proficient in the operation of the vehicle. It is recommended that operator be experienced in the operation of a DPV prior to open water use. WARNING: Should the vehicle begin to flood it must be turned off immediately. The unit should be abandoned if it becomes too heavy causing problems with your buoyancy. As a precaution, a lift bag may be carried (120 lb. of lift) to prevent the loss of the vehicle in this situation. TIPS FOR USE OF THE VEHICLE ON A BOAT: The first step when planning a boat dive with the Mk7-E is to inform the boat captain prior to your arrival at the boat. Let the captain know the physical size of the unit and
  • 11. 11 your space requirements. The captain will greatly appreciate this information prior to the dive date. It is good to get the specifications of the boat at this time also so that you may plan your dive with the Mk7-E. The unit should be equipped with a 25 foot long tether line. When the boat arrives at the dive site you should connect the tether line immediately and lower the unit into the water. Make certain that the unit is lowered down current from the boat. In the ocean the unit will sink only slightly. You may now proceed with preparing your dive equipment as with any standard dive, being cautious to secure lose or dangling lines. Once in the water, grab the vehicle and assume the proper riding position, making certain that all of your equipment is clear of the propeller guard. Release the vehicle from the tether and proceed with your dive. Following the dive and following standard safety accent rates, re-attach the vehicle to the tether line. Make sure that the main system “On/Off” switch is in the “Off” position at this time. This should put you at approximately 20 feet a good place to do a safety stop. Once you are on the boat remove your gear and pull the unit to the side of the boat or to the platform. With the help of a buddy diver lift the vehicle carefully onto the boat deck and secure for travel to the next dive or back to the dock. If you are going to use the vehicle for a second dive, check the battery status prior to placing the unit back into the water. CARE OF THE VEHICLE AFTER EACH USE Following the use of the vehicle, several steps should be taken to ensure proper storage or battery replacement. The exterior housing, trigger areas and shaft area must be rinsed with fresh water to protect the seals and hardware. The main body joint should then be wiped dry to prevent water from entering the battery compartment when the unit is opened. The unit should then be opened (fore and aft sections separated and the battery and electronics connectors disconnected) and the batteries completely removed for charging or replacement. The battery compartment should be inspected at this time for signs of leakage. The unit should be stored with the fore and aft sections assembled with main body O ring removed and placed in the front housing for storage. The batteries should be stored separately and fully charged. BATTERY CHARGING and REPLACEMENT WARNING: Charging batteries while they are located in vehicle may produce off- gassing which could lead to an explosion causing death or serious
  • 12. 12 injury. The Farallon MK7E is equipped with a 24 Volt Battery Pack. Using the Farallon battery charger there is no need to change any of the wire harness configuration. The operator should remove the battery completely from the front housing by first disconnecting the cable from the bulkhead. Second, the battery stop bracket (24) should be removed and the batteries carefully pulled completely out of the housing. Prior to charging, batteries should be inspected for cracks and potential leaks. If cracks are observed the battery should no longer be used. The Farallon charger may then be connected directly to the battery plug and turned on to charge. WARNING: The battery should be allowed to remain in a well ventilated area for a minimum of one (1) hour after being taken off charge! 1. Batteries: The Farallon Mk7E uses (2) 12 volt, 18 amp/hr, rechargeable, sealed lead acid batteries wired as a 24 volt pack which has no memory, thereby making it possible to recharge on less than full discharge. The operator should always store the batteries fully charged. 2. Charge Time: Using the supplied Farallon brand charger 6hours are required to obtain a 90% charge. Using the Farallon CVCC-6 charger only 6 hours are required to obtain a full charge. Faster chargers are available from other manufacturers but these may deplete the cycles in the batteries and void the warranty. A 100% charge (24 hours) is recommended to maintain the life of the batteries and to produce maximum usable run time for your DPV. 3. Battery Tray Removal and Installation: Should the battery tray need to be removed from the housing for any reason the following steps should be taken. First, remove the securing screw located in the front of the tray. Next, turn the tray counter clockwise (approximately 45° angle) and very slowly pull the tray out, being careful not to catch the electronics cable coming out from the front housing. Reverse the process to replace the battery tray. ELECTRICAL SYSTEM
  • 13. 13 Your Mk7-E is equipped with a fully digital electronic speed control and monitoring system designed for ease of use and durability. The electrical system incorporates the use of two printed circuit boards; one for control and one for monitoring. The control board is located in the sealed aft section compartment and the display board is located behind the indicator panel on the handle assembly. Neither board shall be removed or repaired except by an authorized Farallon dealer or by Farallon USA, Inc. Anti-fouling (Current Limiting) Feature: The system is also equipped with an anti-fouling feature which will protect the motor and electronics in the event of an overload caused by a locked propeller or other overload condition. In the event of one of these conditions the control board will automatically shut down the system when it detects an unusually high current draw by the motor. If this should occur during operation your vehicle will shut down. The operator should turn the vehicle’s main system switch “OFF” immediately. Any obstruction should then be cleared from the propeller. The operator can then resume the riding position and turn the vehicle to the “ON” position. The vehicle at this time will have automatically re-set itself to the lowest speed. If the system does not re-set there may be an electrical problem and the vehicle should be returned to the manufacturer or abandoned in the event of an emergency. ________________________________________________________________________ TROUBLE SHOOTING Problem Cause Solution
  • 14. 14 Unit Not Turned On Move On/Off Switch to “ON” Position Motor Enable Switch not Depress Motor Enable Depressed Switch Motor will not run Batteries Discharged Recharge Batteries Battery Terminal Secure Connection Connections Battery Lead Connection Secure Connection Electronic Lead Connection Secure Connection Fuse Blown Replace Fuse Malfunctioning Electronics Return to Dealer Propeller is obstructed Remove obstruction Motor runs but Loose propeller screw Tighten/Replace propeller propeller does not turn screw Drive Train problems Return to Dealer Failed View Port Seal Return to Dealer Moisture has entered the battery Failed Body Joint O ring Replace/Grease main joint O compartment ring Failed Body Clip Replace Body Clip Moisture has entered Failed Shaft Seal Return to Dealer the motor compartment Failed Bulkhead Seal Return to Dealer MAINTENANCE
  • 15. 15 The Farallon DPV requires regular maintenance to keep it operating properly and to maintain the maximum life of the vehicle. 1. Batteries: Batteries should be replaced every 200 cycles or sooner if a 60% discharge level is repeatedly exceeded. The batteries should be checked for cracks or other physical damage and should be replaced immediately if a problem exists. 2. Catalyzers: The catalyzers absorb the hydrogen gases expelled by batteries during operation. While your unit is equipped with batteries that do not off-gas during normal operation, these catalyzers are provided as an extra safety precaution and should be replaced every 2 years or immediately if they become cracked or damaged. They are located on the far end of the battery tray. (See battery tray removal) 3. Propeller: The propeller should be replaced when damaged to ensure the most efficient operation of your vehicle. 4. Printed Circuit Boards: The printed circuit boards should not be replaced by the operator as this will result in the voiding of the warranty. The boards should be kept in their respective housings and returned to the dealer. There is no regular maintenance scheduled for the printed circuitry boards. 5. Seals: The shaft seal on the Mk7-E should be inspected regularly and replaced every two (2) years depending upon use or sooner if a problem is detected. The main body “O” ring should be inspected prior to each dive for cuts or other deformities and should be free of all sand, hair and other foreign substances. The “O” ring should be replaced approximately every twenty-five uses. WARRANTY CONDITIONS
  • 16. 16 All Farallon USA, Inc. products are warranted, to the original purchaser only, against any material and manufacturing defects for a period of one (1) year from the date of purchase, under normal scuba use and with proper care and maintenance as required in the Farallon DPV Instruction and Service Manual. Defective products should be returned prepaid directly to Farallon USA, Inc. Farallon USA, Inc. will, at its discretion, repair or replace such products, and will return to customer prepaid. This warranty covers the following specific components: 1. Main body housing 2. Control housings 3. Propeller shroud 4. Propeller Shaft The following items are excluded from coverage in the warranty: 1. Printed Circuit Boards 2. Batteries 3. Battery Charger 4. Main Housing Coating 5. Propeller 6. Shaft Seal The printed circuit boards are covered by a 90 day manufacturers warranty. The other exceptions listed above may be covered by a manufacturers warranty. Any returns for warranty service must be accompanied by the original sales receipt and a copy of the owner’s portion of the warranty registration card. This warranty does not apply and may be rendered completely null and void in the event of misuse, abuse, overcharging of batteries, deep discharge of batteries, flooding due to neglect, tampering, lack of care and maintenance, improper storage, or unauthorized service. Modification or repair by anyone other than a Farallon authorized service dealer will void the warranty. Farallon will not be responsible for the recovery or replacement of the product in the event of loss or theft. Farallon, its distributors and retailers make no warranties express or implied, with respect to this product or its owner’s guide except those stated in the preceding paragraphs. By purchasing this product you agree and understand that in no event will Farallon USA, its distributors or retailers, be held liable for any personal injury resulting from its operation, or for any other damages whether direct, indirect, incidental, or consequential, even if Farallon is advised of such damages. Some states do not allow the exclusion or limitation of implied warranties or liabilities for incidental or consequential damages, so the above limitation may not apply to you. • An extended warranty up to 36 months is available. Contact your nearest dealer or Farallon USA, Inc. for more information. FARALLON DPV USE AND MAINTENANCE LOG Serial number __________________________________________________________
  • 17. 17 Date of Purchase _______________________________________________________ Purchased From ________________________________________________________ Date: _______________ Dive Location: __________________ Time: ____________ Maintenance Performed: ___________________________________________________ ________________________________________________________________________ ________________________________________________________________________ ________________________________________________________________________ Date: _______________ Dive Location: __________________ Time: ____________ Maintenance Performed: ___________________________________________________ ________________________________________________________________________ ________________________________________________________________________ ________________________________________________________________________ Date: _______________ Dive Location: __________________ Time: ____________ Maintenance Performed: ___________________________________________________ ________________________________________________________________________ ________________________________________________________________________ ________________________________________________________________________ Date: _______________ Dive Location: __________________ Time: ____________ Maintenance Performed: ___________________________________________________ ________________________________________________________________________ ________________________________________________________________________ ________________________________________________________________________ Date: _______________ Dive Location: __________________ Time: ____________ Maintenance Performed: ___________________________________________________ ________________________________________________________________________ ________________________________________________________________________ ________________________________________________________________________ Date: _______________ Dive Location: __________________ Time: ____________ Maintenance Performed: ___________________________________________________ ________________________________________________________________________ ________________________________________________________________________ ________________________________________________________________________ FARALLON DPV BATTERY CHARGING AND MAINTENANCE LOG DATE:__________________
  • 18. 18 START TIME:_____________________ END TIME:_______________________ DATE:__________________ START TIME:_____________________ END TIME:_______________________ DATE:__________________ START TIME:_____________________ END TIME:_______________________ DATE:__________________ START TIME:_____________________ END TIME:_______________________ DATE:__________________ START TIME:_____________________ END TIME:_______________________ DATE:__________________ START TIME:_____________________ END TIME:_______________________ DATE:__________________ START TIME:_____________________ END TIME:_______________________ DATE:__________________ START TIME:_____________________ END TIME:_______________________ DATE:__________________ START TIME:_____________________ END TIME:_______________________ DATE:__________________ START TIME:_____________________ END TIME:_______________________ DATE:__________________ START TIME:_____________________ END TIME:_______________________ DATE:__________________ START TIME:_____________________ END TIME:_______________________ DATE:__________________ START TIME:_____________________ END TIME:_______________________ FARALLON Mk DPV WARRANTY REGISTRATION
  • 19. 19 You must read your Farallon Instruction and Maintenance Manual and complete and sign this warranty registration and return within thirty (30) days of date of purchase for your warranty to be validated. Please Type or Print: Date of Purchase: __________ Serial Number: ____________ Model: _____________ =============================================================== = By signing below, I attest that I have read the Mk8/Mk-S/Mk7-E Owners Manual and I thoroughly understand the risks involved with operating the Mk8/Mk8-S/Mk7-E Diver Propulsion Vehicle. ______________________________________ ____________________________ Signature Date =============================================================== = Customer Name: _________________________________________________________ Address: ________________________________________________________________ City: ___________________________ State: _________ Zip: ___________________ Phone: (____)____________________ Fax: (_____)____________________________ Purchase Price: ________________________ =============================================================== = Where did you purchase your Farallon Mk DPV? ________________________________ Occupation: _________________________ Type of Diving:______________________ Will the DPV be used for ___ Business ___ Pleasure ___ Both ----------------------------------------------------------------------------------------------------------- -- CUT ALONG DOTTED LINE RETAIN LOWER PORTION FOR YOUR RECORDS FARALLON DPV WARRANTY REGISTRATION Date Purchased: ______________________ Serial Number: ______________________ Farallon USA, Inc., P.O. Box 450505, Atlanta, GA 31145