This document provides instructions for performing planned maintenance on lift trucks. It discusses the purpose and terminology of periodic service and planned maintenance. Recommended maintenance intervals are based on normal, severe, or extreme operating conditions. A coding system is used on maintenance check sheets to indicate if components are OK, need minor adjustment, repair, or urgent repair. The document outlines steps for visual inspections of external components like batteries, covers, forks, and tires as well as operational tests of controls, brakes, and gauges.
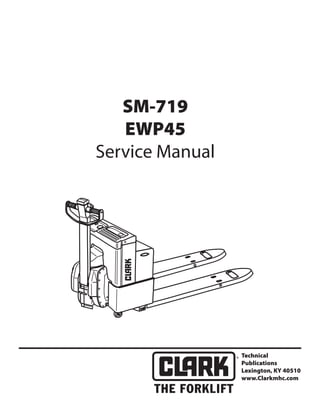
2. SM-719 iii June '07
Safety Notice
IMPORTANT SAFETY NOTICE
Read and understand all safety precautions and
warnings before performing repairs on lift trucks.
Appropriate service methods and proper repair procedures are essential to the safe, reliable operation of industrial
trucks as well as the personal safety of the individual doing the work. This Service Manual provides general
directions for accomplishing service and repair work with tested, effective techniques. Following them will help
assure successful repair and reliable truck operation.
There are numerous variations in procedures, techniques, tools, and parts for servicing industrial trucks, as well
as in the skill of the individual doing the work. This manual cannot possibly anticipate all such variations and
provide advice or precautions as to each. Accordingly, anyone departing from the instructions provided in this
manual through procedures used or choice of tools, materials, and parts may jeopardize his or her personal safety
and/or the safety of the vehicle user.
Improper or careless techniques cause accidents. Don’t take chances with incorrect or damaged equipment.
Read and understand the procedures for safe operation and maintenance outlined in this manual.
STAY ALERT! Follow safety rules, regulations and procedures. Accidents can be avoided by recognizing
dangerous procedures or situations before they occur.
DRIVE AND WORK SAFELY and follow the safety signs and their messages displayed on the truck and in this
manual.
General Precautions
The following list contains general precautions that should be followed when working on a lift truck:
• Always wear safety glasses for eye protection.
• Remove rings, watches, loose jewelry and open clothing before working on a vehicle, to avoid serious
injury.
• Do not smoke while working on a vehicle.
• Put key switch in the OFF position, unless otherwise required by the procedure.
• Set the parking brake. Place wheel chocks or wood blocks of 4" x 4" size or larger to the front and rear surfaces
of the tires to provide further restraint from inadvertent vehicle movement.
• Use safety stands or blocks whenever a procedure requires you to be under the vehicle.
• Service Electric Truck Batteries in a well-ventilated area to avoid the danger of igniting explosive gases.
• Follow the Safety Instructions outlined in GROUP 12 "Handling Storage Batteries".
• Always Discharge the Capacitors prior to working on or around electrical components. Refer to the
instructions outlined in GROUP 19 "Discharging Capacitors:.
• Avoid contact with Battery Acid. The battery contains corrosive acid which can cause injury. Following the
4. Intro-2 SM-719, June ‘07
INTRODUCTION
Contents by Group
Contents are listed here by Group number.
INTRO INTRODUCTION
PS PERIODIC SERVICE
12 BATTERY
13 ELECTRIC CONTROLS
14 ELECTRICAL
16 ELECTRIC MOTORS
19 MOTOR CONTROL
20 DRIVE UNIT ASSEMBLY
23 BRAKE SYSTEM
25 CASTER ASSEMBLY
26 STEERING
30 HYDRAULIC SYSTEM
34 LIFT CYLINDER
35 LIFT LINKAGE AND LOAD WHEELS
39 SHEET METAL
40 SPECIFICATIONS
5. SM-719, June ‘07 Intro-3
INTRODUCTION
Section Locations
Figure Intro-2
6. Intro-4 SM-719, June ‘07
INTRODUCTION
Truck Presentation.
The EWP45 is a battery powered walkie pallet
truck intended solely to be operated handling pal-
lets or similar load carriers indoors. The trucks are
equipped with a steering arm with all the controls
for operating within easy access. The trucks have
maximum lifting capacities of up to 4500 pounds
(2041 kg). Review data plate on the truck to note
the maximum lifting capacity.
The truck is equipped with a 24 volt electrical
system. Truck speed is regulated by means of a
transistor controller to provide infinite control of
acceleration and speed while driving. Chassis/lift
frame is raised by means of a hydraulic unit. The
control of the lift/lower is done electrically with
the push button on the steering arm. The trucks can
be fitted with a battery pack.
Truck Side Views
The terms right-hand and left-hand used indicate
the right and left side of the truck as viewed from
the operator’s line of sight for proper operation of
truck. Use this view when ordering parts to assure
proper selection of parts.
Figure Intro-3
Intended Truck Application
The trucks are solely designed and manufactured
to handle goods and should be fitted with the ap-
propriate accessories relevant to the application.
Prohibited Truck Application
The trucks are designed for handling
goods indoors. The use of trucks for
other purposes is not permitted. Do
not use the truck for the following:
As a towing tractor for trailers.
To tow other trucks.
To transport/lift passengers.
To drive on gravel or grass.
Truck Data
The table below provides information regarding
some technical data which is of value with daily
use of the trucks.
Truck data
Lifting capacity rated load, lb/kg 4500/2041
Lift height, inches/mm 8.5/216
Operating speed without load, mph/k 3.7/5.96
Operating speed with load, mph/k 2.9/4.6
Service weight without battery, lb/kg 859/390
Service weight including battery
(minimum battery weight 150 lb
(68 kg) maximum 330 lb (149.6 kg)
Above +
battery
weight
The lifting capacity and weight of the truck can be
found on the truck data plate.
•
•
•
•
7. SM-719, June ‘07 Intro-5
INTRODUCTION
Truck Dimensions
The following diagram shows external dimensions
for the EWP45 truck in its standard design.
All dimensions shown for 48” (1219 mm) long
pallet.
Figure Intro-4
8. Intro-6 SM-719, June ‘07
INTRODUCTION
Data Plate
The following diagram shows the data plate used
on the truck.
Figure Intro-5
Main Components
9. SM-719, June ‘07 Intro-7
INTRODUCTION
1. Reverser switch
The end of the control handle is equipped with
a red automatic reversing switch which causes
the truck to travel in the rearward direction when
activated.
2. Travel speed/direction selection
Selects the direction truck moves. The further in
that direction the faster the truck moves.
3. Horn switch
Horn sounds to warn others of truck position.
4. Fork raise switch
Forks will raise when switch is pressed or until lift
reaches upper limit switch.
5. Fork lower switch
Forks will lower when switch is pressed or until
lower stops are reached.
6. Battery
24 volt with different capacities and weights.
7. Load wheel
Lubricate load wheels to prevent wheels from
locking up.
8. Drive unit with brake
Fixed drive unit with a spring applied brake, drive
motor, gear box, and drive wheel combined into a
compact unit. The steering bearings are at the top
of the drive unit.
9. Electric panel
24 volt electrical system. Truck speed is regulated
by means of a transistor controller.
10. Circuit breaker
15A, Control circuit breaker
80A, Power circuit breaker
11. Cover
Removable to provide access for servicing.
12. Steering pivot point
Lubricate pivot point to prevent stiff steering.
13. Hydraulic unit
Pump motor, pump, electric valves and oil tank
integrated in a compact unit.
14. Hydraulic electric solenoid valve
For controlling lifting and lowering functions with
electric solenoid valve.
15. Steering control handle
Truck is controlled by the operator with 180 degree
steering angle.The brake is applied in the upper and
lower position of the steering control handle.
16. Key switch (toggle switch)
Shuts off electrical power to control system.
17. Gauge
Combined hourmeter/battery indicator, hourme-
ter/battery indicator with lift cutout or hourmeter
only.
18. Emergency Disconnect Switch
Pushing in on this button disconnects the battery
from all circuits on the truck shutting off all power
to the truck.
19. Battery Receptacle
Pulling the battery connector shuts off all electrical
power to truck.
11. PERIODIC SERVICE
SM-719, June ‘07 Planned Maintenance • PS-1-1
GROUP PS
SECTION 1
Maintenance Schedule
“Periodic Service” and “Planned Maintenance” .....................................PS-1-2
Determining Maintenance Intervals .........................................................PS-1-2
12. PERIODIC SERVICE
SM-719, June ‘07
PS-1-2 • Planned Maintenance
“Periodic Service” and “Planned
Maintenance”
The term “periodic service” includes all mainte-
nance tasks that should be performed on a regu-
larly scheduled basis.
The term “Planned Maintenance” indicates a for-
malized program of basic inspections, adjustments,
and lubrications that the Clark service organization
provides customers at a prescribed interval, usually
50-250 hours. The recommended basic “Planned
Maintenance” procedure is given in Section 2.
The current Section,”Maintenance Schedules,”
specifies all maintenance tasks-including Planned
Maintenance tasks-that should be performed pe-
riodically, and suggests intervals at which they
should be performed.
Determining Maintenance Intervals
Time intervals on the charts and elsewhere in this
manual relate to truck operating hours as recorded
on the hourmeter, and are based on experience
Clark has found to be convenient and suitable under
normal operation. Standard operating condition
classifications are:
Normal Operation: Eight-hour material handling,
mostly in buildings or in clean, open air on clean,
paved surfaces.
Severe Operation: Prolonged operating hours or
constant usage.
Extreme Operation:
In sandy or dusty locations, such as cement
plants, lumber mills, and coal dust or stone
crushing sites.
High-temperature locations, such as steel mills
and foundries.
Sudden temperature changes, such as constant
trips from buildings into the open air, or in
refrigeration plants.
IMPORTANT
MAINTENANCE INTERVALS. If the
lift truck is used in severe or extreme
operating conditions, the maintenance
intervals should be shortened accord-
ingly.
Since the operating environments of lift
trucks vary widely, the above descrip-
tions are highly generalized and should
be applied as actual conditions dictate.
•
•
•
13. SM-719, June ‘07 Planned Maintenance • PS-1-3
PERIODIC SERVICE
P.M. CHECK SHEET
A special coding system on the P.M. Check Sheet
allows truck condition to be reported with a mini-
mum number of words. As the P.M. is performed,
a check mark should be made in the appropriate
box of the component being checked. Refer to
Figure PS-1.
(✓) indicates the particular truck component or
system has been checked and is O.K.
(x) indicates the component or system is in need
of a minor adjustment or service (not part of the
normal P.M.) that should be taken care of in the
near future.
(r) indicates there is a potential problem that could
result in damage to a component or system and
requires attention.
(s) indicates the need for urgent repair or replace-
mentofacomponentorsystemandthetruckshould
be shut down as eminent damage or possible injury
may result.
The nature of problems found during a PM should
be noted in the “comments” portion of the check
sheet. Whenever a system or component is faulty
or unsafe, it must be noted on the check sheet, and
reported to the designated authority at the conclu-
sion of the P.M.
WARNING
Remove all jewelry before examining
electrical components.
Visual Inspection
A. Oil leaks ✓
B. Switches ✓
C. Drive Tire ✓
D. Load Wheels ✓
E. Caster Wheels ✓
F. Control Linkage ✓
Operational Tests
A. Brakes s
B. Brake Switch r
C. Horn ✓
D. Steering ✓
E. Speed Control x
F. Lift and Lower Control ✓
CODE
✓ = O.K.
O.K. X = Adjust (Not P.M.)
Potential r = Repair or Replace
Urgent s = Requires Shop Repair
Figure PS-1
14. SM-719, June ‘07
PS-1-4 • Planned Maintenance
PERIODIC SERVICE
Visual Inspection
Inspect Battery Plug & Truck Receptacle
Disconnect battery from truck. Refer to Figure
PS-2.
Inspect the spring loaded connectors in the
truck battery receptacle and check the battery
plug connectors. Severely burned connectors
should be noted on the P.M. check sheet.
Inspect Battery Cover for damage
Check cover for damage. Refer to Figure
PS-3.
The cover should not be dented. A badly
dented cover could short out across the battery
cell connectors.
The cover should be free to swing open and
closed without binding.
Inspect Pallet Forks for obvious damage
Forks should not be bent or warped. If the
forks are damaged, report condition to the
designated authority. Refer to Figure PS-4.
•
•
•
•
•
•
Figure PS-2
Figure PS-3
Figure PS-4
15. SM-719, June ‘07 Planned Maintenance • PS-1-5
PERIODIC SERVICE
Inspect Exterior
Inspect Frame Components
Check truck console, access covers and panels
for damage. Refer to Figure PS-5.
Inspect nameplates and decals for damage and
to be sure they are not missing.
Check for obvious oil leaks
Make a quick overall inspection for leakage. If
an oil leak appears to be major, note condition
on the check sheet for immediate attention.
Minor leaks should be repaired during the P.M.
Refer to Figure PS-6.
Inspect Tires & Wheels
Check for obvious damage to tires on the
load, caster and drive wheels. Refer to Figure
PS-7.
Look for excessive tire wear, cuts, breaks,
chunking or bond failure between the tires
and wheels. Note condition on the PM check
sheet.
Remove embedded objects from the tires.
Be sure, wheel fasteners are secure and none
are missing.
Make certain grease fittings are not damaged
or missing.
•
•
•
•
•
•
•
•
•
Figure PS-5
Figure PS-6
Figure PS-7
16. Thank you very much for
your reading. Please Click
Here. Then Get COMPLETE
MANUAL. NO WAITING
NOTE:
If there is no response to
click on the link above,
please download the PDF
document first and then
click on it.
17. SM-719, June ‘07
PS-1-6 • Planned Maintenance
PERIODIC SERVICE
Expose Internal Components
Remove the covers exposing the drive unit,
brake, lift cylinder, hydraulic unit and transis-
tor control. Front panel and covers are held
on with socket head screws. Refer to Figure
PS-8.
Connect Truck Battery
Connect truck battery and check truck opera-
tion. Refer to Figure PS-9.
•
•
Figure PS-8
Figure PS-9
18. SM-719, June ‘07 Planned Maintenance • PS-1-7
PERIODIC SERVICE
Operational Tests
Turn the key switch on. Refer to Figure PS-
10.
Pull the Emergency Disconnect Button out to
connect the battery circuit.
Check the horn to be sure it operates. Refer
to Figure PS-11.
Check the hour meter to be sure it operates.
Refer to Figure PS-12.
•
•
•
•
Figure PS-10
Figure PS-11
Figure PS-12