SlideShare a Scribd company logo
1 of 64
Download to read offline
FIAT
D -3
PE..SC,-LMANCE
HANDBCOK
By Ran :corn
FIAT X1/9 PERFOlXWWCE HANDBOOK
By Ron Coltins
Published By
P.O. Box 371383 El Paso,Texas 79937
All rights resieryed. NO patt of this book may be produced or bmsmitted in any fam or by any
r n m ,electronic or mechanical, including photoolDpY;ii& rroaPding a by any information stwage
retrieval system without written pemissm h r n the author, except for the inclusion of brief
qwtations m a review.
myright 1990, 1991by R d d E. Chllias
Firstpintea in 1990
S@mdprinting 191, rievised
Printed and bound in theUnited States afAmerica
Library ofCongress Catalog Card Number. 90-92227
Taale- -, of Contents
I m O D U m O N
1 A LlTI'LE HISTORY
2 .BUILDINGA HOT STREETCAR
3 BUILDING AN AUTOCROSS CAR
4 BUILDING A ROAD RACE/SOLX) TIPREPARED CAR
5 BUILDING A MODWED SOLOnCAR
6 THEDALLA.RAXlf9
APPENDIX 1 SOURCIES FOR PARTS
APPENDIX 2 RECOMMENDED READING
Introduction
Since its inbroduction so m y yearsago9dre Fiat XX9 has been a terrific sports car to~ w n
and drive, It also a car which many people wanted ta impiwe, modifjl and rhce.This has
spawned a whole bunch ofspecial highpd-ce parts for the X119. I hope thisbook will
help you select and install these cprnpmmts whether it's for street ar competition driving.
However, this book is not meant to r e p l ~a repair manual. % v d g d rqdr manuals
recommknded in the Appe.ndk.
Mthough many minufactwets and suppliers ate mentioned iuib'ev& 'r&miGin'dd 'in'~Gs
book, I am in tm way associated with any of them,, nor do I have anything to sell myself. I
ama teacher by profession and my hobby and passion is mOdifyiag and racing Fiats.
To the best of my knowledge, all the hfhmhn coatained in his book is tnm and mmct
All rexmnme-ns are made withbut any guarantee. Because thequality of partsgmtifrials
and methods is beyond my conbol, I disclaim all liability in comtim with the use of this
ia?rnti~&.
.Wluck with your XI@ ~mj-ea
A Little History
In the late 1960s Fiat was looking to
ce a new sports cat,even though their
!iP"O spider had only been in production a
few years and was very suo~essful. Fiat
m t e d to fit a car into their new
b n t wheel drive family.
W r Bertone. Bertone designers had
already prodCtC6d midengined designs for
. They used their expertise in
=crew a midengine design
which naoved Rat's entire EWD transirerse
engine set-up b the rear of a sprtsm.
&tone hen produced a special show car,
called the Runabout, for the Turin autb
show in 1969. This car was hurriedly put
together and had Fiat's 903 cc engine
instead of the new 12&bmed bansverse
set-up. The Runabout was well received.
Fiat soon put their stamp of approval on a
midenginel replacement for the 850
sp'ir.
While the new .car was be'ig developed it
was given tha code name "Xlf9". The
name stuck when the new midengined "car
for dre masseswwent into producbcm in late
1972 as a 1973 model.
For a rnid-engined car Bertone did a
brilliant job of packaging everyihing so
m d y into such a small car. The disturctrve
- .
attribute of the car was, of course, the
styling; which still looh modem today.
Also, the chassiswa incredibly strong for a
car with so many opnings in it. Mo~t-bfthq
strengh ofaechassis wiw in the &mr, with
box sei=tkm sills under the doors and the
cent@ tunnel. The targa rdof didn't hurt
things either in the rigidity department*
The XI19 had tWO e;one in the nose,
he other behind the engine. The rear brwk
had minimal ins&on cm the early models
from the heat of the engine and from the
muffler mwnted beneath'i~ This was the
perfkctp~cefostawyoUrpiPaon~way
home.
The suspensh layout, which was all
in& ndentI featured MacPher&mstruts in
tlie Cnt and rear. The clar didn't have.any
sway b-ars - front ar rear1 It didn't need
a. Even with the skinny tires and wheels
o ered, the car cornered asif on railsraiJs
The, X1/9 used a mildly modified I28
engine, whi& featured a finned cast alloy
oil sump W redesigned intake and exhaust
manifolds, which are not inkrchangeable
with dm 128 because the engine m~unting
an es are iWerent. In European hrm tbe
1Acc four cylinder put out 75 bbpand 72
Ib ft of torque, But, when ~e car was
stmgld by U.S. emions it pur out a
measly 66 bhpand 63lb ft of torque. Still,
theM e car was an immediate swcess when
it hit the U.S. streets in 1974. It had
nematlcable mad-holding and 'handling. I
think wbat attracted most buyers was it's
wm&M wedge-shape styling. I still love
the looksof the-cartcrday.
When the X1B was intr6ducql it was so far
ahead of the Pthor cars in its, class, Fiat
didn't mess with its basic styling or
rne&a&als fbr several years; The
X1/9 rcmained vizhrally unchanged until
October, 1978, when it was filted with the
Ritmo's (Strada) 149.8 cc engine. This
answered the criticism that the car was too
underpowered,
Brought out as a 1979model, the X1/9now
had 85 bhp' and 87 lb ft of torque in
European trim; but only had a pathetic 67
bhp and 76 lb ft oftorque forUSA modoh.
The nw engine was also mated to a 5-$pee$
transmission which helped in highbay
cruising. A wtch had to be cut m the frame
and in the susp%nsioncontrol arm for the
longer transmission to fit mnmersely in the
engine biy. A higher emgine covef was
installed t6 clear the naw tdler engine. It
now had wider tires and wheels; 5x13 with
16Sn0 radials instead of the skinny 4
1/2x13 rims and 145@ tires. The interior
was also updated with a completely new
dash layout and seats. The result of all
hse changes was a car that was quite a bit
quicbr than the previous version.
In 1981 U.S. models received the
Bosch-made fuel injatiun f i c b gqve 75
b h p - s J a m e a s & s l . i ~ E w ~1300
Tk fual injected models were not much
uicker than the aubureted uexsions, but
$,re was betLei drivability and response.
Also adopted were redesigned four spoke
alloy wheels, revised d g , a three year
limited m s i o n warranty d ,a host of
Qther small improvements.
By 1981 sal& af both 'tho X1/9.and 124
Spider slwrped badly. It wasn't so much
that the; .cars lacked hotsegower, Fiat bad
quality control problems. Plus, their sports
cars were getting dated compared with
newer designs from other car makers.
Bertone had always built tfre body/cMs
units for the X1/9and would ship them to
Fiat for assembly. By 1941 Fiat turn@#
over.completea;s~mblyto & coachb builder.
It was then rebgdgd "Ikrtone Xlr'9".
Production mfinued at Bertone at a low
level until 1988. No major changes were
made to the .XU9 dwing the period that
Bertone produced the car, but several
improvements were made to trim items,
paint-work and quality wmroL
During the "muperiad @ luxury
items were inhvduaxl, including P0H)er
prindows and leather seats. AU of these
unpnwr!me~~codhnued to drive the price
ug to a high sf about $14,000 during. the
rnld-198as.
Too~QKIFiat W inkrest in the carafter the
introduction of the 1500 engine. The X119
was never really developed gfiar 19S2. If it
had spm&d mu18wider rubber and more
pa~erfulengine, the w might still be in
prodwlion today. Still, the X1/9jmd its day
in the sun, or rather years. Not many sports
cars can claim such a lmg prpduction nm
wimout having a major styling and
mechanical change. The X1A llas earned its
plaee in histpry as one .6f the great sports
cam. Rad $ Track bven tiorqinatd it as
orwofthewnbeslsports~arsmtheworM
in 1981.
Building A Hot Street Car
Over the years many components have been developed to modify the X1/9 for stfeet use
TIRES
When Fiat intrdduced the X1/9 it could
outoomer anything else in its class. And
with equal tires it can stay with the mom
recent sports cars of tab But there is
Lmorn for improvement, T X1/9can be
turned into a real "G"machine with a few
straight forward modifications.
Changing to a set of high performance tires
will show the biggest improvement in
handling over any otbr changes. It used to
be that fin'ding rf~rmancetires in small
sizes was cliffi at best But, since high
#- tires have "calten qff in the
198Ck, more tire rnanuhcturars are making
the smaller sizes to iit the X1/9. In the
1970s PhUi was one of the few tire
companies making sizes to fit the X1/9;a
175/50-13 and a wide 1%/55-13. In
autocross circles the Phoenix Staiflex gained
a reputation as a Sricky tire. It wasn't seen
The early madel X1/9 m e with 4 l/Zn
steel rims shod with 145180 tires. There
was a lot of Mom for imprdvemmt. in 19'79
Fit improwxi the tirt+whe@ st-up by
offering 5" wide rims with 16970 tires. 'On
h e r model cars there were some very
handsome alloy.$ made by Cromadora, but
with the samesize tire.
A good size tire fgt the Xli9 is 185/6O-13.
In case you'm not timilk with d e tire
- Lhe 185 rebn to the section width
(@stance from side-wall 'to sidewall) in
miliimebers. The is the tire's a-t
ratio. This means h t the%average section
height is 60 percent of the width. Fiaally,
the%"13" is the rim diameter in inches. A
IS/@the will be a little shorter than either
the stock 145/80 or 165170. This tire size
will preser~tna clearance problems on the
stuck 5x13 Fiat wheels or with n w i
aftermarket wheels. If you have an early
mode1 with the 4 1/2x13 wheels, you
will have togotoawkkwheel.
When selecting a high performance.
replacement tire ternemher that you want b
end 9 with approximately the same
circurn erenee as the originat tire, but avoid
going too much patex in circudkrence,
What d& does is raise the ide height ofthe
car and consequently the center of gravity
,(CG). "So what", you say. What happens
isthat anytime you raise the CG of a car the
handling diminishes. Lowering the CG
helps the hanclling. If you decide to go with
a slightly shorter high performance tire -
you lower the CG,put a wider f a print oa
the ground, get jncreased madholdin? and
brahg dl wiih just changing one thurg on
the .car!
Below is a chart for comparing the original
wheeycire combination wlfr popular
replacement sizes. Remember that these are
approximate sims form~nparisonpurposes.
Each manufacturer's lW60-13 tire, for
instance, may be cMkrent incircurnA=rence,
section width, and mad width. That's why
tires mounted on the same axle not only
should be the same size, but a& from the
same manufacturer.
CIRCUMFERENCE, IN.
REPLACEMENT IUEPLACEMBNT PERCENT IblmmmM
SIZE CECUM.. IN. DIFF, WHEEL WIDTH
"sood choice
Notice that I only labeled two sizes as
"good choicen. That's because both sizes
were close the original wficeVfire
combii6an in circdrence, but not
over k If you wanted to, ym cwld go with
a larger size the in the n'ar; maybe a
205/60-13 with either a 185/6@13 or
195155-13 in the from P e m y , I prefer
tostaywi~thesarne*tireallaround.
Now that you have a better idea ofwhat
tire sizes to uss, it's time to decide what
brand of tire you umt,Thk is a personal
choice, of course. There is a good Yariety
of hi& p e w tires out them with
high end of the high p e w market,
c k k out the latest bire test in the car
--WHEELS
That is why 1 am going to limit Lfie
discussion of afkrnwket wheels to alloys
only-
There aie a bunch of aftemirket wheels w
there to choose frc!m,even for a Fiat, if you
do a little saihmg. I hope this section
will make it easier for you to decide what
aftermarkt wheei will grace your X1/9.
The primary masons for laying down your
hard+amed eashfar replacerneni wheels 3,
1. going toa wider w k I .
2. having a lighter wheel.
3. better 1QPks.
,As you can imagine, &ere is a vast
.dB- between a $50.@ Stmt-0-Sphere
Chrome Deluxe and a $MO.OO magnesium
d +
Acidly, steel chromed wheels will
pr y be heavier than the Q.B. ones.
TYPES OF W Y S
The most common alloys that wheels are
made ftom are aluminium and magnesium,
with magnesium b e ' i the lighter of the
two. The stnrcture and thickness of wheels
made b r n aluminium and magnesium give
the wheel more stiffness than those
manufactured from pressed steel. This
results in less rim dcfmtion under lateral
aaxleration during qmeiing.
I ADVANTAGES OF A UOaTBR WlEIEBL
1- acaelerab and braking will be improved because of the lighter weight of the
rotating wheel.
2. the lower weight pue les stress an the steering gear.
3. with the unsprung weight decreased, the madholding increases.
']The oldest method is tbat af saad casting.
A highly trained eraf1sman will pour mdtm
metal htoand fill up the mold cavity slowly
by hand. This method is slow, time
consuming and expensive. A quick
method is casting by low pressure into a
metal chilt. These two casting methods
pennit the best structural soundness tc, be
achieved, Die casting using high pmmre is
the quickest modto produce wfieels, but
does abt produce a high quality casting.
The rea'lsw is that a hi& pressure casting
has gas and air trapped in he stnacture
wheh the material progresses h r n a liquid
toa solid state.
A m h r m&d is that of forging. BBBS
produces a line of high quality fmged
wheels. They start with a single billet of
aluminum alloy. 'Ihis billet
is heat mted and forged under fourteen
million ptHlnds of preysure to produce the
shaped qenter and rim flanges. The b g e s
are tiyn cold rolled into the desired
dgumtion. Once the. hrging and rolling
is 'co@leted, the wheel is drilled f a bolt
holes and center bore. 'he multof all this
is expeasive and strong wheel that is
20%lighter than BBS own cast wheel. BIBS
also produces cast w h l s using the ccrunber-
pressure casting tdmique. In this method
the mold is.placed above the vat of molten
aluminum alloy. The alloy is then drawn up
into Wmold under a strang vacuum. All
the slag and impdies remain in thc vat.
This produces a non-prous, totally uniform
casting.
Several manuhcturers have copied the BBS
"web"design,although BBS didn't invent it.
The web design isa difficult one to cast and
BBS goes to a lbt of trouble to get it
right.Be wary of other m;ulufacturer's wet!
designs. They may not have the quality
control to p d w a good casting of that
complexity.
.RUN>Orn
A wheel pressed from steel is usually ping
toshow some measurable run out at the rim.
It could be either axial or transverse or
botfi. Either the rim flange edge is not true
witb tespect to tb rim center line during
rolling or the rim itseif is not pezfectly
r d over its circdenmx. This rs not to
say tbal alloy wheels ale not frae'from nm
oul problems. AUgrs do have the advantage,
though, of c o d v e machining of the Tim
profile and mounting f$ce.Wheels with less
m out will be easier to baIance and less
tire wear is possible due: to the rnwe
auwmte wheel to road contact.
w m B L , ~ G
T h German TUV test probably bas the
highest standards for wheels. An alloy
wheel with the German T W approval
w& ahigh quality w@l-
In the U S there is no Lpvernment
specification pm&am covering custom
wheels. So, viriuaUy anyone can
manufacture them. The Specialty Equipment
M.;taufadmrs Association' (SWA)
Foumdasion was developed out of the
ptalty/perfarmaaee parts industry in early
1978. It wag establishsd by several
rrianuf;h~tute~who mmg&&l the need for
self-govaiug product specificati4m. This
is the only mgankation in the U.S. having a
emtom wheel specification program. They
have specifications covering both aluminum
and steel wheels.
One very innptxbnt phase in amting these
specs is rotary htigue stress testing. The
.;'r,z& is actually "loaded" with constant
5x2s~at a rate 1.6 times that of an average
-.;:,&.--.- The stress "loaded" wheel is then
2:; &rough simulated cornering maneuvers.
-L?orhsr lrnportant phase in the specification
-.lrwam is when a tire is mounted onto the
-A5x1. inflated to the proper pressure, and
-----> L i b > "down loaded" to a rate 2 114 times
-,.-.*
LLof the average vehicle. The wheel and
>is are then run in this "loaded" mode at a
slrnulated speed of 50 mph for several hun-
zsd thousand revolutions.The only problem
x.i:d this type of program is that U.S. wheel
manufacturers do not have to submit their
ir heels for testing. It is a strictly voluntary
?ro&xarn.
Here are some points the SEMA Foundation
says about custom wheels:
1. Be certain that the proper lug nuts are
installed. You will generally find the correct
size and style lug nuts packed with the
heels.
2. Make sure the lug nuts are installed with
&e proper torque tension. Above all,never
d$ve a vehicle with lug nuts missing.
3. Balance your wheels properly.
4. L t e rthe first 500 miles of driving with
'.our new wheels, recheck the lug nut torque
:snsion.
Here are the wheels I would consider
putting on my X119. If money was not an
object I would choose Campagnolo. Their
quality is unsurpassed, plus they come in
several different wheel widths to fit the
X119. Other wheels to consider are O.Z.
(now teamed with MSW), Mom, and
Pamport.
SUSPENSION
Now that your XI19 looks and corners
better with your new tirelwheel setup - you
may be tempted to delve into the engine and
extract more power. Don't do it just yet.
Always improve the handling before adding
more power.
HANDLING-THE BASICS
Handling means having control over your
vehicle, whether it's negotiating a twisty
section of road or a bumpy one. The more
control you have of your car, the safer it is
going to be. But, that's probably not the
main reason you want to improve the
handling of your X119. Going around
corners just a little faster than normal is fun!
Before I can talk about handhg, you need
to understand three basic terms you hear
over and over again whenever there is a
discussion about the handling of a car.
UNDERSTEER
This is the tendency for a car, when nego-
tiating a comer, to turn less sharply than the
GUIDELINES FOR SELECTING ALLOY WHEELS
1. Method of manufacture. I don't want to know about any wheel that is die cast
by high pressure.
2. The wheel is specifically made for the X119.
3. Meets the German T W standards.
4. The wheels have steel lug inserts.
driver intends. This is because the front
tires loose traction before the rear ones. If
the steering wheel and throttle are held con-
stant, the car will not make the comer.
OVERSTEER
This is the tendency for a car, when nego-
tiating a comer, to turn more sharply than
the driver intends. This is because the rear
tires loose traction before the front ones.
The car wdl have a tendency to "spin out".
NEUTRAL STEER
The ideal condition. Front and rear traction
is equal. When negotiating a comer at max-
imum adhesion, both front and rear tires
will loose traction at the same time and the
car will "drift" away from the comer.
Most production cars will understeer when
pushed hard in a comer, some more than
others. Some nose-heavy sedans, and even
sports cars, understeer badly. The reason
understeer is built into production cars is
that it is relatively easy for the average dri-
ver to control the car if a comer is taken too
quickly. You simply take your foot off the
gas pedal. Of course, this is a small con-
solation if you're already off the road and
into the weeds! If you were to continue at
the same speed in the corner you would
have to crank the steering wheel more in
order to turn the corner; and the car would
understeer, or "plow", more.
An oversteering car wdl have a tendency to
spin out if some very deft steering cor-
rections are not made. I guess the auto
engineers believe that it is better for a driver
to go straight off the road than it is to spin
out on the highway.
Fortunately, the X119 is a fairly well bal-
anced car in its stock form. There are
several reasons for this. It has a low center
of gravity, good suspension geometry, and a
mid-engine design, to name a few. It is
basically an understeering car, but not in the
extreme. A big weakness in the car is that
the springs are fairly soft. This tends to
transfer a lot of weight to the outside tires in
a comer. This causes some nasty things to
happen, hke the tires going to positive
camber and consequently losing traction.
W - S W A Y BARS
These are sometines called "stabilizer bars,
"anti-rollbars", or just "sway bars". The
basic principle behind anti-sway bars is that
they allow the wheel assemblies to move up
or down together over dips and bumps, but
do not let one wheel go up by itself unless
it twists the bar. It simply reduces the sway
or body roll in a comer giving the car sta-
bility without increasing harshness.
Anti-sway bars hme to be made out of high
grade spring steel because after they are
twisted they must be able to return to their
original shape.
Most production cars today come with at
least a front anti-sway bar and some sports
cars have a rear bar also. The XI19 has
neither, no bars in the front or rear. In-
stalling sway bars on the XI19 will help the
handling considerably.
If you choose to install anti-sway bars, put a
front and rear bar on at the same time.
Don't make the mistake of only putting on a
front bar.This unbalances the car and causes
more understeer. Balance the car by having
a rear bar also.There are several companies
that make anti-sway bars for the X119.
ADDCO makes a good one. At one time
ADDCO had some quality control problems
with their sway bars. But, I have used their
bars on my XI19 for several years of auto-
crossing and have had no problems with
them. Their front bar is 7/8"dia., while the
rear bar is 518" dia. Order the hard urethane
bushings instead of the soft rubber ones.
Throw away the mounting bolts and nuts
that come with the bars. Use at least grade 5
or AN nuts and bolts. Make sure the nuts
are the locking type with nylon inserts.
Some aftermarket anti-sway bars have their
only mounting points attached to the front
trailing links. These suspension links were
not designed to hold up to the extra stress
imposed by the sway bar and could bend
after prolonged use. With anti-sway bars
mounted on your X119, it will now corner
flatter and with less camber change to the
Two things that can improve the handling of
your X119 - adding sway bars and changing to
stiffer springs.
the tires.
SHOCK ABSORBERS
Most people are confused about what shock
absorbers should do for a car. They do not
affect the stiffness of a suspension or hold
up the car. The springs do that. What shock
absorbers do is dampen the spring oscilla-
tion. Without correctly functioning shocks
the springs would go into uncontrolled oscil-
lations after hitting a bump in the road.
The XU9 actually has MacPherson struts in
the front and rear.This is very common now
on small and medium sized cars, as it saves
space.
The early X1/9s (1974-1978) came with
struts that could be disassembled and re-
built. Fiat no longer supplies internal parts
for these. If you order new struts from Fiat
you will get the complete welded strut as-
sembly. Aftermarket strut inserts are avail-
able, KIT3 being one of the better ones. The
later model X1/9s came with welded strut
assemblies, so inserts cannot be used. Koni
sells complete strut assemblies for the X1/9.
They are good quality units, but expensive.
Whatever you use, you're going to need a
spring compressor to compress the spring.
Refer to a Fiat repair manual for this pro-
cedure. A cheap, but effective spring com-
pressor can be purchased from the J.C.
Whitney catalog.
SPRINGS
With a new set of light alloy wheels, high
performance tires, sway bars, and shocks,
you may be perfectly happy with the way
your X1/9 handles on the street. If you want
to go one step further, to get your car
handling like a slot car, change to shorter,
stiffer springs. Contrary to what you may
have read in other publications, particularly
a Motor Trend article a few years ago, you
do not have to do any cutting and welding to
relocate the top sbxt mount. A1 Cosentino
at FAZA has been showing us the way for
years.
He sells three series of coil springs for the
X1/9. Series I lowers the car about 1" in
the front and 1/2" in the rear. This is the
I HANDLING GUIDE
Adiustment
front tire pressure
rear tire pressure
front tire size
rear tire size
weight distribution
front springs
rear springs
front anti-sway bar
rear anti-sway bar
To Increase Understeer
lower
higher
smaller
larger
more foward
stiffer
softer
thicker
thinner
To Increase Oversteer
higher
lower
larger
smaller
more rearward
softer
stiffer
thinner
thicker
one I prefer for a street car, as the XI19 is
already pretty low to start with. Series IT
springs lower the front about 2" and the rear
about 1 112". Use this only if you have very
smooth roads in your area. Series III is for
racing and lowers the car even more!
You will not dramatically alter the geometry
of the suspension by using these springs.
The only thing that will change is you will
gain some negative camber. With the Series
I springs, it's not too much to worry about.
With the Series I1 you may end up with
more negative camber than you want for the
street, enough to cause some uneven tire
wear and less effective braking. The camber
is not adjustable on the X1/9.But,in Chapter
3, I'll show you how you can fix this simply
and inexpensively.
ENGINE
Now that you have your XI19 cornering like
a Formula I car, it's time to do some engine
modifications. Bear in mind that some of the
modifications outlined here may be illegal in
some states because of emissions laws.
Also, this book does not take the place of a
Fiat repair manual.
The 1974-1978 X119s have 1300 cc
(actually 1290 cc) engines. They have a
bore of 86 mm and a stroke of 55.5 mm.
The compression ratio is 8.5 to 1. It is a
single overhead cam design with in-line
valves. The block is cast iron, while the
cylinder head and intake manifold is alumin-
um. The engine is fitted with a dual-barrel
downdraft Weber carburetor. The '74 model
has a dual outlet cast iron exhaust manifold.
The '75 and later models have the single
exhaust outlet. The specifications for these
engines are basically the same, except for
some emission controls, through 1978. The
1979 and later models feature the 1500 cc~-~ ~
(actually 1498cc) engine. It has a slightly
larger bore than the 1300 (86.4 mm) and a
longer stroke (63.9 rnm) which helped
increase the torque of the engine. The com-
pression ratio remained the same for the
U.S. models, at 8.5 to 1. The 1500 exhaust
valves are enlarged to 33 mm, compared to
the 1300's 31 rnrn. The size of the intake
valves is the same for both engines, at 36
mm. The 1500 connecting rods are forged
instead of cast, as in the 1300 engine. In-
stead of ignition points, a Bosch electronic
ignition system is used. In 1980 the Bosch
electronic fuel injection system was
introduced.
The problem with all these engines is the
restricted breathing, poor cam timing, and
an exhaust system that strangles the engine.
Don't make the mistake a lot of owners do
and change to a bigger carburetor as the
first modification. This will make little or
no improvement in performance, unless
your original carburetor was acting up.
Engine modifications should be carried out
in a logical sequence that will extract the
most power from each component. The fol-
lowing modifications can be done in stages.
How far you want to go depends on your
budget and how much performance you
want.
STAGE 1 5-7 horsepower increase
EXHAUST SYSTEM
Replace the stock system with a set of head-
ers. This will help scavenge the exhaust and
reduce back pressure for better perfor-
mance. Also add a free-flow muffler to the
system. Ansa makes a good unit for both the
early and late model X119s. They fit exactly
in place of the original units. With the Ansa
unit for the later model cars, you can still
run the catalytic converter. They have a
nice sound to them without being overly
loud.
AIR FiILTER
Replace the standard filter unit with a more
efficient free-flow design. Air can enter
from all sides of the unit and the engine will
"breathe" better. These units are also lighter
and take up less space. Installation is real
simple.
STAGE 2 20-30 horsepower increase
CAMSHAFT
The stock camshaft has very poor timing, as
shown below:
Intake:
Opens: B.T.D.C. 10 degrees
Closes: A.B.D.C. 54 degrees
Exhaust:
Opens: B.B.D.C. 54 degrees
Closes: A.T.D.C. 10 degrees
A camshaft with more radical timing will
open the intake and exhaust valves earlier
than a stock one, and closes them later. This
allows more fuel and air to enter the cylin-
der and allows more exhaust gases to leave
the engine. This will make the biggest im-
provement in power over any other single
modification.
There are a wide range of camshafts avail-
able for the Fiat S.O.H.C. engine. For
street use, a camshaft with timing in the
35/75 to 40180 range are the most popular.
When buying a camshaft, be sure to tell the
person what kind of modifications your
engine has or plans to have. That will help
determine the exact camshaft suitable
The Weber 34 mm carburetor is shown mounted on the stock intake manifold with a free
flow air cleaner from Bayless.
for your engine.
CARBURETlON
To take advantage of your aftermarket cam-
shaft's improved valve timing, your engine
needs to breathe better. The stock XI19
came with either a Weber 32 mm or a
Weber 28/30 mm carburetor, depending on
your engine. As a minimum replacement
use a Weber 34 DMTR. It has a manual
choke, so owners of cars '75 and later will
have to install a cable operated choke.This
carburetor will bolt to the stock intake
manifold. A slight enlargement of the
manifold opening is required to accom-
modate the increased size of the re-
placement carburetor. The opening can be
enlarged with a metal file or small rotary
grinder. It is recommended that the man-
ifold be taken off the engine to preclude any
chance of metal filings getting down into the
intake ports.
You can also go to larger single carburetors,
such as a 36 mm or 40 rnm. These require
their own special intake manifolds and
usually modified linkages. With these car-
buretors, you'll really see some power gains
with your modified camshaft. The intake
manifold designs for these carburetors are
much improved over the stock one, as the
intake runners are more equal and have a
straighter path to the cylinders.
mTEL PUMP
If you live in a hot climate, you may have
experienced some fuel percolation and
vapor lock problems with the X1/9. Because
of its rnid-engined design there is not a lot
of air that gets to the engine compartment.
Fiat knew of this problem and installed a
fan and ducting to blow air to the carburetor
when the engine is shut off. In very hot cli-
mates this does not always solve the
problem.
One problem is the location of the stock
mechanical fuel pump, as it is buried down
low in the engine compartment next to the
fire wall. Replacing this with an electrical
fuel pump helps the problem. The pump can
be mounted in a better location away from
the engine heat. Facet electric pumps work
well on these engines with Webers. They
are small in size but very reliable. You can
mount them in an accessable location, even
shielding them from the heat with some
sheet metal if you choose.
Insulating the fuel lines in the engine com-
partment will also help. Use what is known
as a "fire proof sleeve". It is constructed of
thick braided fiberglass tubing covered with
silicone rubber. They are sold by either the
foot or the inch. You can find the stuff in
supply houses that specialize in racing
equipment.
STAGE 3 45-50 horsepower increase
PISTONS
Replace your stock pistons with high com-
pression ones. There are a variety of after-
market pistons avadable for the X1/9. There
is a greater selection for the 1300 engine
than for the 1500 engine. Just using the
European pistons,which have a compression
ratio of 8.9: 1, will help the performance.
For street use, I wouldn't use a piston with
a compression ratio of over 10.0:1. You
will have trouble, gasoline octane being
what it is today.
Be sure you tell your piston supplier what
other modifications you have on your
engine, especially in the head. Since the
head has to come off when you change pis-
tons, this would be a good time to do a
valve job and clean-up the head. If it's been
40,000 miles since the engine had a valve
job, having one done makes a big difference
in power. If you are having someone do the
work for you, make sure the person is
competent and experienced in Fiat engines.
Performance parts are expensive so don't let
just anyone work on your Fiat.
Have your cyhder head planed also. Do
not plane too much off the head, as there is
not a lot of material there. Plane just enough
to get the surface cleaned up and flat. The
cylinder head has to be absolutely flat when
it is bolted back on the block Remember,
the head is aluminum while the block is cast
iron - two dissimilar materials which heat
and cool at different rates.
While the engine is apart, it is a good idea
to check the connecting rods, especially if
the engine has high mileage. Remember,
with a higher horsepower engine more
stress will be placed on the connecting rods.
It is not necessary to use any special racing
rods or do any special treatment to the stock
rods for sweet driving. Have the connecting
rods magnafluxed to spot any stress cracks.
Replace them if they are in any way sus-
pect.
It is not necessary to do any balancing or
"blueprinting" of the engine. I ran an engine
built for autocrossing with all stock internal
parts that regularly saw 8,000 rpms. It was-
n't balanced or blueprinted in any way.
MORE CARBURETION
To really improve the breathing of your
engine add two Weber DCNF carburetors
on a custom intake manifold. These down-
draft carburetors present no clearance
problems, even with air cleaners or 90
degree velocity stacks.
Be prepared for your gas mileage to suffer,
as four 40 mm butterflies opening at once
tend to use a large quantity of fuel. They
have to be set up slightly rich on the idle
circuit to provide a smooth transition to thc
main circuit on acceleration.
When choosing an intake manifold for these
carburetors, make sure the design has a
bridge across the middle, as these are
sturdier than separate individual runners.
IGNITION
With the extra power and higher rpms, the
stock ignition system needs to be upgraded
for maximum performance.
The 1300 engine has conventional breaker
points that are a real pain to replace and ad-
just. Marelli offers an electronic breakerless
ignition system for the X119. It comes with
a complete distributor and coil. The dis-
tributor is all centrifugal advance.
Unit Control Module
Marelli electronic breakerless ignition unit.
4-
TO
BATTERY
-
MSD Ignition control box
cellent Bosch electronic ignition. Ths works
well up to about 7,000 rpm. A good ad-
dition is the MSD (multiple spark discharge)
ignition. It can be used with the stock
Bosch spark box and the stock distributor.
The MSD uses a multi-spark discharge that
produces complete combustion even under
the worst possible conditions, even if the
plugs are fouled! These units are accurate
up to 10,000 rpms.
In case you're concerned about over-reving
your engine, MSD offers a rev-limiter with
plug-in modules to select your rpm limit.
The tachometer wdl require a tach adapter
to operate.
The X119s from 1979-on came with an ex- With the MSD ignition it is a good idea to
replace the stock ignition wires with some
high performance ones. There are lots of
good aftermarket wires offered. Some are
custom made for Fiats, others you have to
assemble the ends yourself.
CLUTCH
All this extra horsepower could put a strain
on the stock clutch, especially on the 1300
engines, as the clutch and pressure plate are
smaller than the 1500. Fichtel and Sachs
makes a heavy duty pressure plate to be
used with the standard disc for the 1300
engine. The best, and most reliable, is the
Borg and Beck unit. It will be harder to find
an aftermarket heavy duty clutch for the
1500. But, it is larger and more robust than
the 1300, so the stock unit may do just fine.
It all depends on how you drive. Some
people are brutal with clutches, while others
last the life of the engine.
OIL CONTROL
Cars prepared to this stage will be able to
corner very hard. The problem is that the
oil will move away from the oil pump pick-
up. The oil pump will be just pumping air,
which can destroy rod bearings very quick-
ly. FAZA and PBS sell a special oil baffle
made out of sheet metal which fits in the oil
pan. The purpose of this baffle is to control
the oil in hard cornering to prevent it from
being picked up by the crankshaft, which
would cause a substantial power loss.
STAGE 4 70-80 horsepower increase
This is it! Lf you want to create the ultimate
X119, from a power standpoint, read on.
With this kind of power you will surprise
some more expensive sports cars on the
road.
BIG VALVE HEAD
To really make the XI19 breathe with a high
performance cam and big carburetors the
valve size needs to be enlarged. There are
physical limitations to the size of the valves
that can be used. Most big valve heads for
both the 1300 and 1500 engines feature 40
mm intake and 35 mm exhaust valves. They
usually feature bronze valve guides, mod-
ified combustion chambers, and ported and
polished. Be aware that trick multi-angled
valve seats usually don't last as long as the
stock angled valve seats.
BE'ITER CARBURETION
The best carburetor set-up, from a perfor-
mance standpoint, is a pair of Weber 45
DCOE sidedrafts. Unfortunately, these
carburetors produce some clearance
problems in the Xll9. The rear trunk area
has to be cut. The large boxed-in area that
connects the rear strut towers has to be cut
from the bottom to offer the proper clear-
ance. Sheet metal then has to be welded up
in the cut-out area to make the member
structurally sound again. It is worth the
trouble, as the sidedrafts offer better breath-
ing capability at high rpms.
CONCLUSION
All the aftermarket items mentioned in this
chapter are readily available from various
suppliers. It would be impossible to list all
the various components available in detail
from each supplier. Some recommendations
have been made, based on experience. At
the end of this book I have listed the man-
ufacturers and suppliers and what kinds of
parts and services they offer. In most cases
they offer catalogs which show the speci-
fications of their product and explain it in
detail.
Building An Autocross Car
Autocrossing has become a very popular form of motorsports, and the XI19 can be made
into a very competitive car.
This chapter wiU take you through the steps penalty is assessed if you knock over any
needed to make the XI19 competitive in the pylons. Speeds usually don't exceed 60mph.
sport of autocrossing. Sound easy? The tricky part is that you
don't get any practice runs, you are only al-
lowed to walk to course to familiarize vour-
WHAT IS AUTOCROSSING? self with it. Usually you are given 'three
timed runs,with the fastest run counted.
Autocrossing, also known as Solo 11, is a
in which one car at a time nego Autocrosses are run on short courses that
a twisty course outlined with emphasize the handling of a car rather than
pylons. The idea is to complete the course sheer power- This is what makes the
in the shortest amount of time. A time the perfect car for autocrossing-
The recommendations outlined in this chap-
ter are based on the current national Solo II
rules published by the Sports Car Club of
America (SCCA). You can purchase a copy
of their rule book by contacting the SCCA.
The SCCA has hundreds of Regions across
the country which stage autocrosses. There
may be a local region in your city, or at
least close-by. These local regions usually
conduct an autocross about once a month.
They are usually held in large parking lots
or abandoned airports. There are also inde-
pendent clubs not associated with the SCCA
which may have their own rules and
classing for cars.
Autocrossing has become a very popular
form of motorsport. The appeal is that it is
an inexpensive sport to get into. No com-
petition license or expensive driving suit is
required. You do need to have a helmet, but
most regions have loaners. Entry fees are
low and range from $8.00 to $12.00.
Classes range from pure stock cars to fully
modified racers. Since you are not racing
wheel to wheel with other cars, damage to
your auto is rare. Courses are usually set-up
far away from obstacles, such as curbs,
light poles, walls, etc. Most of all it's just
plain fun!
AUTOMOBILE CLASSES
Solo II racing is made up of four classes:
Stock, Street Prepared, Prepared, and Mod-
ified. Each of the four main classes is then
divided into sub-classes for the individual
cars competing.
I'm going to concentrate on the Street Pre-
pared class, as the XI19 is not really com-
petitive that much in the Stock class any-
more. At one time the XI19 enjoyed tre-
mendous success in the Stock category.
When it was classed in E Stock, the X1/9
won the National Solo II title twice, in 1977
and 1982. It was moved to D Stock in 1983
and won the title that year and also in '84
and '85. Since then D Stock has been dom-
inated by the Toyota MR2 and the Porsche
944. At the 1990 Nationals the dominate
cars were the Honda Civic and CRX Si. As
of this writing, late model X1/9s with fuel
injection are classed in D Stock, while the
carbureted models are in E Stock This is
the class were the XI19 has the best chance
of winning. In fact,on a local level a well
prepared X1/9 might do well in E Stock.
But you might just get blasted if you take
the car to a Divisional or the Nationals.
In E Stock the main competition is from the
Honda CRX, Toyota FX-16, and the Volks-
wagen RabbitJGolfIJetta. In D Stock you
have your hands full, even though this class
was reshuffled. At the 1990 Nationals the
car of choice was a Civic or CRX Si. Either
car is just too quick for a stock X1/9.
STREET PREPARED
The X1/9 has a better chance in Street Pre-
pared. There are five classes of Street Pre-
pared cars, A-E. The X1/9 is classed in D.
In h s class you are allowed a number of
suspension modifications and a limited num-
ber of engine modifications, mostly of the
bolt-on type. Consult the Solo I1 rule book
for specifics. The XI19 has enjoyed success
in the Street Prepared class, as the marque
has won the Nationals several times in both
the Ladies and Mens classes.
A typical autocross course.
This XI19 is modified for Street Prepared competition. Suspension improvements include
6 x13 alloy wheels with Hoosier Autocrosser tires, shorter and stiffer coil springs, and
sway bars.
Bill Condrashoff's XI19 is shown competing in an autocross held on city streets, a yearly
event organized by the San Francisco Region of the SCCA.
GETTING STARTED - SUSPENSION
If you have read the suspension modifications outlined in Chapter 2, then you have the basis
for a Street Prepared suspension. Here they are again, briefly:
1. Wheels (I'll get to tires later)
2. Swav Bars front and rear
3. stiff& suspension springs
4. Struts
FnmTUNING THE SUSPBNSION
If you use the FAZA stage II coil springs,
as outlined in Chapter 2, you'll find that you
have gained a bunch of negative camber in
the process. This is good, as we want to
have some static negative camber, up to a
point. If you put your X1/9 on an align-
ment rack, you may find that it has as much
as 3-4 degrees of static negative camber!
That is a little too much. Remember that
when a car turns into a corner the outside
wheel goes into positive camber. Ideally,we
would like the tire to be pointing straight up
and down (0 degrees camber) for maximum
traction in a corner.That is why we static-
ally set the wheel and tire to negative
camber. With stiff springs and sway bars,
the X1/9 only needs about 1-1 112 degrees
of negative camber. Running an excessive
amount of negative camber hurts the car in
straight line braking. The problem is that
camber is not adjustable on the stock X1/9.
The rules allow adjustable camber plates to
be used, but the center clearance hole in,the
Slotting the original mounting holes in the strut tower is a simple and inexpensive way to
acheive adjustable camber. The front strut tower is shown here. The rear is modified in a
similar fashion.
strut tower cannot be modified. Most after-
market camber plates require modifying the
strut tower. FAZA offers a Unibal type of
camber adjuster which bolts to the top of the
stock strut tower. It uses an eccentric fea-
ture to adjust the camber. That is one solu-
tion to the problem, but they are expensive.
Another solution that won't cost you any-
thing is very simple. Just slot the original
three mounting holes in the strut tower. It
can be done easily with a drill, hacksaw and
a metal file. This only gives you a limited
amount of adjustability, about 2 degrees, but
it helps.
After the camber adjustments are made, set
the front toe to zero degrees. Set the rear
toe-in to 118.
STRUTS
If your struts are worn, you basically have
three choices, depending on your pocket-
book:
1. Stock replacements from Fiat. These
come as complete welded assemblies. You'll
have to do some checking to get a good
price.
2. KYB inserts. If the struts you have will
accept inserts, this is a good choice. You
can usually fmd these at discounted prices.
3. Konis. These are the famous adjustable
shocks; although the struts have to be taken
off the car to be adjusted. These are expen-
sive, but the q d t y is second to none.
TIRES
As of this writing the most popular tire used
in autocrossing for Street Prepared cars is
the Hoosier Autocrosser. As the name im-
plies, this tire is especially made for auto-
crossing. It is a bias belted tire rather than
the more common radial. The best size for
the XI19 is a 185160-13. It is designed to be
used on a minimum rim width of 6 inches.
The tire has a circumference of 64.7 inches
and a tread width of 6 inches.
ENGINE
Only a limited amount of modifications are
allowed in Street Prepared competition.
Parts must be chosen carefully to optimize
engine performance. First, remove all the
smog controls, including the air pump if one
is fitted. This may pose a problem if you
also plan to drive your car on the street.
Check your state's laws regarding removing
emission control equipment.
CARBURETION
No internal modifications are allowed, but
carburetion is free. That means that one of
the weak points of the engine, the camshaft,
cannot be upgraded. Reason tells us that we
cannot use big carburetors without some
help in other areas, such as piston compres-
sion and improved valve timing-Competitors
have been using big carburetors on the Xl/9
and they do work, up to a point.
You can run the Weber 40 DCNF carbs, but
don't expect a big increase in horsepower.
What these carbs do is offer more precise
fuel delivery over the standard single car-
buretor. This is because there is a "barrel"
for each cylinder and the carbs are non-
progressive. When you step on the throttle
each barrel opens "right now". Obviously,
the carburetors have to be adjusted dif-
ferently to run with the stock internal parts.
Fortunately, like most Webers, the DCNF
series is almost infinitely adjustable to suit
most any engine. Some testing will have to
be done to determine the correct settings for
your particular engine and the altitude of
your locale. Use the following settings as a
starting point. Have on hand a good supply
of Main and Air Corrector jets.Only change
one thing at a time to avoid confusion, then
test the car.
WEBER DCNF JETTING
Chokes
Auxiliary Venturis
Emulsion Tubes
Pump Cams
Pump Jets
Idle Jets
Main Jets
Air Corrector Jets
Notice how much this stock XI19 leans in a corner.
This Street Prepared XI19 sits much lower and leans less.
26
Dual Weber DCNF carburetors with 90 degree velocity stacks from FAZA. The canister to
the left is a cool can, used to cool the fuel before it reaches the carburetors. This is no
longer legal for SCCA Street Prepared competition.
For the Needle and Seat on the DCNFs, do
yourself a favor and throw away the stock
Weber part. Order the Grose-Jet from D&
G Valve Mfg. Co. This little device will go
a long way in solving the rough idle and
flooding with the Webers. The metering
action is much more precise than with a
standard Needle and Seat. The b-ick is in
using two free-floating stainless steel balls
to control the fuel metering. They're not
much affected by the G forces of cornering,
acceleration or braking. Order the Weber
501 in the .069 (1.7 mm) size. Remember
to order two jets, one for each carburetor.
The jets come with detailed instructions on
installation. Set the float level carefully
according to the Weber Manual.
setting the float level correctly and also
from the idle and progression circuits. Also
pay attention to getting the butterflies
synched. If you don't get all these details
correct, you will lose a lot of time on an
autocross course waiting for the engine to
clean itself out before getting on the power.
If the engine tends to stutter and cough on
acceleration, try lowering the float level.
Getting the dual Webers to run correctly on
essentially a stock engine can be tiresome,
but worth the trouble. I certainly wouldn't
want to run them on a stock engine for
street use. Even though a Street Prepared
car is designed to be driven on the street as
well as autocrossed, you'll find most serious
autocrossers trailer their cars to events,even
You are going to have to spend a lot of time local ones.
getting the carburetors set up correctly, and
not just for the power end of it but for cor- If you have a late model X1/9 with fuel in-
rect throttle response. This comes from jection, stick with it. It's not worth
This older model intake manifold from
Bayless does not have the center connecting
bridge for added rigidity. Their newer models
incorporate the connecting bridge.
the trouble changing to carburetors. Fuel in-
jection is so much easier to deal with any-
way, plus being much more precise than
carburetors.
INTAKE MANIFOLD
The intake manifold ports can be matched
with the cylinder head ports as long as no
change is made more than one inch from the
port/manifold interface. Complete porting
and polishing is not allowed.
PISTONS AND VALVES
Clyinders can be rebored up to .0472 over-
size using standard oversize pistons. Don't
bother with this unless you are doing an
engine rebuild. You will gain a slight in-
crease in engine displacement and I guess
every little bit helps, but it's not worth the
trouble for the small increase in power.
If you have the engine apart do a valve job
also. As I said earlier, blueprinting this
engine is not necessary and is a waste of
time and money.
FlLYWHEEL
Any flywheel may be used provided it uses
the standard attachment points. Lightening
the standard flywheel helps considerably.
Make sure it is lightened without weakening
the flywheel.
This manifold from PBS Engineering has the
center connecting bridge.
IGNITION
An upgraded ignition system is essential,
such as the MSD unit mentioned in Chapter
2. Mount it in the spare tire area.You don't
have to run the spare tire during competi-
tion. This keeps the unit away from the heat
of the engine compartment.
Solid core racing plug wires are available
for this engine and work well with a high
energy ignition. They will cause radio inter-
ference but who runs the radio during an
autocross?
EXJUUST
A set of headers is another legal bolt-on
modification. Since a muffler must be used,
one must be chosen that offers little back
pressure relative to the exhaust gases. Muf-
flers are mandatory in most forms of racing
today. This has spawned the development of
special racing mufflers. I have a garage full
of various mufflers made for the X1/9. The
basic construction of these. mufflers is the
old "glass-pak" style. Don't bother with
these for your Street Prepared machine.1 use
a Flowmaster muffler for the X1/9. It is
very cleverly designed with internal baffles
and offers little or no decrease in perfor-
mance compared with an open exhaust. It is
also compact and lightweight.
BRAKES
Don't make the mistake of installing special
racing pads for autocrossing. You will never
heat them up enough to get them to work
properly. The standard pads work just fine.
If your rotors are grooved at all, replace
them. Don't bother having them turned.
New ones are dirt cheap.
THE FEST OF IT
The Street Prepared rules allow an alternate
steering wheel to be used. Replace the skin-
ny stock wheel with a smaller 13 inch fatter
wheel. There are many available for the
X119, such as Mom, Formuling France,
and of courseAbarth.
The stock seat may be changed and this is a
worthwhile improvement. Racing seats may
be used as long as they are fully padded.
There are a wide range of racing seats
available. Choose your seat carefully. The
XI19 is a small car, so the seat cannot be
very wide, nor can it sit very high. The
Corbean Clubman seat, for instance, just
sits too high to be used in the X119. One
place that can help you out is FAZA. They
have a line of racing seats from fiberglass to
lightweight Kelvar. Al Cosentino is very
knowledgeable about Fiats and knows which
seats are best for the X119. His prices are
also reasonable.
Although not required, installing a racing
harness is a good idea. It holds you in the
seat firmy and you can concentrate on
driving rather than hanging on to the seat. It
is also a good idea to install a roll bar, es-
pecially if you ?re a tall person and your
helmet sticks out above the targa top. Bolt-
in roll bars are available for the X119, with
Autopower being the best known name for
building roll bars.
Fiberglass fully padded racing seat from FAZA.
SUMMARY
If I were building an XI19 for Street Prepared competition and I was on a budget, this is the
order I would follow in modifying the car:
1. Wheels and tires
2. Suspension
3. Seat, steering wheel, belts
4. Engine
The reason for this is that you are going to go faster changing the wheels, tires and suspen-
sion than you are with engine modfications. And don't forget the importance of a good set
of tires. This will help you go faster more than anythmg else. I have seen too many people
new to the sport of autocrossing make this mistake. They spend -all their money on engine
and suspension goodies and then throw on an old set of radials. Then they wonder why they
are so slow. In autocrossing you spend most of your time cornering the car rather than
hauling down a straight-away. The right tires are expensive, but they are a must if you hope
to be competitive.
I hope this chapter helps you in setting up your XI19 for Street Prepared competition. Chap-
ter 5 will cover the Solo IIModiJied class.
Building A Road RacefSolo
I1 Prepared Car
This Solo II Prepared car is modified, based on the Production car rules for road racing
INTRODUCTION
This chapter will guide you through building
an XU9 for SCCA Production racing or
Solo I1 Prepared racing. The Solo I1 Pre-
pared rules is based on the Production rules.
About the only difference between the two
classes is some safety equipment and the
weight of the car.
Production racing, especially G Production,
having won at the Runoffs several times in
the 1980s. At the 1990 Runoffs an XU9
won in F Production with Bob Boig driving
and placed third in G Production with
Thomas Reichenbach at the helm. True to
form, because of this success, the SCCA
has added a tremendous amount of weight in
hopes to slow the cars down. Still, I feel the
X1/9 can be competitive in Production class
In recent years competitors have enjoyed racmg.
tremendous success with the XU9 in
The XI19 can also be competitive in Solo II
Prepared racing, but hasn't seen as much
success in this class of racing, and the car
has not yet won at the Nationals. But, I
think it is only a matter of time before this
happens. At the 1990 Solo 11Nationals Bill
Cutrer placed his XU9 second in D Pre-
pared.
The first step in building the car is to have a
recent copy of the General Competition
Rules (GCR) and the Production Car Speci-
fications. If you are preparing the car for
Solo 11 competition, also get a copy of the
Solo 11rules. Make sure that you read and
thoroughly understand the rules. You will
then have a better understanding of what can
be changed or modified.
BODY AND CHASSIS
Strip the car down completely to the bare
body. Get rid of any equipment that you are
not required to run, it only adds weight to
the car.
ROLL CAGE
Start planning and designing the roll cage
structure. Make sure it conforms to the
specifications outlined in the GCR.The cage
should not only protect the driver in case of
a crash, but also provide structural stiffness
of the chassis. The cage must tie into the
front and rear strut towers, have a main and
lower front hoop,and bridge across the door
openings. A good look at the pictures will
give you an idea of what the structure is like.
This shows the location of the front hoop and how the tubes transverse the door openings.
32
The location of the diagonal brace under the main hoop is shown here.
The diagonal brace for the main hoop goes Most of the roll cage designs I have seen
through the bulkhead behind the driver, have the underside of the targa top cut so
where the fuel tank was,and is welded to the the main hoop can be placed up higher for
chassis. headroom. If you are a tall person, look at
the other designs pictured. If you are build-
.ing your own cage, try building a
mock-up out of PCV pipe before
cutting your steel tubing. It might
save you a lot of headaches.
In its stock form the XI19 chassis is
pretty rigid for a car with so many
openings in its unit body. I never
thought about putting any additional
welds on the chassis until I saw a
racing XI19 which had some spot
welds come loose. It was on the
seams on top of the rear strut
towers. I had never seen or heard of
this happening to any other X119s.
To be on the safe side, when I
started building my X1/9, I put a
continuous weld on these areas, plus
on the seam that goes around the
rear strut tower
33
strut tower. Still,I don't think it is necessary
to seam weld the entire chassis.
REMOVING THE WINDSHELD
Taking out the windshield on an XI19 can
be a real pain. It is glued in place and dif-
ficult to remove without breaking. To re-
move it, you must find two smaU wires
from under the chrome strip and apply
about 12 volts to them. This will soften the
glue enough so the windshield can be
pushed out, maybe. If it proves difficult to
remove you can try prying it out and stand a
good chance of cracking it. If you don't
wish to save the windshield, just cut off the
posts flush with the bodywork. Weld a plate
over the openings on the windshield posts.
These X119s have the main hoop up
higher for more headroom.
In the top photo Bob Strange's car
has the main hoop in front of and
above the targa top.
The bottom photo shows a different
solution. In Chuck Sample's car the
main hoop extends through the targa
top.
SUSPENSION
There are several schools of thought on how
to m d i the X1/9 suspension. If you are
on a budget, the cheapest way to go is to
use the FAZA coil springs with some kind
of method of adjusting the camber.
At the other end of the scale, the most ex-
pensive method is to cut up the chassis to
relocate the suspension points and modify
the struts so you end up with an adjustable
suspension. This method is costly, time
consuming, and to me is just not worth the
trouble and expense. I would recommend it
if you are planning an all out assault for
the Runoffs. I know one person who did
these extensive modifications to the XI19
chassis. He said the job was very difficult,
even though he has a fully outfitted race
preparation shop. Unless you are an en-
gineer with experience in m-ing pro-
duction-based cars, this is not a job the
typical home builder should attempt.
I do like the idea of modifying the struts so
that the ride height and comer weight can be
adjusted. Plus, you will be able to use the
standard for racing 2 114" I.D. springs. You
will then be able to choose from a variety of
lengths and spring rates. Kits are available
so you can rnw the XI19 struts. Carrera
is one such supplier. -
Basically, you have to cut off the spring
perch and weld the threaded tube over the
strut housing. Then the new spring seats are
simply threaded on. This set-up also elimin-
ates any tire clearance problems since the
spring and perch are much smaller in di-
ameter than the stock ones. Carrera and
KYB make strut inserts that work well for
the racing X119.
The best springs to use are made by Rock-
well. They aren't that much more expensive
than other brands. It is hard to recommend
specific spring rates, as this depends on the
smoothness of the track, the weight of the
On the left is a Koni replacement
strut with FAZA Stage II coil spring
On the right is a modified strut with
adjustable spring perches and
2 114" I.D. racing spring.
vehicle, sway bars used, etc. As a starting
point use between 200-250 1b.Iin. for the
fronts and 250-300 lb./in. for the rears.
Adjustable camber plates should be bought
or fabricated. Look at the camber plate in
the picture. It is. very simple in design and
the only modification to the strut tower is
the enlargement of the center hole.
All the rubber in the suspension should be
replaced with spherical bearings or rod
ends. You will need access to a hydraulic
press, as most of the stock rubber bushings
need to be pressed out with considerable
force. This needs to be done on the front
and rear control arms. Check on the avail-
ability of metric spherical bearings, as more
sizes are available now. You may still have
to shim the bearing for a press fit. Fabricate
spacers to hold the bearings centered.
The front trailing links can be modified to
accept rod ends. Cut off the end of the
trailing link and thread the end using a
5/8-18 size die. The threads should be about
2 114 inches long. Use a 518 inch bore fe-
male rod end. Brackets and spacers will
have to be fabricated to hold the rod
Adustable camber plate on rear
strut tower. The front plates are
similar. This allows simple camber
adjustment.
and allow movement. Make sure the brack-
ets are designed to hold the rod end in
double shear. Use AN spec nuts and bolts
and a jam nut on the rod end. As far as
strength goes, diecutting threads like this is
a big no-no. It creates the dreaded stress
raiser. Check out Carroll Smith's books on
this subject. After you cut the threads with a
die, take a close look at them. They don't
look so hot, do they? But, in this case you
are almost forced to do it this way, unless
you want to make a completely new trailing
link with a threaded tube -andmale rod ends.
I think you can get away with this design
because this is not a heavily loaded suspen-
sion part.
SWAY BARS
For the anti-sway bars, you can use ready
made ones or make your own. If you make
your own, use straight bars with splined
ends and long arms. Use solid aluminum
mounting blocks and rod ends on the arms
to allow for adjustability. Ready-made anti-
sway bars for the X1/9 could be modified to
get rid of the rubber bushings and rod-ends
installed for the end links. A good diameter
for the sway bars is 718" for the front and
314" for the rear.
ALIGNMENT
Check the front castor first. The stock X1/9
has no provision for changing castor. After
changing the ends of the trailing arms to rod
ends, you now have some amount of ad-
justment. Lowering the car will have in-
creased the positive castor slightly. Not
enough castor leads to light steering,straight
line instabihty and insufficient self-center-
ing. Too much castor and the steering is
heavy and slow. Try and get the castor close
to stock specs (6-7degrees). It's more im-
portant to get the castor even on both sides
than it is to get an exact number of degrees.
Remember, that every time you change the
castor you also will change the camber and
toe. That's why you set the castor first.
Set the camber next. This can be easily
done with the camber plates atop the strut
towers. Some amount of experimenting will
have to be done to determine the correct
camber angle. Start off with about 1 112
degrees negative, front and rear. Changing
the camber will also change the toe setting,
so be sure to check the toe-in every time
you change the camber.
Toe-in should be adjusted last. Front toe-in
is for straight line stability and to influence
entrance into a corner. Toe-in should be set
to zero or very close to it, no more than
1/32 in or out.
The rear should always have toe-in, never
toe-out. This promotes stability under accel-
eration. 1/16 toe-in should be about right.
RIDE HEIGHT AND CORNEiR WEIGT3-I
To set the ride height you must have a level
surface. Your garage floor or driveway is
not going to be very level. With a carpen-
ter's level and some shims under the tires,
you can establish a level surface. Rotate the
spring perches up or down to achieve the
desired ride height. If the ride height is
changed more than just a little it will effect
the static camber.
In order to adjust the corner weight you
must have a set of accurate scales. The idea
is to jack weight from one corner to another
in order to achieve a "square" car. That is,
have the weight of the left front equal that
of the right front and the left rear equal that
of the right rear. Unfortunately, on a pro-
duction car this is not always entirely p s -
sible. This is because the driver is offset
from the centerline of the car and because
weight is offset due to the design of the
vehicle. Try to get it as close as possible.
BRAKES
For F-Production cars, the SCCA allows the
use of larger discs from the Lancia. This is
a very worthwhile modification, but it does
require some rnachming and modifications
to adapt the Lancia discs. Only the fronts
need to be done. PBS and FAZA can supply
units ready to bolt on. This can save you a
lot of time and work from doing the mod-
ifications yourself.
Modified hub with Moroso wheel studs and adjustable strut.
At this time you may also want to think
about replacing the stock wheel bolts with
studs and lug nuts. This is because on a race
car you are constantly taking the wheels on
and off and lining up the wheel bolts can be
a real pain. The threaded portion of the
wheel flange has to be drilled out so the
wheel studs can be pressed in from the back
side. Use 7/16 inch studs, such as Moroso.
A portion of the stud heads will have to be
ground away so that the brake disc will
clear. Since you have the hub assembly
apart,it is a good idea to press in new wheel
bearings before assembling the unit back on
the car.
The stock braking system needs to be mod-
ified so that the front and rear brake balance
can be adjusted for optimum braking char-
acteristics under racing conditions. Most
race cars today use twin master cylinders
and a balance bar for setting the brake
balance. Tilton offers ready-made units with
master cylinders, push rods and bias bar
with a spherical bearing attached to the bar.
This unit can then be adapted to the stock
brake pedal. Tilton also offers complete
assemblies including the pedal. One model
is a firewall mount, where the master cylin-
ders are mounted in the front trunk On the
over-hung mount, the master cylinders are
hung under the dash just like the stock
master cylinder. Buying one of these units
saves a lot of time from trying to build your
own. Use two 3/4 inch master cylinders and
make sure they are mounted to a rigid
structure. You don't want the brackets and
cylinders moving every time you step on
the brake pedal. The thin sheet metal of a
firewall is not enough support.
In order to improve brake pedal firmness
replace the stock flexible rubber lines to
each caliper with steel braided ones. Earl's
Supply makes a set with the correct fittings
already attached for the X119.
Lightweight 3-piece Revolution wheel is
very popular with SCCA racers. It can be
configured to any width or offset.
WHEELS AND TIRES
For G-Production the XI19 is allowed to use
a 6 x 13 wheel, while the F-Production car
can use a 6 112 x 13 wheel. You can choose
a one-piece cast wheel or the increasingly
popular 3-piece wheel. The one-piece cast
wheel will be cheaper and the best ones for
the XI19 are made by Campugnolo, Mom,
02,Panusport, and Revolution. A 3-piece
wheel has an advantage over the one-piece.
You can have it built with the offset and
wheel width that y a want. If you ever want
to change to a wider whee1,say you're mov-
ing from G to F-Production, you don't have
to buy new wheels. The most popular 3-
piece wheel used in SCCA racing is made
by Revolution. This is not because it is so
overwhelmingly superior to other wheel
makes. It is because Revolution has a good
contingency program for racers. Revolution
makes a good 3-piece wheel, but there are
other wheels out there that are just as good
or better.
Since tire technology is everchanging, it's
difficult to recommend a specific racing
slick for the X119. The most popular tire
size is 20-21 inches in diameter with an
8-inch section width. Make sure that the tire
you choose is recommended for a 6 or 6 112
inch wheel width.
ELECTRICAL
Wiring a race car is not especially difficult,
but care must be taken to avoid shorts,
using the correct wire size, and attaching
the terminals. The entire original wiring
harness should be removed. I even removed
the battery cable that goes to the starter, as I
thought the original one was rather small. I
replaced it with larger 2 gauge wire. Crimp
on terminals on each end of the battery
cable. One end will be for the starter
solenoid, the other end will connect to the
master battery cut off switch. This switch
can be located just ahead of the windshield,
close to the battery. Smaller 4 gauge wire
can then be used from the other master
switch terminal to the battery.
The ignition system needs to be upgraded in
order to handle a high rewing engine. The
MSD ignition unit, described earlier in this
book, &in be used with either the point-type
ignition of the 1300, or the Bosch electronic
unit of the 1500 engine. A good place to
mount the MSD control box is in the spare
tire well so that it is away from the engine
heat. Use the optional rubber shock mounts
for the MSD to isolate vibrations to the unit.
If you are using the stock Bosch control
module to trigger the MSD, it can also be
mounted in the spare tire well close to the
MSD. Use a high energy coil, such as the
MSD Blaster and a set of racing solid core
plug wires that can take the higher voltage.
For G-Production cars it is a good idea to
change the point-type distributor to an
electronic breakerless unit. Changing and
setting points can be a real pain since the
distributor is not in an accessible location.
Marelli has a system that comes with a com-
plete distributor and coil, and is all cen-
trifugal advance.
RED
WHITE
I
IGN,
COIL
il_:
SOLENOID
MSD
ENGINE
DISTRIBUTOR
IGN. START
FUEL
PUMP
SWlTCl I
1 BATTERY I
i
Typical electrical diagram for an X1/9 race car using MSD ignition
The interiors of two racing X119s. The placement of the instruments is similar for both,
but the bottom one retains most of the stock dash.
INSTRUMENTS
For race car applications some people con-
sider mechanical gauges as the only proper
way to go, while others argue that electrical
should be your choice. There are pros and
cons for both types. Mechanical gauges re-
quire some plumbing to the gauge itself,
such as for the water temperature and oil
pressure. One advantage they have over
electrical gauges is that they have a larger
sweep area on the face of the instrument,
which translates in larger more noticeable
needle movement. A mechanical tachometer
requires a drive cable that has to run from
the engine all the way to the back of the
tach.
The big advantage of electrical gauges is, of
course, the absence of all the plumbing to
the gauges. All that is required is a sending
unit and a run of wire.
Whatever type that you use, you will
probably have to obtain some metric adapter
fittings.
The only gauges you'll need are water
temperature, oil pressure, tachometer, and
fuel pressure. The fuel pressure gauge is
best mounted in the engine compartment or
in the rear trunk area close to the
Fuel cell is best mounted in
front trunk area '
carburetor. Make sure your tachometer
reads to 10,000 rpm. You are going to need
to use high revs.
Two good manufacturers of instruments
suitable for racing are Auto Meter and
Stewart Warner.
Besides the instruments, you will need an
ignition switch and a start button. Longacre
Automotive Products has these switches
already wired and mounted in brushed
aluminum panels. The switches are rubber
coated to protect them from dirt and water.
They also offer pre-wired gauges mounted
in aluminum panels with warning lights for
each gauge.
FUBL CELL
The best place to mount the fuel cell is in
the front trunk. For autocrossing you can
use a small cell with a 3-4 gallon capacity.
The SCCA lists specifications and approved
manufacturers of fuel cells. Make sure the
cell is securely mounted. The electric fuel
pump can be placed near the fuel cell, as
low as possible. Use two inline fuel filters,
one near the fuel pump and the other near
the engine, and a pressure regulator. Use
high quahty braided lines, such as Earl's or
Aeroquip. Make sure the braided lines don't
rub against the fuel cell, wires, or even
metal. The stamless steel covering will wear
a hole through just about anythg.
BODYWORK
The body needs to be lightened as
much as possible. For road racing
you will probably get the car con-
siderably lighter than the minimum
weight. You can then add weight
were it is needed on the car. The
SCCA allows alternate materials
for the hood, engine cover, rear
trunk, and fenders. Fiberglass re-
placements are available for these
components, including - complete
fenders. The fiberglass fenders
can be attached with Dzus fasteners
or riveted on. The stock steel door
has to remain, but can be
lightened. With a torch cut out the
d&r side guard beams and some of the
interior metal. Rivet on some thin gauge
aluminum for the inside panel of the door.
OIL COOLER
The best place for the oil cooler is in the
engine compartment near the air duct.If you
attached the rear fiberglass fender with
Dzus fasteners,the oil cooler can be serviced
from the outside. Oil coolers need a tremen-
dous amount of air to cool the oil properly.
Make sure that all the air from the rear air
duct makes its way to the oil cooler. On an
autocross car an oil cooler is not really
necessary, as the car is not on the track long
enough for the cooler to make a difference.
RADIATOR
The stock radiator can be retained for road
racing with a few modifications. The edges
around the radiator must be sealed off to
prevent air from escaping. Also, the water
pump must be slowed down because at high
rpms water is forced through the radiator
too quickly for it to be cooled properly. A
Gilmer belt system is available for the 1300
and 1500 engines and is recommended. Be
sure to retain the top bleeder valve on the
radiator, as this is used to be sure that there
is no air in the cooling system.
ENGINE
Engines built for road racing will be slightly
different than for Solo II racing. A Solo II
engine needs a more torquey engine with
less top end power and more mid-range
power and a broader more usable rpm
range. Keep this in mind when you are
building your engine or having someone
build it for you.
Building a winning race engine requires
using the best parts and assembling them
meticulously. You have to decide for your-
self whether you have the expertise to build
your own engine. A lot of the machining
operations will probably be farmed out
unless you have the ability and equipment to
do it yourself. For that reason, I am not
going to explain how to lighten and balance
a connecting rod or show in detail the ins
and outs of porting and polishing a cylinder
head. I think that's what professional race
shops are for.
The number of engine builders experienced
with the Fiat SOHC engine is a rather short
list. We're not dealing with Chevy or Ford
engines here!
PBS Engineering in southern California has
been around a long time and they
have the experience to do a complete engine
or machine work for you.
International Auto Parts in West Virginia
hasn't been around as long as PBS, but they
have a good reputation for building winning
engines.
FAZA in California probably has the best
connection of racing parts coming out of
Italy.
Elite-CarsJnc. out of the New York area is
another engine builder that specializes in
Fiats, Alfas, and Lancias.Their prices are a
little high.
Before receiving an engine from a builder,
you should have it run on a dynamometer.
Any assembly mistakes should show up
then, and the builder is responsible. Insist
on receiving a dyno sheet that shows the
horsepower and torque and at what rpm.
You need this information to gear your car
properly. Your engine builder can probably
help you with this also. They can also give
you the correct ignition timing and cam
timing for their engine.
CYLINDER HEAD
You are going to obtain a good portion of
your engine's power by using a well pre-
pared cylinder head. Many racers are using
cylinder heads from the 1100 cc engine with
good results. These have the small com-
bustion chambers and can be used on either
the 1300 or 1500. Using this head raises
the compression ratio using the stock type
pistons.
The other alternative is using the stock 1300
or 1500 cylinder head with high com-
pression pistons. In either case the heads
have to be properly prepared,which includes
porting and polishing and reshaping the
combustion chambers. Don't try planing the
head too much to gain compression or you
are going to run into problems. There is just
not a lot of extra material there to plane.
Have your cylinder head flowed and cc'ed
(which means that the combustion chambers
have been contoured so that each one has
the same capacity) .
VALVE TRAIN
You cannot change the size of the valves,
but alternate valves can be used, such as
from Abarth and others. Some use smaller
than stock valve stems to make the valves
lighter and use correspondingly smaller
valve guides. If the stock valves are retain-
ed, have them lightened. Your engine
builder can also do a special valve grinding.
The multi-angle valve job has become al-
most universal with most all high perfor-
mance engines. It must be remembered that
a typical stock-type wide angle valve seat
will not flow as well as its multi-angle
counterpart, but it is not as durable. Also, a
wide seat will help cool the valve somewhat
better than a multi-angled one.
Stiffer valve springs are needed for racing
to avoid coil bind. Special springs are avad-
able. You can retain the stock cast iron
valve guides or go with special bronze
guides. Reducing the weight of the valve
train is important. Special valve spring re-
tainers are available, made out of aluminum
or titanium.
CAMSHAFT
Selection of a camshaft must be done care-
fully. It has to be compatible with your
cylinder head, pistons, compression ratio,
etc.
Many people place too much emphasis on
an engine's peak horsepower and not
enough on the engine's torque character-
istics. In their stock form, the Fiat SOHC
engines do not have a lot of torque. The
1500 engine offers more due to its longer
stroke.
The operating parameter of the camshaft
that affects torque the most is the duration.
Duration is the time during which the valve
is off its seat and is measured in degrees of
rotation at the crankshaft. The duration
should be selected so that it offers the most
torque in the rpm range that the engine will
be operated. In Solo I1 racing the rpm range
will be lower and broader. The rpm range
for road racing will be higher and narrower.
If you want an engine that produces more
torque in the lower rpm range, choose
a camshaft with a short duration. For more
torque in the higher rpm range, choose a
camshaft with a longer duration.
The lobe center is another important con-
sideration, as it also affects torque. The lobe
center is the angle between the point of
maximum lift on the intake lobe and the
point of maximum lift on the exhaust lobe.
It is measured in camshaft degrees.The lobe
center is fixed when the camshaft is ground
and cannot be adjusted unless it is reground.
On the other hand, the lobe centerline can
be adjusted by advancing or retarding the
cam timing.
On a camshaft designed for racing the lift is
increased to improve performance. Lift is
the distance a valve moves off its seat. The
higher the lift, the larger the opening is for
the gas and air mixture.
There are many manufacturers of high
performance camshafts for Fiat engines.
Some are made in Europe, others in the
U.S. Each engine builder will have their
favorite. Follow your engine builder's
advice on the proper camshaft for your
application. If you don't trust your engine
builder on these things, you need to find
another engine builder.
PISTONS
If you are using the standard 1300 or 1500
head, you need high compression pistons to
raise the compression ratio, and hence, the
power. There are several types of cast and
forged pistons available for these engines.
Forged pistons offer better heat rejection
than do cast ones.The piston design selected
must be compatible with your head modifi-
cations.You certainly don't want the pistons
striking the valves! The pistons in your set
should all weigh the same and be balanced.
CONNECTING RODS
The stock rods in the 1500 engine are
forged, while the 1300 rods are cast. The
forged rods in the 1500 can be retained but
should be lightened, balanced, and shot-
peened. Alternate forged rods are avadable
for the 1300 engine. Carrillo makes forged
connecting rods for Fiat engines.
CRANKSHAFT
The crankshaft is probably the most highly
stressed component in the engine. Even so,
the stock crankshaft can be retained for both
the 1300 and 1500 engines if the rpms are
kept at a safe level. For the 1300 engine
keep the revs below 9,000 and for the 1500
engine 8,500 rpm is the limit.
You should be aware by now that many
stock components can be retained on an
XI19 racing engine, but they do have limits
and must be checked and handled carefully.
ENGINE BEARINGS
The stock Fiat bearings can be retained, but
for added security you need some special
bearings, Vandenvell being about the best.
LUBRICATION
Because of the high G forces created when
the suspension is modified and racing slicks
are used, the stock wet sump lubrication is
not adequate. Some form of oil control
system must be employed. The most reliable
system is a dry sump. It is expensive,bulky,
and complex. PBS sells a dry sump system
for the X119. The pump is located where
the original alternator was and is driven by
a cogged pulley and belt.
An alternate method of controhg the oil is
using an oil pan with special baffles welded
inside. This system retains the stock wet
sump system and seems to work well. It was
first developed by the Italians some years
ago and tested in international competition
in races that are much longer in length than
your typical SCCA National or Regional
race.
A third method for controlling the oil is
using an increasingly popular device called
an Accusump. The Accusump is the poor
man's dry sump system. It retains the stock
wet sump system and uses a canister filled
with engine oil that is plumbed into the
engine's oiling system. The Accusump
releases oil into your engine whenever oil
gets away from the oil pump. When the oil
pump gets oil again the Accusump
recharges itself. The unit stores about three
quarts of oil and releases only the amount
the engine needs to maintain normal oil
pressure. I have no personal experience
using an Accusump, but have known racers
that swear by them and others that have
experienced catastrophic engine failures
using them.
INDUCTION SYSTEM
For an F Production car you are allowed to
use a single Weber 34 mm DMTR or the
standard fuel injection. -An alternate car-
buretor is the Weber 36 DCNF with a 34
mm venturi and a manifold adapter. The G
~ m h ~ t i o n is allowed a Weber 32fm-n For a Solo II car a cool can could be mounted
DMTR carburetor. in the rear trunk area, as well as the fuel
pressure gauge.
In order to be competitive the carburetors
have to be specially prepared. The SCCA
doesn't allow very much in the induction
department for the X1/9s, so it is important
to get the most out of what we have to work
with. For both the 32 and 34 mm DMTR
carburetors the venturis can be bored out
and the butterflies reshaped. The 36 DCNF plus it improves the thmttle response. Of
Weber can be used on the stock intake man- course, running it too lean leads to burnt
ifold with some modifications. pistons. If you buy a "prepared" carburetor
don't assume it is jetted perfectly. Use the
You can get these carburetors completely settings as a starting Point and go from
set up for racing with all the modifications there-
done from PBS, FAZA, and others.
The intake manifold needs to be opened up
as much as possible and the ports matched
to the cylinder head. The intake manifold
from a 1974 model works best because it
gives better breathing.
Most people set up their carburetors too
rich, which robs power and increases fuel
comsumption. A very rich mixture is easy
to spot - black tailpipe and black, sooty
deposits on the sparkplugs. An extremely
lean mixture is also easy to spot - the tail-
pipe is very, very white. The trouble comes
in determining the mixture in between, as
this takes experience. If you are not ex-
perienced in this area let someone who is
help you.
The reason we want the mixture somewhat
lean is because that is where the power is,
EXHAUST SYSTEM
Don't try designing your own headers
unless you have access to a dynometer. A
good design will -not find any extra horse-
power, but a bad one will loose power for
you. Make sure that no part of the exhaust
system comes in contact with any moving
part, such as the suspension. The collector
on FAZA's headers come very close to the
right axle, so be careful. Use a good racing
muffler, such as Flowmaster. I don't like
the SuperTrapp very much.
I have yet to find a good paint for headers
that will stay on for a reasonable amount of
time. Unless you are rich and using stainless
steel, you will be painting your headers
often. Glass beading them instead of sand-
blasting seems to make the paint stick
better.
It's not a good idea to chrome your headers.
It adds weight to the headers, but more im-
portantly it could weaken them.The reason
lies in the chroming process. Before the
chrome is applied the welds on the headers
are ground smooth which could weaken the
welds and hence, the headers.
ENGINE MOUNTS
It's a good idea to change the top torque rod
engine mount to a solid mount. Use two 518
inch female rod ends with a threaded rod
connecting the two. Drill out the holes in
the mounting brackets to 7/16 in. diameter.
Fabricate spacers to take up the difference
between the rod end and the brackets. Use
aircraft quality 7/16 in. bolts and lock nuts.
This modification reduces a lot of the rock-
ing motion of the engine.
THE DFUVE LINE
F%YWHEEL AND CLUTCH
To reduce rotational inertia the flywheel
should be lightened and then balanced. An
alternate aluminum flywheel can also be
used.
The stock clutch on
suitable for racing.
the 1300 engine is not
The 1500 clutch as-
sembly is a little larger but still marginal for
racing. Running the Borg and Beck racing
clutch and pressure plate effectively solves
this problem.
TRANSMISSION
Different gear ratios are available for the
stock spiral cut gears. If you have the
money PBS offers a gearbox conversion
which uses straight cut Webster gears. This
is a five speed conversion which can be
installed in either the 4 or 5 speed box.
Without the synchros of the stock
transmission you can shift faster and without
using the clutch.
DrnRENTIAL
To prevent inside wheelspin in corners the
differential needs to be modified so that
drive is provided to both wheels.This can be
done by locking the differential by welding
or by using a limited slip. All of the limited
slips for Fiats came from Europe, but this
source has just about dried up and finding a
limited slip for the XI19 in good condition
will be difficult. If you do find one, it is
going to be expensive. 'Just about every road
racer is now using a locked diff.
For Solo TI racing I wouldn't run a locked
differential. You are going to have gobs of
understeer in the typically tight comers in
Rod ends installed as top engine mount.
46
an autocross. You could get away with it by
trying to tune out some of the understeer
and change your driving style so that you
toss the car into the corners. If you can't
find a limited slip it might just be better to
run an open differential.
AXLES AND CV JOINTS
The 1300 models came with constant veloci-
ty joints on the outer ends of the axles and a
sliding "Tripode" type joint on the inner
ends. The 1500 models have a better set-up,
using identical C.V. joints on both ends.
The later models also use slightly larger
axles and incorporate larger rear bearings.
The C.V. joints themselves are of excellent
quality and should give good service even
under racing.conditions. The allen head-type
bolts which thread into the axle flanges do
tend to loosen, though. One solution is to
use Luctite and safety wire all the bolts. The
bolts will be difficult to drill for safety wire.
The preferred method is to drill out the
threaded holes on both the inboard and
outboard ends and use aircraft quality bolts
and nuts to hold them.
I have seen and heard about the stub axles
breaking on Prepared X119s used for auto-
crossing, especially in Pro Solos. This is
probably due to <thedrag racing type starts
that are used. The stub axles should be shot
peened and replaced on a regular schedule.
A lot can be seen in the front trunk area. fuel cell, fuel filter, fuel pump,
master cut-off switch, and strut tower brace.
Location of MSD ignition
Bosch control module in
tire well.
XI19 racing "office".
and
spare
Select a racing seat
carefully. It must be
comfortable for you.
Buildin A Modieied Solo I1
The Solo II Modified class allows a great deal of ingenuity.
This chapter will be short, since most of what is outlined in Chapter 4 applies to building a
nodified racer. These modifications are in excess of what's allowed in SCCA Production
-acingor in Prepared Solo 11racing.
The SCCA Solo 11Modified rules for production based cars are simple.
1. There are two classes for production cars.
2. D Modified cars have a minimum weight of 1000lbs. and engines are limited to 2
liters of capacity.
3. E Modified cars have a minimum weight of 1500 lbs. and engines of over 2 liters.
4. Wheels, tires, and suspensions are free.
The modified rules allow a lot of ingenuity,
as any engine and transmission can be used
and the car can be very light.
You are never going to get an X1/9 to the
minimum weight of 1000 lbs. for D Mod-
ified, few cars in this class do - with maybe
the exception of the Lotus 7. Get the car as
light as you can without sacrificing strength
and leave it at that. If you are preparing the
car for E Modified the minimum weight can
be easily met.
WHEELS AND TIRES
Since wheel and tire size are free, take ad-
vantage of using a wider wheel. Don't go
too wide on the front, about 7 inches wide
maximum. The rears can be wider, about 8
inches. At first thought it might seem
reasonable to use the widest racing slicks
that you can fit on the car. This may not be
wise. The typical autocross course lasts
between 1 to 1 112 minutes in length, not
enough time to properly heat up a set of
wide race tires. If I were to increase the tire
width, I would do it in the rear to get a little
more traction since the engine will be more
powerful.
ENGINE
will be from a pair of Weber 45 DCOE's
with an appropriate intake manifold. The
rear trunk area will have to be modified to
make rcmm for these carbs. You can even
cut away the whole rear boxed structure
between the strut towers and replace it with
some smaller welded in or bolted in braces.
An air scoop can be bought or fabricated to
sit on top of the engine cover, allowing
fresh air to feed the carburetors.
With these modifications you will have a
very powerful engine, indeed. Still, you will
be behind some of the Lotus cars with their
twin cam Fords tiiat are putting out between
200 and 230 horsepower.
USING THE 1500 E N G M AN
EARLY CAR
If you have an early model car (1974-1978)
and wish to install the larger 1500 engine,
it can be done without too many problems.
Starting in 1979 a great number of changes
were made to the cars besides a larger
engine. A 5-speed transmission was added,
plus larger rear bearings, new C.V. joints,
and larger axles to name a few. Trying to
use the existing drive-line components with
the 1500 engine and transmission can create
some problems. It would be better to use the
complete rear suspension from a 1500
model. The suspension mounting points are
the same.
If you look at the rear structure of a 1979
The biggest restriction to a Production or
Prepared racer is the induction system, so
this needs to be looked at to improve power
and torque. This means using a big valve
head. They are available completely pre-
pared from a number of sources. Even a
special 16 valve DOHC head, developed in
Europe, is available.
To complement the improved breathing in
the head, you'll need larger carburetors or,
if you can afford it, a racing fuel injection
system. With carburetors, the best response
similar area in the frame of the early model
car. Sheet metal then has to be welded up
inside the cut out area.
All the engine mounts are the same and do
not have to be changed or modified.
Since the 1500 engine is taller than the 1300
the early model engine cover may not clear
properly. The late model engine cover is
needed and is available in fiberglass.
The later model X1/9s have a different
design for the throttle cable and the metal
housing inside the central tunnel. Neither
the early or late model throttle cable will
work properly without some modifications.
The preferred set-up is a custom made cable
using high quality stainless steel aircraft
cable. The casing should be Teflon lined.
Use a 10-32 female rod end at the pedal for
maximum strength. Most cables come with
10-32 threaded ends. This will thread on to
the stock Fiat end fitting at the throttle link-
age.
TURBOCHARGING
Turbocharging for the Fiat SOHC engine
has been developed by Serra and PBS with
mixed results. It must be remembered that
the engine was never designed with turbo-
charging in mind. PBS did tests with both a
carbureted 1300 and 1500 engine and with
the Bosch fuel injected 1500 engine. They
were able to get about 140 horsepower
using 7 - 9 psi for boost. Increasing the
boost lowers the reliability. Turbocharging
is expensive, complex and takes up a lot of
room in the engine compartment. More
horsepower can be obtained by improve-
ments to the normally aspriated engine.
ALTERNATE ENGINES
In the Modified class you are not restricted
to using the stock-type motor. Any engine
that will fit in the same general location as
the original can be used. This makes for
some interesting engine swaps. About the
most common is adapting the Fiat DOHC
unit from the 124 in the X1/9's tight engine
bay. This is more complicated than it first
seems. You have to adapt the axles and
drive line as well as fitting in new motor
mounts, not to mention the notches cut in
the chassis and suspension for clearance.
To my mind it would be easier to just race
the mid-engined Lancia Scorpion, which
uses the same DOHC engine.
Still, the possibilities are almost endless and
almost anything is possible - from V.W.
engines to rotaries.
Extensive fabrication work has been done here to mount a V.W. air-cooled engine in the
north-south position.
This XI19 features a clever air box to force fresh air to the carburetors.
he Dal I
A Dallara XI19 racing in Germany, 1978.
-
- Fiat Torino decided not to produce a factory
road racing X1/9, instead commissioning
Abarth to produce a rally version of the car.
-
And Abarth did a wonderful job. The rally
XI19 was powered by a Fiat twincam 16-
valve engine, producing in the neighbor-
hood of 200 bhp. It turned out that the per-
-.
formance of the car was better than some
had hoped, beating the world champion
Lancia Stratos and the Fiat Abarth 131.
- Despite its winning ways, the Abarth XI19
saw limited competition as a rally car. Be-
cause of some political in-fighting within
.-
the Fiat group, which is a whole other
story,the X1/9 rally program was dropped.
Here was a beautiful midengined sports car
and Fiat chose to ignore it's racing capabil-
ities. Fiat wanted to put Lancia into long
distance racing, while Ferrari continued in
Formula 1. Fiat would have the rally
segment for the moment, but with the 131
sedan, not the X1/9.
ENTER DALLARA
Since Fiat wasn't interested in racing the
X1/9, it was up to the private sector to take
up the slack. One of the most notable was
Gian Paolo Dallara. He was a most capable
engineer. Dallara was an assistant to Ing.
Chiti at Ferrari, worked with competition
Fiat x19 performance handbook   ron collins

More Related Content

What's hot

история Ford escort-europe
история Ford escort-europeистория Ford escort-europe
история Ford escort-europerukford
 
Vauxhall t car aka chevrolet chevette brazil
Vauxhall t car   aka chevrolet chevette brazilVauxhall t car   aka chevrolet chevette brazil
Vauxhall t car aka chevrolet chevette brazilnikoric
 
2011 Ford Mustang Lamoureux Ford MA
2011 Ford Mustang Lamoureux Ford MA2011 Ford Mustang Lamoureux Ford MA
2011 Ford Mustang Lamoureux Ford MALamoureux Ford
 
Review: Traxxas BIGFOOT 2WD Monster Truck
Review: Traxxas BIGFOOT 2WD Monster TruckReview: Traxxas BIGFOOT 2WD Monster Truck
Review: Traxxas BIGFOOT 2WD Monster Trucktphalen
 
2011 Don Chalmers Ford Mustang Albuquerque NM
2011 Don Chalmers Ford Mustang Albuquerque NM2011 Don Chalmers Ford Mustang Albuquerque NM
2011 Don Chalmers Ford Mustang Albuquerque NMNew Mexico Ford
 
Catalogo automotor 2014
Catalogo automotor 2014Catalogo automotor 2014
Catalogo automotor 2014Dissan2014
 

What's hot (7)

история Ford escort-europe
история Ford escort-europeистория Ford escort-europe
история Ford escort-europe
 
FLYING CAR
FLYING CARFLYING CAR
FLYING CAR
 
Vauxhall t car aka chevrolet chevette brazil
Vauxhall t car   aka chevrolet chevette brazilVauxhall t car   aka chevrolet chevette brazil
Vauxhall t car aka chevrolet chevette brazil
 
2011 Ford Mustang Lamoureux Ford MA
2011 Ford Mustang Lamoureux Ford MA2011 Ford Mustang Lamoureux Ford MA
2011 Ford Mustang Lamoureux Ford MA
 
Review: Traxxas BIGFOOT 2WD Monster Truck
Review: Traxxas BIGFOOT 2WD Monster TruckReview: Traxxas BIGFOOT 2WD Monster Truck
Review: Traxxas BIGFOOT 2WD Monster Truck
 
2011 Don Chalmers Ford Mustang Albuquerque NM
2011 Don Chalmers Ford Mustang Albuquerque NM2011 Don Chalmers Ford Mustang Albuquerque NM
2011 Don Chalmers Ford Mustang Albuquerque NM
 
Catalogo automotor 2014
Catalogo automotor 2014Catalogo automotor 2014
Catalogo automotor 2014
 

Similar to Fiat x19 performance handbook ron collins

Similar to Fiat x19 performance handbook ron collins (20)

2015 Dodge Charger Details. El Paso - Albuquerque Dealers Jack Key New Mexico...
2015 Dodge Charger Details. El Paso - Albuquerque Dealers Jack Key New Mexico...2015 Dodge Charger Details. El Paso - Albuquerque Dealers Jack Key New Mexico...
2015 Dodge Charger Details. El Paso - Albuquerque Dealers Jack Key New Mexico...
 
Model t and its beginnings
Model t and its beginningsModel t and its beginnings
Model t and its beginnings
 
Savage New Canaan
Savage New CanaanSavage New Canaan
Savage New Canaan
 
Mike Savage New Canaan
Mike Savage New CanaanMike Savage New Canaan
Mike Savage New Canaan
 
The 6 spectacular futuristic cars
The 6 spectacular futuristic carsThe 6 spectacular futuristic cars
The 6 spectacular futuristic cars
 
CARS COLLECTION
CARS COLLECTIONCARS COLLECTION
CARS COLLECTION
 
2015 FIAT Abarth Brochure | NJ FIAT Dealer
2015 FIAT Abarth Brochure | NJ FIAT Dealer 2015 FIAT Abarth Brochure | NJ FIAT Dealer
2015 FIAT Abarth Brochure | NJ FIAT Dealer
 
Auto History - Engine
Auto History - EngineAuto History - Engine
Auto History - Engine
 
Bugatti as a Brand
Bugatti as a BrandBugatti as a Brand
Bugatti as a Brand
 
AA306 HiRes Jag E
AA306 HiRes Jag EAA306 HiRes Jag E
AA306 HiRes Jag E
 
VW_US FullLine_2009.pdf
VW_US FullLine_2009.pdfVW_US FullLine_2009.pdf
VW_US FullLine_2009.pdf
 
1 automobile intro-v5-1
1 automobile intro-v5-11 automobile intro-v5-1
1 automobile intro-v5-1
 
1929 Isotta Fraschini 8 A Roadster
1929 Isotta Fraschini 8 A Roadster1929 Isotta Fraschini 8 A Roadster
1929 Isotta Fraschini 8 A Roadster
 
Auto Quiz
Auto QuizAuto Quiz
Auto Quiz
 
Michael Savage New Canaan
Michael Savage New CanaanMichael Savage New Canaan
Michael Savage New Canaan
 
Mike Savage New Canaan
Mike Savage New CanaanMike Savage New Canaan
Mike Savage New Canaan
 
car and technology
car and technologycar and technology
car and technology
 
Mike Savage New Canaan
Mike Savage New CanaanMike Savage New Canaan
Mike Savage New Canaan
 
Savage New Canaan
Savage New CanaanSavage New Canaan
Savage New Canaan
 
Mike Savage New Canaan
Mike Savage New CanaanMike Savage New Canaan
Mike Savage New Canaan
 

Recently uploaded

Dubai Call Girls Size E6 (O525547819) Call Girls In Dubai
Dubai Call Girls  Size E6 (O525547819) Call Girls In DubaiDubai Call Girls  Size E6 (O525547819) Call Girls In Dubai
Dubai Call Girls Size E6 (O525547819) Call Girls In Dubaikojalkojal131
 
Call Girls in Karachi | +923081633338 | Karachi Call Girls
Call Girls in Karachi  | +923081633338 | Karachi Call GirlsCall Girls in Karachi  | +923081633338 | Karachi Call Girls
Call Girls in Karachi | +923081633338 | Karachi Call GirlsAyesha Khan
 
What Causes DPF Failure In VW Golf Cars & How Can They Be Prevented
What Causes DPF Failure In VW Golf Cars & How Can They Be PreventedWhat Causes DPF Failure In VW Golf Cars & How Can They Be Prevented
What Causes DPF Failure In VW Golf Cars & How Can They Be PreventedAutobahn Automotive Service
 
FULL ENJOY - 9953040155 Call Girls in Sector 61 | Noida
FULL ENJOY - 9953040155 Call Girls in Sector 61 | NoidaFULL ENJOY - 9953040155 Call Girls in Sector 61 | Noida
FULL ENJOY - 9953040155 Call Girls in Sector 61 | NoidaMalviyaNagarCallGirl
 
꧁༒☬ 7042364481 (Call Girl) In Dwarka Delhi Escort Service In Delhi Ncr☬༒꧂
꧁༒☬ 7042364481 (Call Girl) In Dwarka Delhi Escort Service In Delhi Ncr☬༒꧂꧁༒☬ 7042364481 (Call Girl) In Dwarka Delhi Escort Service In Delhi Ncr☬༒꧂
꧁༒☬ 7042364481 (Call Girl) In Dwarka Delhi Escort Service In Delhi Ncr☬༒꧂Hot Call Girls In Sector 58 (Noida)
 
What Could Cause A VW Tiguan's Radiator Fan To Stop Working
What Could Cause A VW Tiguan's Radiator Fan To Stop WorkingWhat Could Cause A VW Tiguan's Radiator Fan To Stop Working
What Could Cause A VW Tiguan's Radiator Fan To Stop WorkingEscondido German Auto
 
Digamma / CertiCon Company Presentation
Digamma / CertiCon Company  PresentationDigamma / CertiCon Company  Presentation
Digamma / CertiCon Company PresentationMihajloManjak
 
原版工艺美国普林斯顿大学毕业证Princeton毕业证成绩单修改留信学历认证
原版工艺美国普林斯顿大学毕业证Princeton毕业证成绩单修改留信学历认证原版工艺美国普林斯顿大学毕业证Princeton毕业证成绩单修改留信学历认证
原版工艺美国普林斯顿大学毕业证Princeton毕业证成绩单修改留信学历认证jjrehjwj11gg
 
call girls in G.T.B. Nagar (DELHI) 🔝 >༒9953330565🔝 genuine Escort Service 🔝✔️✔️
call girls in  G.T.B. Nagar (DELHI) 🔝 >༒9953330565🔝 genuine Escort Service 🔝✔️✔️call girls in  G.T.B. Nagar (DELHI) 🔝 >༒9953330565🔝 genuine Escort Service 🔝✔️✔️
call girls in G.T.B. Nagar (DELHI) 🔝 >༒9953330565🔝 genuine Escort Service 🔝✔️✔️9953056974 Low Rate Call Girls In Saket, Delhi NCR
 
GREEN VEHICLES the kids picture show 2024
GREEN VEHICLES the kids picture show 2024GREEN VEHICLES the kids picture show 2024
GREEN VEHICLES the kids picture show 2024AHOhOops1
 
办理埃默里大学毕业证Emory毕业证原版一比一
办理埃默里大学毕业证Emory毕业证原版一比一办理埃默里大学毕业证Emory毕业证原版一比一
办理埃默里大学毕业证Emory毕业证原版一比一mkfnjj
 
(8264348440) 🔝 Call Girls In Shaheen Bagh 🔝 Delhi NCR
(8264348440) 🔝 Call Girls In Shaheen Bagh 🔝 Delhi NCR(8264348440) 🔝 Call Girls In Shaheen Bagh 🔝 Delhi NCR
(8264348440) 🔝 Call Girls In Shaheen Bagh 🔝 Delhi NCRsoniya singh
 
UNIT-V-ELECTRIC AND HYBRID VEHICLES.pptx
UNIT-V-ELECTRIC AND HYBRID VEHICLES.pptxUNIT-V-ELECTRIC AND HYBRID VEHICLES.pptx
UNIT-V-ELECTRIC AND HYBRID VEHICLES.pptxDineshKumar4165
 
定制昆士兰大学毕业证(本硕)UQ学位证书原版一比一
定制昆士兰大学毕业证(本硕)UQ学位证书原版一比一定制昆士兰大学毕业证(本硕)UQ学位证书原版一比一
定制昆士兰大学毕业证(本硕)UQ学位证书原版一比一fjjhfuubb
 
如何办理(UC毕业证书)堪培拉大学毕业证毕业证成绩单原版一比一
如何办理(UC毕业证书)堪培拉大学毕业证毕业证成绩单原版一比一如何办理(UC毕业证书)堪培拉大学毕业证毕业证成绩单原版一比一
如何办理(UC毕业证书)堪培拉大学毕业证毕业证成绩单原版一比一fjjwgk
 
2024 WRC Hyundai World Rally Team’s i20 N Rally1 Hybrid
2024 WRC Hyundai World Rally Team’s i20 N Rally1 Hybrid2024 WRC Hyundai World Rally Team’s i20 N Rally1 Hybrid
2024 WRC Hyundai World Rally Team’s i20 N Rally1 HybridHyundai Motor Group
 
办理学位证(MLU文凭证书)哈勒 维滕贝格大学毕业证成绩单原版一模一样
办理学位证(MLU文凭证书)哈勒 维滕贝格大学毕业证成绩单原版一模一样办理学位证(MLU文凭证书)哈勒 维滕贝格大学毕业证成绩单原版一模一样
办理学位证(MLU文凭证书)哈勒 维滕贝格大学毕业证成绩单原版一模一样umasea
 

Recently uploaded (20)

Dubai Call Girls Size E6 (O525547819) Call Girls In Dubai
Dubai Call Girls  Size E6 (O525547819) Call Girls In DubaiDubai Call Girls  Size E6 (O525547819) Call Girls In Dubai
Dubai Call Girls Size E6 (O525547819) Call Girls In Dubai
 
Call Girls in Karachi | +923081633338 | Karachi Call Girls
Call Girls in Karachi  | +923081633338 | Karachi Call GirlsCall Girls in Karachi  | +923081633338 | Karachi Call Girls
Call Girls in Karachi | +923081633338 | Karachi Call Girls
 
What Causes DPF Failure In VW Golf Cars & How Can They Be Prevented
What Causes DPF Failure In VW Golf Cars & How Can They Be PreventedWhat Causes DPF Failure In VW Golf Cars & How Can They Be Prevented
What Causes DPF Failure In VW Golf Cars & How Can They Be Prevented
 
FULL ENJOY - 9953040155 Call Girls in Sector 61 | Noida
FULL ENJOY - 9953040155 Call Girls in Sector 61 | NoidaFULL ENJOY - 9953040155 Call Girls in Sector 61 | Noida
FULL ENJOY - 9953040155 Call Girls in Sector 61 | Noida
 
꧁༒☬ 7042364481 (Call Girl) In Dwarka Delhi Escort Service In Delhi Ncr☬༒꧂
꧁༒☬ 7042364481 (Call Girl) In Dwarka Delhi Escort Service In Delhi Ncr☬༒꧂꧁༒☬ 7042364481 (Call Girl) In Dwarka Delhi Escort Service In Delhi Ncr☬༒꧂
꧁༒☬ 7042364481 (Call Girl) In Dwarka Delhi Escort Service In Delhi Ncr☬༒꧂
 
What Could Cause A VW Tiguan's Radiator Fan To Stop Working
What Could Cause A VW Tiguan's Radiator Fan To Stop WorkingWhat Could Cause A VW Tiguan's Radiator Fan To Stop Working
What Could Cause A VW Tiguan's Radiator Fan To Stop Working
 
Digamma / CertiCon Company Presentation
Digamma / CertiCon Company  PresentationDigamma / CertiCon Company  Presentation
Digamma / CertiCon Company Presentation
 
原版工艺美国普林斯顿大学毕业证Princeton毕业证成绩单修改留信学历认证
原版工艺美国普林斯顿大学毕业证Princeton毕业证成绩单修改留信学历认证原版工艺美国普林斯顿大学毕业证Princeton毕业证成绩单修改留信学历认证
原版工艺美国普林斯顿大学毕业证Princeton毕业证成绩单修改留信学历认证
 
Call Girls In Kirti Nagar 📱 9999965857 🤩 Delhi 🫦 HOT AND SEXY VVIP 🍎 SERVICE
Call Girls In Kirti Nagar 📱  9999965857  🤩 Delhi 🫦 HOT AND SEXY VVIP 🍎 SERVICECall Girls In Kirti Nagar 📱  9999965857  🤩 Delhi 🫦 HOT AND SEXY VVIP 🍎 SERVICE
Call Girls In Kirti Nagar 📱 9999965857 🤩 Delhi 🫦 HOT AND SEXY VVIP 🍎 SERVICE
 
call girls in G.T.B. Nagar (DELHI) 🔝 >༒9953330565🔝 genuine Escort Service 🔝✔️✔️
call girls in  G.T.B. Nagar (DELHI) 🔝 >༒9953330565🔝 genuine Escort Service 🔝✔️✔️call girls in  G.T.B. Nagar (DELHI) 🔝 >༒9953330565🔝 genuine Escort Service 🔝✔️✔️
call girls in G.T.B. Nagar (DELHI) 🔝 >༒9953330565🔝 genuine Escort Service 🔝✔️✔️
 
sauth delhi call girls in Connaught Place🔝 9953056974 🔝 escort Service
sauth delhi call girls in  Connaught Place🔝 9953056974 🔝 escort Servicesauth delhi call girls in  Connaught Place🔝 9953056974 🔝 escort Service
sauth delhi call girls in Connaught Place🔝 9953056974 🔝 escort Service
 
GREEN VEHICLES the kids picture show 2024
GREEN VEHICLES the kids picture show 2024GREEN VEHICLES the kids picture show 2024
GREEN VEHICLES the kids picture show 2024
 
办理埃默里大学毕业证Emory毕业证原版一比一
办理埃默里大学毕业证Emory毕业证原版一比一办理埃默里大学毕业证Emory毕业证原版一比一
办理埃默里大学毕业证Emory毕业证原版一比一
 
(8264348440) 🔝 Call Girls In Shaheen Bagh 🔝 Delhi NCR
(8264348440) 🔝 Call Girls In Shaheen Bagh 🔝 Delhi NCR(8264348440) 🔝 Call Girls In Shaheen Bagh 🔝 Delhi NCR
(8264348440) 🔝 Call Girls In Shaheen Bagh 🔝 Delhi NCR
 
UNIT-V-ELECTRIC AND HYBRID VEHICLES.pptx
UNIT-V-ELECTRIC AND HYBRID VEHICLES.pptxUNIT-V-ELECTRIC AND HYBRID VEHICLES.pptx
UNIT-V-ELECTRIC AND HYBRID VEHICLES.pptx
 
定制昆士兰大学毕业证(本硕)UQ学位证书原版一比一
定制昆士兰大学毕业证(本硕)UQ学位证书原版一比一定制昆士兰大学毕业证(本硕)UQ学位证书原版一比一
定制昆士兰大学毕业证(本硕)UQ学位证书原版一比一
 
如何办理(UC毕业证书)堪培拉大学毕业证毕业证成绩单原版一比一
如何办理(UC毕业证书)堪培拉大学毕业证毕业证成绩单原版一比一如何办理(UC毕业证书)堪培拉大学毕业证毕业证成绩单原版一比一
如何办理(UC毕业证书)堪培拉大学毕业证毕业证成绩单原版一比一
 
2024 WRC Hyundai World Rally Team’s i20 N Rally1 Hybrid
2024 WRC Hyundai World Rally Team’s i20 N Rally1 Hybrid2024 WRC Hyundai World Rally Team’s i20 N Rally1 Hybrid
2024 WRC Hyundai World Rally Team’s i20 N Rally1 Hybrid
 
Indian Downtown Call Girls # 00971528903066 # Indian Call Girls In Downtown D...
Indian Downtown Call Girls # 00971528903066 # Indian Call Girls In Downtown D...Indian Downtown Call Girls # 00971528903066 # Indian Call Girls In Downtown D...
Indian Downtown Call Girls # 00971528903066 # Indian Call Girls In Downtown D...
 
办理学位证(MLU文凭证书)哈勒 维滕贝格大学毕业证成绩单原版一模一样
办理学位证(MLU文凭证书)哈勒 维滕贝格大学毕业证成绩单原版一模一样办理学位证(MLU文凭证书)哈勒 维滕贝格大学毕业证成绩单原版一模一样
办理学位证(MLU文凭证书)哈勒 维滕贝格大学毕业证成绩单原版一模一样
 

Fiat x19 performance handbook ron collins

  • 1.
  • 2.
  • 4. FIAT X1/9 PERFOlXWWCE HANDBOOK
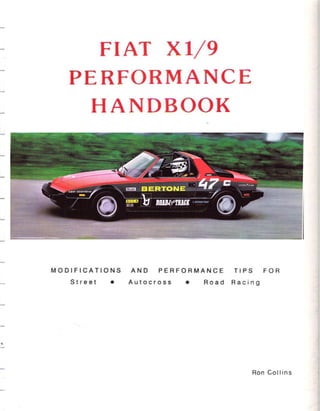
 By Ron Coltins Published By P.O. Box 371383 El Paso,Texas 79937 All rights resieryed. NO patt of this book may be produced or bmsmitted in any fam or by any r n m ,electronic or mechanical, including photoolDpY;ii& rroaPding a by any information stwage retrieval system without written pemissm h r n the author, except for the inclusion of brief qwtations m a review. myright 1990, 1991by R d d E. Chllias Firstpintea in 1990 S@mdprinting 191, rievised Printed and bound in theUnited States afAmerica Library ofCongress Catalog Card Number. 90-92227
  • 5. Taale- -, of Contents I m O D U m O N 1 A LlTI'LE HISTORY 2 .BUILDINGA HOT STREETCAR 3 BUILDING AN AUTOCROSS CAR 4 BUILDING A ROAD RACE/SOLX) TIPREPARED CAR 5 BUILDING A MODWED SOLOnCAR 6 THEDALLA.RAXlf9 APPENDIX 1 SOURCIES FOR PARTS APPENDIX 2 RECOMMENDED READING
  • 6. Introduction Since its inbroduction so m y yearsago9dre Fiat XX9 has been a terrific sports car to~ w n and drive, It also a car which many people wanted ta impiwe, modifjl and rhce.This has spawned a whole bunch ofspecial highpd-ce parts for the X119. I hope thisbook will help you select and install these cprnpmmts whether it's for street ar competition driving. However, this book is not meant to r e p l ~a repair manual. % v d g d rqdr manuals recommknded in the Appe.ndk. Mthough many minufactwets and suppliers ate mentioned iuib'ev& 'r&miGin'dd 'in'~Gs book, I am in tm way associated with any of them,, nor do I have anything to sell myself. I ama teacher by profession and my hobby and passion is mOdifyiag and racing Fiats. To the best of my knowledge, all the hfhmhn coatained in his book is tnm and mmct All rexmnme-ns are made withbut any guarantee. Because thequality of partsgmtifrials and methods is beyond my conbol, I disclaim all liability in comtim with the use of this ia?rnti~&. .Wluck with your XI@ ~mj-ea
  • 7. A Little History In the late 1960s Fiat was looking to ce a new sports cat,even though their !iP"O spider had only been in production a few years and was very suo~essful. Fiat m t e d to fit a car into their new b n t wheel drive family. W r Bertone. Bertone designers had already prodCtC6d midengined designs for . They used their expertise in =crew a midengine design which naoved Rat's entire EWD transirerse engine set-up b the rear of a sprtsm. &tone hen produced a special show car, called the Runabout, for the Turin autb show in 1969. This car was hurriedly put together and had Fiat's 903 cc engine instead of the new 12&bmed bansverse set-up. The Runabout was well received. Fiat soon put their stamp of approval on a midenginel replacement for the 850 sp'ir. While the new .car was be'ig developed it
  • 8. was given tha code name "Xlf9". The name stuck when the new midengined "car for dre masseswwent into producbcm in late 1972 as a 1973 model. For a rnid-engined car Bertone did a brilliant job of packaging everyihing so m d y into such a small car. The disturctrve - . attribute of the car was, of course, the styling; which still looh modem today. Also, the chassiswa incredibly strong for a car with so many opnings in it. Mo~t-bfthq strengh ofaechassis wiw in the &mr, with box sei=tkm sills under the doors and the cent@ tunnel. The targa rdof didn't hurt things either in the rigidity department* The XI19 had tWO e;one in the nose, he other behind the engine. The rear brwk had minimal ins&on cm the early models from the heat of the engine and from the muffler mwnted beneath'i~ This was the perfkctp~cefostawyoUrpiPaon~way home. The suspensh layout, which was all in& ndentI featured MacPher&mstruts in tlie Cnt and rear. The clar didn't have.any sway b-ars - front ar rear1 It didn't need a. Even with the skinny tires and wheels o ered, the car cornered asif on railsraiJs The, X1/9 used a mildly modified I28 engine, whi& featured a finned cast alloy oil sump W redesigned intake and exhaust manifolds, which are not inkrchangeable with dm 128 because the engine m~unting an es are iWerent. In European hrm tbe 1Acc four cylinder put out 75 bbpand 72 Ib ft of torque, But, when ~e car was stmgld by U.S. emions it pur out a measly 66 bhpand 63lb ft of torque. Still, theM e car was an immediate swcess when it hit the U.S. streets in 1974. It had nematlcable mad-holding and 'handling. I think wbat attracted most buyers was it's wm&M wedge-shape styling. I still love the looksof the-cartcrday. When the X1B was intr6ducql it was so far ahead of the Pthor cars in its, class, Fiat didn't mess with its basic styling or rne&a&als fbr several years; The X1/9 rcmained vizhrally unchanged until October, 1978, when it was filted with the Ritmo's (Strada) 149.8 cc engine. This answered the criticism that the car was too underpowered, Brought out as a 1979model, the X1/9now had 85 bhp' and 87 lb ft of torque in European trim; but only had a pathetic 67 bhp and 76 lb ft oftorque forUSA modoh. The nw engine was also mated to a 5-$pee$ transmission which helped in highbay cruising. A wtch had to be cut m the frame and in the susp%nsioncontrol arm for the longer transmission to fit mnmersely in the engine biy. A higher emgine covef was installed t6 clear the naw tdler engine. It now had wider tires and wheels; 5x13 with 16Sn0 radials instead of the skinny 4 1/2x13 rims and 145@ tires. The interior was also updated with a completely new dash layout and seats. The result of all hse changes was a car that was quite a bit quicbr than the previous version. In 1981 U.S. models received the Bosch-made fuel injatiun f i c b gqve 75 b h p - s J a m e a s & s l . i ~ E w ~1300 Tk fual injected models were not much uicker than the aubureted uexsions, but $,re was betLei drivability and response. Also adopted were redesigned four spoke alloy wheels, revised d g , a three year limited m s i o n warranty d ,a host of Qther small improvements. By 1981 sal& af both 'tho X1/9.and 124 Spider slwrped badly. It wasn't so much that the; .cars lacked hotsegower, Fiat bad quality control problems. Plus, their sports cars were getting dated compared with newer designs from other car makers. Bertone had always built tfre body/cMs units for the X1/9and would ship them to Fiat for assembly. By 1941 Fiat turn@# over.completea;s~mblyto & coachb builder. It was then rebgdgd "Ikrtone Xlr'9". Production mfinued at Bertone at a low level until 1988. No major changes were made to the .XU9 dwing the period that Bertone produced the car, but several
  • 9. improvements were made to trim items, paint-work and quality wmroL During the "muperiad @ luxury items were inhvduaxl, including P0H)er prindows and leather seats. AU of these unpnwr!me~~codhnued to drive the price ug to a high sf about $14,000 during. the rnld-198as. Too~QKIFiat W inkrest in the carafter the introduction of the 1500 engine. The X119 was never really developed gfiar 19S2. If it had spm&d mu18wider rubber and more pa~erfulengine, the w might still be in prodwlion today. Still, the X1/9jmd its day in the sun, or rather years. Not many sports cars can claim such a lmg prpduction nm wimout having a major styling and mechanical change. The X1A llas earned its plaee in histpry as one .6f the great sports cam. Rad $ Track bven tiorqinatd it as orwofthewnbeslsports~arsmtheworM in 1981.
  • 10.
  • 11. Building A Hot Street Car Over the years many components have been developed to modify the X1/9 for stfeet use TIRES When Fiat intrdduced the X1/9 it could outoomer anything else in its class. And with equal tires it can stay with the mom recent sports cars of tab But there is Lmorn for improvement, T X1/9can be turned into a real "G"machine with a few straight forward modifications. Changing to a set of high performance tires will show the biggest improvement in handling over any otbr changes. It used to be that fin'ding rf~rmancetires in small sizes was cliffi at best But, since high #- tires have "calten qff in the 198Ck, more tire rnanuhcturars are making the smaller sizes to iit the X1/9. In the 1970s PhUi was one of the few tire companies making sizes to fit the X1/9;a 175/50-13 and a wide 1%/55-13. In autocross circles the Phoenix Staiflex gained a reputation as a Sricky tire. It wasn't seen
  • 12. The early madel X1/9 m e with 4 l/Zn steel rims shod with 145180 tires. There was a lot of Mom for imprdvemmt. in 19'79 Fit improwxi the tirt+whe@ st-up by offering 5" wide rims with 16970 tires. 'On h e r model cars there were some very handsome alloy.$ made by Cromadora, but with the samesize tire. A good size tire fgt the Xli9 is 185/6O-13. In case you'm not timilk with d e tire - Lhe 185 rebn to the section width (@stance from side-wall 'to sidewall) in miliimebers. The is the tire's a-t ratio. This means h t the%average section height is 60 percent of the width. Fiaally, the%"13" is the rim diameter in inches. A IS/@the will be a little shorter than either the stock 145/80 or 165170. This tire size will preser~tna clearance problems on the stuck 5x13 Fiat wheels or with n w i aftermarket wheels. If you have an early mode1 with the 4 1/2x13 wheels, you will have togotoawkkwheel. When selecting a high performance. replacement tire ternemher that you want b end 9 with approximately the same circurn erenee as the originat tire, but avoid going too much patex in circudkrence, What d& does is raise the ide height ofthe car and consequently the center of gravity ,(CG). "So what", you say. What happens isthat anytime you raise the CG of a car the handling diminishes. Lowering the CG helps the hanclling. If you decide to go with a slightly shorter high performance tire - you lower the CG,put a wider f a print oa the ground, get jncreased madholdin? and brahg dl wiih just changing one thurg on the .car! Below is a chart for comparing the original wheeycire combination wlfr popular replacement sizes. Remember that these are approximate sims form~nparisonpurposes. Each manufacturer's lW60-13 tire, for instance, may be cMkrent incircurnA=rence, section width, and mad width. That's why tires mounted on the same axle not only should be the same size, but a& from the same manufacturer. CIRCUMFERENCE, IN. REPLACEMENT IUEPLACEMBNT PERCENT IblmmmM SIZE CECUM.. IN. DIFF, WHEEL WIDTH "sood choice
  • 13. Notice that I only labeled two sizes as "good choicen. That's because both sizes were close the original wficeVfire combii6an in circdrence, but not over k If you wanted to, ym cwld go with a larger size the in the n'ar; maybe a 205/60-13 with either a 185/6@13 or 195155-13 in the from P e m y , I prefer tostaywi~thesarne*tireallaround. Now that you have a better idea ofwhat tire sizes to uss, it's time to decide what brand of tire you umt,Thk is a personal choice, of course. There is a good Yariety of hi& p e w tires out them with high end of the high p e w market, c k k out the latest bire test in the car --WHEELS That is why 1 am going to limit Lfie discussion of afkrnwket wheels to alloys only- There aie a bunch of aftemirket wheels w there to choose frc!m,even for a Fiat, if you do a little saihmg. I hope this section will make it easier for you to decide what aftermarkt wheei will grace your X1/9. The primary masons for laying down your hard+amed eashfar replacerneni wheels 3, 1. going toa wider w k I . 2. having a lighter wheel. 3. better 1QPks. ,As you can imagine, &ere is a vast .dB- between a $50.@ Stmt-0-Sphere Chrome Deluxe and a $MO.OO magnesium d + Acidly, steel chromed wheels will pr y be heavier than the Q.B. ones. TYPES OF W Y S The most common alloys that wheels are made ftom are aluminium and magnesium, with magnesium b e ' i the lighter of the two. The stnrcture and thickness of wheels made b r n aluminium and magnesium give the wheel more stiffness than those manufactured from pressed steel. This results in less rim dcfmtion under lateral aaxleration during qmeiing.
  • 14. I ADVANTAGES OF A UOaTBR WlEIEBL 1- acaelerab and braking will be improved because of the lighter weight of the rotating wheel. 2. the lower weight pue les stress an the steering gear. 3. with the unsprung weight decreased, the madholding increases. ']The oldest method is tbat af saad casting. A highly trained eraf1sman will pour mdtm metal htoand fill up the mold cavity slowly by hand. This method is slow, time consuming and expensive. A quick method is casting by low pressure into a metal chilt. These two casting methods pennit the best structural soundness tc, be achieved, Die casting using high pmmre is the quickest modto produce wfieels, but does abt produce a high quality casting. The rea'lsw is that a hi& pressure casting has gas and air trapped in he stnacture wheh the material progresses h r n a liquid toa solid state. A m h r m&d is that of forging. BBBS produces a line of high quality fmged wheels. They start with a single billet of aluminum alloy. 'Ihis billet is heat mted and forged under fourteen million ptHlnds of preysure to produce the shaped qenter and rim flanges. The b g e s are tiyn cold rolled into the desired dgumtion. Once the. hrging and rolling is 'co@leted, the wheel is drilled f a bolt holes and center bore. 'he multof all this is expeasive and strong wheel that is 20%lighter than BBS own cast wheel. BIBS also produces cast w h l s using the ccrunber- pressure casting tdmique. In this method the mold is.placed above the vat of molten aluminum alloy. The alloy is then drawn up into Wmold under a strang vacuum. All the slag and impdies remain in thc vat. This produces a non-prous, totally uniform casting. Several manuhcturers have copied the BBS "web"design,although BBS didn't invent it. The web design isa difficult one to cast and BBS goes to a lbt of trouble to get it right.Be wary of other m;ulufacturer's wet! designs. They may not have the quality control to p d w a good casting of that complexity. .RUN>Orn A wheel pressed from steel is usually ping toshow some measurable run out at the rim. It could be either axial or transverse or botfi. Either the rim flange edge is not true witb tespect to tb rim center line during rolling or the rim itseif is not pezfectly r d over its circdenmx. This rs not to say tbal alloy wheels ale not frae'from nm oul problems. AUgrs do have the advantage, though, of c o d v e machining of the Tim profile and mounting f$ce.Wheels with less m out will be easier to baIance and less tire wear is possible due: to the rnwe auwmte wheel to road contact. w m B L , ~ G T h German TUV test probably bas the highest standards for wheels. An alloy wheel with the German T W approval w& ahigh quality w@l- In the U S there is no Lpvernment specification pm&am covering custom wheels. So, viriuaUy anyone can manufacture them. The Specialty Equipment M.;taufadmrs Association' (SWA) Foumdasion was developed out of the ptalty/perfarmaaee parts industry in early 1978. It wag establishsd by several rrianuf;h~tute~who mmg&&l the need for self-govaiug product specificati4m. This is the only mgankation in the U.S. having a emtom wheel specification program. They have specifications covering both aluminum and steel wheels. One very innptxbnt phase in amting these specs is rotary htigue stress testing. The
  • 15. .;'r,z& is actually "loaded" with constant 5x2s~at a rate 1.6 times that of an average -.;:,&.--.- The stress "loaded" wheel is then 2:; &rough simulated cornering maneuvers. -L?orhsr lrnportant phase in the specification -.lrwam is when a tire is mounted onto the -A5x1. inflated to the proper pressure, and -----> L i b > "down loaded" to a rate 2 114 times -,.-.* LLof the average vehicle. The wheel and >is are then run in this "loaded" mode at a slrnulated speed of 50 mph for several hun- zsd thousand revolutions.The only problem x.i:d this type of program is that U.S. wheel manufacturers do not have to submit their ir heels for testing. It is a strictly voluntary ?ro&xarn. Here are some points the SEMA Foundation says about custom wheels: 1. Be certain that the proper lug nuts are installed. You will generally find the correct size and style lug nuts packed with the heels. 2. Make sure the lug nuts are installed with &e proper torque tension. Above all,never d$ve a vehicle with lug nuts missing. 3. Balance your wheels properly. 4. L t e rthe first 500 miles of driving with '.our new wheels, recheck the lug nut torque :snsion. Here are the wheels I would consider putting on my X119. If money was not an object I would choose Campagnolo. Their quality is unsurpassed, plus they come in several different wheel widths to fit the X119. Other wheels to consider are O.Z. (now teamed with MSW), Mom, and Pamport. SUSPENSION Now that your XI19 looks and corners better with your new tirelwheel setup - you may be tempted to delve into the engine and extract more power. Don't do it just yet. Always improve the handling before adding more power. HANDLING-THE BASICS Handling means having control over your vehicle, whether it's negotiating a twisty section of road or a bumpy one. The more control you have of your car, the safer it is going to be. But, that's probably not the main reason you want to improve the handling of your X119. Going around corners just a little faster than normal is fun! Before I can talk about handhg, you need to understand three basic terms you hear over and over again whenever there is a discussion about the handling of a car. UNDERSTEER This is the tendency for a car, when nego- tiating a comer, to turn less sharply than the GUIDELINES FOR SELECTING ALLOY WHEELS 1. Method of manufacture. I don't want to know about any wheel that is die cast by high pressure. 2. The wheel is specifically made for the X119. 3. Meets the German T W standards. 4. The wheels have steel lug inserts.
  • 16. driver intends. This is because the front tires loose traction before the rear ones. If the steering wheel and throttle are held con- stant, the car will not make the comer. OVERSTEER This is the tendency for a car, when nego- tiating a comer, to turn more sharply than the driver intends. This is because the rear tires loose traction before the front ones. The car wdl have a tendency to "spin out". NEUTRAL STEER The ideal condition. Front and rear traction is equal. When negotiating a comer at max- imum adhesion, both front and rear tires will loose traction at the same time and the car will "drift" away from the comer. Most production cars will understeer when pushed hard in a comer, some more than others. Some nose-heavy sedans, and even sports cars, understeer badly. The reason understeer is built into production cars is that it is relatively easy for the average dri- ver to control the car if a comer is taken too quickly. You simply take your foot off the gas pedal. Of course, this is a small con- solation if you're already off the road and into the weeds! If you were to continue at the same speed in the corner you would have to crank the steering wheel more in order to turn the corner; and the car would understeer, or "plow", more. An oversteering car wdl have a tendency to spin out if some very deft steering cor- rections are not made. I guess the auto engineers believe that it is better for a driver to go straight off the road than it is to spin out on the highway. Fortunately, the X119 is a fairly well bal- anced car in its stock form. There are several reasons for this. It has a low center of gravity, good suspension geometry, and a mid-engine design, to name a few. It is basically an understeering car, but not in the extreme. A big weakness in the car is that the springs are fairly soft. This tends to transfer a lot of weight to the outside tires in a comer. This causes some nasty things to happen, hke the tires going to positive camber and consequently losing traction. W - S W A Y BARS These are sometines called "stabilizer bars, "anti-rollbars", or just "sway bars". The basic principle behind anti-sway bars is that they allow the wheel assemblies to move up or down together over dips and bumps, but do not let one wheel go up by itself unless it twists the bar. It simply reduces the sway or body roll in a comer giving the car sta- bility without increasing harshness. Anti-sway bars hme to be made out of high grade spring steel because after they are twisted they must be able to return to their original shape. Most production cars today come with at least a front anti-sway bar and some sports cars have a rear bar also. The XI19 has neither, no bars in the front or rear. In- stalling sway bars on the XI19 will help the handling considerably. If you choose to install anti-sway bars, put a front and rear bar on at the same time. Don't make the mistake of only putting on a front bar.This unbalances the car and causes more understeer. Balance the car by having a rear bar also.There are several companies that make anti-sway bars for the X119. ADDCO makes a good one. At one time ADDCO had some quality control problems with their sway bars. But, I have used their bars on my XI19 for several years of auto- crossing and have had no problems with them. Their front bar is 7/8"dia., while the rear bar is 518" dia. Order the hard urethane bushings instead of the soft rubber ones. Throw away the mounting bolts and nuts that come with the bars. Use at least grade 5 or AN nuts and bolts. Make sure the nuts are the locking type with nylon inserts. Some aftermarket anti-sway bars have their only mounting points attached to the front trailing links. These suspension links were not designed to hold up to the extra stress imposed by the sway bar and could bend after prolonged use. With anti-sway bars mounted on your X119, it will now corner flatter and with less camber change to the
  • 17. Two things that can improve the handling of your X119 - adding sway bars and changing to stiffer springs. the tires. SHOCK ABSORBERS Most people are confused about what shock absorbers should do for a car. They do not affect the stiffness of a suspension or hold up the car. The springs do that. What shock absorbers do is dampen the spring oscilla- tion. Without correctly functioning shocks the springs would go into uncontrolled oscil- lations after hitting a bump in the road. The XU9 actually has MacPherson struts in the front and rear.This is very common now on small and medium sized cars, as it saves space. The early X1/9s (1974-1978) came with struts that could be disassembled and re- built. Fiat no longer supplies internal parts for these. If you order new struts from Fiat you will get the complete welded strut as- sembly. Aftermarket strut inserts are avail- able, KIT3 being one of the better ones. The later model X1/9s came with welded strut assemblies, so inserts cannot be used. Koni sells complete strut assemblies for the X1/9. They are good quality units, but expensive. Whatever you use, you're going to need a spring compressor to compress the spring. Refer to a Fiat repair manual for this pro- cedure. A cheap, but effective spring com- pressor can be purchased from the J.C. Whitney catalog. SPRINGS With a new set of light alloy wheels, high performance tires, sway bars, and shocks, you may be perfectly happy with the way your X1/9 handles on the street. If you want to go one step further, to get your car handling like a slot car, change to shorter, stiffer springs. Contrary to what you may have read in other publications, particularly a Motor Trend article a few years ago, you do not have to do any cutting and welding to relocate the top sbxt mount. A1 Cosentino at FAZA has been showing us the way for years. He sells three series of coil springs for the X1/9. Series I lowers the car about 1" in the front and 1/2" in the rear. This is the
  • 18. I HANDLING GUIDE Adiustment front tire pressure rear tire pressure front tire size rear tire size weight distribution front springs rear springs front anti-sway bar rear anti-sway bar To Increase Understeer lower higher smaller larger more foward stiffer softer thicker thinner To Increase Oversteer higher lower larger smaller more rearward softer stiffer thinner thicker one I prefer for a street car, as the XI19 is already pretty low to start with. Series IT springs lower the front about 2" and the rear about 1 112". Use this only if you have very smooth roads in your area. Series III is for racing and lowers the car even more! You will not dramatically alter the geometry of the suspension by using these springs. The only thing that will change is you will gain some negative camber. With the Series I springs, it's not too much to worry about. With the Series I1 you may end up with more negative camber than you want for the street, enough to cause some uneven tire wear and less effective braking. The camber is not adjustable on the X1/9.But,in Chapter 3, I'll show you how you can fix this simply and inexpensively. ENGINE Now that you have your XI19 cornering like a Formula I car, it's time to do some engine modifications. Bear in mind that some of the modifications outlined here may be illegal in some states because of emissions laws. Also, this book does not take the place of a Fiat repair manual. The 1974-1978 X119s have 1300 cc (actually 1290 cc) engines. They have a bore of 86 mm and a stroke of 55.5 mm. The compression ratio is 8.5 to 1. It is a single overhead cam design with in-line valves. The block is cast iron, while the cylinder head and intake manifold is alumin- um. The engine is fitted with a dual-barrel downdraft Weber carburetor. The '74 model has a dual outlet cast iron exhaust manifold. The '75 and later models have the single exhaust outlet. The specifications for these engines are basically the same, except for some emission controls, through 1978. The 1979 and later models feature the 1500 cc~-~ ~ (actually 1498cc) engine. It has a slightly larger bore than the 1300 (86.4 mm) and a longer stroke (63.9 rnm) which helped increase the torque of the engine. The com- pression ratio remained the same for the U.S. models, at 8.5 to 1. The 1500 exhaust valves are enlarged to 33 mm, compared to the 1300's 31 rnrn. The size of the intake valves is the same for both engines, at 36 mm. The 1500 connecting rods are forged instead of cast, as in the 1300 engine. In- stead of ignition points, a Bosch electronic ignition system is used. In 1980 the Bosch electronic fuel injection system was introduced. The problem with all these engines is the restricted breathing, poor cam timing, and an exhaust system that strangles the engine. Don't make the mistake a lot of owners do and change to a bigger carburetor as the first modification. This will make little or no improvement in performance, unless your original carburetor was acting up.
  • 19. Engine modifications should be carried out in a logical sequence that will extract the most power from each component. The fol- lowing modifications can be done in stages. How far you want to go depends on your budget and how much performance you want. STAGE 1 5-7 horsepower increase EXHAUST SYSTEM Replace the stock system with a set of head- ers. This will help scavenge the exhaust and reduce back pressure for better perfor- mance. Also add a free-flow muffler to the system. Ansa makes a good unit for both the early and late model X119s. They fit exactly in place of the original units. With the Ansa unit for the later model cars, you can still run the catalytic converter. They have a nice sound to them without being overly loud. AIR FiILTER Replace the standard filter unit with a more efficient free-flow design. Air can enter from all sides of the unit and the engine will "breathe" better. These units are also lighter and take up less space. Installation is real simple. STAGE 2 20-30 horsepower increase CAMSHAFT The stock camshaft has very poor timing, as shown below: Intake: Opens: B.T.D.C. 10 degrees Closes: A.B.D.C. 54 degrees Exhaust: Opens: B.B.D.C. 54 degrees Closes: A.T.D.C. 10 degrees A camshaft with more radical timing will open the intake and exhaust valves earlier than a stock one, and closes them later. This allows more fuel and air to enter the cylin- der and allows more exhaust gases to leave the engine. This will make the biggest im- provement in power over any other single modification. There are a wide range of camshafts avail- able for the Fiat S.O.H.C. engine. For street use, a camshaft with timing in the 35/75 to 40180 range are the most popular. When buying a camshaft, be sure to tell the person what kind of modifications your engine has or plans to have. That will help determine the exact camshaft suitable The Weber 34 mm carburetor is shown mounted on the stock intake manifold with a free flow air cleaner from Bayless.
  • 20. for your engine. CARBURETlON To take advantage of your aftermarket cam- shaft's improved valve timing, your engine needs to breathe better. The stock XI19 came with either a Weber 32 mm or a Weber 28/30 mm carburetor, depending on your engine. As a minimum replacement use a Weber 34 DMTR. It has a manual choke, so owners of cars '75 and later will have to install a cable operated choke.This carburetor will bolt to the stock intake manifold. A slight enlargement of the manifold opening is required to accom- modate the increased size of the re- placement carburetor. The opening can be enlarged with a metal file or small rotary grinder. It is recommended that the man- ifold be taken off the engine to preclude any chance of metal filings getting down into the intake ports. You can also go to larger single carburetors, such as a 36 mm or 40 rnm. These require their own special intake manifolds and usually modified linkages. With these car- buretors, you'll really see some power gains with your modified camshaft. The intake manifold designs for these carburetors are much improved over the stock one, as the intake runners are more equal and have a straighter path to the cylinders. mTEL PUMP If you live in a hot climate, you may have experienced some fuel percolation and vapor lock problems with the X1/9. Because of its rnid-engined design there is not a lot of air that gets to the engine compartment. Fiat knew of this problem and installed a fan and ducting to blow air to the carburetor when the engine is shut off. In very hot cli- mates this does not always solve the problem. One problem is the location of the stock mechanical fuel pump, as it is buried down low in the engine compartment next to the fire wall. Replacing this with an electrical fuel pump helps the problem. The pump can be mounted in a better location away from the engine heat. Facet electric pumps work well on these engines with Webers. They are small in size but very reliable. You can mount them in an accessable location, even shielding them from the heat with some sheet metal if you choose. Insulating the fuel lines in the engine com- partment will also help. Use what is known as a "fire proof sleeve". It is constructed of thick braided fiberglass tubing covered with silicone rubber. They are sold by either the foot or the inch. You can find the stuff in supply houses that specialize in racing equipment. STAGE 3 45-50 horsepower increase PISTONS Replace your stock pistons with high com- pression ones. There are a variety of after- market pistons avadable for the X1/9. There is a greater selection for the 1300 engine than for the 1500 engine. Just using the European pistons,which have a compression ratio of 8.9: 1, will help the performance. For street use, I wouldn't use a piston with a compression ratio of over 10.0:1. You will have trouble, gasoline octane being what it is today. Be sure you tell your piston supplier what other modifications you have on your engine, especially in the head. Since the head has to come off when you change pis- tons, this would be a good time to do a valve job and clean-up the head. If it's been 40,000 miles since the engine had a valve job, having one done makes a big difference in power. If you are having someone do the work for you, make sure the person is competent and experienced in Fiat engines. Performance parts are expensive so don't let just anyone work on your Fiat. Have your cyhder head planed also. Do not plane too much off the head, as there is not a lot of material there. Plane just enough to get the surface cleaned up and flat. The cylinder head has to be absolutely flat when it is bolted back on the block Remember, the head is aluminum while the block is cast iron - two dissimilar materials which heat
  • 21. and cool at different rates. While the engine is apart, it is a good idea to check the connecting rods, especially if the engine has high mileage. Remember, with a higher horsepower engine more stress will be placed on the connecting rods. It is not necessary to use any special racing rods or do any special treatment to the stock rods for sweet driving. Have the connecting rods magnafluxed to spot any stress cracks. Replace them if they are in any way sus- pect. It is not necessary to do any balancing or "blueprinting" of the engine. I ran an engine built for autocrossing with all stock internal parts that regularly saw 8,000 rpms. It was- n't balanced or blueprinted in any way. MORE CARBURETION To really improve the breathing of your engine add two Weber DCNF carburetors on a custom intake manifold. These down- draft carburetors present no clearance problems, even with air cleaners or 90 degree velocity stacks. Be prepared for your gas mileage to suffer, as four 40 mm butterflies opening at once tend to use a large quantity of fuel. They have to be set up slightly rich on the idle circuit to provide a smooth transition to thc main circuit on acceleration. When choosing an intake manifold for these carburetors, make sure the design has a bridge across the middle, as these are sturdier than separate individual runners. IGNITION With the extra power and higher rpms, the stock ignition system needs to be upgraded for maximum performance. The 1300 engine has conventional breaker points that are a real pain to replace and ad- just. Marelli offers an electronic breakerless ignition system for the X119. It comes with a complete distributor and coil. The dis- tributor is all centrifugal advance. Unit Control Module Marelli electronic breakerless ignition unit. 4- TO BATTERY - MSD Ignition control box cellent Bosch electronic ignition. Ths works well up to about 7,000 rpm. A good ad- dition is the MSD (multiple spark discharge) ignition. It can be used with the stock Bosch spark box and the stock distributor. The MSD uses a multi-spark discharge that produces complete combustion even under the worst possible conditions, even if the plugs are fouled! These units are accurate up to 10,000 rpms. In case you're concerned about over-reving your engine, MSD offers a rev-limiter with plug-in modules to select your rpm limit. The tachometer wdl require a tach adapter to operate. The X119s from 1979-on came with an ex- With the MSD ignition it is a good idea to
  • 22. replace the stock ignition wires with some high performance ones. There are lots of good aftermarket wires offered. Some are custom made for Fiats, others you have to assemble the ends yourself. CLUTCH All this extra horsepower could put a strain on the stock clutch, especially on the 1300 engines, as the clutch and pressure plate are smaller than the 1500. Fichtel and Sachs makes a heavy duty pressure plate to be used with the standard disc for the 1300 engine. The best, and most reliable, is the Borg and Beck unit. It will be harder to find an aftermarket heavy duty clutch for the 1500. But, it is larger and more robust than the 1300, so the stock unit may do just fine. It all depends on how you drive. Some people are brutal with clutches, while others last the life of the engine. OIL CONTROL Cars prepared to this stage will be able to corner very hard. The problem is that the oil will move away from the oil pump pick- up. The oil pump will be just pumping air, which can destroy rod bearings very quick- ly. FAZA and PBS sell a special oil baffle made out of sheet metal which fits in the oil pan. The purpose of this baffle is to control the oil in hard cornering to prevent it from being picked up by the crankshaft, which would cause a substantial power loss. STAGE 4 70-80 horsepower increase This is it! Lf you want to create the ultimate X119, from a power standpoint, read on. With this kind of power you will surprise some more expensive sports cars on the road. BIG VALVE HEAD To really make the XI19 breathe with a high performance cam and big carburetors the valve size needs to be enlarged. There are physical limitations to the size of the valves that can be used. Most big valve heads for both the 1300 and 1500 engines feature 40 mm intake and 35 mm exhaust valves. They usually feature bronze valve guides, mod- ified combustion chambers, and ported and polished. Be aware that trick multi-angled valve seats usually don't last as long as the stock angled valve seats. BE'ITER CARBURETION The best carburetor set-up, from a perfor- mance standpoint, is a pair of Weber 45 DCOE sidedrafts. Unfortunately, these carburetors produce some clearance problems in the Xll9. The rear trunk area has to be cut. The large boxed-in area that connects the rear strut towers has to be cut from the bottom to offer the proper clear- ance. Sheet metal then has to be welded up in the cut-out area to make the member structurally sound again. It is worth the trouble, as the sidedrafts offer better breath- ing capability at high rpms. CONCLUSION All the aftermarket items mentioned in this chapter are readily available from various suppliers. It would be impossible to list all the various components available in detail from each supplier. Some recommendations have been made, based on experience. At the end of this book I have listed the man- ufacturers and suppliers and what kinds of parts and services they offer. In most cases they offer catalogs which show the speci- fications of their product and explain it in detail.
  • 23. Building An Autocross Car Autocrossing has become a very popular form of motorsports, and the XI19 can be made into a very competitive car. This chapter wiU take you through the steps penalty is assessed if you knock over any needed to make the XI19 competitive in the pylons. Speeds usually don't exceed 60mph. sport of autocrossing. Sound easy? The tricky part is that you don't get any practice runs, you are only al- lowed to walk to course to familiarize vour- WHAT IS AUTOCROSSING? self with it. Usually you are given 'three timed runs,with the fastest run counted. Autocrossing, also known as Solo 11, is a in which one car at a time nego Autocrosses are run on short courses that a twisty course outlined with emphasize the handling of a car rather than pylons. The idea is to complete the course sheer power- This is what makes the in the shortest amount of time. A time the perfect car for autocrossing-
  • 24. The recommendations outlined in this chap- ter are based on the current national Solo II rules published by the Sports Car Club of America (SCCA). You can purchase a copy of their rule book by contacting the SCCA. The SCCA has hundreds of Regions across the country which stage autocrosses. There may be a local region in your city, or at least close-by. These local regions usually conduct an autocross about once a month. They are usually held in large parking lots or abandoned airports. There are also inde- pendent clubs not associated with the SCCA which may have their own rules and classing for cars. Autocrossing has become a very popular form of motorsport. The appeal is that it is an inexpensive sport to get into. No com- petition license or expensive driving suit is required. You do need to have a helmet, but most regions have loaners. Entry fees are low and range from $8.00 to $12.00. Classes range from pure stock cars to fully modified racers. Since you are not racing wheel to wheel with other cars, damage to your auto is rare. Courses are usually set-up far away from obstacles, such as curbs, light poles, walls, etc. Most of all it's just plain fun! AUTOMOBILE CLASSES Solo II racing is made up of four classes: Stock, Street Prepared, Prepared, and Mod- ified. Each of the four main classes is then divided into sub-classes for the individual cars competing. I'm going to concentrate on the Street Pre- pared class, as the XI19 is not really com- petitive that much in the Stock class any- more. At one time the XI19 enjoyed tre- mendous success in the Stock category. When it was classed in E Stock, the X1/9 won the National Solo II title twice, in 1977 and 1982. It was moved to D Stock in 1983 and won the title that year and also in '84 and '85. Since then D Stock has been dom- inated by the Toyota MR2 and the Porsche 944. At the 1990 Nationals the dominate cars were the Honda Civic and CRX Si. As of this writing, late model X1/9s with fuel injection are classed in D Stock, while the carbureted models are in E Stock This is the class were the XI19 has the best chance of winning. In fact,on a local level a well prepared X1/9 might do well in E Stock. But you might just get blasted if you take the car to a Divisional or the Nationals. In E Stock the main competition is from the Honda CRX, Toyota FX-16, and the Volks- wagen RabbitJGolfIJetta. In D Stock you have your hands full, even though this class was reshuffled. At the 1990 Nationals the car of choice was a Civic or CRX Si. Either car is just too quick for a stock X1/9. STREET PREPARED The X1/9 has a better chance in Street Pre- pared. There are five classes of Street Pre- pared cars, A-E. The X1/9 is classed in D. In h s class you are allowed a number of suspension modifications and a limited num- ber of engine modifications, mostly of the bolt-on type. Consult the Solo I1 rule book for specifics. The XI19 has enjoyed success in the Street Prepared class, as the marque has won the Nationals several times in both the Ladies and Mens classes. A typical autocross course.
  • 25. This XI19 is modified for Street Prepared competition. Suspension improvements include 6 x13 alloy wheels with Hoosier Autocrosser tires, shorter and stiffer coil springs, and sway bars. Bill Condrashoff's XI19 is shown competing in an autocross held on city streets, a yearly event organized by the San Francisco Region of the SCCA.
  • 26. GETTING STARTED - SUSPENSION If you have read the suspension modifications outlined in Chapter 2, then you have the basis for a Street Prepared suspension. Here they are again, briefly: 1. Wheels (I'll get to tires later) 2. Swav Bars front and rear 3. stiff& suspension springs 4. Struts FnmTUNING THE SUSPBNSION If you use the FAZA stage II coil springs, as outlined in Chapter 2, you'll find that you have gained a bunch of negative camber in the process. This is good, as we want to have some static negative camber, up to a point. If you put your X1/9 on an align- ment rack, you may find that it has as much as 3-4 degrees of static negative camber! That is a little too much. Remember that when a car turns into a corner the outside wheel goes into positive camber. Ideally,we would like the tire to be pointing straight up and down (0 degrees camber) for maximum traction in a corner.That is why we static- ally set the wheel and tire to negative camber. With stiff springs and sway bars, the X1/9 only needs about 1-1 112 degrees of negative camber. Running an excessive amount of negative camber hurts the car in straight line braking. The problem is that camber is not adjustable on the stock X1/9. The rules allow adjustable camber plates to be used, but the center clearance hole in,the Slotting the original mounting holes in the strut tower is a simple and inexpensive way to acheive adjustable camber. The front strut tower is shown here. The rear is modified in a similar fashion.
  • 27. strut tower cannot be modified. Most after- market camber plates require modifying the strut tower. FAZA offers a Unibal type of camber adjuster which bolts to the top of the stock strut tower. It uses an eccentric fea- ture to adjust the camber. That is one solu- tion to the problem, but they are expensive. Another solution that won't cost you any- thing is very simple. Just slot the original three mounting holes in the strut tower. It can be done easily with a drill, hacksaw and a metal file. This only gives you a limited amount of adjustability, about 2 degrees, but it helps. After the camber adjustments are made, set the front toe to zero degrees. Set the rear toe-in to 118. STRUTS If your struts are worn, you basically have three choices, depending on your pocket- book: 1. Stock replacements from Fiat. These come as complete welded assemblies. You'll have to do some checking to get a good price. 2. KYB inserts. If the struts you have will accept inserts, this is a good choice. You can usually fmd these at discounted prices. 3. Konis. These are the famous adjustable shocks; although the struts have to be taken off the car to be adjusted. These are expen- sive, but the q d t y is second to none. TIRES As of this writing the most popular tire used in autocrossing for Street Prepared cars is the Hoosier Autocrosser. As the name im- plies, this tire is especially made for auto- crossing. It is a bias belted tire rather than the more common radial. The best size for the XI19 is a 185160-13. It is designed to be used on a minimum rim width of 6 inches. The tire has a circumference of 64.7 inches and a tread width of 6 inches. ENGINE Only a limited amount of modifications are allowed in Street Prepared competition. Parts must be chosen carefully to optimize engine performance. First, remove all the smog controls, including the air pump if one is fitted. This may pose a problem if you also plan to drive your car on the street. Check your state's laws regarding removing emission control equipment. CARBURETION No internal modifications are allowed, but carburetion is free. That means that one of the weak points of the engine, the camshaft, cannot be upgraded. Reason tells us that we cannot use big carburetors without some help in other areas, such as piston compres- sion and improved valve timing-Competitors have been using big carburetors on the Xl/9 and they do work, up to a point. You can run the Weber 40 DCNF carbs, but don't expect a big increase in horsepower. What these carbs do is offer more precise fuel delivery over the standard single car- buretor. This is because there is a "barrel" for each cylinder and the carbs are non- progressive. When you step on the throttle each barrel opens "right now". Obviously, the carburetors have to be adjusted dif- ferently to run with the stock internal parts. Fortunately, like most Webers, the DCNF series is almost infinitely adjustable to suit most any engine. Some testing will have to be done to determine the correct settings for your particular engine and the altitude of your locale. Use the following settings as a starting point. Have on hand a good supply of Main and Air Corrector jets.Only change one thing at a time to avoid confusion, then test the car. WEBER DCNF JETTING Chokes Auxiliary Venturis Emulsion Tubes Pump Cams Pump Jets Idle Jets Main Jets Air Corrector Jets
  • 28. Notice how much this stock XI19 leans in a corner. This Street Prepared XI19 sits much lower and leans less. 26
  • 29. Dual Weber DCNF carburetors with 90 degree velocity stacks from FAZA. The canister to the left is a cool can, used to cool the fuel before it reaches the carburetors. This is no longer legal for SCCA Street Prepared competition. For the Needle and Seat on the DCNFs, do yourself a favor and throw away the stock Weber part. Order the Grose-Jet from D& G Valve Mfg. Co. This little device will go a long way in solving the rough idle and flooding with the Webers. The metering action is much more precise than with a standard Needle and Seat. The b-ick is in using two free-floating stainless steel balls to control the fuel metering. They're not much affected by the G forces of cornering, acceleration or braking. Order the Weber 501 in the .069 (1.7 mm) size. Remember to order two jets, one for each carburetor. The jets come with detailed instructions on installation. Set the float level carefully according to the Weber Manual. setting the float level correctly and also from the idle and progression circuits. Also pay attention to getting the butterflies synched. If you don't get all these details correct, you will lose a lot of time on an autocross course waiting for the engine to clean itself out before getting on the power. If the engine tends to stutter and cough on acceleration, try lowering the float level. Getting the dual Webers to run correctly on essentially a stock engine can be tiresome, but worth the trouble. I certainly wouldn't want to run them on a stock engine for street use. Even though a Street Prepared car is designed to be driven on the street as well as autocrossed, you'll find most serious autocrossers trailer their cars to events,even You are going to have to spend a lot of time local ones. getting the carburetors set up correctly, and not just for the power end of it but for cor- If you have a late model X1/9 with fuel in- rect throttle response. This comes from jection, stick with it. It's not worth
  • 30. This older model intake manifold from Bayless does not have the center connecting bridge for added rigidity. Their newer models incorporate the connecting bridge. the trouble changing to carburetors. Fuel in- jection is so much easier to deal with any- way, plus being much more precise than carburetors. INTAKE MANIFOLD The intake manifold ports can be matched with the cylinder head ports as long as no change is made more than one inch from the port/manifold interface. Complete porting and polishing is not allowed. PISTONS AND VALVES Clyinders can be rebored up to .0472 over- size using standard oversize pistons. Don't bother with this unless you are doing an engine rebuild. You will gain a slight in- crease in engine displacement and I guess every little bit helps, but it's not worth the trouble for the small increase in power. If you have the engine apart do a valve job also. As I said earlier, blueprinting this engine is not necessary and is a waste of time and money. FlLYWHEEL Any flywheel may be used provided it uses the standard attachment points. Lightening the standard flywheel helps considerably. Make sure it is lightened without weakening the flywheel. This manifold from PBS Engineering has the center connecting bridge. IGNITION An upgraded ignition system is essential, such as the MSD unit mentioned in Chapter 2. Mount it in the spare tire area.You don't have to run the spare tire during competi- tion. This keeps the unit away from the heat of the engine compartment. Solid core racing plug wires are available for this engine and work well with a high energy ignition. They will cause radio inter- ference but who runs the radio during an autocross? EXJUUST A set of headers is another legal bolt-on modification. Since a muffler must be used, one must be chosen that offers little back pressure relative to the exhaust gases. Muf- flers are mandatory in most forms of racing today. This has spawned the development of special racing mufflers. I have a garage full of various mufflers made for the X1/9. The basic construction of these. mufflers is the old "glass-pak" style. Don't bother with these for your Street Prepared machine.1 use a Flowmaster muffler for the X1/9. It is very cleverly designed with internal baffles and offers little or no decrease in perfor- mance compared with an open exhaust. It is also compact and lightweight.
  • 31. BRAKES Don't make the mistake of installing special racing pads for autocrossing. You will never heat them up enough to get them to work properly. The standard pads work just fine. If your rotors are grooved at all, replace them. Don't bother having them turned. New ones are dirt cheap. THE FEST OF IT The Street Prepared rules allow an alternate steering wheel to be used. Replace the skin- ny stock wheel with a smaller 13 inch fatter wheel. There are many available for the X119, such as Mom, Formuling France, and of courseAbarth. The stock seat may be changed and this is a worthwhile improvement. Racing seats may be used as long as they are fully padded. There are a wide range of racing seats available. Choose your seat carefully. The XI19 is a small car, so the seat cannot be very wide, nor can it sit very high. The Corbean Clubman seat, for instance, just sits too high to be used in the X119. One place that can help you out is FAZA. They have a line of racing seats from fiberglass to lightweight Kelvar. Al Cosentino is very knowledgeable about Fiats and knows which seats are best for the X119. His prices are also reasonable. Although not required, installing a racing harness is a good idea. It holds you in the seat firmy and you can concentrate on driving rather than hanging on to the seat. It is also a good idea to install a roll bar, es- pecially if you ?re a tall person and your helmet sticks out above the targa top. Bolt- in roll bars are available for the X119, with Autopower being the best known name for building roll bars. Fiberglass fully padded racing seat from FAZA.
  • 32. SUMMARY If I were building an XI19 for Street Prepared competition and I was on a budget, this is the order I would follow in modifying the car: 1. Wheels and tires 2. Suspension 3. Seat, steering wheel, belts 4. Engine The reason for this is that you are going to go faster changing the wheels, tires and suspen- sion than you are with engine modfications. And don't forget the importance of a good set of tires. This will help you go faster more than anythmg else. I have seen too many people new to the sport of autocrossing make this mistake. They spend -all their money on engine and suspension goodies and then throw on an old set of radials. Then they wonder why they are so slow. In autocrossing you spend most of your time cornering the car rather than hauling down a straight-away. The right tires are expensive, but they are a must if you hope to be competitive. I hope this chapter helps you in setting up your XI19 for Street Prepared competition. Chap- ter 5 will cover the Solo IIModiJied class.
  • 33. Building A Road RacefSolo I1 Prepared Car This Solo II Prepared car is modified, based on the Production car rules for road racing INTRODUCTION This chapter will guide you through building an XU9 for SCCA Production racing or Solo I1 Prepared racing. The Solo I1 Pre- pared rules is based on the Production rules. About the only difference between the two classes is some safety equipment and the weight of the car. Production racing, especially G Production, having won at the Runoffs several times in the 1980s. At the 1990 Runoffs an XU9 won in F Production with Bob Boig driving and placed third in G Production with Thomas Reichenbach at the helm. True to form, because of this success, the SCCA has added a tremendous amount of weight in hopes to slow the cars down. Still, I feel the X1/9 can be competitive in Production class In recent years competitors have enjoyed racmg. tremendous success with the XU9 in
  • 34. The XI19 can also be competitive in Solo II Prepared racing, but hasn't seen as much success in this class of racing, and the car has not yet won at the Nationals. But, I think it is only a matter of time before this happens. At the 1990 Solo 11Nationals Bill Cutrer placed his XU9 second in D Pre- pared. The first step in building the car is to have a recent copy of the General Competition Rules (GCR) and the Production Car Speci- fications. If you are preparing the car for Solo 11 competition, also get a copy of the Solo 11rules. Make sure that you read and thoroughly understand the rules. You will then have a better understanding of what can be changed or modified. BODY AND CHASSIS Strip the car down completely to the bare body. Get rid of any equipment that you are not required to run, it only adds weight to the car. ROLL CAGE Start planning and designing the roll cage structure. Make sure it conforms to the specifications outlined in the GCR.The cage should not only protect the driver in case of a crash, but also provide structural stiffness of the chassis. The cage must tie into the front and rear strut towers, have a main and lower front hoop,and bridge across the door openings. A good look at the pictures will give you an idea of what the structure is like. This shows the location of the front hoop and how the tubes transverse the door openings. 32
  • 35. The location of the diagonal brace under the main hoop is shown here. The diagonal brace for the main hoop goes Most of the roll cage designs I have seen through the bulkhead behind the driver, have the underside of the targa top cut so where the fuel tank was,and is welded to the the main hoop can be placed up higher for chassis. headroom. If you are a tall person, look at the other designs pictured. If you are build- .ing your own cage, try building a mock-up out of PCV pipe before cutting your steel tubing. It might save you a lot of headaches. In its stock form the XI19 chassis is pretty rigid for a car with so many openings in its unit body. I never thought about putting any additional welds on the chassis until I saw a racing XI19 which had some spot welds come loose. It was on the seams on top of the rear strut towers. I had never seen or heard of this happening to any other X119s. To be on the safe side, when I started building my X1/9, I put a continuous weld on these areas, plus on the seam that goes around the rear strut tower 33
  • 36. strut tower. Still,I don't think it is necessary to seam weld the entire chassis. REMOVING THE WINDSHELD Taking out the windshield on an XI19 can be a real pain. It is glued in place and dif- ficult to remove without breaking. To re- move it, you must find two smaU wires from under the chrome strip and apply about 12 volts to them. This will soften the glue enough so the windshield can be pushed out, maybe. If it proves difficult to remove you can try prying it out and stand a good chance of cracking it. If you don't wish to save the windshield, just cut off the posts flush with the bodywork. Weld a plate over the openings on the windshield posts. These X119s have the main hoop up higher for more headroom. In the top photo Bob Strange's car has the main hoop in front of and above the targa top. The bottom photo shows a different solution. In Chuck Sample's car the main hoop extends through the targa top. SUSPENSION There are several schools of thought on how to m d i the X1/9 suspension. If you are on a budget, the cheapest way to go is to use the FAZA coil springs with some kind of method of adjusting the camber. At the other end of the scale, the most ex- pensive method is to cut up the chassis to relocate the suspension points and modify the struts so you end up with an adjustable suspension. This method is costly, time consuming, and to me is just not worth the trouble and expense. I would recommend it if you are planning an all out assault for the Runoffs. I know one person who did these extensive modifications to the XI19 chassis. He said the job was very difficult, even though he has a fully outfitted race
  • 37. preparation shop. Unless you are an en- gineer with experience in m-ing pro- duction-based cars, this is not a job the typical home builder should attempt. I do like the idea of modifying the struts so that the ride height and comer weight can be adjusted. Plus, you will be able to use the standard for racing 2 114" I.D. springs. You will then be able to choose from a variety of lengths and spring rates. Kits are available so you can rnw the XI19 struts. Carrera is one such supplier. - Basically, you have to cut off the spring perch and weld the threaded tube over the strut housing. Then the new spring seats are simply threaded on. This set-up also elimin- ates any tire clearance problems since the spring and perch are much smaller in di- ameter than the stock ones. Carrera and KYB make strut inserts that work well for the racing X119. The best springs to use are made by Rock- well. They aren't that much more expensive than other brands. It is hard to recommend specific spring rates, as this depends on the smoothness of the track, the weight of the On the left is a Koni replacement strut with FAZA Stage II coil spring On the right is a modified strut with adjustable spring perches and 2 114" I.D. racing spring. vehicle, sway bars used, etc. As a starting point use between 200-250 1b.Iin. for the fronts and 250-300 lb./in. for the rears. Adjustable camber plates should be bought or fabricated. Look at the camber plate in the picture. It is. very simple in design and the only modification to the strut tower is the enlargement of the center hole. All the rubber in the suspension should be replaced with spherical bearings or rod ends. You will need access to a hydraulic press, as most of the stock rubber bushings need to be pressed out with considerable force. This needs to be done on the front and rear control arms. Check on the avail- ability of metric spherical bearings, as more sizes are available now. You may still have to shim the bearing for a press fit. Fabricate spacers to hold the bearings centered. The front trailing links can be modified to accept rod ends. Cut off the end of the trailing link and thread the end using a 5/8-18 size die. The threads should be about 2 114 inches long. Use a 518 inch bore fe- male rod end. Brackets and spacers will have to be fabricated to hold the rod Adustable camber plate on rear strut tower. The front plates are similar. This allows simple camber adjustment.
  • 38. and allow movement. Make sure the brack- ets are designed to hold the rod end in double shear. Use AN spec nuts and bolts and a jam nut on the rod end. As far as strength goes, diecutting threads like this is a big no-no. It creates the dreaded stress raiser. Check out Carroll Smith's books on this subject. After you cut the threads with a die, take a close look at them. They don't look so hot, do they? But, in this case you are almost forced to do it this way, unless you want to make a completely new trailing link with a threaded tube -andmale rod ends. I think you can get away with this design because this is not a heavily loaded suspen- sion part. SWAY BARS For the anti-sway bars, you can use ready made ones or make your own. If you make your own, use straight bars with splined ends and long arms. Use solid aluminum mounting blocks and rod ends on the arms to allow for adjustability. Ready-made anti- sway bars for the X1/9 could be modified to get rid of the rubber bushings and rod-ends installed for the end links. A good diameter for the sway bars is 718" for the front and 314" for the rear. ALIGNMENT Check the front castor first. The stock X1/9 has no provision for changing castor. After changing the ends of the trailing arms to rod ends, you now have some amount of ad- justment. Lowering the car will have in- creased the positive castor slightly. Not enough castor leads to light steering,straight line instabihty and insufficient self-center- ing. Too much castor and the steering is heavy and slow. Try and get the castor close to stock specs (6-7degrees). It's more im- portant to get the castor even on both sides than it is to get an exact number of degrees. Remember, that every time you change the castor you also will change the camber and toe. That's why you set the castor first. Set the camber next. This can be easily done with the camber plates atop the strut towers. Some amount of experimenting will have to be done to determine the correct camber angle. Start off with about 1 112 degrees negative, front and rear. Changing the camber will also change the toe setting, so be sure to check the toe-in every time you change the camber. Toe-in should be adjusted last. Front toe-in is for straight line stability and to influence entrance into a corner. Toe-in should be set to zero or very close to it, no more than 1/32 in or out. The rear should always have toe-in, never toe-out. This promotes stability under accel- eration. 1/16 toe-in should be about right. RIDE HEIGHT AND CORNEiR WEIGT3-I To set the ride height you must have a level surface. Your garage floor or driveway is not going to be very level. With a carpen- ter's level and some shims under the tires, you can establish a level surface. Rotate the spring perches up or down to achieve the desired ride height. If the ride height is changed more than just a little it will effect the static camber. In order to adjust the corner weight you must have a set of accurate scales. The idea is to jack weight from one corner to another in order to achieve a "square" car. That is, have the weight of the left front equal that of the right front and the left rear equal that of the right rear. Unfortunately, on a pro- duction car this is not always entirely p s - sible. This is because the driver is offset from the centerline of the car and because weight is offset due to the design of the vehicle. Try to get it as close as possible. BRAKES For F-Production cars, the SCCA allows the use of larger discs from the Lancia. This is a very worthwhile modification, but it does require some rnachming and modifications to adapt the Lancia discs. Only the fronts need to be done. PBS and FAZA can supply units ready to bolt on. This can save you a lot of time and work from doing the mod- ifications yourself.
  • 39. Modified hub with Moroso wheel studs and adjustable strut. At this time you may also want to think about replacing the stock wheel bolts with studs and lug nuts. This is because on a race car you are constantly taking the wheels on and off and lining up the wheel bolts can be a real pain. The threaded portion of the wheel flange has to be drilled out so the wheel studs can be pressed in from the back side. Use 7/16 inch studs, such as Moroso. A portion of the stud heads will have to be ground away so that the brake disc will clear. Since you have the hub assembly apart,it is a good idea to press in new wheel bearings before assembling the unit back on the car. The stock braking system needs to be mod- ified so that the front and rear brake balance can be adjusted for optimum braking char- acteristics under racing conditions. Most race cars today use twin master cylinders and a balance bar for setting the brake balance. Tilton offers ready-made units with master cylinders, push rods and bias bar with a spherical bearing attached to the bar. This unit can then be adapted to the stock brake pedal. Tilton also offers complete assemblies including the pedal. One model is a firewall mount, where the master cylin- ders are mounted in the front trunk On the over-hung mount, the master cylinders are hung under the dash just like the stock master cylinder. Buying one of these units saves a lot of time from trying to build your own. Use two 3/4 inch master cylinders and make sure they are mounted to a rigid structure. You don't want the brackets and cylinders moving every time you step on the brake pedal. The thin sheet metal of a firewall is not enough support. In order to improve brake pedal firmness replace the stock flexible rubber lines to each caliper with steel braided ones. Earl's Supply makes a set with the correct fittings already attached for the X119.
  • 40. Lightweight 3-piece Revolution wheel is very popular with SCCA racers. It can be configured to any width or offset. WHEELS AND TIRES For G-Production the XI19 is allowed to use a 6 x 13 wheel, while the F-Production car can use a 6 112 x 13 wheel. You can choose a one-piece cast wheel or the increasingly popular 3-piece wheel. The one-piece cast wheel will be cheaper and the best ones for the XI19 are made by Campugnolo, Mom, 02,Panusport, and Revolution. A 3-piece wheel has an advantage over the one-piece. You can have it built with the offset and wheel width that y a want. If you ever want to change to a wider whee1,say you're mov- ing from G to F-Production, you don't have to buy new wheels. The most popular 3- piece wheel used in SCCA racing is made by Revolution. This is not because it is so overwhelmingly superior to other wheel makes. It is because Revolution has a good contingency program for racers. Revolution makes a good 3-piece wheel, but there are other wheels out there that are just as good or better. Since tire technology is everchanging, it's difficult to recommend a specific racing slick for the X119. The most popular tire size is 20-21 inches in diameter with an 8-inch section width. Make sure that the tire you choose is recommended for a 6 or 6 112 inch wheel width. ELECTRICAL Wiring a race car is not especially difficult, but care must be taken to avoid shorts, using the correct wire size, and attaching the terminals. The entire original wiring harness should be removed. I even removed the battery cable that goes to the starter, as I thought the original one was rather small. I replaced it with larger 2 gauge wire. Crimp on terminals on each end of the battery cable. One end will be for the starter solenoid, the other end will connect to the master battery cut off switch. This switch can be located just ahead of the windshield, close to the battery. Smaller 4 gauge wire can then be used from the other master switch terminal to the battery. The ignition system needs to be upgraded in order to handle a high rewing engine. The MSD ignition unit, described earlier in this book, &in be used with either the point-type ignition of the 1300, or the Bosch electronic unit of the 1500 engine. A good place to mount the MSD control box is in the spare tire well so that it is away from the engine heat. Use the optional rubber shock mounts for the MSD to isolate vibrations to the unit. If you are using the stock Bosch control module to trigger the MSD, it can also be mounted in the spare tire well close to the MSD. Use a high energy coil, such as the MSD Blaster and a set of racing solid core plug wires that can take the higher voltage. For G-Production cars it is a good idea to change the point-type distributor to an electronic breakerless unit. Changing and setting points can be a real pain since the distributor is not in an accessible location. Marelli has a system that comes with a com- plete distributor and coil, and is all cen- trifugal advance.
  • 41. RED WHITE I IGN, COIL il_: SOLENOID MSD ENGINE DISTRIBUTOR IGN. START FUEL PUMP SWlTCl I 1 BATTERY I i Typical electrical diagram for an X1/9 race car using MSD ignition
  • 42. The interiors of two racing X119s. The placement of the instruments is similar for both, but the bottom one retains most of the stock dash.
  • 43. INSTRUMENTS For race car applications some people con- sider mechanical gauges as the only proper way to go, while others argue that electrical should be your choice. There are pros and cons for both types. Mechanical gauges re- quire some plumbing to the gauge itself, such as for the water temperature and oil pressure. One advantage they have over electrical gauges is that they have a larger sweep area on the face of the instrument, which translates in larger more noticeable needle movement. A mechanical tachometer requires a drive cable that has to run from the engine all the way to the back of the tach. The big advantage of electrical gauges is, of course, the absence of all the plumbing to the gauges. All that is required is a sending unit and a run of wire. Whatever type that you use, you will probably have to obtain some metric adapter fittings. The only gauges you'll need are water temperature, oil pressure, tachometer, and fuel pressure. The fuel pressure gauge is best mounted in the engine compartment or in the rear trunk area close to the Fuel cell is best mounted in front trunk area ' carburetor. Make sure your tachometer reads to 10,000 rpm. You are going to need to use high revs. Two good manufacturers of instruments suitable for racing are Auto Meter and Stewart Warner. Besides the instruments, you will need an ignition switch and a start button. Longacre Automotive Products has these switches already wired and mounted in brushed aluminum panels. The switches are rubber coated to protect them from dirt and water. They also offer pre-wired gauges mounted in aluminum panels with warning lights for each gauge. FUBL CELL The best place to mount the fuel cell is in the front trunk. For autocrossing you can use a small cell with a 3-4 gallon capacity. The SCCA lists specifications and approved manufacturers of fuel cells. Make sure the cell is securely mounted. The electric fuel pump can be placed near the fuel cell, as low as possible. Use two inline fuel filters, one near the fuel pump and the other near the engine, and a pressure regulator. Use high quahty braided lines, such as Earl's or Aeroquip. Make sure the braided lines don't rub against the fuel cell, wires, or even metal. The stamless steel covering will wear a hole through just about anythg.
  • 44. BODYWORK The body needs to be lightened as much as possible. For road racing you will probably get the car con- siderably lighter than the minimum weight. You can then add weight were it is needed on the car. The SCCA allows alternate materials for the hood, engine cover, rear trunk, and fenders. Fiberglass re- placements are available for these components, including - complete fenders. The fiberglass fenders can be attached with Dzus fasteners or riveted on. The stock steel door has to remain, but can be lightened. With a torch cut out the d&r side guard beams and some of the interior metal. Rivet on some thin gauge aluminum for the inside panel of the door. OIL COOLER The best place for the oil cooler is in the engine compartment near the air duct.If you attached the rear fiberglass fender with Dzus fasteners,the oil cooler can be serviced from the outside. Oil coolers need a tremen- dous amount of air to cool the oil properly. Make sure that all the air from the rear air duct makes its way to the oil cooler. On an autocross car an oil cooler is not really necessary, as the car is not on the track long enough for the cooler to make a difference. RADIATOR The stock radiator can be retained for road racing with a few modifications. The edges around the radiator must be sealed off to prevent air from escaping. Also, the water pump must be slowed down because at high rpms water is forced through the radiator too quickly for it to be cooled properly. A Gilmer belt system is available for the 1300 and 1500 engines and is recommended. Be sure to retain the top bleeder valve on the radiator, as this is used to be sure that there is no air in the cooling system. ENGINE Engines built for road racing will be slightly different than for Solo II racing. A Solo II engine needs a more torquey engine with less top end power and more mid-range power and a broader more usable rpm range. Keep this in mind when you are building your engine or having someone build it for you. Building a winning race engine requires using the best parts and assembling them meticulously. You have to decide for your- self whether you have the expertise to build your own engine. A lot of the machining operations will probably be farmed out unless you have the ability and equipment to do it yourself. For that reason, I am not going to explain how to lighten and balance a connecting rod or show in detail the ins and outs of porting and polishing a cylinder head. I think that's what professional race shops are for. The number of engine builders experienced with the Fiat SOHC engine is a rather short list. We're not dealing with Chevy or Ford engines here! PBS Engineering in southern California has been around a long time and they
  • 45. have the experience to do a complete engine or machine work for you. International Auto Parts in West Virginia hasn't been around as long as PBS, but they have a good reputation for building winning engines. FAZA in California probably has the best connection of racing parts coming out of Italy. Elite-CarsJnc. out of the New York area is another engine builder that specializes in Fiats, Alfas, and Lancias.Their prices are a little high. Before receiving an engine from a builder, you should have it run on a dynamometer. Any assembly mistakes should show up then, and the builder is responsible. Insist on receiving a dyno sheet that shows the horsepower and torque and at what rpm. You need this information to gear your car properly. Your engine builder can probably help you with this also. They can also give you the correct ignition timing and cam timing for their engine. CYLINDER HEAD You are going to obtain a good portion of your engine's power by using a well pre- pared cylinder head. Many racers are using cylinder heads from the 1100 cc engine with good results. These have the small com- bustion chambers and can be used on either the 1300 or 1500. Using this head raises the compression ratio using the stock type pistons. The other alternative is using the stock 1300 or 1500 cylinder head with high com- pression pistons. In either case the heads have to be properly prepared,which includes porting and polishing and reshaping the combustion chambers. Don't try planing the head too much to gain compression or you are going to run into problems. There is just not a lot of extra material there to plane. Have your cylinder head flowed and cc'ed (which means that the combustion chambers have been contoured so that each one has the same capacity) . VALVE TRAIN You cannot change the size of the valves, but alternate valves can be used, such as from Abarth and others. Some use smaller than stock valve stems to make the valves lighter and use correspondingly smaller valve guides. If the stock valves are retain- ed, have them lightened. Your engine builder can also do a special valve grinding. The multi-angle valve job has become al- most universal with most all high perfor- mance engines. It must be remembered that a typical stock-type wide angle valve seat will not flow as well as its multi-angle counterpart, but it is not as durable. Also, a wide seat will help cool the valve somewhat better than a multi-angled one. Stiffer valve springs are needed for racing to avoid coil bind. Special springs are avad- able. You can retain the stock cast iron valve guides or go with special bronze guides. Reducing the weight of the valve train is important. Special valve spring re- tainers are available, made out of aluminum or titanium. CAMSHAFT Selection of a camshaft must be done care- fully. It has to be compatible with your cylinder head, pistons, compression ratio, etc. Many people place too much emphasis on an engine's peak horsepower and not enough on the engine's torque character- istics. In their stock form, the Fiat SOHC engines do not have a lot of torque. The 1500 engine offers more due to its longer stroke. The operating parameter of the camshaft that affects torque the most is the duration. Duration is the time during which the valve is off its seat and is measured in degrees of rotation at the crankshaft. The duration should be selected so that it offers the most torque in the rpm range that the engine will be operated. In Solo I1 racing the rpm range will be lower and broader. The rpm range for road racing will be higher and narrower. If you want an engine that produces more torque in the lower rpm range, choose
  • 46. a camshaft with a short duration. For more torque in the higher rpm range, choose a camshaft with a longer duration. The lobe center is another important con- sideration, as it also affects torque. The lobe center is the angle between the point of maximum lift on the intake lobe and the point of maximum lift on the exhaust lobe. It is measured in camshaft degrees.The lobe center is fixed when the camshaft is ground and cannot be adjusted unless it is reground. On the other hand, the lobe centerline can be adjusted by advancing or retarding the cam timing. On a camshaft designed for racing the lift is increased to improve performance. Lift is the distance a valve moves off its seat. The higher the lift, the larger the opening is for the gas and air mixture. There are many manufacturers of high performance camshafts for Fiat engines. Some are made in Europe, others in the U.S. Each engine builder will have their favorite. Follow your engine builder's advice on the proper camshaft for your application. If you don't trust your engine builder on these things, you need to find another engine builder. PISTONS If you are using the standard 1300 or 1500 head, you need high compression pistons to raise the compression ratio, and hence, the power. There are several types of cast and forged pistons available for these engines. Forged pistons offer better heat rejection than do cast ones.The piston design selected must be compatible with your head modifi- cations.You certainly don't want the pistons striking the valves! The pistons in your set should all weigh the same and be balanced. CONNECTING RODS The stock rods in the 1500 engine are forged, while the 1300 rods are cast. The forged rods in the 1500 can be retained but should be lightened, balanced, and shot- peened. Alternate forged rods are avadable for the 1300 engine. Carrillo makes forged connecting rods for Fiat engines. CRANKSHAFT The crankshaft is probably the most highly stressed component in the engine. Even so, the stock crankshaft can be retained for both the 1300 and 1500 engines if the rpms are kept at a safe level. For the 1300 engine keep the revs below 9,000 and for the 1500 engine 8,500 rpm is the limit. You should be aware by now that many stock components can be retained on an XI19 racing engine, but they do have limits and must be checked and handled carefully. ENGINE BEARINGS The stock Fiat bearings can be retained, but for added security you need some special bearings, Vandenvell being about the best. LUBRICATION Because of the high G forces created when the suspension is modified and racing slicks are used, the stock wet sump lubrication is not adequate. Some form of oil control system must be employed. The most reliable system is a dry sump. It is expensive,bulky, and complex. PBS sells a dry sump system for the X119. The pump is located where the original alternator was and is driven by a cogged pulley and belt. An alternate method of controhg the oil is using an oil pan with special baffles welded inside. This system retains the stock wet sump system and seems to work well. It was first developed by the Italians some years ago and tested in international competition in races that are much longer in length than your typical SCCA National or Regional race. A third method for controlling the oil is using an increasingly popular device called an Accusump. The Accusump is the poor man's dry sump system. It retains the stock wet sump system and uses a canister filled with engine oil that is plumbed into the engine's oiling system. The Accusump releases oil into your engine whenever oil gets away from the oil pump. When the oil pump gets oil again the Accusump
  • 47. recharges itself. The unit stores about three quarts of oil and releases only the amount the engine needs to maintain normal oil pressure. I have no personal experience using an Accusump, but have known racers that swear by them and others that have experienced catastrophic engine failures using them. INDUCTION SYSTEM For an F Production car you are allowed to use a single Weber 34 mm DMTR or the standard fuel injection. -An alternate car- buretor is the Weber 36 DCNF with a 34 mm venturi and a manifold adapter. The G ~ m h ~ t i o n is allowed a Weber 32fm-n For a Solo II car a cool can could be mounted DMTR carburetor. in the rear trunk area, as well as the fuel pressure gauge. In order to be competitive the carburetors have to be specially prepared. The SCCA doesn't allow very much in the induction department for the X1/9s, so it is important to get the most out of what we have to work with. For both the 32 and 34 mm DMTR carburetors the venturis can be bored out and the butterflies reshaped. The 36 DCNF plus it improves the thmttle response. Of Weber can be used on the stock intake man- course, running it too lean leads to burnt ifold with some modifications. pistons. If you buy a "prepared" carburetor don't assume it is jetted perfectly. Use the You can get these carburetors completely settings as a starting Point and go from set up for racing with all the modifications there- done from PBS, FAZA, and others. The intake manifold needs to be opened up as much as possible and the ports matched to the cylinder head. The intake manifold from a 1974 model works best because it gives better breathing. Most people set up their carburetors too rich, which robs power and increases fuel comsumption. A very rich mixture is easy to spot - black tailpipe and black, sooty deposits on the sparkplugs. An extremely lean mixture is also easy to spot - the tail- pipe is very, very white. The trouble comes in determining the mixture in between, as this takes experience. If you are not ex- perienced in this area let someone who is help you. The reason we want the mixture somewhat lean is because that is where the power is, EXHAUST SYSTEM Don't try designing your own headers unless you have access to a dynometer. A good design will -not find any extra horse- power, but a bad one will loose power for you. Make sure that no part of the exhaust system comes in contact with any moving part, such as the suspension. The collector on FAZA's headers come very close to the right axle, so be careful. Use a good racing muffler, such as Flowmaster. I don't like the SuperTrapp very much. I have yet to find a good paint for headers that will stay on for a reasonable amount of time. Unless you are rich and using stainless steel, you will be painting your headers often. Glass beading them instead of sand- blasting seems to make the paint stick better.
  • 48. It's not a good idea to chrome your headers. It adds weight to the headers, but more im- portantly it could weaken them.The reason lies in the chroming process. Before the chrome is applied the welds on the headers are ground smooth which could weaken the welds and hence, the headers. ENGINE MOUNTS It's a good idea to change the top torque rod engine mount to a solid mount. Use two 518 inch female rod ends with a threaded rod connecting the two. Drill out the holes in the mounting brackets to 7/16 in. diameter. Fabricate spacers to take up the difference between the rod end and the brackets. Use aircraft quality 7/16 in. bolts and lock nuts. This modification reduces a lot of the rock- ing motion of the engine. THE DFUVE LINE F%YWHEEL AND CLUTCH To reduce rotational inertia the flywheel should be lightened and then balanced. An alternate aluminum flywheel can also be used. The stock clutch on suitable for racing. the 1300 engine is not The 1500 clutch as- sembly is a little larger but still marginal for racing. Running the Borg and Beck racing clutch and pressure plate effectively solves this problem. TRANSMISSION Different gear ratios are available for the stock spiral cut gears. If you have the money PBS offers a gearbox conversion which uses straight cut Webster gears. This is a five speed conversion which can be installed in either the 4 or 5 speed box. Without the synchros of the stock transmission you can shift faster and without using the clutch. DrnRENTIAL To prevent inside wheelspin in corners the differential needs to be modified so that drive is provided to both wheels.This can be done by locking the differential by welding or by using a limited slip. All of the limited slips for Fiats came from Europe, but this source has just about dried up and finding a limited slip for the XI19 in good condition will be difficult. If you do find one, it is going to be expensive. 'Just about every road racer is now using a locked diff. For Solo TI racing I wouldn't run a locked differential. You are going to have gobs of understeer in the typically tight comers in Rod ends installed as top engine mount. 46
  • 49. an autocross. You could get away with it by trying to tune out some of the understeer and change your driving style so that you toss the car into the corners. If you can't find a limited slip it might just be better to run an open differential. AXLES AND CV JOINTS The 1300 models came with constant veloci- ty joints on the outer ends of the axles and a sliding "Tripode" type joint on the inner ends. The 1500 models have a better set-up, using identical C.V. joints on both ends. The later models also use slightly larger axles and incorporate larger rear bearings. The C.V. joints themselves are of excellent quality and should give good service even under racing.conditions. The allen head-type bolts which thread into the axle flanges do tend to loosen, though. One solution is to use Luctite and safety wire all the bolts. The bolts will be difficult to drill for safety wire. The preferred method is to drill out the threaded holes on both the inboard and outboard ends and use aircraft quality bolts and nuts to hold them. I have seen and heard about the stub axles breaking on Prepared X119s used for auto- crossing, especially in Pro Solos. This is probably due to <thedrag racing type starts that are used. The stub axles should be shot peened and replaced on a regular schedule. A lot can be seen in the front trunk area. fuel cell, fuel filter, fuel pump, master cut-off switch, and strut tower brace.
  • 50. Location of MSD ignition Bosch control module in tire well. XI19 racing "office". and spare Select a racing seat carefully. It must be comfortable for you.
  • 51. Buildin A Modieied Solo I1 The Solo II Modified class allows a great deal of ingenuity. This chapter will be short, since most of what is outlined in Chapter 4 applies to building a nodified racer. These modifications are in excess of what's allowed in SCCA Production -acingor in Prepared Solo 11racing. The SCCA Solo 11Modified rules for production based cars are simple. 1. There are two classes for production cars. 2. D Modified cars have a minimum weight of 1000lbs. and engines are limited to 2 liters of capacity. 3. E Modified cars have a minimum weight of 1500 lbs. and engines of over 2 liters. 4. Wheels, tires, and suspensions are free.
  • 52. The modified rules allow a lot of ingenuity, as any engine and transmission can be used and the car can be very light. You are never going to get an X1/9 to the minimum weight of 1000 lbs. for D Mod- ified, few cars in this class do - with maybe the exception of the Lotus 7. Get the car as light as you can without sacrificing strength and leave it at that. If you are preparing the car for E Modified the minimum weight can be easily met. WHEELS AND TIRES Since wheel and tire size are free, take ad- vantage of using a wider wheel. Don't go too wide on the front, about 7 inches wide maximum. The rears can be wider, about 8 inches. At first thought it might seem reasonable to use the widest racing slicks that you can fit on the car. This may not be wise. The typical autocross course lasts between 1 to 1 112 minutes in length, not enough time to properly heat up a set of wide race tires. If I were to increase the tire width, I would do it in the rear to get a little more traction since the engine will be more powerful. ENGINE will be from a pair of Weber 45 DCOE's with an appropriate intake manifold. The rear trunk area will have to be modified to make rcmm for these carbs. You can even cut away the whole rear boxed structure between the strut towers and replace it with some smaller welded in or bolted in braces. An air scoop can be bought or fabricated to sit on top of the engine cover, allowing fresh air to feed the carburetors. With these modifications you will have a very powerful engine, indeed. Still, you will be behind some of the Lotus cars with their twin cam Fords tiiat are putting out between 200 and 230 horsepower. USING THE 1500 E N G M AN EARLY CAR If you have an early model car (1974-1978) and wish to install the larger 1500 engine, it can be done without too many problems. Starting in 1979 a great number of changes were made to the cars besides a larger engine. A 5-speed transmission was added, plus larger rear bearings, new C.V. joints, and larger axles to name a few. Trying to use the existing drive-line components with the 1500 engine and transmission can create some problems. It would be better to use the complete rear suspension from a 1500 model. The suspension mounting points are the same. If you look at the rear structure of a 1979 The biggest restriction to a Production or Prepared racer is the induction system, so this needs to be looked at to improve power and torque. This means using a big valve head. They are available completely pre- pared from a number of sources. Even a special 16 valve DOHC head, developed in Europe, is available. To complement the improved breathing in the head, you'll need larger carburetors or, if you can afford it, a racing fuel injection system. With carburetors, the best response similar area in the frame of the early model car. Sheet metal then has to be welded up inside the cut out area. All the engine mounts are the same and do not have to be changed or modified. Since the 1500 engine is taller than the 1300 the early model engine cover may not clear properly. The late model engine cover is needed and is available in fiberglass. The later model X1/9s have a different design for the throttle cable and the metal
  • 53. housing inside the central tunnel. Neither the early or late model throttle cable will work properly without some modifications. The preferred set-up is a custom made cable using high quality stainless steel aircraft cable. The casing should be Teflon lined. Use a 10-32 female rod end at the pedal for maximum strength. Most cables come with 10-32 threaded ends. This will thread on to the stock Fiat end fitting at the throttle link- age. TURBOCHARGING Turbocharging for the Fiat SOHC engine has been developed by Serra and PBS with mixed results. It must be remembered that the engine was never designed with turbo- charging in mind. PBS did tests with both a carbureted 1300 and 1500 engine and with the Bosch fuel injected 1500 engine. They were able to get about 140 horsepower using 7 - 9 psi for boost. Increasing the boost lowers the reliability. Turbocharging is expensive, complex and takes up a lot of room in the engine compartment. More horsepower can be obtained by improve- ments to the normally aspriated engine. ALTERNATE ENGINES In the Modified class you are not restricted to using the stock-type motor. Any engine that will fit in the same general location as the original can be used. This makes for some interesting engine swaps. About the most common is adapting the Fiat DOHC unit from the 124 in the X1/9's tight engine bay. This is more complicated than it first seems. You have to adapt the axles and drive line as well as fitting in new motor mounts, not to mention the notches cut in the chassis and suspension for clearance. To my mind it would be easier to just race the mid-engined Lancia Scorpion, which uses the same DOHC engine. Still, the possibilities are almost endless and almost anything is possible - from V.W. engines to rotaries.
  • 54. Extensive fabrication work has been done here to mount a V.W. air-cooled engine in the north-south position. This XI19 features a clever air box to force fresh air to the carburetors.
  • 55. he Dal I A Dallara XI19 racing in Germany, 1978. - - Fiat Torino decided not to produce a factory road racing X1/9, instead commissioning Abarth to produce a rally version of the car. - And Abarth did a wonderful job. The rally XI19 was powered by a Fiat twincam 16- valve engine, producing in the neighbor- hood of 200 bhp. It turned out that the per- -. formance of the car was better than some had hoped, beating the world champion Lancia Stratos and the Fiat Abarth 131. - Despite its winning ways, the Abarth XI19 saw limited competition as a rally car. Be- cause of some political in-fighting within .- the Fiat group, which is a whole other story,the X1/9 rally program was dropped. Here was a beautiful midengined sports car and Fiat chose to ignore it's racing capabil- ities. Fiat wanted to put Lancia into long distance racing, while Ferrari continued in Formula 1. Fiat would have the rally segment for the moment, but with the 131 sedan, not the X1/9. ENTER DALLARA Since Fiat wasn't interested in racing the X1/9, it was up to the private sector to take up the slack. One of the most notable was Gian Paolo Dallara. He was a most capable engineer. Dallara was an assistant to Ing. Chiti at Ferrari, worked with competition