SlideShare a Scribd company logo
1 of 29
Mapping local
community
assets online
Read this if you want to learn how to:
1) Create online maps of local community assets using
Google Maps
2) Allow other people to add to and edit your maps
3) Share these maps online
All map data © Google 2015
What’s in this presentation?
• What can you achieve with online mapping? Slide 3
• What is a map made up of? Slide 4
• Step 1: Setting up your map Slides 5-9
• Step 2: Adding markers to your map Slides 10-16
• Step 3: Adding shapes to your map Slides 17-18
• Step 4: Customising your map Slides 19-21
• Step 5: Sharing your map with others Slides 22-27
What can you achieve with online mapping?
Online maps can be a great way of sharing what’s
going on in your community – you might want to
create a map of local community groups, for
example, or could show where all the local
businesses are located.
Online maps could also help you consult with your
community better, by allowing lots of different
people to share what they like and don’t like about
the area. This enables you to better understand your
area, which is crucial when developing your First
Steps plan.
Click on the map to the right to see an example of
what you can achieve.
What is a map made up of?
Layers
Layers are used to
organise your markers,
lines, and shapes and
control what you see on
your map. You begin with
one but can add more if
you want to.
Markers
Markers pin-point
specific places on your
map. If users click them
then a balloon appears
with information about
that place.
Shapes
These act like markers
but, rather than covering
specific points, cover
whole areas.
The base map
Your base map is the
style that you choose for
your background map.
There are nine to choose
from in Google Maps.
Step 1: Setting up your map
1) In your web browser go to www.google.co.uk/maps.
2) If you already have a Google Account sign in using the
box in the top-right corner.
If not, click this box anyway and then register for an
account by selecting ‘Create account’ on the
following page. Once registered return to Google
maps via the above link.
3) Once signed in click the menu symbol at the left of
the search box to make a menu appear at the left-
hand side of the screen.
4) Click ‘My maps’ when the menu appears.
5) A box appears below the search bar – click ‘Create’ to
set up a new map. (This opens a new window.)
Step 1: Setting up your map (cont.)
The box in the top-left of the window is where you change
the map settings, such as the name and description of the
map and who is able to view and edit it. This box also
allows you to add new layers and change the ‘base map’.
The search bar along the top of the window allows you to
search for places or postcodes. Just type a place name or
postcode in the box and hit the Enter key on your
keyboard.
Step 1: Setting up your map (cont.)
Navigate around the map using the zoom buttons at
the bottom-right of the window and the hand symbol
below the search bar. Alternatively, use the arrow and plus
or minus keys on your keyboard to move around.
If you make a mistake when editing the map just use the
undo and redo keys located below the search bar.
Step 1: Setting up your map (cont.)
To finish setting up your map…
6) Click on ‘Untitled map’ to give your map a name and
description.
7) Click on ‘Base map’ to choose the style you want for
your map from the selection shown below. Bear in
mind that the different base maps have different
levels of information; for example, some do not
contain details such as street names.
Step 2: Adding markers to your map
Markers like those shown on the map to the right let
people know the location of key places or landmarks
within an area.
You could add markers to the map to highlight a range of
assets within a community, from community buildings to
local businesses, sports clubs to tourist attractions.
When users click on markers a balloon pops up with
information about the feature that the marker is
highlighting. Keep on reading to find out how.
Step 2: Adding markers to your map (cont.)
There are two main methods of adding markers to your
map:
1) Manually clicking to add markers
You can place markers on the map one at a time
using Google’s ‘Add marker’ tool.
2) Importing data from a spreadsheet
If you have a spreadsheet of local places /
landmarks and their postcodes then you can
import these into your map, e.g. names,
addresses and telephone numbers of local
community groups.
Step 2: Adding markers to your map (cont.)
Manually clicking to add markers
1. If you plan to include specific details about each point
you are marking on your map, such as contact details
or web addresses, then it can be helpful to set it up to
ask you to fill out this information each time you add a
new marker. To do this click the menu button to the
right of the layer name and then select ‘Open data
table’.
A blank data table should appear. Click the arrow
symbol on the ‘name’ column and select ‘Insert
column after’. In the box that appears type in the
name of the variable, e.g. ‘Telephone number’ or
‘Web address’, and choose what type of data it is
(text, number, date/time or true/false*). Then press
‘Add’. Repeat to add more variables if necessary.
* For telephone numbers select ‘Text’ because selecting
‘Number’ cuts off the 0 at the start of phone numbers.
Manually clicking to add markers
2. Add a marker by selecting the ‘Add marker’ button
and then clicking on the map where you want the
marker to be.
3. A box will appear asking you to fill out details for each
of the column headings that you earlier added to the
data table. Fill these out and untick any if you don’t
want them to show up when someone clicks on the
marker.
4. Repeat steps 2 and 3 to add as many markers as you
want to this layer. If you make a mistake you can use
the undo and redo buttons at the top of the
page.
Step 2: Adding markers to your map (cont.)
Importing data from a spreadsheet
1. If your selected layer is currently empty then it gives
you the option to import data from a spreadsheet into
your map using the button shown on the right.
2. Select the file to upload. Make sure this spreadsheet
has clear column headings and starts in the cell A1.
Also make sure you have a column just for postcodes
and another with whatever you want to name your
markers.
Importing data from a spreadsheet
3. You will then need to tell Google Maps which column
in your spreadsheet contains the geographical location
of your markers. Select the column containing
postcodes and click ‘Continue’.
4. It will then ask you to choose which column contains
the names of your markers. Select the correct column
and click ‘Finish’.
Step 2: Adding markers to your map (cont.)
Importing data from a spreadsheet
5. Your markers will appear on the map after taking a
few seconds to load. The layer will now be named
after your spreadsheet – if you want to change the
name of the layer click the menu button to the right
of the layer name and select ‘Rename this layer’.
6. If any of the places in the spreadsheet you uploaded
have the same postcode then these will overlap on
your map. If this is the case then click and drag on one
of the markers to move it slightly so that both markers
are visible.
Step 2: Adding markers to your map (cont.)
Step 3: Adding shapes to your map
You can also add shapes to your map. These can be used
to mark features on the map that cover larger areas, e.g.
parks or different neighbourhoods. The process is quite
similar to adding markers:
1. It is best to keep all of your shapes in their own layer,
so start by adding a new layer by clicking ‘Add layer’
in the box at the top-left of the window.
2. Click the ‘Draw a line’ button at the top of the
page and on the drop-down menu select ‘Add line or
shape’
Step 3: Adding shapes to your map (cont.)
3. Click on the map where you want to start the shape
and then keep clicking to draw it. Complete it by
clicking back on the first point of the shape.
4. Complete the box asking for the details about the
polygon and click ‘Save’.
Google Maps allows you to customise your map with
different coloured markers and shapes, and gives you the
option to change the marker icons.
1. To change the colour or icon of a marker just hover
over it in the layer box and a little icon appears to
the right of the marker name. Click this and a new
menu appears with a range of colours and icons to
choose from. If you do this for shapes it allows you to
change the fill transparency and border width as well.
Step 4: Customising your map
Step 4: Customising your map (cont.)
2. You can choose whether all items in a layer follow a
uniform style, appear in sequence, each have
individual styles or are styled according to a particular
attribute from their data table. Just click the blue
writing below the layer name and select one of the
options under ‘Group places by’.
3. Clicking on the blue writing also gives you the option
to change whether individual markers on the map are
labelled with their marker name or other piece of
information, as shown here:
Step 4: Customising your map (cont.)
4. Before sharing the map with others it is important to
give your map a name and description and to make sure
all layers and markers are clearly named.
To change the map title and description click on the
map title in the top-left corner.
To change layer names click the menu button to the
right of the layer name and select ‘Rename this layer’.
To edit individual markers click on them on the map
and click the edit button in the bottom-right of the
window that pops up.
Step 5: Sharing your map with others
1. Before sharing your map with others you should set
the default view that people will see when they load
the map. To do this adjust the pan and zoom of the
map so that it is as you want people to see it, click the
menu button to the right of the ‘Share’ button and
on the following menu click ‘Set default view’.
Step 5: Sharing your map with others
You can allow your map to be viewed by either:
1. Anyone with the link
2. The general public
3. Specified others with Google accounts
Or, if you want to, you can allow your map to be edited
by specific others with Google accounts.
Step 5: Sharing your map with others (cont.)
To set it up so that anyone with the link to the map can
access it…
1. Click ‘Share’ just below the map name in the top-left
of the page.
2. Click ‘Change…’ and in the new box that appears
select ‘On – anyone with the link’.
3. Then click the link at the top of the box and it will
become highlighted. Press Ctrl+C to copy the link if
you want to paste it into another document or email.
Alternatively you can choose to share the link via
Gmail, Google+, Facebook or Twitter.
Step 5: Sharing your map with others (cont.)
To set it up so that the general public can see the map
and so that it can be shared on other websites…
1. Click ‘Share’ and on the new box that appears click
‘Change…’.
2. Then select ‘On – Public on the web’. Click ‘Save’.
3. You can then copy and send the map link to anyone
you want to send the map to or can share the link on
Gmail, Google+, Facebook or Twitter via the buttons
at the top of the box.
Step 5: Sharing your map with others (cont.)
4. Google Maps gives you the option to embed your map
onto your own website, but to do this you need to be
able to access the back-end of your website. If you
cannot do this then it is best to contact whoever
manages your website and ask them to do it for you.
By clicking the menu button next to the ‘Share’
button and then selecting ‘Embed on my site’ you can
access the HTML code that can be copied and then
added to your website.
Step 5: Sharing your map with others (cont.)
To allow others with Google accounts to access and/or
add to the map…
1. Click ‘Share’ just below the map name in the top-left
of the page.
2. Type in the Google email addresses (e.g. …@gmail.com
or …@googlemail.com) of those you want to be able to
edit the map and then click ‘Send’. For each one
choose whether they ‘Can view’ or ‘Can edit’.
3. If you want to be the only person who can invite other
people to view and edit the map then just tick the box
which says ‘Prevent editors from changing access and
adding new people’ at the bottom of the window
Click the map below to see an example of the sort of map it is possible to create…
Example map
mycommunity.org.uk
@mycommunityhelp
#mycommunityhelp
My Community Rights

More Related Content

Viewers also liked

Padres muy cuestionables
Padres muy cuestionablesPadres muy cuestionables
Padres muy cuestionablesMiguel
 
Application assignment, CMGT500
Application assignment, CMGT500Application assignment, CMGT500
Application assignment, CMGT500Doublexxalexx
 
Sociologia planificação - 2015-2016
Sociologia   planificação - 2015-2016Sociologia   planificação - 2015-2016
Sociologia planificação - 2015-2016Leonor Alves
 
Gestão do portfolio de serviço utilizando método AMD
Gestão do portfolio de serviço utilizando método AMDGestão do portfolio de serviço utilizando método AMD
Gestão do portfolio de serviço utilizando método AMDAlysson Amorim
 
Trabalhando com dados: analise tématica de conteudo
Trabalhando com dados: analise tématica de conteudoTrabalhando com dados: analise tématica de conteudo
Trabalhando com dados: analise tématica de conteudoRon Martinez
 
Organization chart template - Functional business (color)
Organization chart template - Functional business (color)Organization chart template - Functional business (color)
Organization chart template - Functional business (color)njpeters
 
Métodos de separación de mezclas (jennifer)
Métodos de separación de mezclas (jennifer)Métodos de separación de mezclas (jennifer)
Métodos de separación de mezclas (jennifer)Jenni1502
 

Viewers also liked (11)

Padres muy cuestionables
Padres muy cuestionablesPadres muy cuestionables
Padres muy cuestionables
 
Application assignment, CMGT500
Application assignment, CMGT500Application assignment, CMGT500
Application assignment, CMGT500
 
CVMODIFEID mark[2]
CVMODIFEID mark[2]CVMODIFEID mark[2]
CVMODIFEID mark[2]
 
Sociologia planificação - 2015-2016
Sociologia   planificação - 2015-2016Sociologia   planificação - 2015-2016
Sociologia planificação - 2015-2016
 
Gestão do portfolio de serviço utilizando método AMD
Gestão do portfolio de serviço utilizando método AMDGestão do portfolio de serviço utilizando método AMD
Gestão do portfolio de serviço utilizando método AMD
 
Trabalhando com dados: analise tématica de conteudo
Trabalhando com dados: analise tématica de conteudoTrabalhando com dados: analise tématica de conteudo
Trabalhando com dados: analise tématica de conteudo
 
Organization chart template - Functional business (color)
Organization chart template - Functional business (color)Organization chart template - Functional business (color)
Organization chart template - Functional business (color)
 
Sahs
SahsSahs
Sahs
 
Lumbalgia en AP
Lumbalgia en AP Lumbalgia en AP
Lumbalgia en AP
 
Métodos de separación de mezclas (jennifer)
Métodos de separación de mezclas (jennifer)Métodos de separación de mezclas (jennifer)
Métodos de separación de mezclas (jennifer)
 
Metodos de separacion de mezclas
Metodos de separacion de mezclasMetodos de separacion de mezclas
Metodos de separacion de mezclas
 

Recently uploaded

CALL ON ➥8923113531 🔝Call Girls Sushant Golf City Lucknow best sexual service...
CALL ON ➥8923113531 🔝Call Girls Sushant Golf City Lucknow best sexual service...CALL ON ➥8923113531 🔝Call Girls Sushant Golf City Lucknow best sexual service...
CALL ON ➥8923113531 🔝Call Girls Sushant Golf City Lucknow best sexual service...anilsa9823
 
Lucknow 💋 Escort Service in Lucknow ₹7.5k Pick Up & Drop With Cash Payment 89...
Lucknow 💋 Escort Service in Lucknow ₹7.5k Pick Up & Drop With Cash Payment 89...Lucknow 💋 Escort Service in Lucknow ₹7.5k Pick Up & Drop With Cash Payment 89...
Lucknow 💋 Escort Service in Lucknow ₹7.5k Pick Up & Drop With Cash Payment 89...anilsa9823
 
High Profile Call Girls in Lucknow | Whatsapp No 🧑🏼‍❤️‍💋‍🧑🏽 8923113531 𓀇 VIP ...
High Profile Call Girls in Lucknow | Whatsapp No 🧑🏼‍❤️‍💋‍🧑🏽 8923113531 𓀇 VIP ...High Profile Call Girls in Lucknow | Whatsapp No 🧑🏼‍❤️‍💋‍🧑🏽 8923113531 𓀇 VIP ...
High Profile Call Girls in Lucknow | Whatsapp No 🧑🏼‍❤️‍💋‍🧑🏽 8923113531 𓀇 VIP ...gurkirankumar98700
 
VIP Chandigarh Call Girls 7001035870 Enjoy Call Girls With Our Escorts
VIP Chandigarh Call Girls 7001035870 Enjoy Call Girls With Our EscortsVIP Chandigarh Call Girls 7001035870 Enjoy Call Girls With Our Escorts
VIP Chandigarh Call Girls 7001035870 Enjoy Call Girls With Our Escortssonatiwari757
 
(COD) ̄Young Call Girls In Defence Colony , New Delhi꧁❤ 7042364481❤꧂ Escorts S...
(COD) ̄Young Call Girls In Defence Colony , New Delhi꧁❤ 7042364481❤꧂ Escorts S...(COD) ̄Young Call Girls In Defence Colony , New Delhi꧁❤ 7042364481❤꧂ Escorts S...
(COD) ̄Young Call Girls In Defence Colony , New Delhi꧁❤ 7042364481❤꧂ Escorts S...Hot Call Girls In Sector 58 (Noida)
 
VIP 7001035870 Find & Meet Hyderabad Call Girls Secunderabad high-profile Cal...
VIP 7001035870 Find & Meet Hyderabad Call Girls Secunderabad high-profile Cal...VIP 7001035870 Find & Meet Hyderabad Call Girls Secunderabad high-profile Cal...
VIP 7001035870 Find & Meet Hyderabad Call Girls Secunderabad high-profile Cal...aditipandeya
 
VIP 7001035870 Find & Meet Hyderabad Call Girls Gachibowli high-profile Call ...
VIP 7001035870 Find & Meet Hyderabad Call Girls Gachibowli high-profile Call ...VIP 7001035870 Find & Meet Hyderabad Call Girls Gachibowli high-profile Call ...
VIP 7001035870 Find & Meet Hyderabad Call Girls Gachibowli high-profile Call ...aditipandeya
 
Dehradun Call Girls Service ☎ ️82500–77686 ☎️ Enjoy 24/7 Escort Service
Dehradun Call Girls Service ☎ ️82500–77686 ☎️ Enjoy 24/7 Escort ServiceDehradun Call Girls Service ☎ ️82500–77686 ☎️ Enjoy 24/7 Escort Service
Dehradun Call Girls Service ☎ ️82500–77686 ☎️ Enjoy 24/7 Escort ServiceDamini Dixit
 
VIP 7001035870 Find & Meet Hyderabad Call Girls Jubilee Hills high-profile Ca...
VIP 7001035870 Find & Meet Hyderabad Call Girls Jubilee Hills high-profile Ca...VIP 7001035870 Find & Meet Hyderabad Call Girls Jubilee Hills high-profile Ca...
VIP 7001035870 Find & Meet Hyderabad Call Girls Jubilee Hills high-profile Ca...aditipandeya
 
Call girls in Andheri with phone number 9892124323
Call girls in Andheri with phone number 9892124323Call girls in Andheri with phone number 9892124323
Call girls in Andheri with phone number 9892124323Pooja Nehwal
 
CALL ON ➥8923113531 🔝Call Girls Mohanlalganj Lucknow best sexual service
CALL ON ➥8923113531 🔝Call Girls Mohanlalganj Lucknow best sexual serviceCALL ON ➥8923113531 🔝Call Girls Mohanlalganj Lucknow best sexual service
CALL ON ➥8923113531 🔝Call Girls Mohanlalganj Lucknow best sexual serviceanilsa9823
 
Top Call Girls In Arjunganj ( Lucknow ) ✨ 8923113531 ✨ Cash Payment
Top Call Girls In Arjunganj ( Lucknow  ) ✨ 8923113531 ✨  Cash PaymentTop Call Girls In Arjunganj ( Lucknow  ) ✨ 8923113531 ✨  Cash Payment
Top Call Girls In Arjunganj ( Lucknow ) ✨ 8923113531 ✨ Cash Paymentanilsa9823
 
Tirupati Call Girls Service ☎ ️82500–77686 ☎️ Enjoy 24/7 Escort Service
Tirupati Call Girls Service ☎ ️82500–77686 ☎️ Enjoy 24/7 Escort ServiceTirupati Call Girls Service ☎ ️82500–77686 ☎️ Enjoy 24/7 Escort Service
Tirupati Call Girls Service ☎ ️82500–77686 ☎️ Enjoy 24/7 Escort ServiceDamini Dixit
 
Top Call Girls In Indira Nagar Lucknow ( Lucknow ) 🔝 8923113531 🔝 Cash Payment
Top Call Girls In Indira Nagar Lucknow ( Lucknow  ) 🔝 8923113531 🔝  Cash PaymentTop Call Girls In Indira Nagar Lucknow ( Lucknow  ) 🔝 8923113531 🔝  Cash Payment
Top Call Girls In Indira Nagar Lucknow ( Lucknow ) 🔝 8923113531 🔝 Cash Paymentanilsa9823
 
call girls in Siolim Escorts Book Tonight Now Call 8588052666
call girls in Siolim Escorts Book Tonight Now Call 8588052666call girls in Siolim Escorts Book Tonight Now Call 8588052666
call girls in Siolim Escorts Book Tonight Now Call 8588052666nishakur201
 

Recently uploaded (15)

CALL ON ➥8923113531 🔝Call Girls Sushant Golf City Lucknow best sexual service...
CALL ON ➥8923113531 🔝Call Girls Sushant Golf City Lucknow best sexual service...CALL ON ➥8923113531 🔝Call Girls Sushant Golf City Lucknow best sexual service...
CALL ON ➥8923113531 🔝Call Girls Sushant Golf City Lucknow best sexual service...
 
Lucknow 💋 Escort Service in Lucknow ₹7.5k Pick Up & Drop With Cash Payment 89...
Lucknow 💋 Escort Service in Lucknow ₹7.5k Pick Up & Drop With Cash Payment 89...Lucknow 💋 Escort Service in Lucknow ₹7.5k Pick Up & Drop With Cash Payment 89...
Lucknow 💋 Escort Service in Lucknow ₹7.5k Pick Up & Drop With Cash Payment 89...
 
High Profile Call Girls in Lucknow | Whatsapp No 🧑🏼‍❤️‍💋‍🧑🏽 8923113531 𓀇 VIP ...
High Profile Call Girls in Lucknow | Whatsapp No 🧑🏼‍❤️‍💋‍🧑🏽 8923113531 𓀇 VIP ...High Profile Call Girls in Lucknow | Whatsapp No 🧑🏼‍❤️‍💋‍🧑🏽 8923113531 𓀇 VIP ...
High Profile Call Girls in Lucknow | Whatsapp No 🧑🏼‍❤️‍💋‍🧑🏽 8923113531 𓀇 VIP ...
 
VIP Chandigarh Call Girls 7001035870 Enjoy Call Girls With Our Escorts
VIP Chandigarh Call Girls 7001035870 Enjoy Call Girls With Our EscortsVIP Chandigarh Call Girls 7001035870 Enjoy Call Girls With Our Escorts
VIP Chandigarh Call Girls 7001035870 Enjoy Call Girls With Our Escorts
 
(COD) ̄Young Call Girls In Defence Colony , New Delhi꧁❤ 7042364481❤꧂ Escorts S...
(COD) ̄Young Call Girls In Defence Colony , New Delhi꧁❤ 7042364481❤꧂ Escorts S...(COD) ̄Young Call Girls In Defence Colony , New Delhi꧁❤ 7042364481❤꧂ Escorts S...
(COD) ̄Young Call Girls In Defence Colony , New Delhi꧁❤ 7042364481❤꧂ Escorts S...
 
VIP 7001035870 Find & Meet Hyderabad Call Girls Secunderabad high-profile Cal...
VIP 7001035870 Find & Meet Hyderabad Call Girls Secunderabad high-profile Cal...VIP 7001035870 Find & Meet Hyderabad Call Girls Secunderabad high-profile Cal...
VIP 7001035870 Find & Meet Hyderabad Call Girls Secunderabad high-profile Cal...
 
VIP 7001035870 Find & Meet Hyderabad Call Girls Gachibowli high-profile Call ...
VIP 7001035870 Find & Meet Hyderabad Call Girls Gachibowli high-profile Call ...VIP 7001035870 Find & Meet Hyderabad Call Girls Gachibowli high-profile Call ...
VIP 7001035870 Find & Meet Hyderabad Call Girls Gachibowli high-profile Call ...
 
Dehradun Call Girls Service ☎ ️82500–77686 ☎️ Enjoy 24/7 Escort Service
Dehradun Call Girls Service ☎ ️82500–77686 ☎️ Enjoy 24/7 Escort ServiceDehradun Call Girls Service ☎ ️82500–77686 ☎️ Enjoy 24/7 Escort Service
Dehradun Call Girls Service ☎ ️82500–77686 ☎️ Enjoy 24/7 Escort Service
 
VIP 7001035870 Find & Meet Hyderabad Call Girls Jubilee Hills high-profile Ca...
VIP 7001035870 Find & Meet Hyderabad Call Girls Jubilee Hills high-profile Ca...VIP 7001035870 Find & Meet Hyderabad Call Girls Jubilee Hills high-profile Ca...
VIP 7001035870 Find & Meet Hyderabad Call Girls Jubilee Hills high-profile Ca...
 
Call girls in Andheri with phone number 9892124323
Call girls in Andheri with phone number 9892124323Call girls in Andheri with phone number 9892124323
Call girls in Andheri with phone number 9892124323
 
CALL ON ➥8923113531 🔝Call Girls Mohanlalganj Lucknow best sexual service
CALL ON ➥8923113531 🔝Call Girls Mohanlalganj Lucknow best sexual serviceCALL ON ➥8923113531 🔝Call Girls Mohanlalganj Lucknow best sexual service
CALL ON ➥8923113531 🔝Call Girls Mohanlalganj Lucknow best sexual service
 
Top Call Girls In Arjunganj ( Lucknow ) ✨ 8923113531 ✨ Cash Payment
Top Call Girls In Arjunganj ( Lucknow  ) ✨ 8923113531 ✨  Cash PaymentTop Call Girls In Arjunganj ( Lucknow  ) ✨ 8923113531 ✨  Cash Payment
Top Call Girls In Arjunganj ( Lucknow ) ✨ 8923113531 ✨ Cash Payment
 
Tirupati Call Girls Service ☎ ️82500–77686 ☎️ Enjoy 24/7 Escort Service
Tirupati Call Girls Service ☎ ️82500–77686 ☎️ Enjoy 24/7 Escort ServiceTirupati Call Girls Service ☎ ️82500–77686 ☎️ Enjoy 24/7 Escort Service
Tirupati Call Girls Service ☎ ️82500–77686 ☎️ Enjoy 24/7 Escort Service
 
Top Call Girls In Indira Nagar Lucknow ( Lucknow ) 🔝 8923113531 🔝 Cash Payment
Top Call Girls In Indira Nagar Lucknow ( Lucknow  ) 🔝 8923113531 🔝  Cash PaymentTop Call Girls In Indira Nagar Lucknow ( Lucknow  ) 🔝 8923113531 🔝  Cash Payment
Top Call Girls In Indira Nagar Lucknow ( Lucknow ) 🔝 8923113531 🔝 Cash Payment
 
call girls in Siolim Escorts Book Tonight Now Call 8588052666
call girls in Siolim Escorts Book Tonight Now Call 8588052666call girls in Siolim Escorts Book Tonight Now Call 8588052666
call girls in Siolim Escorts Book Tonight Now Call 8588052666
 

Mapping assets in the local area

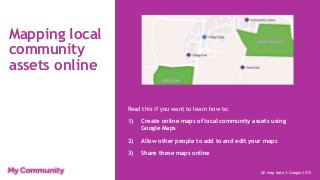
  • 1. Mapping local community assets online Read this if you want to learn how to: 1) Create online maps of local community assets using Google Maps 2) Allow other people to add to and edit your maps 3) Share these maps online All map data © Google 2015
  • 2. What’s in this presentation? • What can you achieve with online mapping? Slide 3 • What is a map made up of? Slide 4 • Step 1: Setting up your map Slides 5-9 • Step 2: Adding markers to your map Slides 10-16 • Step 3: Adding shapes to your map Slides 17-18 • Step 4: Customising your map Slides 19-21 • Step 5: Sharing your map with others Slides 22-27
  • 3. What can you achieve with online mapping? Online maps can be a great way of sharing what’s going on in your community – you might want to create a map of local community groups, for example, or could show where all the local businesses are located. Online maps could also help you consult with your community better, by allowing lots of different people to share what they like and don’t like about the area. This enables you to better understand your area, which is crucial when developing your First Steps plan. Click on the map to the right to see an example of what you can achieve.
  • 4. What is a map made up of? Layers Layers are used to organise your markers, lines, and shapes and control what you see on your map. You begin with one but can add more if you want to. Markers Markers pin-point specific places on your map. If users click them then a balloon appears with information about that place. Shapes These act like markers but, rather than covering specific points, cover whole areas. The base map Your base map is the style that you choose for your background map. There are nine to choose from in Google Maps.
  • 5. Step 1: Setting up your map 1) In your web browser go to www.google.co.uk/maps. 2) If you already have a Google Account sign in using the box in the top-right corner. If not, click this box anyway and then register for an account by selecting ‘Create account’ on the following page. Once registered return to Google maps via the above link.
  • 6. 3) Once signed in click the menu symbol at the left of the search box to make a menu appear at the left- hand side of the screen. 4) Click ‘My maps’ when the menu appears. 5) A box appears below the search bar – click ‘Create’ to set up a new map. (This opens a new window.) Step 1: Setting up your map (cont.)
  • 7. Step 1: Setting up your map (cont.) The box in the top-left of the window is where you change the map settings, such as the name and description of the map and who is able to view and edit it. This box also allows you to add new layers and change the ‘base map’. The search bar along the top of the window allows you to search for places or postcodes. Just type a place name or postcode in the box and hit the Enter key on your keyboard.
  • 8. Step 1: Setting up your map (cont.) Navigate around the map using the zoom buttons at the bottom-right of the window and the hand symbol below the search bar. Alternatively, use the arrow and plus or minus keys on your keyboard to move around. If you make a mistake when editing the map just use the undo and redo keys located below the search bar.
  • 9. Step 1: Setting up your map (cont.) To finish setting up your map… 6) Click on ‘Untitled map’ to give your map a name and description. 7) Click on ‘Base map’ to choose the style you want for your map from the selection shown below. Bear in mind that the different base maps have different levels of information; for example, some do not contain details such as street names.
  • 10. Step 2: Adding markers to your map Markers like those shown on the map to the right let people know the location of key places or landmarks within an area. You could add markers to the map to highlight a range of assets within a community, from community buildings to local businesses, sports clubs to tourist attractions. When users click on markers a balloon pops up with information about the feature that the marker is highlighting. Keep on reading to find out how.
  • 11. Step 2: Adding markers to your map (cont.) There are two main methods of adding markers to your map: 1) Manually clicking to add markers You can place markers on the map one at a time using Google’s ‘Add marker’ tool. 2) Importing data from a spreadsheet If you have a spreadsheet of local places / landmarks and their postcodes then you can import these into your map, e.g. names, addresses and telephone numbers of local community groups.
  • 12. Step 2: Adding markers to your map (cont.) Manually clicking to add markers 1. If you plan to include specific details about each point you are marking on your map, such as contact details or web addresses, then it can be helpful to set it up to ask you to fill out this information each time you add a new marker. To do this click the menu button to the right of the layer name and then select ‘Open data table’. A blank data table should appear. Click the arrow symbol on the ‘name’ column and select ‘Insert column after’. In the box that appears type in the name of the variable, e.g. ‘Telephone number’ or ‘Web address’, and choose what type of data it is (text, number, date/time or true/false*). Then press ‘Add’. Repeat to add more variables if necessary. * For telephone numbers select ‘Text’ because selecting ‘Number’ cuts off the 0 at the start of phone numbers.
  • 13. Manually clicking to add markers 2. Add a marker by selecting the ‘Add marker’ button and then clicking on the map where you want the marker to be. 3. A box will appear asking you to fill out details for each of the column headings that you earlier added to the data table. Fill these out and untick any if you don’t want them to show up when someone clicks on the marker. 4. Repeat steps 2 and 3 to add as many markers as you want to this layer. If you make a mistake you can use the undo and redo buttons at the top of the page. Step 2: Adding markers to your map (cont.)
  • 14. Step 2: Adding markers to your map (cont.) Importing data from a spreadsheet 1. If your selected layer is currently empty then it gives you the option to import data from a spreadsheet into your map using the button shown on the right. 2. Select the file to upload. Make sure this spreadsheet has clear column headings and starts in the cell A1. Also make sure you have a column just for postcodes and another with whatever you want to name your markers.
  • 15. Importing data from a spreadsheet 3. You will then need to tell Google Maps which column in your spreadsheet contains the geographical location of your markers. Select the column containing postcodes and click ‘Continue’. 4. It will then ask you to choose which column contains the names of your markers. Select the correct column and click ‘Finish’. Step 2: Adding markers to your map (cont.)
  • 16. Importing data from a spreadsheet 5. Your markers will appear on the map after taking a few seconds to load. The layer will now be named after your spreadsheet – if you want to change the name of the layer click the menu button to the right of the layer name and select ‘Rename this layer’. 6. If any of the places in the spreadsheet you uploaded have the same postcode then these will overlap on your map. If this is the case then click and drag on one of the markers to move it slightly so that both markers are visible. Step 2: Adding markers to your map (cont.)
  • 17. Step 3: Adding shapes to your map You can also add shapes to your map. These can be used to mark features on the map that cover larger areas, e.g. parks or different neighbourhoods. The process is quite similar to adding markers: 1. It is best to keep all of your shapes in their own layer, so start by adding a new layer by clicking ‘Add layer’ in the box at the top-left of the window. 2. Click the ‘Draw a line’ button at the top of the page and on the drop-down menu select ‘Add line or shape’
  • 18. Step 3: Adding shapes to your map (cont.) 3. Click on the map where you want to start the shape and then keep clicking to draw it. Complete it by clicking back on the first point of the shape. 4. Complete the box asking for the details about the polygon and click ‘Save’.
  • 19. Google Maps allows you to customise your map with different coloured markers and shapes, and gives you the option to change the marker icons. 1. To change the colour or icon of a marker just hover over it in the layer box and a little icon appears to the right of the marker name. Click this and a new menu appears with a range of colours and icons to choose from. If you do this for shapes it allows you to change the fill transparency and border width as well. Step 4: Customising your map
  • 20. Step 4: Customising your map (cont.) 2. You can choose whether all items in a layer follow a uniform style, appear in sequence, each have individual styles or are styled according to a particular attribute from their data table. Just click the blue writing below the layer name and select one of the options under ‘Group places by’. 3. Clicking on the blue writing also gives you the option to change whether individual markers on the map are labelled with their marker name or other piece of information, as shown here:
  • 21. Step 4: Customising your map (cont.) 4. Before sharing the map with others it is important to give your map a name and description and to make sure all layers and markers are clearly named. To change the map title and description click on the map title in the top-left corner. To change layer names click the menu button to the right of the layer name and select ‘Rename this layer’. To edit individual markers click on them on the map and click the edit button in the bottom-right of the window that pops up.
  • 22. Step 5: Sharing your map with others 1. Before sharing your map with others you should set the default view that people will see when they load the map. To do this adjust the pan and zoom of the map so that it is as you want people to see it, click the menu button to the right of the ‘Share’ button and on the following menu click ‘Set default view’.
  • 23. Step 5: Sharing your map with others You can allow your map to be viewed by either: 1. Anyone with the link 2. The general public 3. Specified others with Google accounts Or, if you want to, you can allow your map to be edited by specific others with Google accounts.
  • 24. Step 5: Sharing your map with others (cont.) To set it up so that anyone with the link to the map can access it… 1. Click ‘Share’ just below the map name in the top-left of the page. 2. Click ‘Change…’ and in the new box that appears select ‘On – anyone with the link’. 3. Then click the link at the top of the box and it will become highlighted. Press Ctrl+C to copy the link if you want to paste it into another document or email. Alternatively you can choose to share the link via Gmail, Google+, Facebook or Twitter.
  • 25. Step 5: Sharing your map with others (cont.) To set it up so that the general public can see the map and so that it can be shared on other websites… 1. Click ‘Share’ and on the new box that appears click ‘Change…’. 2. Then select ‘On – Public on the web’. Click ‘Save’. 3. You can then copy and send the map link to anyone you want to send the map to or can share the link on Gmail, Google+, Facebook or Twitter via the buttons at the top of the box.
  • 26. Step 5: Sharing your map with others (cont.) 4. Google Maps gives you the option to embed your map onto your own website, but to do this you need to be able to access the back-end of your website. If you cannot do this then it is best to contact whoever manages your website and ask them to do it for you. By clicking the menu button next to the ‘Share’ button and then selecting ‘Embed on my site’ you can access the HTML code that can be copied and then added to your website.
  • 27. Step 5: Sharing your map with others (cont.) To allow others with Google accounts to access and/or add to the map… 1. Click ‘Share’ just below the map name in the top-left of the page. 2. Type in the Google email addresses (e.g. …@gmail.com or …@googlemail.com) of those you want to be able to edit the map and then click ‘Send’. For each one choose whether they ‘Can view’ or ‘Can edit’. 3. If you want to be the only person who can invite other people to view and edit the map then just tick the box which says ‘Prevent editors from changing access and adding new people’ at the bottom of the window
  • 28. Click the map below to see an example of the sort of map it is possible to create… Example map