
Recommended
More Related Content
What's hot
What's hot (20)
Similar to Impression errors presentation
Similar to Impression errors presentation (20)
Recently uploaded
Recently uploaded (20)
Impression errors presentation
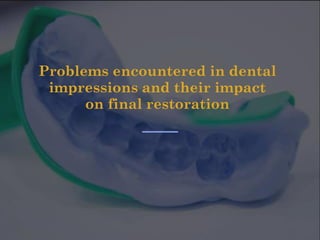
- 1. Problems encountered in dental impressions and their impact on final restoration
- 2. Introduction Prerequisites Impression material Impression techniques Impression tray Impression errors ILOs
- 3. Dental impression is defined as the negative imprint of the teeth and other parts of the oral cavity (gums, surrounding tissues, etc.) Preliminary impression: for the diagnosis, documentation of dental arches, and as a visual aid for education. Definition of Dental Impression Final impression: used to make casts and dies with the precise details of the tooth structures and their surrounding tissues. Bite registration: to document the occlusal relationship between arches.
- 4. PREREQUISITES 1- Tissue Heath – Periodontal disease must be treated and resolved before fixed prosthodontic treatment.
- 5. PREREQUISITES 2- Saliva Control – Rubber dam is probably the most effective method. – Absorbent cotton rolls. – Saliva ejector must be placed where the saliva pools.
- 6. 2- Saliva Control – Svedopter (left) and Speejector (right) saliva evacuators. – disposable Hygoformic aspirator system.
- 8. PREREQUISITES 3- Displacement of Gingival Tissues – Mechanical displacement: retraction cord. – Chemicals: aluminum sulfate or epinephrine cause localized soft tissue shrinkage. – Surgical tissue removal: curettage, excision with a scalpel, electrosurgery, or laser.
- 11. Impression Materials - Polysulfide: • Has unpleasant sulfide odor and long setting time in the mouth (about 10 minutes) . • Has better dimensional stability and tear strength and it is the least expensive elastomer . - Condensation Silicone: • is its relatively short setting time in the mouth (about 6 to 8 minutes) and it is odorless , putty wash technique is used . • Hydrophobic so the prepared teeth and gingival sulci must be completely dried , Silicone and polysulfide have a dimensional instability.
- 12. Impression Materials - Addition Silicone: • Hydrophobic • One disadvantage of some of these materials is that setting can be inhibited by latex gloves or by interim resin materials ,The problem is most apparent if a hand-mixed putty . • it has high dimensional stability , accuracy , elastic recovery . - Polyether: • Dimensional stability is excellent as there is no byproduct and its polymerization shrinkage is unusually low . • short setting time in the mouth (about 5 minutes) • The stiffness of the set material causes problems when a stone cast is separated from the impression.
- 13. Impression Techniques - Heavy-bodied–Light-bodied Combination. - Single-mix Technique. - Automix Technique. - Machine Mixing Technique. - One step Putty wash technique. - Two step Putty wash technique. - Modified one step putty wash technique. -Closed-mouth Impression Technique.
- 14. Selection of impression material ➢ Selection of impression material according to case. ➢ The best impression material for veneers , implant is polyvinyl siloxane material with Automix Technique . ➢ The best impression materials for custom made post is polyvinyl siloxane with Automix Technique. ➢ condensation silicone used with crown , bridge , implant and over denture (Putty wash technique )
- 15. Impression Trays – Prefabricated or Custom. – Autoclavable or Disposable. – Perforated or Nonperforated. – Metallic or Plastic.
- 16. Impression Errors – 1- Inadequate Marginal Detail – 2- Internal Bubbles – 3- Marginal Tears – 4- Inadequate Impression Material Mixing – 5- Inadequate Syringe Material – 6- Tray Selection – 7- Separation from the Tray – 8- Tray Distortion – 9- Surface Contamination – 10-rotation – 11-Dimensional instability due to wrong disinfection – 12-Dimensional instability due to wrong storage
- 17. 1- Inadequate Marginal Detail - Voids at the margins are the result of either insufficient retraction or fluid accumulation that prevented the impression material from flowing around the margin. – Solved by: – 1-using retraction cord with syringeable hemostatic or retraction paste that placed into gingival sulcus after preparation. – Lead to: open margin and inadequate marginal fit.
- 18. 2- Internal Bubbles – causes: occur as a result of either fluid accumulation or air entrapment. – solved : 1-flushing and drying of the preparation prior to impression taking and using hemostop . – 2-Placing a curved intraoral impression tip into the deepest part of the preparation floor , it will force air out of the preparation and decreasing entrapment. – The fit of final restoration will not be affected by air bubbles but if there is fluid voids are larger enough to affect the long term success of luting agent , The prosthetic material may also be thinner than recommended.
- 19. 3- Marginal Tears – causes: -Removal of the impression prior to complete setting of the syringeable material. – Inadequate mix. – using a syringeable PVS in a thin deep sulcus. – solved by: 1-any remnants of the original impression material must be removed from the sulcus. – 2-using more viscous syringeable material – 3-using retraction cord or retraction paste. – Retake impression
- 20. 4-Streaking – Causes:1- improper amounts of base and catalyst – 2-Glove contamination – 3-Inadequate mixing – more common with hand mixed putty materials. – Lead to: streaking in impression
- 21. 5- Inadequate Syringe Material – A “stepped” impression may result when using a two-phase impression technique. – This can be avoided by filling the entire set tray material where the teeth depressions are with syringeable material, to provide a uniform impression. – The result is restorations that require excessive occlusal adjustments.
- 22. 6- Tray Selection – Cause: – A tray that is too narrow may prevent adequate seating of the tray – solved by: – make sure that tray cover all surfaces of teeth. – it’s important to select a tray that is long enough to capture the entire arch from the hamular notches or retromolar pads to the most anterior aspect of the buccal vestibule. - the width of the selected tray is also important – lead to missing of needed arch detail.
- 23. 7- Separation from the Tray – Cause: – This deformity may be overlooked when using trays with slots and holes to lock the impression material. – Solve by: – Tray adhesive should be used with all impressions to help eliminate impression separation from the tray. – Retake impression
- 24. 8- Tray Distortion – is more common with dual arch trays due to their more flex – Solved by: – Two-phase impressions can be used to create a custom format using the triple tray. The preliminary impression creates a rigid base that will provide hydraulic pressure to force the syringeable material in and around the preparations.
- 25. 9- Surface Contamination Causes : – 1-leaving remnant of material on tooth surface as composite - or remnant of temporary crown material . – 2- presence of some blood on tooth after preparation . – solved by : – 1-rinse the prepared are with water well and remove any remnants then dry well all surfaces of teeth . – 2-use hemostatic agents to stop bleeding then dry well . – 3-Disinfection of impression by Immersion of the impression in common disinfecting solutions (e.g., phenols and glutaraldehyde) for periods of up to 60 minutes
- 26. 10-Rotation – Cause : – Lack of adhesive or wrong application of tray in mouth . – Lead to inaccurate seating of the tray.
- 27. 11-Dimensional instability due to wrong disinfection – Disinfection does not affect the accuracy or surface reproduction of the elastomer. – Suitable chemicals should be used for disinfection, such as glutaraldehyde solutions not less than 30 min. – polyether or “hydrophilic”addition silicone impression materials should be sprayed and stored in a plastic bag rather than submerged and soaked in a glutaraldehyde solution Because of its tendency to distort and absorb moisture.
- 28. 12-Dimensional instability due to wrong storage FOR (POLYSULFIDE- CONDENSATION SILICONE POLYMERIZATION REACTION OF ELASTOMERS NEVER COMPLETE IT CONTINUE AT LEAST TO 24 H AFTER CLINICAL SET THIS MEANS MORE SHRINKAGE WILL OCCUR. – POLYETHER- ADDITIONAL SILICONE )IMMEDIATE POURING IS RECOMMENDED AFTER THE GRADUAL RECOVERY WITHIN 1 HOUR.
- 29. REFERENCES – Contemporary Fixed Prosthodontics (5th edition). – Kurtzman, G., Mahesh, L., & Strassler, H. E. (2012). Dental Impressions: Identification and Correction of Common Problems. Indian J Dent Res, 1(1), 13-17. [cited 2020May2]. Available from: http://jrdindia.org/ver2/app/upload/Review Article.pdf – [cited 2020May2]. Available from: https://www.slideshare.net/talibamin5/modified-one- step-putty-wash-technique – [cited 2020May2]. Available from: https://www.ultradent.com/products/categories/retra ction
- 30. “Whatever you do, do it well” Walt Disney Thank you