SlideShare a Scribd company logo
1 of 41
Download to read offline
Shopify.com
How To Open a Drop Shipping Store
with Shopify.com in 10 Steps
Do you want to build a professional looking, fully functional drop shipping site in under a
day, and for less than $65? I did this despite having absolutely no prior experience building
websites. In this article, I’ll show you the 10 Steps I used to Open a Drop Shipping Store with
Shopify.
By the time you finish this article, you’ll have your drop shipping site up and running.
How Long Will This Take: 1 Day
First Month’s Costs: $63 ($13 per year for web domain, $29 per month for Shopify, $21
for my logo via Fiverr)
In my last article, 10 Steps to Starting a Drop Shipping Business, I showed you how to pick a
niche, identify your competitors, and find top tier suppliers. Once you’ve done that, you’re
ready to open a drop shipping store.
Follow along, step by step. You’ll want to identify a niche, competitors, and suppliers
beforehand. For more on this process, see our guide on How to Start a Drop Shipping
Service.
1-Register with Shopify
2-Buy Web Domain
3-Set Up Email Forwarding
4-Choose a Theme for Your Shopify Store
5-Add Must Have Pages for Drop Shipping
6-Add Products and Brand Collections
7-Revisit Theme Customization
8-Add a Shopify Customer Review App
9-Pick the Best Shopify Plan
10-Finalize Your Settings
Step 1: Register with Shopify.com
First, visit Shopify.com and get started with a free 14-day trial. Click the “Start your free
trial” tab and fill out the information in the below window:
If the store name is already taken, Shopify won’t allow you to move forward. That’s why
it’s a good idea to have a list of top 5 store names before registering for your free trial.
(Need help coming up with a name? See our list of top 25 tips from the Pros here)
After entering your name and basic contact info you’ll be prompted to enter some
information about what stage your business is in. Shopify.com is brand new, so I select the
corresponding drop down tabs.
From there you’ll be taken to your administrator page which will look like this:
If you scroll down, you’ll see the heading “Where would you like to start selling?.” Beneath
that you’ll see a button to the right that says “Add Online Store.
My drop shipping business will only be making sales through its online store so this is all I
need to focus on (Want to see shopify’s offline capabilities? Go here.) Clicking on “Add
Online Store” will take me back to my home admin page but with a key difference: I now
have a tab on the left menu section that says “Online Store.”
Step 2: Buy Your Web Domain
At this point I recommend buying your web domain. You could wait, but why run the risk of
someone else buying the domain before you? Plus, at $13.00 per year, this is a no brainer.
If choose not to buy a domain, your URL will look like this:
“YourStandingDesk.myshopify.com.” The store will be functional but the URL will not look
professional. A legitimate business has it’s own web domain – customers and suppliers
know and expect this.
To buy your domain name, click on “Online Store” then “Domains” and then, in the upper
right hand corner, click “Buy new Domain.” This will take you here:
In this case, I want the the web domain www.yourstandingdesk.com so I would type in
shopify.com and then click “Check Availability.” Shopify will then inform you whether the
URL is available or not. (Tip: you can easily check available domains at GoDaddy ahead of
time.) If it is available, you’ll be given the opportunity to enter your billing information to
buy the domain
Once you purchase your domain, you’ll be directed to a page asking if you want to redirect
all traffic to this new domain. In this case, I do. I select “yourstandingdeck.com” and hit
save.
You’ll also receive an email from Shopify.com asking you to verify your domain purchase.
Make sure you do so or your domain will eventually be suspended. This detail is easy to
overlook, so do it now while it’s fresh in your mind.
Step 3: Set Up Email Forwarding
Now that you have purchased and verified your domain, another important but easy to
overlook step is to set up email forwarding for your store.
In the “Online Store” menu, click “Domains” and you’ll see the heading “Manage Domains”
Select the web domain you just purchased. In this case, I would select
“yourstandingdesk.com” which directs you to a page that has the heading “Email
Forwarding.”
Email forwarding means that if a customer or supplier emails me at
info@yourstandingdesk.com the email is automatically forwarded to another email address
of my choosing. Shopify.com automatically populates the email forwarding with the email
address you used to first register with Shopify.com . If you want to change what email
address is used for forwarding, you can do so at this point.
Shopify automatically sets up two email forwarding addresses info@ and sales@. I
recommend setting up one more for your drop shipping site: customerservice@. As you’ll
recall from my last article, when suppliers and customers visit your site, they want to see
that they can easily reach your customer service team (even if that’s just you). With this in
mind, I immediately set up customerservice@yourstandingdesk.com.
Important: Shopify.com email forwarding allows people to reach you by using an
account with your domain in it. But because it’s not actually hosting email for you, when you
reply to the email it will come from whatever account the email was forwarded to. Read our
article on free business email hosting with Zoho.
Now that you have purchased your domain name and set up email forwarding, it’s time to
pick a Shopify theme (look and layout) for your store.
Step 4: Choose a Theme for Your Shopify
Store
Shopify makes building a great looking desktop and mobile compatible site easy. Shopify’s
platform is the foundation on which you’re building your drop shipping store. Everything
else you build and add on afterward will be built on it. If Shopify is the foundation, think of
the theme as the framing. This will give your store it’s basic structure and layout.
From “Online Store” click on the “Themes” tab. Next, in the upper right hand corner you’ll
see a button that says “Visit Theme Store.” Click on that tab and another window/tab will
open up with Shopify’s theme store.
Once there, you’ll see that Shopify has many great looking themes for you to choose from.
Shopify offers both free and premium (paid) themes. Paid themes cost on about $150.00.
Shopify allows you to search their themes by price, most popular, and even industry-
specific.
I want a free theme that’s well suited for a furniture store. I find two right away. By clicking
“View Demo” I can see the various pages and feature the themes have to offer.
I decide to select a theme called “Supply.”
You can click all around the site on the theme demos. You can even select items to add to
your cart. Doing this will give you a good sense of the entire customer experience.
Once you have found the perfect Shopify theme, select “Install Theme.” You’ll be asked
whether you want publish as your shop’s theme or install as an unpublished theme. If you
choose to publish, your store’s theme will update right away. If you opt for an unpublished
theme it will not impact your published/visible store.
Since YourStandingDesk doesn’t currently have a theme I am opting to publish the “Supply”
theme right away.
After a quick download my theme is live and ready to be customized. When I go to the
“Theme” tab I can see my Theme has updated to “Supply.”
Now it’s time to customize the theme so that it stands out from the crowd and fits your
niche. If I click “Customize Theme” in the upper right hand corner I am directed to a page
that allows me to edit the various aspects of the theme:
From here, I am able to change the colors and fonts of the site. I can also change what
products and collections (explained later) are being displayed on various pages. I am not
that far along yet, but I will be soon.
Even a free theme can be customized in a ton of ways. Getting things just the way you like
them will take some time, but I recommend making a few quick changes just to get a sense
of what is possible. But don’t get bogged down. There’s still a lot to do in order to get your
store ready to show suppliers.
WARNING: Don’t spend hours making minor adjustments yet. You will make lots of major
additions like new pages, product listings, reviews, etc. These major additions will impact all
the minor cosmetic choices you make.
Step 5: Add Must Have Pages for Drop
Shipping
Your Shopify theme will come preloaded with some basic pages that all stores typically
have. But Shopify doesn’t know you want to build a drop shipping store that will wow your
customers and impress your suppliers. So you’ll have to add the “Must Have” pages we
discussed before.
These are:
Homepage
About Us
Product Page
Shipping
Returns
Contact Us
Learn more about what each page should contain in our Ultimate Guide to Drop Shipping.
Luckily, Shopify makes adding and editing pages easy..
From “Online Store,” select the “Pages” tab. You’ll be directed to a page that looks like this:
Right now you just have an “About Us” page and a “Home Page”. The first one I want to
work on is the “About Us” page. Shopify offers some helpful bullet points to keep you on
track, but I also add specifics that I think will speak to the customers and suppliers in my
niche.
Once you’ve got all the info you want in your About Us page, click on the “Preview” button
in the top right corner to see what the page will actually look like.
Want to see my About Us page: https://www.shopify.com/?ref=tuphan143
If you’re happy with what you saw after previewing the page, hit “Save.” Then get started
on your other Must Have pages: Contact Us, Shipping, and Return Policies.
For each page that I want to add I simply hit the “Add Page” button in the top right corner of
the page. After that it’s the same as before.
Adding images and video to a page is easy. For example, I decided I wanted to include a map
of the US on my Shipping page. After a quick Google Image search I find a map I like. I copy
the image and paste it in page. It’s that easy.
To make sure everything looks the way I expect it to, again, I click Preview.
I think this look okay for right now. Again, you might want to make changes to certain
details in the future. But don’t get bogged down in minutia right now. Once the site is built
out you can come back a tweak images, wording, and page layout. In fact, that will be an
important part of continually optimizing your site for customer conversion. For now, you
want to get all your store’s Must Have pages up.
Once you have your Must Have pages drafted, go to “Online Store” and “Navigation” and
make sure the pages you added will show up on your Home Page menu.
TIP: In the upper right corner there is a “Visibility” button that allows your changes to be
instant (meaning they will immediately appear on your store) or scheduled (meaning they
will appear on your page at a scheduled time). This will allow you to update all your pages
simultaneously.
Step 6: Add Products and Brand Collections
This is where Shopify really gets exciting! Until now, this experience has not been much
different from any free website or blog. By adding products all of Shopify’s awesome
ecommerce capabilities get to come out and play!
Add Your First Product
At this point I have all of my essential pages except for samples of Products and Brands.
Putting these on the site will be different than the pages we’ve added so far. We’re going to
move away from “Online Store” on the main menu and move up to the “Products” tab.
Once there, click on the “Add Product” button in the middle of the page. You’ll then be
taken to a page where you can add all the detail about your first product!
For this article, I will continue to work with the Luxor 60″ Crank Adjustable Standing Desk
that I had identified in my last article as a good product from a good supplier in my ultimate
guide to drop shipping.
The information and photos I will be using are coming straight from my supplier’s website.
Most suppliers will have lots of information on their site, like product descriptions, product
specs, photos, and maybe some pamphlets or sales materials. Suppliers want their partners
to have everything they need to sell their products and build their brands. So don’t hesitate
to use their site as a resource. (Want help finding suppliers? Go here)
First, I enter in the name, product description, and all the specs of my product. Then I type
in the information in the “Organization” tab on the right side of the page. By filling out the
“Organization” info, Shopify will automatically group things together making easier for your
customers to find the products they want.
Product Organization:
Product Type: allows you to group by type of products, (i.e. standing desk, adjustable height
desks, etc.).
Vendor: allows you to group by brand.
Collections: add a product to specially curated grouping (i.e. “Desks for Execs”)
Tags: make all aspects of a product searchable (i.e. height, material, mobile, etc)
Scrolling down the page I can upload photos (again, taken from my supplier’s site) and set
my price.
For price, I’m entering what my research revealed to be the lowest allowable price
according to my supplier’s MAP policy which appears to be $350 (don’t know what a MAP
policy is? Go here). I also enter in the most common “list price” that I saw in my research so
my customer’s can see what a deal I am offering, $665. If I need to adjust this later, I can.
By listing it now a supplier can see that my prices are in line with their expectations. Notice
that I have also clicked the box has Shopify automatically charge taxes on this product.
If I scroll down a little further I get an option to track inventory, shipping weight, and
variants. Since drop shippers including myself do not carrying our own inventory it won’t
make sense to have Shopify track this.
Next you have the option to input shipping weight. Some sellers charge a specific rate by
the pound which is why this is here. With drop shipping your shipping rate depends on your
supplier, so you can leave this blank.
However, I will add my product variations at this point. Variants allow me to list all the
versions of the same product. Adding variations is easy to do and makes for a much better
shopping experience for the customer .For example, if my desk comes with different colors ,
finishes, or materials, I could enter them here and the Customer could then select the exact
version they want to purchase.
Once I hit “Save” my product page is ready to be viewed.
Add Collections with Automatic Conditions
Shopify gives you the ability to group any of your products together in a “Collection.” I can
group products by color, or brand, specific feature, or even by a theme, like “Modern
Office.” Collections make it easier for customers to find what they’re looking for.
For example, YourStandingDesk.com has a Collection called “Electric Adjustable Height
Desk.” Customers know exactly what they’ll find in that collection. You can see it yourself at
this URL: shopify.com
Since I plan on selling a number of Luxor’s standing desks on my site, I am going to devote
collections to their brand. From the “Products” dashboard I click the “Collections” tab which
will pull up an unpopulated page for me to fill in. I populate the page with basic information
about brand using material from the supplier’s site.
Next, I have the option of manually selecting products to add to the collection or
automatically adding products to the collection based on conditions I set.
When you’re starting out with your first one or two products, it might seem easier to
manually add each product to a “Collection.” But remember, you’re hoping to fill your store
up with lots of products. Taking a little time now to get products automatically added to a
collection will save you a lot of time in the end.
When you set up automatic conditions for the Collections, any product that meets those
conditions get added. Once you do that, you can go into any product listing and you’ll see
this:
Now you’ll save time with every product you add. Plus, this works retroactively, too. So if
you think of a new collection you want to group together, for example “Desks Under $500,”
you can set up the conditions and Shopify.com will add every desk under $500 to that
collection.
Don’t Start Similar Products from Scratch – Duplicate and Edit
When adding a product that is very similar to a product that already exists in your store,
rather than starting the product page from scratch, pull up the existing product and hit the
duplicate button in the top right corner.
When you click duplicate you see this
Click duplicate again and you have an exact copy of the title, description, images, tags, etc.
Why is this such a powerful tool?
Because when I wanted to list a 48″ Crank Adjustable Standing Desk I simply duplicated my
60″ Crank Adjustable Standing Desk, adjusted the dimension, pricing, and one picture and I
was done. I had a new product listed in no time!
Before you know it, you’ll have listed all the products a Supplier offers in your Niche!
Here’s what it looks like on the site:
Step 7: Revisit Theme Customization
At this point I have all my “must have” drop shipping pages up and a supplier’s full line of
products in my niche listed. Now I want to go back to the “Online Store” section of the site
to revisit the “Theme” tab where I am able to select “Customize Your Theme.”
When I was last here I had zero content on my site. It was very difficult to tell how anything
would end up looking. Since then I have added pages, filled those pages with content, and I
have complete product listings. It will be much easier to see how the pages will look overall.
One of the things I liked about my theme, “Supply,” was that it had a slideshow on the
homepage. Now that I have product listings I can go back and fill in the slideshow with
pictures of specific products and the corresponding URL to my site’s product page.
If someone visits shopify.com and sees a picture of a desk they like, they can click on that
picture and my site will redirect them to the page where they can buy that desk. In no time
at all my drop shipping store is looking and behaving like the websites I visit every day.
I also recommend going to the Social Media tab and entering your social media accounts.
This is an easy way to stay in touch with your customers. Once your accounts are listed,
Shopify will link all the social media icons on your site to your pages.
I don’t have followers yet, but I want to be ready for them. I also want to show suppliers I
know that engaging with customers on social media is an important way to build their brand
and sell their products. It takes just a few minutes to open an account for your business at
the top social media sites and it’s completely free.
Again, you don’t want to get bogged down in the details of those profiles yet. You can come
back to this later and read our Guide to Setting Up Facebook and Twitter’s Setup Page. For
now, you just want to have the accounts linked to your Shopify store so that customers and
suppliers can engage with you wherever they spend their time online.
TIP: Later, you’ll be able to sell directly on these social media platforms by going to Settings
and selecting Sales Channels (Shopify explains how these work: Pinterest, Facebook, and
Twitter):
While staying within “Customize Your Theme” menu, click on the “Products Page” tab which
is center right. Clicking this will let you change what is displayed on the product listing page.
I enabled the “image zoom” and “compare at” feature because they were features I had
remembered thinking worked well on competitor sites. You also want to enable product
reviews.
To do this, you’ll need to add a Shopify App.
Step 8: Add Shopify’s Free Customer Review
App
Shopify has a robust App Store. Apps are add-ons and plug-ins that add additional features
and capabilities to your Shopify Store. Some of the apps are free but others cost money. The
apps can help with everything from pop-up offers to accounting and analytics.
The customer review app that I want to add is free and once installed will allow my site to
collect customer reviews. Those reviews will help persuade other visitors to buy my
products:
Adding an app to your shopify store is a little harder than adding an app to your phone. But
not that much harder. Follow the links to download the app and you’ll eventually be taken
back to your own store to confirm that you want to install this app in your store. Click
“Install App.” You’ll then see this:
Instructions to add the review app to your site come with four easy steps to follow.
First I copy the code to my clipboard by clicking the link they tell me to click. Easy! Then I go
to Step two which tells me to open my templates/product .liquid file. Now, I don’t know
what that is, but again, they provide me a link which I can click on and it instantly opens the
page I need.
I don’t know a lick of coding at this point my eye briefly cross. But only briefly! Because the
second part of Step 2 tells me exactly what I am looking for. So I hit “ctrl-f” (find) and type in
“product. description” and I am taken right there. Once there I paste the line of code I
copied earlier right below. Then I click “Save.” Easy!
Step 3 for the App says it is optional. I think about calling things good enough until I see that
Step 3 is going to add the Stars feature.
What good is a review if it can’t be summarized by celestial bodies?!
So I click “View Instructions” and there’s another snippet of code (with a copy link) and
another page I have to go to so I can add the code (again, with a link). It’s no more
complicated than what I just did and Shopify is practically holding my hand through the
entire process.
Follow the links just like last time and install the line of code. I click “Save.” Easy!
Now when I go to a product page on my site, I see at this at the bottom of the page:
Also, if you go back to your main Shopify dashboard and click on Apps, you should see that
you have one installed app:
It’s the Shopify Product Reviews App that I just installed. If I click that app logo it will take
me to that app’s page within my site and I can click “Settings” which is in the upper right
hand corner. That takes me the app’s control panel. It is here that I can control whether
reviews are published automatically or whether they need my approval first. I can also
select to get email notifications any time a review comes in. I can even decide what fields
(i.e. Name, Email Address, etc) are required to submit a review.
At this point your Shopify store is set up and ready sell products (as soon as your suppliers
approve you and you get the drop shipping agreements signed). There’s just one last thing
we need to do: pick a Shopify plan.
Step 9: Pick Your Shopify Plan
Shopify’s free 14-day trial is a great deal. It allows you to familiarize yourself with their
product and build out your store all for free. But at this point, you’re ready to get in the
game! So let’s go through Shopify’s plans so you can find the one that best suits your needs.
First, a couple things to keep in mind when picking a plan:
Contracts are month to month unless you sign up for an annual or biennial plan.
Annual contracts get a 10% discount on plan rates and Biennial contracts get 20%.
You can upgrade or downgrade your plan any time.
You can cancel any time.
Shopify offers four plans for Dropshippers to choose from: Starter, Basic, Pro, and
Unlimited.
From your Shopify dashboard yo’ll see that Shopify offers your four plan options. Want to go
in depth? Read my Ultimate Shopify Pricing Guide. For now, let me give you the basics and
make my recommendation.
Starter Plan: $14 per month; store is limited to 25 products; no phone support.
Basic Plan: $29 per month; unlimited products, 24/7 support, sell on social media.
Professional Plan: $79 per month; all of Basic plus gift cards, cart recovery, and better
reporting; lower credit card processing rates.
Unlimited Plan: $179 per month; all of Professional plus enhanced reporting and shipping;
even lower credit card processing rates.
I recommend the Basic Plan for brand new drop shipping businesses. I want to list many
products and have tech support, so Starter is not a good option. But all the bells and
whistles offered by Professional and Unlimited don’t do me much good until I have traffic
and am making sales.
When I select the Basic Plan I am shown my billing options:
I have decided that a monthly payment of $29 is the best fit for me right now. Once I have
drop shipping agreements with Suppliers I will look to prepay Shopify for a year or two in
order to realize additional savings for my business.
TIP:On all essential services like Shopify, phone and internet, etc. I will set up automatic
charges to a rewards credit card so that I never experience a disruption to an essential part
of my business due to a billing issue. Plus I will earn rewards and build my business credit
score.
Step 10: Finalize Your Shopify Settings
The last step is to finalize your settings. Go back to your main Shopify dashboard and select
“Settings.” Double check the information in each tab.
I would start by going to Online Store. This section has Title and Meta Description which
define how your site appears in search results:
You can read more about that with Moz.com. It also has a section to integrate Google
Analytics which will allow you to track your customers optimize your marketing efforts. You
can create a Google Analytics account for free. You can read more about that here.
This tab also has the storefront password protection setting. By password protecting your
storefront, you must enter a password before entering the site. This means that customers
can’t accidentally try to purchase products before you have suppliers’ permission. At the
same time, suppliers have a way of logging into and reviewing your site.
It’s critical that you visit the “Payments” tab as well. This information must be filled out in
order for customers to pay you. You can use PayPal or your business’s bank account.
We recommend Bank of America for small business checking.
When you select “Complete Shopify Payments Account Setup” you’ll be asked for you and
your business’s information: official name and address, how your business is structured, EIN,
and bank account information, etc. (Haven’t registered your business yet? See our guide for
drop shippers.) Go to Once you have this information logged in, you’re ready accept
payments from customers.
Summary:
 Your drop shipping business now has a functioning Shopify store. There will always
be things you can do to improve your site. In future articles I’ll discuss ways to
optimize conversion rates and automate or outsource as much as possible. For now,
the only thing left to do is to finalize agreements with your supplier partners, start
generating traffic to your site, and make your first sale. For those of you who want to
continue to build your site, check out Shopify’s guides or familiarize yourself with
Shopify’s drop shipping forum.

More Related Content

Recently uploaded

Call Girls In Sukhdev Vihar Delhi 💯Call Us 🔝8264348440🔝
Call Girls In Sukhdev Vihar Delhi 💯Call Us 🔝8264348440🔝Call Girls In Sukhdev Vihar Delhi 💯Call Us 🔝8264348440🔝
Call Girls In Sukhdev Vihar Delhi 💯Call Us 🔝8264348440🔝
soniya singh
 
Delhi Call Girls Rohini 9711199171 ☎✔👌✔ Whatsapp Hard And Sexy Vip Call
Delhi Call Girls Rohini 9711199171 ☎✔👌✔ Whatsapp Hard And Sexy Vip CallDelhi Call Girls Rohini 9711199171 ☎✔👌✔ Whatsapp Hard And Sexy Vip Call
Delhi Call Girls Rohini 9711199171 ☎✔👌✔ Whatsapp Hard And Sexy Vip Call
shivangimorya083
 
Lucknow ❤CALL GIRL 88759*99948 ❤CALL GIRLS IN Lucknow ESCORT SERVICE❤CALL GIRL
Lucknow ❤CALL GIRL 88759*99948 ❤CALL GIRLS IN Lucknow ESCORT SERVICE❤CALL GIRLLucknow ❤CALL GIRL 88759*99948 ❤CALL GIRLS IN Lucknow ESCORT SERVICE❤CALL GIRL
Lucknow ❤CALL GIRL 88759*99948 ❤CALL GIRLS IN Lucknow ESCORT SERVICE❤CALL GIRL
imonikaupta
 
CALL ON ➥8923113531 🔝Call Girls Lucknow Lucknow best sexual service Online
CALL ON ➥8923113531 🔝Call Girls Lucknow Lucknow best sexual service OnlineCALL ON ➥8923113531 🔝Call Girls Lucknow Lucknow best sexual service Online
CALL ON ➥8923113531 🔝Call Girls Lucknow Lucknow best sexual service Online
anilsa9823
 
Rohini Sector 26 Call Girls Delhi 9999965857 @Sabina Saikh No Advance
Rohini Sector 26 Call Girls Delhi 9999965857 @Sabina Saikh No AdvanceRohini Sector 26 Call Girls Delhi 9999965857 @Sabina Saikh No Advance
Rohini Sector 26 Call Girls Delhi 9999965857 @Sabina Saikh No Advance
Call Girls In Delhi Whatsup 9873940964 Enjoy Unlimited Pleasure
 
₹5.5k {Cash Payment}New Friends Colony Call Girls In [Delhi NIHARIKA] 🔝|97111...
₹5.5k {Cash Payment}New Friends Colony Call Girls In [Delhi NIHARIKA] 🔝|97111...₹5.5k {Cash Payment}New Friends Colony Call Girls In [Delhi NIHARIKA] 🔝|97111...
₹5.5k {Cash Payment}New Friends Colony Call Girls In [Delhi NIHARIKA] 🔝|97111...
Diya Sharma
 
Call Girls In Saket Delhi 💯Call Us 🔝8264348440🔝
Call Girls In Saket Delhi 💯Call Us 🔝8264348440🔝Call Girls In Saket Delhi 💯Call Us 🔝8264348440🔝
Call Girls In Saket Delhi 💯Call Us 🔝8264348440🔝
soniya singh
 
Call Girls In Ashram Chowk Delhi 💯Call Us 🔝8264348440🔝
Call Girls In Ashram Chowk Delhi 💯Call Us 🔝8264348440🔝Call Girls In Ashram Chowk Delhi 💯Call Us 🔝8264348440🔝
Call Girls In Ashram Chowk Delhi 💯Call Us 🔝8264348440🔝
soniya singh
 

Recently uploaded (20)

INDIVIDUAL ASSIGNMENT #3 CBG, PRESENTATION.
INDIVIDUAL ASSIGNMENT #3 CBG, PRESENTATION.INDIVIDUAL ASSIGNMENT #3 CBG, PRESENTATION.
INDIVIDUAL ASSIGNMENT #3 CBG, PRESENTATION.
 
VVVIP Call Girls In Connaught Place ➡️ Delhi ➡️ 9999965857 🚀 No Advance 24HRS...
VVVIP Call Girls In Connaught Place ➡️ Delhi ➡️ 9999965857 🚀 No Advance 24HRS...VVVIP Call Girls In Connaught Place ➡️ Delhi ➡️ 9999965857 🚀 No Advance 24HRS...
VVVIP Call Girls In Connaught Place ➡️ Delhi ➡️ 9999965857 🚀 No Advance 24HRS...
 
Call Girls In Sukhdev Vihar Delhi 💯Call Us 🔝8264348440🔝
Call Girls In Sukhdev Vihar Delhi 💯Call Us 🔝8264348440🔝Call Girls In Sukhdev Vihar Delhi 💯Call Us 🔝8264348440🔝
Call Girls In Sukhdev Vihar Delhi 💯Call Us 🔝8264348440🔝
 
Hot Call Girls |Delhi |Hauz Khas ☎ 9711199171 Book Your One night Stand
Hot Call Girls |Delhi |Hauz Khas ☎ 9711199171 Book Your One night StandHot Call Girls |Delhi |Hauz Khas ☎ 9711199171 Book Your One night Stand
Hot Call Girls |Delhi |Hauz Khas ☎ 9711199171 Book Your One night Stand
 
Call Now ☎ 8264348440 !! Call Girls in Shahpur Jat Escort Service Delhi N.C.R.
Call Now ☎ 8264348440 !! Call Girls in Shahpur Jat Escort Service Delhi N.C.R.Call Now ☎ 8264348440 !! Call Girls in Shahpur Jat Escort Service Delhi N.C.R.
Call Now ☎ 8264348440 !! Call Girls in Shahpur Jat Escort Service Delhi N.C.R.
 
Delhi Call Girls Rohini 9711199171 ☎✔👌✔ Whatsapp Hard And Sexy Vip Call
Delhi Call Girls Rohini 9711199171 ☎✔👌✔ Whatsapp Hard And Sexy Vip CallDelhi Call Girls Rohini 9711199171 ☎✔👌✔ Whatsapp Hard And Sexy Vip Call
Delhi Call Girls Rohini 9711199171 ☎✔👌✔ Whatsapp Hard And Sexy Vip Call
 
Lucknow ❤CALL GIRL 88759*99948 ❤CALL GIRLS IN Lucknow ESCORT SERVICE❤CALL GIRL
Lucknow ❤CALL GIRL 88759*99948 ❤CALL GIRLS IN Lucknow ESCORT SERVICE❤CALL GIRLLucknow ❤CALL GIRL 88759*99948 ❤CALL GIRLS IN Lucknow ESCORT SERVICE❤CALL GIRL
Lucknow ❤CALL GIRL 88759*99948 ❤CALL GIRLS IN Lucknow ESCORT SERVICE❤CALL GIRL
 
DDoS In Oceania and the Pacific, presented by Dave Phelan at NZNOG 2024
DDoS In Oceania and the Pacific, presented by Dave Phelan at NZNOG 2024DDoS In Oceania and the Pacific, presented by Dave Phelan at NZNOG 2024
DDoS In Oceania and the Pacific, presented by Dave Phelan at NZNOG 2024
 
Russian Call girl in Ajman +971563133746 Ajman Call girl Service
Russian Call girl in Ajman +971563133746 Ajman Call girl ServiceRussian Call girl in Ajman +971563133746 Ajman Call girl Service
Russian Call girl in Ajman +971563133746 Ajman Call girl Service
 
CALL ON ➥8923113531 🔝Call Girls Lucknow Lucknow best sexual service Online
CALL ON ➥8923113531 🔝Call Girls Lucknow Lucknow best sexual service OnlineCALL ON ➥8923113531 🔝Call Girls Lucknow Lucknow best sexual service Online
CALL ON ➥8923113531 🔝Call Girls Lucknow Lucknow best sexual service Online
 
Rohini Sector 26 Call Girls Delhi 9999965857 @Sabina Saikh No Advance
Rohini Sector 26 Call Girls Delhi 9999965857 @Sabina Saikh No AdvanceRohini Sector 26 Call Girls Delhi 9999965857 @Sabina Saikh No Advance
Rohini Sector 26 Call Girls Delhi 9999965857 @Sabina Saikh No Advance
 
𓀤Call On 7877925207 𓀤 Ahmedguda Call Girls Hot Model With Sexy Bhabi Ready Fo...
𓀤Call On 7877925207 𓀤 Ahmedguda Call Girls Hot Model With Sexy Bhabi Ready Fo...𓀤Call On 7877925207 𓀤 Ahmedguda Call Girls Hot Model With Sexy Bhabi Ready Fo...
𓀤Call On 7877925207 𓀤 Ahmedguda Call Girls Hot Model With Sexy Bhabi Ready Fo...
 
₹5.5k {Cash Payment}New Friends Colony Call Girls In [Delhi NIHARIKA] 🔝|97111...
₹5.5k {Cash Payment}New Friends Colony Call Girls In [Delhi NIHARIKA] 🔝|97111...₹5.5k {Cash Payment}New Friends Colony Call Girls In [Delhi NIHARIKA] 🔝|97111...
₹5.5k {Cash Payment}New Friends Colony Call Girls In [Delhi NIHARIKA] 🔝|97111...
 
Call Girls In Saket Delhi 💯Call Us 🔝8264348440🔝
Call Girls In Saket Delhi 💯Call Us 🔝8264348440🔝Call Girls In Saket Delhi 💯Call Us 🔝8264348440🔝
Call Girls In Saket Delhi 💯Call Us 🔝8264348440🔝
 
Call Girls Ludhiana Just Call 98765-12871 Top Class Call Girl Service Available
Call Girls Ludhiana Just Call 98765-12871 Top Class Call Girl Service AvailableCall Girls Ludhiana Just Call 98765-12871 Top Class Call Girl Service Available
Call Girls Ludhiana Just Call 98765-12871 Top Class Call Girl Service Available
 
✂️ 👅 Independent Andheri Escorts With Room Vashi Call Girls 💃 9004004663
✂️ 👅 Independent Andheri Escorts With Room Vashi Call Girls 💃 9004004663✂️ 👅 Independent Andheri Escorts With Room Vashi Call Girls 💃 9004004663
✂️ 👅 Independent Andheri Escorts With Room Vashi Call Girls 💃 9004004663
 
Call Now ☎ 8264348440 !! Call Girls in Green Park Escort Service Delhi N.C.R.
Call Now ☎ 8264348440 !! Call Girls in Green Park Escort Service Delhi N.C.R.Call Now ☎ 8264348440 !! Call Girls in Green Park Escort Service Delhi N.C.R.
Call Now ☎ 8264348440 !! Call Girls in Green Park Escort Service Delhi N.C.R.
 
(+971568250507 ))# Young Call Girls in Ajman By Pakistani Call Girls in ...
(+971568250507  ))#  Young Call Girls  in Ajman  By Pakistani Call Girls  in ...(+971568250507  ))#  Young Call Girls  in Ajman  By Pakistani Call Girls  in ...
(+971568250507 ))# Young Call Girls in Ajman By Pakistani Call Girls in ...
 
All Time Service Available Call Girls Mg Road 👌 ⏭️ 6378878445
All Time Service Available Call Girls Mg Road 👌 ⏭️ 6378878445All Time Service Available Call Girls Mg Road 👌 ⏭️ 6378878445
All Time Service Available Call Girls Mg Road 👌 ⏭️ 6378878445
 
Call Girls In Ashram Chowk Delhi 💯Call Us 🔝8264348440🔝
Call Girls In Ashram Chowk Delhi 💯Call Us 🔝8264348440🔝Call Girls In Ashram Chowk Delhi 💯Call Us 🔝8264348440🔝
Call Girls In Ashram Chowk Delhi 💯Call Us 🔝8264348440🔝
 

Featured

How Race, Age and Gender Shape Attitudes Towards Mental Health
How Race, Age and Gender Shape Attitudes Towards Mental HealthHow Race, Age and Gender Shape Attitudes Towards Mental Health
How Race, Age and Gender Shape Attitudes Towards Mental Health
ThinkNow
 
Social Media Marketing Trends 2024 // The Global Indie Insights
Social Media Marketing Trends 2024 // The Global Indie InsightsSocial Media Marketing Trends 2024 // The Global Indie Insights
Social Media Marketing Trends 2024 // The Global Indie Insights
Kurio // The Social Media Age(ncy)
 

Featured (20)

How Race, Age and Gender Shape Attitudes Towards Mental Health
How Race, Age and Gender Shape Attitudes Towards Mental HealthHow Race, Age and Gender Shape Attitudes Towards Mental Health
How Race, Age and Gender Shape Attitudes Towards Mental Health
 
AI Trends in Creative Operations 2024 by Artwork Flow.pdf
AI Trends in Creative Operations 2024 by Artwork Flow.pdfAI Trends in Creative Operations 2024 by Artwork Flow.pdf
AI Trends in Creative Operations 2024 by Artwork Flow.pdf
 
Skeleton Culture Code
Skeleton Culture CodeSkeleton Culture Code
Skeleton Culture Code
 
PEPSICO Presentation to CAGNY Conference Feb 2024
PEPSICO Presentation to CAGNY Conference Feb 2024PEPSICO Presentation to CAGNY Conference Feb 2024
PEPSICO Presentation to CAGNY Conference Feb 2024
 
Content Methodology: A Best Practices Report (Webinar)
Content Methodology: A Best Practices Report (Webinar)Content Methodology: A Best Practices Report (Webinar)
Content Methodology: A Best Practices Report (Webinar)
 
How to Prepare For a Successful Job Search for 2024
How to Prepare For a Successful Job Search for 2024How to Prepare For a Successful Job Search for 2024
How to Prepare For a Successful Job Search for 2024
 
Social Media Marketing Trends 2024 // The Global Indie Insights
Social Media Marketing Trends 2024 // The Global Indie InsightsSocial Media Marketing Trends 2024 // The Global Indie Insights
Social Media Marketing Trends 2024 // The Global Indie Insights
 
Trends In Paid Search: Navigating The Digital Landscape In 2024
Trends In Paid Search: Navigating The Digital Landscape In 2024Trends In Paid Search: Navigating The Digital Landscape In 2024
Trends In Paid Search: Navigating The Digital Landscape In 2024
 
5 Public speaking tips from TED - Visualized summary
5 Public speaking tips from TED - Visualized summary5 Public speaking tips from TED - Visualized summary
5 Public speaking tips from TED - Visualized summary
 
ChatGPT and the Future of Work - Clark Boyd
ChatGPT and the Future of Work - Clark Boyd ChatGPT and the Future of Work - Clark Boyd
ChatGPT and the Future of Work - Clark Boyd
 
Getting into the tech field. what next
Getting into the tech field. what next Getting into the tech field. what next
Getting into the tech field. what next
 
Google's Just Not That Into You: Understanding Core Updates & Search Intent
Google's Just Not That Into You: Understanding Core Updates & Search IntentGoogle's Just Not That Into You: Understanding Core Updates & Search Intent
Google's Just Not That Into You: Understanding Core Updates & Search Intent
 
How to have difficult conversations
How to have difficult conversations How to have difficult conversations
How to have difficult conversations
 
Introduction to Data Science
Introduction to Data ScienceIntroduction to Data Science
Introduction to Data Science
 
Time Management & Productivity - Best Practices
Time Management & Productivity -  Best PracticesTime Management & Productivity -  Best Practices
Time Management & Productivity - Best Practices
 
The six step guide to practical project management
The six step guide to practical project managementThe six step guide to practical project management
The six step guide to practical project management
 
Beginners Guide to TikTok for Search - Rachel Pearson - We are Tilt __ Bright...
Beginners Guide to TikTok for Search - Rachel Pearson - We are Tilt __ Bright...Beginners Guide to TikTok for Search - Rachel Pearson - We are Tilt __ Bright...
Beginners Guide to TikTok for Search - Rachel Pearson - We are Tilt __ Bright...
 
Unlocking the Power of ChatGPT and AI in Testing - A Real-World Look, present...
Unlocking the Power of ChatGPT and AI in Testing - A Real-World Look, present...Unlocking the Power of ChatGPT and AI in Testing - A Real-World Look, present...
Unlocking the Power of ChatGPT and AI in Testing - A Real-World Look, present...
 
12 Ways to Increase Your Influence at Work
12 Ways to Increase Your Influence at Work12 Ways to Increase Your Influence at Work
12 Ways to Increase Your Influence at Work
 
ChatGPT webinar slides
ChatGPT webinar slidesChatGPT webinar slides
ChatGPT webinar slides
 

Shopify.com pdf ebook

  • 2. How To Open a Drop Shipping Store with Shopify.com in 10 Steps Do you want to build a professional looking, fully functional drop shipping site in under a day, and for less than $65? I did this despite having absolutely no prior experience building websites. In this article, I’ll show you the 10 Steps I used to Open a Drop Shipping Store with Shopify. By the time you finish this article, you’ll have your drop shipping site up and running. How Long Will This Take: 1 Day First Month’s Costs: $63 ($13 per year for web domain, $29 per month for Shopify, $21 for my logo via Fiverr)
  • 3. In my last article, 10 Steps to Starting a Drop Shipping Business, I showed you how to pick a niche, identify your competitors, and find top tier suppliers. Once you’ve done that, you’re ready to open a drop shipping store. Follow along, step by step. You’ll want to identify a niche, competitors, and suppliers beforehand. For more on this process, see our guide on How to Start a Drop Shipping Service. 1-Register with Shopify 2-Buy Web Domain 3-Set Up Email Forwarding 4-Choose a Theme for Your Shopify Store 5-Add Must Have Pages for Drop Shipping 6-Add Products and Brand Collections 7-Revisit Theme Customization 8-Add a Shopify Customer Review App 9-Pick the Best Shopify Plan 10-Finalize Your Settings
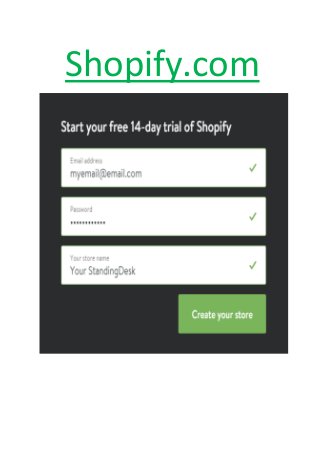
  • 4. Step 1: Register with Shopify.com First, visit Shopify.com and get started with a free 14-day trial. Click the “Start your free trial” tab and fill out the information in the below window: If the store name is already taken, Shopify won’t allow you to move forward. That’s why it’s a good idea to have a list of top 5 store names before registering for your free trial. (Need help coming up with a name? See our list of top 25 tips from the Pros here) After entering your name and basic contact info you’ll be prompted to enter some information about what stage your business is in. Shopify.com is brand new, so I select the corresponding drop down tabs. From there you’ll be taken to your administrator page which will look like this:
  • 5. If you scroll down, you’ll see the heading “Where would you like to start selling?.” Beneath that you’ll see a button to the right that says “Add Online Store.
  • 6. My drop shipping business will only be making sales through its online store so this is all I need to focus on (Want to see shopify’s offline capabilities? Go here.) Clicking on “Add Online Store” will take me back to my home admin page but with a key difference: I now have a tab on the left menu section that says “Online Store.” Step 2: Buy Your Web Domain At this point I recommend buying your web domain. You could wait, but why run the risk of someone else buying the domain before you? Plus, at $13.00 per year, this is a no brainer. If choose not to buy a domain, your URL will look like this: “YourStandingDesk.myshopify.com.” The store will be functional but the URL will not look professional. A legitimate business has it’s own web domain – customers and suppliers know and expect this.
  • 7. To buy your domain name, click on “Online Store” then “Domains” and then, in the upper right hand corner, click “Buy new Domain.” This will take you here: In this case, I want the the web domain www.yourstandingdesk.com so I would type in shopify.com and then click “Check Availability.” Shopify will then inform you whether the URL is available or not. (Tip: you can easily check available domains at GoDaddy ahead of time.) If it is available, you’ll be given the opportunity to enter your billing information to buy the domain Once you purchase your domain, you’ll be directed to a page asking if you want to redirect all traffic to this new domain. In this case, I do. I select “yourstandingdeck.com” and hit save. You’ll also receive an email from Shopify.com asking you to verify your domain purchase. Make sure you do so or your domain will eventually be suspended. This detail is easy to overlook, so do it now while it’s fresh in your mind.
  • 8. Step 3: Set Up Email Forwarding Now that you have purchased and verified your domain, another important but easy to overlook step is to set up email forwarding for your store. In the “Online Store” menu, click “Domains” and you’ll see the heading “Manage Domains” Select the web domain you just purchased. In this case, I would select “yourstandingdesk.com” which directs you to a page that has the heading “Email Forwarding.” Email forwarding means that if a customer or supplier emails me at info@yourstandingdesk.com the email is automatically forwarded to another email address of my choosing. Shopify.com automatically populates the email forwarding with the email address you used to first register with Shopify.com . If you want to change what email address is used for forwarding, you can do so at this point.
  • 9. Shopify automatically sets up two email forwarding addresses info@ and sales@. I recommend setting up one more for your drop shipping site: customerservice@. As you’ll recall from my last article, when suppliers and customers visit your site, they want to see that they can easily reach your customer service team (even if that’s just you). With this in mind, I immediately set up customerservice@yourstandingdesk.com. Important: Shopify.com email forwarding allows people to reach you by using an account with your domain in it. But because it’s not actually hosting email for you, when you reply to the email it will come from whatever account the email was forwarded to. Read our article on free business email hosting with Zoho. Now that you have purchased your domain name and set up email forwarding, it’s time to pick a Shopify theme (look and layout) for your store. Step 4: Choose a Theme for Your Shopify Store Shopify makes building a great looking desktop and mobile compatible site easy. Shopify’s platform is the foundation on which you’re building your drop shipping store. Everything else you build and add on afterward will be built on it. If Shopify is the foundation, think of the theme as the framing. This will give your store it’s basic structure and layout. From “Online Store” click on the “Themes” tab. Next, in the upper right hand corner you’ll see a button that says “Visit Theme Store.” Click on that tab and another window/tab will open up with Shopify’s theme store.
  • 10. Once there, you’ll see that Shopify has many great looking themes for you to choose from. Shopify offers both free and premium (paid) themes. Paid themes cost on about $150.00. Shopify allows you to search their themes by price, most popular, and even industry- specific. I want a free theme that’s well suited for a furniture store. I find two right away. By clicking “View Demo” I can see the various pages and feature the themes have to offer. I decide to select a theme called “Supply.”
  • 11. You can click all around the site on the theme demos. You can even select items to add to your cart. Doing this will give you a good sense of the entire customer experience. Once you have found the perfect Shopify theme, select “Install Theme.” You’ll be asked whether you want publish as your shop’s theme or install as an unpublished theme. If you choose to publish, your store’s theme will update right away. If you opt for an unpublished theme it will not impact your published/visible store. Since YourStandingDesk doesn’t currently have a theme I am opting to publish the “Supply” theme right away. After a quick download my theme is live and ready to be customized. When I go to the “Theme” tab I can see my Theme has updated to “Supply.”
  • 12. Now it’s time to customize the theme so that it stands out from the crowd and fits your niche. If I click “Customize Theme” in the upper right hand corner I am directed to a page that allows me to edit the various aspects of the theme: From here, I am able to change the colors and fonts of the site. I can also change what products and collections (explained later) are being displayed on various pages. I am not that far along yet, but I will be soon. Even a free theme can be customized in a ton of ways. Getting things just the way you like them will take some time, but I recommend making a few quick changes just to get a sense of what is possible. But don’t get bogged down. There’s still a lot to do in order to get your store ready to show suppliers.
  • 13. WARNING: Don’t spend hours making minor adjustments yet. You will make lots of major additions like new pages, product listings, reviews, etc. These major additions will impact all the minor cosmetic choices you make. Step 5: Add Must Have Pages for Drop Shipping Your Shopify theme will come preloaded with some basic pages that all stores typically have. But Shopify doesn’t know you want to build a drop shipping store that will wow your customers and impress your suppliers. So you’ll have to add the “Must Have” pages we discussed before. These are: Homepage About Us Product Page Shipping Returns Contact Us Learn more about what each page should contain in our Ultimate Guide to Drop Shipping.
  • 14. Luckily, Shopify makes adding and editing pages easy.. From “Online Store,” select the “Pages” tab. You’ll be directed to a page that looks like this: Right now you just have an “About Us” page and a “Home Page”. The first one I want to work on is the “About Us” page. Shopify offers some helpful bullet points to keep you on track, but I also add specifics that I think will speak to the customers and suppliers in my niche. Once you’ve got all the info you want in your About Us page, click on the “Preview” button in the top right corner to see what the page will actually look like.
  • 15. Want to see my About Us page: https://www.shopify.com/?ref=tuphan143 If you’re happy with what you saw after previewing the page, hit “Save.” Then get started on your other Must Have pages: Contact Us, Shipping, and Return Policies. For each page that I want to add I simply hit the “Add Page” button in the top right corner of the page. After that it’s the same as before. Adding images and video to a page is easy. For example, I decided I wanted to include a map of the US on my Shipping page. After a quick Google Image search I find a map I like. I copy the image and paste it in page. It’s that easy.
  • 16. To make sure everything looks the way I expect it to, again, I click Preview.
  • 17. I think this look okay for right now. Again, you might want to make changes to certain details in the future. But don’t get bogged down in minutia right now. Once the site is built out you can come back a tweak images, wording, and page layout. In fact, that will be an important part of continually optimizing your site for customer conversion. For now, you want to get all your store’s Must Have pages up. Once you have your Must Have pages drafted, go to “Online Store” and “Navigation” and make sure the pages you added will show up on your Home Page menu. TIP: In the upper right corner there is a “Visibility” button that allows your changes to be instant (meaning they will immediately appear on your store) or scheduled (meaning they will appear on your page at a scheduled time). This will allow you to update all your pages simultaneously. Step 6: Add Products and Brand Collections
  • 18. This is where Shopify really gets exciting! Until now, this experience has not been much different from any free website or blog. By adding products all of Shopify’s awesome ecommerce capabilities get to come out and play! Add Your First Product At this point I have all of my essential pages except for samples of Products and Brands. Putting these on the site will be different than the pages we’ve added so far. We’re going to move away from “Online Store” on the main menu and move up to the “Products” tab. Once there, click on the “Add Product” button in the middle of the page. You’ll then be taken to a page where you can add all the detail about your first product!
  • 19. For this article, I will continue to work with the Luxor 60″ Crank Adjustable Standing Desk that I had identified in my last article as a good product from a good supplier in my ultimate guide to drop shipping. The information and photos I will be using are coming straight from my supplier’s website. Most suppliers will have lots of information on their site, like product descriptions, product specs, photos, and maybe some pamphlets or sales materials. Suppliers want their partners to have everything they need to sell their products and build their brands. So don’t hesitate to use their site as a resource. (Want help finding suppliers? Go here) First, I enter in the name, product description, and all the specs of my product. Then I type in the information in the “Organization” tab on the right side of the page. By filling out the “Organization” info, Shopify will automatically group things together making easier for your customers to find the products they want.
  • 20. Product Organization: Product Type: allows you to group by type of products, (i.e. standing desk, adjustable height desks, etc.). Vendor: allows you to group by brand. Collections: add a product to specially curated grouping (i.e. “Desks for Execs”) Tags: make all aspects of a product searchable (i.e. height, material, mobile, etc) Scrolling down the page I can upload photos (again, taken from my supplier’s site) and set my price. For price, I’m entering what my research revealed to be the lowest allowable price according to my supplier’s MAP policy which appears to be $350 (don’t know what a MAP policy is? Go here). I also enter in the most common “list price” that I saw in my research so my customer’s can see what a deal I am offering, $665. If I need to adjust this later, I can. By listing it now a supplier can see that my prices are in line with their expectations. Notice that I have also clicked the box has Shopify automatically charge taxes on this product.
  • 21. If I scroll down a little further I get an option to track inventory, shipping weight, and variants. Since drop shippers including myself do not carrying our own inventory it won’t make sense to have Shopify track this. Next you have the option to input shipping weight. Some sellers charge a specific rate by the pound which is why this is here. With drop shipping your shipping rate depends on your supplier, so you can leave this blank. However, I will add my product variations at this point. Variants allow me to list all the versions of the same product. Adding variations is easy to do and makes for a much better shopping experience for the customer .For example, if my desk comes with different colors , finishes, or materials, I could enter them here and the Customer could then select the exact version they want to purchase.
  • 22. Once I hit “Save” my product page is ready to be viewed.
  • 23. Add Collections with Automatic Conditions Shopify gives you the ability to group any of your products together in a “Collection.” I can group products by color, or brand, specific feature, or even by a theme, like “Modern Office.” Collections make it easier for customers to find what they’re looking for. For example, YourStandingDesk.com has a Collection called “Electric Adjustable Height Desk.” Customers know exactly what they’ll find in that collection. You can see it yourself at this URL: shopify.com
  • 24. Since I plan on selling a number of Luxor’s standing desks on my site, I am going to devote collections to their brand. From the “Products” dashboard I click the “Collections” tab which will pull up an unpopulated page for me to fill in. I populate the page with basic information about brand using material from the supplier’s site.
  • 25. Next, I have the option of manually selecting products to add to the collection or automatically adding products to the collection based on conditions I set. When you’re starting out with your first one or two products, it might seem easier to manually add each product to a “Collection.” But remember, you’re hoping to fill your store up with lots of products. Taking a little time now to get products automatically added to a collection will save you a lot of time in the end.
  • 26. When you set up automatic conditions for the Collections, any product that meets those conditions get added. Once you do that, you can go into any product listing and you’ll see this: Now you’ll save time with every product you add. Plus, this works retroactively, too. So if you think of a new collection you want to group together, for example “Desks Under $500,” you can set up the conditions and Shopify.com will add every desk under $500 to that collection.
  • 27. Don’t Start Similar Products from Scratch – Duplicate and Edit When adding a product that is very similar to a product that already exists in your store, rather than starting the product page from scratch, pull up the existing product and hit the duplicate button in the top right corner. When you click duplicate you see this Click duplicate again and you have an exact copy of the title, description, images, tags, etc. Why is this such a powerful tool? Because when I wanted to list a 48″ Crank Adjustable Standing Desk I simply duplicated my 60″ Crank Adjustable Standing Desk, adjusted the dimension, pricing, and one picture and I was done. I had a new product listed in no time!
  • 28. Before you know it, you’ll have listed all the products a Supplier offers in your Niche! Here’s what it looks like on the site:
  • 29. Step 7: Revisit Theme Customization At this point I have all my “must have” drop shipping pages up and a supplier’s full line of products in my niche listed. Now I want to go back to the “Online Store” section of the site to revisit the “Theme” tab where I am able to select “Customize Your Theme.”
  • 30. When I was last here I had zero content on my site. It was very difficult to tell how anything would end up looking. Since then I have added pages, filled those pages with content, and I have complete product listings. It will be much easier to see how the pages will look overall. One of the things I liked about my theme, “Supply,” was that it had a slideshow on the homepage. Now that I have product listings I can go back and fill in the slideshow with pictures of specific products and the corresponding URL to my site’s product page. If someone visits shopify.com and sees a picture of a desk they like, they can click on that picture and my site will redirect them to the page where they can buy that desk. In no time at all my drop shipping store is looking and behaving like the websites I visit every day. I also recommend going to the Social Media tab and entering your social media accounts. This is an easy way to stay in touch with your customers. Once your accounts are listed, Shopify will link all the social media icons on your site to your pages.
  • 31. I don’t have followers yet, but I want to be ready for them. I also want to show suppliers I know that engaging with customers on social media is an important way to build their brand and sell their products. It takes just a few minutes to open an account for your business at the top social media sites and it’s completely free. Again, you don’t want to get bogged down in the details of those profiles yet. You can come back to this later and read our Guide to Setting Up Facebook and Twitter’s Setup Page. For now, you just want to have the accounts linked to your Shopify store so that customers and suppliers can engage with you wherever they spend their time online. TIP: Later, you’ll be able to sell directly on these social media platforms by going to Settings and selecting Sales Channels (Shopify explains how these work: Pinterest, Facebook, and Twitter):
  • 32. While staying within “Customize Your Theme” menu, click on the “Products Page” tab which is center right. Clicking this will let you change what is displayed on the product listing page. I enabled the “image zoom” and “compare at” feature because they were features I had remembered thinking worked well on competitor sites. You also want to enable product reviews. To do this, you’ll need to add a Shopify App.
  • 33. Step 8: Add Shopify’s Free Customer Review App Shopify has a robust App Store. Apps are add-ons and plug-ins that add additional features and capabilities to your Shopify Store. Some of the apps are free but others cost money. The apps can help with everything from pop-up offers to accounting and analytics. The customer review app that I want to add is free and once installed will allow my site to collect customer reviews. Those reviews will help persuade other visitors to buy my products: Adding an app to your shopify store is a little harder than adding an app to your phone. But not that much harder. Follow the links to download the app and you’ll eventually be taken back to your own store to confirm that you want to install this app in your store. Click “Install App.” You’ll then see this:
  • 34. Instructions to add the review app to your site come with four easy steps to follow. First I copy the code to my clipboard by clicking the link they tell me to click. Easy! Then I go to Step two which tells me to open my templates/product .liquid file. Now, I don’t know what that is, but again, they provide me a link which I can click on and it instantly opens the page I need.
  • 35. I don’t know a lick of coding at this point my eye briefly cross. But only briefly! Because the second part of Step 2 tells me exactly what I am looking for. So I hit “ctrl-f” (find) and type in “product. description” and I am taken right there. Once there I paste the line of code I copied earlier right below. Then I click “Save.” Easy! Step 3 for the App says it is optional. I think about calling things good enough until I see that Step 3 is going to add the Stars feature. What good is a review if it can’t be summarized by celestial bodies?! So I click “View Instructions” and there’s another snippet of code (with a copy link) and another page I have to go to so I can add the code (again, with a link). It’s no more complicated than what I just did and Shopify is practically holding my hand through the entire process.
  • 36. Follow the links just like last time and install the line of code. I click “Save.” Easy! Now when I go to a product page on my site, I see at this at the bottom of the page:
  • 37. Also, if you go back to your main Shopify dashboard and click on Apps, you should see that you have one installed app: It’s the Shopify Product Reviews App that I just installed. If I click that app logo it will take me to that app’s page within my site and I can click “Settings” which is in the upper right hand corner. That takes me the app’s control panel. It is here that I can control whether reviews are published automatically or whether they need my approval first. I can also select to get email notifications any time a review comes in. I can even decide what fields (i.e. Name, Email Address, etc) are required to submit a review. At this point your Shopify store is set up and ready sell products (as soon as your suppliers approve you and you get the drop shipping agreements signed). There’s just one last thing we need to do: pick a Shopify plan.
  • 38. Step 9: Pick Your Shopify Plan Shopify’s free 14-day trial is a great deal. It allows you to familiarize yourself with their product and build out your store all for free. But at this point, you’re ready to get in the game! So let’s go through Shopify’s plans so you can find the one that best suits your needs. First, a couple things to keep in mind when picking a plan: Contracts are month to month unless you sign up for an annual or biennial plan. Annual contracts get a 10% discount on plan rates and Biennial contracts get 20%. You can upgrade or downgrade your plan any time. You can cancel any time. Shopify offers four plans for Dropshippers to choose from: Starter, Basic, Pro, and Unlimited.
  • 39. From your Shopify dashboard yo’ll see that Shopify offers your four plan options. Want to go in depth? Read my Ultimate Shopify Pricing Guide. For now, let me give you the basics and make my recommendation. Starter Plan: $14 per month; store is limited to 25 products; no phone support. Basic Plan: $29 per month; unlimited products, 24/7 support, sell on social media. Professional Plan: $79 per month; all of Basic plus gift cards, cart recovery, and better reporting; lower credit card processing rates. Unlimited Plan: $179 per month; all of Professional plus enhanced reporting and shipping; even lower credit card processing rates. I recommend the Basic Plan for brand new drop shipping businesses. I want to list many products and have tech support, so Starter is not a good option. But all the bells and whistles offered by Professional and Unlimited don’t do me much good until I have traffic and am making sales. When I select the Basic Plan I am shown my billing options: I have decided that a monthly payment of $29 is the best fit for me right now. Once I have drop shipping agreements with Suppliers I will look to prepay Shopify for a year or two in order to realize additional savings for my business. TIP:On all essential services like Shopify, phone and internet, etc. I will set up automatic charges to a rewards credit card so that I never experience a disruption to an essential part of my business due to a billing issue. Plus I will earn rewards and build my business credit score.
  • 40. Step 10: Finalize Your Shopify Settings The last step is to finalize your settings. Go back to your main Shopify dashboard and select “Settings.” Double check the information in each tab. I would start by going to Online Store. This section has Title and Meta Description which define how your site appears in search results: You can read more about that with Moz.com. It also has a section to integrate Google Analytics which will allow you to track your customers optimize your marketing efforts. You can create a Google Analytics account for free. You can read more about that here. This tab also has the storefront password protection setting. By password protecting your storefront, you must enter a password before entering the site. This means that customers can’t accidentally try to purchase products before you have suppliers’ permission. At the same time, suppliers have a way of logging into and reviewing your site. It’s critical that you visit the “Payments” tab as well. This information must be filled out in order for customers to pay you. You can use PayPal or your business’s bank account.
  • 41. We recommend Bank of America for small business checking. When you select “Complete Shopify Payments Account Setup” you’ll be asked for you and your business’s information: official name and address, how your business is structured, EIN, and bank account information, etc. (Haven’t registered your business yet? See our guide for drop shippers.) Go to Once you have this information logged in, you’re ready accept payments from customers. Summary:  Your drop shipping business now has a functioning Shopify store. There will always be things you can do to improve your site. In future articles I’ll discuss ways to optimize conversion rates and automate or outsource as much as possible. For now, the only thing left to do is to finalize agreements with your supplier partners, start generating traffic to your site, and make your first sale. For those of you who want to continue to build your site, check out Shopify’s guides or familiarize yourself with Shopify’s drop shipping forum.