
Recommended
Recommended
More Related Content
Similar to Still wagner su sd sv forklift service repair manual
Similar to Still wagner su sd sv forklift service repair manual (20)
More from ufjjskekmem
More from ufjjskekmem (20)
Recently uploaded
Recently uploaded (20)
Still wagner su sd sv forklift service repair manual
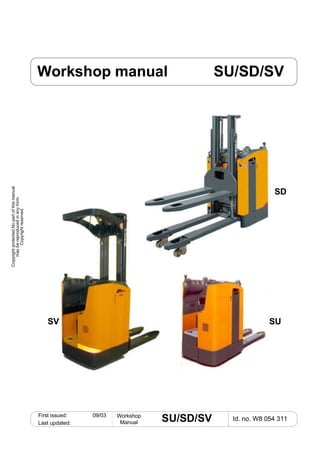
- 1. Copyrightprotected.Nopartofthismanual maybereproducedinanyform. Copyrightreserved. First issued: 09/03 Workshop ManualLast updated: SU/SD/SV Id. no. W8 054 311 Workshop manual SU/SD/SV SD SUSV
- 2. Foreword Copyrightprotected.Nopartofthismanual maybereproducedinanyform. Copyrightreserved. Issue 09/03 Workshop ManualReplaces issue SU/SD/SV Sheet no. I Foreword This workshop manual (WM) is a collection of technical data and functional descriptions for the standard vehicle. It is intended as a guide which should be kept at hand at all times, to help explain the technical features of the vehicle and consequently ensure that maintenance and repair are carried out correctly. The workshop manual is updated on a regular basis with additional sheets. Updating workshop manuals Our range of equipment is subject to continuous development and improvement. A consequence of this is that components or assemblies are sometimes replaced or their function changed. In order to guarantee that the owner of a workshop manual is always in possession of up-to-date and relevant documentation, the manual must be updated using the method described overleaf. 5/0003 5/0004 5/0002new 1/0096
- 3. Foreword Copyrightprotected.Nopartofthismanual maybereproducedinanyform. Copyrightreserved. Issue 09/03 Workshop ManualReplaces issue SU/SD/SV Sheet no. II Updating workshop manuals 1. Replacing incorrect sheets If a sheet contains an error, e.g. if adjustment values have been altered, the sheet in question must be replaced. The new sheet can be identified by the information at the left-hand side of the page footer (1). The date of issue is updated here in the Issue line (2). The date of issue of the sheet which needs replacing is specified in the Replaces issue line (3). The sheet no. remains the same (4). Every time a change is made, the cover sheet is replaced. The date of first issue and the date of the last update are shown in field 9. This means that the workshop manual edition is immediately obvious. 2. Inserting new sheets If new, altered or additional components are introduced to the series, it may be necessary to insert one or more additional sheets. An additional sheet can be identified by the changes at the left and right of the page footer (5 + 6). At the left, in the Issue line, is the current date of issue (7). At the right, the additional sheet is marked with the sheet no. with a consecutive index (8). The list of contents for the assembly in question must also be replaced. Issue: 03/03 Replaces issue: Workshop Manual Sheet no.SU/SD/SV A 1 Issue: 09/03 Replaces issue: 03/03 Workshop Manual Sheet no. A 1 Page footer of an existing sheet Page footer of a corrected sheet 1 4 2 3 Issue: 03/03 Replaces issue: Workshop Manual Sheet no. A 1 Issue: 09/03 Replaces issue: Workshop Manual Sheet no. A 1.1 Page footer of an existing sheet Page footer of an additional sheet 65 7 8 First issued: 03/03 Last updated: Workshop Manual Id. no. Page footer of a cover sheet 9 SU/SD/SV SU/SD/SV SU/SD/SV SU/SD/SV
- 4. Foreword Copyrightprotected.Nopartofthismanual maybereproducedinanyform. Copyrightreserved. Issue 09/03 Workshop ManualReplaces issue SU/SD/SV Sheet no. III Updating workshop manuals We send new sheets, whether they are replacement or additional sheets, and new lists of contents, to all the workshop manual owners we know of by mail. Notes, Imprint We can accept no liability for warranty claims relating to work carried out in accordance with the instructions in this workshop manual. The warranty terms remain unaffected. STILL WAGNER works continuously on the development of its industrial trucks. We would ask for your understanding that we reserve the right to make alterations and that errors cannot be excluded, and that no warranty claims may be based on the information, illustrations or descriptions contained in this workshop manual. Published by STILL WAGNER GMBH & CO KG Trainingszentrum (Training Centre) Ernst-Wagner-Weg 1-5 72766 Reutlingen-Mittelstadt Germany
- 5. Guide to chapters Copyrightprotected.Nopartofthismanual maybereproducedinanyform. Copyrightreserved. Issue 09/03 Workshop ManualReplaces issue SU/SD/SV Sheet no. IV Chapter 1: Chapter Chapter 2: 3: Chapter Chapter Chapter Chapter 4: 5: 6: 7: Chapter Chapter Chapter Chapter 8: 9: 10: 11: Chapter Chapter Chapter Chapter 12: 13: 14: 15: Chapter Chapter Chapter Chapter 16: 17: 18: 19: Chapter Chapter 20: 99: Drive wheel Gear Drive motor Speed sensor Steering Brake Mast Vehicle control Component panel ABÜ - braking monitor Curtis display unit Battery Valve driver Block diagram of hydraulics Pump assembly Pressure sensor Valve block Steering software Travel control software Summary of errormessages Maint
- 6. List of contents Copyrightprotected.Nopartofthismanual maybereproducedinanyform. Copyrightreserved. Issue 09/03 Workshop ManualReplaces issue SU/SD/SV Sheet no. IV Chapter 1: Drive wheel • Changing the drive wheel .....................................................................1-01 - Removal .............................................................................................1-01 - Installation ..........................................................................................1-01 • Information table: ID numbers of drive wheel .......................................1-02 Chapter 2: Gear • Removing the gear ...............................................................................2-01 • Commissioning the travel drive (after replacement) .............................2-02 - Lubricating the bogie bearing .............................................................2-02 • Oil change.............................................................................................2-03 Chapter 3: Drive motor • Removing the gear ...............................................................................3-01 • Carbon brushes ....................................................................................3-02 - Replacing the carbon brushes............................................................3-02 • Technical data ......................................................................................3-03 • Maintenance .........................................................................................3-04 - General...............................................................................................3-04 - Cleaning .............................................................................................3-04 - Visual inspection, replacing damaged parts.......................................3-05 - Checking the brush unit, replacing the carbon brushes .....................3-06 - Commutator........................................................................................3-07 - Bearings .............................................................................................3-08 Chapter 4: Speed sensor • General.................................................................................................4-01 • Testing the speed sensor .....................................................................4-02 Chapter 5: Steering • Block diagram of steering SU ...............................................................5-01 • Block diagram of steering SD/SV .........................................................5-02 • Pin assignment .....................................................................................5-03 • Setpoint potentiometer..........................................................................5-05 • Actual value potentiometer ...................................................................5-06 • Quick start adjusting the steering .........................................................5-07 • Travel on curves function......................................................................5-08 Chapter 6: Brake • Electromagnetic spring brake ...............................................................6-01 - Function..............................................................................................6-01 - Removal .............................................................................................6-02 - Replacing the brake lining ..................................................................6-04 - Adjusting the brake clearance ............................................................6-05 - Adjusting the braking force.................................................................6-06 - Measuring the brake deceleration ......................................................6-07 Sheet no.
- 7. List of contents Copyrightprotected.Nopartofthismanual maybereproducedinanyform. Copyrightreserved. Issue 09/03 Workshop ManualReplaces issue SU/SD/SV Sheet no. V - Checking the brake deceleration........................................................6-10 - Maintenance.......................................................................................6-12 Chapter 7: Mast • Removing the mast...............................................................................7-01 • Removing the lift carriage.....................................................................7-03 • Exchange Guiderollers .........................................................................7-04 • Sideplay................................................................................................7-04 Chapter 8: Travel control • Block diagram for "Travel" ....................................................................8-01 • Pin assignment .....................................................................................8-03 • General.................................................................................................8-06 • Braking modes......................................................................................8-07 • Table of operating modes.....................................................................8-07 • Travel on curves ...................................................................................8-08 • Hour meter............................................................................................8-09 • Service hour meter ...............................................................................8-09 • Battery discharge indicator ...................................................................8-09 • Self test.................................................................................................8-10 • Error display..........................................................................................8-11 • Test procedure......................................................................................8-11 Chapter 9: Component panel • Arrangement of the components on comonent panel for SU................9-01 • Arrangement of the components on comonent panel for SD................9-02 Chapter 10: ABÜ - Braking monitor • Block diagram of braking monitor ABÜ (U50).....................................10-01 • Pin assignment ...................................................................................10-02 • General...............................................................................................10-04 • Functions ............................................................................................10-05 -Wheel position display (optional).....................................................10-05 -Adjust the display ............................................................................10-05 -Driving while curve ..........................................................................10-06 -Flashing error codes........................................................................10-07 Chapter 11: Curtis display unit • General...............................................................................................11-01 • Pin assignment ...................................................................................11-02 • Function..............................................................................................11-03 • Error display........................................................................................11-03 • Battery discharge indicator .................................................................11-03 • Hour meter..........................................................................................11-04 Sheet no.
- 8. List of contents Copyrightprotected.Nopartofthismanual maybereproducedinanyform. Copyrightreserved. Issue 09/03 Workshop ManualReplaces issue SU/SD/SV Sheet no. VI Chapter 12: Battery • General 12-01 • Durability and lifetime .........................................................................12-01 • Handling and maintenance.................................................................12-02 • Maintenance intervals.........................................................................12-03 • Acid density test..................................................................................12-04 • Prevention of damage and accidents .................................................12-05 • Commissioning unfilled battery with charged plates...........................12-06 • Changing the battery ..........................................................................12-07 - Lifting and removing the battery .......................................................12-07 - Installing the battery .........................................................................12-08 Chapter 13: Valve driver • Block diagram.....................................................................................13-01 • Pin assignment ...................................................................................13-02 • General...............................................................................................13-03 • Removal..............................................................................................13-05 • Flashing error codes...........................................................................13-06 • Table of functions ...............................................................................13-07 Chapter 14: Hydraulics • Block diagram of hydraulics................................................................14-01 • Filter....................................................................................................14-02 - Maintainens....................................................................................14-02 • Lowering brake valve..........................................................................14-03 - General...........................................................................................14-03 - Exchange........................................................................................1403 Chapter 15: Pump assembly • Individual components........................................................................15-01 • LIFTING function ................................................................................15-02 • LOWERING function...........................................................................15-03 • Electrically pilot controlled non-return valve (2/2-way valve)..............15-04 • Replacing carbon brushes on the SU.................................................15-05 • Replacing carbon brushes on the SD.................................................15-06 • Removing the pump motor .................................................................15-07 • Hydraulic pump...................................................................................15-08 - General.............................................................................................15-08 - Removing the hydraulic pump..........................................................15-09 • Adjusting the pressure relief valve on the SU.....................................15-10 • Adjusting the pressure relief valve on the SD/SV...............................15-11 - Proportional valve.............................................................................15-11 • Changing the hydraulic oil ..................................................................15-12 • Pumpassembly SV tecnical datas ......................................................15-13 - Removal .........................................................................................15-13 - Exchange of Carbonbrush..............................................................15-13 • Pumpcontaktor 2Y1 ............................................................................15-14 • Tankvolume ........................................................................................15-14 Sheet no.
- 9. List of contents Copyrightprotected.Nopartofthismanual maybereproducedinanyform. Copyrightreserved. Issue 09/03 Workshop ManualReplaces issue SU/SD/SV Sheet no. VII Chapter 16: Pressure sensor • Pressure sensor..................................................................................16-01 Chapter 17: Valve block • General SD.........................................................................................17-01 • Hydraulic connections SD...................................................................17-01 • Electrical values..................................................................................17-01 • General SV .........................................................................................17-02 • Hydraulic connections SD...................................................................17-02 • Electrical values SD............................................................................17-02 • Other Valves SD.................................................................................17-02 Chapter 18: Steering software • General...............................................................................................18-01 • Making a connection...........................................................................18-02 • Errors..................................................................................................18-03 • Teaching in .........................................................................................18-04 - Setpoint potentiometer .....................................................................18-04 - Actual value potentiometer...............................................................18-06 • Tester..................................................................................................18-07 - Speed measurement ........................................................................18-10 - Amplifier data....................................................................................18-11 - Digital inputs and ouputs ..................................................................18-12 - Potentiometer voltages.....................................................................18-14 • Settings...............................................................................................18-15 - Wheel distance.................................................................................18-15 Chapter 19: Travel control software • General...............................................................................................19-01 • Setting parameters .............................................................................19-02 • Test.....................................................................................................19-03 • Diagnosis............................................................................................19-03 • "File" menu .........................................................................................19-03 • Setting parameters with the hand-held programming unit..................19-05 • Summary of the parameters that have to be set.................................19-19 • Battery discharge curves ....................................................................19-20 • List of parameters 1............................................................................19-21 • List of parameters 2............................................................................19-22 • List of parameters 3............................................................................19-23 • List of parameters 4............................................................................19-24 • List of parameters 5............................................................................19-25 • Description of parameters...................................................................19-26 • Errors displayed with flashing code ....................................................19-32 • List of flashing error codes..................................................................19-33 • Tester table.........................................................................................19-34 Sheet no.
- 10. List of contents Copyrightprotected.Nopartofthismanual maybereproducedinanyform. Copyrightreserved. Issue 09/03 Workshop ManualReplaces issue SU/SD/SV Sheet no. Chapter 20: Summary of errormessages • Errormessages of the Travel control...................................................20-01 • Errormessages of the ABÜ-Braking monitor......................................20-01 • Errormessages of the Steering controler...........................................20-01 • Errormessages of the Valve driver ....................................................20-01 Sheet no. VIII
- 11. Chapter 1 Drive wheel Copyrightprotected.Nopartofthismanual maybereproducedinanyform. Copyrightreserved. Issue 09/03 Workshop ManualReplaces issue SU/SD/SV Sheet no. 1 – 01 Changing the drive wheel Dimensions of new wheel: ř 250 x 80 mm Change at residual diameter: ř 225 mm The drive wheel must be replaced when: • the running surface is very pitted, • the running surface is out of round, • the running surface is cracked, • the diameter of the tyre has decreased by 10%. Removal 1. Pull out the battery plug. 2. Jack up the vehicle safely on both sides and secure it to prevent it rolling away. 3. Remove the covers. 4. Move the drive wheel into the straight-on position. 5. Loosen the 5 drive wheel nuts (1) and unscrew them. 6. Pull off the drive wheel, taking care not to damage the threaded bolts. Installation 1. Before installing the drive wheel, clean the area where the wheel is seated on the axis and ensure that it is in perfect condition. 2. Push on the drive wheel and tighten the 5 wheel nuts by hand. 3. To secure the new drive wheel, tighten the wheel nuts diagonally in several passes with a torque wrench. Tightening torque for the wheel bolts: 140 Nm 6/0168 1
- 12. Chapter 1 Drive wheel Copyrightprotected.Nopartofthismanual maybereproducedinanyform. Copyrightreserved. Issue 09/03 Workshop ManualReplaces issue SU/SD/SV Sheet no. 1 – 02 Information table ID numbers of drive wheels Design Id. no. ř 250/100 Solid rubber tyre, press-fit Solid rubber tyre, tread press-fit 8 305059 8 305060 Solid rubber tyre, natural rubber Solid rubber tyre, with tread 8 329012 8 329013 Solid rubber tyre, electrically conductive Vulkollan tyre, vulcanized in place 8 340792 Vulkollan tyre, press-fit Vulkollan tyre, profile press-fit 8 305063 8 305064
- 13. Chapter 2 Gear Copyrightprotected.Nopartofthismanual maybereproducedinanyform. Copyrightreserved. Issue 09/03 Workshop ManualReplaces issue SU/SD/SV Sheet no. 2 – 01 Removing the gear 1. Jack up the vehicle and secure it to prevent it rolling away (distance of approx. 10cm between drive wheel and floor). 2. Turn the drive wheel to one side so that the gear is visible. It is more practical not to remove the drive wheel to start with when you want to take out the gear. 3. Pull out the battery plug. 4. Position a fork-lift truck or a low-lift truck under the drive wheel so that the weight of the gear is supported (clear distance between forks approx. 220 mm). 5. Support the gear safely from below. 6. Raise the fork-lift truck or low-lift truck until there is a slight pressure applied to the drive wheel. 7. Remove the 6 gear screws M10x40 (2). 8. Raise the motor with a rope (special tool, cable pull, see the section entitled "Removing the drive motor") and underlay it in at least 2 places with flat steel bars approx 20 mm thick (3). 9. Slowly lower the fork-lift truck and remove the gear at the front. Cover the gear opening to prevent dirt entering. Support the gear with a taut rope or chock it up from below with wood to prevent it tilting over to the rear or side. 2 8-0518 6/0167 33 min. 10cm Floor
- 14. Chapter 2 Gear Copyrightprotected.Nopartofthismanual maybereproducedinanyform. Copyrightreserved. Issue 09/03 Workshop ManualReplaces issue SU/SD/SV Sheet no. 2 – Commissioning the travel drive (after replacement) The following types of gear oil are used: Standard oil: SAE 80 Ambient temperature: 0°C to 40°C Id. no. W8 036 925 Low temperature oil: SAE 75 W-90 Partly synthetic Ambient temperature: to -30°C Id. no. W8 036 929 For vehicle use in special conditions, please contact the manufacturer for further information. Oil volume: approx. 1.5 l Transmission: i = 15.18 The given amount of oil is a guideline only. The correct amount of oil is that required for the level to reach the lower edge of the filling hole (1). This means that the spur gear is submerged in oil by about 1/3 of its height (1). Overfilling must be avoided, otherwise oil can escape at the gear bleeder screw, the seals may be damaged and it is possible that the operating temperature may not be maintained. Check that the gear bleeder screw is clean. Lubricating the bogie bearing The bogie bearing should be lubricated once a year through the two lubricating nipples at opposite sides (2 and 3). This is particularly important every time the gear has been cleaned (e.g. with steam jets). The bearing play at the bogie bearing must be checked whenever maintenance is carried out. Grease type: All-purpose grease 6/2016 oil level 1 6/2014 2 3 02
- 15. Chapter 2 Gear Copyrightprotected.Nopartofthismanual maybereproducedinanyform. Copyrightreserved. Issue 09/03 Workshop ManualReplaces issue SU/SD/SV Sheet no. 2 – Oil change The first oil change must be carried out after approx. 1000 operating hours. All subsequent oil changes should be carried out after approx. 2000 operating hours or at least once a year. Between the oil change intervals, the oil level should be checked once a quarter and topped up if necessary. The gear oil must be drained off when the vehicle is warm. The maximum permissible operating temperature is 80°C. Changing the oil Remove the filler screw (1). Check the oil level with a dipstick through the threaded hole of the filler screw. The gear oil level should be at the lower edge of the filler hole. Top up if necessary (Fig. 1). or: • Jack up the vehicle and secure it to prevent it rolling away. • Move the gear into the drainage position. • Set an oil catchment vessel under the oil drain- age screw (3) (should have a vol. of approx. 1.5l). • Remove the oil filler screw (1). • Remove the oil drainage screw (1) and allow the oil to run out. Risk of scalding! The oil temperature may be as high as 80°C! • Clean the magnet on the oil drainage screw (3) • Screw the oil drainage screw back in place, using a new sealing ring (2). • Fill with new gear oil up to the lower edge of the threaded hole for oil filler screw (approx.1.5l). • Screw the oil filler screw back in place, using a new sealing ring (4). Sealing rings: Id. no. W8 006 172 Tightening torque for the oil filler (1) and drainage screw (3) MA= 22Nm. 6/2012 6/2013 6/2016 Oil level 4 Fig. 1 1 2 3 4 1 03
- 16. Chapter 3 Drive motor Copyrightprotected.Nopartofthismanual maybereproducedinanyform. Copyrightreserved. Issue 09/03 Workshop ManualReplaces issue SU/SD/SV Sheet no. 3 – 01 Removal Once the drive motor has been removed, the vehicle is no longer braked. Secure the vehicle to prevent it rolling away! • Pull out the battery plug. • Mark and disconnect the field coil connections. • Mark and disconnect the armature coils. • Mark and disconnect the speed sensor and brake connector. • Unscrew the supports for the component panel (1). • Unscrew the 8 M6 screws (2). • Screw a screw-fit eyebolt (3) into the motor shaft and hitch to the rope and lifting bar. • Lay the lifting bar on the arm console and lever the motor out of its guide by lifting. 20408 20408 20408 1 2 3
- 17. Chapter 3 Drive motor Copyrightprotected.Nopartofthismanual maybereproducedinanyform. Copyrightreserved. Issue 09/03 Workshop ManualReplaces issue SU/SD/SV Sheet no. 3 – 02 Carbon brushes Replacing the carbon brushes The carbon brushes must be replaced when they have reached a residual length of 16 mm. • Pull out the battery plug. • Remove the drive motor (please see Drive motor, Removal). • Lever out the black plastic cap (1). • Shape a loop out of a piece of wire and use it to pull off the carbon brush spring (2). • Pull carbon brush out of the guide shaft. • Unscrew the carbon brush connecting screw (3) and, if necessary, replace the carbon brushes. Always replace the full set of carbon brushes (4 brushes). 20411 1 20412 23
- 18. Chapter 3 Drive motor Copyrightprotected.Nopartofthismanual maybereproducedinanyform. Copyrightreserved. Issue 09/03 Workshop ManualReplaces issue SU/SD/SV Sheet no. 3 – 03 Technical data Model...................................GF 114-F4 Excitation type.....................Shunt motor Voltage ................................24 V Rated current ......................104 A Rated output........................2000 W Rated speed........................2700 rpm Direction of rotation .............right / left Protection class...................IP 00/20 Insulation class....................F Switching-on time................S 2 = 60 min Drive motor terminals Designation Meaning at the motor A 1 rotor coil; B+ A 2 rotor coil; B - F1 shunt field coil, F2 shunt field coil, Direct current motor with separately excited field coil (without commutation poles) Clockwise Anti-clockwise + - + - A1 A2 F2 F1 M + - - + A1 A2 F2 F1 M 6110003
- 19. Chapter 3 Drive motor Copyrightprotected.Nopartofthismanual maybereproducedinanyform. Copyrightreserved. Issue 09/03 Workshop ManualReplaces issue SU/SD/SV Sheet no. 3 – Maintenance General Maintenance work between major overhauls should consist of the following: • Cleaning • General visual inspection • Replacing damaged parts • Checking the brush unit and commutator • Replacing the carbon brushes (if necessary) This work should be carried out at least every 500 operating hours or once a quarter. We recommend having major motor overhauls carried out by a specially equipped workshop, as special tools and specialist knowledge are required. Before carrying out any work on the motor, always first pull out the battery plug to avoid short circuits or injury. Cleaning • Remove the cover and take out the brushes. • Clean the motor thoroughly using compressed air, taking care not to breathe in any dust (wear a protective mask). • Clean soiled commutators and brush unit using a clean cloth (not cleaning wool) moistened with benzine and dry well. Do not lift the brush springs more than is necessary and do not bend them to the side. 04
- 20. Thank you very much for your reading. Please Click Here Then Get More Information. NOTE: If there is no response to click on the link above, please download the PDF document first and then click on it.
- 21. Chapter 3 Drive motor Copyrightprotected.Nopartofthismanual maybereproducedinanyform. Copyrightreserved. Issue 09/03 Workshop ManualReplaces issue SU/SD/SV Sheet no. 3 – Maintenance Visual inspection, replacing damaged parts • Check that the gear ventilation channels (1) are clean. Soiling impairs the air circulation, which leads to increased temperatures in the motor and possibly irreparable damage to the motor. • Clean the gear bleeder screw. • Check the field and armature coils for signs of overloading (e.g. overheating): dark coloration, brittle or burned insulation, unsoldered commutators. Motors with this kind of damage must be replaced without delay. • If you discover oil or grease in the motor (usually a paste made up of oil, oil vapour mixed with dust and carbon abrasions), investigate the cause immediately and remedy it. The motor must be cleaned extremely thoroughly. Rapid carbon brush or commutator wear is generally due to the effect of oil. The oil/grease burns in the brush sparks, leaving behind a sharp-edged oil ash which has an abrasive effect. This can lead to inadmissibly high levels of carbon brush wear before the next scheduled maintenance date is reached. 6/2008 1 05
- 22. Chapter 3 Drive motor Copyrightprotected.Nopartofthismanual maybereproducedinanyform. Copyrightreserved. Issue 09/03 Workshop ManualReplaces issue SU/SD/SV Sheet no. 3 – 06 Maintenance Checking the brush unit, replacing the carbon brushes After the carbon brush unit has been cleaned, it should be possible to move the carbon brushes easily in their guide with the spring raised. If one or more of the carbon brushes jam, they must not be sanded down with emery paper or any other abrasive. In this case, the entire carbon brush unit must be replaced, as it is possible that the brushes were thermally overloaded. It is also important that the carbon brushes are not broken or chipped at the running edges. • Always replace the entire brush set, basing your assessment on the shortest brush. • Only use original replacement carbon brushes (see spare parts list!). • Do not allow the carbon brush springs to knock against the carbon brushes when you are inserting the brushes. • If the minimum length has not quite been reached, replace the brushes anyway, as the remaining running time may be shorter than the next maintenance interval. • A maximum of 3 carbon brush sets should be replaced in succession before a general overhaul of the motor is carried out (by a specialist workshop).