This is the Highly Detailed factory service repair manual for theHYUNDAI 18L-7A FORKLIFT TRUCK, this Service Manual has detailed illustrations as well as step by step instructions,It is 100 percents complete and intact. they are specifically written for the do-it-yourself-er as well as the experienced mechanic.HYUNDAI 18L-7A FORKLIFT TRUCK Service Repair Workshop Manual provides step-by-step instructions based on the complete dis-assembly of the machine. It is this level of detail, along with hundreds of photos and illustrations, that guide the reader through each service and repair procedure. Complete download comes in pdf format which can work under all PC based windows operating system and Mac also, All pages are printable. Using this repair manual is an inexpensive way to keep your vehicle working properly.
Service Repair Manual Covers:
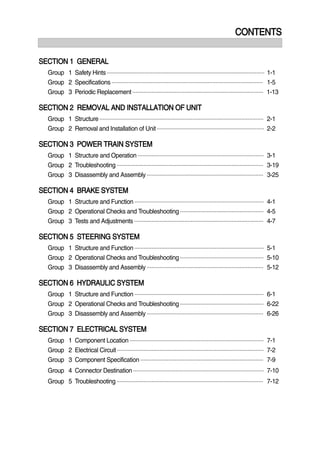
SECTION 1 GENERAL
Group 1 Safety Hints
Group 2 Specifications
Group 3 Periodic replacement
SECTION 2 REMOVAL AND INSTALLATION OF UNITUNCTION
Group 1 Structure
Group 2 Removal and installation of unit
SECTION 3 POWER TRAIN SYSTEM
Group 1 Structure and Operation
Group 2 Troubleshooting
Group 3 Disassembly and assembly
SECTION 4 BRAKE SYSTEM
Group 1 Structure and function
Group 2 Operational checks and troubleshooting
Group 3 Test and adjustment
SECTION 5 STEERING SYSTEM
Group 1 Structure and function
Group 2 Operational checks and troubleshooting
Group 3 Disassembly and assembly
SECTION 6 HYDRAULIC SYSTEM
Group 1 Structure and function
Group 2 Operational checks and troubleshooting
Group 3 Disassembly and assembly
SECTION 7 ELECTRIC SYSTEM
Group 1 Component location
Group 2 Electrical circuit
Group 3 Component specification
Group 4 Connector destination and troubleshooting
SECTION 8 MAST
Group 1 Structure
Group 2 Operational checks and troubleshooting
Group 3 Adjustment
Group 4 Removal and installation
File Format: PDF
Compatible: All Versions of Windows & Mac
Language: English
Requirements: Adobe PDF Reader
NO waiting, Buy from responsible seller and get INSTANT DOWNLOAD, Without wasting your hard-owned money on uncertainty or surprise! All pages are is great to haveHYUNDAI 18L-7A FORKLIFT TRUCK Service Repair Workshop Manual.
Thanks for visiting!
Top Rated Call Girls Mumbai Central : 9920725232 We offer Beautiful and sexy ...
Hyundai 18L-7A Forklift Truck Service Repair Manual
1. CONTENTS
SECTION 1 GENERAL
Group 1 Safety Hints ---------------------------------------------------------------------------------------------------- 1-1
Group 2 Specifications ------------------------------------------------------------------------------------------------ 1-5
Group 3 Periodic Replacement ----------------------------------------------------------------------------------- 1-13
SECTION 2 REMOVAL AND INSTALLATION OF UNIT
Group 1 Structure -------------------------------------------------------------------------------------------------------- 2-1
Group 2 Removal and Installation of Unit -------------------------------------------------------------------- 2-2
SECTION 3 POWER TRAIN SYSTEM
Group 1 Structure and Operation -------------------------------------------------------------------------------- 3-1
Group 2 Troubleshooting --------------------------------------------------------------------------------------------- 3-19
Group 3 Disassembly and Assembly -------------------------------------------------------------------------- 3-25
SECTION 4 BRAKE SYSTEM
Group 1 Structure and Function ---------------------------------------------------------------------------------- 4-1
Group 2 Operational Checks and Troubleshooting ----------------------------------------------------- 4-5
Group 3 Tests and Adjustments ---------------------------------------------------------------------------------- 4-7
SECTION 5 STEERING SYSTEM
Group 1 Structure and Function ---------------------------------------------------------------------------------- 5-1
Group 2 Operational Checks and Troubleshooting ----------------------------------------------------- 5-10
Group 3 Disassembly and Assembly -------------------------------------------------------------------------- 5-12
SECTION 6 HYDRAULIC SYSTEM
Group 1 Structure and Function ---------------------------------------------------------------------------------- 6-1
Group 2 Operational Checks and Troubleshooting ----------------------------------------------------- 6-22
Group 3 Disassembly and Assembly -------------------------------------------------------------------------- 6-26
SECTION 7 ELECTRICAL SYSTEM
Group 1 Component Location ------------------------------------------------------------------------------------- 7-1
Group 2 Electrical Circuit --------------------------------------------------------------------------------------------- 7-2
Group 3 Component Specification ------------------------------------------------------------------------------ 7-9
Group 4 Connector Destination ----------------------------------------------------------------------------------- 7-10
Group 5 Troubleshooting --------------------------------------------------------------------------------------------- 7-12
2. SECTION 8 MAST
Group 1 Structure -------------------------------------------------------------------------------------------------------- 8-1
Group 2 Operational Checks and Troubleshooting ----------------------------------------------------- 8-4
Group 3 Adjustment ---------------------------------------------------------------------------------------------------- 8-7
Group 4 Removal and Installation ------------------------------------------------------------------------------- 8-10
3. 0-1
FOREWORD
1. STRUCTURE
This service manual has been prepared as an aid to improve the quality of repairs by giving the
serviceman an accurate understanding of the product and by showing him the correct way to perform
repairs and make judgements. Make sure you understand the contents of this manual and use it to
full effect at every opportunity.
This service manual mainly contains the necessary technical information for operations performed in
a service workshop.
For ease of understanding, the manual is divided into the following sections.
SECTION 1 GENERAL
This section gives the general information of the machine and explains the safety hints for
maintenance.
SECTION 2 REMOVAL & INSTALLATION OF UNIT
This section explains the procedures and techniques of removal and installation of each component.
SECTION 3 POWER TRAIN SYSTEM
This section explains the structure of the transmission as well as control valve and drive axle.
SECTION 4 BRAKE SYSTEM
This section explains the brake piping, each component and operation.
SECTION 5 STEERING SYSTEM
This section explains the structure of the steering unit, priority valve, trail axle as well as steering
circuit and operation.
SECTION 6 HYDRAULIC SYSTEM
This section explains the structure of the gear pump, main control valve as well as work equipment
circuit, each component and operation.
SECTION 7 ELECTRICAL SYSTEM
This section explains the electrical circuit and each component.
It serves not only to give an understanding electrical system, but also serves as reference material for
troubleshooting.
SECTION 8 MAST
This section explains the structure of mast, carriage, backrest and forks.
The specifications contained in this service manual are subject to change at any time and without any
advance notice. Contact your HYUNDAI distributor for the latest information.
4. 0-2
Revised edition mark(ΗΘΙÄ)
When a manual is revised, an edition mark is
recorded on the bottom outside corner of the
pages.
R
Revisions
Revised pages are shown at the list of revised
pages on the between the contents page and
section 1 page.
Symbols
So that the shop manual can be of ample
practical use, important places for safety and
quality are marked with the following symbols.
2. HOW TO READ THE SERVICE MANUAL
Distribution and updating
Any additions, amendments or other changes will
be sent to HYUNDAI distributors.
Get the most up-to-date information before you
start any work.
Filing method
See the page number on the bottom of the
page.
File the pages in correct order.
Following examples shows how to read the
page number.
Example 1
2 - 3
Item number(2. Structure and
Function)
Consecutive page number for
each item.
Additional pages : Additional pages are
indicated by a hyphen(-) and number after the
page number. File as in the example.
1.
2.
3.
Symbol Item Remarks
Special safety precautions are
necessary when performing the
work.
Extra special safety precautions
are necessary when performing
the work because it is under
internal pressure.
Special technical precautions or
other precautions for preserving
standards are necessary when
performing the work.
Safety
Caution
ö
10 - 4
10 - 4 - 1
10 - 4 - 2
10 - 5
Added pages
5. 0-3
3. CONVERSION TABLE
Method of using the Conversion Table
The Conversion Table in this section is provided to enable simple conversion of figures. For details of
the method of using the Conversion Table, see the example given below.
Example
Method of using the Conversion Table to convert from millimeters to inches
Convert 55mm into inches.
Locate the number 50in the vertical column at the left side, take this as ͽ, then draw a
horizontal line from ͽ.
Locate the number 5in the row across the top, take this as ;, then draw a perpendicular line
down from ;.
Take the point where the two lines cross as Ϳ. This point Ϳ gives the value when converting
from millimeters to inches. Therefore, 55mm = 2.165 inches.
Convert 550mm into inches.
The number 550 does not appear in the table, so divide by 10(Move the decimal point one place
to the left) to convert it to 55mm.
Carry out the same procedure as above to convert 55mm to 2.165 inches.
The original value(550mm) was divided by 10, so multiply 2.165 inches by 10(Move the decimal
point one place to the right) to return to the original value.
This gives 550mm = 21.65 inches.
1.
2.
(1)
(2)
(3)
(1)
(2)
(3)
Millimeters to inches 1mm = 0.03937 in
;
ͽ
0 1 2 3 4 5 6 7 8 9
0 0.039 0.079 0.118 0.157 0.197 0.236 0.276 0.315 0.354
10 0.394 0.433 0.472 0.512 0.551 0.591 0.630 0.669 0.709 0.748
20 0.787 0.827 0.866 0.906 0.945 0.984 1.024 1.063 1.102 1.142
30 1.181 1.220 1.260 1.299 1.339 1.378 1.417 1.457 1.496 1.536
40 1.575 1.614 1.654 1.693 1.732 1.772 1.811 1.850 1.890 1.929
50 1.969 2.008 2.047 2.087 2.126 2.165 2.205 2.244 2.283 2.323
60 2.362 2.402 2.441 2.480 2.520 2.559 2.598 2.638 2.677 2.717
70 2.756 2.795 2.835 2.874 2.913 2.953 2.992 3.032 3.071 3.110
80 3.150 3.189 3.228 3.268 3.307 3.346 3.386 3.425 3.465 3.504
90 3.543 3.583 3.622 3.661 3.701 3.740 3.780 3.819 3.858 3.898
Ϳ
6. 6-26
GROUP 3 DISASSEMBLY AND ASSEMBLY
1. HYDRAULIC GEAR PUMP
Tools required
ÂMetric socket set
ÂInternal snap ring pliers
ÂShaft seal sleeve
ÂTorque wrench
It is very important to work in a clean work
area when repairing hydraulic products.
Plug ports and wash exterior of pump with
a proper cleaning solvent before continu-
ing.
Remove port plugs and drain oil from
pump.
Use a permanent marker pen to mark a
line across the mounting flange, gear
housing and end cover. This will assure
proper reassembly and rotation of pump.
Remove key from drive shaft if applicable.
(1)
(2)
(3)
(4)
ö
PUMP 01
PUMP 02
Clamp mounting flange in a protected jaw
vise with pump shaft facing down.
Loosen the four metric hexagon head
bolts.
Remove pump from vise and place on
clean work bench, remove the four hexagon
head bolts and spacers applicable.
(5)
(6)
(7)
7. 6-27
PUMP 03
Lift and remove end cover.
(8)
PUMP 04
Carefully remove gear housing and place
on work bench. Make sure the rear
bearing block remains on the drive and
idler shafts.
(9)
PUMP 05
Remove rear bearing block from drive and
idler shafts.
(10)
PUMP 06
Remove idler shaft from bearing block.
(11)
8. 6-28
PUMP 07
Remove drive shaft from mounting flange.
There is no need to protect the shaft seal
as it will be replaced as a new item.
(12)
PUMP 08
Remove the front bearing block.
(13)
PUMP 09
Turn mounting flange over, with shaft seal
up, and remove the retaining ring with
proper snap ring pliers.
(14)
PUMP 10
Remove the oil seal from mounting flange,
be careful not to mar or scratch the seal
bore.
Remove the dowel pins from the gear
housing. Do not lose pins.
(15)
(16)
9. 6-29
PUMP 11
Remove seals from both bearing blocks
and discard.
(17)
INSPECT PARTS FOR WEAR
Clean and dry all parts thoroughly prior to
inspection. It is not necessary to inspect
the seals as they will be replaced as new
items.
Check drive shaft spline for twisted or
broken teeth, check keyed drive shaft for
broken or chipped keyway. No marks or
grooves on shaft in seal area, some
discoloration of shaft is allowable.
Inspect both the drive gear shaft and idler
gear shafts at the bearing points and seal
area for rough surfaces and excessive
wear.
(1)
(2)
(3)
2)
PUMP 12
PUMP 13
Inspect gear face for scoring or excessive
wear. If the face edge of gear teeth are
sharp, they will mill into the bearing blocks.
If wear has occurred, the parts are
unusable.
(4)
10. 6-30
PUMP 14
Inspect bearing blocks for excessive wear
or scoring on the surfaces which are in
contact with the gears. Also inspect the
bearings for excessive wear or scoring.
Inspect the area inside the gear housing.
It is normal for the surface inside the gear
housing to show a clean "wipe" on the
inside surface on the intake side. There
should not be excessive wear or deep
scratches and gouges.
General information
It is important that the relationship of the
mounting flange, bearing blocks and gear
housing is correct. Failure to properly
assemble this pump will result with little or
no flow at rated pressure.
This pump is not bi-rotational.
(5)
(6)
ö
ö
11. 6-31
ASSEMBLY
New seals should be installed upon
reassembly of pump.
Install new shaft seal in mounting flange
with part number side facing outboard.
Press the seal into the seal bore until the
seal reaches the bottom of the bore.
Uniform pressure must be used to prevent
misalignment or damage to the seal.
ö
(1)
3
3)
PUMP 15
PUMP 16
Install retaining ring in groove in seal bore
of mounting flange.
(2)
PUMP 17
Place front and back bearing blocks on a
clean surface with the E-seal grooves
facing up. Apply a light coating of
petroleum jelly in the grooves. Also coat
the E-seal and backup with the petroleum
jelly, this will help keep the seals in place
during assembly.
(3)
PUMP 18
Place the E-seals, flat side outward, into
the grooves in both bearing blocks. Follow
by carefully placing the backup ring, flat
side outward, in the groove made by the
E-seal and the groove in the bearing
block.
Place mounting flange, with shaft seal
side down, on a clean flat surface.
Apply a light coating of petroleum jelly to
the exposed face of the front bearing
block.
(4)
(5)
(6)
12. 6-32
PUMP 19
Insert the drive end of the drive shaft
through the bearing block with the seal
side down, and the open side of the E-
seal pointing to the intake side of the
pump.
Install the seal sleeve over the drive shaft
and carefully slide the drive shaft through
the shaft seal. Remove the seal sleeve
from shaft.
(7)
(8)
PUMP 20
Install the idler gear shaft in the remaining
position in the bearing block. Apply a light
coat of clean oil to the face of the drive
and idler gears.
(9)
PUMP 21
Pick up the rear bearing block, with seal
side up and with open end of the E-seal
facing the intake side of the pump, place
over the drive and idler gear shafts.
Install two dowel pins in the holes in the
mounting flange or two long dowel pins
through gear housing if pump is a multiple
section pump.
(10)
(11)
PUMP 22
To install the O-rings in the gear housing,
apply a light coating of petroleum jelly in
the grooves on both sides of the gear
housing.
Also coat the new O-ring and install them
in the grooves.
(12)
13. 6-33
PUMP 23
Gently slide the gear housing over the rear
bearing block assembly, slide housing
down until the housing engages the dowel
pins. Press firmly in place with hands, do
not force or use any tool.
Check to make sure the intake port in the
housing in on the same side as the open
end of the E-seal and that the marked
lines on the mounting flange and gear
housing are in alignment.
The surface of the rear bearing block
should be slightly below the face of the
gear housing. If the bearing block sits
higher then the rear face of the gear
housing then the E-seal or O-ring have
shifted out of the groove. If this is the
case, remove the gear housing and check
for proper seal installation.
(13)
(14)
PUMP 24
Install the two remaining dowel pins in the
rear of the gear housing and place the
end cover over the back of the pump.
(15)
PUMP 25
Install the four spacers and hexagon head
bolts through the bolt holes in the end
cover, hand tighten.
(16)
14. 6-34
PUMP 26
Place mounting flange of the pump back
in the protected jawed vise and alternately
torque the bolts.
ÂTighten torque : 6~7kgfÂm
(43.4~50.6lbfÂft)
Remove pump from vise.
Place a small amount of clean oil in the
inlet of the pump and rotate the drive shaft
away from the inlet one revolution. If the
drive shaft binds, disassemble the pump
and check for assembly problems, then
reassemble the pump.
(17)
(18)
(19)
15. 6-35
2. MAIN CONTROL VALVE
ASSEMBLY
2.4~2.9kgf m
15L7HS31
Attach all the o-rings to the appropriate grooves between the spool sections.
Stack the valve sections such that all the work ports are facing up, the spool ends are all in the
same direction, and resting on a flat (within 0.2mm), uniform surface.
Insert all the tie rods through the drilled holes in each of the housings.
Press the sections together, being careful not to damage sealing surfaces or seals.
Install nuts to both ends of all tie rods and progressively torque in a circular pattern until reaching
a torque of 2.4~2.9 kgfÂm (17.4~21.0 lbfÂft)on all tie rods. Periodically, make sure that the valve
remains flat while applying torque.
Η
Θ
Ι
Κ
Λ
B
Block subassembly
(2)
1)
General
(1)
Ensure that the assembly area will be clean and free of contamination.
Use a flat (within 0.2mm) work surface when bolting the valve sections together.
Use calibrated torque wrenches and instrumentation.
The formal Bills of Material, descriptions, and views are found in the attached documentation.
Additional auxiliary valve sections may be added to the main control valve in a similar manner as
indicated below, as approved by the Hyundai.
Η
Θ
Ι
Κ
Λ
16. 6-36
CAP
MAIN RELIEF VALVE
AUX SPOOL ASSY
AUX SPOOL ASSY
TILT SPOOL ASSY
LIFT SPOOL ASSY
NEEDLE VALVE
SOLENOID V/V CATRIDGE
(NORMALLY OPEN)
SOLENOID V/V COIL
LIFT LOAD CHECK V/V
SECONDARY RELIEF VALVE
DUST WIPER
SEAL
SEAL PLATE
SPRING
LOAD CHECK
PLUG
SOLENOID V/V CATRIDGE
(NORMALLY CLOSED)
SOLENOID V/V COIL
15L7HS34
Install the main relief valve assembly into the lower side cavity of the inlet section, as illustrated.
Torque to 4.5-5.0 kgfÂm (32.5~36.2 lbfÂft).
Install the normally open solenoid valve assembly in the side cavity of the inlet directly above the
main relief valve. Torque to 3.5-4.0 kgfÂm (25.2~28.8 lbfÂft).
Install the plug assembly in the tank port of the inlet section.
Torque to 4.5-5.0 kgfÂm (32.5~36.2 lbfÂft).
Install the plug in the pressure gage port to the inlet. Torque to 4.5-5.0 kgfÂm (32.5~36.2 lbfÂft).
Η
Θ
Ι
Κ
I
Inlet section
(3)
17. Thank you very much for
your reading. Please Click
Here. Then Get COMPLETE
MANUAL. NO WAITING
NOTE:
If there is no response to
click on the link above,
please download the PDF
document first and then
click on it.
18. 6-37
Lift section
(4)
The spool assembly should already consist of the lift spool, the return spring, one spring seat on
either end of the spring, the seal plate, a spool seal, and a dust wiper. All of these are assembled
on the end of the spool opposite the clevis.
Insert the clevis end of the spool into the right-hand side of the spool bore (the tallest end of the
housing). Place the spool cap over the spool and spring assembly and connect the cap to the
housing using two bolts. Torque both bolts alternatively until a torque of 1.0-1.5 kgfÂm (7.2~10.8
lbfÂft) is reached on both bolts.
Install the second spool seal and dust wiper over the clevis end of the spool and retain with a seal
plate and two bolts. Torque both bolts alternatively until a torque of 1.0-1.5 kgfÂm (7.2~10.8 lbfÂft)
is reached on both bolts.
The load check assembly is inserted into the top center cavity.
Torque to 3.5-4.0kgfÂm (25.2~28.8 lbfÂft).
The normally closed solenoid is installed in the rightmost cavity on the top of the section.
Torque to 3.5-4.0 kgfÂm (25.2~28.8 lbfÂft).
Install the lift lock check valve assembly in the remaining open cavity in the top of the housing.
Torque to 4.5-5.0 kgfÂm (32.5~36.2 lbfÂft).
Install the needle valve subassembly in the cavity on the inlet-facing surface of the housing.
Torque to 1.0-1.5 kgfÂm (7.2~10.8 lbfÂft).
Η
Θ
Ι
Κ
Λ
Μ
Ν
CAP
MAIN RELIEF VALVE
AUX SPOOL ASSY
AUX SPOOL ASSY
TILT SPOOL ASSY
LIFT SPOOL ASSY
NEEDLE VALVE
SOLENOID V/V CATRIDGE
(NORMALLY OPEN)
SOLENOID V/V COIL
LIFT LOAD CHECK V/V
SECONDARY RELIEF VALVE
DUST WIPER
SEAL
SEAL PLATE
SPRING
LOAD CHECK
PLUG
SOLENOID V/V CATRIDGE
(NORMALLY CLOSED)
SOLENOID V/V COIL
15L7HS34
19. 6-38
CAP
MAIN RELIEF VALVE
AUX SPOOL ASSY
AUX SPOOL ASSY
TILT SPOOL ASSY
LIFT SPOOL ASSY
NEEDLE VALVE
SOLENOID V/V CATRIDGE
(NORMALLY OPEN)
SOLENOID V/V COIL
LIFT LOAD CHECK V/V
SECONDARY RELIEF VALVE
DUST WIPER
SEAL
SEAL PLATE
SPRING
LOAD CHECK
PLUG
SOLENOID V/V CATRIDGE
(NORMALLY CLOSED)
SOLENOID V/V COIL
15L7HS34
The spool assembly should already consist of the tilt spool (with tilt plunger and spring inserted
into the bore on the spring end), the return spring, one spring seat on either end of the spring, the
seal plate, a spool seal, and a dust wiper. All of these are assembled on the end of the spool
opposite the clevis.
Insert the clevis end of the spool into the right-hand side of the spool bore (the tallest end of the
housing). Place the spool cap over the spool and spring assembly and connect the cap to the
housing using two bolts. Torque both bolts alternatively until a torque of 1.0-1.5 kgfÂm (7.2~10.8
lbfÂft) is reached on both bolts.
Install the second spool seal and dust wiper over the clevis end of the spool and retain with a seal
plate and two bolts. Torque both bolts alternatively until a torque of 1.0-1.5 kgfÂm (7.2~10.8 lbfÂft)
is reached on both bolts.
The load check assembly is inserted into the top center cavity.
Torque to 3.5-4.0 kgfÂm (25.2~28.8 lbfÂft).
Η
Θ
Ι
Κ
T
Tilt section
(5)
20. 6-39
Auxiliary sections
(6)
(Same procedure for all aux sections, but spool assembly components may vary)
The spool assembly should already consist of the proper aux spool, the return spring, one spring
seat on either end of the spring, the seal plate, a spool seal, and a dust wiper. All of these are
assembled on the end of the spool opposite the clevis.
Insert the clevis end of the spool into the right-hand side of the spool bore (the tallest end of the
housing). Place the spool cap over the spool and spring assembly and connect the cap to the
housing using two bolts. Torque both bolts alternatively until a torque of 1.0-1.5 kgfÂm (7.2~10.8
lbfÂft) is reached on both bolts.
Install the second spool seal and dust wiper over the clevis end of the spool and retain with a seal
plate and two bolts. Torque both bolts alternatively until a torque of 1.0-1.5 kgfÂm (7.2~10.8 lbfÂft)
is reached on both bolts.
The load check assembly is inserted into the top center cavity.
Torque to 3.5-4.0kgfÂm (25.2~28.8 lbfÂft) .
Η
Θ
Ι
Κ
O
Outlet section
(7)
Install the secondary relief valve into the cavity on the clevis end of the housing.
Torque to 4.5-5.0 kgfÂm (32.5~36.2 lbfÂft).
Η
CAP
MAIN RELIEF VALVE
AUX SPOOL ASSY
AUX SPOOL ASSY
TILT SPOOL ASSY
LIFT SPOOL ASSY
NEEDLE VALVE
SOLENOID V/V CATRIDGE
(NORMALLY OPEN)
SOLENOID V/V COIL
LIFT LOAD CHECK V/V
SECONDARY RELIEF VALVE
DUST WIPER
SEAL
SEAL PLATE
SPRING
LOAD CHECK
PLUG
SOLENOID V/V CATRIDGE
(NORMALLY CLOSED)
SOLENOID V/V COIL
15L7HS34