SlideShare a Scribd company logo
1 of 9
Download to read offline
www.topcredu.co.kr 이종철
C#, WPF 기초강좌
ListBox와 LINQ쿼리를 이용한 간단한 데이
터바인딩, 새창 띄우기, 이벤트 및 델리게이
트를 통한 메인윈도우의 ListBox Refresh 적
용 실습
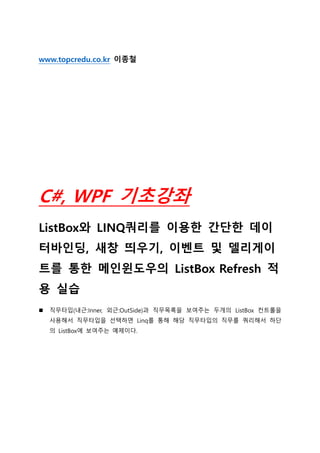
 직무타입(내근:Inner, 외근:OutSide)과 직무목록을 보여주는 두개의 ListBox 컨트롤을
사용해서 직무타입을 선택하면 Linq를 통해 해당 직무타입의 직무를 쿼리해서 하단
의 ListBox에 보여주는 예제이다.
 “직무추가” 버튼을 클릭하면 새창이 뜨고 직무를 입력 후 저장 버튼을 클릭하면 직
무입력 화면이 사라지고 메인 윈도우 상단의 ListBox가 새창에서 입력한 직무타입으
로 선택되면서 하단의 ListBox는 해당 직무타입의 직무목록으로 자동으로 Refresh
된다.
 WPF 프로젝트를 생성하자. (본 예제에서는 프로젝트명을 “WpfApp1”로 설정했다.)
 [Duty.cs]
using System.ComponentModel;
using System.Collections.ObjectModel;
namespace WpfApp1
{
public enum DutyType
{
Inner,
OutSide
}
public class Duty
{
private string _name;
private DutyType _dutyType;
public Duty()
{
}
public Duty(string name, DutyType dutyType)
{
_name = name;
_dutyType = dutyType;
}
public string DutyName
{
get { return _name; }
set
{
_name = value;
}
}
public DutyType DutyType
{
get { return _dutyType; }
set
{
_dutyType = value;
}
}
}
public class Duties : ObservableCollection<Duty>
{
public Duties()
{
Add(new Duty("SALES",DutyType.OutSide));
Add(new Duty("LOGISTICS", DutyType.OutSide));
Add(new Duty("IT", DutyType.Inner));
Add(new Duty("MARKETING", DutyType.Inner));
Add(new Duty("HR", DutyType.Inner));
Add(new Duty("PROPOTION", DutyType.OutSide));
}
}
}
 [MainWindow.xaml]
<Window x:Class="WpfApp1.MainWindow"
xmlns="http://schemas.microsoft.com/winfx/2006/xaml/presentation"
xmlns:x="http://schemas.microsoft.com/winfx/2006/xaml"
xmlns:local="clr-namespace:WpfApp1"
Title="MainWindow"
SizeToContent="WidthAndHeight" Height="600">
<Window.Resources>
<local:Duties x:Key="duties"/>
<DataTemplate x:Key="MyTemplate">
<Border Name="border">
<Grid>
<Grid.RowDefinitions>
<RowDefinition/>
<RowDefinition/>
<RowDefinition/>
</Grid.RowDefinitions>
<Grid.ColumnDefinitions>
<ColumnDefinition />
</Grid.ColumnDefinitions>
<TextBlock Grid.Row="0" Grid.Column="0" Text="Duty
Name:"/>
<TextBlock Grid.Row="0" Grid.Column="1"
Text="{Binding Path=DutyName}" />
<TextBlock Grid.Row="1" Grid.Column="0"
Text="DutyType:"/>
<TextBlock Grid.Row="1" Grid.Column="1"
Text="{Binding Path=DutyType}"/>
<Separator Grid.Row="2" Grid.ColumnSpan="2"/>
</Grid>
</Border>
</DataTemplate>
<LinearGradientBrush x:Key="GrayBlueGradientBrush"
StartPoint="0,0" EndPoint="1,1">
<GradientStop Color="DarkGray" Offset="0" />
<GradientStop Color="#CCCCFF" Offset="0.5" />
<GradientStop Color="DarkGray" Offset="1" />
</LinearGradientBrush>
<Style TargetType="{x:Type Button}">
<Setter Property="Background" Value="{StaticResource
GrayBlueGradientBrush}" />
<Setter Property="Width" Value="80" />
<Setter Property="Margin" Value="10" />
</Style>
</Window.Resources>
<StackPanel>
<Button x:Name="Add" Click="OpenNewWindow">직무 추가</Button>
<TextBlock Margin="10,0,0,0">직무타입을 선택
하세요.</TextBlock>
<ListBox Name="myListBox1" SelectionChanged="OnSelected"
SelectedIndex="0" Margin="10,0,10,0" >
<ListBoxItem>Inner</ListBoxItem>
<ListBoxItem>OutSide</ListBoxItem>
</ListBox>
<TextBlock Margin="10,10,0,-10">직무</TextBlock>
<ListBox Width="400" Margin="10" Name="myListBox2"
HorizontalContentAlignment="Stretch"
ItemsSource="{Binding}"
ItemTemplate="{StaticResource MyTemplate}"
SelectionChanged="OnSelected2"/>
</StackPanel>
</Window>
 [MainWindow.xaml.cs]
using System.Linq;
using System.Windows;
using System.Windows.Controls;
namespace WpfApp1
{
public partial class MainWindow : Window
{
internal static Duties duties = new Duties();
public MainWindow()
{
InitializeComponent();
}
// 상단 ListBox의 항목(직무타입)을 선택했을 때
private void OnSelected(object sender,
SelectionChangedEventArgs e)
{
if ((sender as ListBox).SelectedItem != null)
{
string dutyType = ((sender as ListBox).SelectedItem as
ListBoxItem).Content.ToString();
DataContext = from duty in duties
where duty.DutyType.ToString() ==
dutyType
select duty;
}
}
//하단 ListBox의 항목(직무)를 선택했을 때
private void OnSelected2(object sender,
SelectionChangedEventArgs e)
{
var duty = (Duty)myListBox2.SelectedItem;
string value = duty == null ? "No selection" :
duty.ToString();
MessageBox.Show(duty.DutyName + "::" + duty.DutyType,
"선택한 직무" );
}
// 직무추가 버튼을 클릭 했을 때 새창을 띄움.
private void OpenNewWindow(object sender, RoutedEventArgs e)
{
SubWindow subWindow = new SubWindow();
RefreshListEvent += new RefreshList(RefreshListBox); //
event initialization
subWindow.UpdateActor = RefreshListEvent; // assigning
event to the Delegate
subWindow.Show();
}
// 아래쪽 ListBox를 Refresh 하기위한 델리게이트 및 이벤트
public delegate void RefreshList(DutyType dutyType);
public event RefreshList RefreshListEvent;
// RefreshListEvent 이벤트가 발생했 을 때 호출되는 메소드
private void RefreshListBox(DutyType dutyType)
{
// 내근은 SelectedIndex를 0, 외근은 SelectedIndex를 1로
설정하여
// 상단 ListBox의 선택값을 변경 시킨다.
// 상단 ListBox의 값이 바뀜에 따라 OnSelected 이벤트
핸들러가 호출되어
// 자동으로 아래쪽 ListBox의 값은 변경된다.
myListBox1.SelectedItem = null;
myListBox1.SelectedIndex = (dutyType == DutyType.Inner)?
0 : 1;
}
}
}
 [SubWindow.xaml]
<Window x:Class="WpfApp1.SubWindow"
xmlns="http://schemas.microsoft.com/winfx/2006/xaml/presentation"
xmlns:x="http://schemas.microsoft.com/winfx/2006/xaml"
xmlns:d="http://schemas.microsoft.com/expression/blend/2008"
xmlns:mc="http://schemas.openxmlformats.org/markup-
compatibility/2006"
xmlns:local="clr-namespace:WpfApp1"
mc:Ignorable="d"
Title="SubWindow" Height="230" Width="350">
<Grid Margin="10">
<Grid.ColumnDefinitions>
<ColumnDefinition/>
<ColumnDefinition/>
<ColumnDefinition/>
</Grid.ColumnDefinitions>
<Grid.RowDefinitions>
<RowDefinition Height="40"/>
<RowDefinition />
</Grid.RowDefinitions>
<TextBlock FontSize="20" Grid.ColumnSpan="3"
HorizontalAlignment="Center" VerticalAlignment="Center">직무
등록</TextBlock>
<TextBlock Grid.Row="1" Margin="10"
VerticalAlignment="Center">직무명</TextBlock>
<TextBox x:Name="txtDutyName" Grid.Row="1" Margin="10"
Grid.Column="1" Grid.ColumnSpan="2" VerticalAlignment="Center"/>
<TextBlock Margin="10" Grid.Row="2"
VerticalAlignment="Center">직무타입</TextBlock>
<RadioButton x:Name="rdoInner" Grid.Row="2" Grid.Column="1"
HorizontalAlignment="Center"
VerticalAlignment="Center">내근</RadioButton>
<RadioButton x:Name="rdoOutside" Grid.Row="2" Grid.Column="2"
HorizontalAlignment="Center"
VerticalAlignment="Center">외근</RadioButton>
<Button Grid.Column="1" Grid.Row="3" Width="100"
HorizontalAlignment="Center"
Click="Button_Click" Height="22">저장</Button>
</Grid>
</Window>
 [SubWindow.xaml.cs]
using System;
using System.Windows;
namespace WpfApp1
{
public partial class SubWindow : Window
{
// 메인 윈도우의 하단 ListBox를 Refresh하기 위한 델리게이트
// 메인 윈도우에서 직무추가 버튼을 클릭할 때 이벤트를 할당해
준다.
public Delegate UpdateActor;
public SubWindow()
{
InitializeComponent();
}
// 저장 버튼 클릭
private void Button_Click(object sender, RoutedEventArgs e)
{
if (rdoInner.IsChecked == false && rdoOutside.IsChecked ==
false)
{
MessageBox.Show("내근 또는 외근을 선택하세요.",
"항목선택");
return;
}
DutyType dutyType = (rdoInner.IsChecked == true) ?
DutyType.Inner : DutyType.OutSide;
MainWindow.duties.Add(
new Duty(txtDutyName.Text,
dutyType
));
UpdateActor.DynamicInvoke(dutyType);
MessageBox.Show("저장OK!", "저장확인");
this.Close();
}
}
}

More Related Content

What's hot

Higher Order Components and Render Props
Higher Order Components and Render PropsHigher Order Components and Render Props
Higher Order Components and Render PropsNitish Phanse
 
Select All Record From Tools Menu On Find Receipts For Matching Form
Select All Record From Tools Menu On Find Receipts For Matching FormSelect All Record From Tools Menu On Find Receipts For Matching Form
Select All Record From Tools Menu On Find Receipts For Matching FormAhmed Elshayeb
 
Layout with Stack View, Table View, and Collection View
Layout with Stack View, Table View, and Collection ViewLayout with Stack View, Table View, and Collection View
Layout with Stack View, Table View, and Collection ViewMake School
 
Oracle APEX Performance
Oracle APEX PerformanceOracle APEX Performance
Oracle APEX PerformanceScott Wesley
 
App inventor 3
App inventor 3App inventor 3
App inventor 3Roy Wang
 
Sharing Data Between Angular Components
Sharing Data Between Angular ComponentsSharing Data Between Angular Components
Sharing Data Between Angular ComponentsSquash Apps Pvt Ltd
 
Javascript this keyword
Javascript this keywordJavascript this keyword
Javascript this keywordPham Huy Tung
 
introduction to Vue.js 3
introduction to Vue.js 3 introduction to Vue.js 3
introduction to Vue.js 3 ArezooKmn
 
Flask Introduction - Python Meetup
Flask Introduction - Python MeetupFlask Introduction - Python Meetup
Flask Introduction - Python MeetupAreski Belaid
 
The virtual DOM and how react uses it internally
The virtual DOM and how react uses it internallyThe virtual DOM and how react uses it internally
The virtual DOM and how react uses it internallyClóvis Neto
 
Document object model
Document object modelDocument object model
Document object modelAmit kumar
 
Puppeteer - A web scraping & UI Testing Tool
Puppeteer - A web scraping & UI Testing ToolPuppeteer - A web scraping & UI Testing Tool
Puppeteer - A web scraping & UI Testing ToolMiki Lombardi
 
Html5 and-css3-overview
Html5 and-css3-overviewHtml5 and-css3-overview
Html5 and-css3-overviewJacob Nelson
 

What's hot (20)

How to create PO with ASN
How to create PO with ASNHow to create PO with ASN
How to create PO with ASN
 
Higher Order Components and Render Props
Higher Order Components and Render PropsHigher Order Components and Render Props
Higher Order Components and Render Props
 
JavaScript: Events Handling
JavaScript: Events HandlingJavaScript: Events Handling
JavaScript: Events Handling
 
Select All Record From Tools Menu On Find Receipts For Matching Form
Select All Record From Tools Menu On Find Receipts For Matching FormSelect All Record From Tools Menu On Find Receipts For Matching Form
Select All Record From Tools Menu On Find Receipts For Matching Form
 
Layout with Stack View, Table View, and Collection View
Layout with Stack View, Table View, and Collection ViewLayout with Stack View, Table View, and Collection View
Layout with Stack View, Table View, and Collection View
 
Oracle APEX Performance
Oracle APEX PerformanceOracle APEX Performance
Oracle APEX Performance
 
Reactjs
ReactjsReactjs
Reactjs
 
Sightly - Part 2
Sightly - Part 2Sightly - Part 2
Sightly - Part 2
 
App inventor 3
App inventor 3App inventor 3
App inventor 3
 
Sharing Data Between Angular Components
Sharing Data Between Angular ComponentsSharing Data Between Angular Components
Sharing Data Between Angular Components
 
Javascript this keyword
Javascript this keywordJavascript this keyword
Javascript this keyword
 
introduction to Vue.js 3
introduction to Vue.js 3 introduction to Vue.js 3
introduction to Vue.js 3
 
Flask Introduction - Python Meetup
Flask Introduction - Python MeetupFlask Introduction - Python Meetup
Flask Introduction - Python Meetup
 
The virtual DOM and how react uses it internally
The virtual DOM and how react uses it internallyThe virtual DOM and how react uses it internally
The virtual DOM and how react uses it internally
 
Document object model
Document object modelDocument object model
Document object model
 
Puppeteer - A web scraping & UI Testing Tool
Puppeteer - A web scraping & UI Testing ToolPuppeteer - A web scraping & UI Testing Tool
Puppeteer - A web scraping & UI Testing Tool
 
Html5 and-css3-overview
Html5 and-css3-overviewHtml5 and-css3-overview
Html5 and-css3-overview
 
File Uploading in PHP
File Uploading in PHPFile Uploading in PHP
File Uploading in PHP
 
Vue js for beginner
Vue js for beginner Vue js for beginner
Vue js for beginner
 
Advanced JavaScript
Advanced JavaScriptAdvanced JavaScript
Advanced JavaScript
 

More from 탑크리에듀(구로디지털단지역3번출구 2분거리)

[뷰제이에스학원]뷰제이에스(Vue.js) 프로그래밍 입문(프로그레시브 자바스크립트 프레임워크)
[뷰제이에스학원]뷰제이에스(Vue.js) 프로그래밍 입문(프로그레시브 자바스크립트 프레임워크)[뷰제이에스학원]뷰제이에스(Vue.js) 프로그래밍 입문(프로그레시브 자바스크립트 프레임워크)
[뷰제이에스학원]뷰제이에스(Vue.js) 프로그래밍 입문(프로그레시브 자바스크립트 프레임워크)탑크리에듀(구로디지털단지역3번출구 2분거리)
 
[자마린교육/자마린실습]자바,스프링프레임워크(스프링부트) RESTful 웹서비스 구현 실습,자마린에서 스프링 웹서비스를 호출하고 응답 JS...
[자마린교육/자마린실습]자바,스프링프레임워크(스프링부트) RESTful 웹서비스 구현 실습,자마린에서 스프링 웹서비스를 호출하고 응답 JS...[자마린교육/자마린실습]자바,스프링프레임워크(스프링부트) RESTful 웹서비스 구현 실습,자마린에서 스프링 웹서비스를 호출하고 응답 JS...
[자마린교육/자마린실습]자바,스프링프레임워크(스프링부트) RESTful 웹서비스 구현 실습,자마린에서 스프링 웹서비스를 호출하고 응답 JS...탑크리에듀(구로디지털단지역3번출구 2분거리)
 
C#기초에서 윈도우, 스마트폰 앱개발 과정(c#.net, ado.net, win form, wpf, 자마린)_자마린학원_씨샵교육_WPF학원...
C#기초에서 윈도우, 스마트폰 앱개발 과정(c#.net, ado.net, win form, wpf, 자마린)_자마린학원_씨샵교육_WPF학원...C#기초에서 윈도우, 스마트폰 앱개발 과정(c#.net, ado.net, win form, wpf, 자마린)_자마린학원_씨샵교육_WPF학원...
C#기초에서 윈도우, 스마트폰 앱개발 과정(c#.net, ado.net, win form, wpf, 자마린)_자마린학원_씨샵교육_WPF학원...탑크리에듀(구로디지털단지역3번출구 2분거리)
 
자바, 웹 기초와 스프링 프레임워크 & 마이바티스 재직자 향상과정(자바학원/자바교육/자바기업출강]
자바, 웹 기초와 스프링 프레임워크 & 마이바티스 재직자 향상과정(자바학원/자바교육/자바기업출강]자바, 웹 기초와 스프링 프레임워크 & 마이바티스 재직자 향상과정(자바학원/자바교육/자바기업출강]
자바, 웹 기초와 스프링 프레임워크 & 마이바티스 재직자 향상과정(자바학원/자바교육/자바기업출강]탑크리에듀(구로디지털단지역3번출구 2분거리)
 
3. 안드로이드 애플리케이션 구성요소 3.2인텐트 part01(안드로이드학원/안드로이드교육/안드로이드강좌/안드로이드기업출강]
3. 안드로이드 애플리케이션 구성요소 3.2인텐트 part01(안드로이드학원/안드로이드교육/안드로이드강좌/안드로이드기업출강]3. 안드로이드 애플리케이션 구성요소 3.2인텐트 part01(안드로이드학원/안드로이드교육/안드로이드강좌/안드로이드기업출강]
3. 안드로이드 애플리케이션 구성요소 3.2인텐트 part01(안드로이드학원/안드로이드교육/안드로이드강좌/안드로이드기업출강]탑크리에듀(구로디지털단지역3번출구 2분거리)
 

More from 탑크리에듀(구로디지털단지역3번출구 2분거리) (20)

자마린.안드로이드 기본 내장레이아웃(Built-In List Item Layouts)
자마린.안드로이드 기본 내장레이아웃(Built-In List Item Layouts)자마린.안드로이드 기본 내장레이아웃(Built-In List Item Layouts)
자마린.안드로이드 기본 내장레이아웃(Built-In List Item Layouts)
 
(스프링프레임워크 강좌)스프링부트개요 및 HelloWorld 따라하기
(스프링프레임워크 강좌)스프링부트개요 및 HelloWorld 따라하기(스프링프레임워크 강좌)스프링부트개요 및 HelloWorld 따라하기
(스프링프레임워크 강좌)스프링부트개요 및 HelloWorld 따라하기
 
자마린 iOS 멀티화면 컨트롤러_네비게이션 컨트롤러, 루트 뷰 컨트롤러
자마린 iOS 멀티화면 컨트롤러_네비게이션 컨트롤러, 루트 뷰 컨트롤러자마린 iOS 멀티화면 컨트롤러_네비게이션 컨트롤러, 루트 뷰 컨트롤러
자마린 iOS 멀티화면 컨트롤러_네비게이션 컨트롤러, 루트 뷰 컨트롤러
 
[IT교육/IT학원]Develope를 위한 IT실무교육
[IT교육/IT학원]Develope를 위한 IT실무교육[IT교육/IT학원]Develope를 위한 IT실무교육
[IT교육/IT학원]Develope를 위한 IT실무교육
 
[아이오닉학원]아이오닉 하이브리드 앱 개발 과정(아이오닉2로 동적 모바일 앱 만들기)
[아이오닉학원]아이오닉 하이브리드 앱 개발 과정(아이오닉2로 동적 모바일 앱 만들기)[아이오닉학원]아이오닉 하이브리드 앱 개발 과정(아이오닉2로 동적 모바일 앱 만들기)
[아이오닉학원]아이오닉 하이브리드 앱 개발 과정(아이오닉2로 동적 모바일 앱 만들기)
 
[뷰제이에스학원]뷰제이에스(Vue.js) 프로그래밍 입문(프로그레시브 자바스크립트 프레임워크)
[뷰제이에스학원]뷰제이에스(Vue.js) 프로그래밍 입문(프로그레시브 자바스크립트 프레임워크)[뷰제이에스학원]뷰제이에스(Vue.js) 프로그래밍 입문(프로그레시브 자바스크립트 프레임워크)
[뷰제이에스학원]뷰제이에스(Vue.js) 프로그래밍 입문(프로그레시브 자바스크립트 프레임워크)
 
[씨샵학원/씨샵교육]C#, 윈폼, 네트워크, ado.net 실무프로젝트 과정
[씨샵학원/씨샵교육]C#, 윈폼, 네트워크, ado.net 실무프로젝트 과정[씨샵학원/씨샵교육]C#, 윈폼, 네트워크, ado.net 실무프로젝트 과정
[씨샵학원/씨샵교육]C#, 윈폼, 네트워크, ado.net 실무프로젝트 과정
 
[정보처리기사자격증학원]정보처리기사 취득 양성과정(국비무료 자격증과정)
[정보처리기사자격증학원]정보처리기사 취득 양성과정(국비무료 자격증과정)[정보처리기사자격증학원]정보처리기사 취득 양성과정(국비무료 자격증과정)
[정보처리기사자격증학원]정보처리기사 취득 양성과정(국비무료 자격증과정)
 
[wpf학원,wpf교육]닷넷, c#기반 wpf 프로그래밍 인터페이스구현 재직자 향상과정
[wpf학원,wpf교육]닷넷, c#기반 wpf 프로그래밍 인터페이스구현 재직자 향상과정[wpf학원,wpf교육]닷넷, c#기반 wpf 프로그래밍 인터페이스구현 재직자 향상과정
[wpf학원,wpf교육]닷넷, c#기반 wpf 프로그래밍 인터페이스구현 재직자 향상과정
 
[자마린교육/자마린실습]자바,스프링프레임워크(스프링부트) RESTful 웹서비스 구현 실습,자마린에서 스프링 웹서비스를 호출하고 응답 JS...
[자마린교육/자마린실습]자바,스프링프레임워크(스프링부트) RESTful 웹서비스 구현 실습,자마린에서 스프링 웹서비스를 호출하고 응답 JS...[자마린교육/자마린실습]자바,스프링프레임워크(스프링부트) RESTful 웹서비스 구현 실습,자마린에서 스프링 웹서비스를 호출하고 응답 JS...
[자마린교육/자마린실습]자바,스프링프레임워크(스프링부트) RESTful 웹서비스 구현 실습,자마린에서 스프링 웹서비스를 호출하고 응답 JS...
 
[구로자마린학원/자마린강좌/자마린교육]3. xamarin.ios 3.3.5 추가적인 사항
[구로자마린학원/자마린강좌/자마린교육]3. xamarin.ios  3.3.5 추가적인 사항[구로자마린학원/자마린강좌/자마린교육]3. xamarin.ios  3.3.5 추가적인 사항
[구로자마린학원/자마린강좌/자마린교육]3. xamarin.ios 3.3.5 추가적인 사항
 
3. xamarin.i os 3.3 xamarin.ios helloworld 자세히 살펴보기 3.4.4 view controllers an...
3. xamarin.i os 3.3 xamarin.ios helloworld 자세히 살펴보기 3.4.4 view controllers an...3. xamarin.i os 3.3 xamarin.ios helloworld 자세히 살펴보기 3.4.4 view controllers an...
3. xamarin.i os 3.3 xamarin.ios helloworld 자세히 살펴보기 3.4.4 view controllers an...
 
5. 서브 쿼리(sub query) 5.1 서브 쿼리(sub query) 개요 5.2 단일행 서브쿼리(single row sub query)
5. 서브 쿼리(sub query) 5.1 서브 쿼리(sub query) 개요 5.2 단일행 서브쿼리(single row sub query)5. 서브 쿼리(sub query) 5.1 서브 쿼리(sub query) 개요 5.2 단일행 서브쿼리(single row sub query)
5. 서브 쿼리(sub query) 5.1 서브 쿼리(sub query) 개요 5.2 단일행 서브쿼리(single row sub query)
 
3. xamarin.i os 3.1 xamarin.ios 설치, 개발환경 3.2 xamarin.ios helloworld(단일 뷰) 실습[...
3. xamarin.i os 3.1 xamarin.ios 설치, 개발환경 3.2 xamarin.ios helloworld(단일 뷰) 실습[...3. xamarin.i os 3.1 xamarin.ios 설치, 개발환경 3.2 xamarin.ios helloworld(단일 뷰) 실습[...
3. xamarin.i os 3.1 xamarin.ios 설치, 개발환경 3.2 xamarin.ios helloworld(단일 뷰) 실습[...
 
(닷넷,자마린,아이폰실습)Xamarin.iOS HelloWorld 실습_멀티화면,화면전환_Xamarin교육/Xamarin강좌
(닷넷,자마린,아이폰실습)Xamarin.iOS HelloWorld 실습_멀티화면,화면전환_Xamarin교육/Xamarin강좌(닷넷,자마린,아이폰실습)Xamarin.iOS HelloWorld 실습_멀티화면,화면전환_Xamarin교육/Xamarin강좌
(닷넷,자마린,아이폰실습)Xamarin.iOS HelloWorld 실습_멀티화면,화면전환_Xamarin교육/Xamarin강좌
 
C#기초에서 윈도우, 스마트폰 앱개발 과정(c#.net, ado.net, win form, wpf, 자마린)_자마린학원_씨샵교육_WPF학원...
C#기초에서 윈도우, 스마트폰 앱개발 과정(c#.net, ado.net, win form, wpf, 자마린)_자마린학원_씨샵교육_WPF학원...C#기초에서 윈도우, 스마트폰 앱개발 과정(c#.net, ado.net, win form, wpf, 자마린)_자마린학원_씨샵교육_WPF학원...
C#기초에서 윈도우, 스마트폰 앱개발 과정(c#.net, ado.net, win form, wpf, 자마린)_자마린학원_씨샵교육_WPF학원...
 
자바, 웹 기초와 스프링 프레임워크 & 마이바티스 재직자 향상과정(자바학원/자바교육/자바기업출강]
자바, 웹 기초와 스프링 프레임워크 & 마이바티스 재직자 향상과정(자바학원/자바교육/자바기업출강]자바, 웹 기초와 스프링 프레임워크 & 마이바티스 재직자 향상과정(자바학원/자바교육/자바기업출강]
자바, 웹 기초와 스프링 프레임워크 & 마이바티스 재직자 향상과정(자바학원/자바교육/자바기업출강]
 
3. xamarin.i os 3.1 xamarin.ios 설치, 개발환경 3.2 xamarin.ios helloworld_자마린학원_자마린...
3. xamarin.i os 3.1 xamarin.ios 설치, 개발환경 3.2 xamarin.ios helloworld_자마린학원_자마린...3. xamarin.i os 3.1 xamarin.ios 설치, 개발환경 3.2 xamarin.ios helloworld_자마린학원_자마린...
3. xamarin.i os 3.1 xamarin.ios 설치, 개발환경 3.2 xamarin.ios helloworld_자마린학원_자마린...
 
3. 안드로이드 애플리케이션 구성요소 3.2인텐트 part01(안드로이드학원/안드로이드교육/안드로이드강좌/안드로이드기업출강]
3. 안드로이드 애플리케이션 구성요소 3.2인텐트 part01(안드로이드학원/안드로이드교육/안드로이드강좌/안드로이드기업출강]3. 안드로이드 애플리케이션 구성요소 3.2인텐트 part01(안드로이드학원/안드로이드교육/안드로이드강좌/안드로이드기업출강]
3. 안드로이드 애플리케이션 구성요소 3.2인텐트 part01(안드로이드학원/안드로이드교육/안드로이드강좌/안드로이드기업출강]
 
2. xamarin.android 2.5.3 xamarin.android .aar binding(안드로이드 .aar file을 자마린 바...
2. xamarin.android  2.5.3 xamarin.android .aar binding(안드로이드 .aar file을 자마린 바...2. xamarin.android  2.5.3 xamarin.android .aar binding(안드로이드 .aar file을 자마린 바...
2. xamarin.android 2.5.3 xamarin.android .aar binding(안드로이드 .aar file을 자마린 바...
 

(WPF교육)ListBox와 Linq 쿼리를 이용한 간단한 데이터바인딩, 새창 띄우기, 이벤트 및 델리게이트를 통한 메인윈도우의 ListBox Refresh 적용 실습, WPF추천학원

  • 1. www.topcredu.co.kr 이종철 C#, WPF 기초강좌 ListBox와 LINQ쿼리를 이용한 간단한 데이 터바인딩, 새창 띄우기, 이벤트 및 델리게이 트를 통한 메인윈도우의 ListBox Refresh 적 용 실습  직무타입(내근:Inner, 외근:OutSide)과 직무목록을 보여주는 두개의 ListBox 컨트롤을 사용해서 직무타입을 선택하면 Linq를 통해 해당 직무타입의 직무를 쿼리해서 하단 의 ListBox에 보여주는 예제이다.
  • 2.  “직무추가” 버튼을 클릭하면 새창이 뜨고 직무를 입력 후 저장 버튼을 클릭하면 직 무입력 화면이 사라지고 메인 윈도우 상단의 ListBox가 새창에서 입력한 직무타입으 로 선택되면서 하단의 ListBox는 해당 직무타입의 직무목록으로 자동으로 Refresh 된다.  WPF 프로젝트를 생성하자. (본 예제에서는 프로젝트명을 “WpfApp1”로 설정했다.)  [Duty.cs] using System.ComponentModel; using System.Collections.ObjectModel; namespace WpfApp1 { public enum DutyType { Inner, OutSide
  • 3. } public class Duty { private string _name; private DutyType _dutyType; public Duty() { } public Duty(string name, DutyType dutyType) { _name = name; _dutyType = dutyType; } public string DutyName { get { return _name; } set { _name = value; } } public DutyType DutyType { get { return _dutyType; } set { _dutyType = value; } } } public class Duties : ObservableCollection<Duty> { public Duties() { Add(new Duty("SALES",DutyType.OutSide)); Add(new Duty("LOGISTICS", DutyType.OutSide));
  • 4. Add(new Duty("IT", DutyType.Inner)); Add(new Duty("MARKETING", DutyType.Inner)); Add(new Duty("HR", DutyType.Inner)); Add(new Duty("PROPOTION", DutyType.OutSide)); } } }  [MainWindow.xaml] <Window x:Class="WpfApp1.MainWindow" xmlns="http://schemas.microsoft.com/winfx/2006/xaml/presentation" xmlns:x="http://schemas.microsoft.com/winfx/2006/xaml" xmlns:local="clr-namespace:WpfApp1" Title="MainWindow" SizeToContent="WidthAndHeight" Height="600"> <Window.Resources> <local:Duties x:Key="duties"/> <DataTemplate x:Key="MyTemplate"> <Border Name="border"> <Grid> <Grid.RowDefinitions> <RowDefinition/> <RowDefinition/> <RowDefinition/> </Grid.RowDefinitions> <Grid.ColumnDefinitions> <ColumnDefinition /> <ColumnDefinition /> </Grid.ColumnDefinitions> <TextBlock Grid.Row="0" Grid.Column="0" Text="Duty Name:"/> <TextBlock Grid.Row="0" Grid.Column="1" Text="{Binding Path=DutyName}" /> <TextBlock Grid.Row="1" Grid.Column="0" Text="DutyType:"/> <TextBlock Grid.Row="1" Grid.Column="1" Text="{Binding Path=DutyType}"/> <Separator Grid.Row="2" Grid.ColumnSpan="2"/> </Grid> </Border> </DataTemplate> <LinearGradientBrush x:Key="GrayBlueGradientBrush"
  • 5. StartPoint="0,0" EndPoint="1,1"> <GradientStop Color="DarkGray" Offset="0" /> <GradientStop Color="#CCCCFF" Offset="0.5" /> <GradientStop Color="DarkGray" Offset="1" /> </LinearGradientBrush> <Style TargetType="{x:Type Button}"> <Setter Property="Background" Value="{StaticResource GrayBlueGradientBrush}" /> <Setter Property="Width" Value="80" /> <Setter Property="Margin" Value="10" /> </Style> </Window.Resources> <StackPanel> <Button x:Name="Add" Click="OpenNewWindow">직무 추가</Button> <TextBlock Margin="10,0,0,0">직무타입을 선택 하세요.</TextBlock> <ListBox Name="myListBox1" SelectionChanged="OnSelected" SelectedIndex="0" Margin="10,0,10,0" > <ListBoxItem>Inner</ListBoxItem> <ListBoxItem>OutSide</ListBoxItem> </ListBox> <TextBlock Margin="10,10,0,-10">직무</TextBlock> <ListBox Width="400" Margin="10" Name="myListBox2" HorizontalContentAlignment="Stretch" ItemsSource="{Binding}" ItemTemplate="{StaticResource MyTemplate}" SelectionChanged="OnSelected2"/> </StackPanel> </Window>  [MainWindow.xaml.cs] using System.Linq; using System.Windows; using System.Windows.Controls; namespace WpfApp1 { public partial class MainWindow : Window { internal static Duties duties = new Duties(); public MainWindow()
  • 6. { InitializeComponent(); } // 상단 ListBox의 항목(직무타입)을 선택했을 때 private void OnSelected(object sender, SelectionChangedEventArgs e) { if ((sender as ListBox).SelectedItem != null) { string dutyType = ((sender as ListBox).SelectedItem as ListBoxItem).Content.ToString(); DataContext = from duty in duties where duty.DutyType.ToString() == dutyType select duty; } } //하단 ListBox의 항목(직무)를 선택했을 때 private void OnSelected2(object sender, SelectionChangedEventArgs e) { var duty = (Duty)myListBox2.SelectedItem; string value = duty == null ? "No selection" : duty.ToString(); MessageBox.Show(duty.DutyName + "::" + duty.DutyType, "선택한 직무" ); } // 직무추가 버튼을 클릭 했을 때 새창을 띄움. private void OpenNewWindow(object sender, RoutedEventArgs e) { SubWindow subWindow = new SubWindow(); RefreshListEvent += new RefreshList(RefreshListBox); // event initialization subWindow.UpdateActor = RefreshListEvent; // assigning event to the Delegate subWindow.Show(); }
  • 7. // 아래쪽 ListBox를 Refresh 하기위한 델리게이트 및 이벤트 public delegate void RefreshList(DutyType dutyType); public event RefreshList RefreshListEvent; // RefreshListEvent 이벤트가 발생했 을 때 호출되는 메소드 private void RefreshListBox(DutyType dutyType) { // 내근은 SelectedIndex를 0, 외근은 SelectedIndex를 1로 설정하여 // 상단 ListBox의 선택값을 변경 시킨다. // 상단 ListBox의 값이 바뀜에 따라 OnSelected 이벤트 핸들러가 호출되어 // 자동으로 아래쪽 ListBox의 값은 변경된다. myListBox1.SelectedItem = null; myListBox1.SelectedIndex = (dutyType == DutyType.Inner)? 0 : 1; } } }  [SubWindow.xaml] <Window x:Class="WpfApp1.SubWindow" xmlns="http://schemas.microsoft.com/winfx/2006/xaml/presentation" xmlns:x="http://schemas.microsoft.com/winfx/2006/xaml" xmlns:d="http://schemas.microsoft.com/expression/blend/2008" xmlns:mc="http://schemas.openxmlformats.org/markup- compatibility/2006" xmlns:local="clr-namespace:WpfApp1" mc:Ignorable="d" Title="SubWindow" Height="230" Width="350"> <Grid Margin="10"> <Grid.ColumnDefinitions> <ColumnDefinition/> <ColumnDefinition/> <ColumnDefinition/> </Grid.ColumnDefinitions> <Grid.RowDefinitions> <RowDefinition Height="40"/> <RowDefinition Height="40"/>
  • 8. <RowDefinition Height="40"/> <RowDefinition /> </Grid.RowDefinitions> <TextBlock FontSize="20" Grid.ColumnSpan="3" HorizontalAlignment="Center" VerticalAlignment="Center">직무 등록</TextBlock> <TextBlock Grid.Row="1" Margin="10" VerticalAlignment="Center">직무명</TextBlock> <TextBox x:Name="txtDutyName" Grid.Row="1" Margin="10" Grid.Column="1" Grid.ColumnSpan="2" VerticalAlignment="Center"/> <TextBlock Margin="10" Grid.Row="2" VerticalAlignment="Center">직무타입</TextBlock> <RadioButton x:Name="rdoInner" Grid.Row="2" Grid.Column="1" HorizontalAlignment="Center" VerticalAlignment="Center">내근</RadioButton> <RadioButton x:Name="rdoOutside" Grid.Row="2" Grid.Column="2" HorizontalAlignment="Center" VerticalAlignment="Center">외근</RadioButton> <Button Grid.Column="1" Grid.Row="3" Width="100" HorizontalAlignment="Center" Click="Button_Click" Height="22">저장</Button> </Grid> </Window>  [SubWindow.xaml.cs] using System; using System.Windows; namespace WpfApp1 { public partial class SubWindow : Window { // 메인 윈도우의 하단 ListBox를 Refresh하기 위한 델리게이트 // 메인 윈도우에서 직무추가 버튼을 클릭할 때 이벤트를 할당해 준다. public Delegate UpdateActor; public SubWindow() { InitializeComponent(); }
  • 9. // 저장 버튼 클릭 private void Button_Click(object sender, RoutedEventArgs e) { if (rdoInner.IsChecked == false && rdoOutside.IsChecked == false) { MessageBox.Show("내근 또는 외근을 선택하세요.", "항목선택"); return; } DutyType dutyType = (rdoInner.IsChecked == true) ? DutyType.Inner : DutyType.OutSide; MainWindow.duties.Add( new Duty(txtDutyName.Text, dutyType )); UpdateActor.DynamicInvoke(dutyType); MessageBox.Show("저장OK!", "저장확인"); this.Close(); } } }