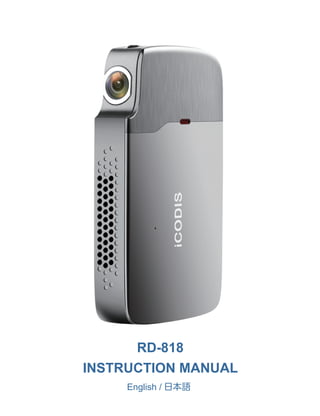
I codis rd 818 projector instruction manual
•
0 likes•36 views

I codis rd 818 projector instruction manual

Recommended
More Related Content
More from Hong Kong Codis Electronic Co.ltd
More from Hong Kong Codis Electronic Co.ltd (11)
I codis rd 818 projector instruction manual
- 3. PROJECTOR OVERVIEW....................................... 02 SPECIFICATIONS....................................................04 REMOTE CONTROL................................................05 POWER ON/OFF......................................................07 FOCUS.....................................................................08 SELECTING THE SIGNAL SOURCE.......................08 USING THE USB INTERFACE.................................09 THE HDMI INTERFACE............................................11 MENU SETTING.......................................................12 CHARGING THE PROJECTOR................................13 IMAGE ADJUSTMENT..............................................14 AUDIO.......................................................................14 TIRPOD....................................................................15 SAFETY INSTRUCTIONS........................................16 TROUBLESHOOTING..............................................17 日本語.......................................................................20 CONTENTS 01
- 4. 1.Ventilation slots 2.LED indicator light 3.Projector lens 4.Ventilation slots 5.USB port 6.IR remote sensor 7.DC-IN terminal 8.Power on/off button 9.HDMI port 10.AUX cord port (Earphone port) 11.Main switch PROJECTOR OVERVIEW 02
- 5. PROJECTOR OVERVIEW 1.Bracket 2.Air inlets 3.Speaker 4.Stand hole(M6) 5.TF card slot 6.Ventilation slots 7.Focus wheel Warning: It‘s prohibited to block the air inlets, which may get the projector overheating to damage the device. 03
- 6. SPECIFICATIONS Physical Parameters Projection size:20-120 inch Throw ratio: 1.4:1 Offset:100% Keystone: Auto Vertical 40 Focus mode: manual Power adapter: DC19V/1.8A Power: 28W Speaker: 4Ω/2W Size: 170*105*28mm N.W.: 380g Physical interface DC port x1 USB 2.0 x1 HDMI x1 3.5mm earphone port x1 TF card slot x1 Accessories Instruction Manual x1 Charing Accessories x1 Remote Control x1 HDMI Cable x1 Tripod x1 Customer service card x1 Optical Parameters Display chip: 0.2" DMD RGB-LED Lens: High light transmittance coating glasses Brightness uniformity: 98% NTSC:≥120% Resolution: 854 x 480 04
- 7. REMOTE CONTROL 1.Power 2.Main menu 3.Arrow keys 4.Mute 5.Volume Down 6.Play / Stop 7.Source 8.OK 9.Volume Up 10.Exit 11.Ratio 1.Power: Power on or off 2.Main menu: Operate multiple functions 3.Arrow key: Move up or down, Move left or right 4.Mute: Silent mode 5.Volume Down: Decrease volume 6.Play/ Stop: Play or stop operation 05
- 8. REMOTE CONTROL 7.Source: Choose the input signal source 8.OK: Select a menu option 9.Volume up: Increase volume 10.Exit: Return to the previous screen 11.Ratio: Choose aspect ratio Note: Please use the remote control aiming at the back of the projector (IR remote sensor), not the screen or the wall. The batteries should be inserted into the remote to work. TIP: If the remote control is lost or broken during use, please contact our Customer Service Team to get a new remote control. 06
- 9. Power ON Step 1 : Connect the power adaptor to the DC-IN terminal of the projector. Step 2: Push the main switch from left to right, then press the power key when the red indicator light is on. Power OFF Step1: Press the power key, then the projector will be off after the indicator light become red. Step2: Push the main switch to the ‘OFF’ position after the projector is off. Main Switch Towards the left is OFF Towards the right is ON POWER ON/OFF 07
- 10. Adjust the focus wheel slightly until the projected image is clear enough. FOCUS Press the ‘source’ button on the remote control, then the menu below will show up on the screen, after which you can select the connected device you want. SELECTING THE SIGNAL SOURCE 08
- 11. Please select the USB on the projected image after inserting your USB disk into the USB port, then the projector will read the information in your USB disk - like what the picture below shows. The projector supports to read picture, music, video and text from the usb stick, not able to read Microsoft Office file. If you want to display Microsoft Office file, please connect the projector with your PC/smart phone or other devices to open the file. USING THE USB INTERFACE 09
- 12. Picture Display When displaying picture from USB stick, press “OK” key on the remote, you could see the menu including Play, Previous, Next, Stop, Music, Playlist, Info., Rotate, Zoom in and Zoom out - like what the picture below shows. Video Playback When displaying video from USB stick, press “OK” key on the remote, you could see the menu including Pause, Fast Backward, Fast Forward, Previous, Next, Stop, Repeat , Playlist and Info. - like what the picture below shows. 90 Play Prev. Next Stop Music Playlist Info. Rotate Rotate Zoom In Zoom Out 90 Pause Play FB FF Prev. Next Stop R_ALL Set A AH Pause Playlist Info. USING THE USB INTERFACE 10
- 13. IMPORTANT: Devices that do not have an HDMI port will require an adapter to connect. Please make sure that you are using any necessary adapters or cables to connect your device. Also check with your device manufacturer to ensure your device supports HDMI video out and you are using any required cables and/or adapters to make the connection. The projector can be connected to a variety of devices such as smart phones, tablets, laptops, DVD player, Blue-ray player, gaming console, etc via HDMI cable. Connecting with PC Step1:Connect projector and your external device with the HDMI cable. Step2: Press the power button on the projector or remote control, then select the ‘HDMI’. Tips: Adjust the displayed resolution of the PC to about ‘854 x 480’. THE HDMI INTERFACE 11
- 14. Please press ‘Menu’ on the remote to enter the menu, and press the ‘<>’ to select the sub menu. Then press ‘OK’. Sub menus: Projection Settings: Gyro Horizon Done / Auto Keystone / Manual Keystone / Mounting / Color Temp / Brightness Mode / Battery Info / Desk Mode / Software update. Picture Menu: Picture Mode / Color Temperature / Aspect Ratio / Noise Reduction / PC Setup Sound Menu: Sound Mode / Balance / Auto Volume / Surround / Sound / EQ TimeMenu: Sleep timer / Auto time System settings: OSD Language / Restore Factory Default / HDMI Mode / Blending / OSD Duration. MENU SETTING 12
- 15. TIP: *Please charge the projector with the original power adapter; *Don’t use the projector in a high-temperature environment; *Don’t block the cooling holes while it’s charging. *Don’t stab or beat the battery while it’s charging. *Don’t get the battery wet. Attention: This function is only for projectors with a battery. 1.Charging the projector when it’s off: Plug the adapter in and push the main switch to the position ‘OFF’, then it will start to charge. 2.Charging the projector when it’s on: Plug the adapter in and push the main switch to the position ‘ON’, then press the switch, after which you can see the charging icon on the projected image. 3.Battery time: about 120 minutes. 4.When connect the power adaptor to the DC-IN terminal of the projector, the blue charging indicator light on the machine will illuminate, the indicator light will turn orange when fully charged. 5.The projector can be powered using the internal battery or while plugged into power with power adapter charging cable. CHARGING THE PROJECTOR 13
- 16. Manual focus Adjustment: Adjust the focus wheel on the projector to fine-tune the image. Gyro Horizon done: Click Gyro Horizon done on menu setting to adjust horizontal reference correction Auto keystone: open Auto keystone on menu setting to automati- cally correct the vertical keystoning of the image. Manual keystone: Go to manual keystone on menu setting to adjust the image. The projector has a built-in speakers that will be automatically used for sound when the projector is powered on. Optionally, connect an external speaker for bigger sound through the 3.5mm audio port on the projector. Adjusting the volume: The volume level of the projector can be adjusted using the volume controls on the included remote control. Press the volume up( +) button or the volume down( -) button to adjust to the preferred volume level. IMAGE ADJUSTMENT AUDIO 14
- 17. How to use the tripod? Step one:Rotate 1 to make the connection between the tripod and the projector fixed. Step two:Rotate 2 to adjust and make the direction of the head of the tripod fixed. Step three:Rotate 3 to adjust and make the position of the foot of the tripod fixed. The tail of the tripod can be elongated. 1 2 3 TIRPOD 15
- 18. Installation •Please use this projector in dark environments to achieve the best visual effect. •Please use this projector carefully - A serious impact may damagethe projector or make the projected images blurry, distorted. Power •Be careful while using the power cord - avoid unnecessary entangle ment ; the damage of the power cord is easy to cause electric shocks or fires. •It is better to unplug the power cord after power off. Cleaning •Unplug the power cord in the first place. •Clean the outer case with a damp cloth. (Neutral detergents can be used.) •Please clean the lens with a piece of glasses cloth or lens paper. •Please clean projector's vents and speakers regularly with a soft brush, otherwise the vents may be blocked. High temperature attention •While working or just finishes running, the ventilation slots may be very hot, so please do not touch it. •To avoid the laser beams injuring your eyes, please don’t stare at the lens while working. *Warm tips •Don’t disassemble the projector, which may cause electric shocks, and end the warranty. •Please do not put any liquid or heavy thing on the projector. •To ensure the stability of heat radiation, please open the bracket on the bottom before starting the projector. SAFETY INSTRUCTIONS 16
- 19. The projected image is blurry. • Adjust the focus on the projector to fine-tune the picture. • Check that the surface you are projecting on is smooth. • Check that the projector’s lens is free of dust and debris. The projected image is too small. • Move the projector farther away from the projection surface. The projected image is smaller on one side and larger on the other. • Move the projector farther away from the projection surface. • Turn on auto keystone correction to adjust the image The projector is not powering on. • Check the battery power on the projector. If the battery is depleted, plug the projector into power. • Check that the charging indicator light is illuminating when the projector is plugged into power. You can’t hear any sound. • Check that the volume on the projector is turned up and is not muted. • If an external speaker is connected with an audio cable, check that the connection from the speaker to the projector is securely plugged in on both ends. Also check that any volume controls on the external speaker are turned up and not muted. TROUBLESHOOTING 17
- 20. The projector’s remote control isn’t functioning. • Please use the remote control aiming at the back of the machine, not the projection screen. • Try moving closer to the projector with the remote. • Check that the batteries are functioning and inserted properly. The projector is not projecting. • Check that there are no obstructions between the projector and the projection surface. • Check the battery charge on the projector. If depleted, try powering the projector on while the unit is plugged into power. • If plugged into power, check that the charging indicator light on the unit is illuminated. • Power the unit off, press the restart button, and power the unit back on. • If connected to the projector with a cabled HDMI connection: -- Check that the HDMI cable is securely plugged into the HDMI port on your device and the HDMI port on the projector. -- Check that you choose the correct signal source - HDMI -- Check that you are using any necessary adapters or cables to connect your device. Also check with your device manufacturer to ensure your device supports HDMI video out and you are using any required cables and/or adapters to make the connec tion. If an adapter is required, power down the projector, add the adapter, and then turn the projector back on. TROUBLESHOOTING 18
- 21. TROUBLESHOOTING If connected to a gaming console, power down the console and the projector. Check that the HDMI cable is securely connected to the HDMI port on the projector and to the HDMI port on the gaming console. Power the projector on, then power on the gaming console. -- -- If connected to a laptop or computer, check your display settings to ensure a multiple display option is selected. 19
- 25. 物理パラメーター 投影サイズ:20-120インチ スロー比:1.4:1 オフセット:100% キーストーン:自動垂直 40 フォーカスモード:手動 電源アダプタ:DC19V / 1.8A パワー:28W スピーカー:4Ω / 2W サイズ:170 * 105 * 28mm N.W .: 380g 光学パラメータ ディスプレイチップ:0.2 "DMD RGB-LED レンズ:高光線透過率コーティングガラス 明るさの均一性:98% NTSC: 120% 解像度:854 x 480 仕様 インターフェイス DCポートx1 USB 2.0 x1 HDMI x1 3.5mmイヤホンスロットx1 TFカードスロットx1 付属品 取扱説明書x1 充電部品x1 リモートコントロールx1 アフターサービスカードx1 HDMIケーブルx1 三脚スタンドx1 23
- 26. 1. パワー 2. メインメニュー 3. 方向 4. マナーモード 5. 音量ダウン 6. 再生/停止 7. ソース 8. OK 9. 音量アップ 10. 戻り 11. 比率 リモートコントロール 1.電源:電源オン/オフ 2.メインメニュー:複数の機能を操作する 3.矢印キー:上下に移動、左右に移動 4.ミュート:サイレントモード 5.ボリュームダウン:音量を下げる 24
- 30. USBディスクをUSBポートに挿入した後、投影された画像上のUSBを 選択すると、プロジェクターはUSBディスク内の情報を読み取ります (下の図の通り)。 対応している形式 画像 オーディオ ビデオ テキスト USBインターフェース プロジェクターは、USBスティックから画像、音楽、ビデオおよびテキ ストを読み取ることをサポートしていますが、Microsoft Officeファイ ルを読み取ることができません。Microsoft Officeファイルを表示す るには、プロジェクターをPC /スマートフォンまたは他のデバイスに接 続してファイルを開いてください。 28
- 31. Play FB FF Prev. Next Stop R_ALL Set A AH 90 Play Prev. Next Stop Music Playlist Info. Rotate Rotate Zoom In Zoom Out 90 Pause Pause Playlist Info. USBインターフェース 画像の再生 USBスティックから画像を表示するときは、リモコンの「OK」ボタンを 押すと、下の図のようなメニューが表示されます。再生/停止、前へ、次 へ、音楽、リスト、リスト、情報、左回す、右回す、拡大、縮小。 ビデオの再生 USBスティックから画像を再生するときは、リモコンの「OK」ボタンを 押すと、ポーズ、早送り、早戻し、前、次、停止、リピート再生、プレイリス トという情報を含んで、下図のようなメニューが表示されます 。 29
- 32. 重要:HDMIポートを持たないデバイスには、アダプタを接続する必要 があります。デバイスを接続するために必要なアダプタまたはケーブル を使用していることを確認してください。また、お使いのデバイスが HDMIビデオ出力をサポートし、接続に必要なケーブルやアダプタを使 用しているかどうか、デバイスメーカーに確認してください。 HDMIインターフェース プロジェクターは、スマートフォン、タブレット、ラップトップ、DVD プレーヤー、ブルーレイプレーヤー、ゲームコンソールなどをHDMI ケーブルで接続します。 PCとの接続: ①: HDMIケーブルでプロジェクターとデバイスを接続します。 ②: プロジェクターを起動して、主画面の HDMI を選びます。 ヒント:解像度を約854 x 480に調整します。 30
- 36. 三脚の使い方? (ステップ1):1 を回転させて、三脚とプロジェクターの接続を 固定します。 (ステップ2): 2 を回して調整し、三脚の頭部の方向を固定します。 (ステップ3): 3 を回して調整し、三脚の足の位置を固定します。 三脚の尾は伸ばすことができます。 三脚の使い方 1 2 3 34
- 39. プロジェクターは投影しません。 •プロジェクターと投影面の間に障害物がないことを確認してください。 •プロジェクターのバッテリーの充電を確認してください。 電源が切れている場合、プロジェクターが電源に接続している間に本体に電源 を入れてみてください。 •電源が入っている場合、本機の充電ランプが点灯していることを確認してくださ い。 •電源を切り、再起動ボタンを押し、電源を入れ直してください。 -HDMIケーブルがデバイスのHDMIポートとプロジェクターのHDMIポートに しっかり接続されていることを確認してください。 - 正しい信号源を選択していることを確認してください。 - デバイスに接続するために必要なアダプターまたはケーブルを使用しているこ とを確認してください。また、お使いのデバイスがHDMIビデオ出力をサポート していること、および必要なケーブルやアダプターを使用して接続を行っている こともデバイスメーカーに確認してください。アダプターの使用が必要な場合、 プロジェクターの電源を切り、アダプターに接続してプロジェクターの電源を 入れ直してください。 - ラップトップまたはパソコンに接続する場合、ディスプレイ設定をチェックして、 複数のオプションが選択されていることを確認してください。 - ゲームコンソールに接続する場合、コンソールとプロジェクターの電源を切っ てください。HDMIケーブルが両端のHDMIポートとしっかり接続されているこ とを確認してください。プロジェクターの電源を入れ直してから、ゲームコン ソールの電源を入れてください。 疑問と答え 37
- 40. iCODIS