This service manual provides information to technicians for troubleshooting, testing, and repairing major systems and components of the Groundsmaster 3500-D. It contains chapters covering safety, product records and maintenance, the Kubota diesel engine, hydraulic system, electrical system, wheels/brakes/chassis, cutting units, and electrical diagrams. Technicians are directed to operator's manuals for operating instructions and to original equipment manufacturer manuals included for additional component information.
Comprehensive program for Agricultural Finance, the Automotive Sector, and Empowerment . We will define the full scope and provide a detailed two-week plan for identifying strategic partners in each area within Limpopo, including target areas.:
1. Agricultural : Supporting Primary and Secondary Agriculture
• Scope: Provide support solutions to enhance agricultural productivity and sustainability.
• Target Areas: Polokwane, Tzaneen, Thohoyandou, Makhado, and Giyani.
2. Automotive Sector: Partnerships with Mechanics and Panel Beater Shops
• Scope: Develop collaborations with automotive service providers to improve service quality and business operations.
• Target Areas: Polokwane, Lephalale, Mokopane, Phalaborwa, and Bela-Bela.
3. Empowerment : Focusing on Women Empowerment
• Scope: Provide business support support and training to women-owned businesses, promoting economic inclusion.
• Target Areas: Polokwane, Thohoyandou, Musina, Burgersfort, and Louis Trichardt.
We will also prioritize Industrial Economic Zone areas and their priorities.
Sign up on https://profilesmes.online/welcome/
To be eligible:
1. You must have a registered business and operate in Limpopo
2. Generate revenue
3. Sectors : Agriculture ( primary and secondary) and Automative
Women and Youth are encouraged to apply even if you don't fall in those sectors.
Why Is Your BMW X3 Hood Not Responding To Release CommandsDart Auto
Experiencing difficulty opening your BMW X3's hood? This guide explores potential issues like mechanical obstruction, hood release mechanism failure, electrical problems, and emergency release malfunctions. Troubleshooting tips include basic checks, clearing obstructions, applying pressure, and using the emergency release.
Symptoms like intermittent starting and key recognition errors signal potential problems with your Mercedes’ EIS. Use diagnostic steps like error code checks and spare key tests. Professional diagnosis and solutions like EIS replacement ensure safe driving. Consult a qualified technician for accurate diagnosis and repair.
Core technology of Hyundai Motor Group's EV platform 'E-GMP'Hyundai Motor Group
What’s the force behind Hyundai Motor Group's EV performance and quality?
Maximized driving performance and quick charging time through high-density battery pack and fast charging technology and applicable to various vehicle types!
Discover more about Hyundai Motor Group’s EV platform ‘E-GMP’!
In this presentation, we have discussed a very important feature of BMW X5 cars… the Comfort Access. Things that can significantly limit its functionality. And things that you can try to restore the functionality of such a convenient feature of your vehicle.
Things to remember while upgrading the brakes of your carjennifermiller8137
Upgrading the brakes of your car? Keep these things in mind before doing so. Additionally, start using an OBD 2 GPS tracker so that you never miss a vehicle maintenance appointment. On top of this, a car GPS tracker will also let you master good driving habits that will let you increase the operational life of your car’s brakes.
5 Warning Signs Your BMW's Intelligent Battery Sensor Needs AttentionBertini's German Motors
IBS monitors and manages your BMW’s battery performance. If it malfunctions, you will have to deal with an array of electrical issues in your vehicle. Recognize warning signs like dimming headlights, frequent battery replacements, and electrical malfunctions to address potential IBS issues promptly.
"Trans Failsafe Prog" on your BMW X5 indicates potential transmission issues requiring immediate action. This safety feature activates in response to abnormalities like low fluid levels, leaks, faulty sensors, electrical or mechanical failures, and overheating.
𝘼𝙣𝙩𝙞𝙦𝙪𝙚 𝙋𝙡𝙖𝙨𝙩𝙞𝙘 𝙏𝙧𝙖𝙙𝙚𝙧𝙨 𝙞𝙨 𝙫𝙚𝙧𝙮 𝙛𝙖𝙢𝙤𝙪𝙨 𝙛𝙤𝙧 𝙢𝙖𝙣𝙪𝙛𝙖𝙘𝙩𝙪𝙧𝙞𝙣𝙜 𝙩𝙝𝙚𝙞𝙧 𝙥𝙧𝙤𝙙𝙪𝙘𝙩𝙨. 𝙒𝙚 𝙝𝙖𝙫𝙚 𝙖𝙡𝙡 𝙩𝙝𝙚 𝙥𝙡𝙖𝙨𝙩𝙞𝙘 𝙜𝙧𝙖𝙣𝙪𝙡𝙚𝙨 𝙪𝙨𝙚𝙙 𝙞𝙣 𝙖𝙪𝙩𝙤𝙢𝙤𝙩𝙞𝙫𝙚 𝙖𝙣𝙙 𝙖𝙪𝙩𝙤 𝙥𝙖𝙧𝙩𝙨 𝙖𝙣𝙙 𝙖𝙡𝙡 𝙩𝙝𝙚 𝙛𝙖𝙢𝙤𝙪𝙨 𝙘𝙤𝙢𝙥𝙖𝙣𝙞𝙚𝙨 𝙗𝙪𝙮 𝙩𝙝𝙚 𝙜𝙧𝙖𝙣𝙪𝙡𝙚𝙨 𝙛𝙧𝙤𝙢 𝙪𝙨.
Over the 10 years, we have gained a strong foothold in the market due to our range's high quality, competitive prices, and time-lined delivery schedules.
What Exactly Is The Common Rail Direct Injection System & How Does It WorkMotor Cars International
Learn about Common Rail Direct Injection (CRDi) - the revolutionary technology that has made diesel engines more efficient. Explore its workings, advantages like enhanced fuel efficiency and increased power output, along with drawbacks such as complexity and higher initial cost. Compare CRDi with traditional diesel engines and discover why it's the preferred choice for modern engines.
What Does the Active Steering Malfunction Warning Mean for Your BMWTanner Motors
Discover the reasons why your BMW’s Active Steering malfunction warning might come on. From electrical glitches to mechanical failures and software anomalies, addressing these promptly with professional inspection and maintenance ensures continued safety and performance on the road, maintaining the integrity of your driving experience.
What Does the PARKTRONIC Inoperative, See Owner's Manual Message Mean for You...Autohaus Service and Sales
Learn what "PARKTRONIC Inoperative, See Owner's Manual" means for your Mercedes-Benz. This message indicates a malfunction in the parking assistance system, potentially due to sensor issues or electrical faults. Prompt attention is crucial to ensure safety and functionality. Follow steps outlined for diagnosis and repair in the owner's manual.
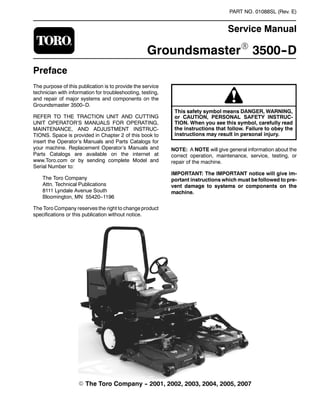
1. PART NO. 01088SL (Rev. E)
Service Manual
GroundsmasterR 3500--D
Preface
The purpose of this publication is to provide the service
technician with information for troubleshooting, testing,
and repair of major systems and components on the
Groundsmaster 3500--D.
REFER TO THE TRACTION UNIT AND CUTTING
UNIT OPERATOR’S MANUALS FOR OPERATING,
MAINTENANCE, AND ADJUSTMENT INSTRUC-
TIONS. Space is provided in Chapter 2 of this book to
insert the Operator’s Manuals and Parts Catalogs for
your machine. Replacement Operator’s Manuals and
Parts Catalogs are available on the internet at
www.Toro.com or by sending complete Model and
Serial Number to:
The Toro Company
Attn. Technical Publications
8111 Lyndale Avenue South
Bloomington, MN 55420--1196
The Toro Company reserves the right to change product
specifications or this publication without notice.
This safety symbol means DANGER, WARNING,
or CAUTION, PERSONAL SAFETY INSTRUC-
TION. When you see this symbol, carefully read
the instructions that follow. Failure to obey the
instructions may result in personal injury.
NOTE: A NOTE will give general information about the
correct operation, maintenance, service, testing, or
repair of the machine.
IMPORTANT: The IMPORTANT notice will give im-
portant instructions which must be followed to pre-
vent damage to systems or components on the
machine.
E The Toro Company -- 2001, 2002, 2003, 2004, 2005, 2007
3. Groundsmaster 3500--D Page 1 -- 1 Safety
Chapter 1
Safety
Table of Contents
GENERAL SAFETY INSTRUCTIONS 1. . . . . . . . . . . .
Supervisor’s Responsibilities 1. . . . . . . . . . . . . . . . .
Before Operating 1. . . . . . . . . . . . . . . . . . . . . . . . . . . .
While Operating 2. . . . . . . . . . . . . . . . . . . . . . . . . . . . .
Maintenance and Service 3. . . . . . . . . . . . . . . . . . . .
JACKING INSTRUCTIONS 4. . . . . . . . . . . . . . . . . . . . .
General Safety Instructions
The GROUNDSMASTER 3500--D was tested and certi-
fied by TORO to be in compliance with the B71.4-1990
specifications of the American National Standards Insti-
tute. Although hazard control and accident prevention
are dependent partially upon the design and configura-
tion of the machine, these factors are also dependent
upon the awareness, concern, and proper training of the
personnel involved in the operation, transport, mainte-
nance, and storage of the machine. Improper use or
maintenance by the operator or owner of the machine
can result in injury. To reduce the potential for any injury,
comply with the following safety instructions.
WARNING
To reduce the potential for injury or death,
comply with the following safety instructions.
Supervisor’s Responsibilities
1. Make sure operators are thoroughly trained and fa-
miliar with the Operator’s Manual, Operator’s Video,
and all the operating and safety decals on the machine.
2. Be sure to establish your own special procedures
and work rules for unusual operating conditions (e.g.
slopes too steep for machine operation). Survey mow-
ing site completely to determine which hills can be
operated on safely. When performing this site survey,
always use common sense and take into consideration
the turf condition and the rollover risk. To determine
which hills or slopes may be safely operated on, use the
inclinometer provided with each machine. To perform a
site survey, lay a 4 foot long, 2 by 4 inch piece of wood
on the slope surfaceand measurethe angleoftheslope.
The piece of wood will average the slope but will not take
into consideration dips or holes. THE MAXIMUM SIDE
HILL ANGLE SHOULD NOT BE GREATER THAN 25
DEGREES.
Before Operating
1. Operate machine only after reading and understand-
ing the contents of the Operator’s Manual and viewing
the Operator’s Video. A replacement manual is avail-
able by sending complete model and serial number to:
The Toro Company
Attn. Technical Publications
8111 Lyndale Avenue South
Minneapolis, Minnesota 55420--1196
2. Only trained operators who are skilled in slope op-
eration and who have read the Operator’s Manual and
viewed the Operator’s Video should operate the ma-
chine. Never allow children to operate the machine or
adults to operate it without proper instructions.
3. Become familiar with the controls and know how to
stop the machine and engine quickly.
4. Do not carry passengers on the machine. Keep ev-
eryone, especially children and pets, away from the
areas of operation.
Safety
4. Groundsmaster 3500--DPage 1 -- 2Safety
5. Keep all shields, safety devices, and decals in place.
Repair or replace damaged, malfunctioning, or illegible
shields, safety devices, or decals before operating the
machine.
6. Always wear substantial shoes. Do not operate ma-
chine while wearing sandals, tennis shoes or sneakers.
Do not wear loose fitting clothing because it could get
caught in moving parts and possibly cause personal in-
jury.
7. Wearing safety glasses, safety shoes, long pants
and a helmet is advisable and required by some local or-
dinances and insurance regulations.
8. Make sure the work area is clear of objects which
might be picked up and thrown by the blades.
9. Fill fuel tank with diesel fuel before starting engine.
Avoid spilling any fuel. Since fuel is highly flammable,
handle it carefully.
A. Use an approved fuel container.
B. Do not remove cap from fuel tank when engine is
hot or running.
C. Do not smoke while handling diesel fuel.
D. Fill fuel tank outdoors and not over one inch from
the top of the tank (bottom of the filler neck). Do not
overfill.
While Operating
1. Always wear your seatbelt.
2. Do not run the engine in a confined area without ade-
quate ventilation. Exhaust fumes are hazardous and
could be deadly.
3. Sit on the seat when starting and operating the ma-
chine.
4. Check interlock switches daily for proper operation
(Chapter 5 -- Electrical System). Do not rely entirely on
safety switches: shut off engine before getting off seat.
If a switch fails, replace it before operating the machine.
The interlock system is for your protection, so do not by-
pass it. Replace all interlock switches every two years.
5. Operator must be skilled and trained in how to drive
on hillsides. Failure to use caution on slopes or hills may
cause vehicle to tip or roll, possibly resulting in personal
injury or death.
6. This triplex mower has a unique drive system for su-
perior traction on hills. The uphill wheel will not spin out
and limit traction like conventional triplexes. If operated
on a side hill that is too steep, rollover will occur before
losing traction.
7. Before backing up, look to the rear and assure no
one is behind the machine. Watch out for traffic when
near or crossing roads. Always yield the right of way.
8. Keep hands, feet and clothing away from moving
parts and the deck discharge area.
9. The slope angle at which the machine will tip is de-
pendent on many factors. Among these are mowing
conditions such as wet or undulating turf, speed (espe-
cially in turns), position of the cutting units, tire pressure,
and operator experience. At side hill slope angles of 20
degrees or less the risk of a rollover is low. As the slope
angle increases to a Toro recommended maximum limit
of25 degrees,the risk ofarollover increasesto amoder-
ate level. DO NOT EXCEED A 25 DEGREE SIDE HILL
ANGLE BECAUSE THE RISK OF A ROLLOVER AND
SERIOUS INJURY OR DEATH IS VERY HIGH. The
Groundsmaster 3500--D is equipped with an angle indi-
cator, mounted on the steering tube, which indicates the
side hill angle the machine is operating on and identifies
the recommended maximum limit of 25 degrees.
Stay alert for holes in terrain and other hidden hazards
which can cause a sudden change in side hill angle. Use
extreme caution when operating close to sand traps,
ditches, creeks, steep hillsides, or other hazards. Re-
duce speed when making sharp turns. Do not turn on
hills. Avoid sudden stops and starts. Use reverse pedal
for braking. Cutting units must be lowered when going
down slopes for steering control.
10.When starting the engine:
A. Engage parking brake.
B. Be sure tractionpedalisin neutraland bladedrive
is in disengage position.
C. After engine starts, release parking brake and
keep foot off traction pedal. Machine must not move.
If movement is evident, the neutral control linkage is
incorrectly adjusted: therefore, shut engine off and
adjust until machine does not move when traction
pedal is released (see Adjust Transmission for Neu-
tral).
11.This product may exceed noise levels of 85 dB(A) at
the operator position. Ear protectors are recommended
for prolonged exposure to reduce the potential of per-
manent hearing damage.
12.Raise the cutting units when driving from one work
area to another.
5. Groundsmaster 3500--D Page 1 -- 3 Safety
13.Donottouch engine,muffler,exhaustpipe orhydrau-
lic tank while engine is running or soon after it has
stopped because these areas could be hot enough to
cause burns.
14.If a cutting unit strikes a solid object or vibrates ab-
normally, stop immediately. Turn engine off, wait for all
motion to stop and inspect for damage.
15.Before getting off the seat:
A. Move traction pedal to neutral.
B. Set the parking brake.
C. Disengage the cutting units and wait for the
blades to stop spinning.
D. Stop the engine and remove key from the ignition
switch.
16.Whenever machine is left unattended, make sure
key is removed from ignition switch and parking brake
is set.
Maintenance and Service
1. Before servicing or making adjustments to the ma-
chine, stop the engine and remove key from switch to
prevent accidental starting of the engine.
2. Check performance of all interlock switches daily. Do
not defeat interlock system. It is for your protection.
3. To ensure entire machine is in good operating condi-
tion, frequently check and keep all nuts, bolts, screws
and hydraulic fittings tight.
4. Make sure all hydraulic line connectors are tight, and
all hydraulic hoses and lines are in good condition be-
fore applying pressure to the system.
5. Keep body and hands away from pin hole leaks or
nozzles that eject hydraulic fluid under high pressure.
Use paper or cardboard, not hands, to search for leaks.
Hydraulic fluid escaping under pressure can have suffi-
cient force to penetrate skin and do serious damage. lf
fluid is injected into the skin it must be surgically re-
moved within a few hours by a doctor familiar with this
form of injury or gangrene may result.
6. Before disconnecting or performing any work on the
hydraulic system, all pressure in system must be re-
lieved by stopping engine and lowering cutting units to
the ground.
7. If major repairs are ever needed, or if assistance is
desired, contact an Authorized Toro Distributor.
8. To reduce potential fire hazard, keep the engine area
free of excessive grease, grass, leaves and accumula-
tion of dirt.
9. If the engine must be running to perform a mainte-
nance adjustment, keep hands, feet, clothing, and any
other parts of the body away from the cutting units and
any moving parts. Keep everyone away.
10.Do not overspeed the engine by changing governor
settings. To assure safety and accuracy, have an Autho-
rized Toro Distributor check maximum engine speed
with a tachometer.
11.Engine must be shut off before checking oil or adding
oil to the crankcase.
12.To insure optimum performance and safety, use gen-
uine TORO replacement parts and accessories. Re-
placement parts and accessories made by other
manufacturers could be dangerous, and such use could
void the product warranty of The Toro Company.
Safety
6. Groundsmaster 3500--DPage 1 -- 4Safety
Jacking Instructions
CAUTION
When changing attachments, tires, or performing
other service, use correct blocks, hoists, and
jacks. Make sure machine is parked on a solid lev-
el floor such as a concrete floor. Prior to raising
machine, remove any attachments that may inter-
fere with the safe and proper raising of the ma-
chine. Always chock or block wheels. Use jack
stands or solid wood blocks to support the raised
machine. If the machine is not properly sup-
ported by blocks or jack stands, the machine may
move or fall, which may result in personal injury.
Use the following positions when jacking up the ma-
chine:
Jacking the Front End
1. If the front wheel motor is to be removed, position
jack securely under the square tube of the lower frame
as closely to the side plate as possible (Fig. 1).
2. If the front tire is to be removed, position the jack se-
curely under the front wheel motor.
3. Use jack stands or hardwood blocks under the
square tube or wheel motors to support the machine.
Jacking the Rear End
1. The preferred method for removing the rear fork, the
rear wheel, or the rear wheel motor is to lift the rear end
of the machine from above:
A. Secure a chain fall or hoist to the rear casting (Fig
2).
B. Chock both front tires. Lift rear tire off the ground.
C. Use jack stands or hardwood blocks under the
frame to support the machine (Fig. 3).
2. If the rear of the machine cannot be lifted from above:
A. Chock both front tires.
IMPORTANT: Make sure jack is as close to the rear
fork as possible when jacking the rear wheel.
B. Place jack securely under the rear wheel motor
as close to the fork as possible (Fig. 3). Jack rear tire
off the ground.
C. Use jack stands or blocks under the frame to sup-
port the machine.
1. Square tube 2. Side plate
Figure 1
2
1
1. Rear tire 2. Rear casting
Figure 2
2
1
1. Frame
2. Rear wheel motor
3. Rear fork
Figure 3
2
3
1
7. Rev. E
Groundsmaster 3500--D Page 2 -- 1 Product Records and Maintenance
Chapter 2
Product Records and Maintenance
Table of Contents
PRODUCT RECORDS 1. . . . . . . . . . . . . . . . . . . . . . . . .
MAINTENANCE 1. . . . . . . . . . . . . . . . . . . . . . . . . . . . . . .
EQUIVALENTS AND CONVERSIONS 2. . . . . . . . . . .
Decimal and Millimeter Equivalents 2. . . . . . . . . . . .
U.S. to Metric Conversions 2. . . . . . . . . . . . . . . . . . .
TORQUE SPECIFICATIONS 3. . . . . . . . . . . . . . . . . . . .
Fastener Identification 3. . . . . . . . . . . . . . . . . . . . . . .
Standard Torque (Inch Series) 4. . . . . . . . . . . . . . . .
Standard Torque (Metric Fasteners) 5. . . . . . . . . . .
Other Torque Specifications 6. . . . . . . . . . . . . . . . . .
Conversion Factors 6. . . . . . . . . . . . . . . . . . . . . . . . . .
LUBRICATION 7. . . . . . . . . . . . . . . . . . . . . . . . . . . . . . . .
Traction Unit 7. . . . . . . . . . . . . . . . . . . . . . . . . . . . . . . .
Cutting Units 10. . . . . . . . . . . . . . . . . . . . . . . . . . . . . .
PREPARATION FOR SEASONAL STORAGE 11. . . .
Product Records
Insert a copy of the Operator’s Manual and Parts Cata-
log for your Groundsmaster 3500--D at the end of this
chapter. Additionally, if any optional equipment or ac-
cessories have been installed to your Groundsmaster,
insert the Installation Instructions, Operator’s Manuals
and Parts Catalogs for those options at the end of this
chapter.
Maintenance
Maintenance procedures and recommended service in-
tervals for the Groundsmaster 3500--D are covered in
the Operator’s Manual. Refer to that publication when
performing regular equipment maintenance.
SafetyProductRecords
andMaintenance
Kubota
DieselEngine
Hydraulic
Systems
Electrical
System
Wheels,Brakes,
andChassis
9. Groundsmaster 3500--D Page 2 -- 3 Product Records and Maintenance
Torque Specifications
Recommended fastener torque values are listed in the
following tables. For critical applications, as determined
by Toro, either the recommended torque or a torque that
is unique to the application is clearly identified and spe-
cified in this Service Manual.
These Torque Specifications for the installation and
tightening of fasteners shall apply to all fasteners which
do not have a specific requirement identified in this Ser-
vice Manual. The following factors shall be considered
when applying torque: cleanliness of the fastener, use
of a thread sealant (Loctite), degree of lubrication on the
fastener, presence of a prevailing torque feature, hard-
ness of the surface underneath the fastener’s head, or
similar condition which affects the installation.
As noted in the following tables, torque values should be
reduced by 25% for lubricated fasteners to achieve
the similar stress as a dry fastener. Torque values may
also have to be reduced when the fastener is threaded
into aluminum or brass. The specific torque value
should be determined based on the aluminum or brass
material strength, fastener size, length of thread en-
gagement, etc.
The standard method of verifying torque shall be per-
formed by marking a line on the fastener (head or nut)
and mating part, then back off fastener 1/4 of a turn.
Measure the torque required to tighten the fastener until
the lines match up.
Fastener Identification
Grade 1 Grade 5 Grade 8
Inch Series Bolts and Screws
Class 8.8 Class 10.9
Metric Bolts and Screws
SafetyProductRecords
andMaintenance
Kubota
DieselEngine
Hydraulic
Systems
Electrical
System
Wheels,Brakes,
andChassis
11. Groundsmaster 3500--D Page 2 -- 5 Product Records and Maintenance
Standard Torque for Dry, Zinc Plated, and Steel Fasteners (Metric Fasteners)
Thread Size
Class 8.8 Bolts, Screws, and Studs with
Regular Height Nuts
Class 10.9 Bolts, Screws, and Studs with
Regular Height NutsThread Size Regular Height Nuts
(Class 8 or Stronger Nuts)
Regular Height Nuts
(Class 10 or Stronger Nuts)
M5 X 0.8 57 + 5 in--lb 640 + 60 N--cm 78 + 7 in--lb 885 + 80 N--cm
M6 X 1.0 96 + 9 in--lb 1018 + 100 N--cm 133 + 13 in--lb 1500 + 150 N--cm
M8 X 1.25 19 + 2 ft--lb 26 + 3 N--m 27 + 2 ft--lb 36 + 3 N--m
M10 X 1.5 38 + 4 ft--lb 52 + 5 N--m 53 + 5 ft--lb 72 + 7 N--m
M12 X 1.75 66 + 7 ft--lb 90 + 10 N--m 92 + 9 ft--lb 125 + 12 N--m
M16 X 2.0 166 + 15 ft--lb 225 + 20 N--m 229 + 22 ft--lb 310 + 30 N--m
M20 X 2.5 325 + 33 ft--lb 440 + 45 N--m 450 + 37 ft--lb 610 + 50 N--m
Note: Reduce torque values listed in the table above
by 25% for lubricated fasteners. Lubricated fasteners
are defined as threads coated with a lubricant such as
oil, graphite, or thread sealant such as Loctite.
Note: Torque values may have to be reduced when
installing fasteners into threaded aluminum or brass.
The specific torque value should be determined based
on the fastener size, the aluminum or base material
strength, length of thread engagement, etc.
Note: The nominal torque values listed above are
based on 75% of the minimum proof load specified in
SAE J1199. The tolerance is approximately + 10% of the
nominal torque value.
SafetyProductRecords
andMaintenance
Kubota
DieselEngine
Hydraulic
Systems
Electrical
System
Wheels,Brakes,
andChassis
12. Groundsmaster 3500--DPage 2 -- 6Product Records and Maintenance
Other Torque Specifications
SAE Grade 8 Steel Set Screws
Thread Size
Recommended Torque
Thread Size
Square Head Hex Socket
1/4 -- 20 UNC 140 + 20 in--lb 73 + 12 in--lb
5/16 -- 18 UNC 215 + 35 in--lb 145 + 20 in--lb
3/8 -- 16 UNC 35 + 10 ft--lb 18 + 3 ft--lb
1/2 -- 13 UNC 75 + 15 ft--lb 50 + 10 ft--lb
Thread Cutting Screws
(Zinc Plated Steel)
Type 1, Type 23, or Type F
Thread Size Baseline Torque*
No. 6 -- 32 UNC 20 + 5 in--lb
No. 8 -- 32 UNC 30 + 5 in--lb
No. 10 -- 24 UNC 38 + 7 in--lb
1/4 -- 20 UNC 85 + 15 in--lb
5/16 -- 18 UNC 110 + 20 in--lb
3/8 -- 16 UNC 200 + 100 in--lb
Wheel Bolts and Lug Nuts
Thread Size Recommended Torque*
7/16 -- 20 UNF
Grade 5
65 + 10 ft--lb 88 + 14 N--m
1/2 -- 20 UNF
Grade 5
80 + 10 ft--lb 108 + 14 N--m
M12 X 1.25
Class 8.8
80 + 10 ft--lb 108 + 14 N--m
M12 X 1.5
Class 8.8
80 + 10 ft--lb 108 + 14 N--m
* For steel wheels and non--lubricated fasteners.
Thread Cutting Screws
(Zinc Plated Steel)
Thread
Size
Threads per Inch
Baseline Torque**Size
Type A Type B
Baseline Torque**
No. 6 18 20 20 + 5 in--lb
No. 8 15 18 30 + 5 in--lb
No. 10 12 16 38 + 7 in--lb
No. 12 11 14 85 + 15 in--lb
** Hole size, material strength, material thickness & fin-
ish must be considered when determining specific
torque values. All torque values are based on non--lubri-
cated fasteners.
Conversion Factors
in--lb X 11.2985 = N--cm N--cm X 0.08851 = in--lb
ft--lb X 1.3558 = N--m N--m X 0.7376 = ft--lb
13. Groundsmaster 3500--D Page 2 -- 7 Product Records and Maintenance
Lubrication
Traction Unit
CAUTION
Before servicing or making adjustments to the
machine, stop engine, lower cutting units, set
parking brake, and remove key from the ignition
switch.
The traction unit has grease fittings that must be lubri-
cated regularly with No. 2 General Purpose Lithium
Base Grease. If machine is operated under normal
conditions, lubricate bearings and bushings after every
50 hours of operation. Bearings and bushings must be
lubricated daily when operating conditions are extreme-
ly dusty and dirty. Dusty and dirty operating conditions
could cause dirt to get into the bearings and bushings,
resulting in accelerated wear. Lubricate bearings and
bushings immediately after every washing, regardless
of the interval listed.
The traction unit bearings and bushings that must be lu-
bricated are: Rear cutting unit pivot (Fig. NO TAG),
Frontcutting unitpivot(Fig.2),Sidewinder cylinder ends
(qty. 2) (Fig. 3), Steering pivot (Fig. 4), Rear lift arm pivot
and lift cylinder (qty. 2) (Fig. 5), Left front lift arm pivot
and lift cylinder (qty. 2) (Fig. 6), Right front lift arm pivot
and lift cylinder (qty. 2) (Fig. 7), Neutral adjust mecha-
nism (Fig. 8), Mow/Transport slide (Fig. 9), Belt tension
pivot (Fig. 10), and Steering cylinder (Fig. 11).
Note: If desired, an additional grease fitting may be
installed in other end of steering cylinder. Tire must be
removed, plug removed, fitting installed, greased, fitting
removed and plug reinstalled (Fig. 12).
IMPORTANT: Do not lubricate Sidewinder cross
tube: bearing blocks are self lubricated.
IMPORTANT: Lubricate bearings and bushings im-
mediately after washing. This helps to purge water
out of bearings and increases bearing life.
1. Wipe each grease fitting with a clean rag.
IMPORTANT: Do not apply too much pressure or
grease seals will be permanently damaged.
2. Apply grease until pressure is felt against handle.
3. Wipe excess grease away.
Figure 1
Figure 2
Figure 3
2
SafetyProductRecords
andMaintenance
Kubota
DieselEngine
Hydraulic
Systems
Electrical
System
Wheels,Brakes,
andChassis
15. Groundsmaster 3500--D Page 2 -- 9 Product Records and Maintenance
Figure 10
Figure 11
Figure 12 (See note)
SafetyProductRecords
andMaintenance
Kubota
DieselEngine
Hydraulic
Systems
Electrical
System
Wheels,Brakes,
andChassis
16. Groundsmaster 3500--DPage 2 -- 10Product Records and Maintenance
Cutting Units
Each cutting unit has two grease fittings per blade
spindle. Either fitting can be used for greasing, which
ever is more accessible. Under normal conditions, lubri-
cate spindle bearings with No. 2 General Purpose Lithi-
um Base Grease or Molybdenum base grease, after
every 50 hours of operation.
IMPORTANT: Lubricate cutting units immediately
after washing. This helps to purge water out of bear-
ings and increases bearing life.
1. Wipe grease fitting with a clean rag.
IMPORTANT: Do not apply too much pressure or
grease seals will be permanently damaged.
2. Apply grease until a small amount appears at bottom
of spindle housing (under deck).
3. Wipe excess grease away.
Figure 13
17. Groundsmaster 3500--D Page 2 -- 11 Product Records and Maintenance
Preparation for Seasonal Storage
Traction Unit
1. Clean traction unit, cutting units, and the engine thor-
oughly.
2. Check tire pressure. Inflate all tires to 14 to 18 psi
(0.97 to 1.24 Bar).
3. Check all fasteners for looseness; tighten as neces-
sary.
4. Lubricate all grease fittings and pivot points (see Lu-
brication).
5. Cover entire length of the Sidewinder cross tube with
a light oil to prevent rust. After storage, wipe off all oil.
6. Lightly sand and use touch--up paint on painted
areas that are scratched, chipped, or rusted. Repair any
dents in the metal body.
7. Service battery and cables as follows:
A. Remove battery terminals from the battery posts
(see Battery Service in Chapter 5 -- Electrical Sys-
tem).
B. Clean battery, terminals, and posts with a wire
brush and baking soda solution.
C. Coat cable terminals and battery posts with Grafo
112X skin--over grease (Toro Part No. 505-47) or pe-
troleum jelly to prevent corrosion.
D. Every 30 days, check battery electrolyte levels
and fill battery as necessary (see Battery Care in
Chapter 5 -- Electrical System).
E. Every 60 days, recharge battery slowly for 24
hours to prevent sulfate from forming on the battery
plates (see manufacturer’s instructions for battery
charger).
Traction Unit Engine
1. Drain engine oilfromthe oilpan andreplace thedrain
plug.
2. Remove and discard oil filter. Install new oil filter.
3. Refill oil pan with approximately 4.0 quarts (3.8 l) of
SAE10W-30 motor oil.
4. Start engine and run at idle speed for approximately
two minutes.
5. Stop engine.
6. Drain all fuel thoroughly from the fuel tank, fuel lines,
and water/fuel separator (see Water/Fuel Separator
and Fuel System in Chapter 3 -- Kubota Diesel Engine).
7. Flush the fuel tank with fresh, clean diesel fuel (see
Fuel System in Chapter 3 -- Kubota Diesel Engine).
8. Re--secure all fuel system fittings.
9. Clean and service the air cleanerassembly (seeSer-
vice Air Filter, Dust Cup, and Burp Valve in Chapter 3 --
Kubota Diesel Engine).
10.Seal air cleaner inlet and the exhaust outlet with
weatherproof tape.
11.Check anti--freeze protection and add as needed for
expected minimum temperature in your area (see
Check Cooling System in Chapter 3 -- Kubota Diesel En-
gine).
SafetyProductRecords
andMaintenance
Kubota
DieselEngine
Hydraulic
Systems
Electrical
System
Wheels,Brakes,
andChassis
19. Groundsmaster 3500--DPage 3 -- 2Kubota Diesel Engine
Introduction
This Chapter gives information about specifications,
maintenance, troubleshooting, testing, and repair of the
diesel engine used in the Groundsmaster 3500--D.
Most repairs and adjustments require tools which are
commonly available in many service shops. Special
tools are described in the Kubota Workshop Manual,
Diesel Engine, 05 Series. The use of some specialized
test equipment is explained. However, the cost of the
test equipment and the specialized nature of some re-
pairs may dictate that the work be done at an engine re-
pair facility.
Service and repair parts for Kubota engines are sup-
plied through your Authorized Toro Distributor. If no
parts listis available,be prepared to provide your distrib-
utor with the Toro model and serial number.
20. Thank you very much
for your reading. Please
Click Here Then Get
More Information.
NOTE:
If there is no response to
click on the link above,
please download the PDF
document first and then
click on it.
21. Groundsmaster 3500--D Page 3 -- 3 Kubota Diesel Engine
Specifications
Item Description
Make / Designation Kubota, 4--Cycle, 3 Cylinder,
Liquid Cooled, Diesel Engine
Horse Power 32 HP @ 2800 RPM
Bore mm (in.) 78.0 (3.07)
Stroke mm (in.) 78.4 (3.09)
Total Displacement cc (cu. in.) 1123 (68.53)
Torque N--m (ft--lb) 68.2 (50.3) @ 2000 RPM
Firing Order 1--2--3
Combustion Chamber Spherical Type
Fuel No. 2 Diesel Fuel (ASTM D975)
Fuel Capacity liters (gallons) 41.7 (11)
Fuel Injection Pump Bosch MD Type Mini Pump
Governor Centrifugal Mechanical
Low Idle (no load) 1400 + 50 RPM
High Idle (no load) 3050 + 50 RPM
Direction of Rotation Counterclockwise (Viewed from Flywheel)
Compression Ratio 23:1
Injection Nozzles Mini Nozzle (DNOPD)
Engine Oil 10W30 Detergent (API classification CD or better)
Oil Pump Trochoid Type
Crankcase Oil Capacity liters (U.S. qt.) 3.8 (4.0) with Filter
Starter 12 VDC, 1.4 KW
Alternator/Regulator 12 VDC, 40 AMP
Dry Weight kilograms (U.S. lbs) 98.0 (215.0)
Coolant Capacity liters (U.S. qt.) 5.7 (6.0) with 0.9 (1.0) Reservoir
SafetyProductRecordsKubota
DieselEngine
HydraulicElectricalWheels,Brakes,
22. Groundsmaster 3500--DPage 3 -- 4Kubota Diesel Engine
General Information
Check Engine Oil
The engine is shipped with oil in the crankcase. Howev-
er, oil level must be checked before and after the engine
is first started.
Crankcase holds about 4.0 qts. (3.8 l) with filter.
IMPORTANT: Check level of oil every 5 operating
hours or daily. Change oil after every 50 hours of op-
eration.
1. Park machine on a level surface, lower cutting units,
stop engine, engage parking brake, and remove key
from the ignition switch. Unlatch and raise hood.
2. Remove dipstick and wipe it with a clean rag. Push
dipstick down into dipstick tube and make sure it is
seated fully. Pull dipstick out and check oil level.
3. If oil level is low, remove oil fill cap and gradually add
small quantities of oil, checking level frequently, until the
oil level reaches the FULL mark on the dipstick.
4. The engine uses any high--quality, 10W30 detergent
oil having the American Petroleum Institute -- API -- “Ser-
vice Classification” CD or better.
5. Install oil fill cap.
6. Close and secure hood.
Figure 1
1. Dipstick
1
Figure 2
1. Oil fill cap 2. Injection pump
2 1