
Recommended
Recommended
More Related Content
Similar to Tips_10_minute_Scientific_PowerPoint_Presentation_Meds_490.pdf
Similar to Tips_10_minute_Scientific_PowerPoint_Presentation_Meds_490.pdf (20)
Recently uploaded
Recently uploaded (20)
Tips_10_minute_Scientific_PowerPoint_Presentation_Meds_490.pdf
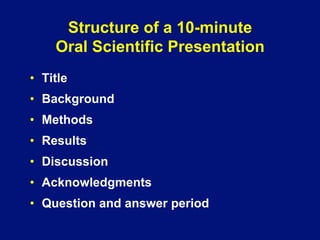
- 1. Structure of a 10-minute Oral Scientific Presentation • Title • Background • Methods • Results • Discussion • Acknowledgments • Question and answer period
- 2. Title Slide (10-15 sec) • Title should include – Subject – Location – Time period • Your name • Your affiliation • Appropriate logos • Say “Good morning / afternoon / evening”
- 3. Advanced Meds 490 Oral Presentations USC undergraduate student KSOM, Department of Life Mentor: Dr. Know Everything
- 4. Background (1-2 min) • Usually a few slides • Engage audience • Set stage for outbreak investigation • Provide rationale for planned study • Essential information (only) about project • Establish relevance to health • Include a slide describing study objectives
- 5. Methods (1-2 min) • Usually a few slides • Describe study design(s) • Describe study groups and why selected • Say what laboratory tests were used
- 6. Results (3-4 min) • Usually several slides • Emphasize most important findings • Describe characteristics of study participants, animal cohort, etc • Include descriptive results and analytic results • Use mixture of text, tables, figures, photos as appropriate to your data
- 7. Discussion (2-3 min) • Interpretation of findings – Don’t repeat results – Prioritize findings from most to least important – Link findings to study objectives – Put findings into context with previous studies • Limitations slide (only the important ones) • Conclusions slide(s) based on your findings • Recommendations slide(s) – Directions for future studies
- 8. Acknowledgments (10-15 sec) • Recognize coauthors and contributors • Same logos as on title slide • Your last words = “Thank You”
- 10. Effective Slides… • Are uncluttered, clear, visible • Don’t distract the audience • Use informative titles – “Characteristics of Study Participants” – “Risk Factors for Illness” – Not “Results 1, “Results 2” • Use bolded, sans serif font (Arial, Tahoma) • Have simple, high-contrast, consistent color schemes
- 11. Color-Blind “Friendly” Presentations • Avoid red-green color combinations • If must use red, use yellowish red (R=255 / G=82 / B=0) instead of pure red • Avoid red characters / lines on dark background • Make text and lines as big or thick as practical • Use high-contrast color scheme
- 12. Recommended Fonts and Sizes • Sans serif font, all titles and text bolded • For Arial (bolded): – Titles 36 pt – Main bullets 28 pt – Sub-bullets 28 pt if room, otherwise 24 pt – Avoid sub-sub bullets (re-format) • Keep text / title size consistent across slides – Stop PowerPoint from changing text size as you type – Go to Tools, AutoCorrect – Uncheck “Autofit body/title text to placeholder”
- 13. Effective Text Slides • Order of slide text matches order of script • Key words only, not complete sentences • 8–10 lines maximum • Bulleted text better than numbered items in most cases • Parallel structure (all verbs, all nouns, etc)
- 14. Things to Avoid • Visual clutter from too many colors • Unbolded, serif font like Times New Roman • ALL CAPS (HARD ON THE EYES) • Pseudo-3D charts and graphs • Animation (no flying objects; slide builds=OK) • Clip art that serves no purpose • Unnecessary grid lines in figures • Necessary lines that are too thin • All PowerPoint design templates
- 15. Photos and Clip Art — Tips • Should serve a purpose • No copyrighted materials without permission • No photos of identifiable people unless release • No photos of your kids or your pets • Clip art cautions – Simplest is most effective – Check in Slide Show to make sure it is not animated
- 16. Tips on Delivering Oral Presentations
- 17. Preparation Tips • Use script, flesh out bullet pts into sentences • Practice is the key to making sure it doesn’t sound scripted • Print your script in large enough type (14-16 pt) – Check script size in Notes Master or Notes view – Print one slide and accompanying script per page • Time your presentation • If you used “Rehearse slide timings” feature, go to Slide Show, Set Up Show, and uncheck “Advance slides using timings if present”
- 18. Delivery Tips • Get there early • Don’t start speaking until ready • Speak slowly and with sufficient volume • Don’t turn your back on your audience • Check that the correct slide is projecting • Use microphone correctly • Be careful with humor • Explain charts / graphs before giving point • Explain associations clearly • Pause before advancing to next slide
- 19. Reasons Not to Use a Laser Pointer • Have to turn away from audience to use it • Some projection screens absorb the laser, so audience in room cannot see it • Color-blind people can’t see it (red) • Can become a crutch • If your hands are shaking, pointer will show it • Alternatives: – Building “pointers” into slides – Using computer cursor (arrow)
- 20. Question & Answer Period: Don’ts • Don’t fumble for extra slides • Don’t be defensive even if question hostile • Don’t ask “Did that answer your question?” • Don’t thank the questioner for the question • Don’t rate the question • Don’t back away from the podium as if poison • Don’t hang on to podium as if life-preserver
- 21. Take-Home Messages • Decide type of data and the point you want to convey, then choose the visual accordingly (text, table, graph, chart, etc.) • Well organized, practiced presentation with clear, effective slides (when used) reinforces your message and helps you communicate effectively • Good science is more important than glitz
- 22. THANK YOU!