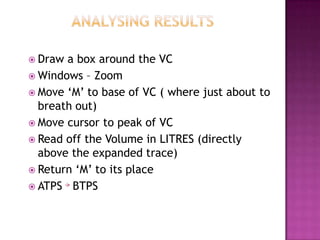
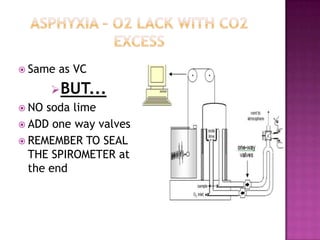
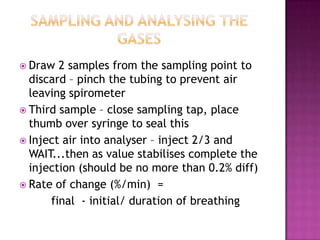
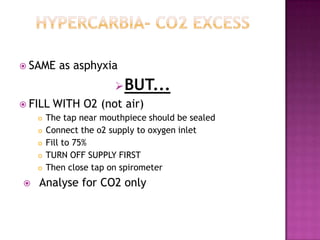
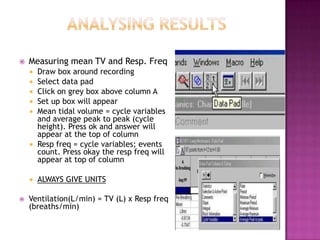
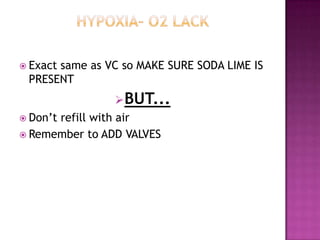
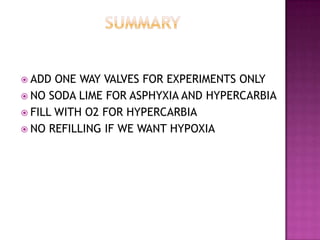
 What   the different volumes and capacities
  mean
 How to set up the spirometer and powerlab
  for:
    Vital capacity
    Forced Vital Capacity
    Asphyxia
    Hypercarbia
    Hypoxia
 How   to analyse results from these
   SET UP SPIROMETER
     Make sure soda lime is under the
      bell
     Place the bell in
     Don’t need to attach one way
      valves
     Attach disposable mouthpiece
     Make tap vertical and ventilate
      the spirometer (VErtical to
      VEntilate) = push right down and
      fill about 75% with air
     Seal the spirometer - Horizontal
      ( check by blowing and air
      should come out of the side)
   Set up the computer:
     sampling rate to 20/S
     Scale amplitude to 1V
     Time base 1:1


   WEAR NOSE CLIP!

   Press start

   Sit comfortably, breath and turn tap
    to vertical

   VC = max inspiration and
    immediately max expiration (steady
    and complete)

   Stop = few secs normal breathing ,
    tap horizontal and stop the
    powerlab software
 Draw a box around the VC
 Windows – Zoom
 Move ‘M’ to base of VC ( where just about to
  breath out)
 Move cursor to peak of VC
 Read off the Volume in LITRES (directly
  above the expanded trace)
 Return ‘M’ to its place
 ATPS BTPS
 Same   as VC
                 BUT...


 When inspiration reaches a peak BREATH OUT
 AS FAST AND HARD AS POSSIBLE AND
 CONTINUE FOR ~ 3secs
   Same as VC

           BUT...

   Place cursor on the plateau

   FEV1 = this is done from the
    FVC recording, but only move
    cursor as far as 1 sec from the
    base. i.e t=1sec and then
    read off the volume
   FEV1/FVC = percentage of air
    breathed out in first second
 Same   as VC
       BUT...
 NO soda lime
 ADD one way valves
 REMEMBER TO SEAL
  THE SPIROMETER at
  the end
 Draw  2 samples from the sampling point to
  discard – pinch the tubing to prevent air
  leaving spirometer
 Third sample – close sampling tap, place
  thumb over syringe to seal this
 Inject air into analyser – inject 2/3 and
  WAIT...then as value stabilises complete the
  injection (should be no more than 0.2% diff)
 Rate of change (%/min) =
      final - initial/ duration of breathing
 SAME     as asphyxia
                        BUT...
 FILL   WITH O2 (not air)
       The tap near mouthpiece should be sealed
       Connect the o2 supply to oxygen inlet
       Fill to 75%
       TURN OFF SUPPLY FIRST
       Then close tap on spirometer
   Analyse for CO2 only
   Measuring mean TV and Resp. Freq
       Draw box around recording
       Select data pad
       Click on grey box above column A
       Set up box will appear
       Mean tidal volume = cycle variables
        and average peak to peak (cycle
        height). Press ok and answer will
        appear at the top of column
       Resp freq = cycle variables; events
        count. Press okay the resp freq will
        appear at top of column

       ALWAYS GIVE UNITS

   Ventilation(L/min) = TV (L) x Resp freq
    (breaths/min)
 Exact
      same as VC so MAKE SURE SODA LIME IS
 PRESENT
                BUT...
 Don’t
      refill with air
 Remember to ADD VALVES
 ADD  ONE WAY VALVES FOR EXPERIMENTS ONLY
 NO SODA LIME FOR ASPHYXIA AND HYPERCARBIA
 FILL WITH O2 FOR HYPERCARBIA
 NO REFILLING IF WE WANT HYPOXIA
QUESTIONS??

Spirometery

  • 2.
     What the different volumes and capacities mean  How to set up the spirometer and powerlab for:  Vital capacity  Forced Vital Capacity  Asphyxia  Hypercarbia  Hypoxia  How to analyse results from these
  • 4.
    SET UP SPIROMETER  Make sure soda lime is under the bell  Place the bell in  Don’t need to attach one way valves  Attach disposable mouthpiece  Make tap vertical and ventilate the spirometer (VErtical to VEntilate) = push right down and fill about 75% with air  Seal the spirometer - Horizontal ( check by blowing and air should come out of the side)
  • 5.
    Set up the computer:  sampling rate to 20/S  Scale amplitude to 1V  Time base 1:1  WEAR NOSE CLIP!  Press start  Sit comfortably, breath and turn tap to vertical  VC = max inspiration and immediately max expiration (steady and complete)  Stop = few secs normal breathing , tap horizontal and stop the powerlab software
  • 6.
     Draw abox around the VC  Windows – Zoom  Move ‘M’ to base of VC ( where just about to breath out)  Move cursor to peak of VC  Read off the Volume in LITRES (directly above the expanded trace)  Return ‘M’ to its place  ATPS BTPS
  • 7.
     Same as VC BUT...  When inspiration reaches a peak BREATH OUT AS FAST AND HARD AS POSSIBLE AND CONTINUE FOR ~ 3secs
  • 8.
    Same as VC BUT...  Place cursor on the plateau  FEV1 = this is done from the FVC recording, but only move cursor as far as 1 sec from the base. i.e t=1sec and then read off the volume  FEV1/FVC = percentage of air breathed out in first second
  • 9.
     Same as VC BUT...  NO soda lime  ADD one way valves  REMEMBER TO SEAL THE SPIROMETER at the end
  • 10.
     Draw 2 samples from the sampling point to discard – pinch the tubing to prevent air leaving spirometer  Third sample – close sampling tap, place thumb over syringe to seal this  Inject air into analyser – inject 2/3 and WAIT...then as value stabilises complete the injection (should be no more than 0.2% diff)  Rate of change (%/min) = final - initial/ duration of breathing
  • 11.
     SAME as asphyxia BUT...  FILL WITH O2 (not air)  The tap near mouthpiece should be sealed  Connect the o2 supply to oxygen inlet  Fill to 75%  TURN OFF SUPPLY FIRST  Then close tap on spirometer  Analyse for CO2 only
  • 12.
    Measuring mean TV and Resp. Freq  Draw box around recording  Select data pad  Click on grey box above column A  Set up box will appear  Mean tidal volume = cycle variables and average peak to peak (cycle height). Press ok and answer will appear at the top of column  Resp freq = cycle variables; events count. Press okay the resp freq will appear at top of column  ALWAYS GIVE UNITS  Ventilation(L/min) = TV (L) x Resp freq (breaths/min)
  • 13.
     Exact same as VC so MAKE SURE SODA LIME IS PRESENT BUT...  Don’t refill with air  Remember to ADD VALVES
  • 14.
     ADD ONE WAY VALVES FOR EXPERIMENTS ONLY  NO SODA LIME FOR ASPHYXIA AND HYPERCARBIA  FILL WITH O2 FOR HYPERCARBIA  NO REFILLING IF WE WANT HYPOXIA
  • 15.

Editor's Notes

  • #4 Tidal vol – the amount of air breathed in and out at restInspiratory reserve vol – the amount of extra air breathed in when you take a deep breathExp reserve – same concept as IRV, but its just the extra volume you breath out when you do a max expirationResidual Volume – the amount you always have left over in your lungs even after maximum expiration (to ensure lungs don’t collapse and can inflate again)Capacities are just different volumes added together – Vital capacity is TV+ERV+IRV = the volume air that you breath in and out during maximum inspiration and expirationInspiratory capacity – TV+IRV = the total vol that you can breath in Functional residual capacity – ERV+RV = the volume of air you have left in your lungs after a normal breath Total lung capacity – everything added together = the total volume of your lungs
  • #5 The valves are needed to ensure that air is mixed within the spirometer so thats why you use them in the experiment Don’t need it here cos we’re not concerned about the what your breathing in, rather how much you can. The valves would create too much resistance and give you a false reading of your capacityIn the exam you won’t have to do it for long BUT need to tell examiner that if you were breathing for more than a few minutes you would stop and refill the air to ensure that o2 levels don’t decrease. if you didn’t do this then you would be creating hypoxic conditions
  • #6 Easy to forget nose clips – need to have it so that when you breath in and out you’re just taking in whats in the spirometer and not air around you
  • #7 ATPS - BTPS = Ambient Temperature and Pressure Saturated with water vapour – Body Temperature and Presssure Saturated with water vapour multiply by appropiate conversion factor for room temp (doubt will have to but can mention)The whole point of this is that the actual volume of air in lungs will differ slightly from volume you calculated from the spirometer because the tempeature of room affects air volume. So to account for this and give a better estimation of the actual values we use a conversion factor depending on the temperature of the room
  • #9 In healthy person FVC should be similar to VC because of lack of obstruction but if person has obstructive disorder i.e COPD then FVC is less even if VC is normal as less airways collapse when not forcedFEV1 should be 80% of FVC, but in pathology it will be decreased due to increased resistance as airways collapsed so less than normal out in the first second.In clinical situations they work out FEV1/FVC which is the % of the total air breathed out in one second and this gives a better indication of the level of obstruction a person may have in their airways The actual FEV1 value will be low – but FVC could be normal and therefore FEV/FVC is worked out
  • #10 The O2 lack comes from the fact that you won’t be refilling if this was to continue whereas in VC etc you would allow your subject to stop and refill In these experiments we want to see how the air conditions affect our breathing. The way to create these conditions is to use one way valvesSafety issues – sign every 20 secs; don’t re-breath for more than 4 mins – incase they ask what you should do to ensure the safety of your ptEnsures that the air you have breathed out mixes with the air in spirometer before you breath it in again. Two seperate pathways for air and air out so you don’t just breath in what you just breathed out
  • #11 Place in the empty syringe and open the sampling point tap and draw out the sampleWhat your doing when you discard is basically allowing for dead space to clear because the sampling point is far away from the main volume of air in the spirometer so the fist couple of samples won’t be representative of whats in there it’ll just be air thats in the pipe3rd – get sample, close the sampling tapWaiting = clears dead spaceyou assume that the final concentration of co2 and o2 in the spirometer is the same as that in the patient’s lungs. So to work out rate of change of these gases ( in %/min) you do final - inital percentages of each gases and divide by duration of breathing– should know original values of co2 and o2 = 5&15%?
  • #12 Tap near mouth piece sealed = horizontal cos we don’ want atmospheric airWhen turinign off supply -turn off the oxygen supply first and THEN close the spirometer inlet otherwise you get pressure building up in the pipe and it pops out of the spirometer which willl look really sloppyAgain safety measures - Don’t re - breath for more than 5 mins etcThis time were only interested in the volumes of co2 in the lungs and how that has changed over our duration so we would analyse for CO2 only
  • #13 For this bit what you’re doing is just measuring the tidal volume and respiratory frequency of the recording you have just done. So what you do is: see slideFor mean tidal volume you select cycle variable in the first column and in the second coumn you need to click on average peak to peak OR may say cycle heightFor resp freq =again cycle variabeles in first column and then this time you select events count in the second columnThe point of these is that now you can work out the pulmonary ventilation for each experiment and compare to see the effects of each one on pulmonary ventilationTo do this you just use the formula – see slide
  • #14 Again this will ensure CO2 is absorbed and we have JUST and O2 lack rather than recreating the asphyxic conditions againThe way you would get your o2 lack is that you would allow the patient to breath for a while without refilling with fresh atmospheric air. This causes o2 depletion. This is what we try to avoid when doing normal breathing by refiling the spirometer every few minutesStill need valves because its an experiment and for all experiments we need valves