Download to read offline

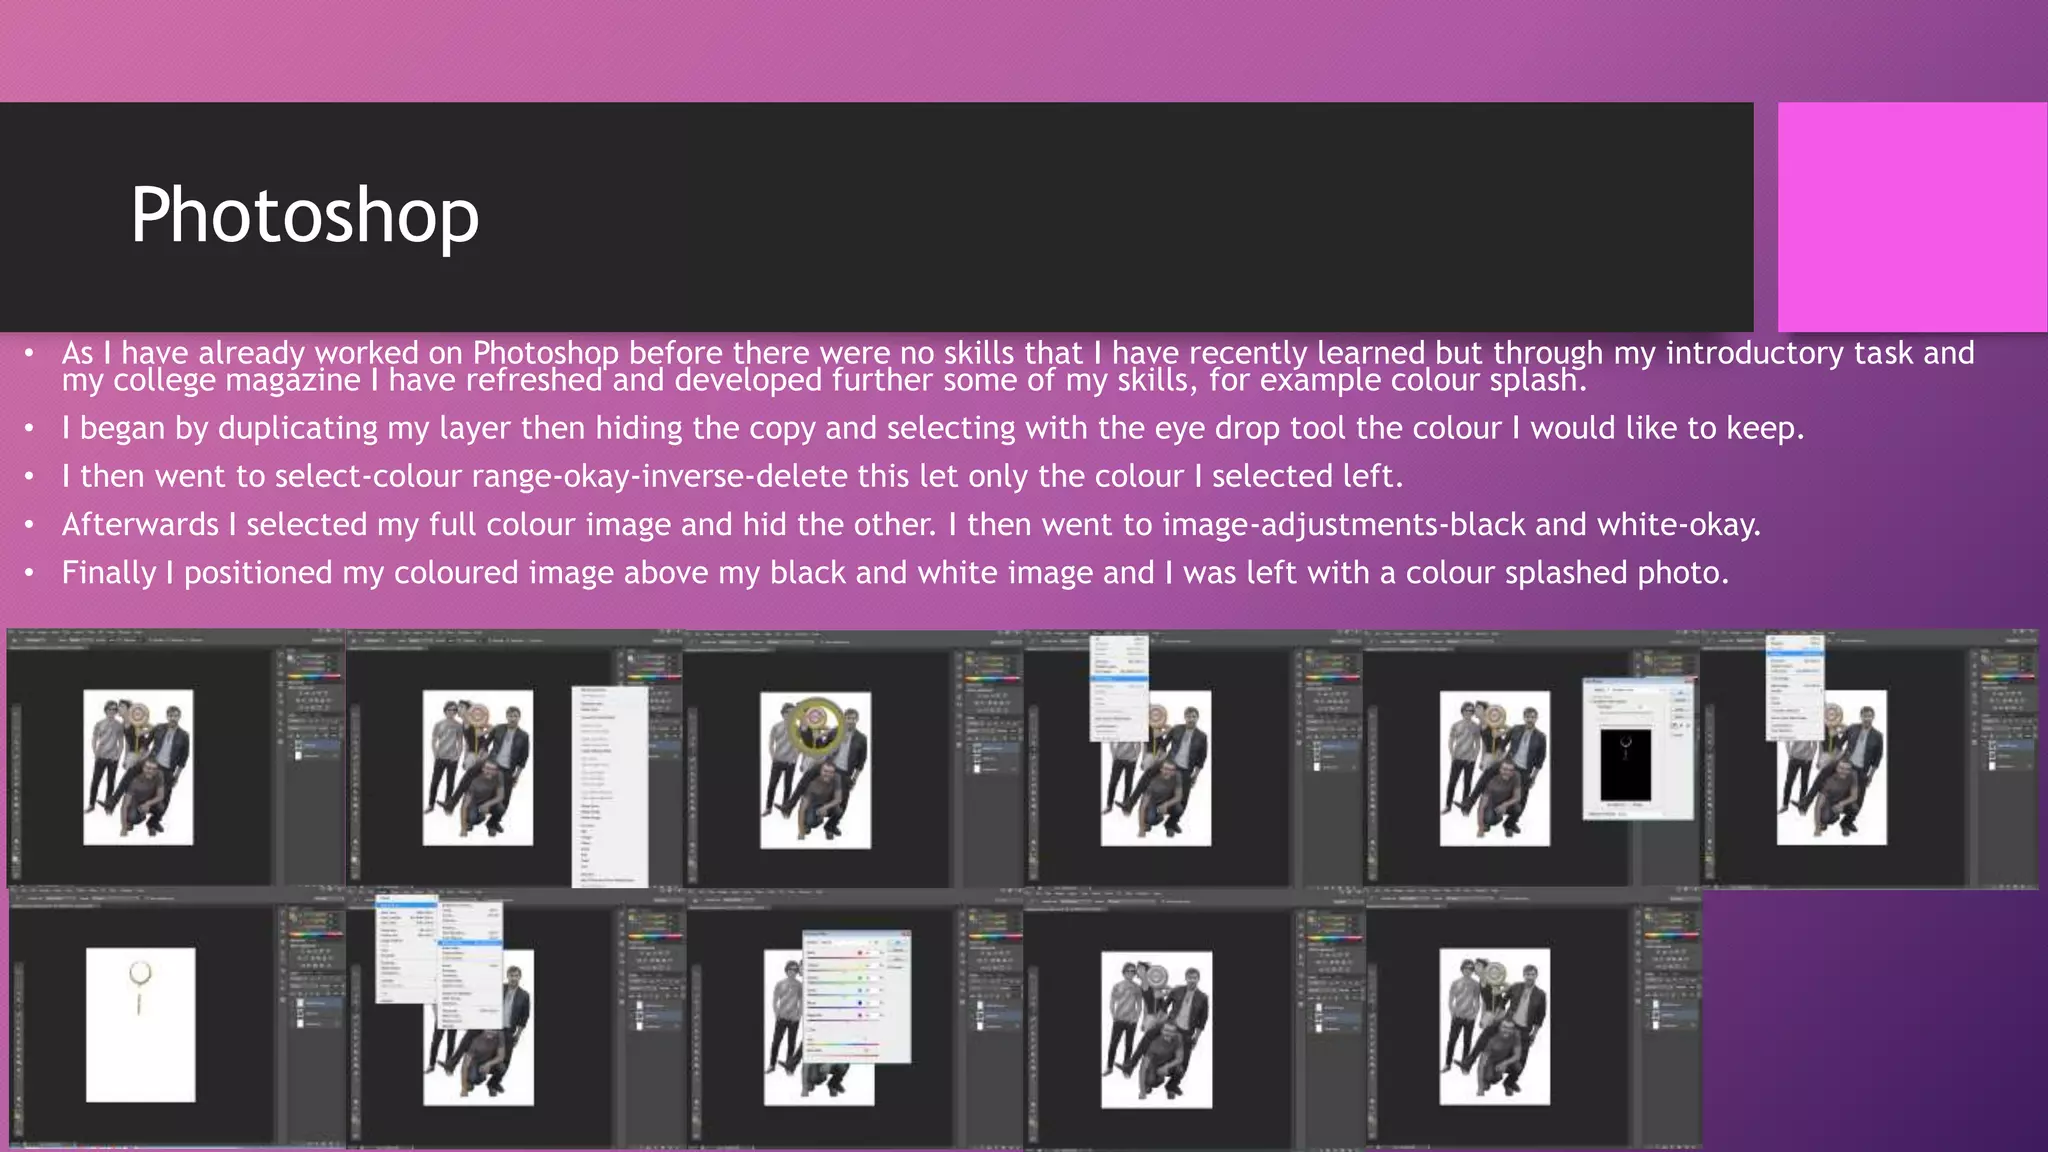
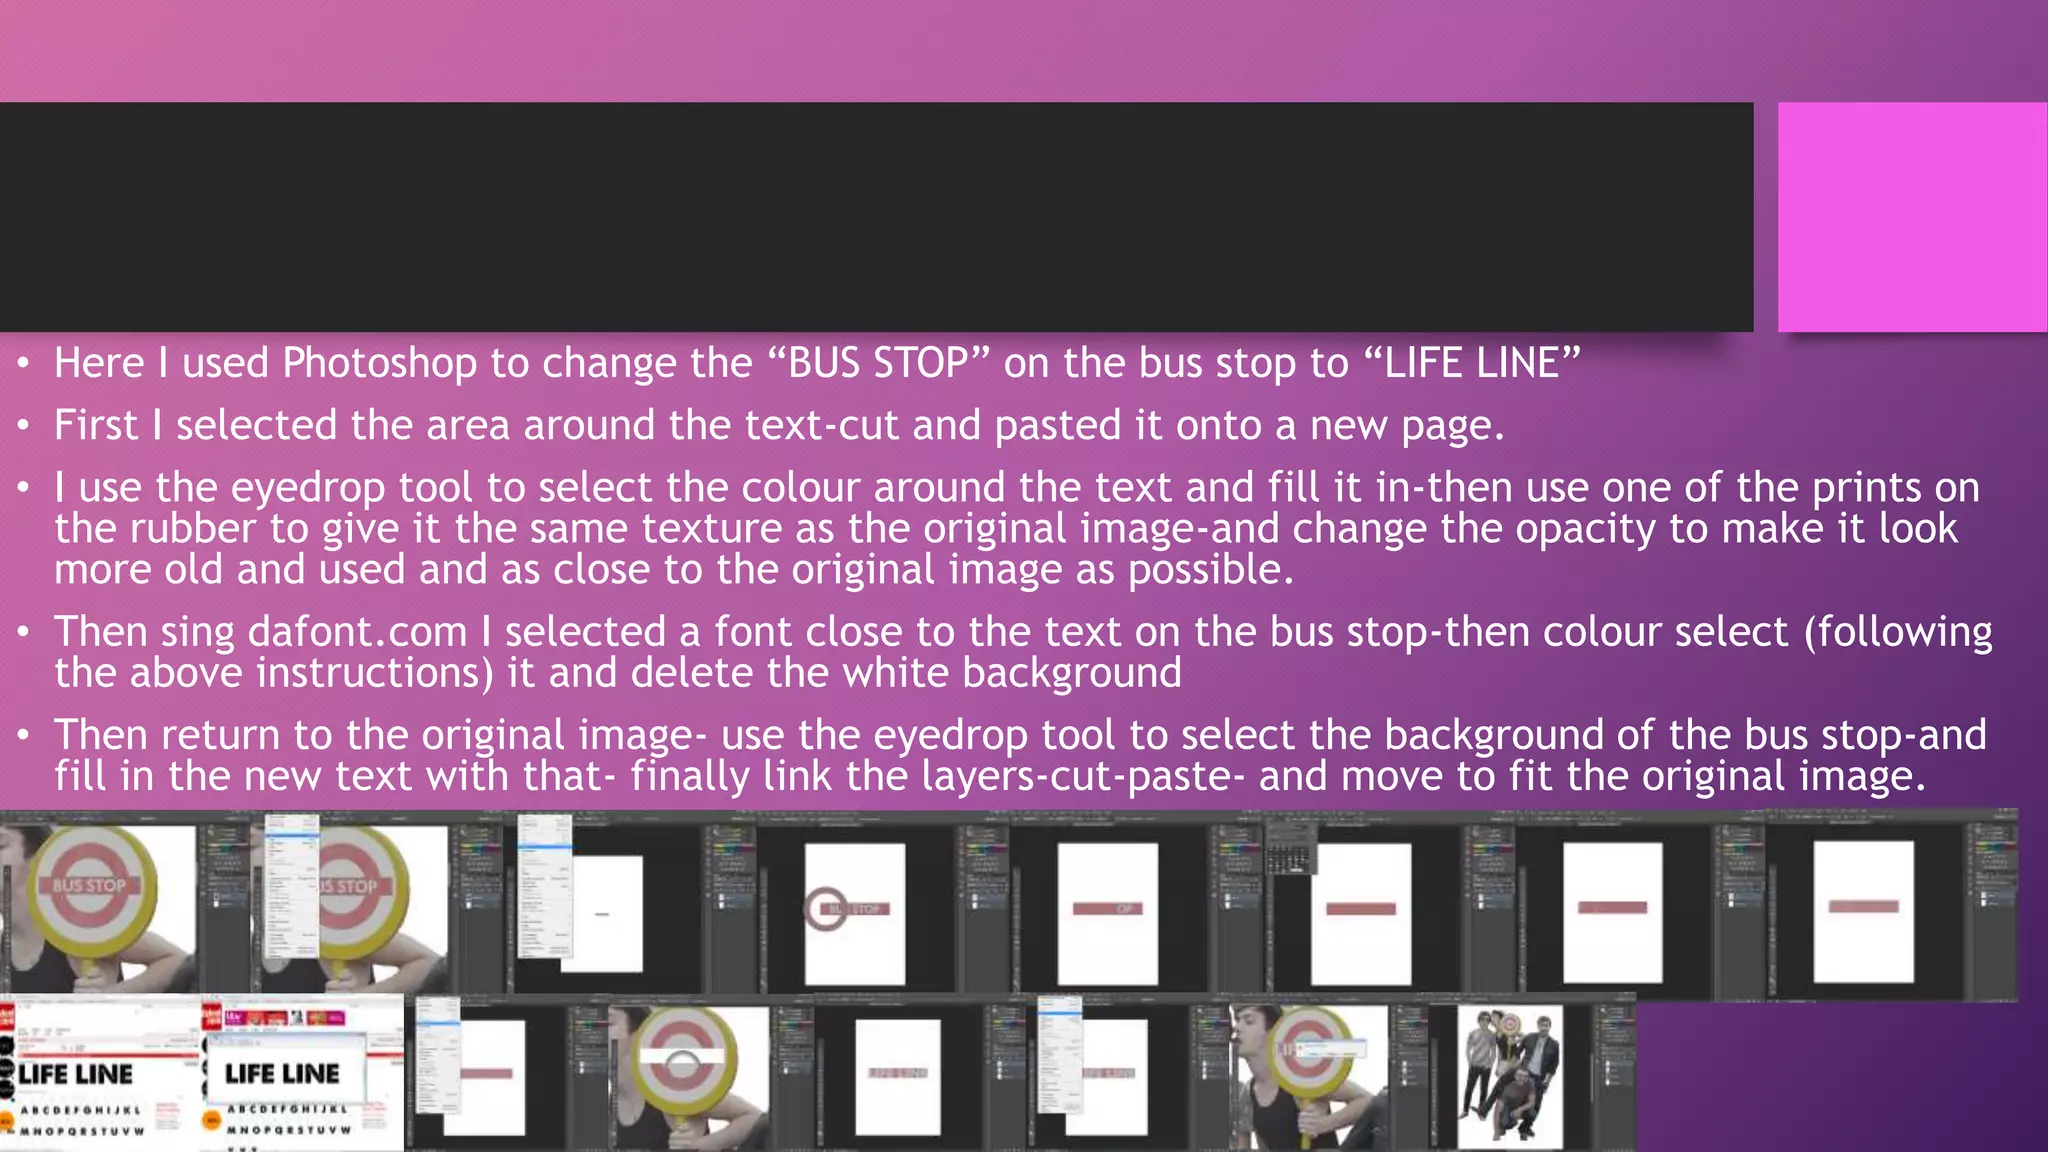
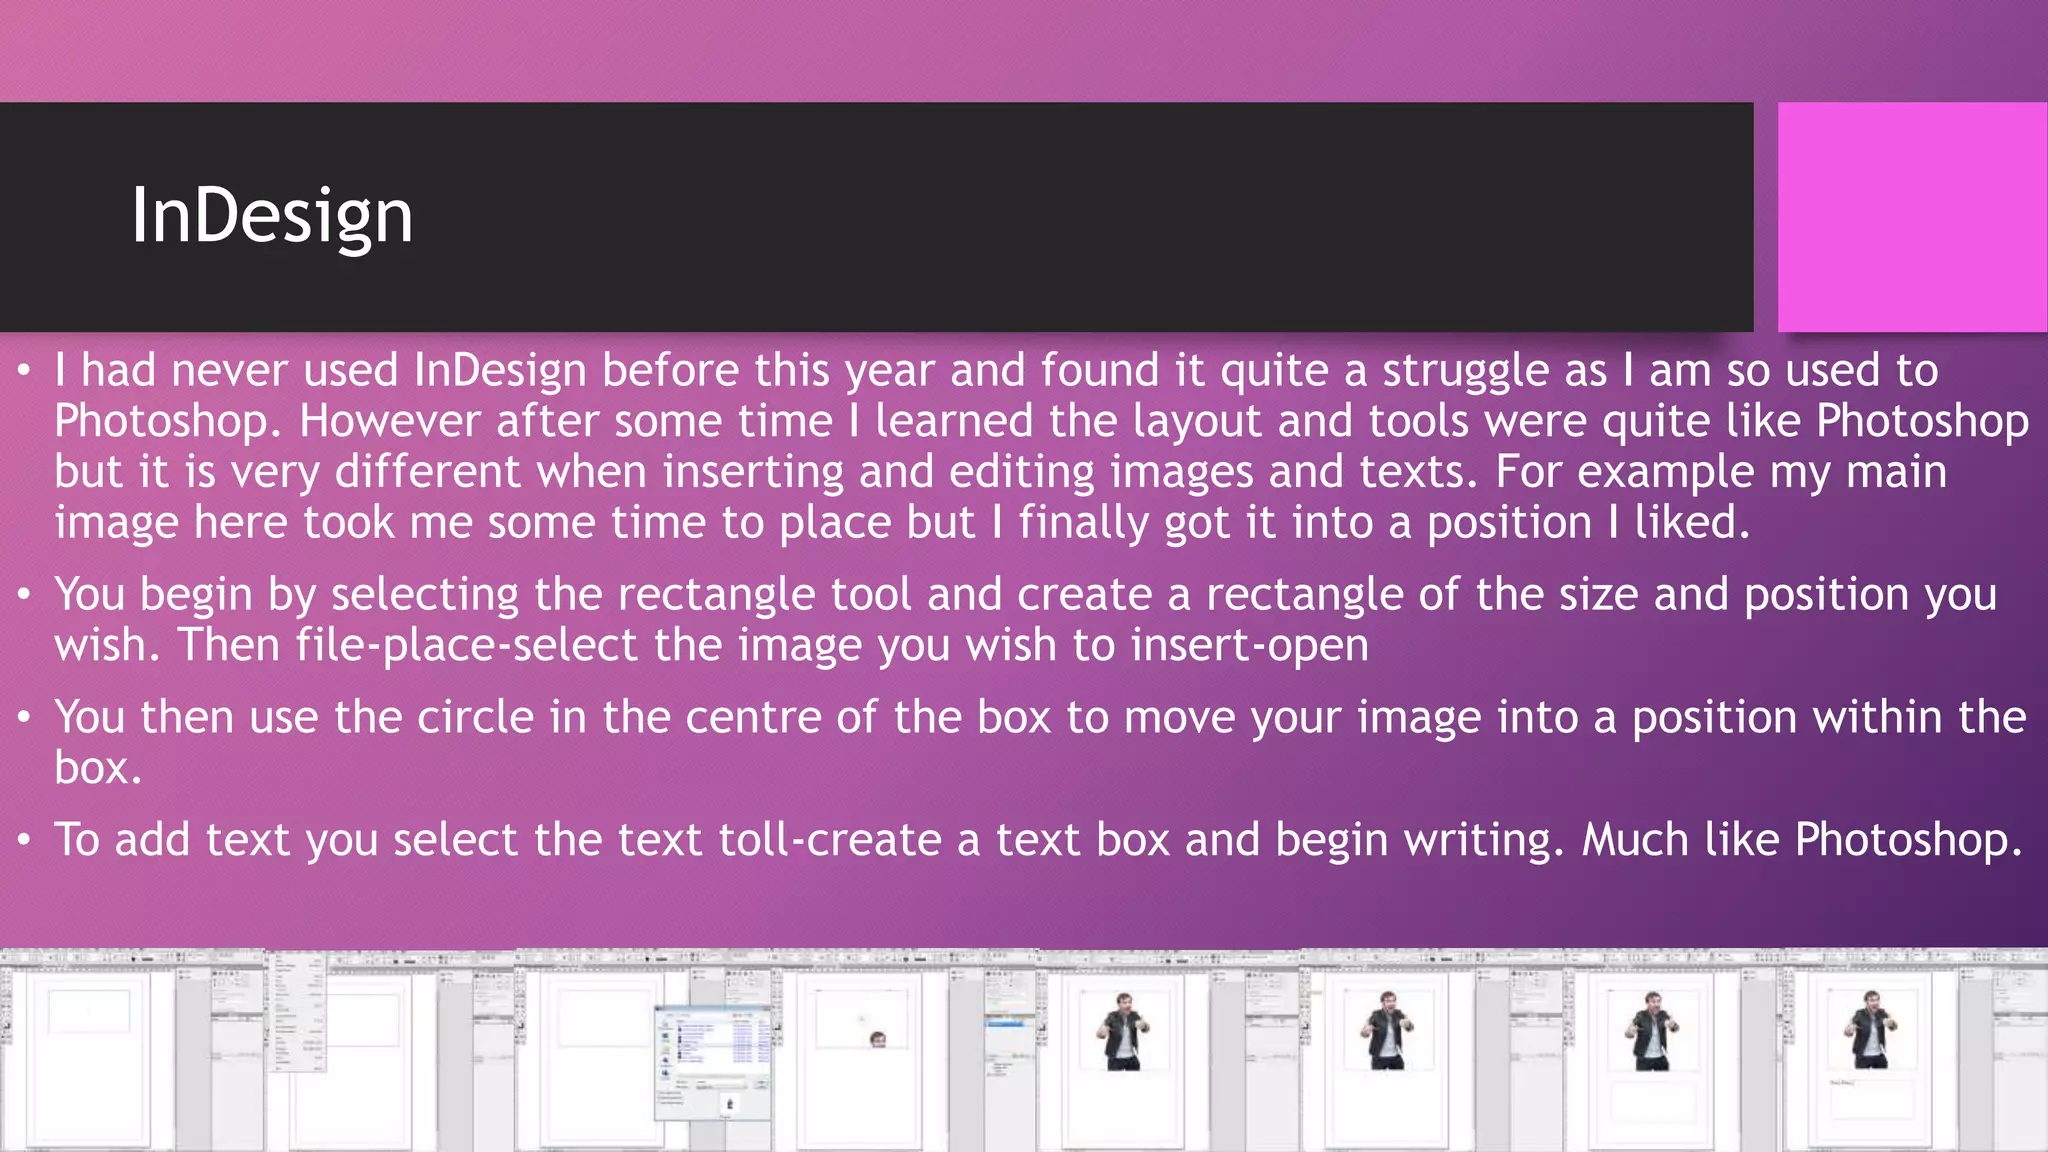

Skills Development College Magazine The document summarizes skills learned and developed in Photoshop and InDesign for a college magazine project. In Photoshop, the author refreshed skills like color splash and learned to change text on an image by selecting colors, adding textures, and adjusting layers. In InDesign, the author struggled at first due to differences from Photoshop but learned to insert and position images and add text boxes like in Photoshop.


![Pre production planning [recovered]](https://cdn.slidesharecdn.com/ss_thumbnails/preproductionplanningrecovered-140123072858-phpapp01-thumbnail.jpg?width=640&height=640&fit=bounds)


