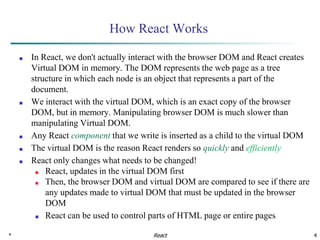
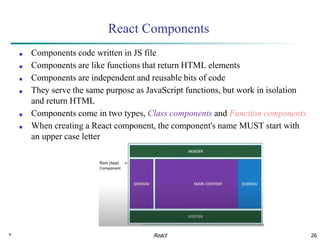
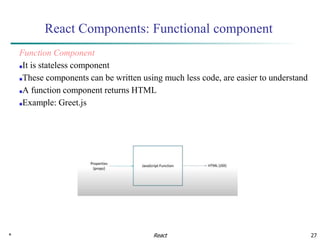
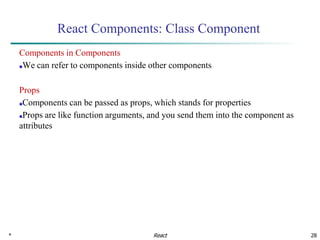
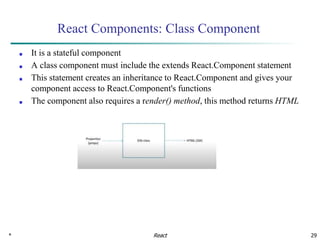
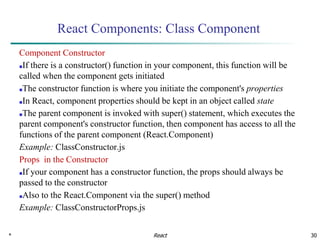
This document provides an overview of React components. It discusses functional components, which are stateless and return HTML, and class components, which are stateful and require a render method. Components can contain other components and receive props. The state object stored in class components allows re-rendering when its values change. Events in React use camelCase syntax and are handled with functions defined in the component. The event object provides information about the event.


![* 15
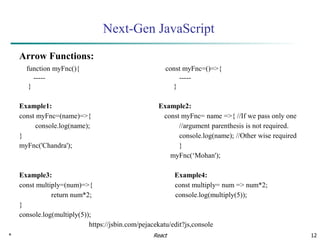
Next-Gen JavaScript
Spread and Rest Operators: both represented with same symbol
■Spread (…) used to split up array elements or object properties
const newArray = […oldArray,1,2]
const newObject = {…oldObject,newProp:5}
Example 1:
const array =[1,2,3];
const newArray=[array,4];
console.log(newArray);
Example 3:
const Person= {
name: 'Chandra'
};
const newPerson={
…Person,
Age:35
}
console.log(newPerson);
React
Example 2:
const array =[1,2,3];
const newArray=[…array,4];
console.log(newArray);](https://image.slidesharecdn.com/reactcomplete-240114173938-c790580a/85/React_Complete-pptx-15-320.jpg)
![* 16
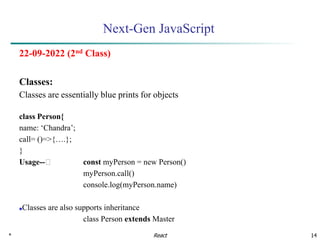
Next-Gen JavaScript
■ Rest(…) used to merge a list of function arguments into an array
function sortArgs(…args){
return args.sort()
}
Example 1:
const filter = (…args) => {
return args.filter(el => el ===1);
}
console.log(filter(1,2,3));
Destructuring:
■ Easily extract array elements or object properties and store them in variables
Array:
const [a, b]=['Chandra', 'Kanta'];
console.log(a);//Chandra
console.log(b);//Kanta
React
Object:
const {name}={name:'Chandra',age:35}
console.log(name);//Chandra
console.log(age);//undefined](https://image.slidesharecdn.com/reactcomplete-240114173938-c790580a/85/React_Complete-pptx-16-320.jpg)
![* 18
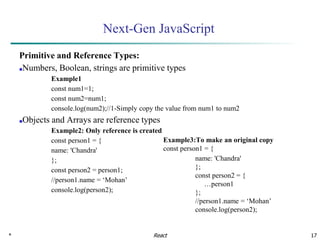
Next-Gen JavaScript
Refreshing Array Functions:
■The map() function picks each element from array and send to a function
Example1
const numbers = [1, 2, 3]
const doubleNumber = numbers.map((num)=>{
return num*2;
})
console.log(doubleNumber);
React](https://image.slidesharecdn.com/reactcomplete-240114173938-c790580a/85/React_Complete-pptx-18-320.jpg)


![January 14, 2024 44
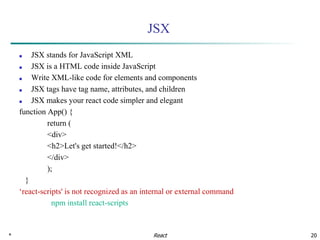
React Hooks
■ Initialize state at the top of the function component
function FavoriteColor() {
const [color, setColor] = useState(“”);
}
■ Notice that again, we are destructuring the returned values from useState
■ The first value, color, is our current state
■ The second value, setColor, is the function that is used to update our state
Read State
■ Use the state variable in the rendered component
function FavoriteColor() {
const [color, setColor] = useState(“red”);
return <h1>My favorite color is {color}!</h1>
}
React](https://image.slidesharecdn.com/reactcomplete-240114173938-c790580a/85/React_Complete-pptx-44-320.jpg)
![January 14, 2024 45
React Hooks
Update State
■ To update our state, we use our state updater function
■ We should never directly update state. Ex: color = "red" is not allowed
function FavoriteColor() {
const [color, setColor] = useState(“red”);
return (
<>
<h1>My favorite color is {color}!</h1>
<button
type="button"
onClick={() => setColor("blue")} >Blue</button>
</> )
}
React](https://image.slidesharecdn.com/reactcomplete-240114173938-c790580a/85/React_Complete-pptx-45-320.jpg)
![January 14, 2024 46
React Hooks
What Can State Hold
■ The useState Hook can be used to keep track of strings, numbers, booleans,
arrays, objects, and any combination of these!
■ We could create multiple state Hooks to track individual values
function Car() {
const [brand, setBrand] = useState("Ford");
const [model, setModel] = useState("Mustang");
const [year, setYear] = useState("1964");
const [color, setColor] = useState("red");
return (
<> <h1>My {brand}</h1>
<p> It is a {color} {model} from {year}. </p>
</> )
}
React](https://image.slidesharecdn.com/reactcomplete-240114173938-c790580a/85/React_Complete-pptx-46-320.jpg)
![January 14, 2024 47
React Hooks
What Can State Hold
■ The useState Hook can be used to keep track of strings, numbers, booleans,
arrays, objects, and any combination of these!
■ We could create multiple state Hooks to track individual values
function Car() {
const [car, setCar] = useState({
brand: "Ford",
model: "Mustang",
year: "1964",
color: "red"});
return (
<> <h1>My {car.brand}</h1>
<p> It is a {car.color} {car.model} from {car.year}. </p>
</> )
}
React](https://image.slidesharecdn.com/reactcomplete-240114173938-c790580a/85/React_Complete-pptx-47-320.jpg)

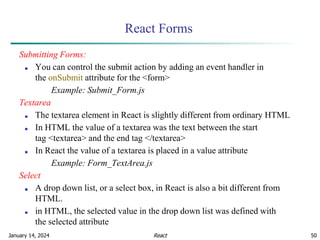
![January 14, 2024 49
React Forms
■ In React, the selected value is defined with a value attribute on
the select tag
Example: Form_Select.js
Multiple Input Fields
■ You can control the values of more than one input field by adding
a name attribute to each element
■ We will initialize our state with an empty object
■ To access the fields in the event handler use
the event.target.name and event.target.value syntax
■ To update the state, use square brackets [bracket notation] around the
property name
Example: Form_MultipleInputs.js
React](https://image.slidesharecdn.com/reactcomplete-240114173938-c790580a/85/React_Complete-pptx-49-320.jpg)
![January 14, 2024 51
React Forms
■ In React, the selected value is defined with a value attribute on
the select tag
Example: Form_Select.js
Multiple Input Fields
■ You can control the values of more than one input field by adding
a name attribute to each element
■ We will initialize our state with an empty object
■ To access the fields in the event handler use
the event.target.name and event.target.value syntax
■ To update the state, use square brackets [bracket notation] around the
property name
Example: Form_MultipleInputs.js
React](https://image.slidesharecdn.com/reactcomplete-240114173938-c790580a/85/React_Complete-pptx-51-320.jpg)