Download to read offline


![9 - 82 Integrating the ProxySG and ProxyAV Appliances
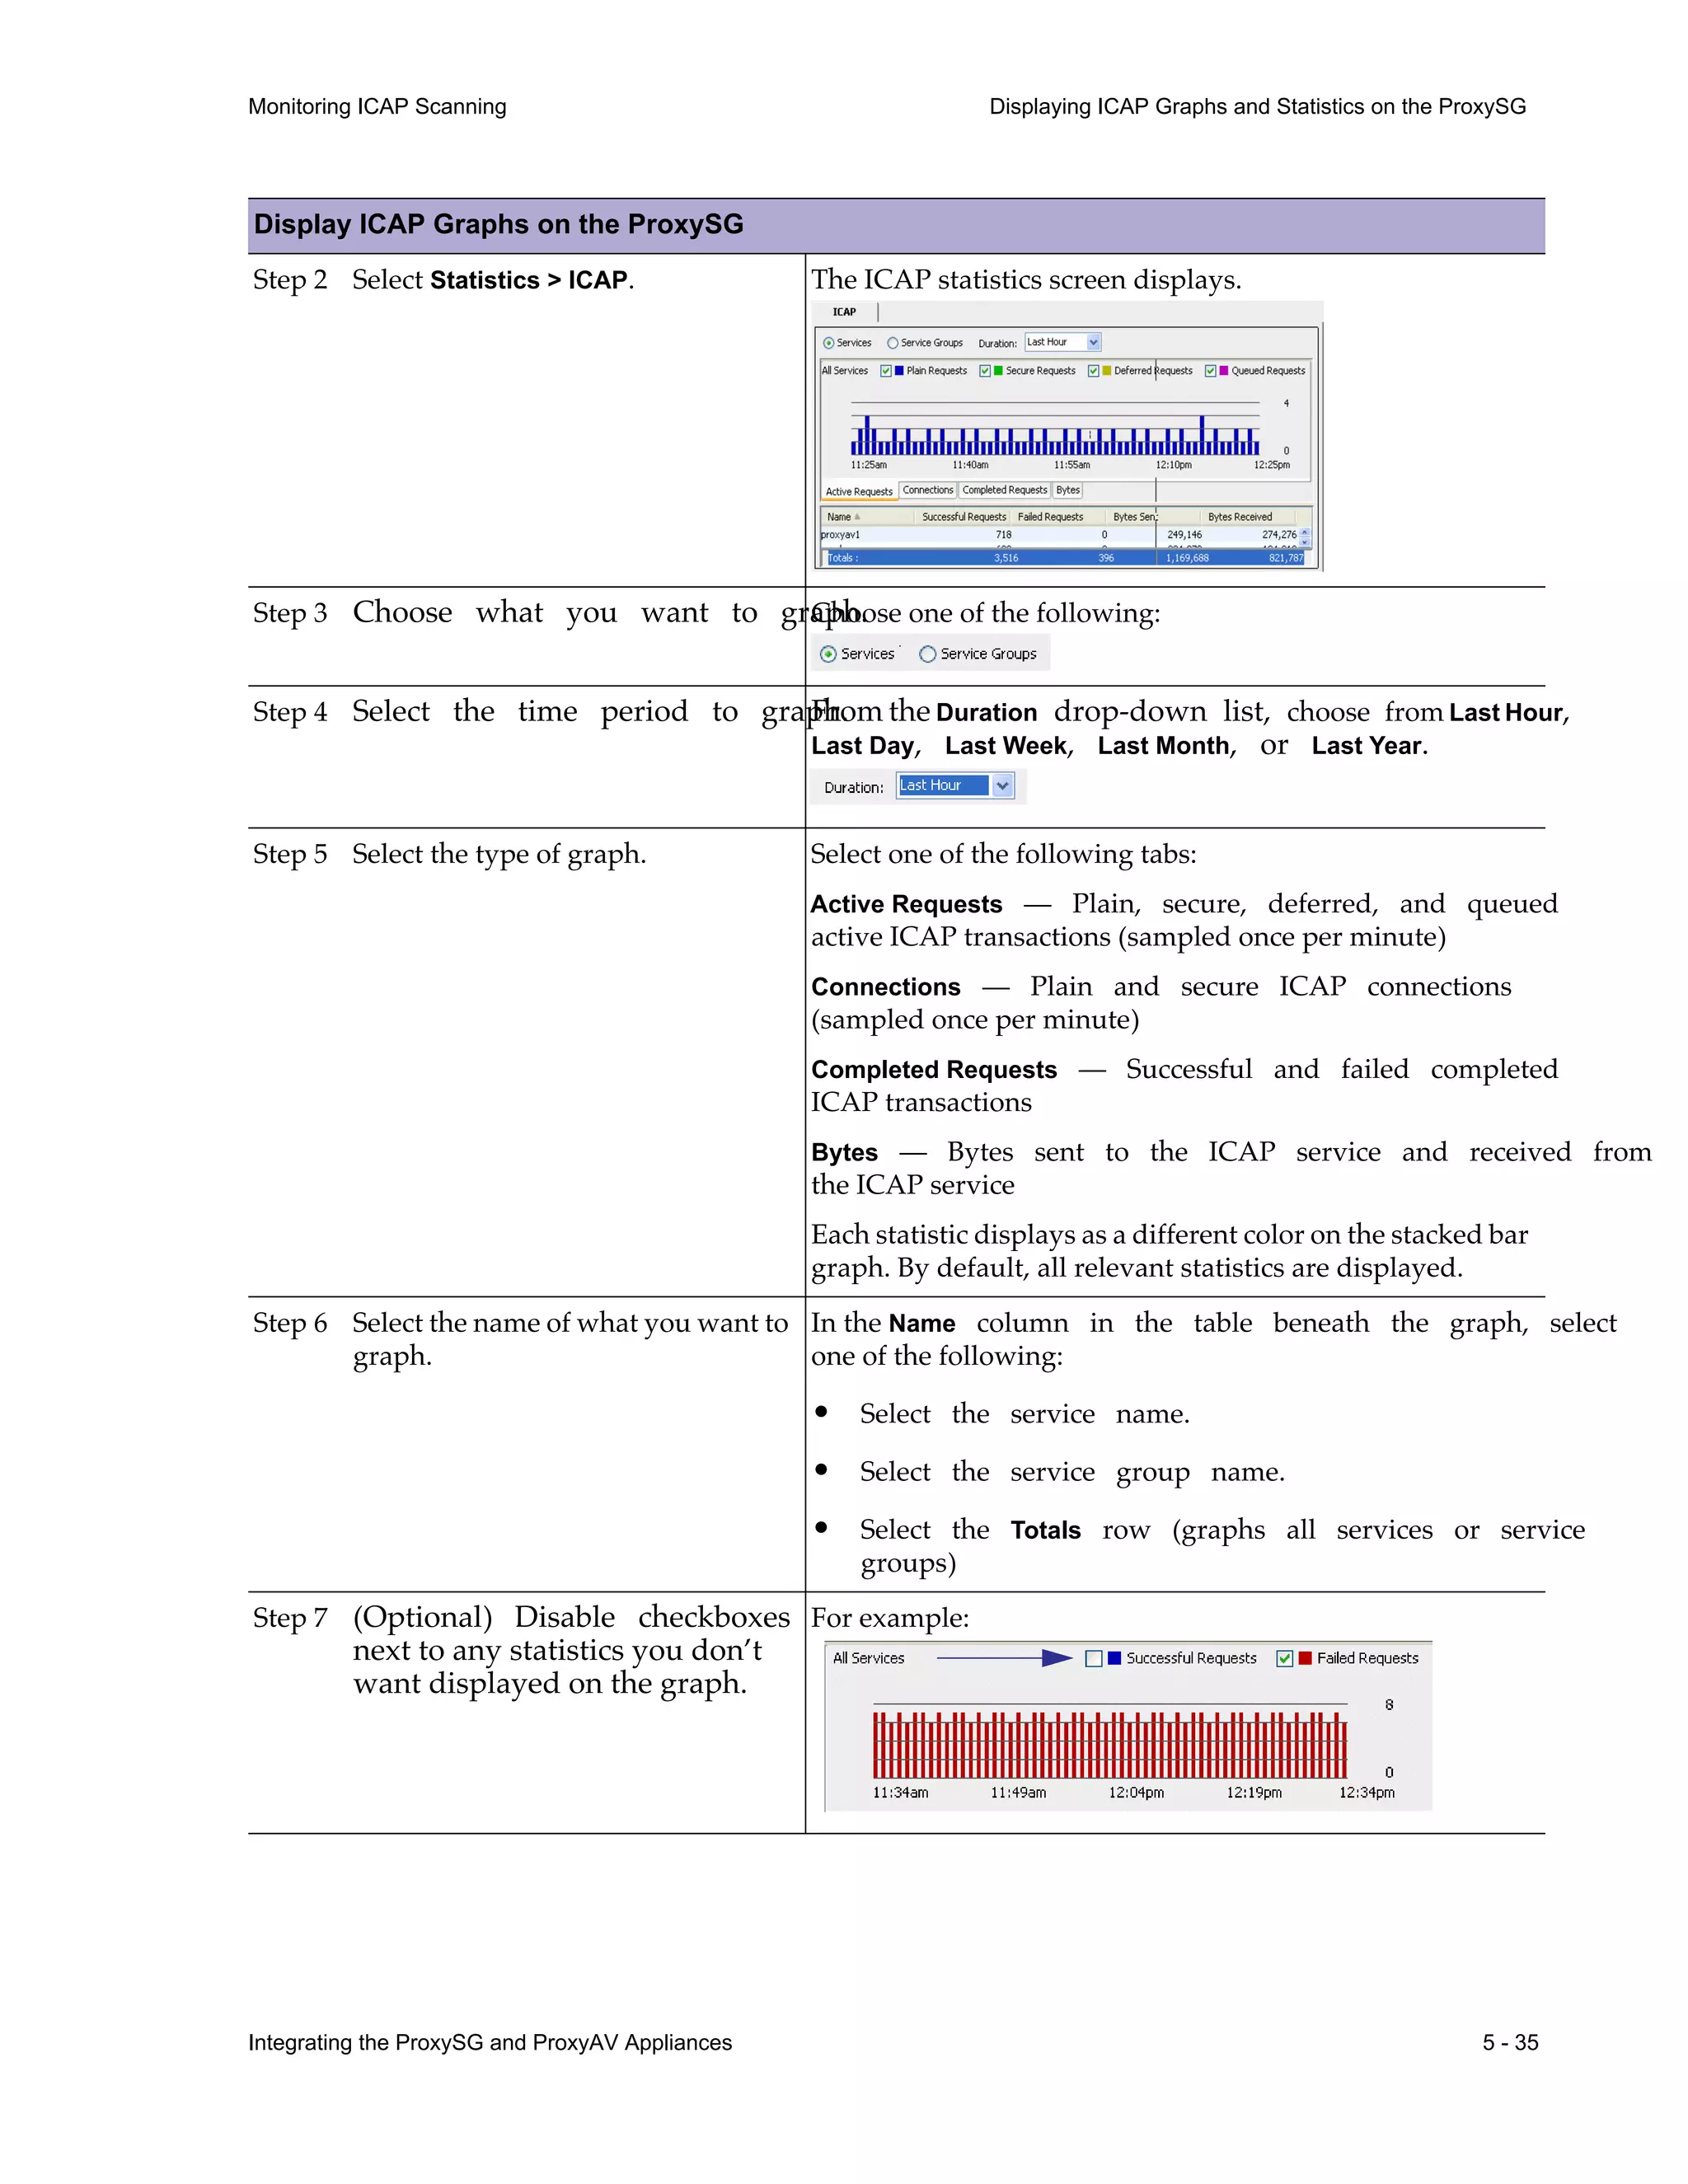
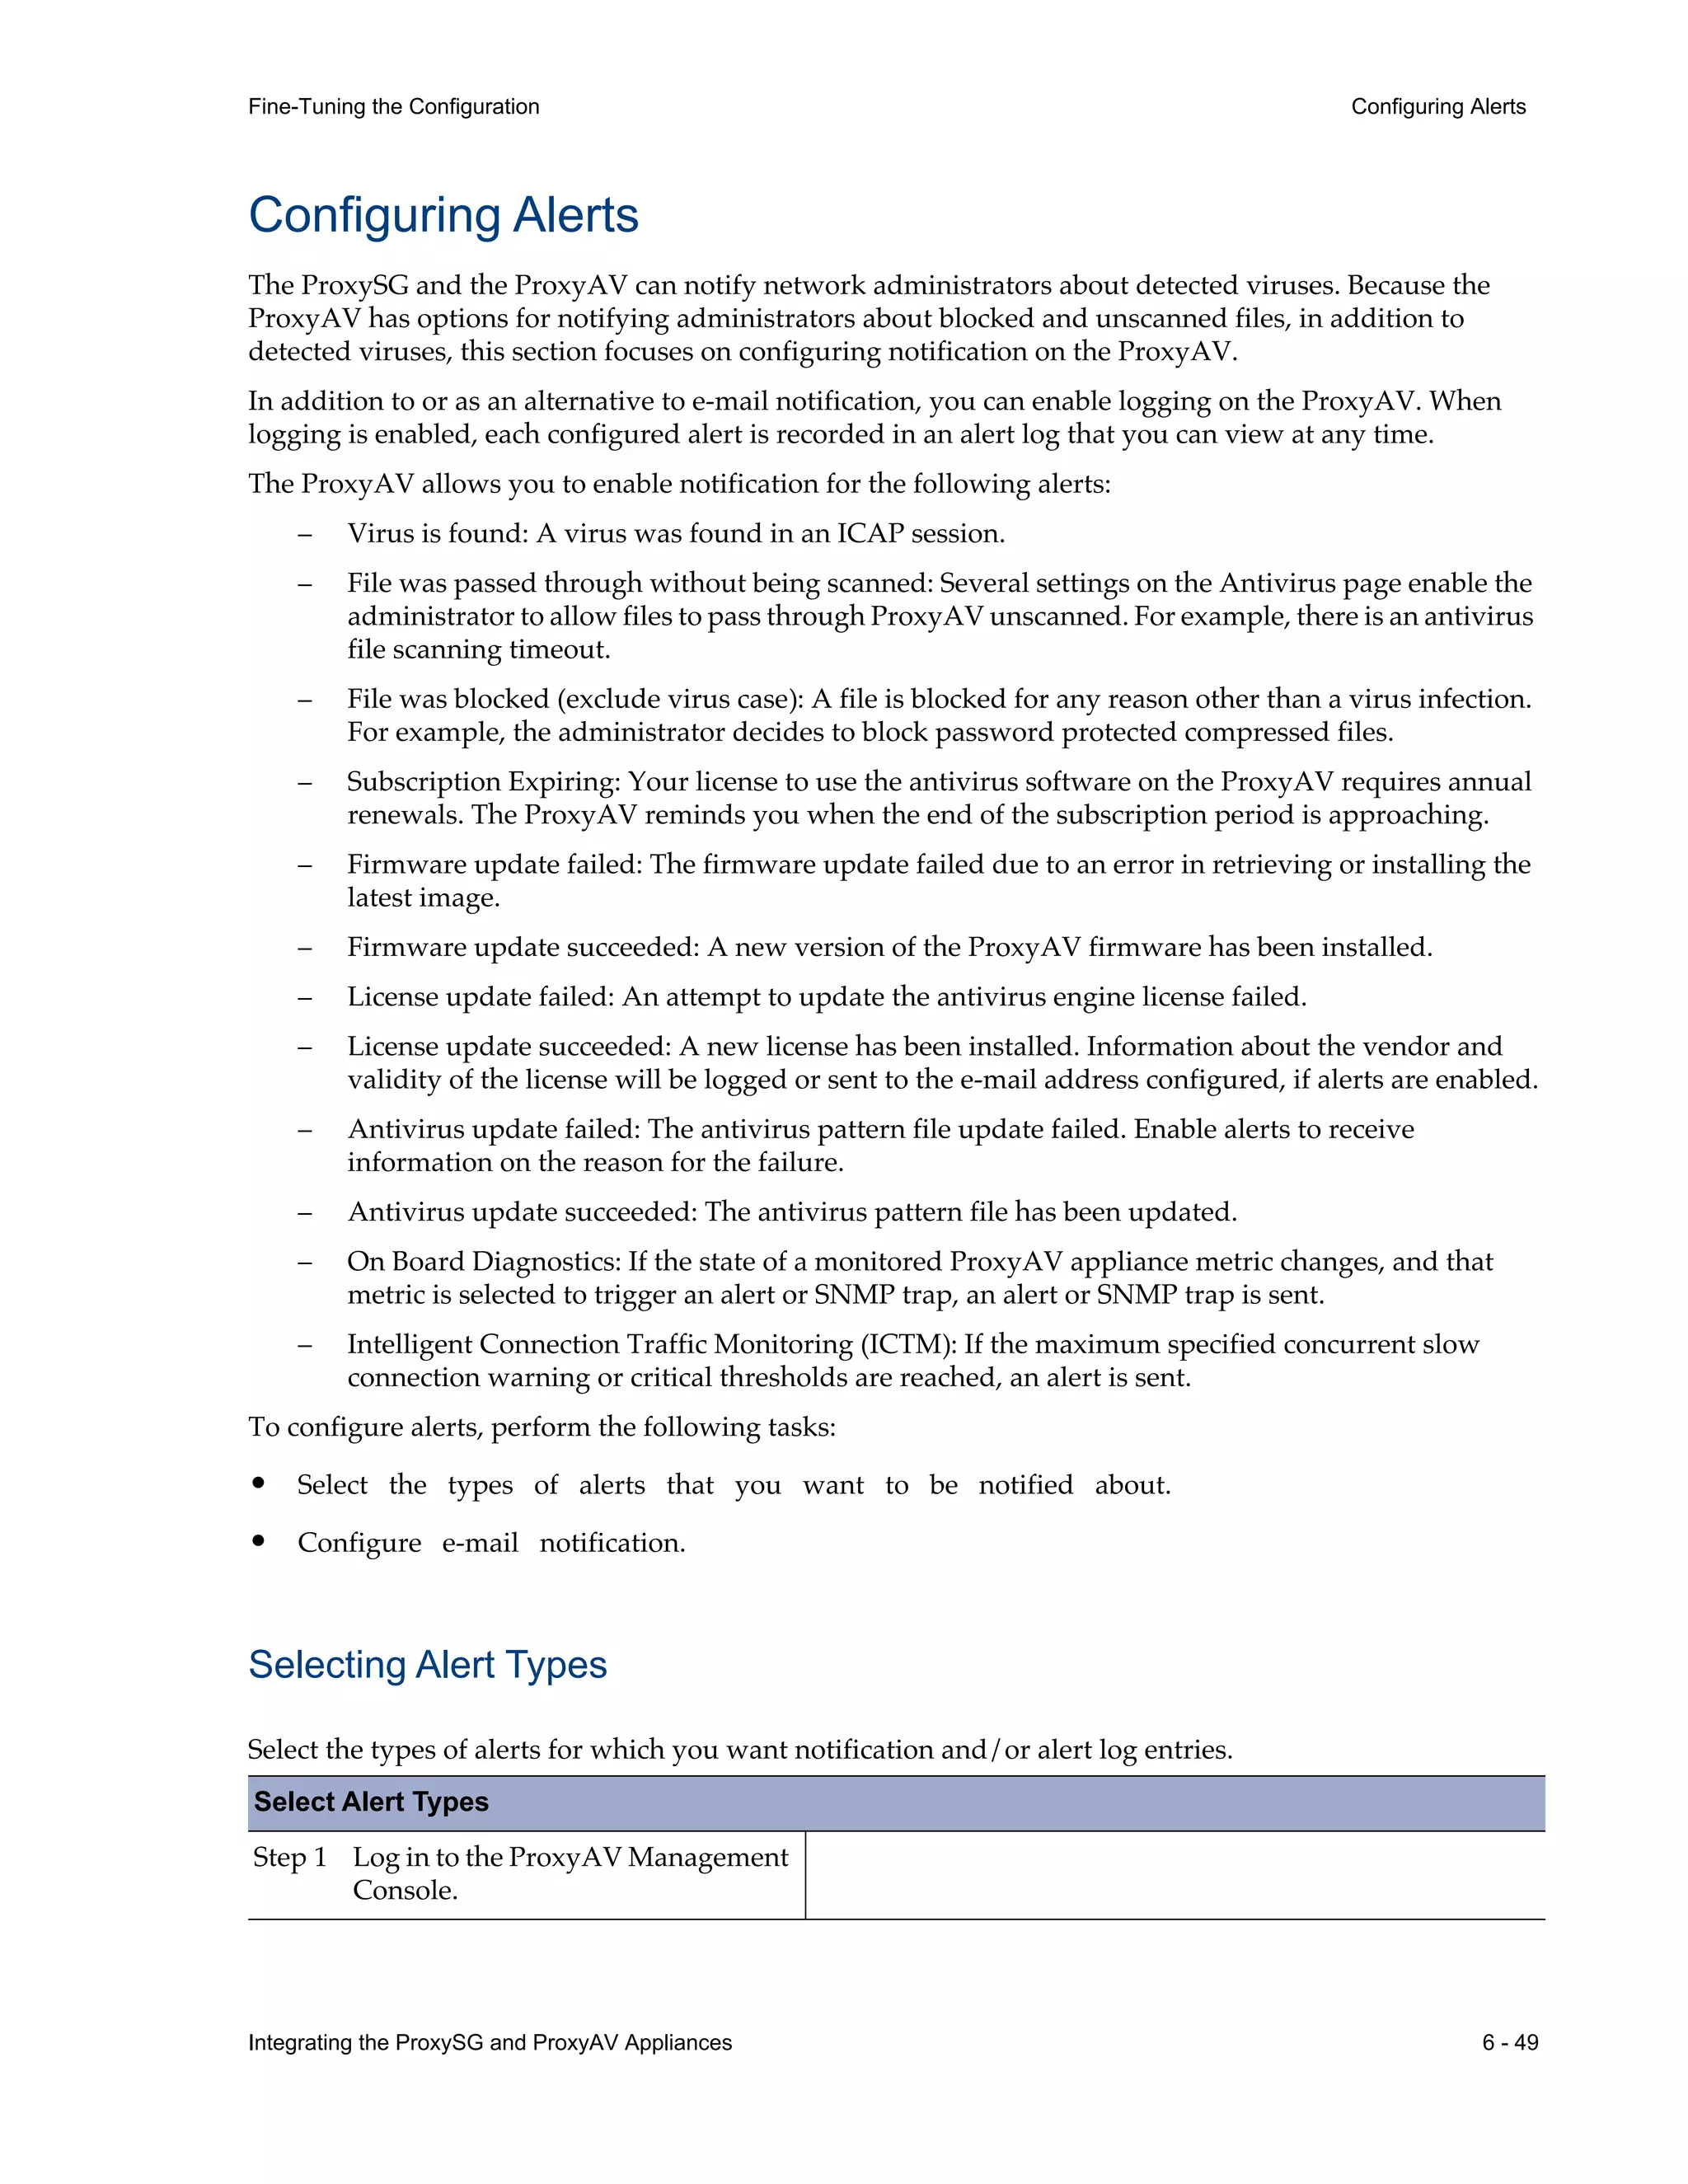
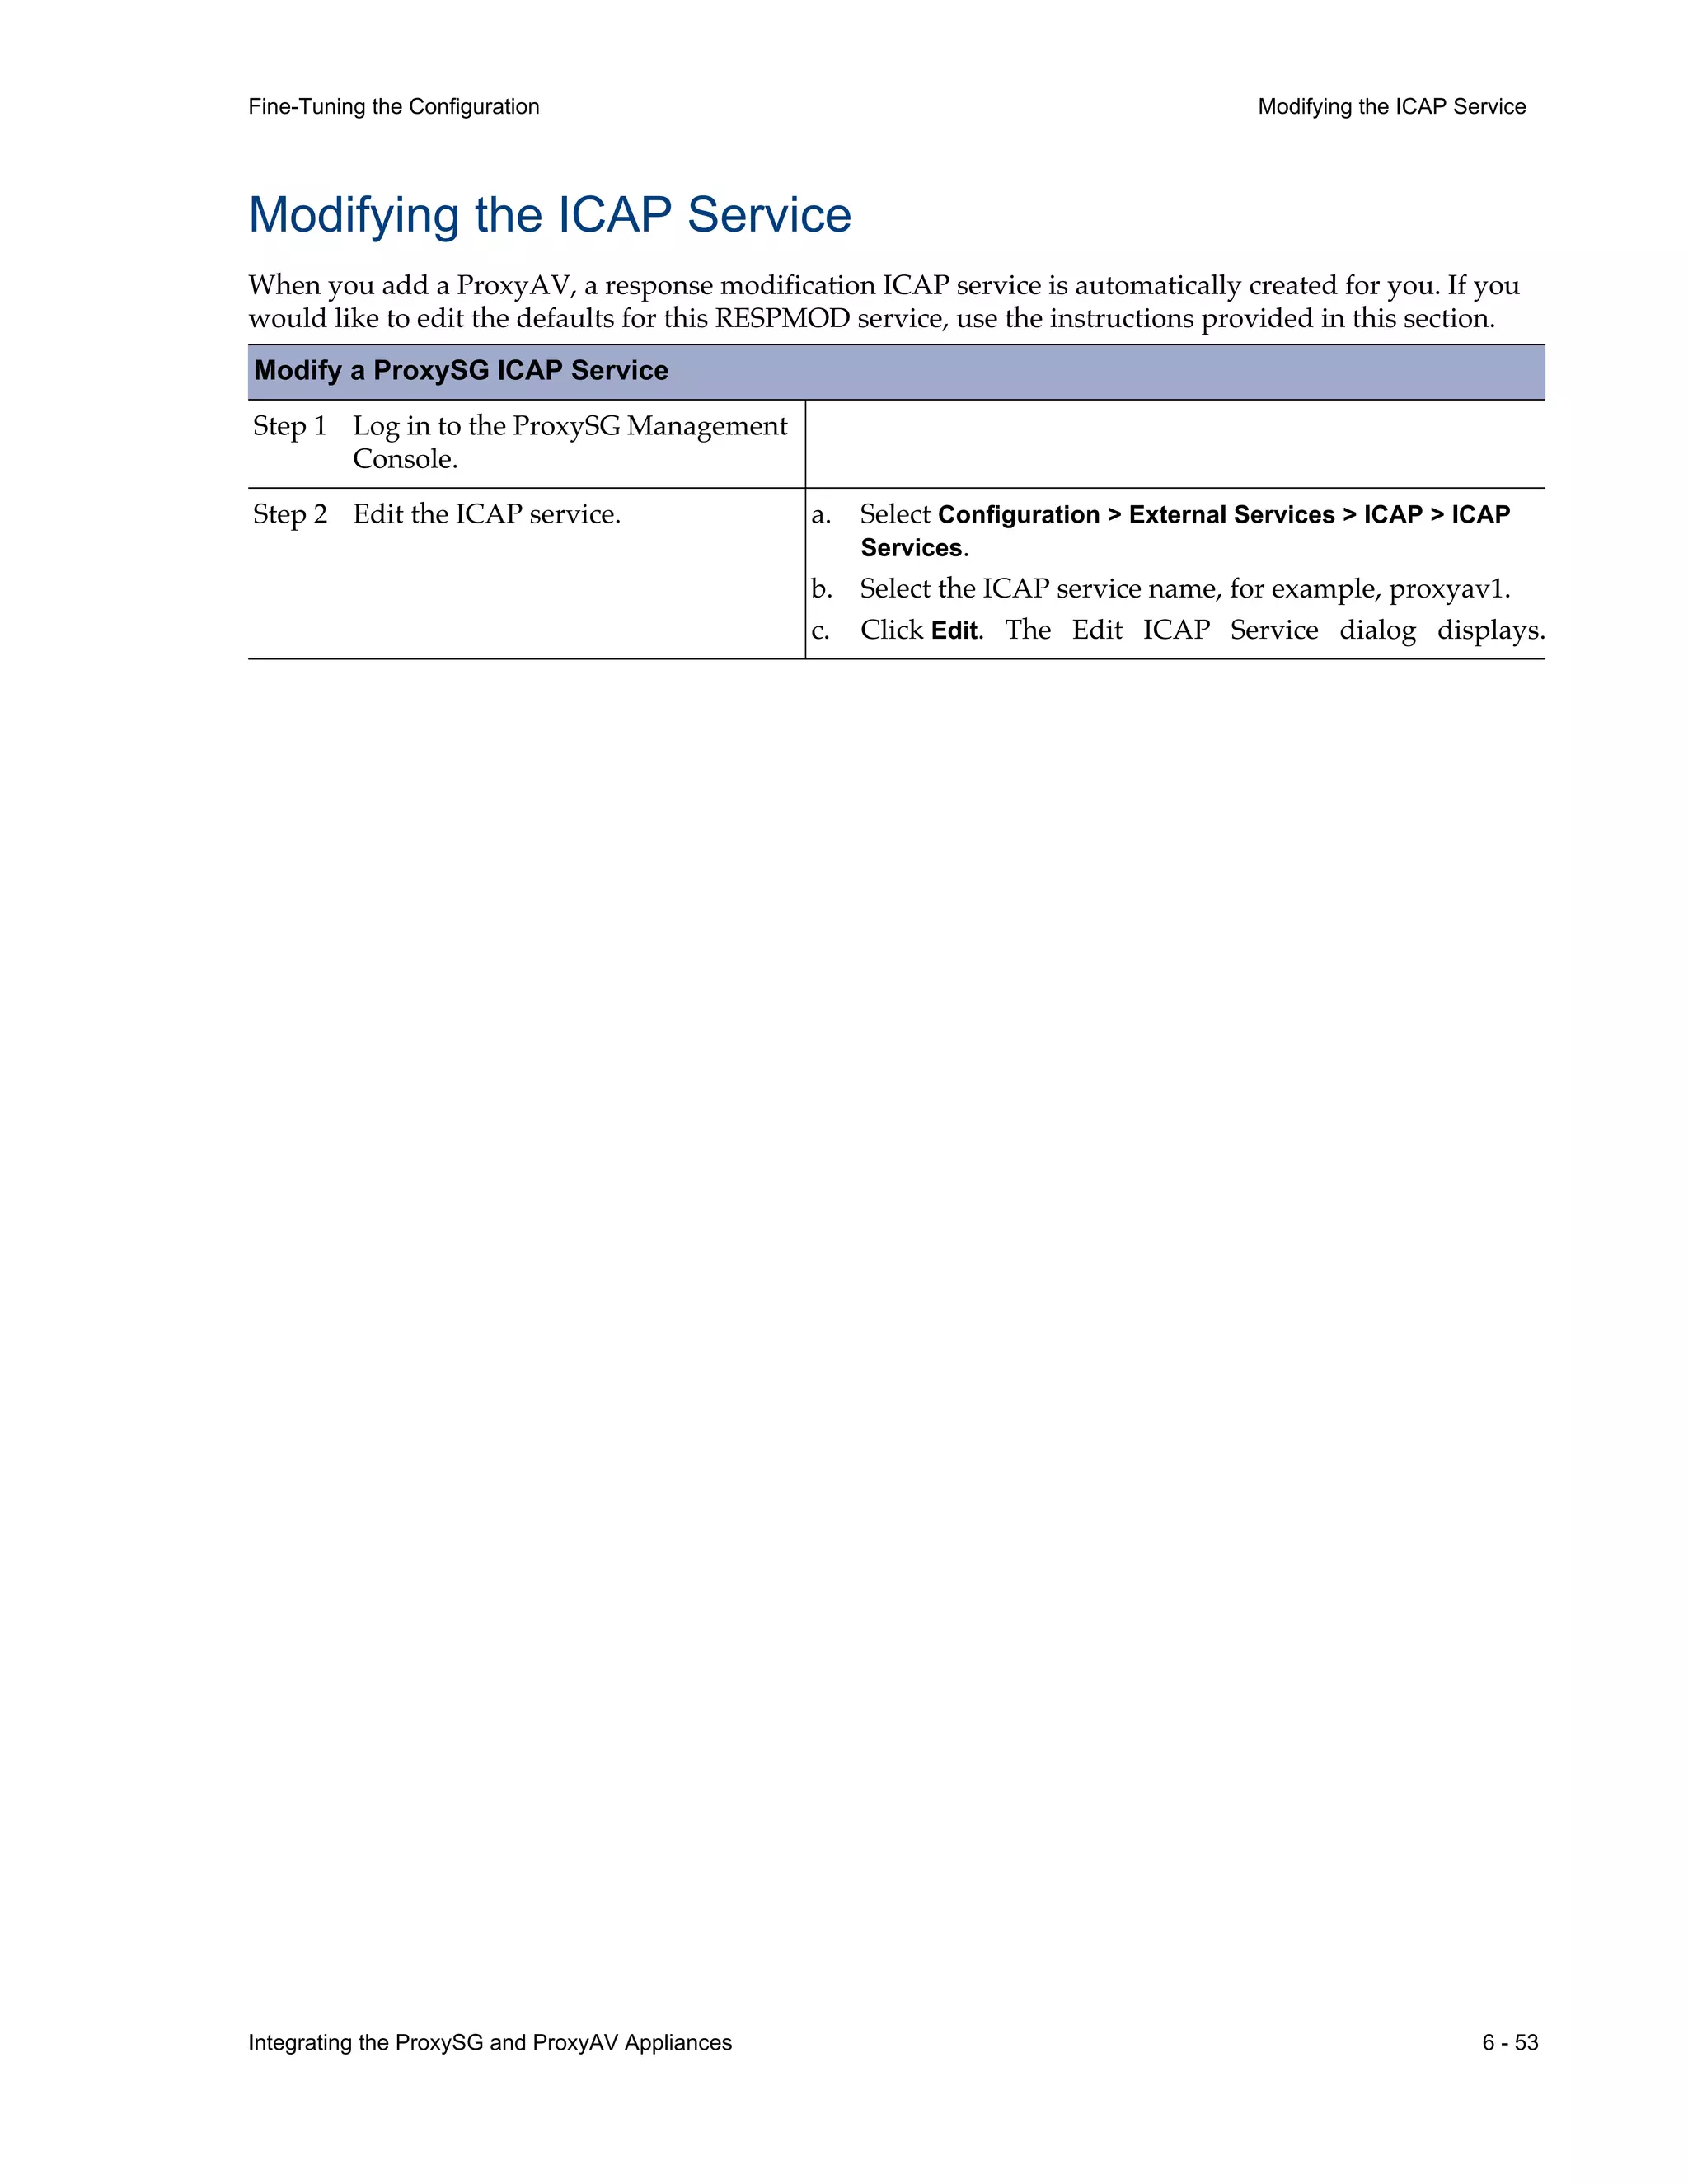
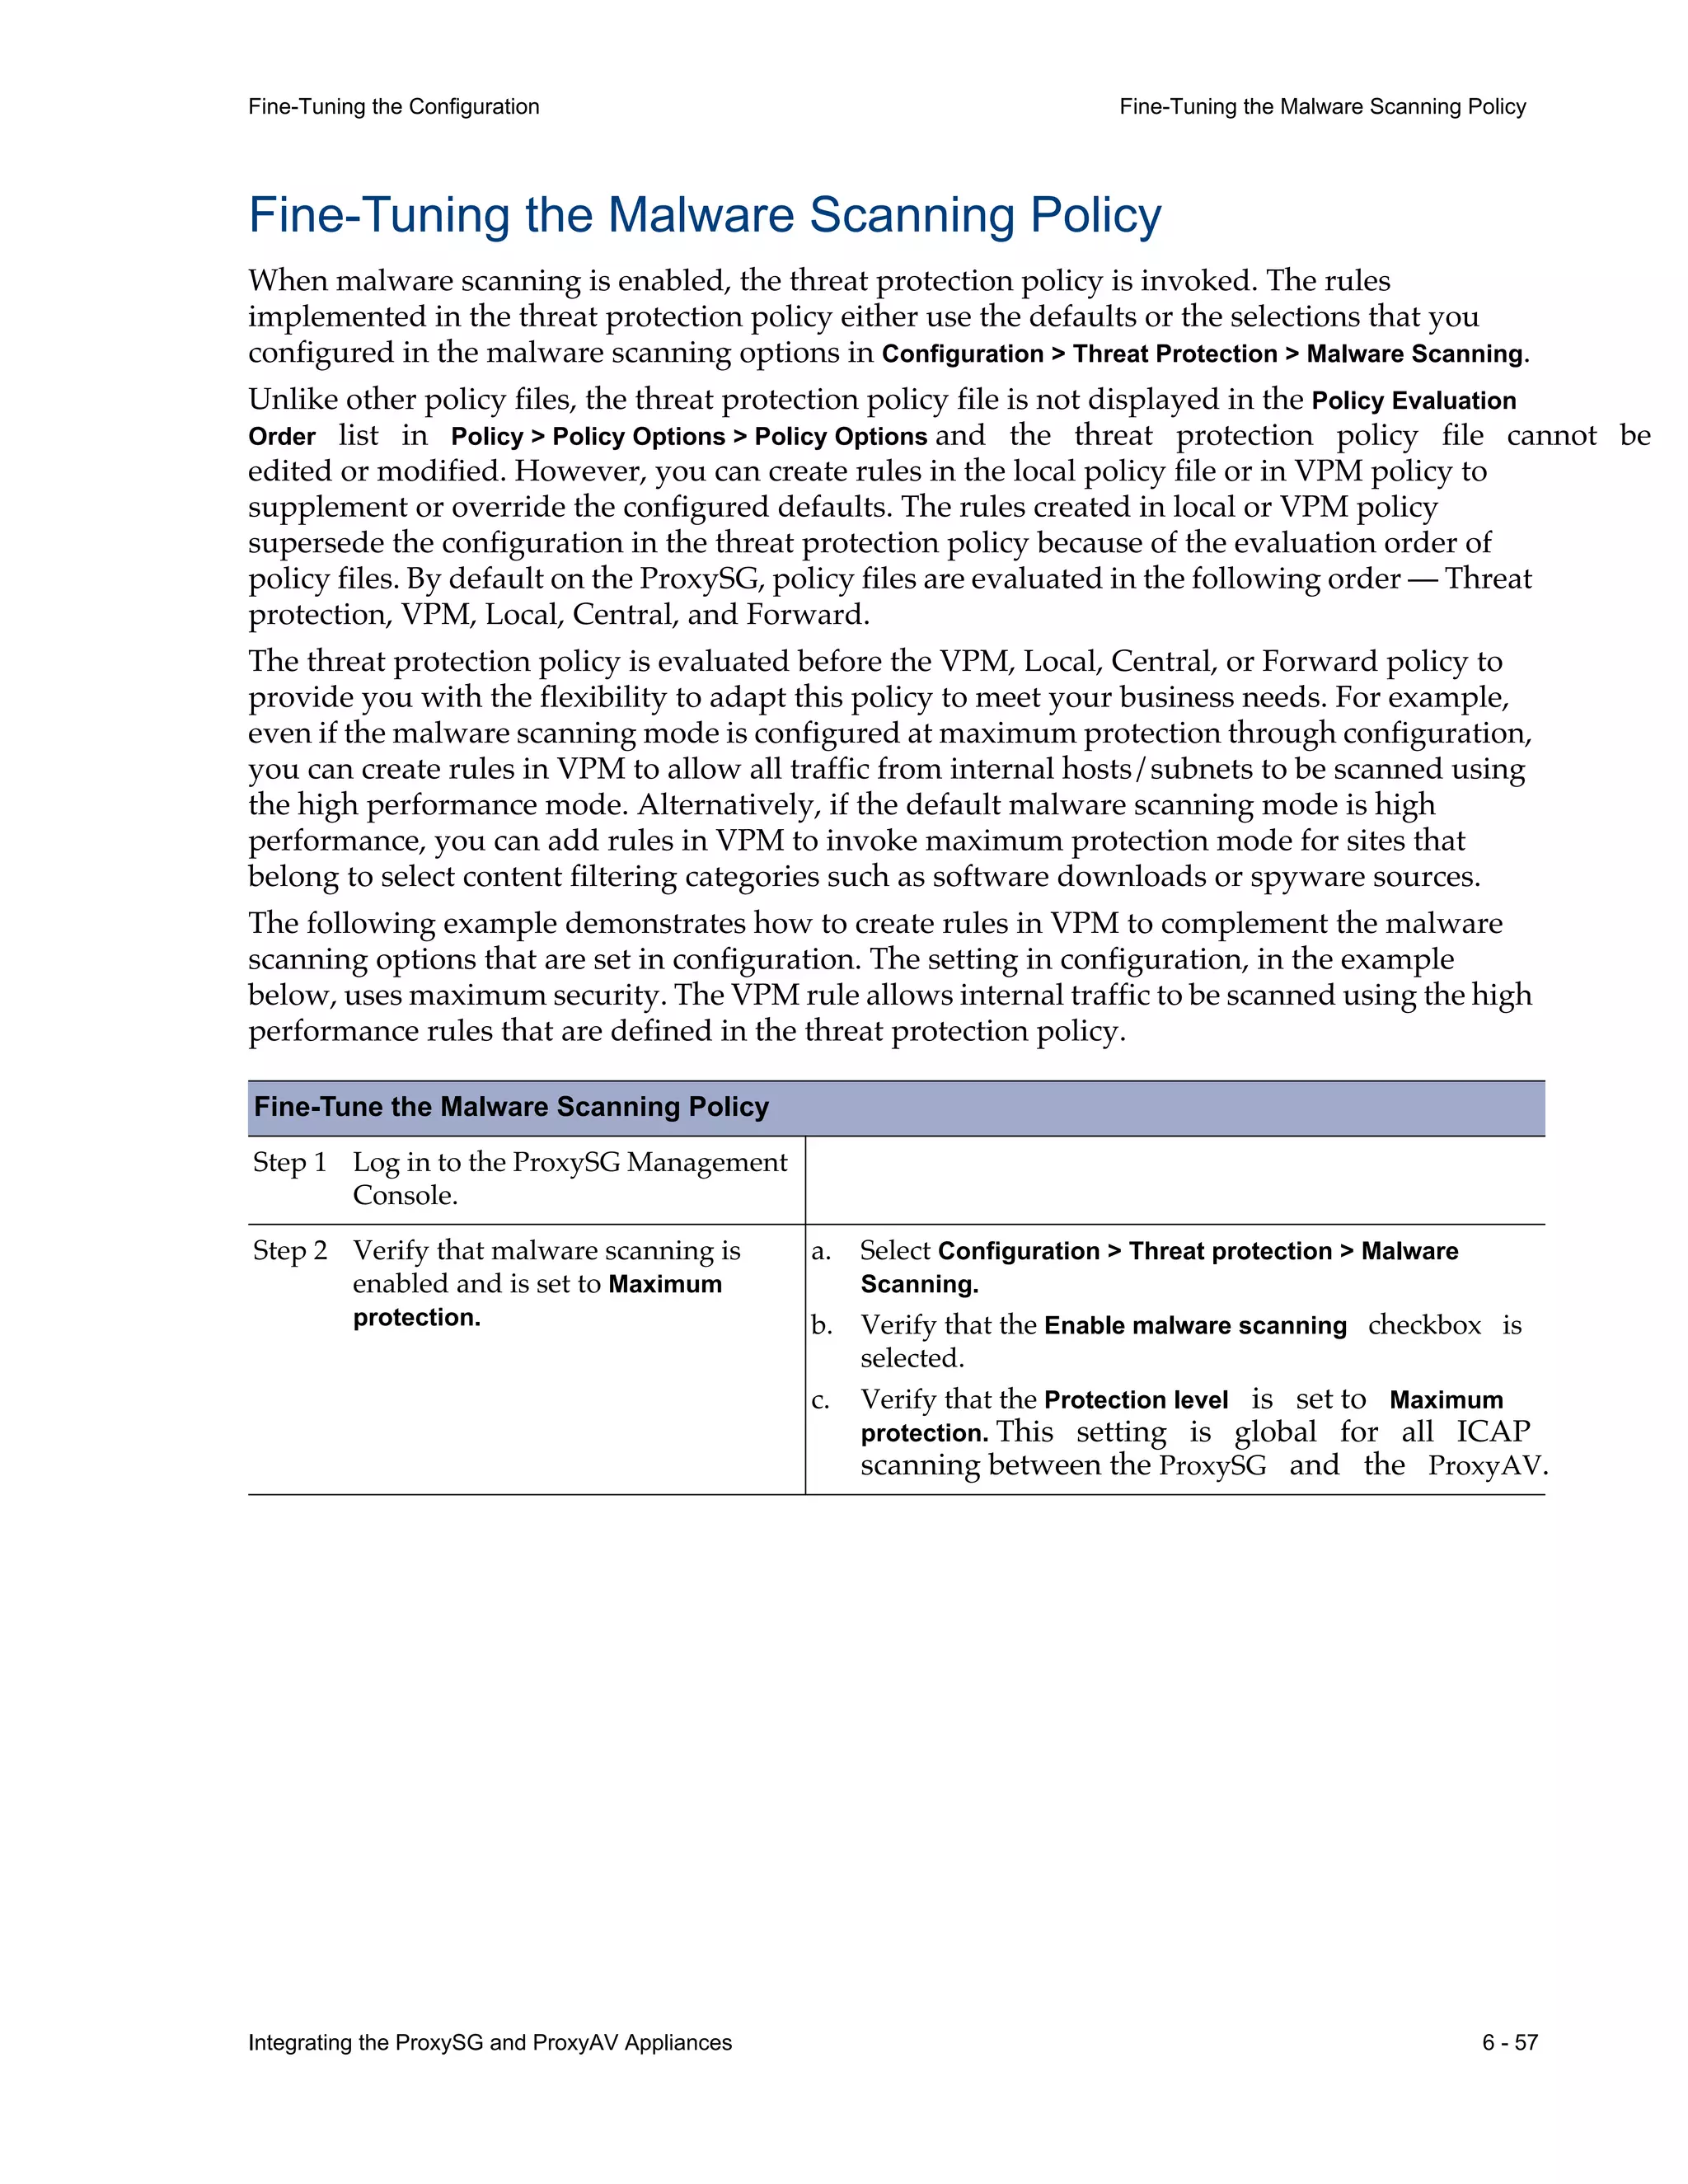
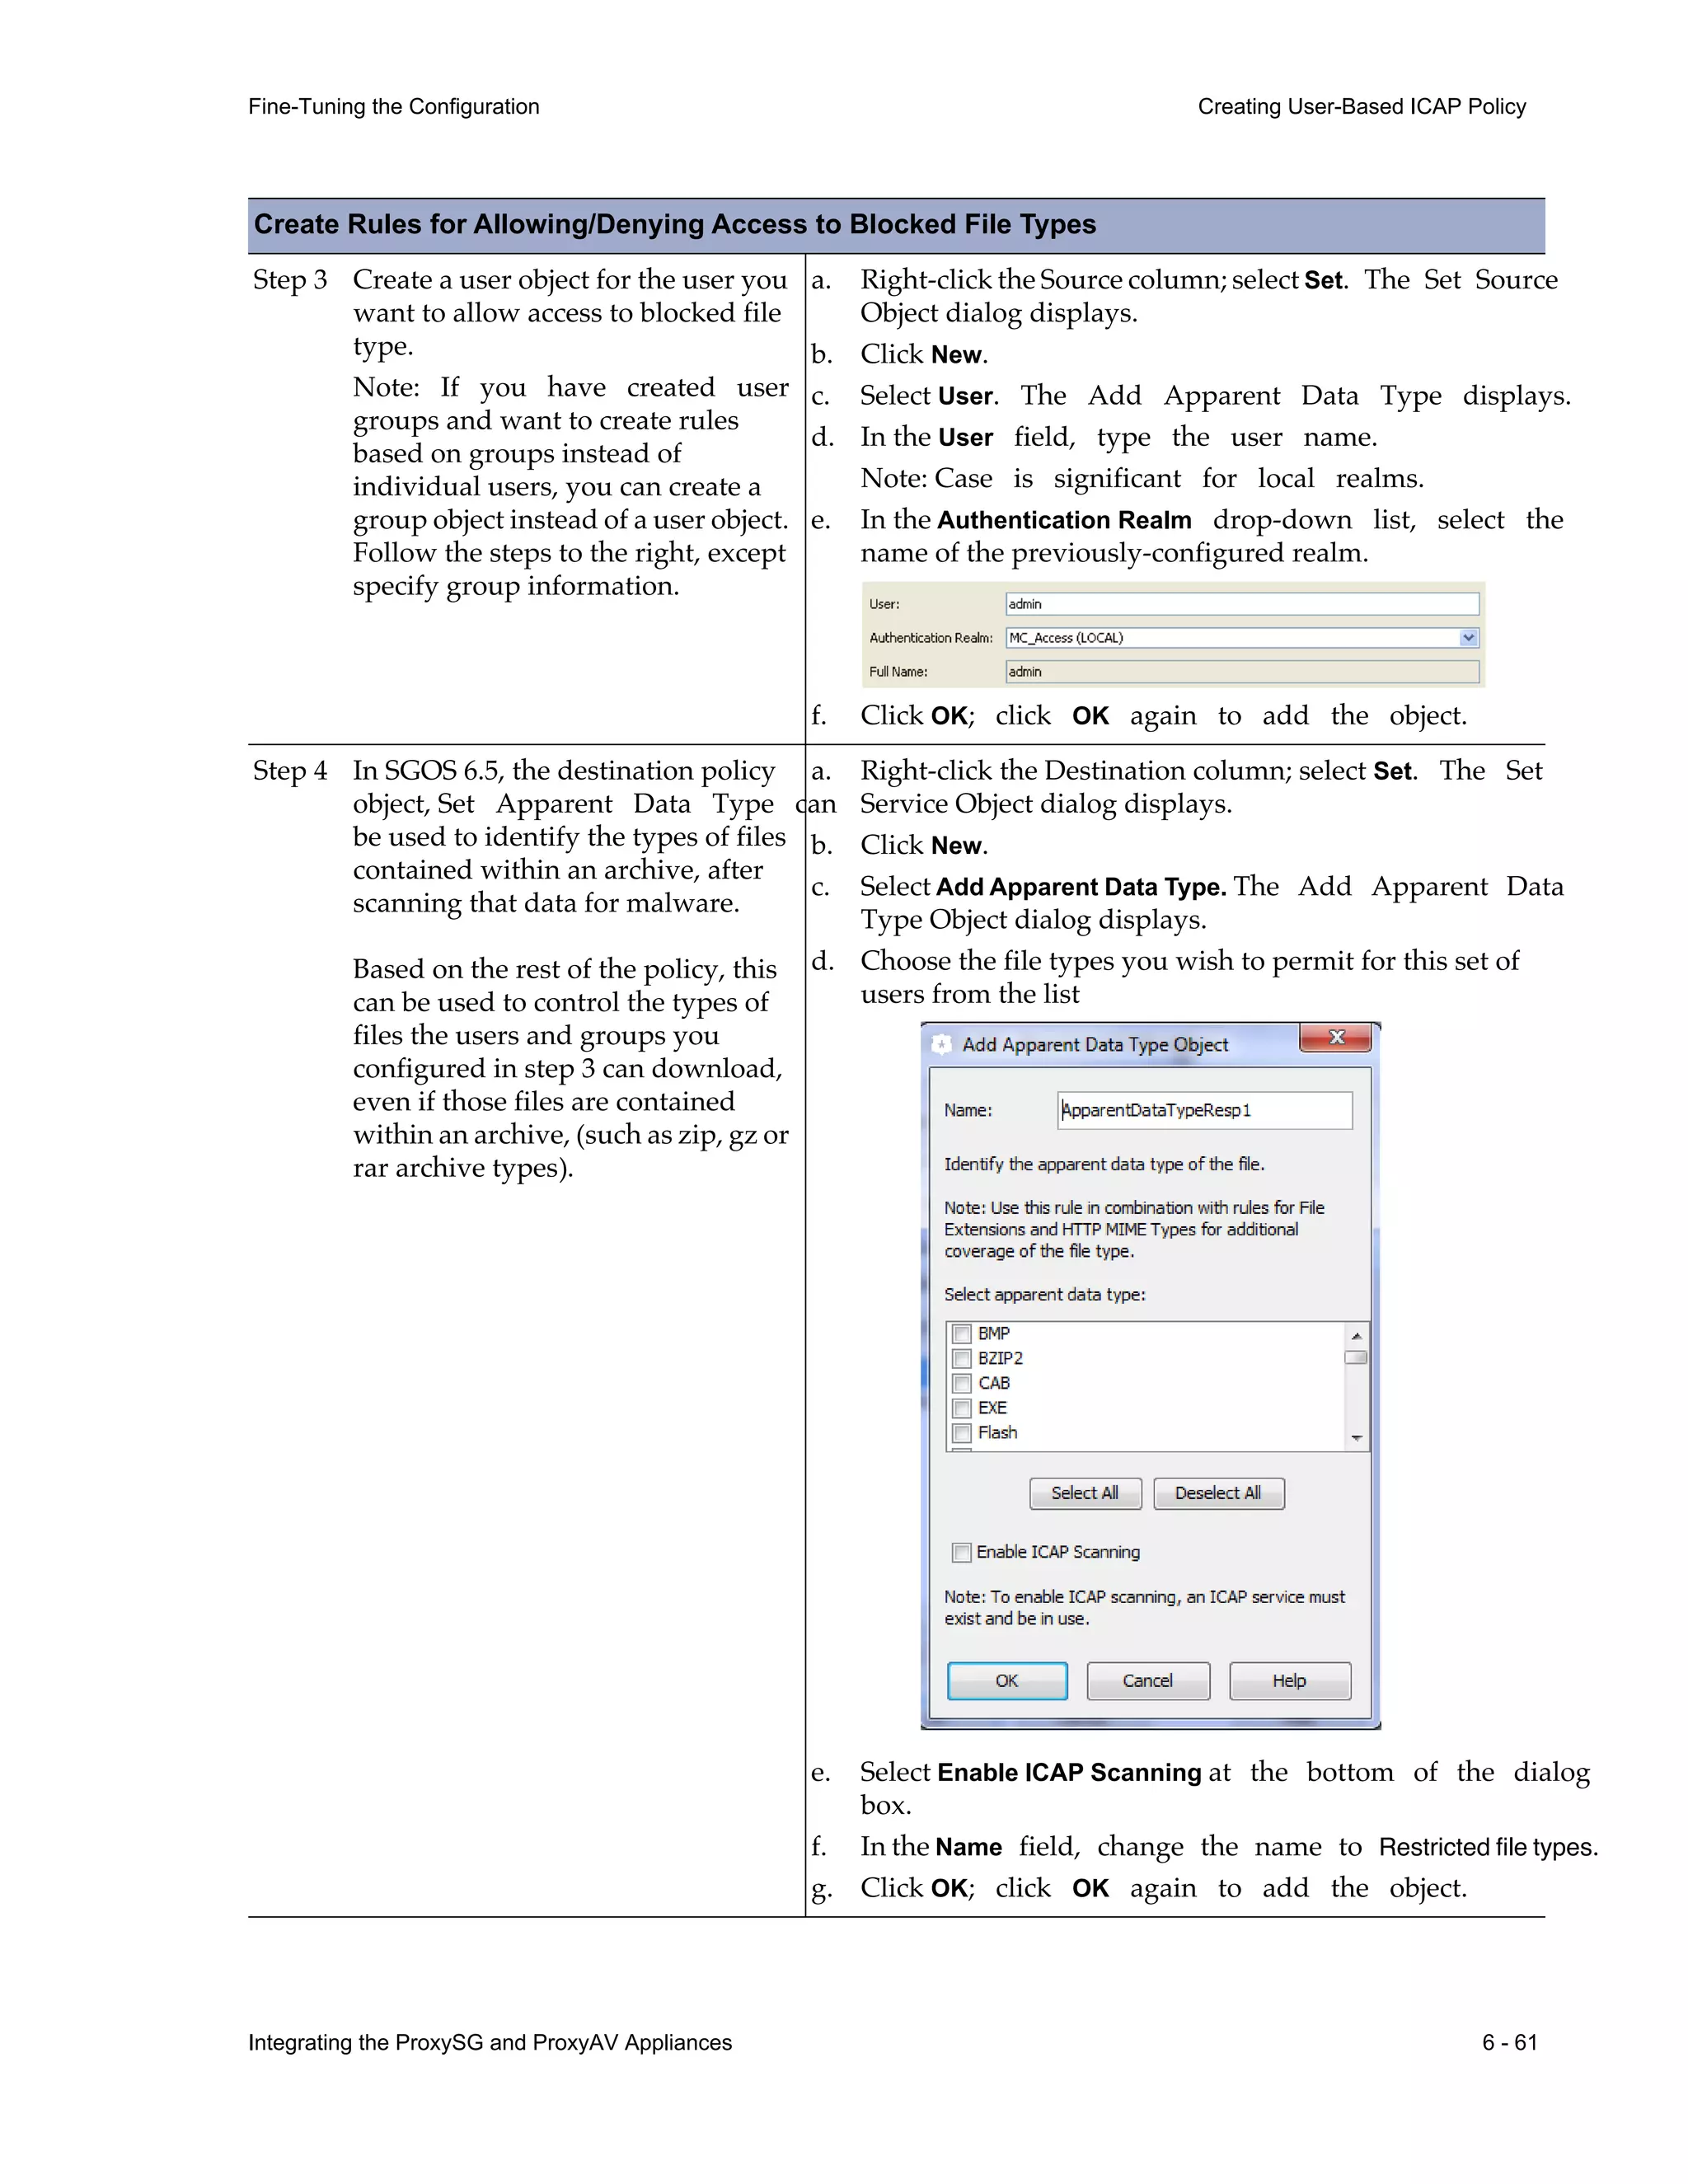
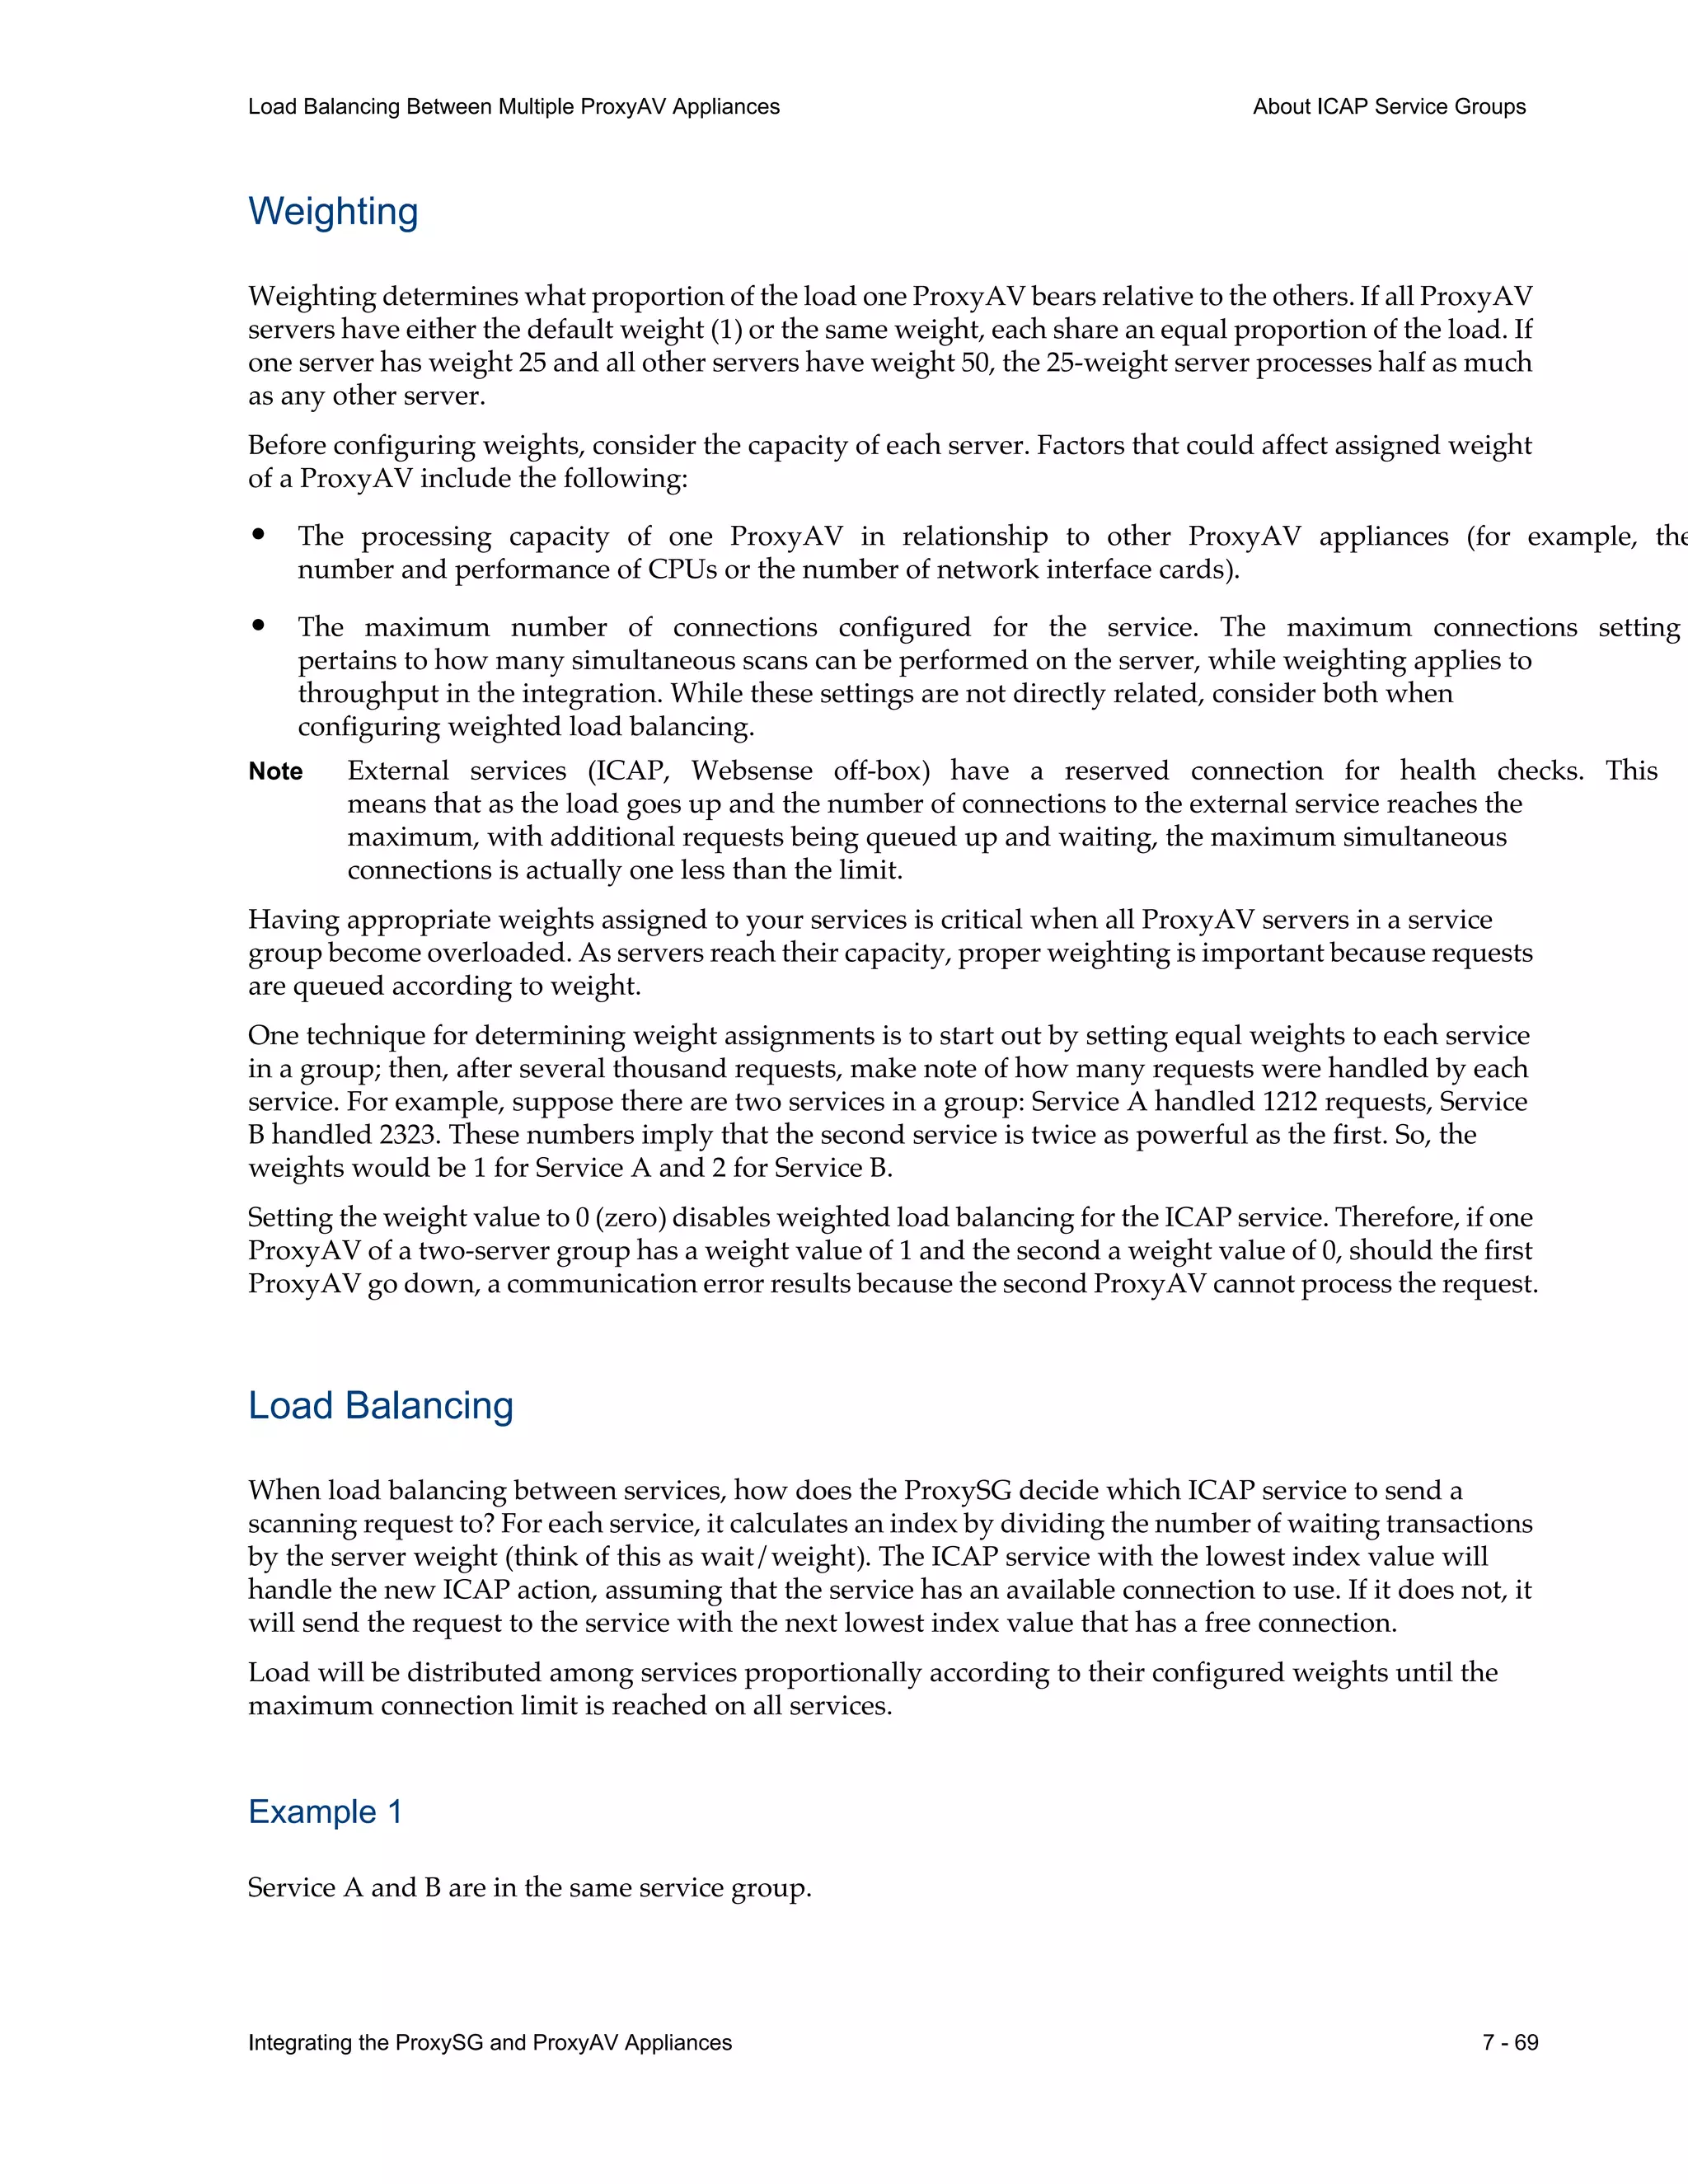
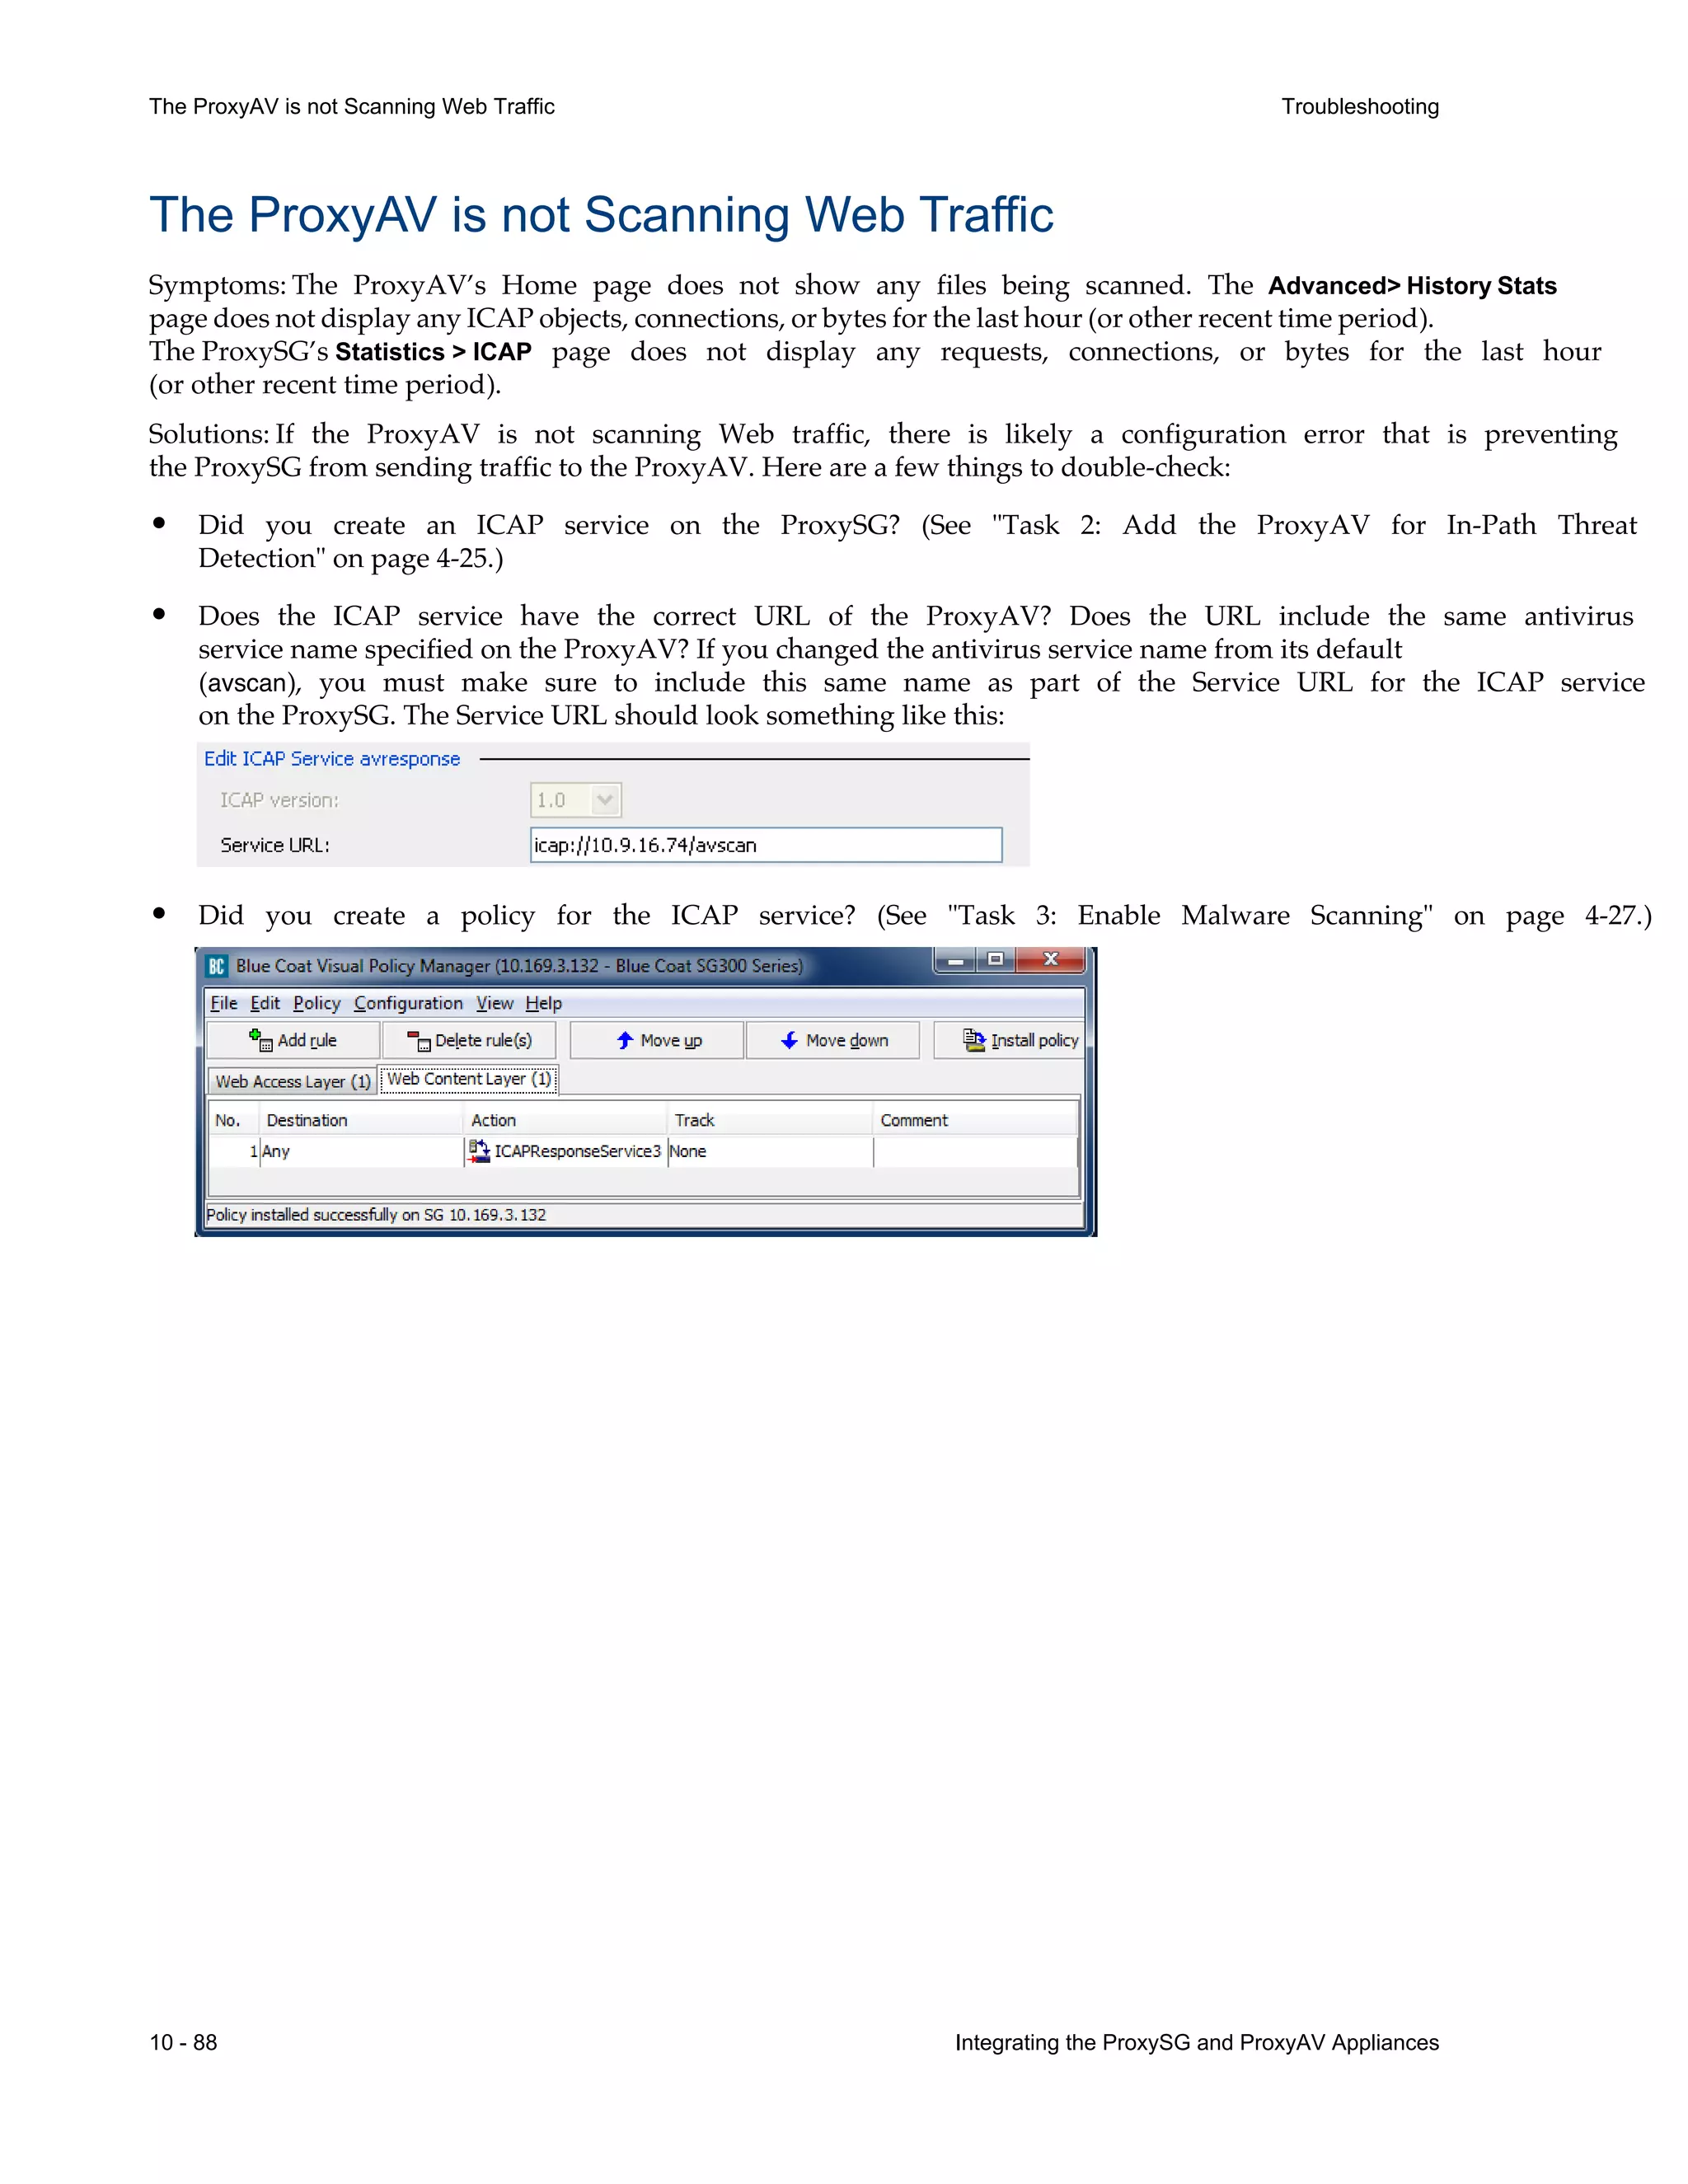
Conserving Scanning Resources Configuration Best Practices
request.header.User-Agent="SVN"
end condition MisBehaving_Old_UserAgents
define condition HTTPv0.9_UserAgents
http.response.version=0.9 condition=MisBehaving_Old_UserAgents
end condition HTTPv0.9_UserAgents
define condition NO_or_LARGE_CONTENT_LENGTH
;note- the following line is correct- do NOT add .* between quotes
response.header.Content-Length=!"" ;true if Content-Length header is not present
response.header.Content-Length=!"^[0-9]{1,8}$" ;>99,999,999
end condition NO_or_LARGE_CONTENT_LENGTH
define condition Bad_response_for_ICAP
condition=NO_or_LARGE_CONTENT_LENGTH
condition=HTTPv0.9_UserAgents
url.domain=//streamerapi.finance.yahoo.com ; Yahoos stock ticker problem -15sep06
end condition Bad_response_for_ICAP
define condition Not_ICAP_response
;note- the following line is correct- do NOT add .* between quotes
response.x_header.X-Virus-ID=!"" ;true if X-Virus-ID header is not present
end condition Not_ICAP_response
define condition NOICAP
;Negate ICAP service only if the OCS response is undesirable
condition=Bad_response_for_ICAP condition=Not_ICAP_response
end condition NOICAP
;--------------END ICAP Best Practices CPL
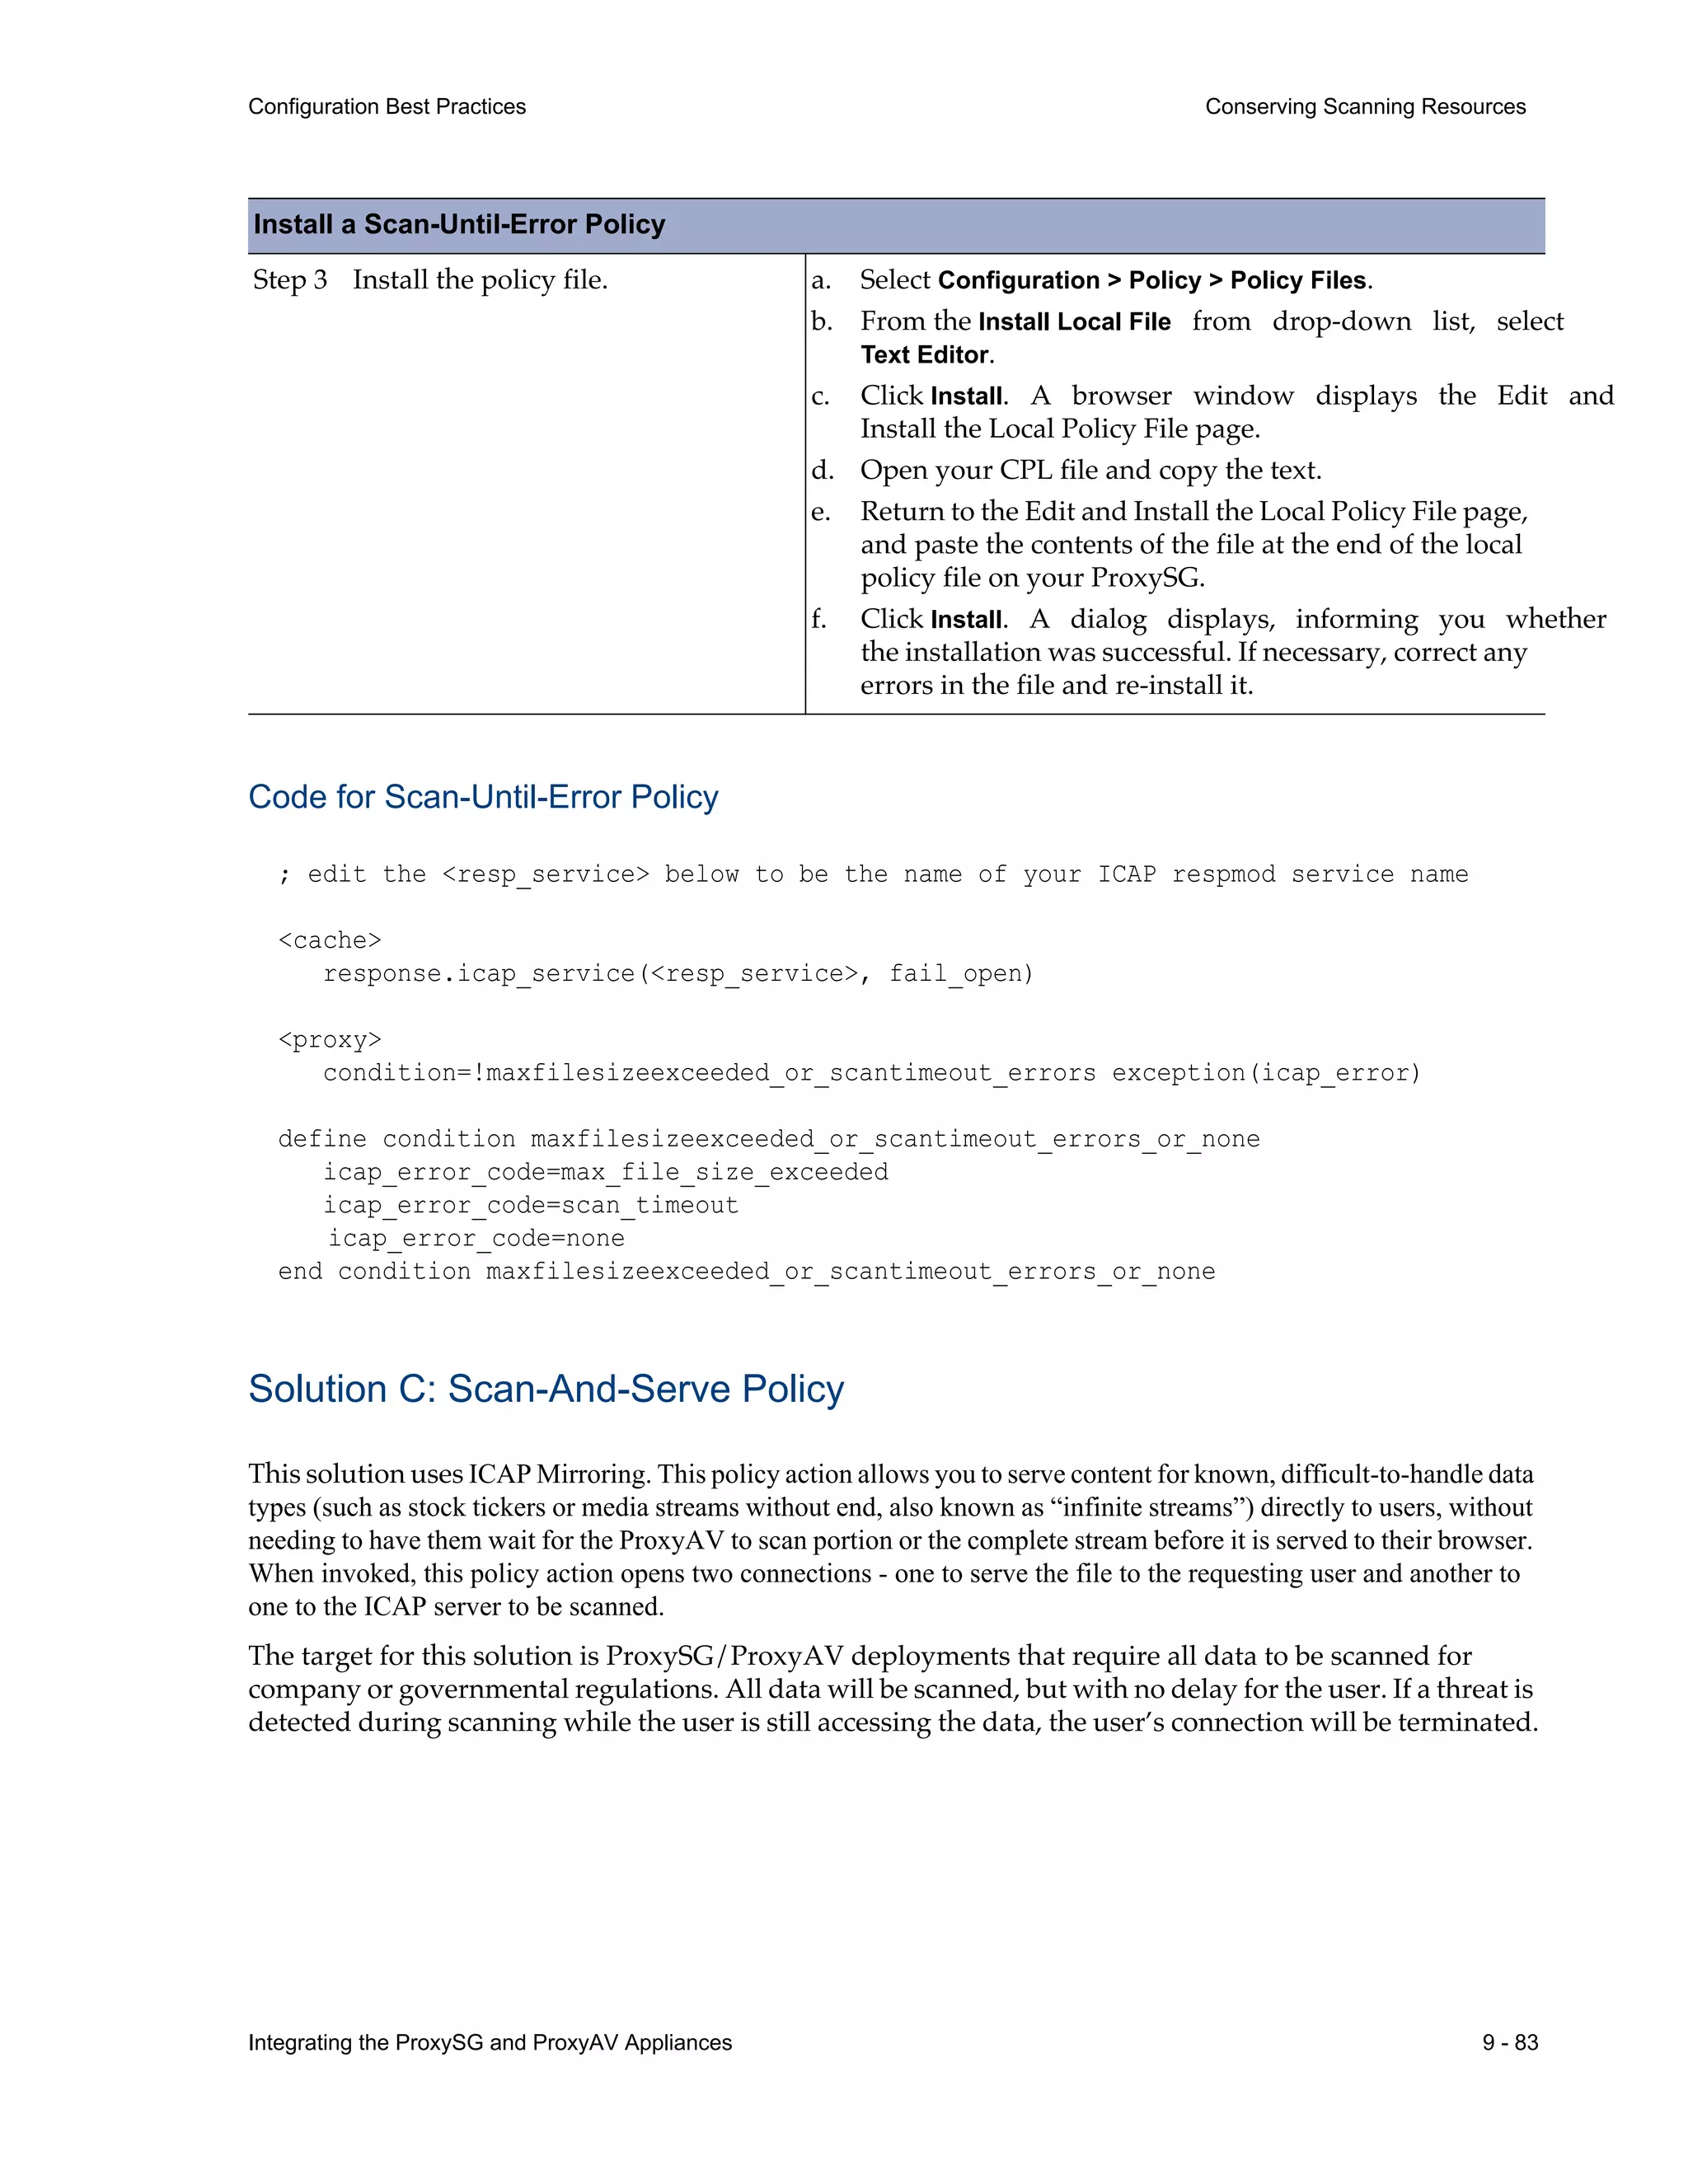
Solution B: Scan-Until-Error Policy
Some administrators choose to wait for one of the symptomatic errors (Maximum file size exceeded or Scan
timeout) to occur and then serve the data stream unscanned. This approach ensures that all data is still sent
to the ProxyAV—thus, the maximum amount of scanning can occur.
The downside to this approach is that all requests for infinite data streams must reach the maximum file
size or scan timeout configured on the ProxyAV. If a sufficient number of concurrent requests for such data
streams occur, the request queue will slow or delay other traffic.
This policy example serves the data stream if the error is Maximum file size exceeded or Scan timeout; other
errors are denied. Blue Coat has written the CPL for this policy and you can download the file, customize
it for your own needs, and install it on your ProxySG.
Install a Scan-Until-Error Policy
Step 1 Download the CPL text file. a. Go to:
http://appliance.bluecoat.com/techlabs/policy/icap_scan.txt
or refer to the text after this procedure.
b. Save the file to your desktop or other convenient
location.
c. Replace <resp_service> with the name of your ICAP
response service name.
d. Modify the policy to meet your requirements.
Step 2 Log in to the ProxySG Management
Console.](https://image.slidesharecdn.com/proxysgproxyavintegrationguide-230927114434-be9e24d9/75/ProxySG_ProxyAV_Integration_Guide-pdf-86-2048.jpg)
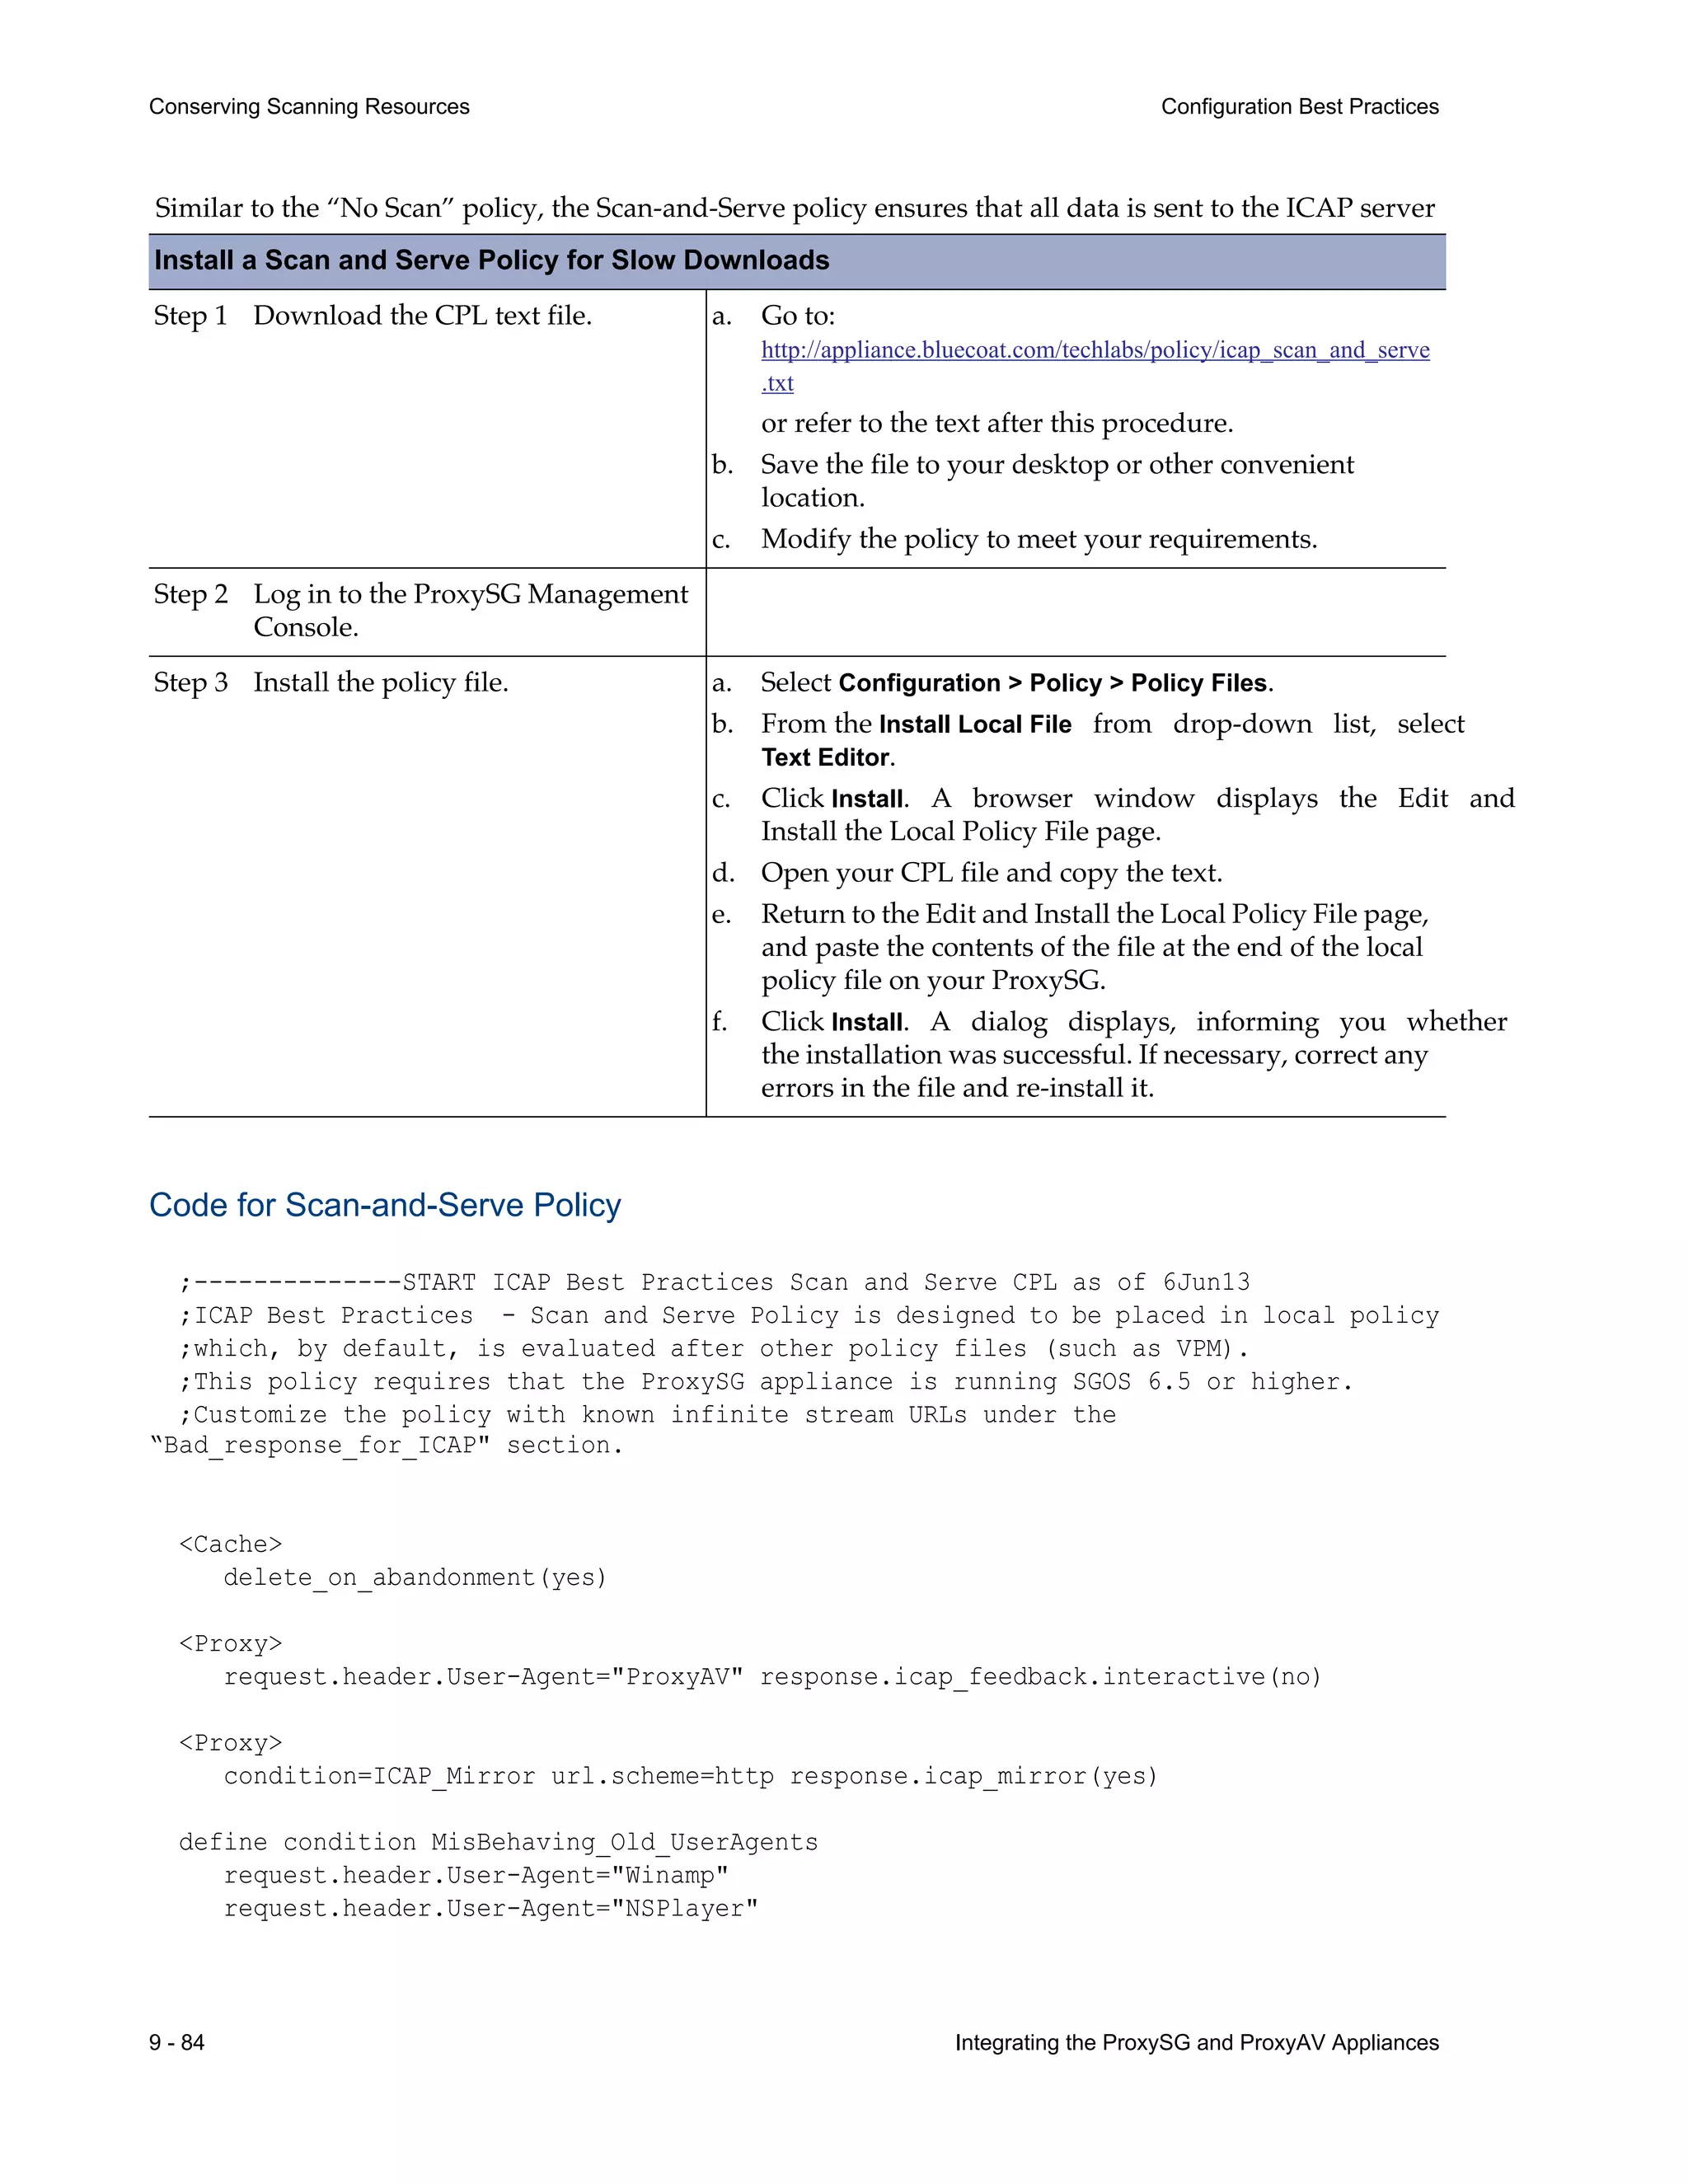
![Integrating the ProxySG and ProxyAV Appliances 9 - 85
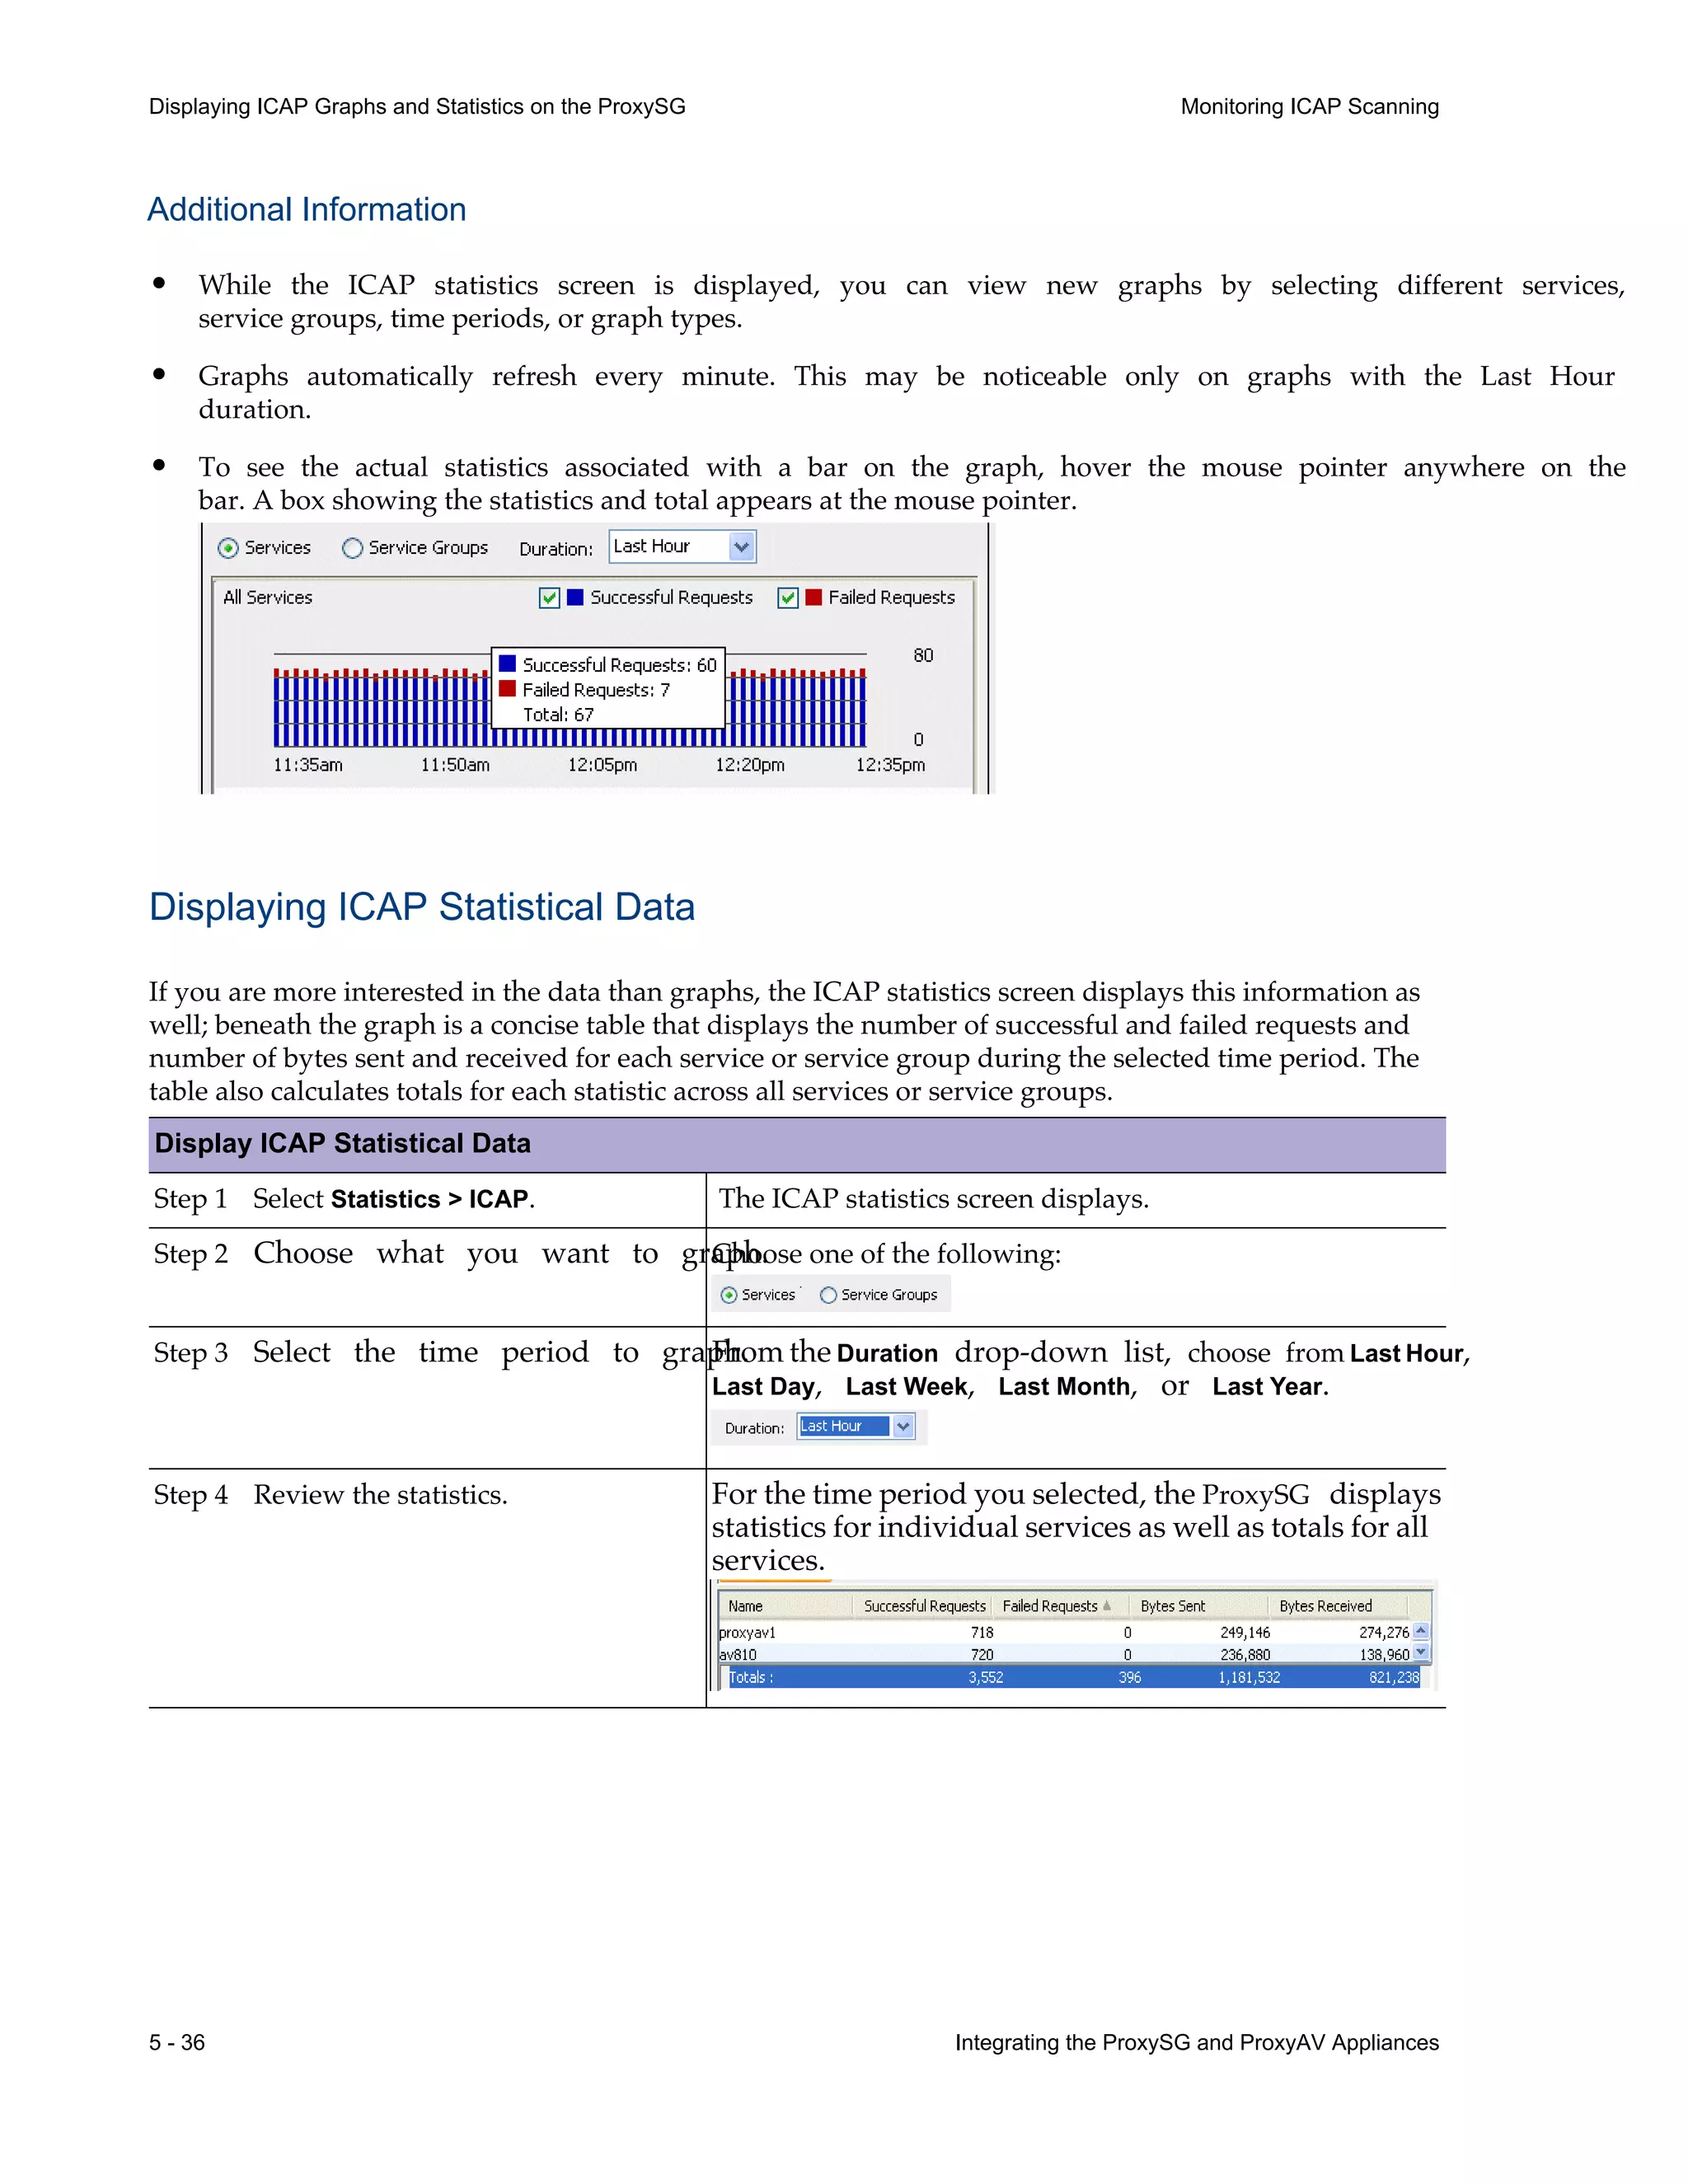
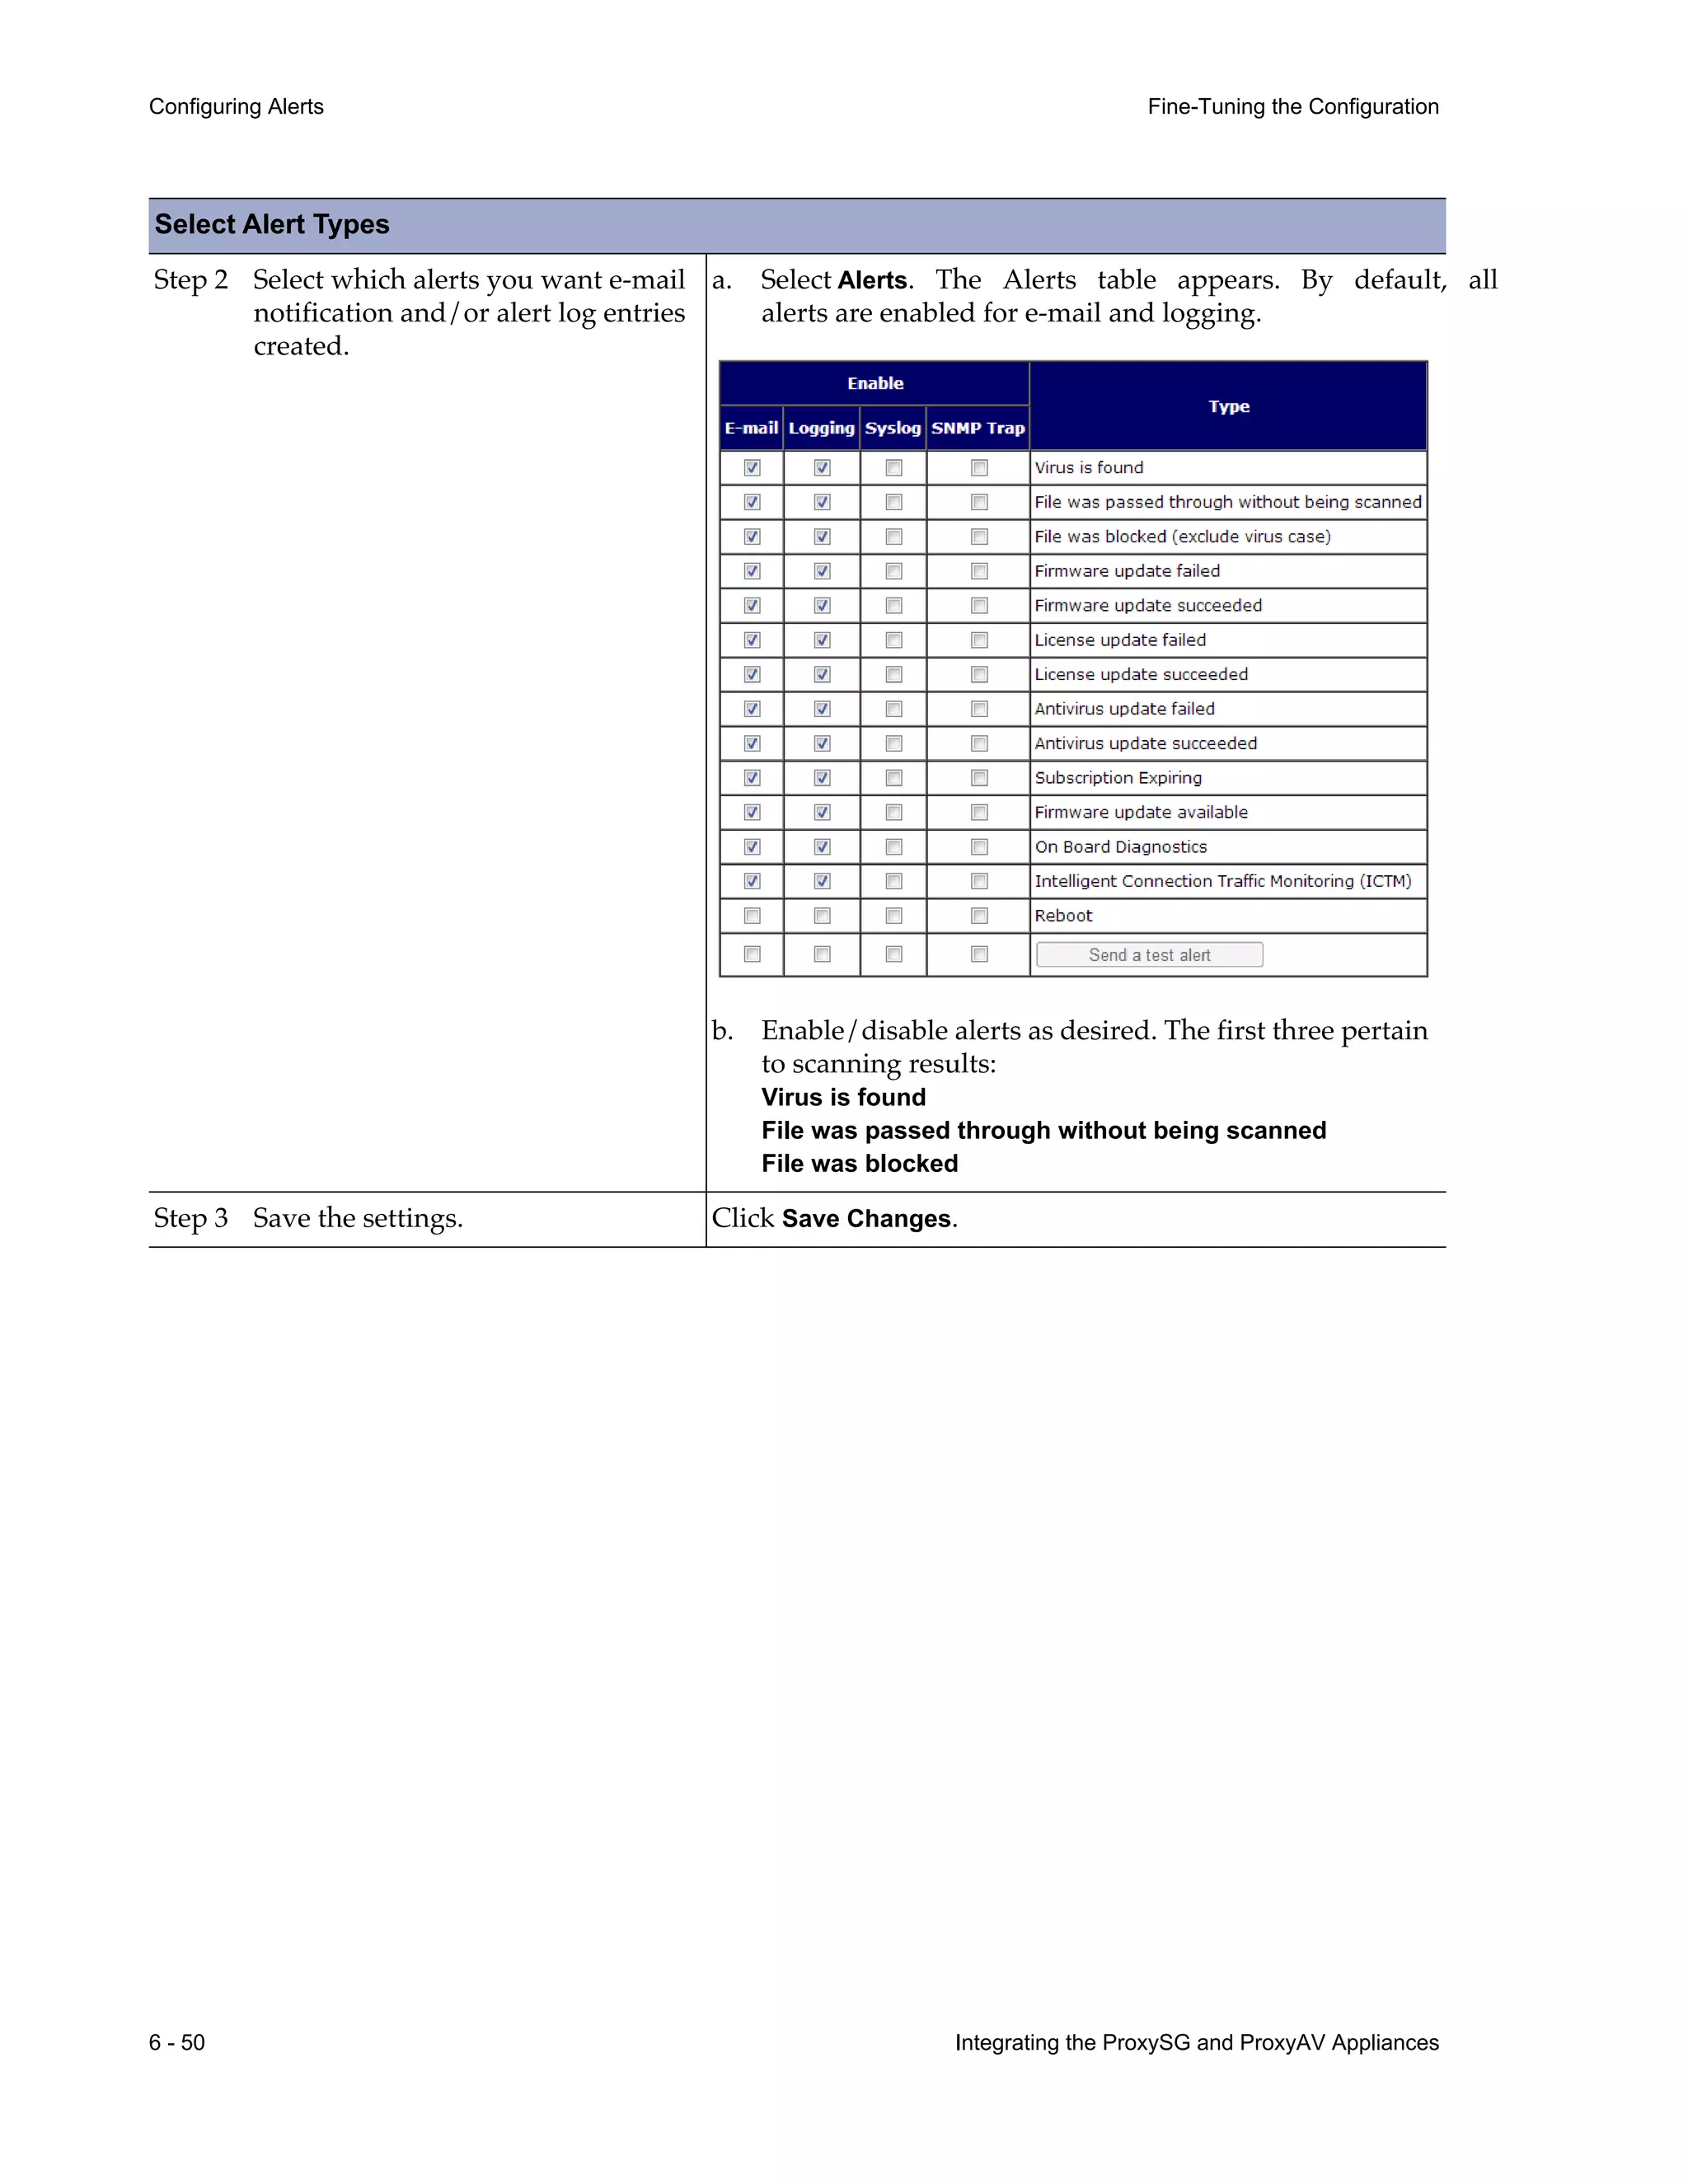
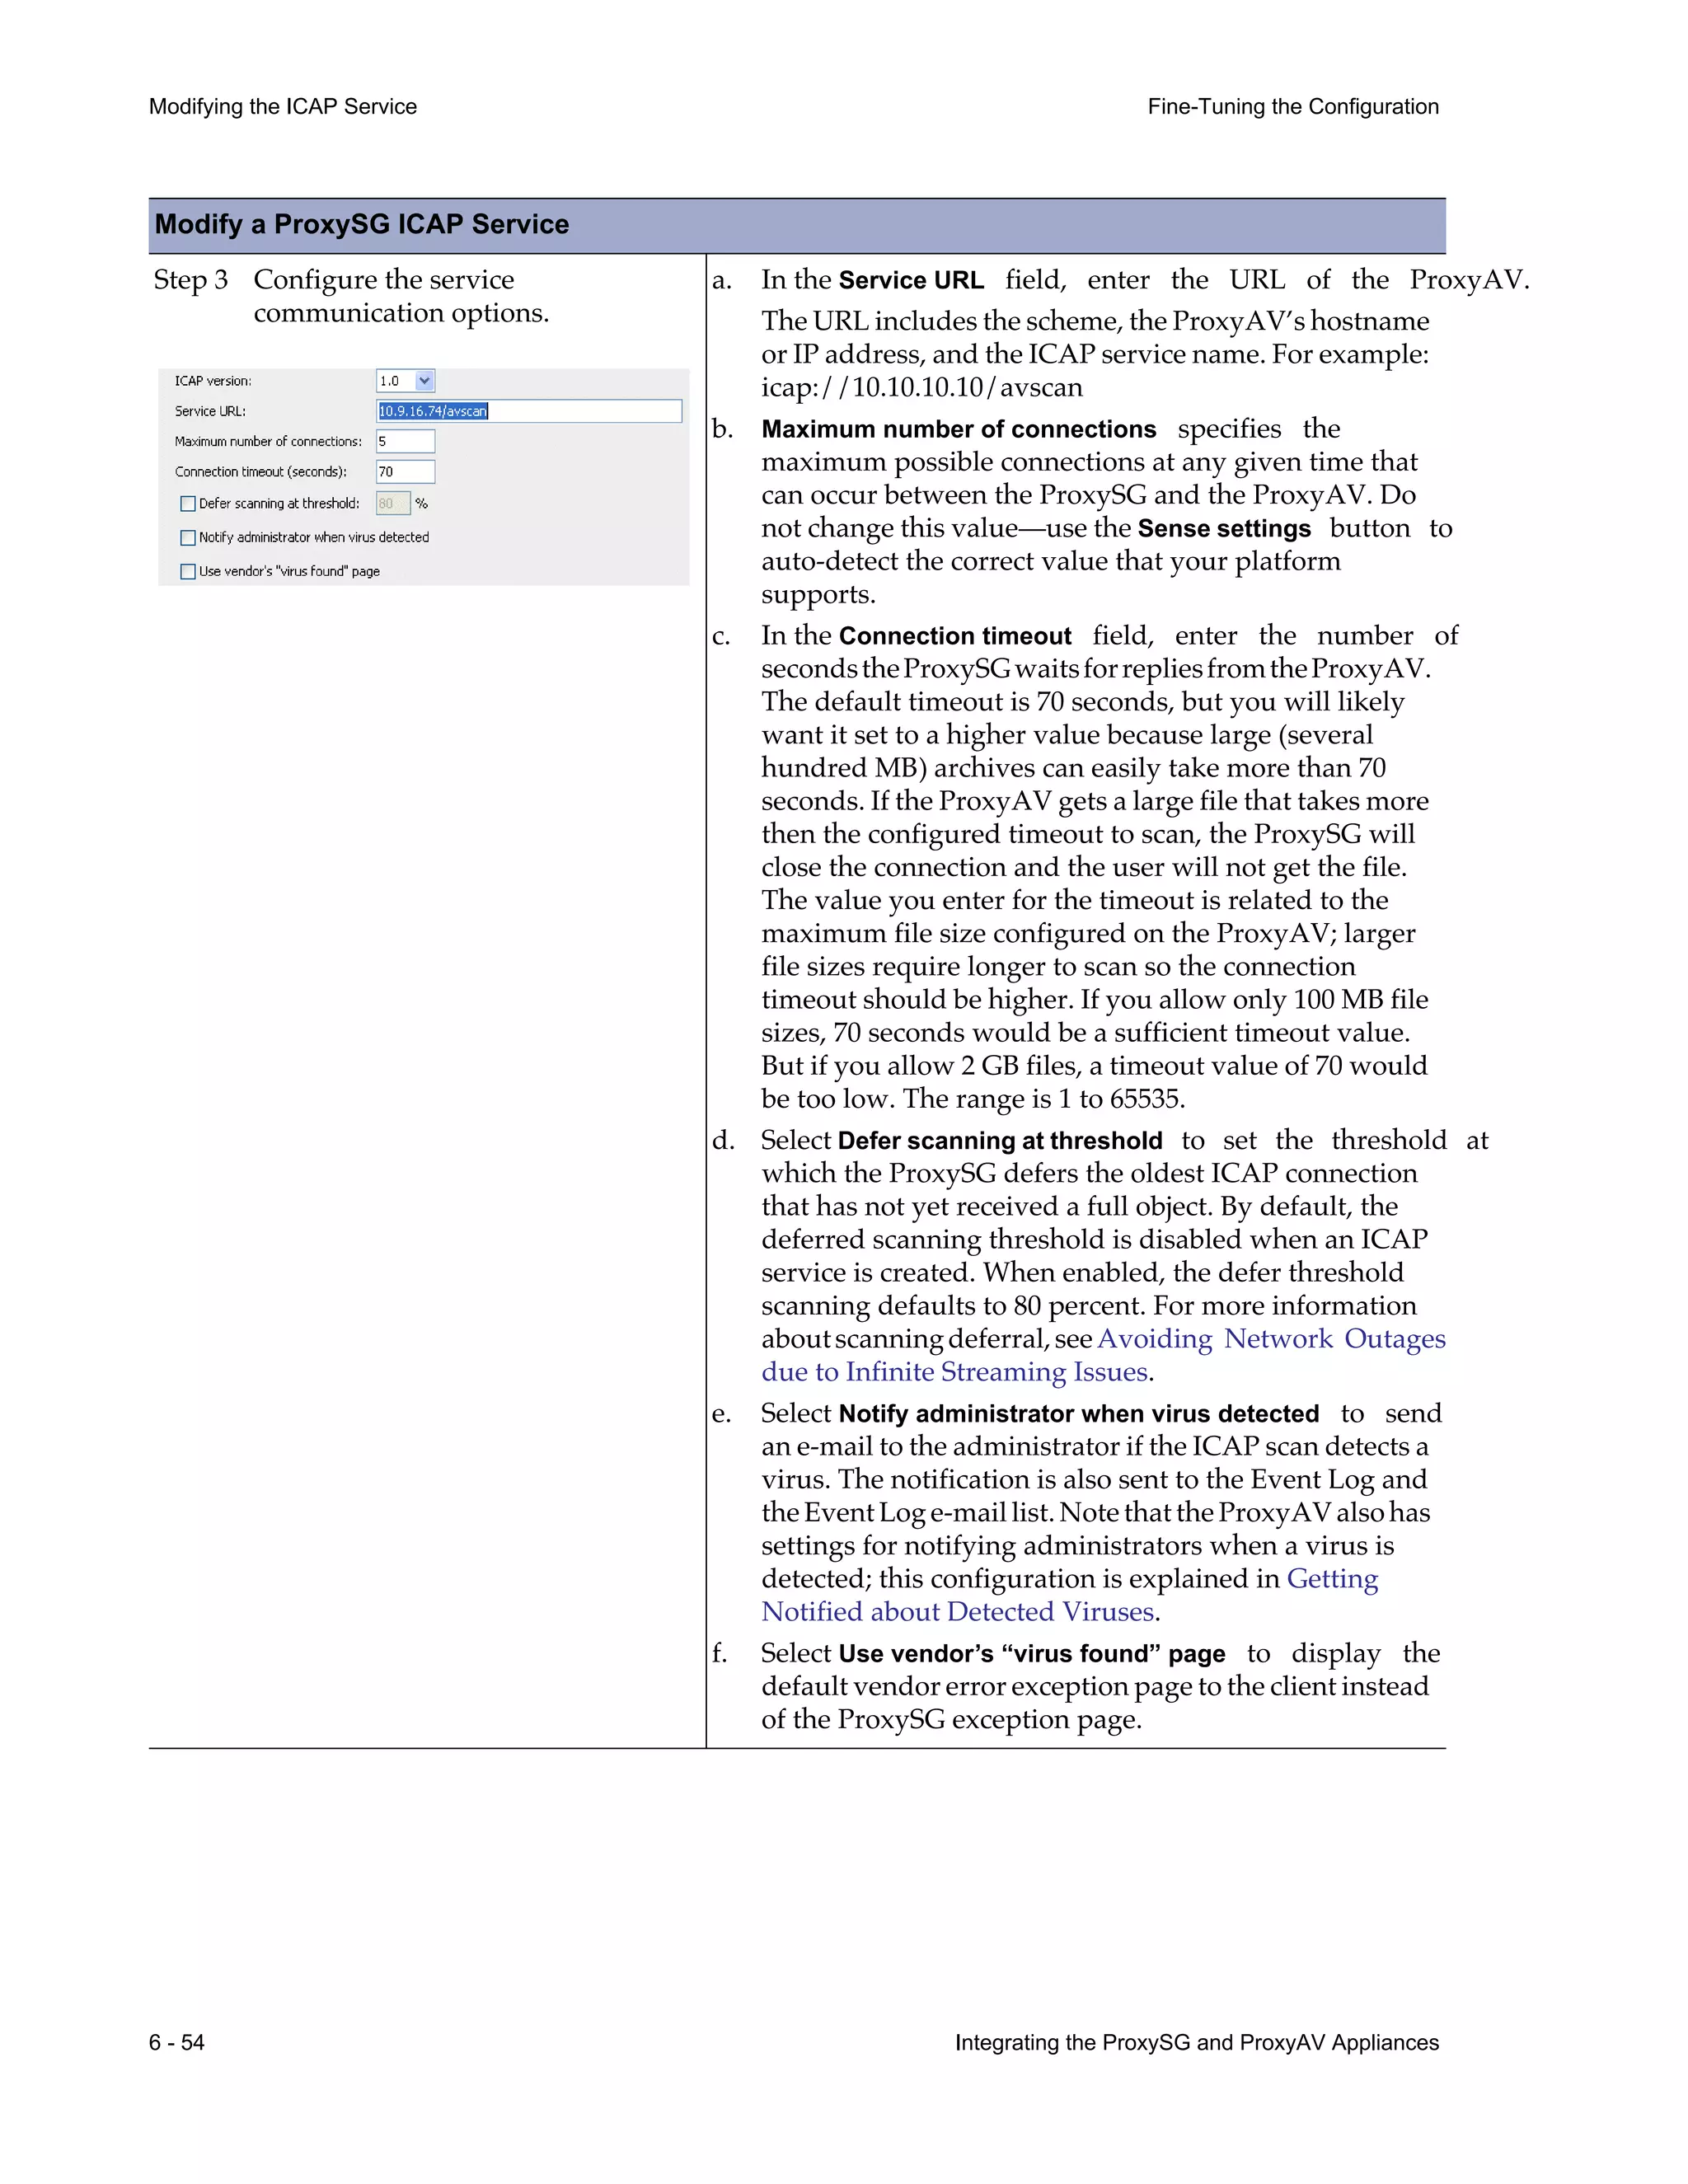
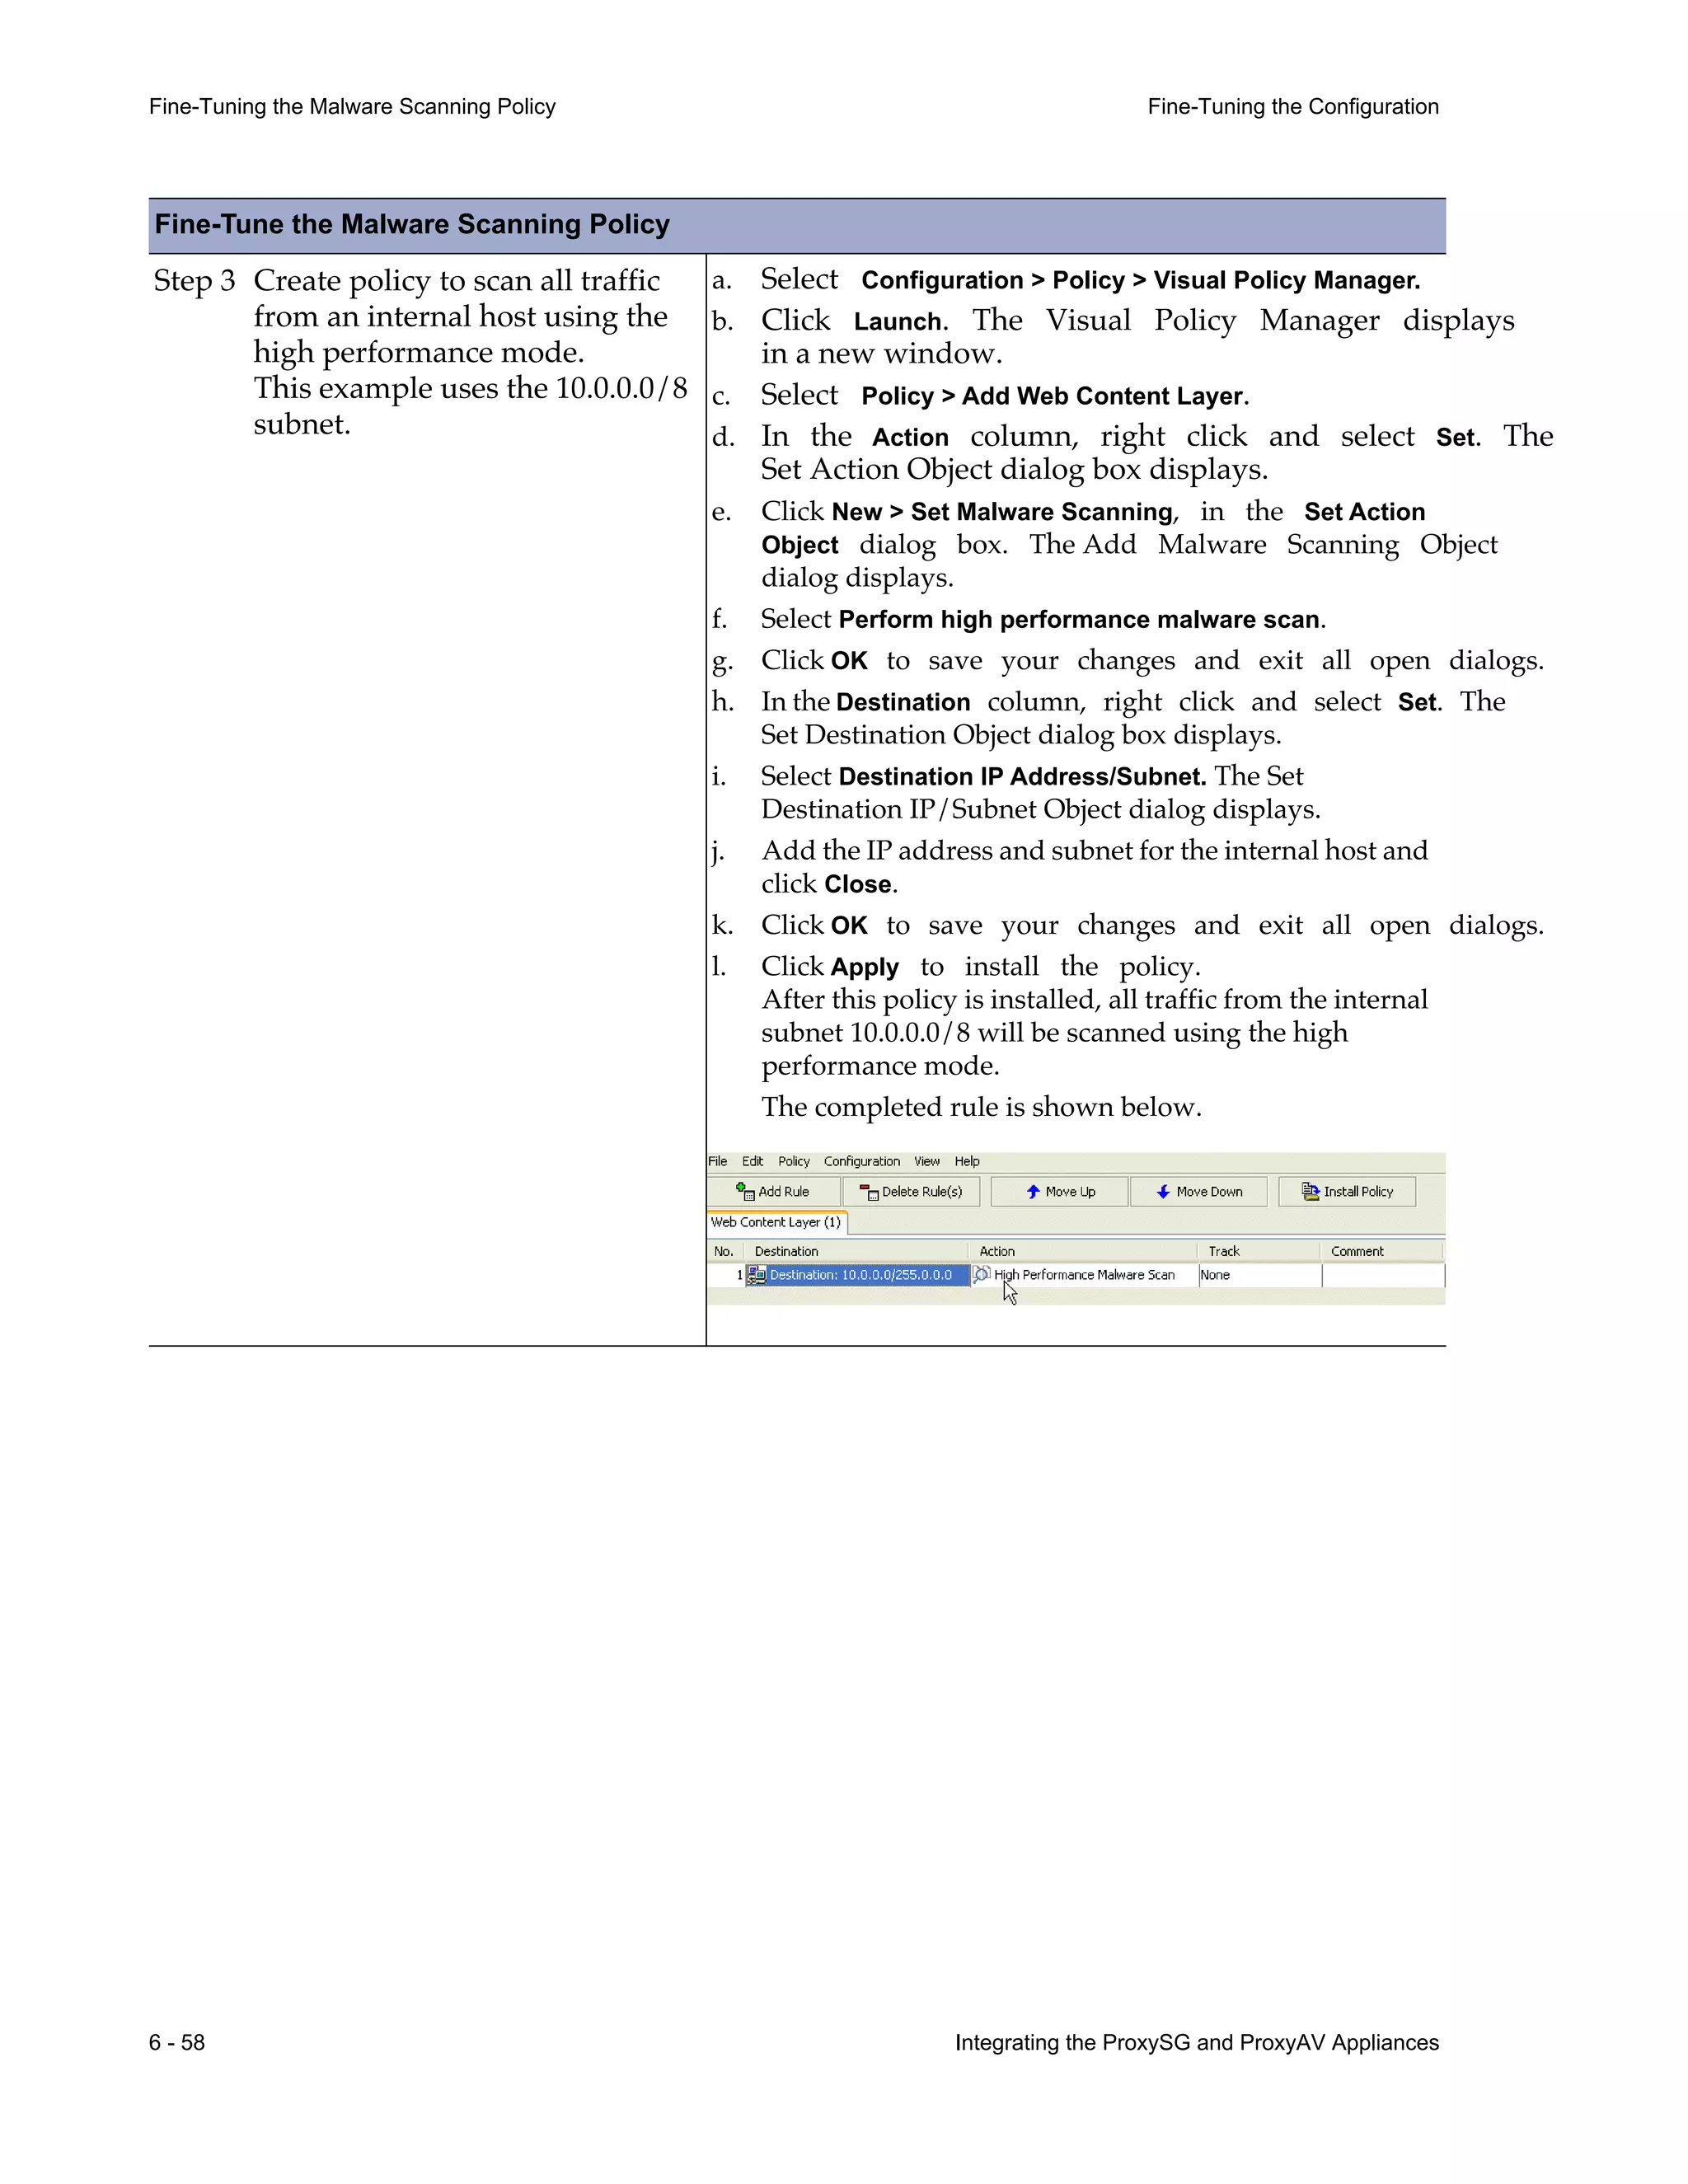
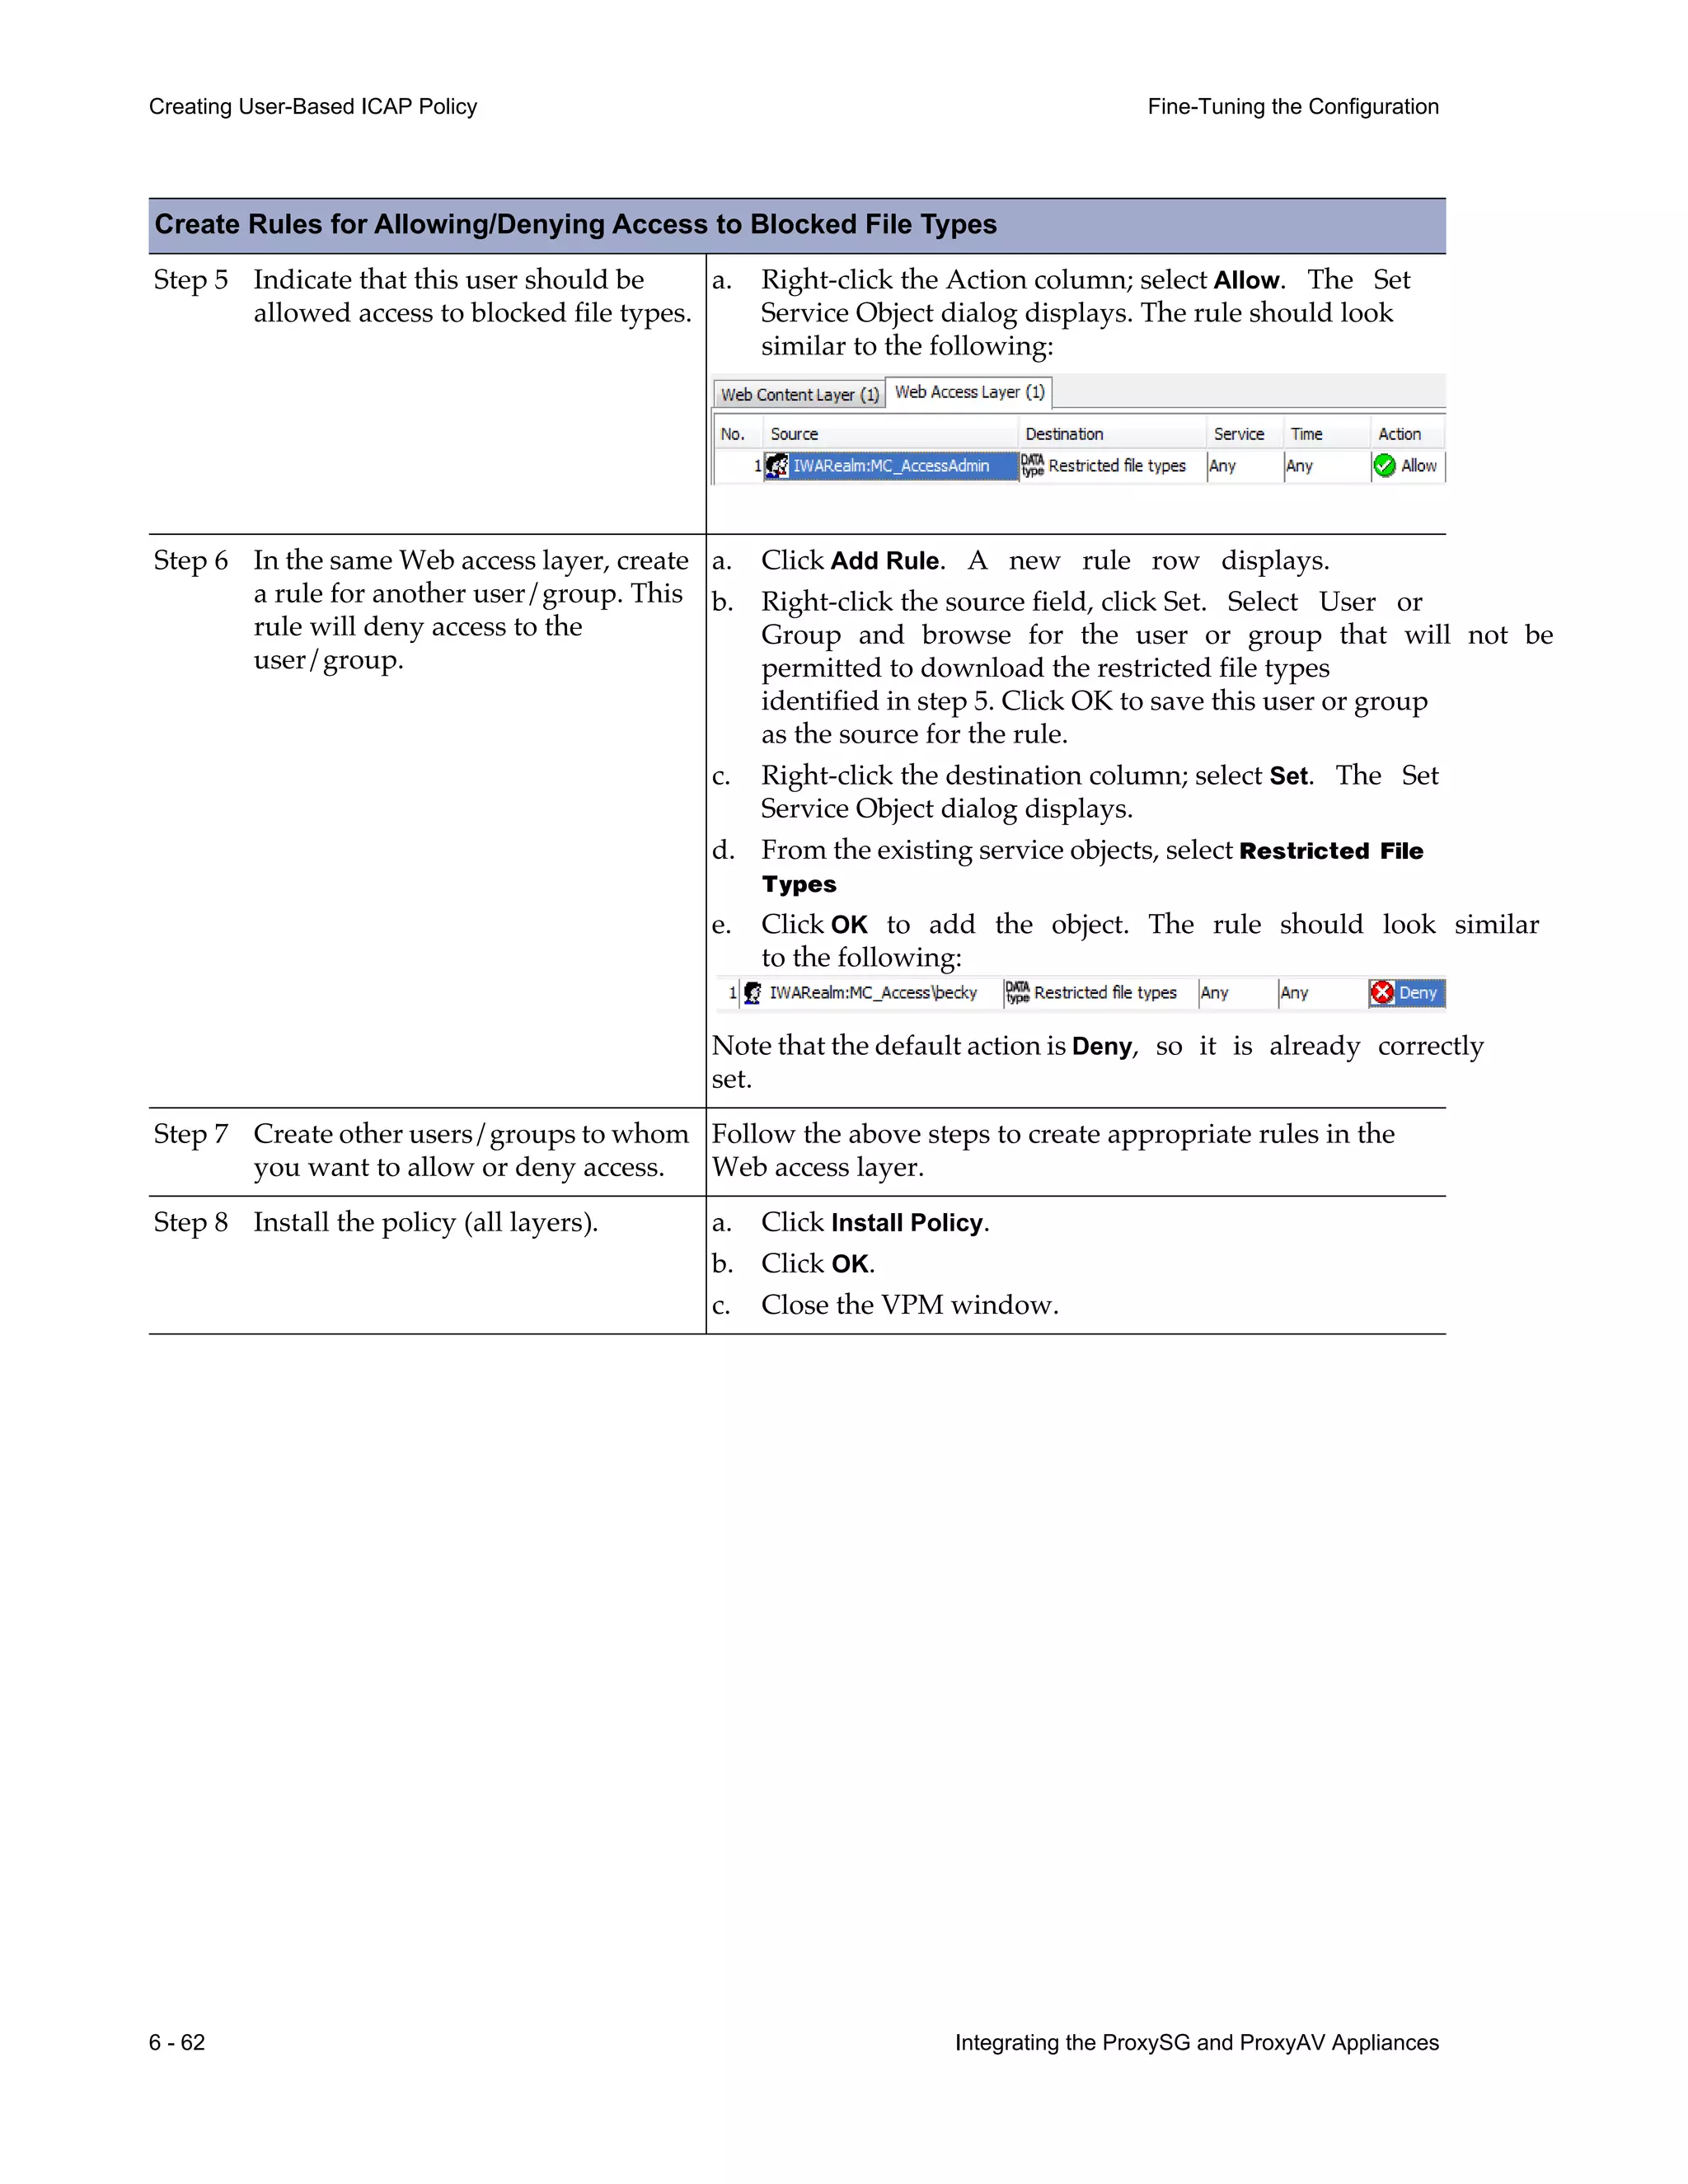
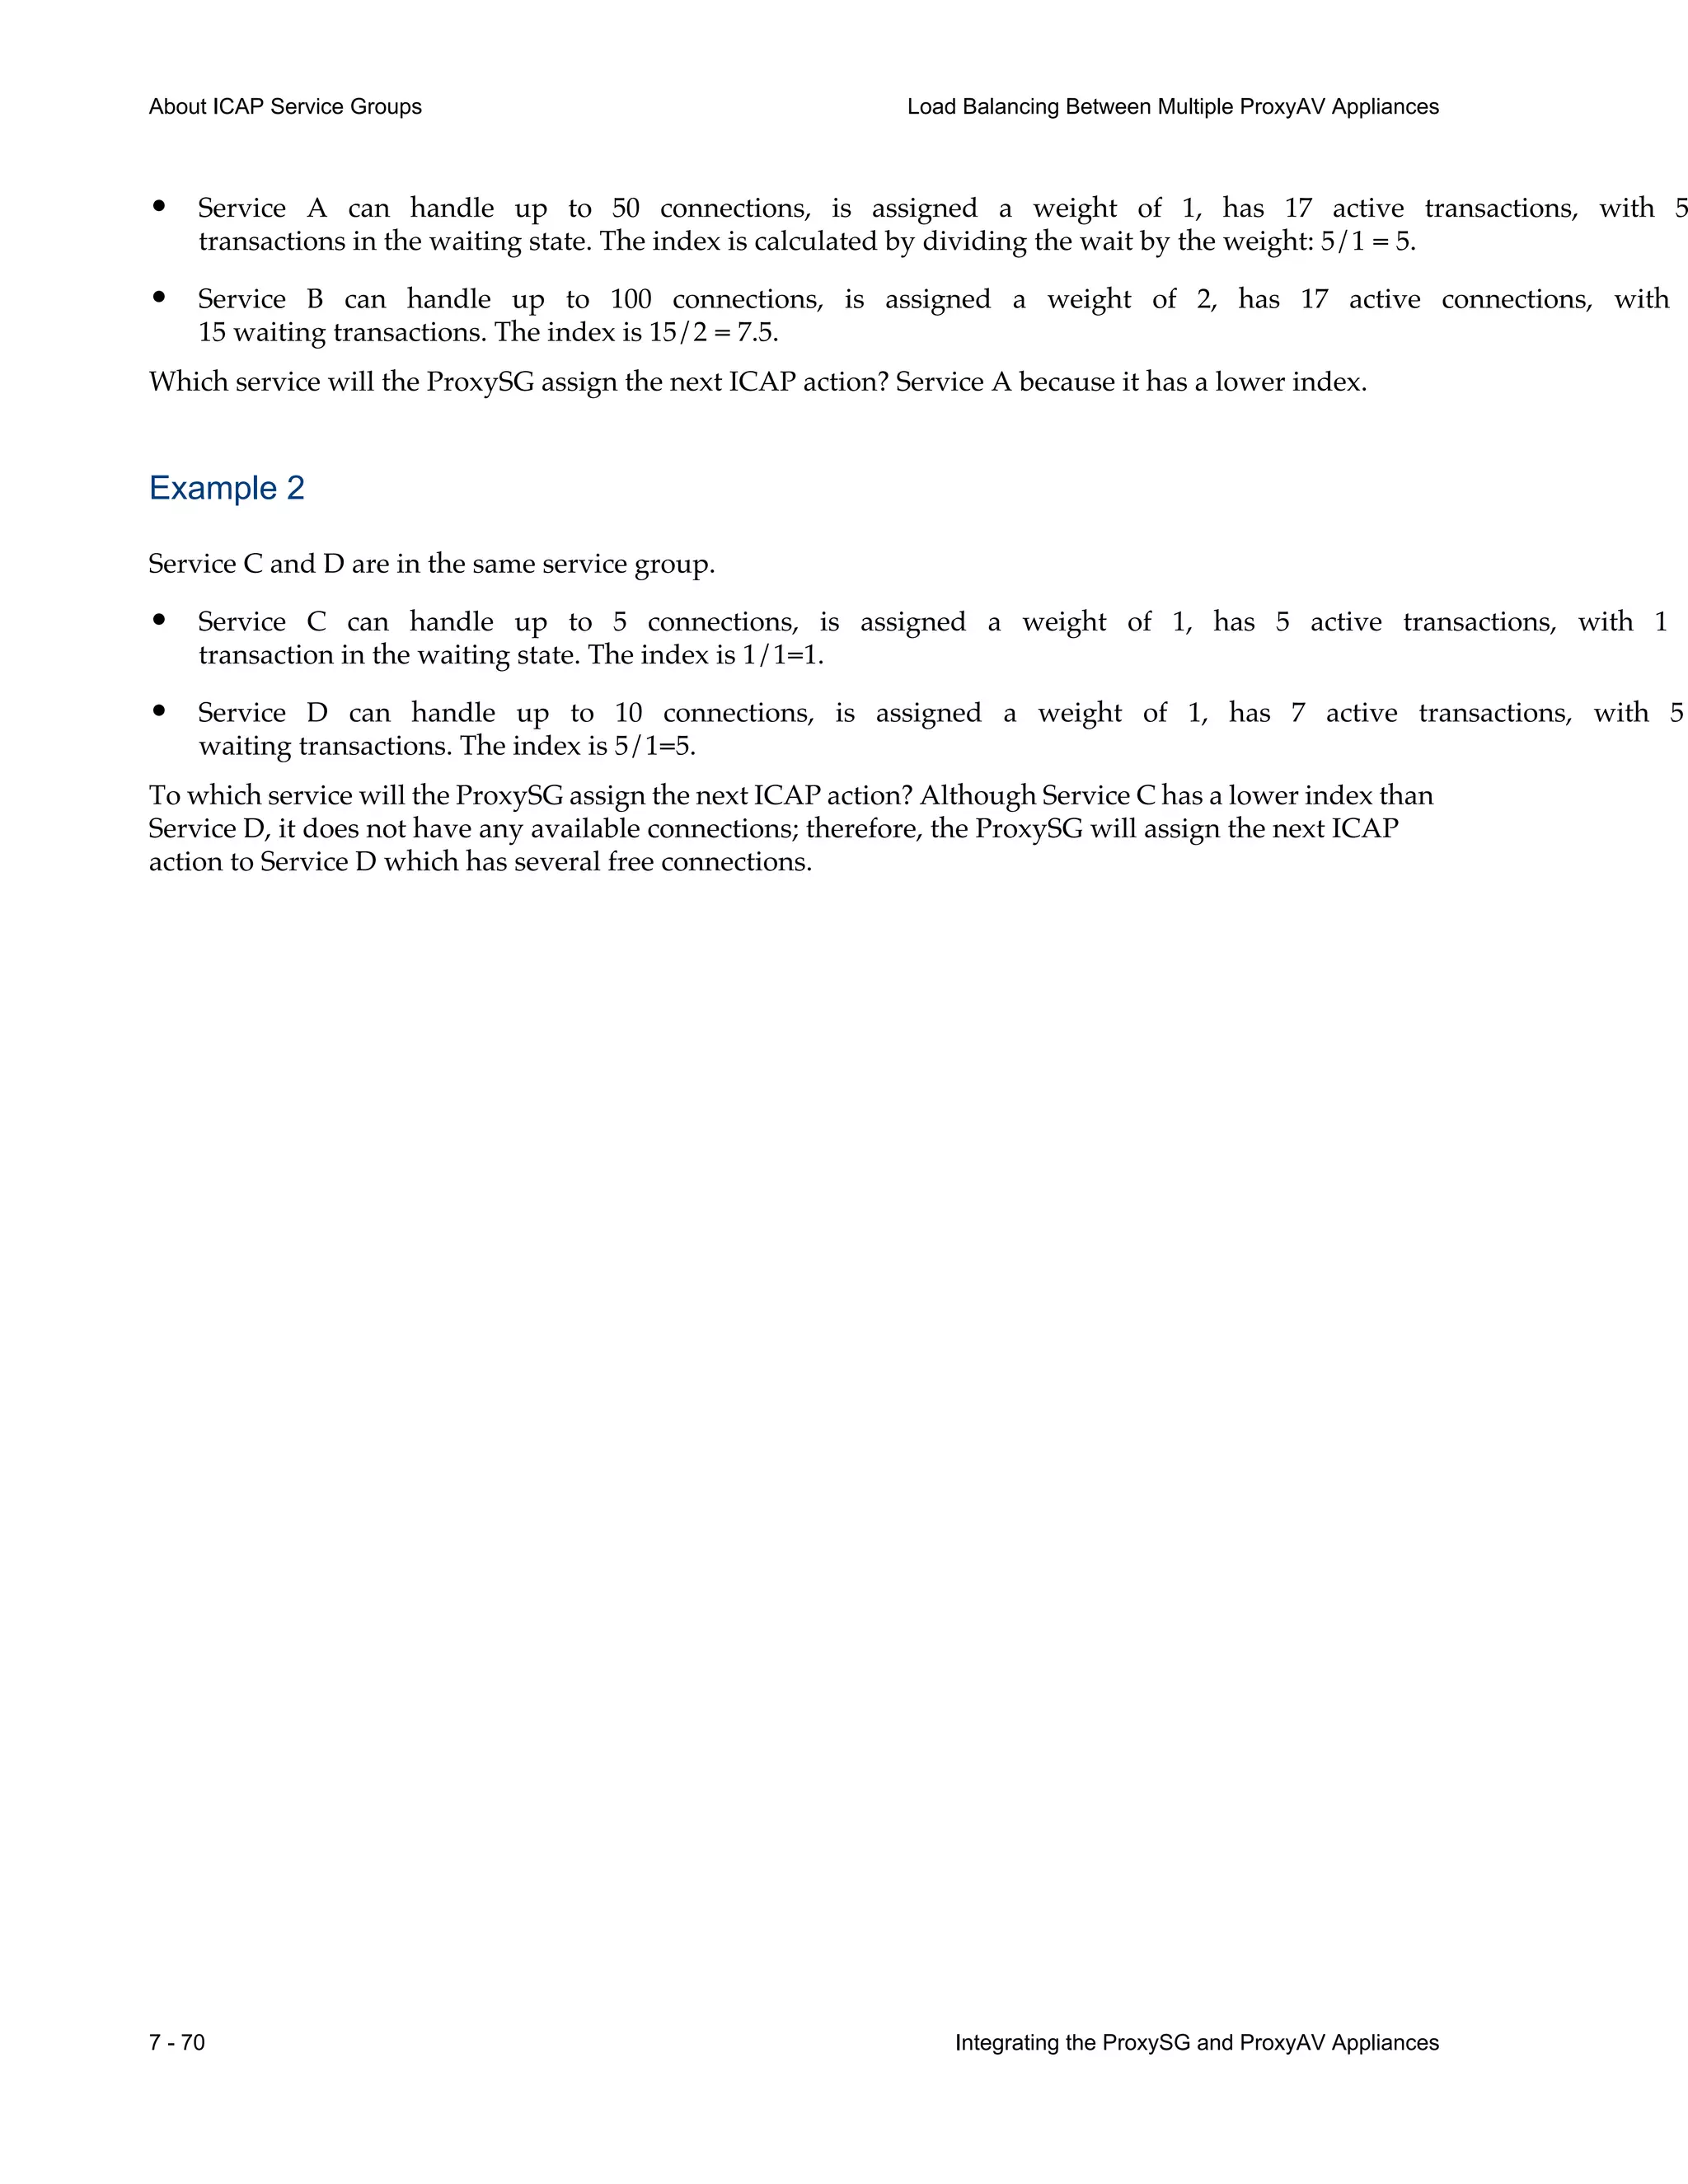
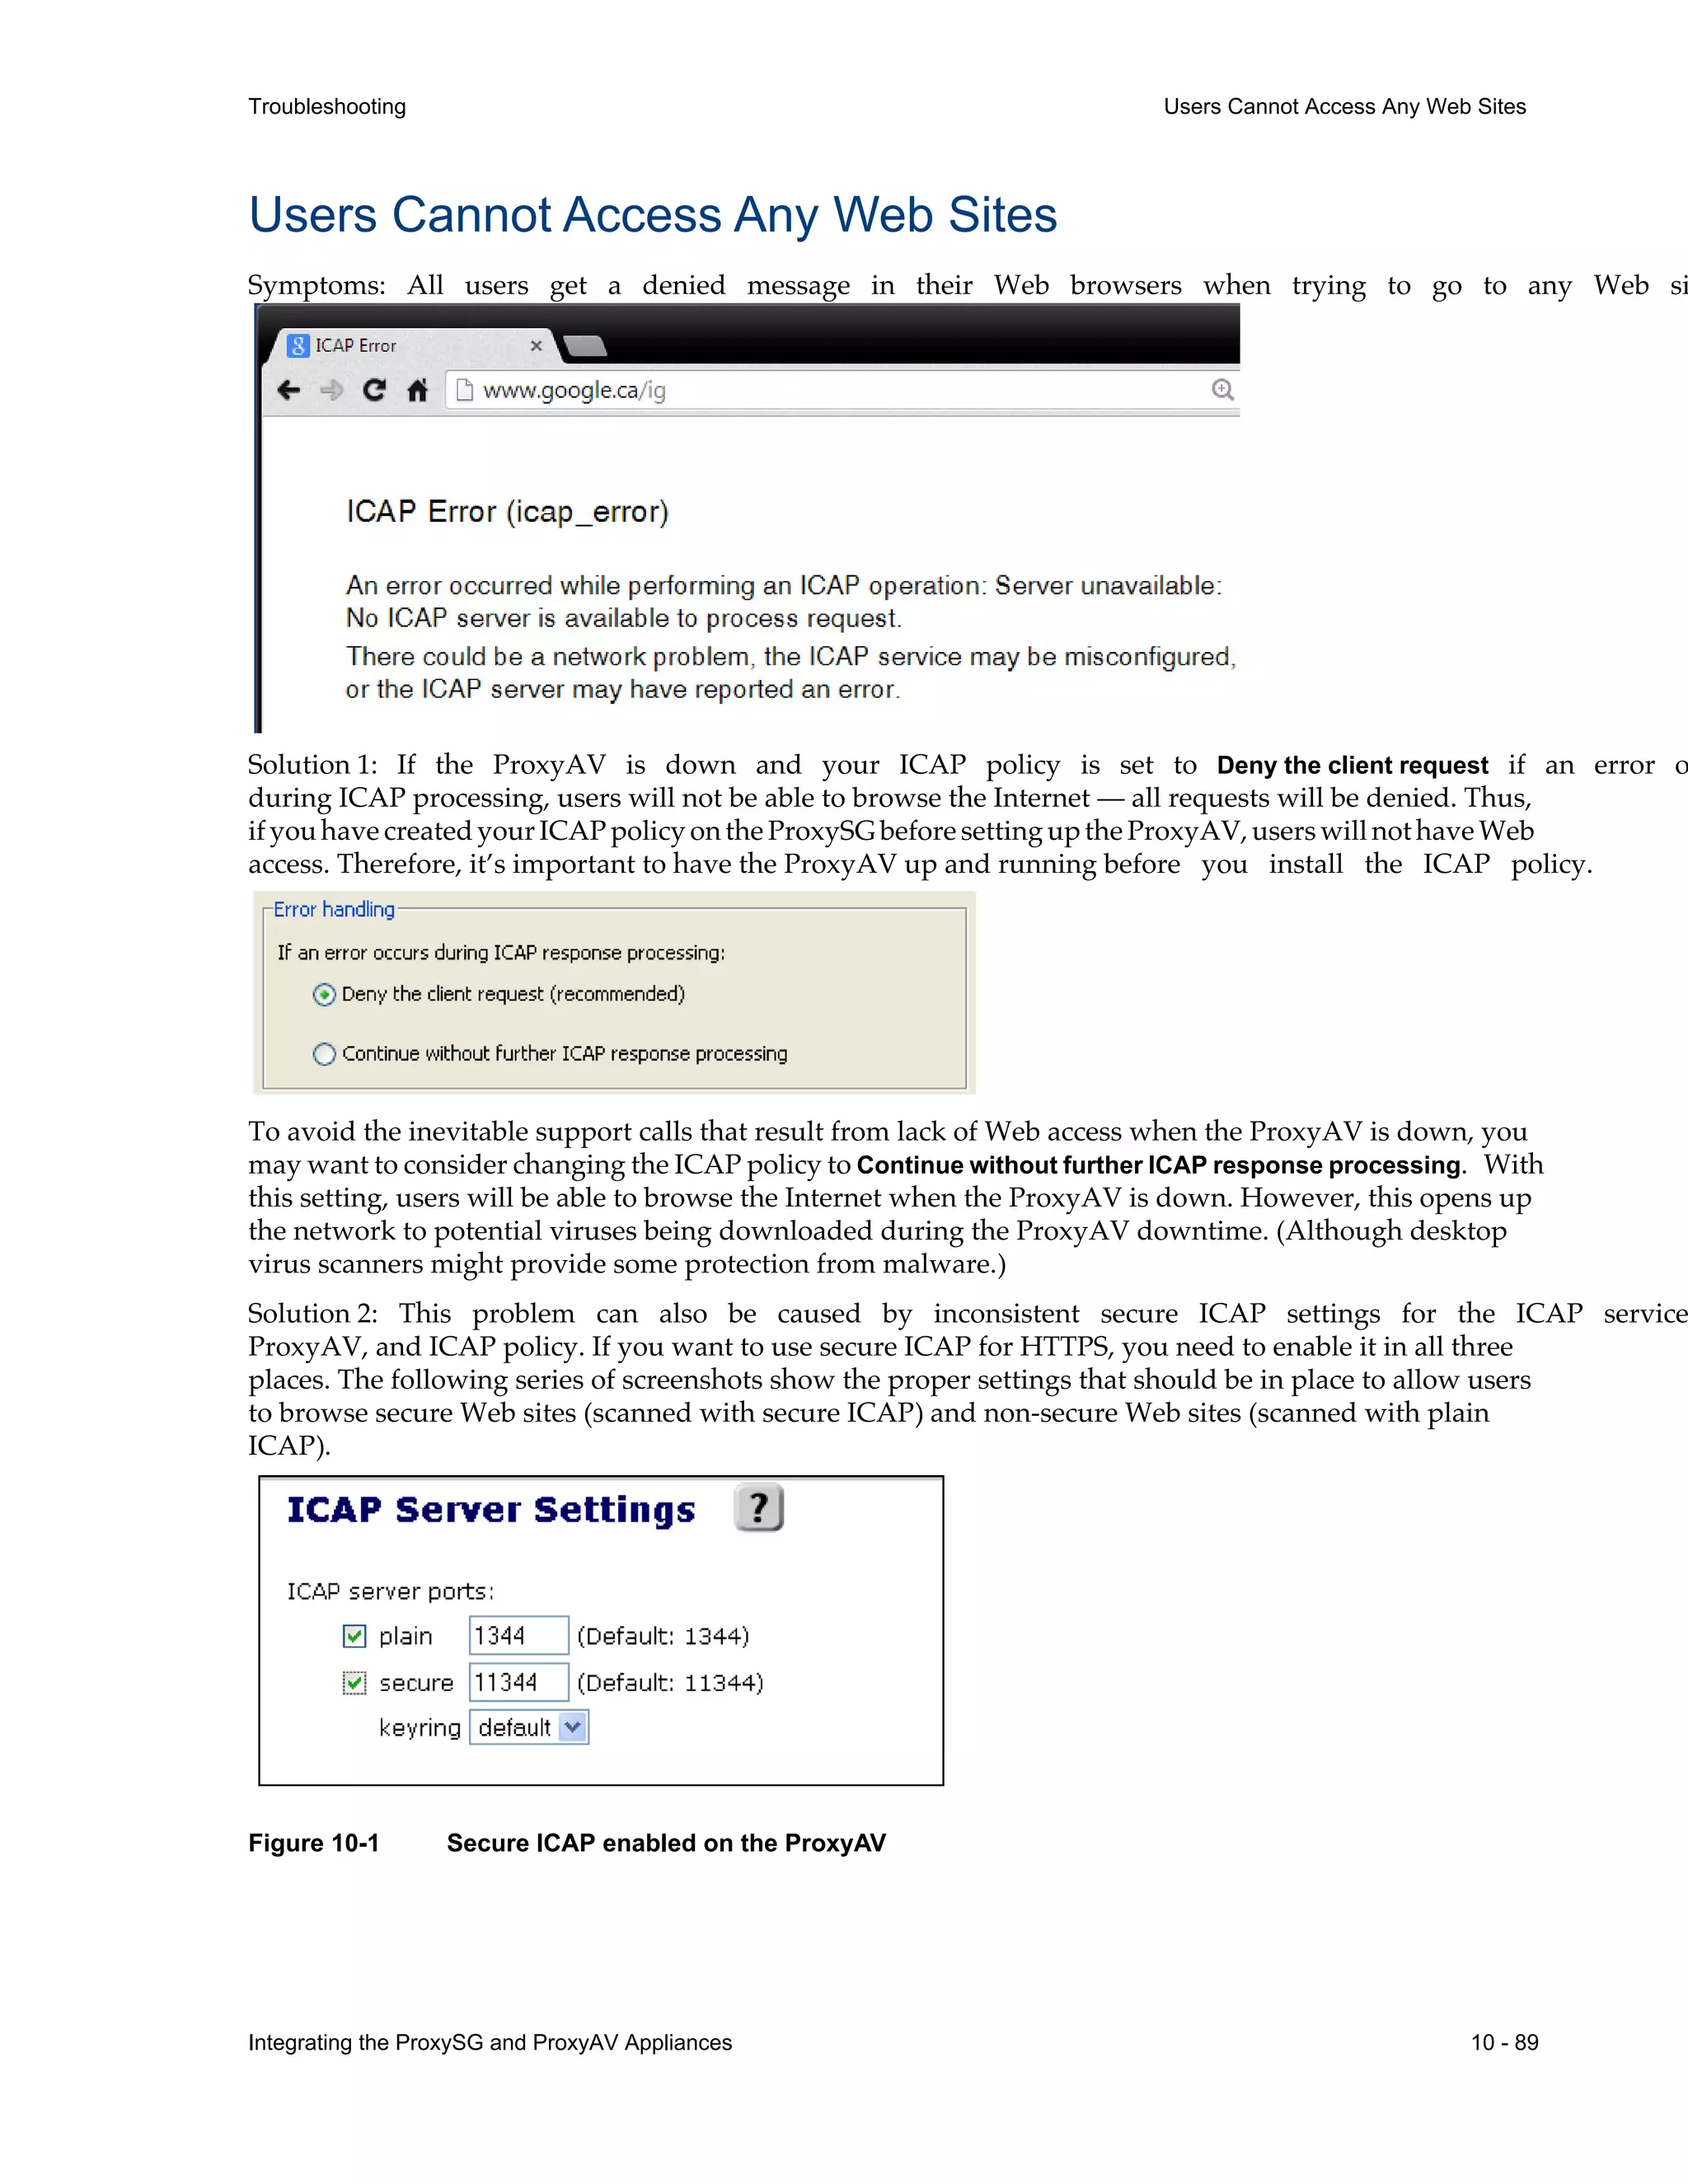
Configuration Best Practices Conserving Scanning Resources
request.header.User-Agent="RMA"
request.header.User-Agent="ultravox"
request.header.User-Agent="itunes"
request.header.User-Agent="forest"
request.header.User-Agent="Scottrader"
request.header.User-Agent="SVN"
end condition MisBehaving_Old_UserAgents
define condition HTTPv0.9_UserAgents
http.response.version=0.9 condition=MisBehaving_Old_UserAgents
end condition HTTPv0.9_UserAgents
define condition NO_or_LARGE_CONTENT_LENGTH
;note- the following line is correct- do NOT add .* between quotes
response.header.Content-Length=!"" ;true if Content-Length header is not present
response.header.Content-Length=!"^[0-9]{1,8}$" ;>99,999,999
end condition NO_or_LARGE_CONTENT_LENGTH
define condition Bad_response_for_ICAP
condition=NO_or_LARGE_CONTENT_LENGTH
condition=HTTPv0.9_UserAgents
url.domain=//streamerapi.finance.yahoo.com ;
end condition Bad_response_for_ICAP
define condition Not_ICAP_response
;note- the following line is correct- do NOT add .* between quotes
response.x_header.X-Virus-ID=!"" ;true if X-Virus-ID header is not present
end condition Not_ICAP_response
define condition ICAP_Mirror
;Negate ICAP service only if the OCS response is undesirable
condition=Bad_response_for_ICAP condition=Not_ICAP_response
end condition ICAP_Mirror
;--------------END ICAP Best Practices CPL](https://image.slidesharecdn.com/proxysgproxyavintegrationguide-230927114434-be9e24d9/75/ProxySG_ProxyAV_Integration_Guide-pdf-89-2048.jpg)
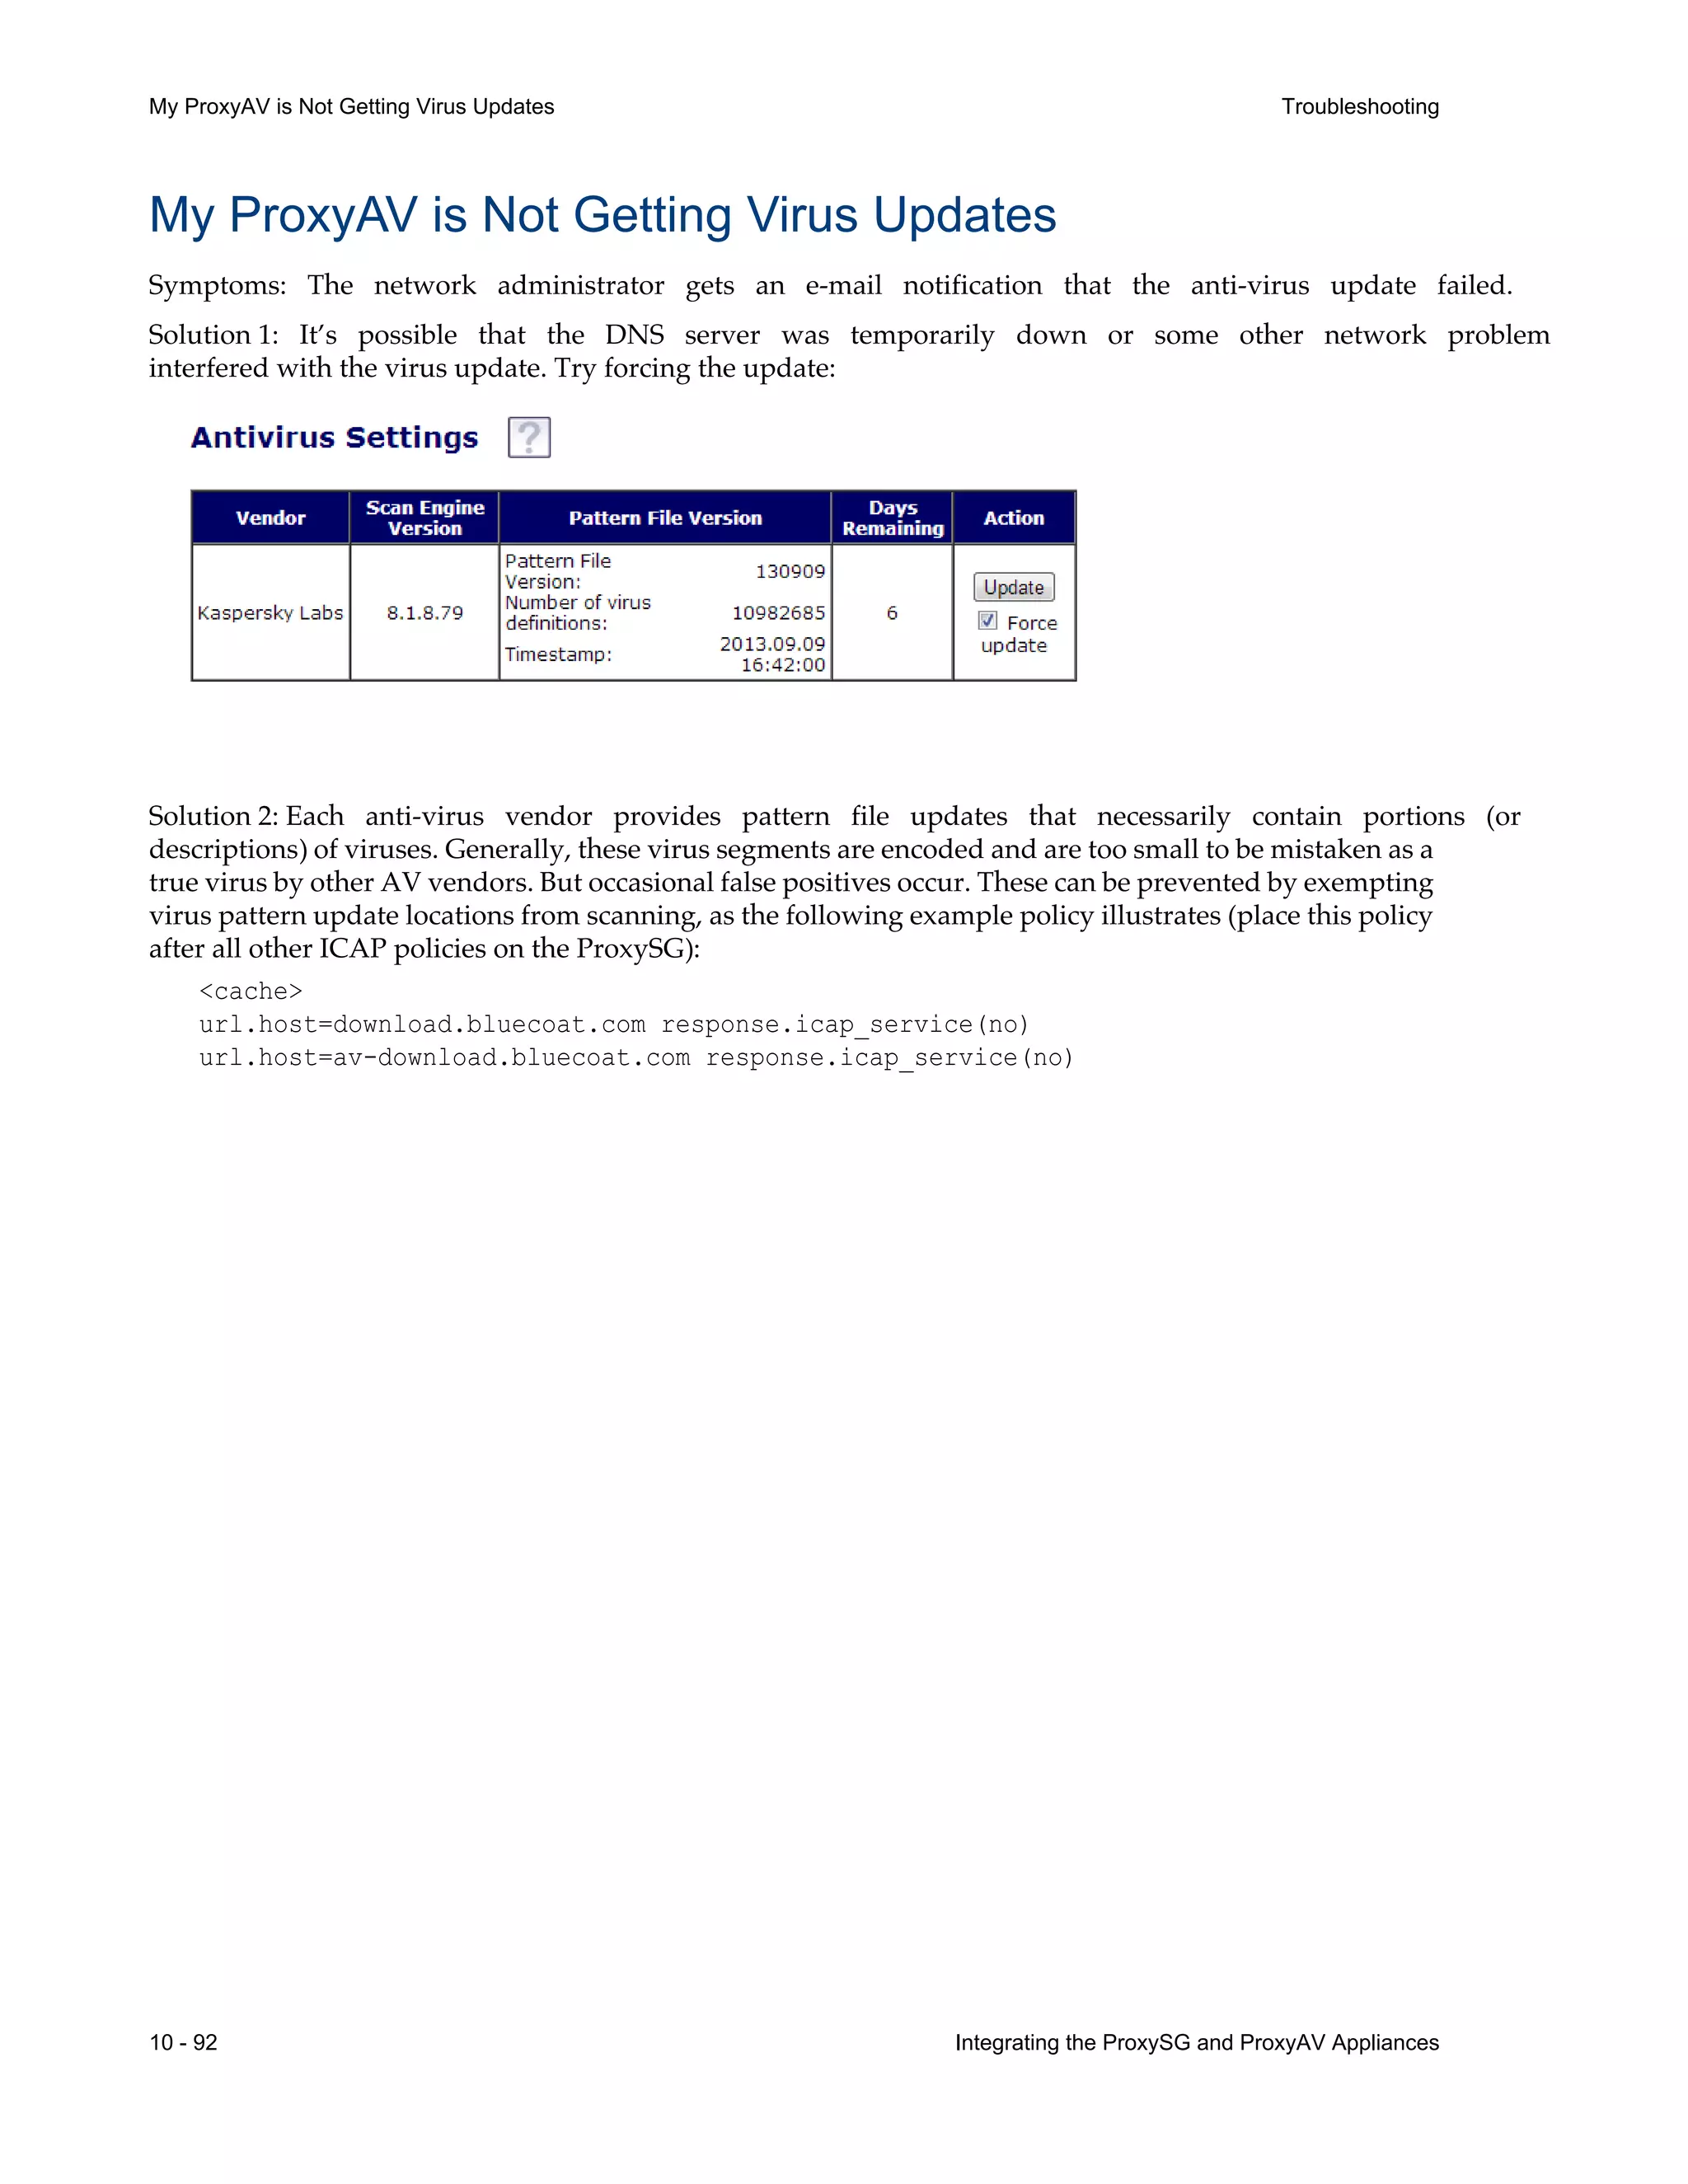

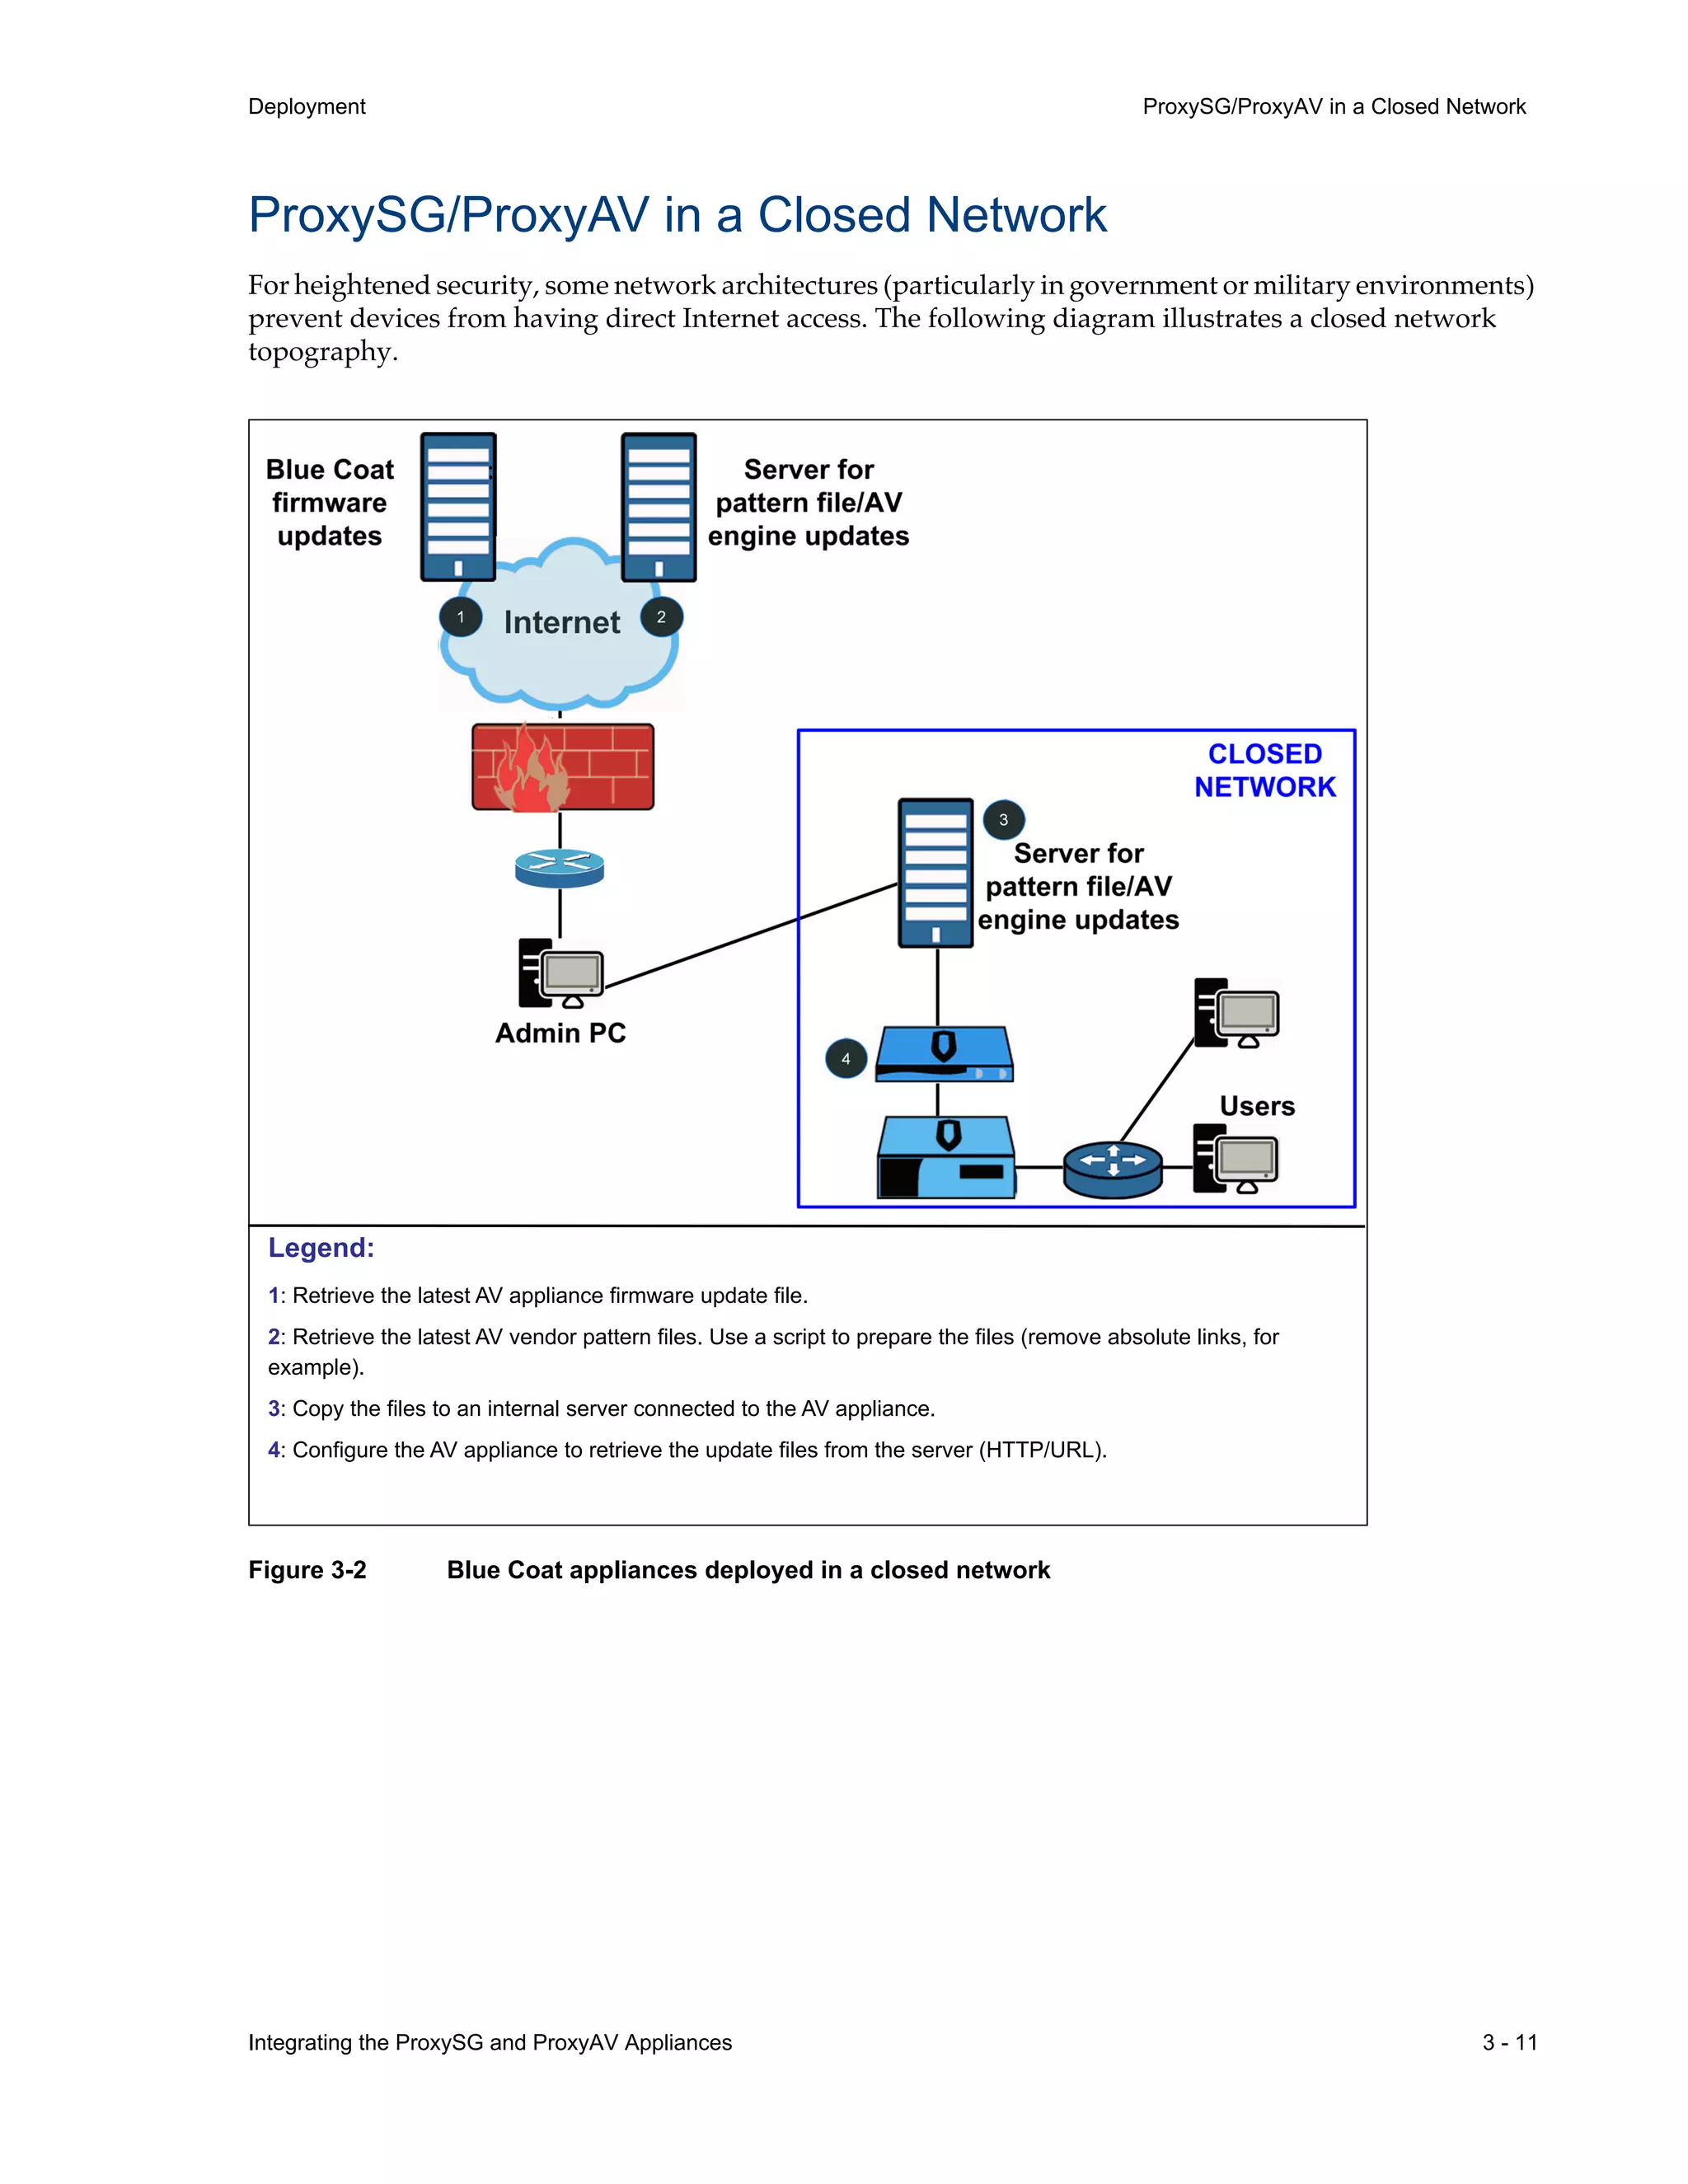
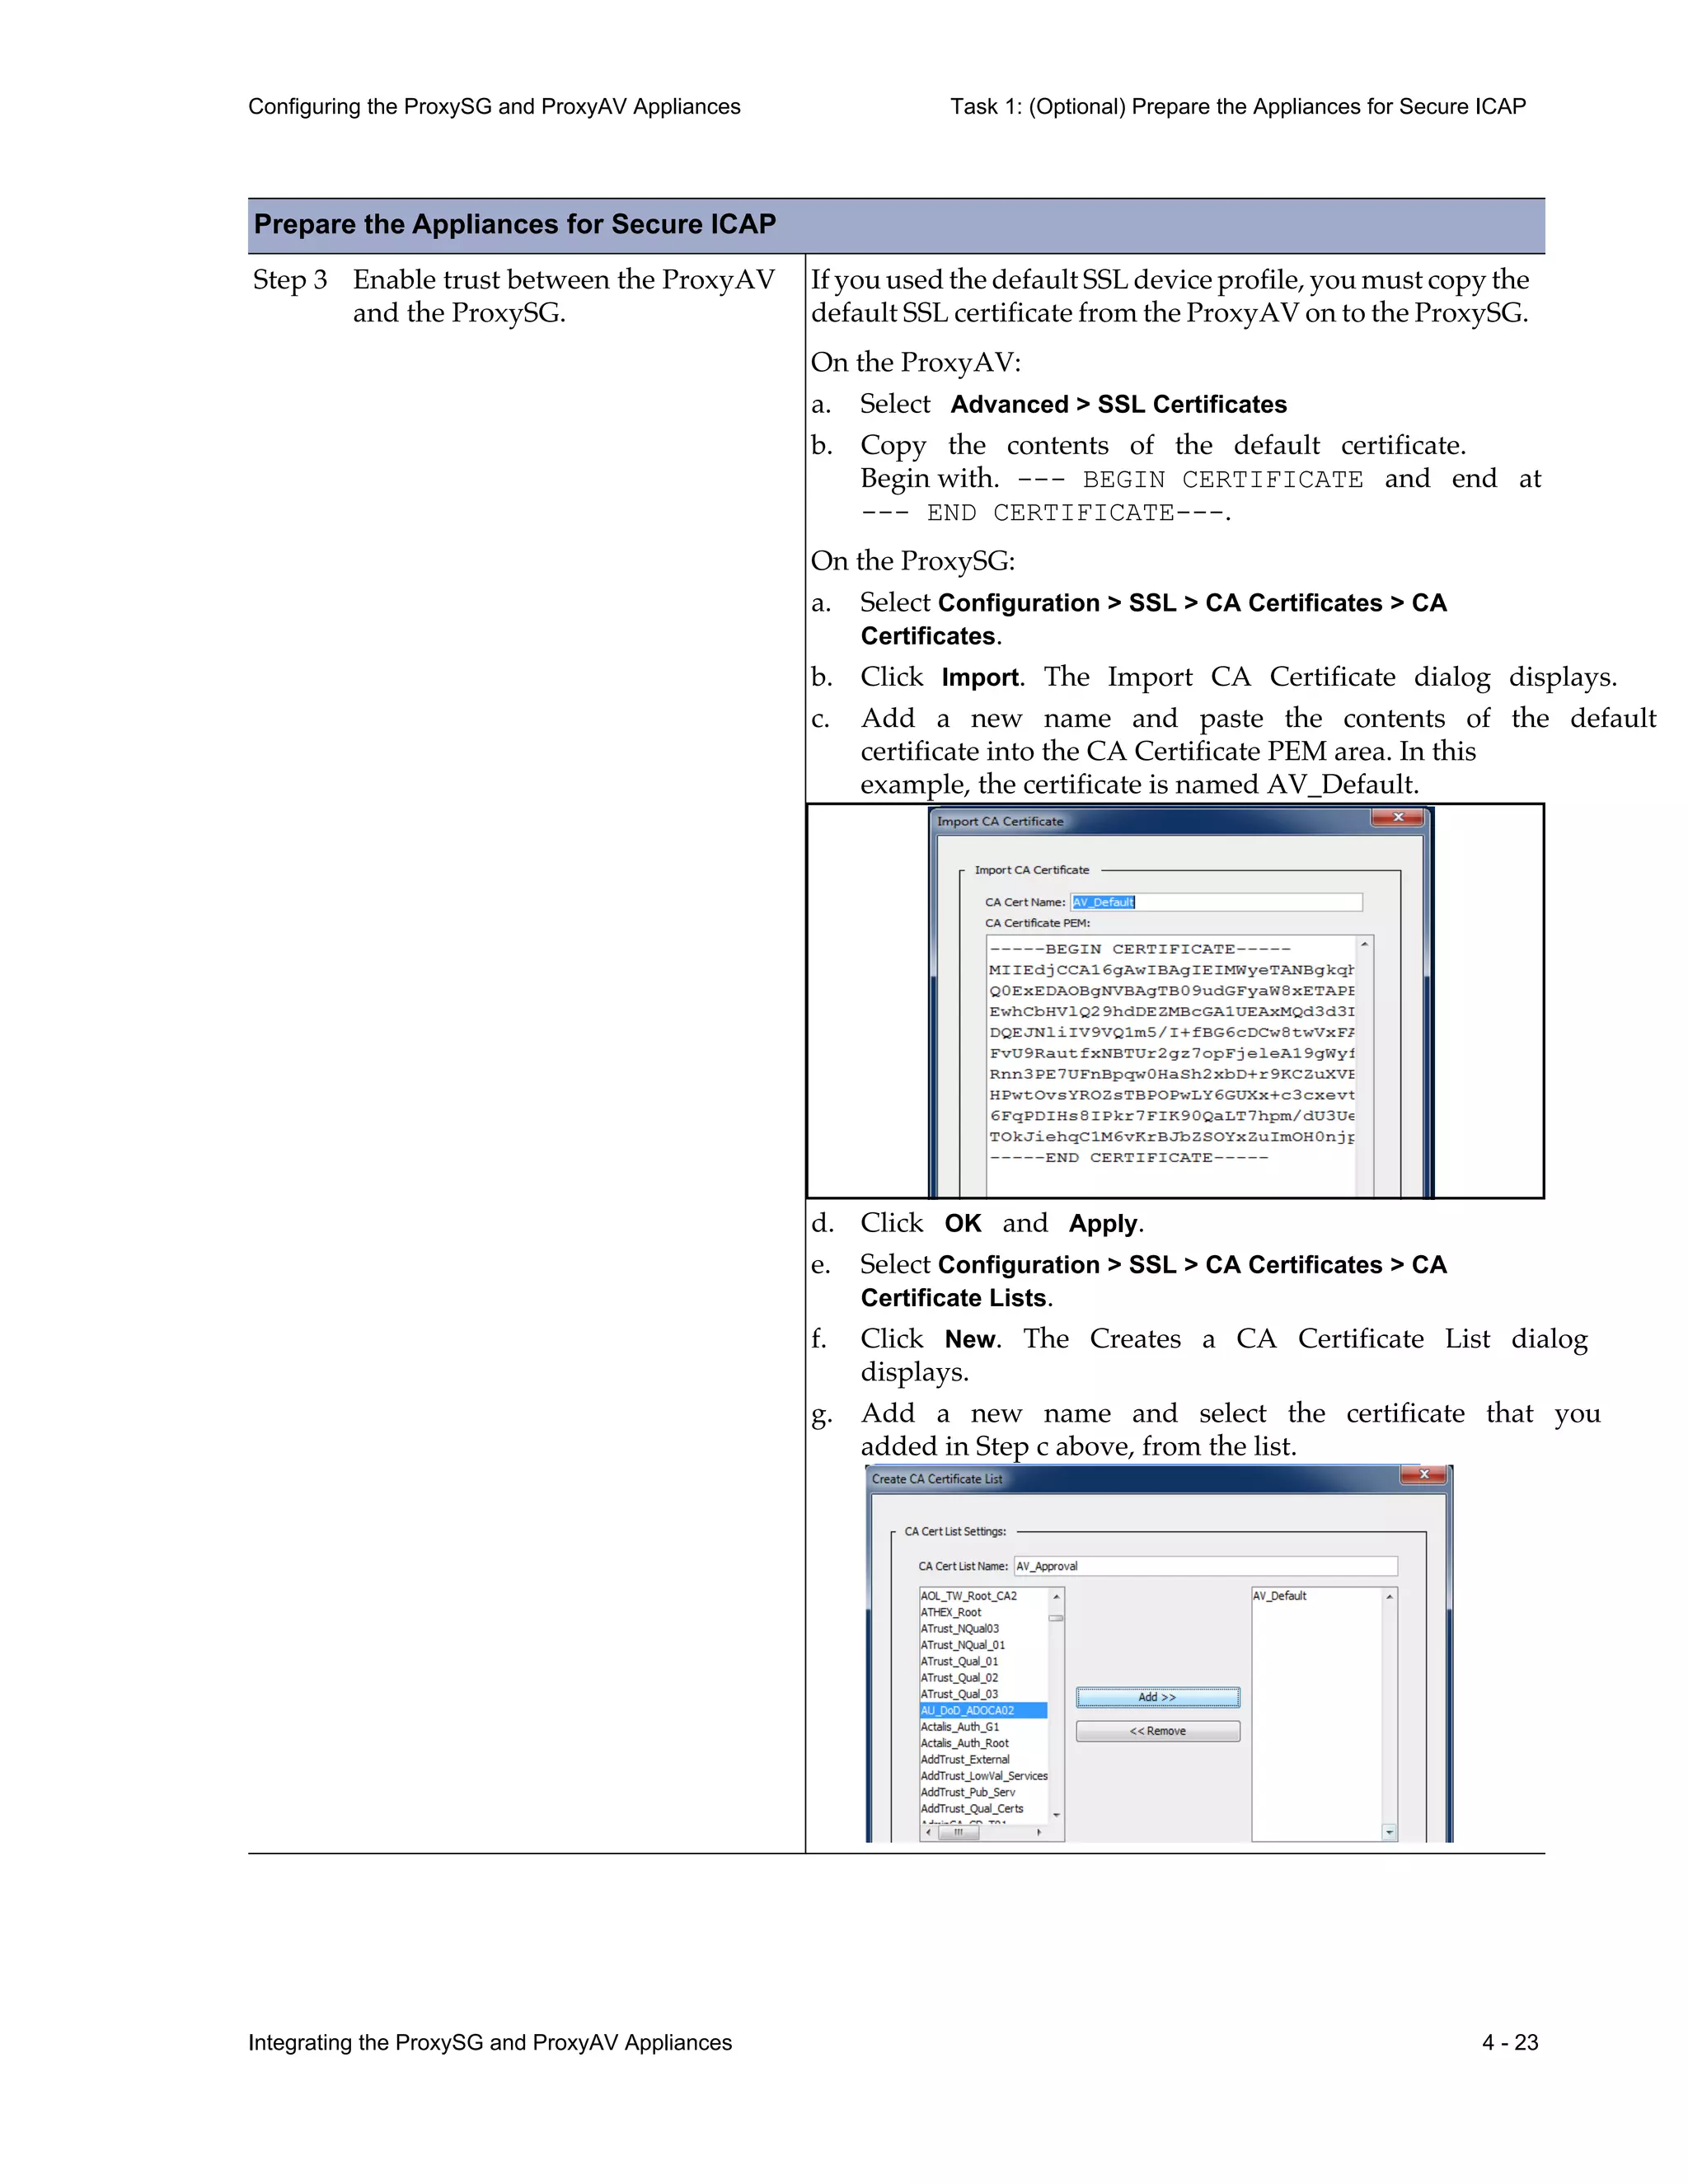
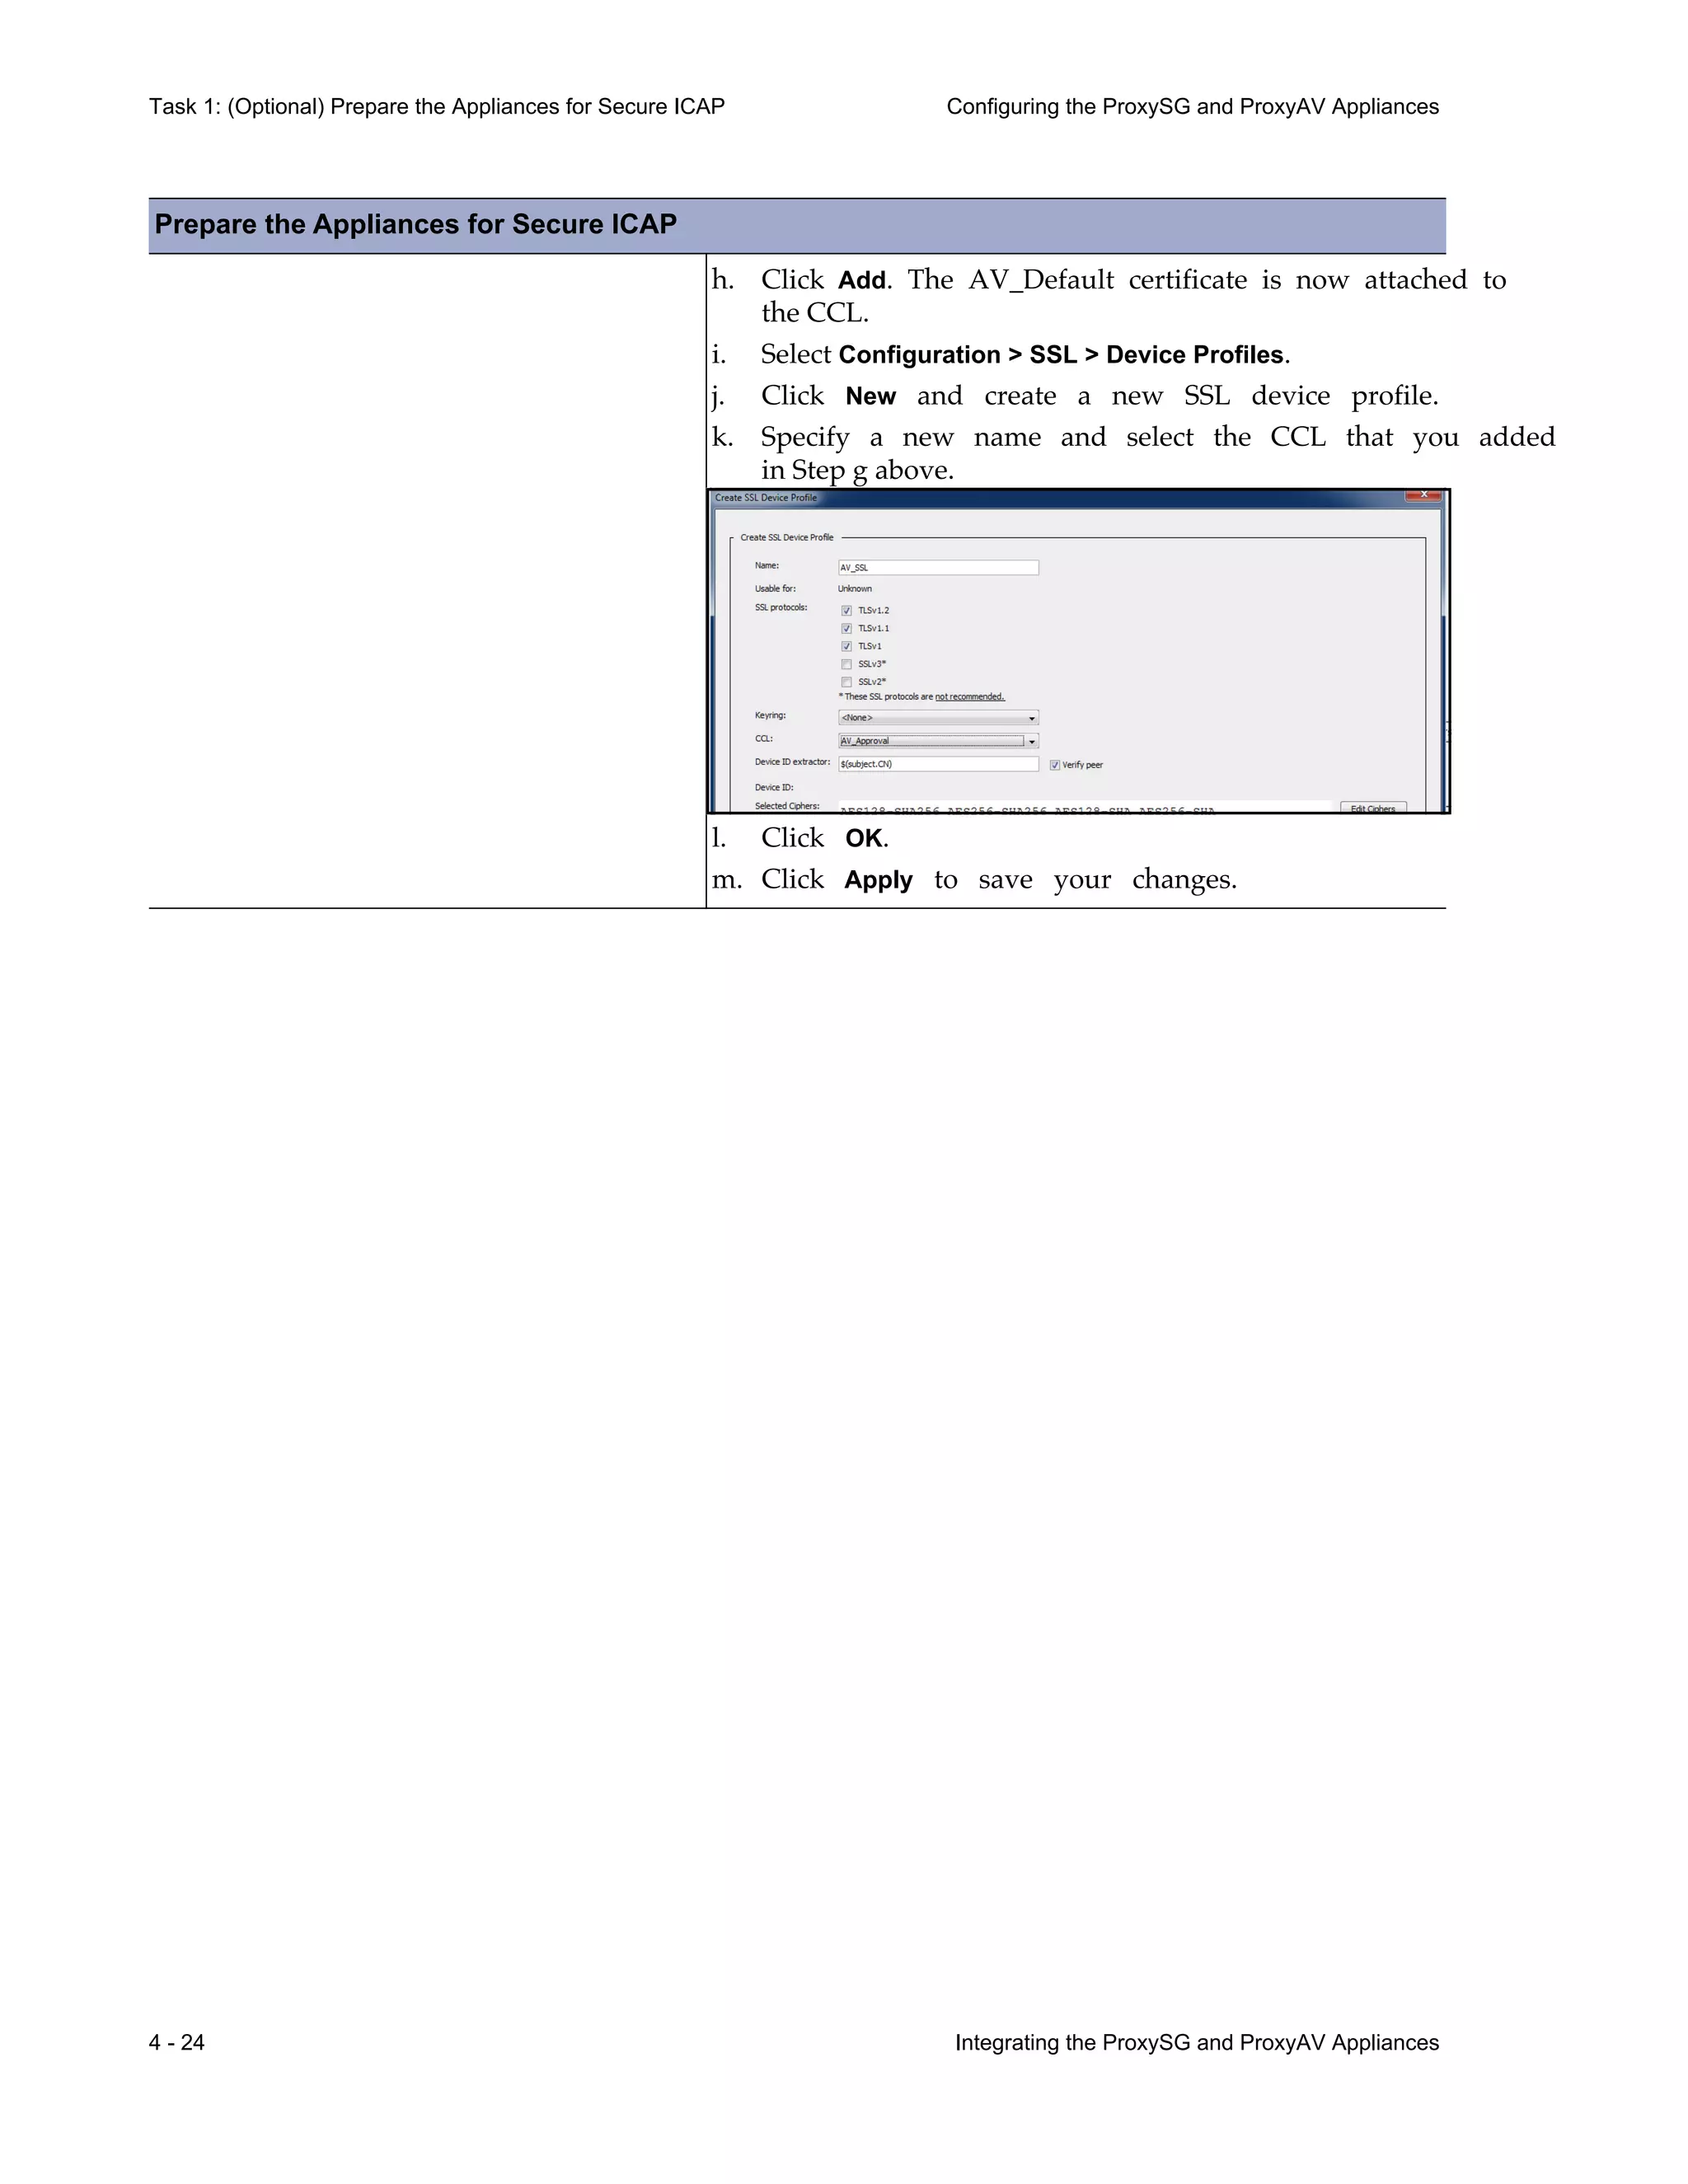
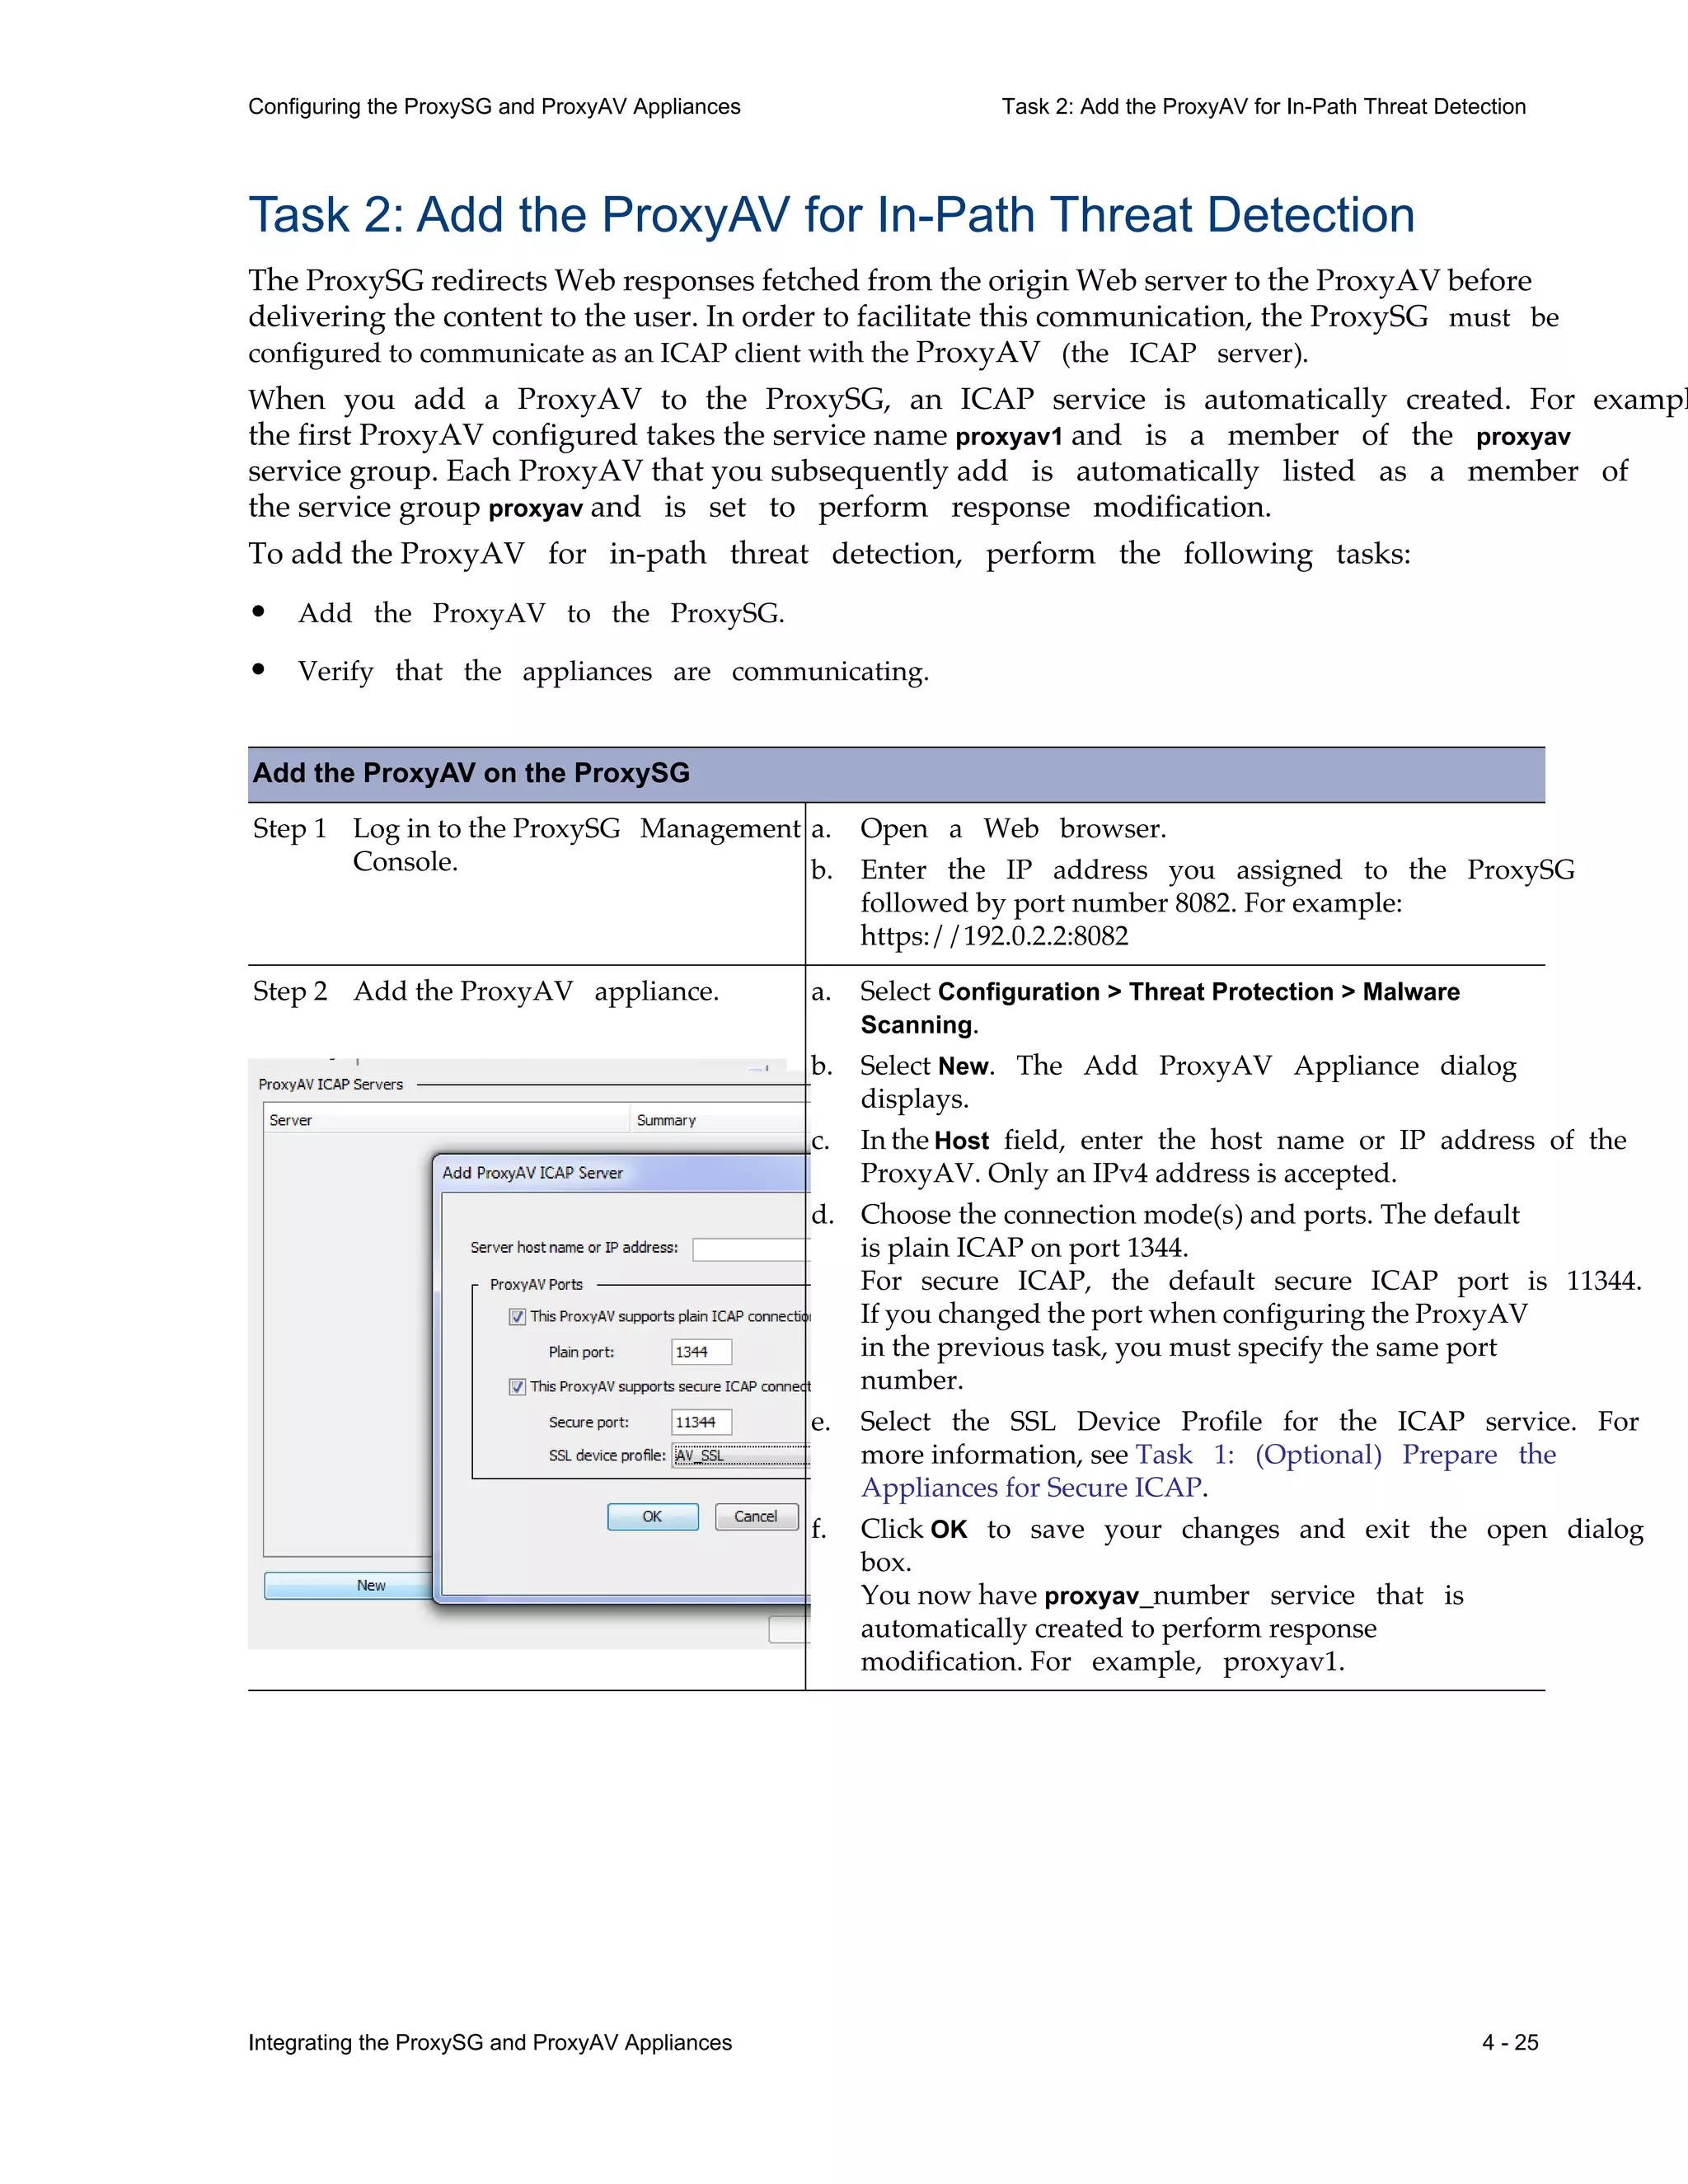
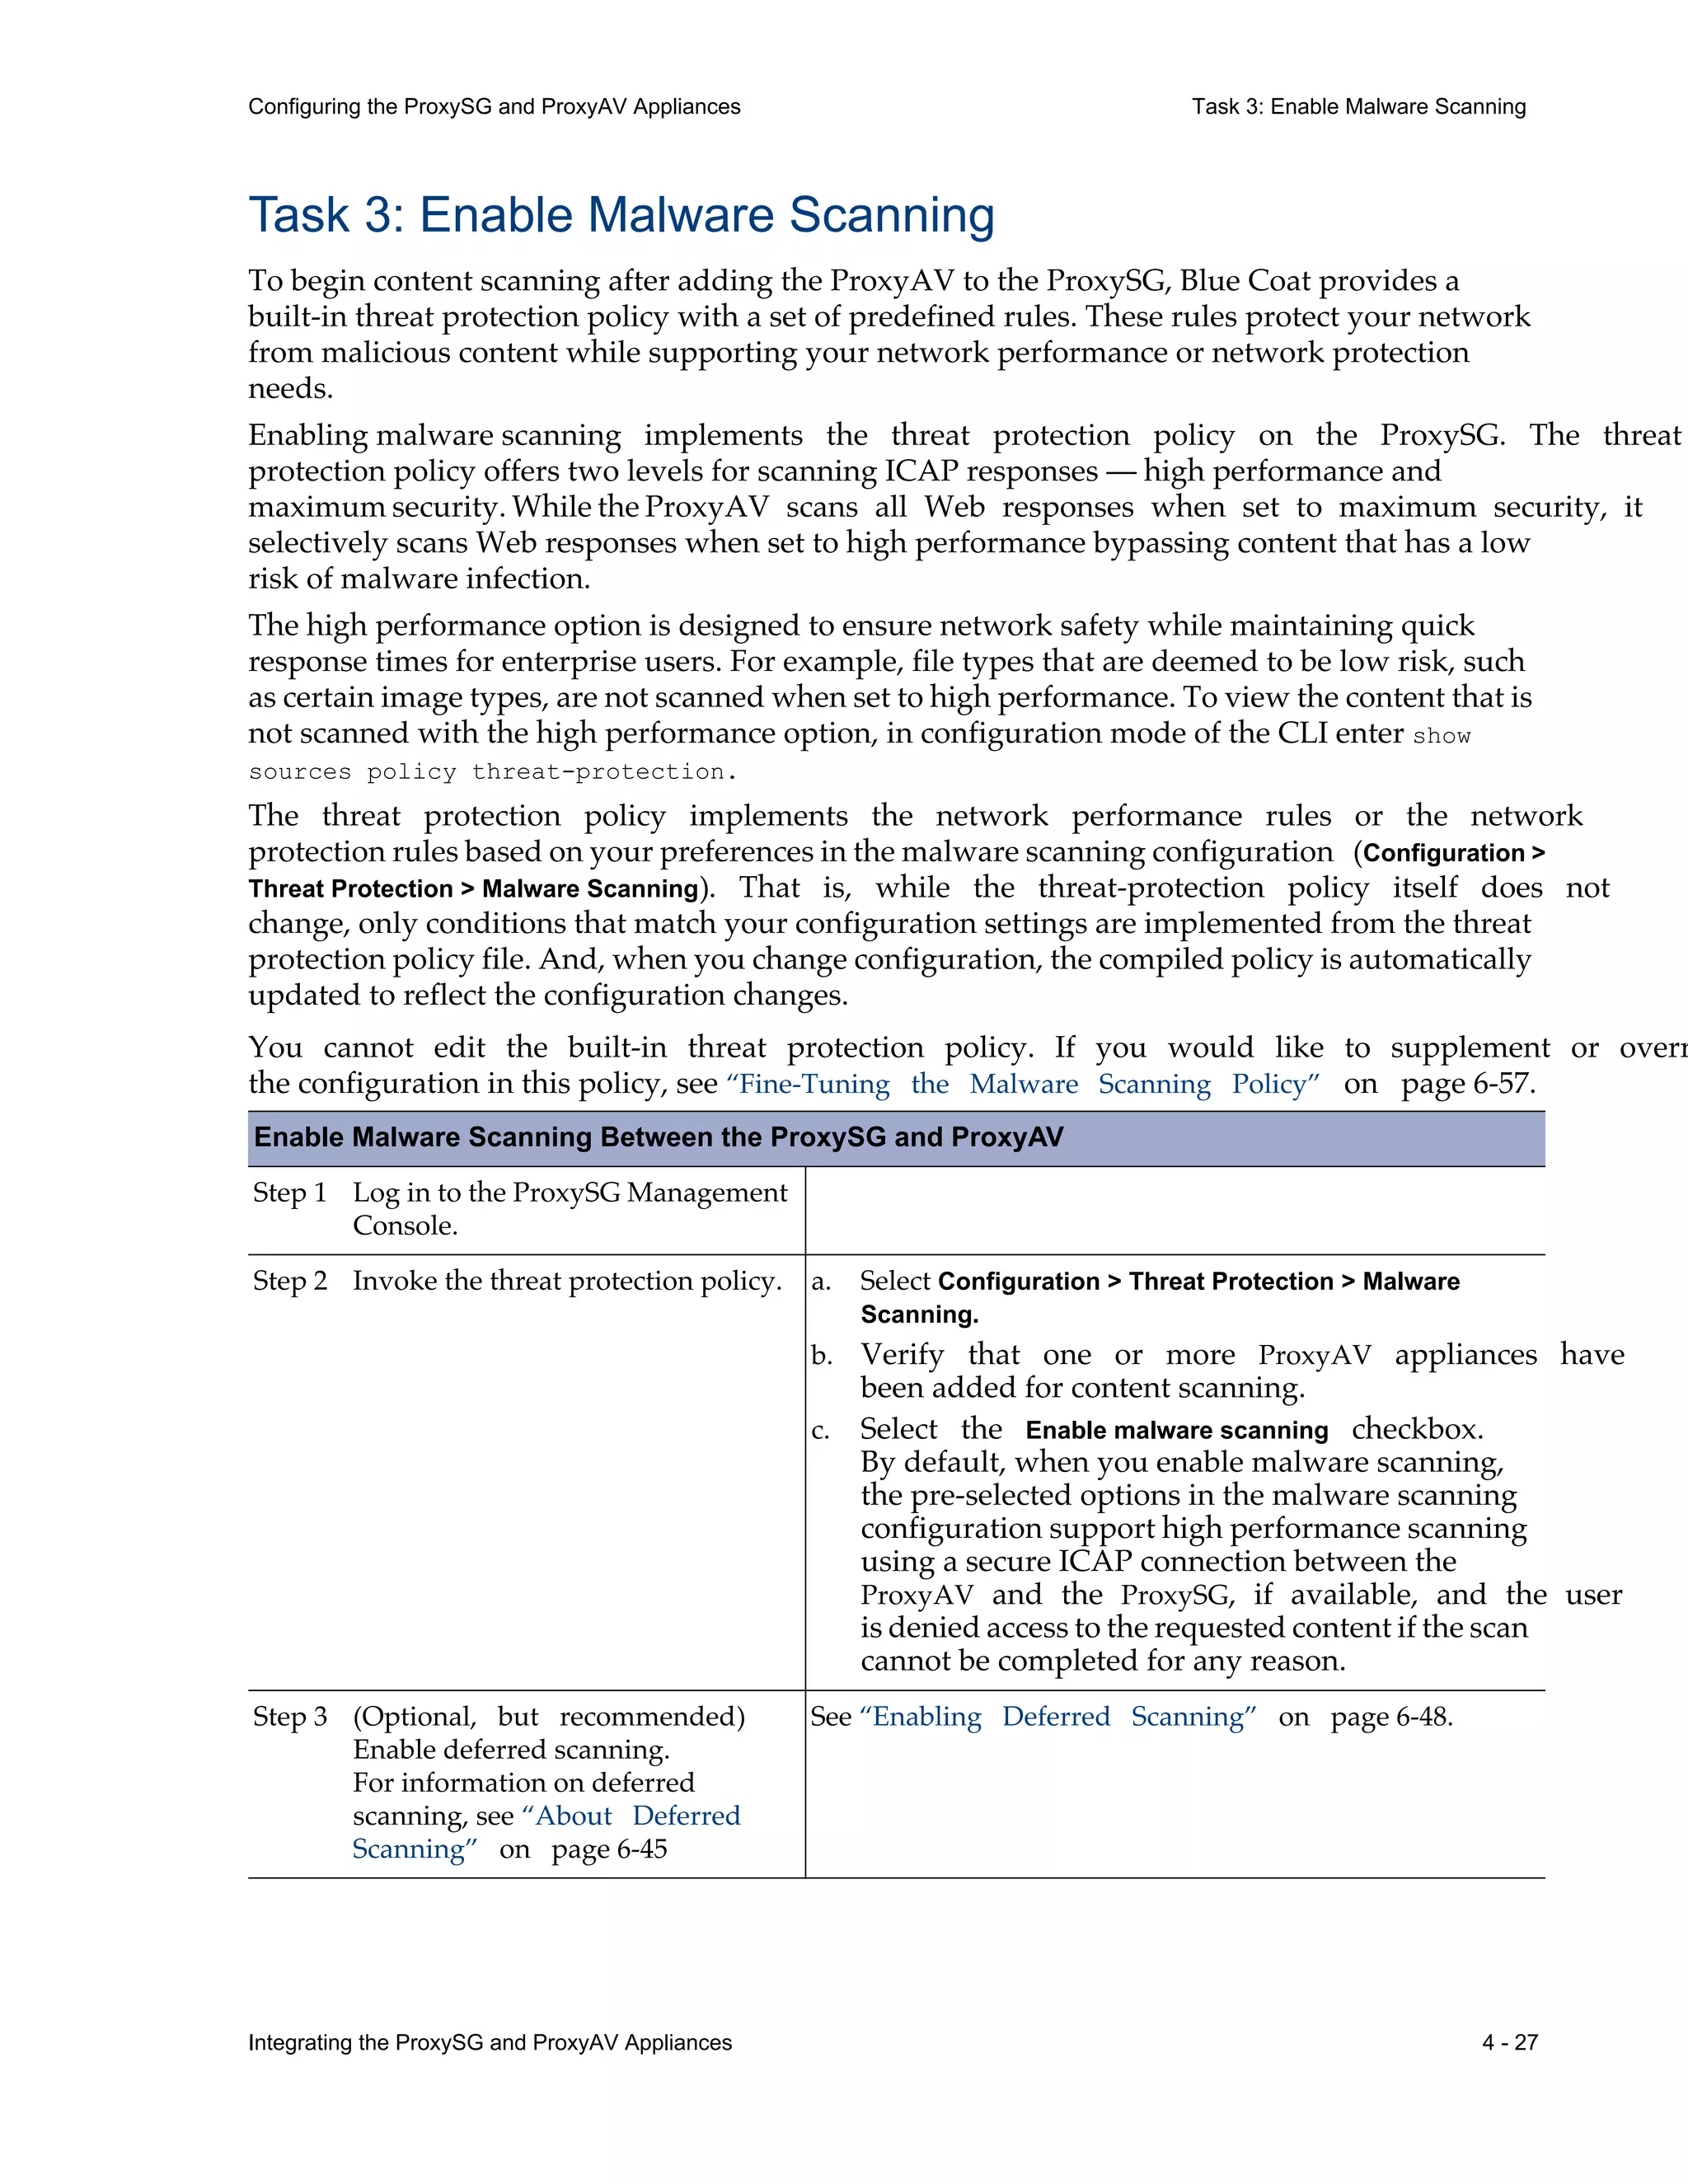
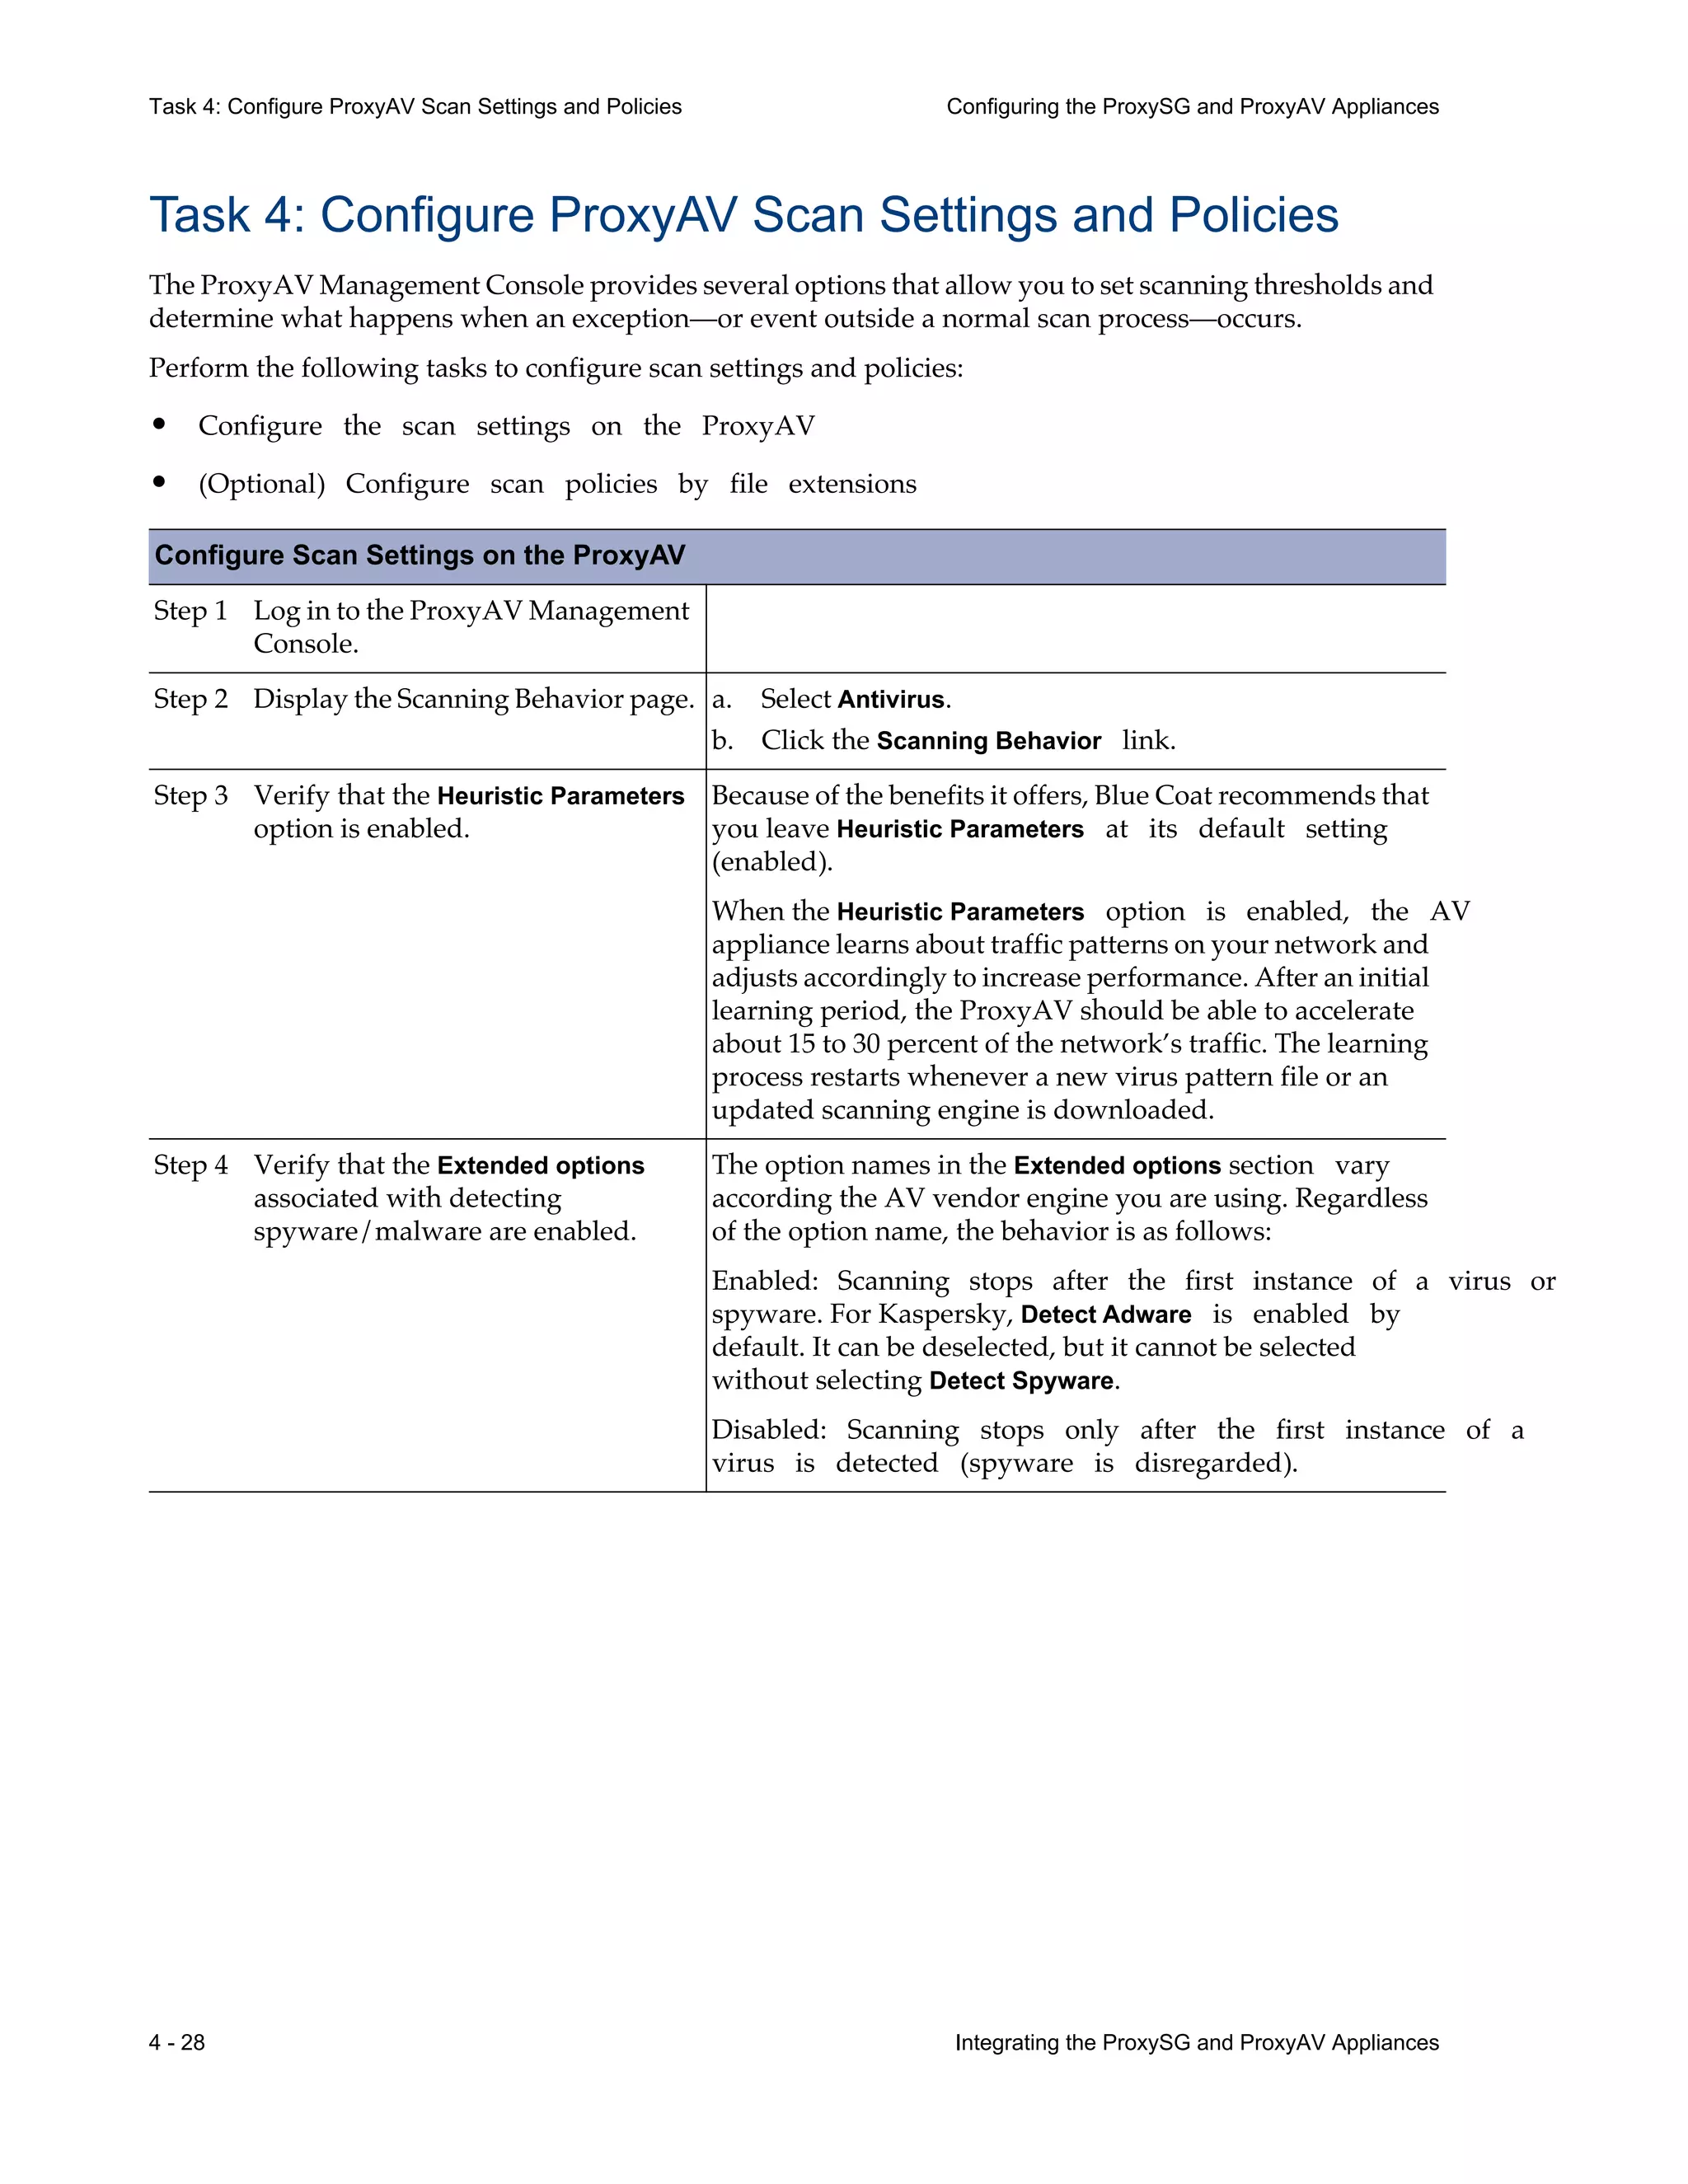
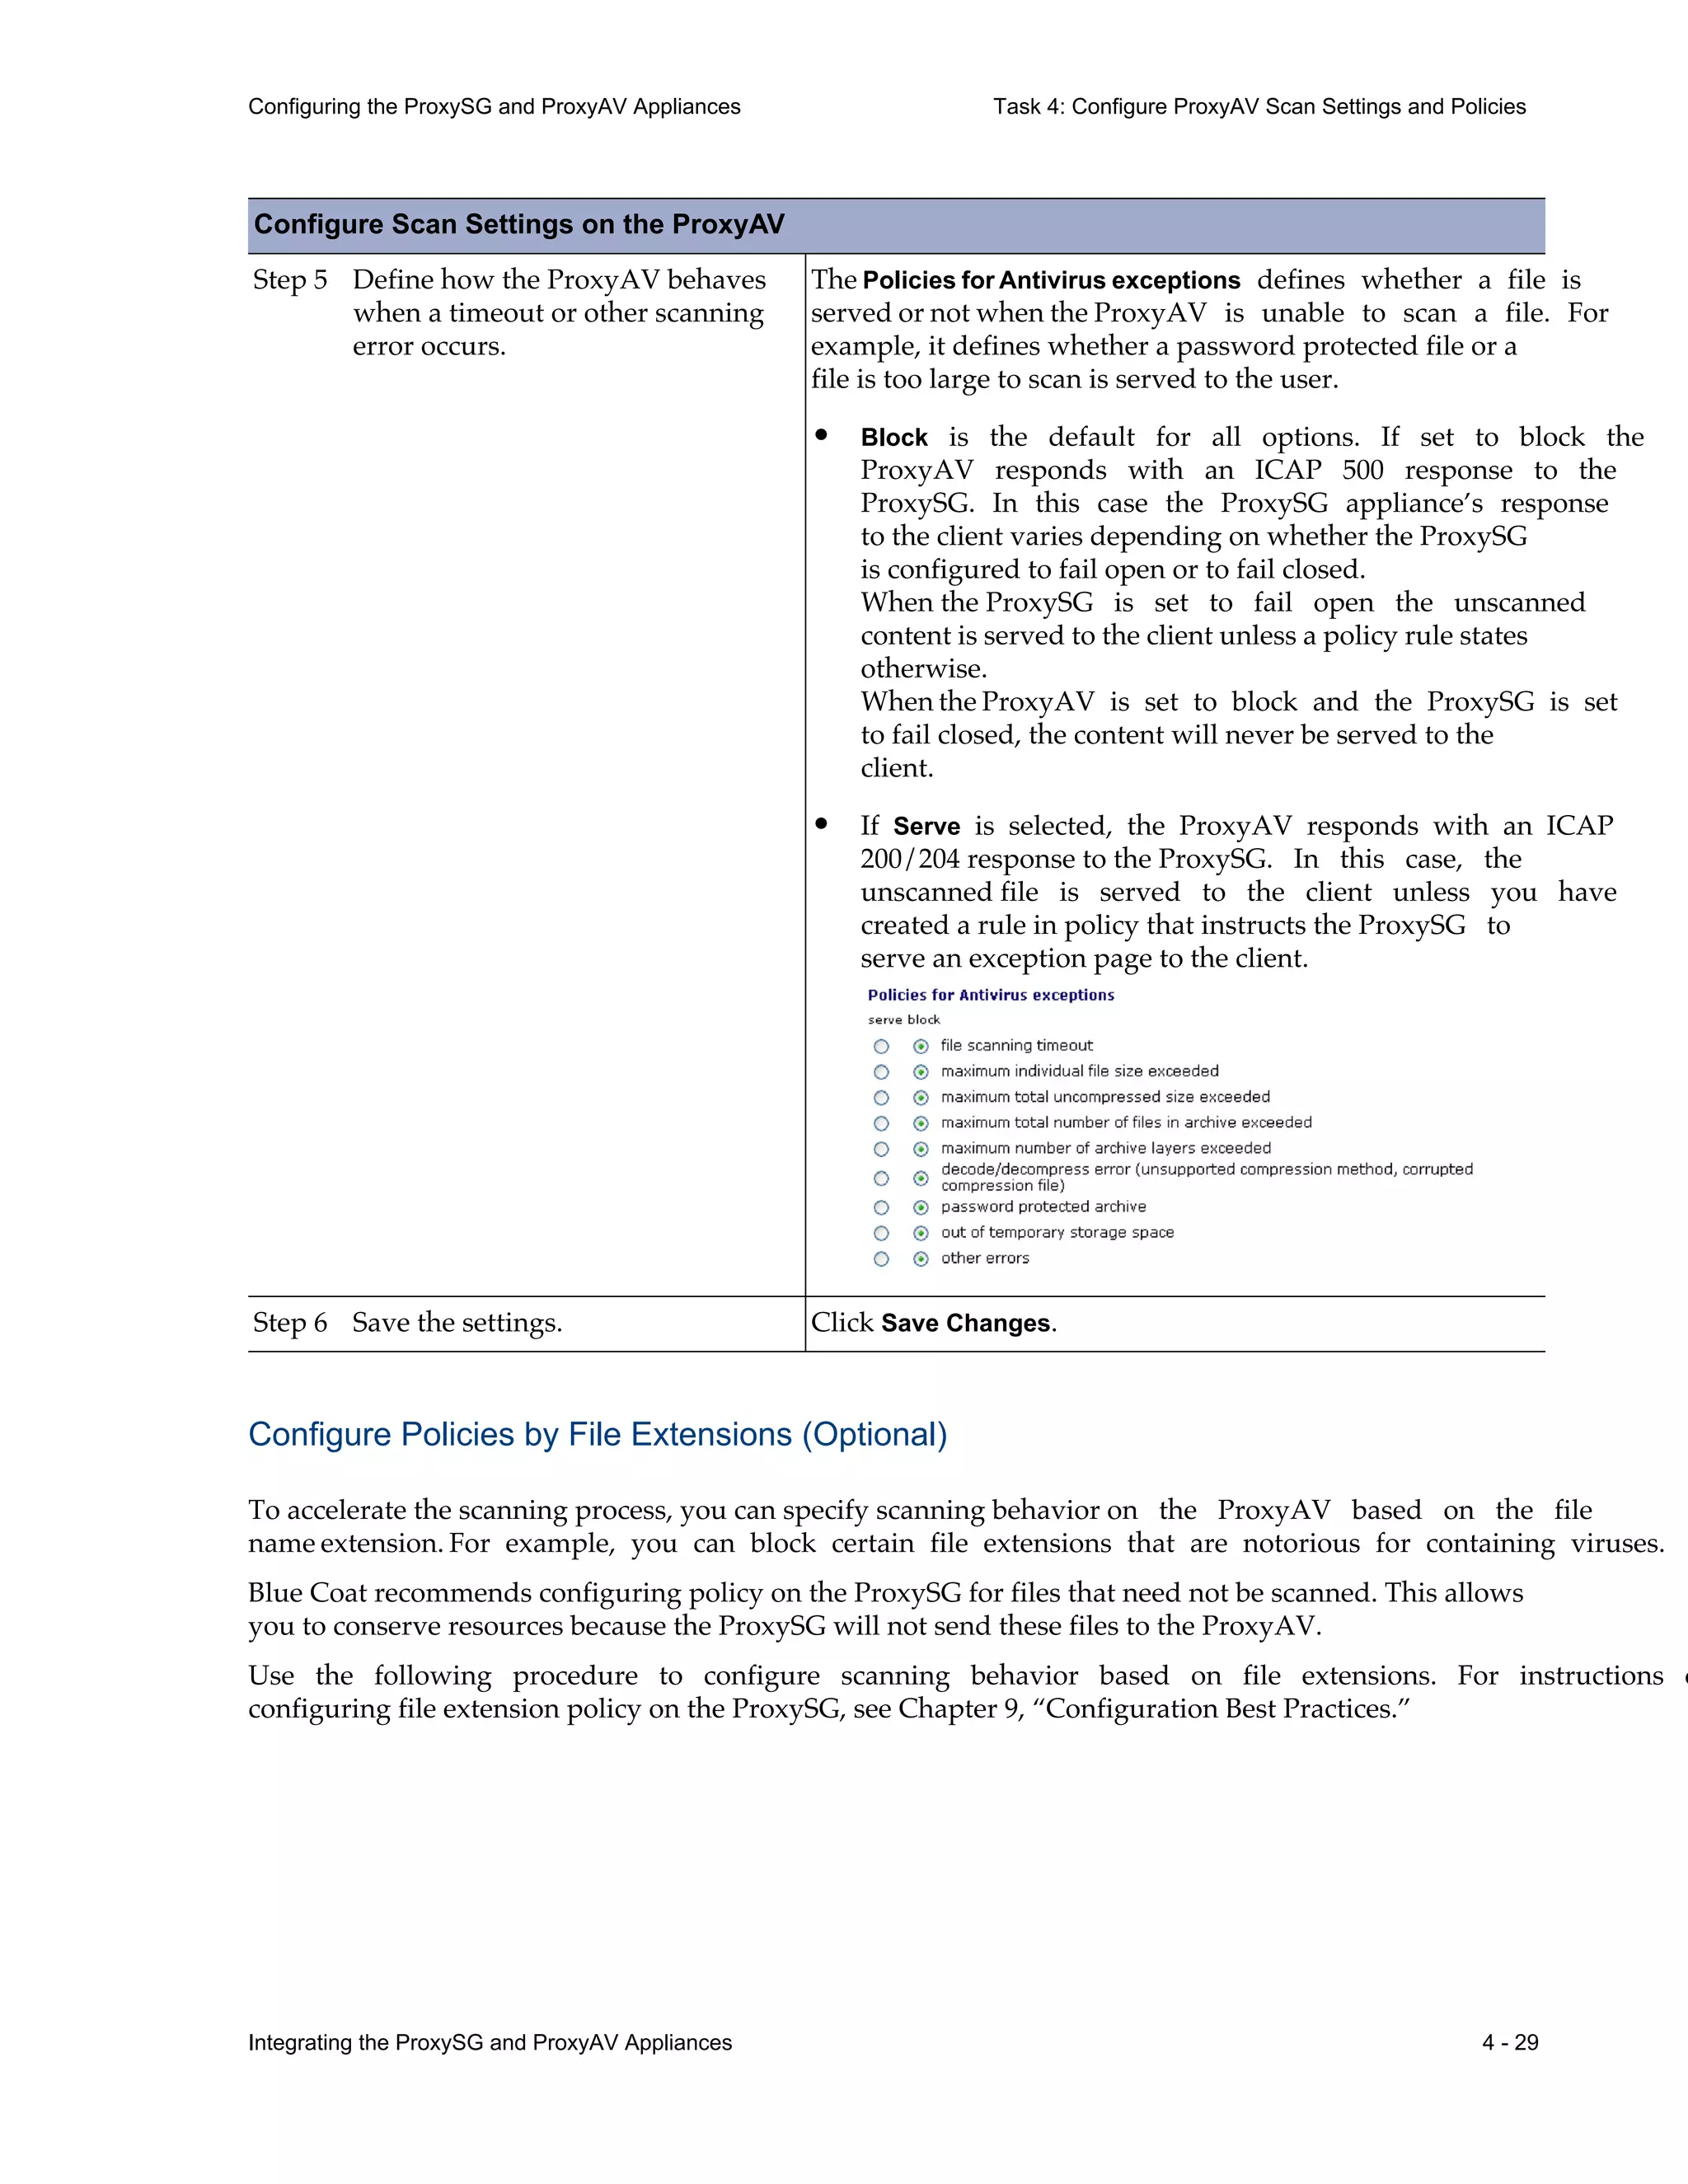
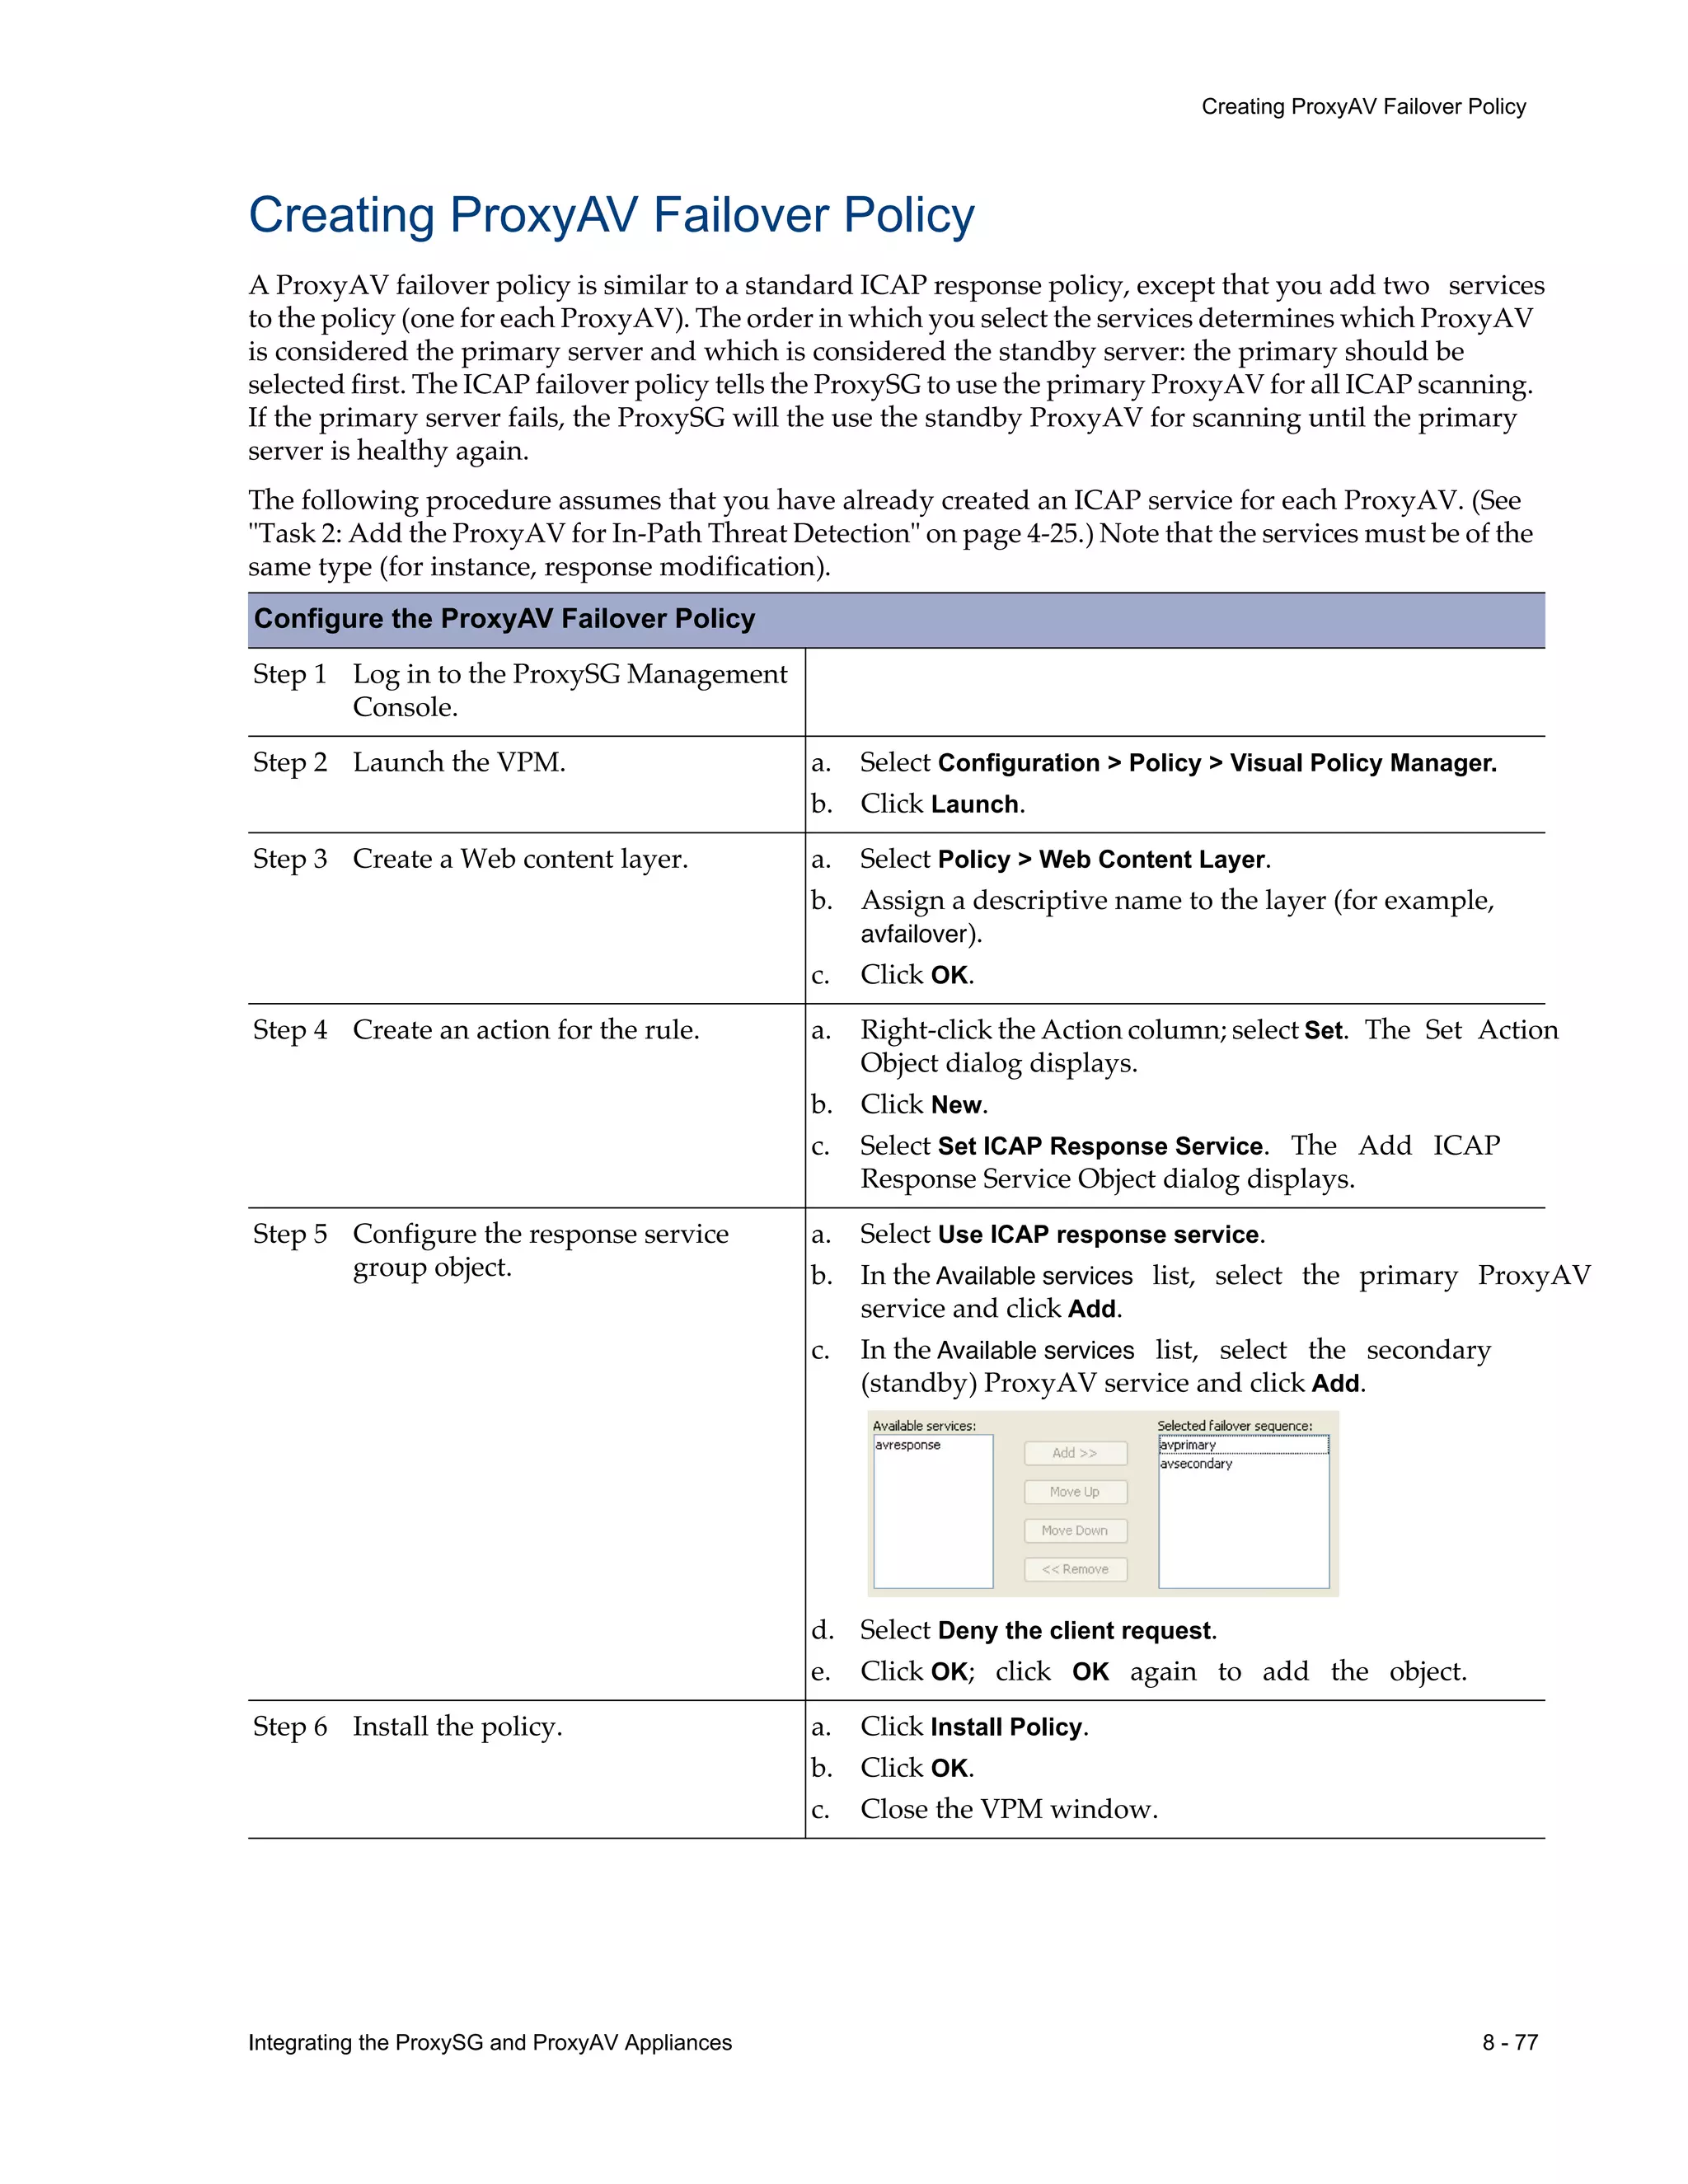
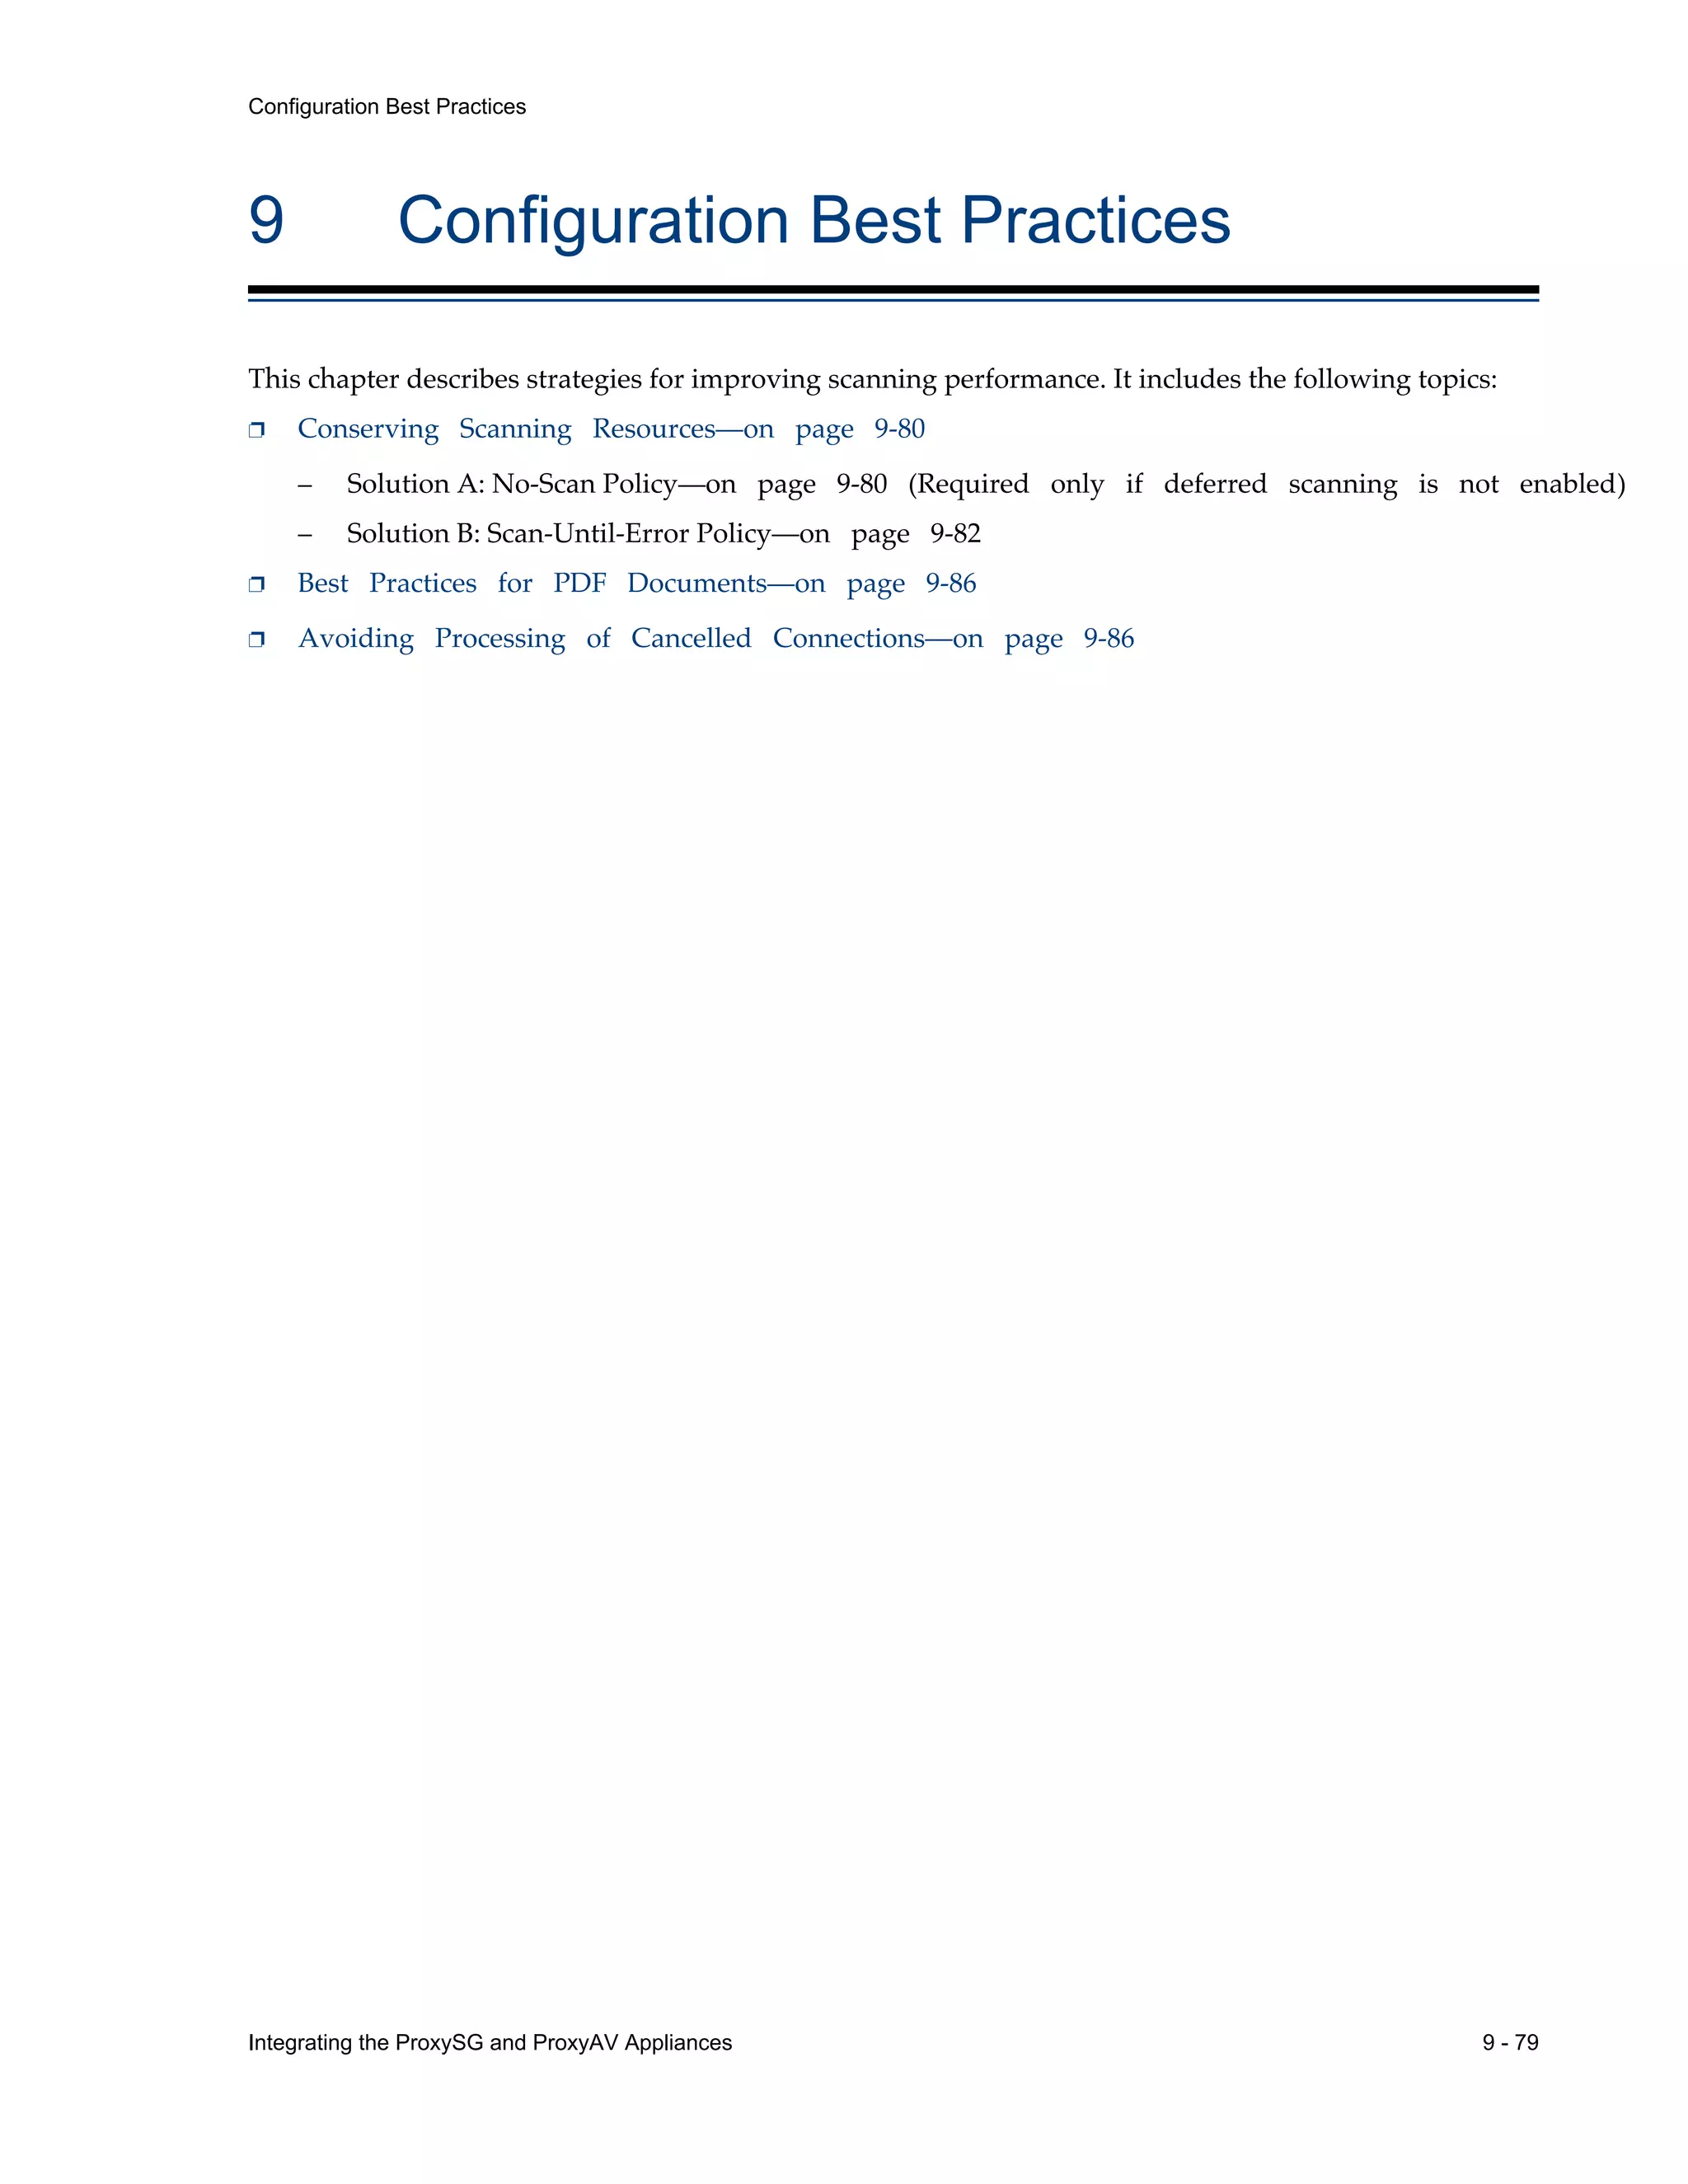
This document provides instructions for integrating Blue Coat ProxySG and ProxyAV appliances to provide web malware protection. Key points include: - The ProxySG acts as a proxy and forwards HTTP requests to the ProxyAV for malware scanning before returning content to users. - The ProxyAV uses supported malware scanning engines to scan content for viruses, spyware, phishing and other web-based threats. - Appliances can be deployed together with direct internet access or in a closed network, with guidelines provided for one-to-one and redundant configurations. - Detailed steps are outlined for configuring the appliances, enabling malware scanning, and testing the threat protection policy.


![Number_Guessing_Game_Dsbsbssbzboc[1].pptx](https://cdn.slidesharecdn.com/ss_thumbnails/numberguessinggamedoc1-251206215042-a076fc05-thumbnail.jpg?width=640&height=640&fit=bounds)


