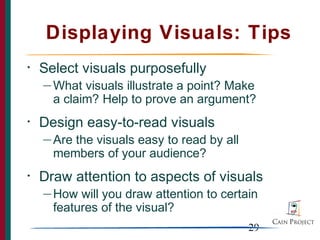
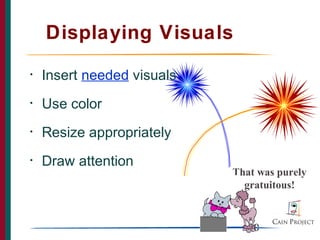
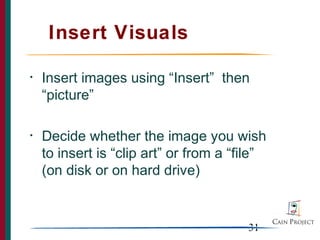
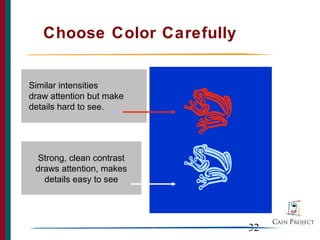
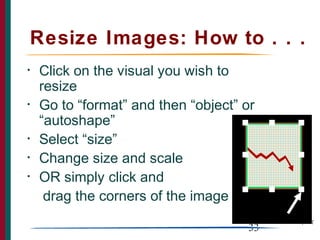
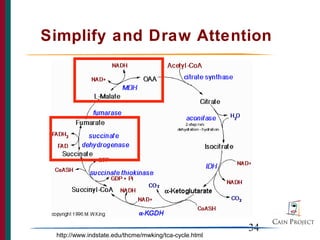
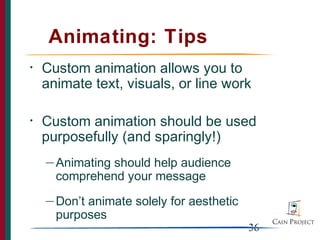
Using PowerPoint to Design
    Effective Presentations

           Copy this file to your computer.
                  Read through the slides.
        When a slide says, “YOUR TURN,”
         Follow the instructions and do the
                                     steps.


                        THE CAIN PROJECT
What You’ll Learn
•   Planning Content
•   Getting Started with Design
•   Displaying Text
•   Displaying Graphics
•   Animating
•   Presenting
                                  2
Planning Content
   for Talks


               3
Planning Content
for Talks
PART 1:
•   List possible audience
    questions
•   Plan your aim(s) upfront
•   Choose the “NEWS” about
    topic
•   Include significance
•   Keep background relevant
                               4
Planning Content
for Talks
PART 2:
•   Explain methods when
    appropriate
    —   Related to the “news” (main point)?
    —   Necessary to understand talk?

•   Explain (don’t just show) data
•   Plan a conclusion
•   Preview future work
                                              5
Planning Content
•   Remember what it was like not to know
•   Talk to prospective audience members
    or imagine them - list their questions
•   Organize information in chunks, going
    from what they know to what they don’t
•   Include topic’s significance


                                   6
Planning Content
•   Introduction: Set Mental “Hooks”
    and preview the content
•   Tie new info to previous studies
    or relevant events - motivate !!
•   Organize from listeners’ point of
    view
•   Principle is “GIVEN to NEW”
•   Preview future work
                                   7
Getting Started


                  8
Getting Started: Tips
•   Create a slide show
    with storyboards, not a
    script

•   Use the slide show...
    — to select important
      topics and issues
    — to organize content

    — to create a hierarchy


                              9
Getting Started: Design
Tips
  •   To select a design, ask yourself:
      — What  professional image do I want to
        project?
      — In   what type of room will I give my talk?
         •   Well-lit room: use light background / dark
             text and visuals

         •   Dimly-lit room: use dark background / light
             text and visuals

                                               10
Getting Started: Design
•   Set up “Slide Master”
    — Design   the “look” of your slide show
•   Choose appropriate template
    — Selectpre-designed, color coordinated
      presentation templates
•   Choose “slide layouts” for slides
    — Select from 12 “master slide styles”
      under “FORMAT” menu to build your
      show
                                           11
Set up “Slide Master”:
     Your Turn
•   To set up a “Slide Master” of your
    own:
    — Go to “Format”
    — Select “Background”

    — Make changes in color bar:
       •   Colors
       •   Fill effects
       •   Textures


                                    12
Project a Clear Font

•   Serif: easy to read in printed documents
    — Times    New Roman, Palatino, Verdana

•   Sans serif: easy to see projected
    across the room
    — Arial,   Helvetica, Geneva


                                         13
Fonts: Your Turn
•   Change the font style of this
    sentence from Arial to Palatino

•   To do so…
    —   Highlight the sentence by dragging your cursor
        across it
    —   Select “format” and then “font”
    —   Select “Palatino” from the pull-down menu


                                                14
Templates: Your Turn

•   To select a template, follow these
    steps:
    — Go to “format”
    — Select “apply design template” (“show

      preview” allows you to examine
      templates)
    — Select “ok”


                                        15
Create New Slides: Your
Turn
•   To create a new slide, choose from
    12 pre-designed slide formats

•   To examine the 12 formats…
    — Go to “Insert” and then “New Slide”
    — Select one design, click “OK”


                                            16
Displaying Text


                  17
Displaying Text: Tips
Your audience...
•                             So you . . .
                              •

    —                             — Use only essential
        Skims each slide
                                    info
    —   Looks for critical        — Guide their eyes with
        points, not details
                                    hierarchy, color
    —   Needs help                — Use big, legible fonts
        reading/seeing text         and framing blank
                                    space


                                                  18
Displaying Text
       •   Use bullets
       •   Use short phrases
       •   Use grammatical parallelism

 Not THAT kind
    of bullets!!!
         a
Let me explain . . .


                                    19
Use Bullets: Tips
•   Bullets help audience skim the slide
•   Bullets help audience see relationships
    between information points
•   For example, this is Main Point 1,
    which leads to...
    — Sub-point 1
    — Sub-point 2

    (To get back to previous level: use “promote” or
      “demote” arrows at top)
                                                       20
Bullets: Your Turn
•   To use bullets…
    — Select   the “bulleted list” or “two-column
      list” slide (from the 12 pre-designed slide
      formats)
    — Type   a phrase then hit “return”
    — Type   a second phrase, hit “return” then
      hit “tab”
    — OR  use “promote” or “demote” arrows at
      top to create a bulleted hierarchy
                                           21
Bullets: Your Turn
•   To use bullets
    — Go   to “format” and then “bullet”
    — Select  the style, color, and size of the
      bullets you’ll use
    — OR  highlight text you wish to bullet and
      select the bullet button at top


                                             22
Use Short Phrases: Tips
•   Use phrases in your slide show
    outline
•   Write complete sentences only in
    certain cases:
    — Hypothesis

    — ???

•   Generate phrases that make your
    point clearly and accurately
•   Use slide show as an outline for your
    talk, not as a script
                                    23
Use Parallelism
•   Make text easy for your audience to
    skim by creating phrases / sentences
    that are grammatically parallel

•   Create parallel text by making items
    in a list the same grammatical form


                                    24
Grammatical Parallelism

•   Not Parallel:
    Criteria to Assess Alarm System
    — Price
    — Effectiveness

    — How easily the alarm could be installed


•   Parallel:
    Criteria to Assess Alarm System
    — Price
    — Effectiveness
    — Ease of installation
                                                25
Use Parallelism
•   Not Parallel:
    — Lyse cells in buffer
    — 5 minute centrifuging

    — Supernatant is removed


•   Parallel:
    — Lyse cells in buffer
    — Centrifuge for 5 minutes

    — Remove supernatant


                                 26
Parallelism: Your Turn
•   Make the following list of sub-points
    parallel:
•   Reliable data collection relies upon:
    — Consistent use of techniques (pipetting,
      making solutions)
    — Correctly calibrated equipment, such as
      balances and pipettors
    — Researcher bias is minimized
      (expecting data to fit model; conflict of
      interest)
                                          27
Displaying Visuals


                 28
Displaying Visuals: Tips
•   Select visuals purposefully
    — What  visuals illustrate a point? Make
      a claim? Help to prove an argument?
•   Design easy-to-read visuals
    — Arethe visuals easy to read by all
      members of your audience?
•   Draw attention to aspects of visuals
    — How  will you draw attention to certain
      features of the visual?
                                           29
Displaying Visuals
•   Insert needed visuals
•   Use color
•   Resize appropriately
•   Draw attention
                            That was purely
                              gratuitous!


                               30
Insert Visuals

•   Insert images using “Insert” then
    “picture”

•   Decide whether the image you wish
    to insert is “clip art” or from a “file”
    (on disk or on hard drive)


                                        31
Choose Color Carefully


Similar intensities
draw attention but make
details hard to see.


 Strong, clean contrast
 draws attention, makes
   details easy to see


                            32
Resize Images: How to . . .
•   Click on the visual you wish to
    resize
•   Go to “format” and then “object” or
    “autoshape”
•   Select “size”
•   Change size and scale
•   OR simply click and
     drag the corners of the image

                                      33
Simplify and Draw Attention


                                                       34
 http://www.indstate.edu/thcme/mwking/tca-cycle.html
Animating


            35
Animating: Tips
•   Custom animation allows you to
    animate text, visuals, or line work

•   Custom animation should be used
    purposefully (and sparingly!)
    — Animatingshould help audience
      comprehend your message
    — Don’tanimate solely for aesthetic
      purposes
                                          36
Animation: Your Turn
                  •   Design slide with grouped
                      items
DNA
                  •   Go to “slide show” and select
  transcription       “animation” and “custom”
                  •   Select item(s) to animate
                  •   Choose
RNA
                      —   Animation method (appear, fly in)
                      —   Sound
                      —   After effects (dim)
                                                37
Presenting


             38
Delivery
•   Adapt to Physical, Cultural Environment
•   Stance
     — Body language
     — Handling notes

•   Gestures
•   Eye contact
•   Voice quality
     — Volume
     — Inflection

     — Pace
                                                             39
                See evaluation form at http://www.owlnet.rice.edu/~cainproj/
Handling questions
•   LISTEN
•   Repeat or rephrase
•   Watch body language
•   Don’t bluff


                          40
Prepare & practice!


                      41
The Cain Project would
like to work with YOU!

       Go to http://www.owlnet.rice.edu/~cainproj
       Or call Ext. 6141 or come to Anderson 211c


                                           42

Presenting

  • 1.
    Using PowerPoint toDesign Effective Presentations Copy this file to your computer. Read through the slides. When a slide says, “YOUR TURN,” Follow the instructions and do the steps. THE CAIN PROJECT
  • 2.
    What You’ll Learn • Planning Content • Getting Started with Design • Displaying Text • Displaying Graphics • Animating • Presenting 2
  • 3.
    Planning Content for Talks 3
  • 4.
    Planning Content for Talks PART1: • List possible audience questions • Plan your aim(s) upfront • Choose the “NEWS” about topic • Include significance • Keep background relevant 4
  • 5.
    Planning Content for Talks PART2: • Explain methods when appropriate — Related to the “news” (main point)? — Necessary to understand talk? • Explain (don’t just show) data • Plan a conclusion • Preview future work 5
  • 6.
    Planning Content • Remember what it was like not to know • Talk to prospective audience members or imagine them - list their questions • Organize information in chunks, going from what they know to what they don’t • Include topic’s significance 6
  • 7.
    Planning Content • Introduction: Set Mental “Hooks” and preview the content • Tie new info to previous studies or relevant events - motivate !! • Organize from listeners’ point of view • Principle is “GIVEN to NEW” • Preview future work 7
  • 8.
  • 9.
    Getting Started: Tips • Create a slide show with storyboards, not a script • Use the slide show... — to select important topics and issues — to organize content — to create a hierarchy 9
  • 10.
    Getting Started: Design Tips • To select a design, ask yourself: — What professional image do I want to project? — In what type of room will I give my talk? • Well-lit room: use light background / dark text and visuals • Dimly-lit room: use dark background / light text and visuals 10
  • 11.
    Getting Started: Design • Set up “Slide Master” — Design the “look” of your slide show • Choose appropriate template — Selectpre-designed, color coordinated presentation templates • Choose “slide layouts” for slides — Select from 12 “master slide styles” under “FORMAT” menu to build your show 11
  • 12.
    Set up “SlideMaster”: Your Turn • To set up a “Slide Master” of your own: — Go to “Format” — Select “Background” — Make changes in color bar: • Colors • Fill effects • Textures 12
  • 13.
    Project a ClearFont • Serif: easy to read in printed documents — Times New Roman, Palatino, Verdana • Sans serif: easy to see projected across the room — Arial, Helvetica, Geneva 13
  • 14.
    Fonts: Your Turn • Change the font style of this sentence from Arial to Palatino • To do so… — Highlight the sentence by dragging your cursor across it — Select “format” and then “font” — Select “Palatino” from the pull-down menu 14
  • 15.
    Templates: Your Turn • To select a template, follow these steps: — Go to “format” — Select “apply design template” (“show preview” allows you to examine templates) — Select “ok” 15
  • 16.
    Create New Slides:Your Turn • To create a new slide, choose from 12 pre-designed slide formats • To examine the 12 formats… — Go to “Insert” and then “New Slide” — Select one design, click “OK” 16
  • 17.
  • 18.
    Displaying Text: Tips Youraudience... • So you . . . • — — Use only essential Skims each slide info — Looks for critical — Guide their eyes with points, not details hierarchy, color — Needs help — Use big, legible fonts reading/seeing text and framing blank space 18
  • 19.
    Displaying Text • Use bullets • Use short phrases • Use grammatical parallelism Not THAT kind of bullets!!! a Let me explain . . . 19
  • 20.
    Use Bullets: Tips • Bullets help audience skim the slide • Bullets help audience see relationships between information points • For example, this is Main Point 1, which leads to... — Sub-point 1 — Sub-point 2 (To get back to previous level: use “promote” or “demote” arrows at top) 20
  • 21.
    Bullets: Your Turn • To use bullets… — Select the “bulleted list” or “two-column list” slide (from the 12 pre-designed slide formats) — Type a phrase then hit “return” — Type a second phrase, hit “return” then hit “tab” — OR use “promote” or “demote” arrows at top to create a bulleted hierarchy 21
  • 22.
    Bullets: Your Turn • To use bullets — Go to “format” and then “bullet” — Select the style, color, and size of the bullets you’ll use — OR highlight text you wish to bullet and select the bullet button at top 22
  • 23.
    Use Short Phrases:Tips • Use phrases in your slide show outline • Write complete sentences only in certain cases: — Hypothesis — ??? • Generate phrases that make your point clearly and accurately • Use slide show as an outline for your talk, not as a script 23
  • 24.
    Use Parallelism • Make text easy for your audience to skim by creating phrases / sentences that are grammatically parallel • Create parallel text by making items in a list the same grammatical form 24
  • 25.
    Grammatical Parallelism • Not Parallel: Criteria to Assess Alarm System — Price — Effectiveness — How easily the alarm could be installed • Parallel: Criteria to Assess Alarm System — Price — Effectiveness — Ease of installation 25
  • 26.
    Use Parallelism • Not Parallel: — Lyse cells in buffer — 5 minute centrifuging — Supernatant is removed • Parallel: — Lyse cells in buffer — Centrifuge for 5 minutes — Remove supernatant 26
  • 27.
    Parallelism: Your Turn • Make the following list of sub-points parallel: • Reliable data collection relies upon: — Consistent use of techniques (pipetting, making solutions) — Correctly calibrated equipment, such as balances and pipettors — Researcher bias is minimized (expecting data to fit model; conflict of interest) 27
  • 28.
  • 29.
    Displaying Visuals: Tips • Select visuals purposefully — What visuals illustrate a point? Make a claim? Help to prove an argument? • Design easy-to-read visuals — Arethe visuals easy to read by all members of your audience? • Draw attention to aspects of visuals — How will you draw attention to certain features of the visual? 29
  • 30.
    Displaying Visuals • Insert needed visuals • Use color • Resize appropriately • Draw attention That was purely gratuitous! 30
  • 31.
    Insert Visuals • Insert images using “Insert” then “picture” • Decide whether the image you wish to insert is “clip art” or from a “file” (on disk or on hard drive) 31
  • 32.
    Choose Color Carefully Similarintensities draw attention but make details hard to see. Strong, clean contrast draws attention, makes details easy to see 32
  • 33.
    Resize Images: Howto . . . • Click on the visual you wish to resize • Go to “format” and then “object” or “autoshape” • Select “size” • Change size and scale • OR simply click and drag the corners of the image 33
  • 34.
    Simplify and DrawAttention 34 http://www.indstate.edu/thcme/mwking/tca-cycle.html
  • 35.
  • 36.
    Animating: Tips • Custom animation allows you to animate text, visuals, or line work • Custom animation should be used purposefully (and sparingly!) — Animatingshould help audience comprehend your message — Don’tanimate solely for aesthetic purposes 36
  • 37.
    Animation: Your Turn • Design slide with grouped items DNA • Go to “slide show” and select transcription “animation” and “custom” • Select item(s) to animate • Choose RNA — Animation method (appear, fly in) — Sound — After effects (dim) 37
  • 38.
  • 39.
    Delivery • Adapt to Physical, Cultural Environment • Stance — Body language — Handling notes • Gestures • Eye contact • Voice quality — Volume — Inflection — Pace 39 See evaluation form at http://www.owlnet.rice.edu/~cainproj/
  • 40.
    Handling questions • LISTEN • Repeat or rephrase • Watch body language • Don’t bluff 40
  • 41.
  • 42.
    The Cain Projectwould like to work with YOU! Go to http://www.owlnet.rice.edu/~cainproj Or call Ext. 6141 or come to Anderson 211c 42