Download as PDF, PPTX
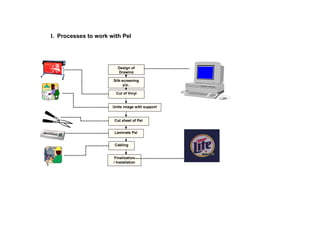
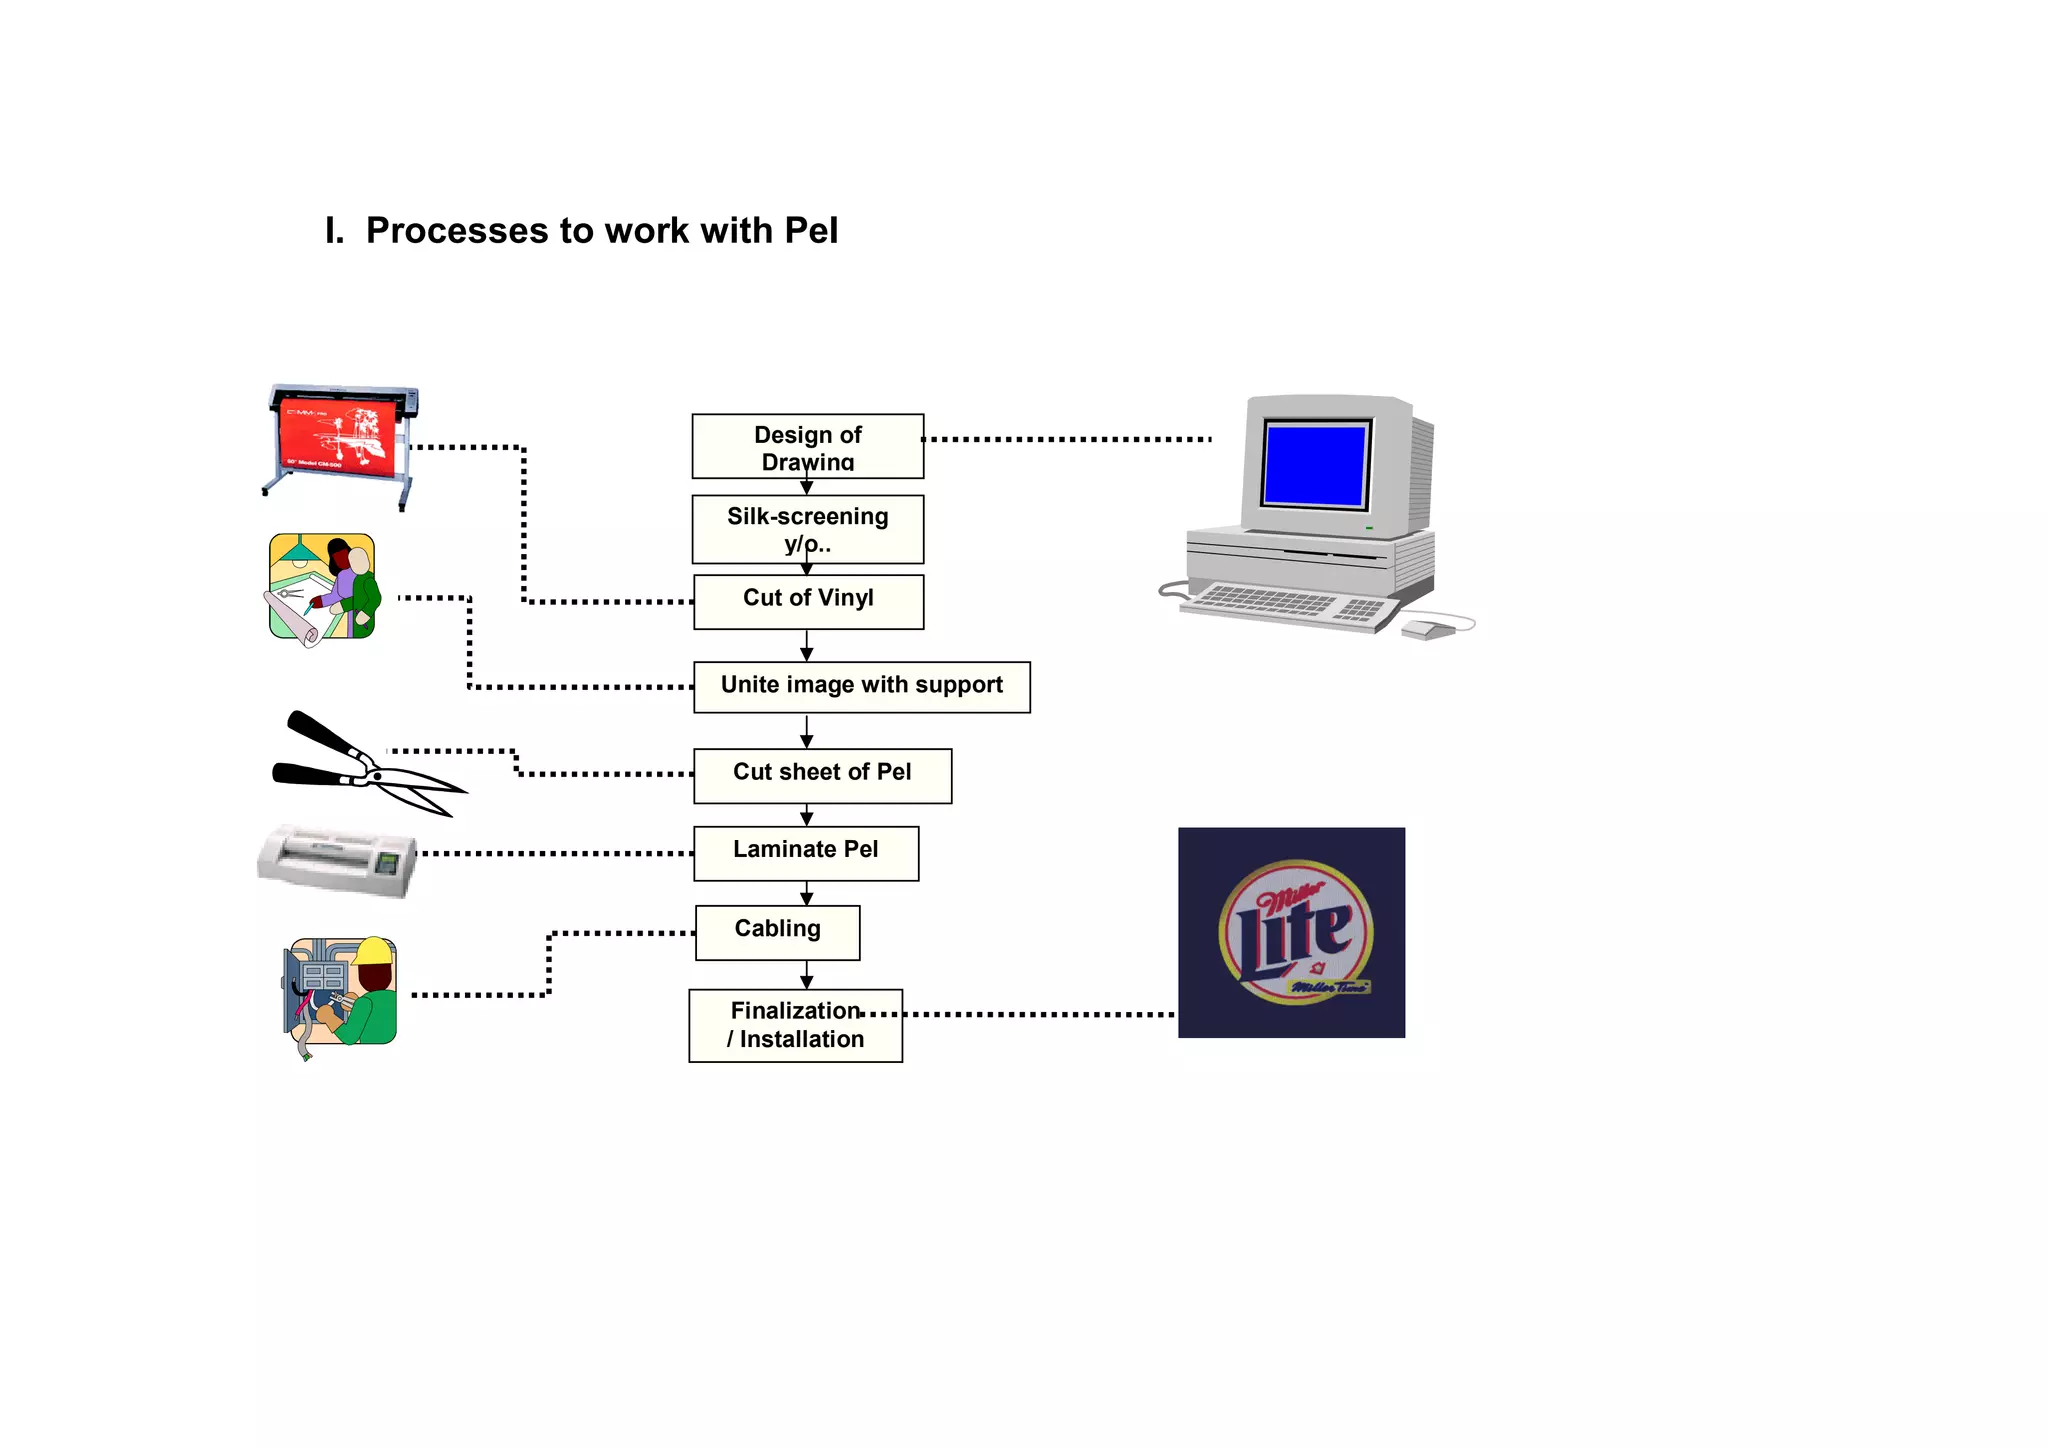

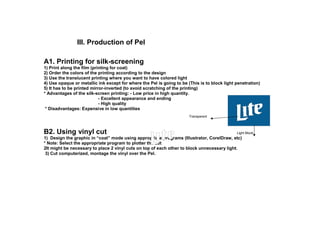

The document outlines the processes involved in creating and installing a silk-screened pel design, including printing methods and vinyl cutting techniques. It details advantages and disadvantages of silk-screen printing, as well as steps for attaching designs to various supports and ensuring proper electrical connections. It emphasizes careful handling of delicate materials and the significance of maintaining humidity and current standards to extend the utility life of the pel.


