Download as PDF, PPTX


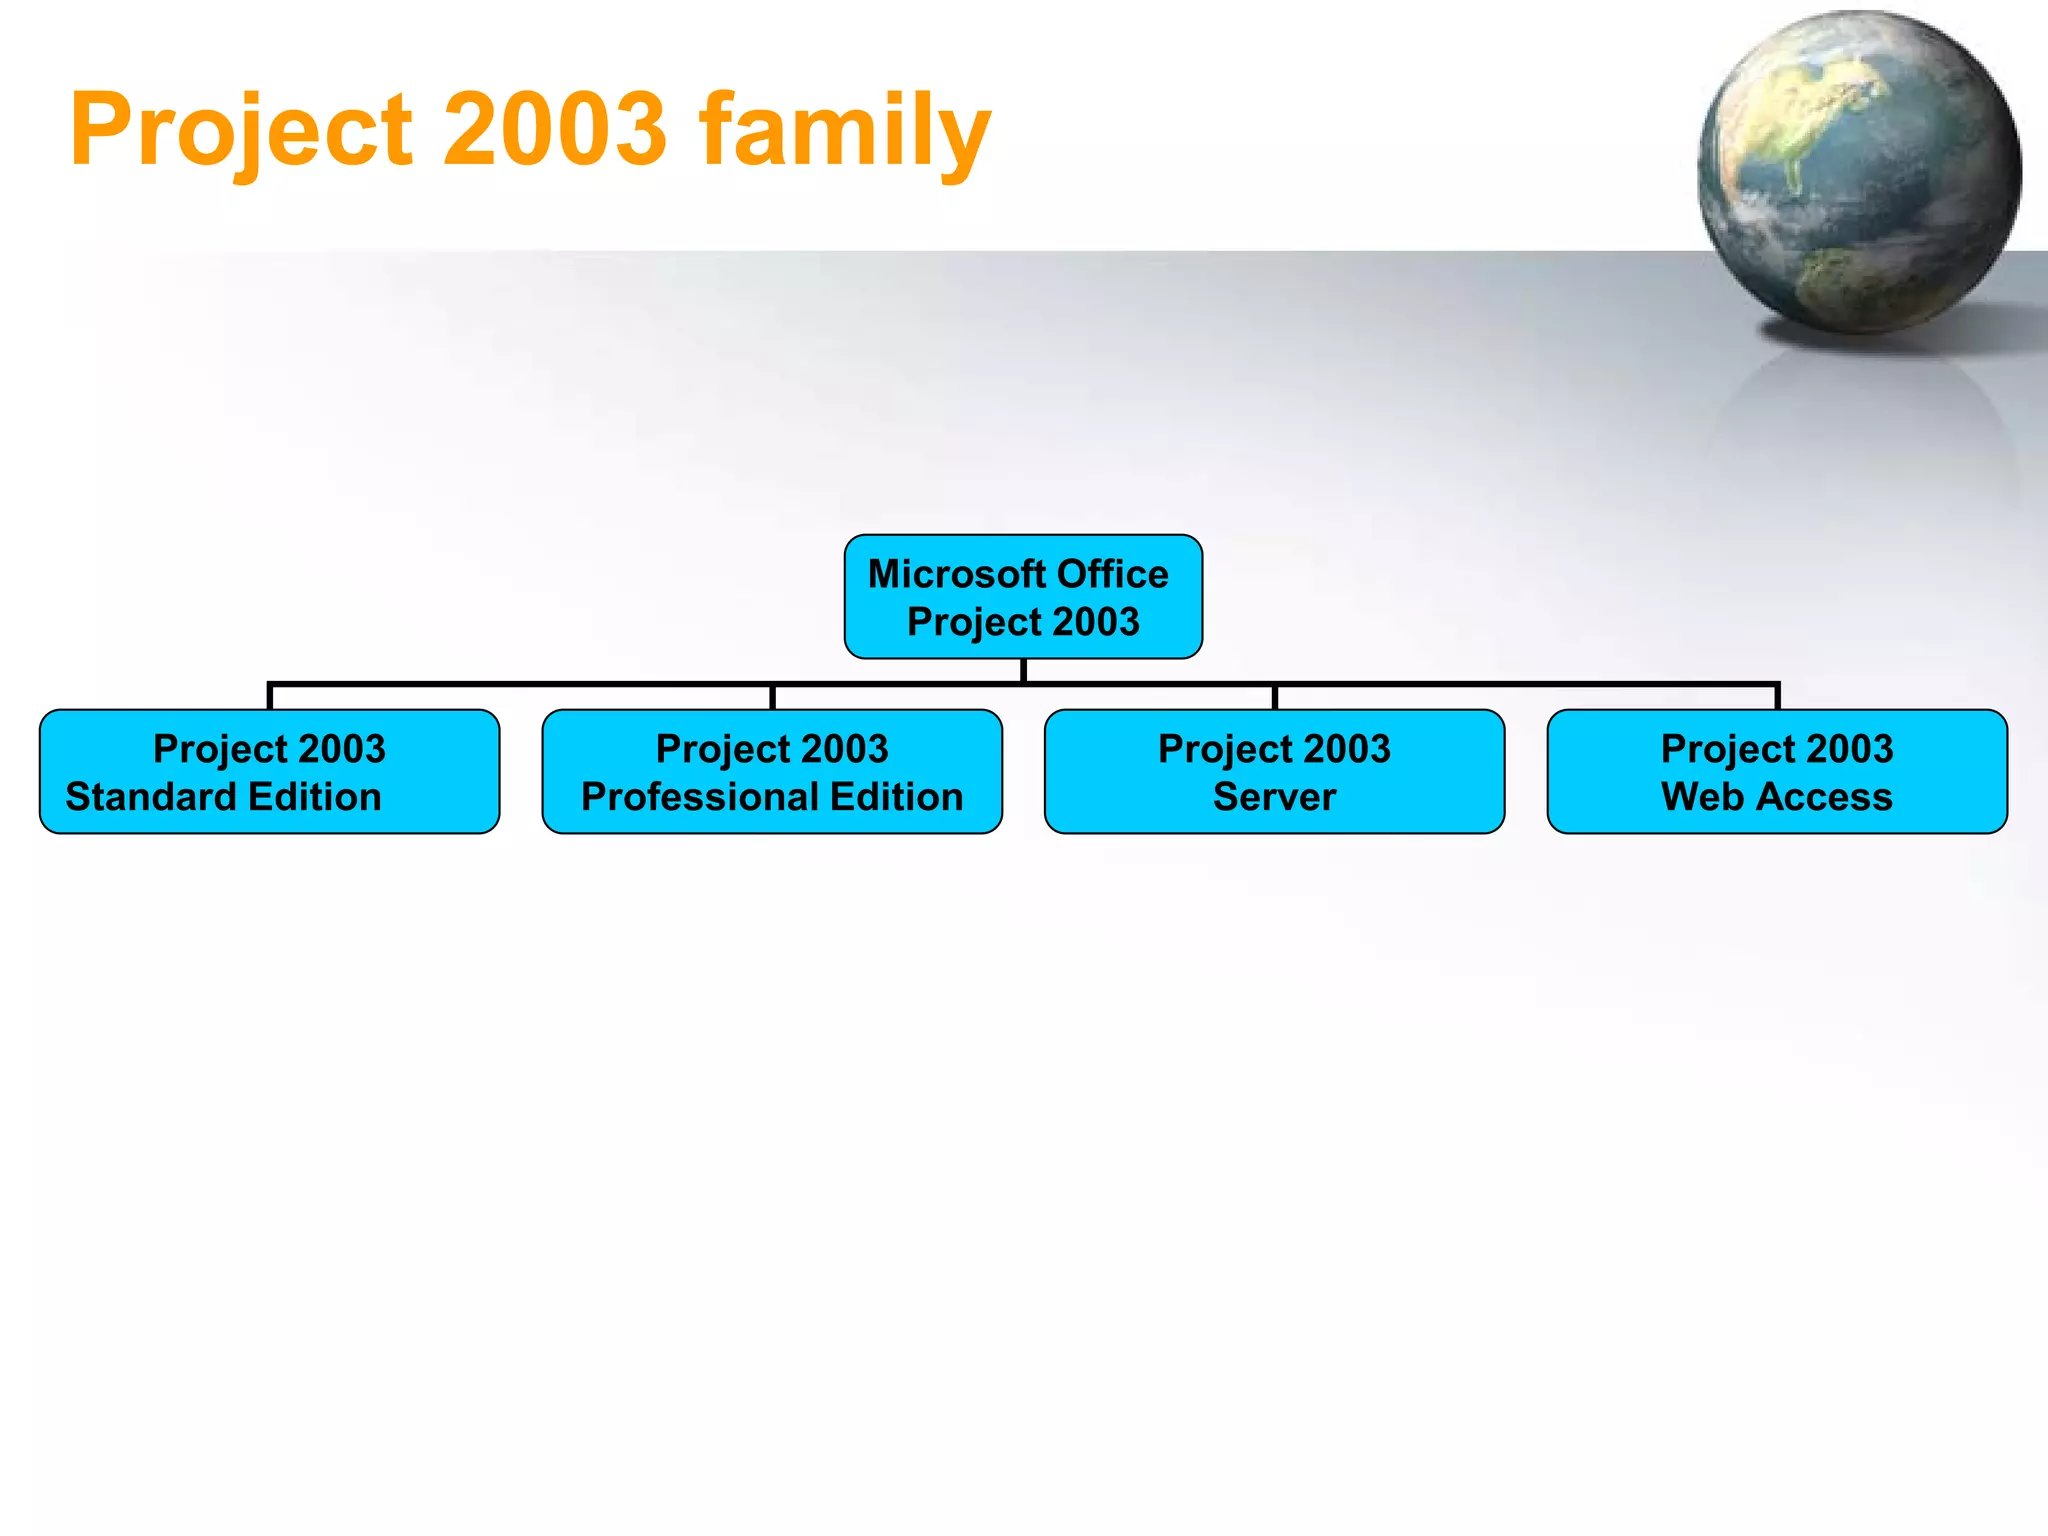

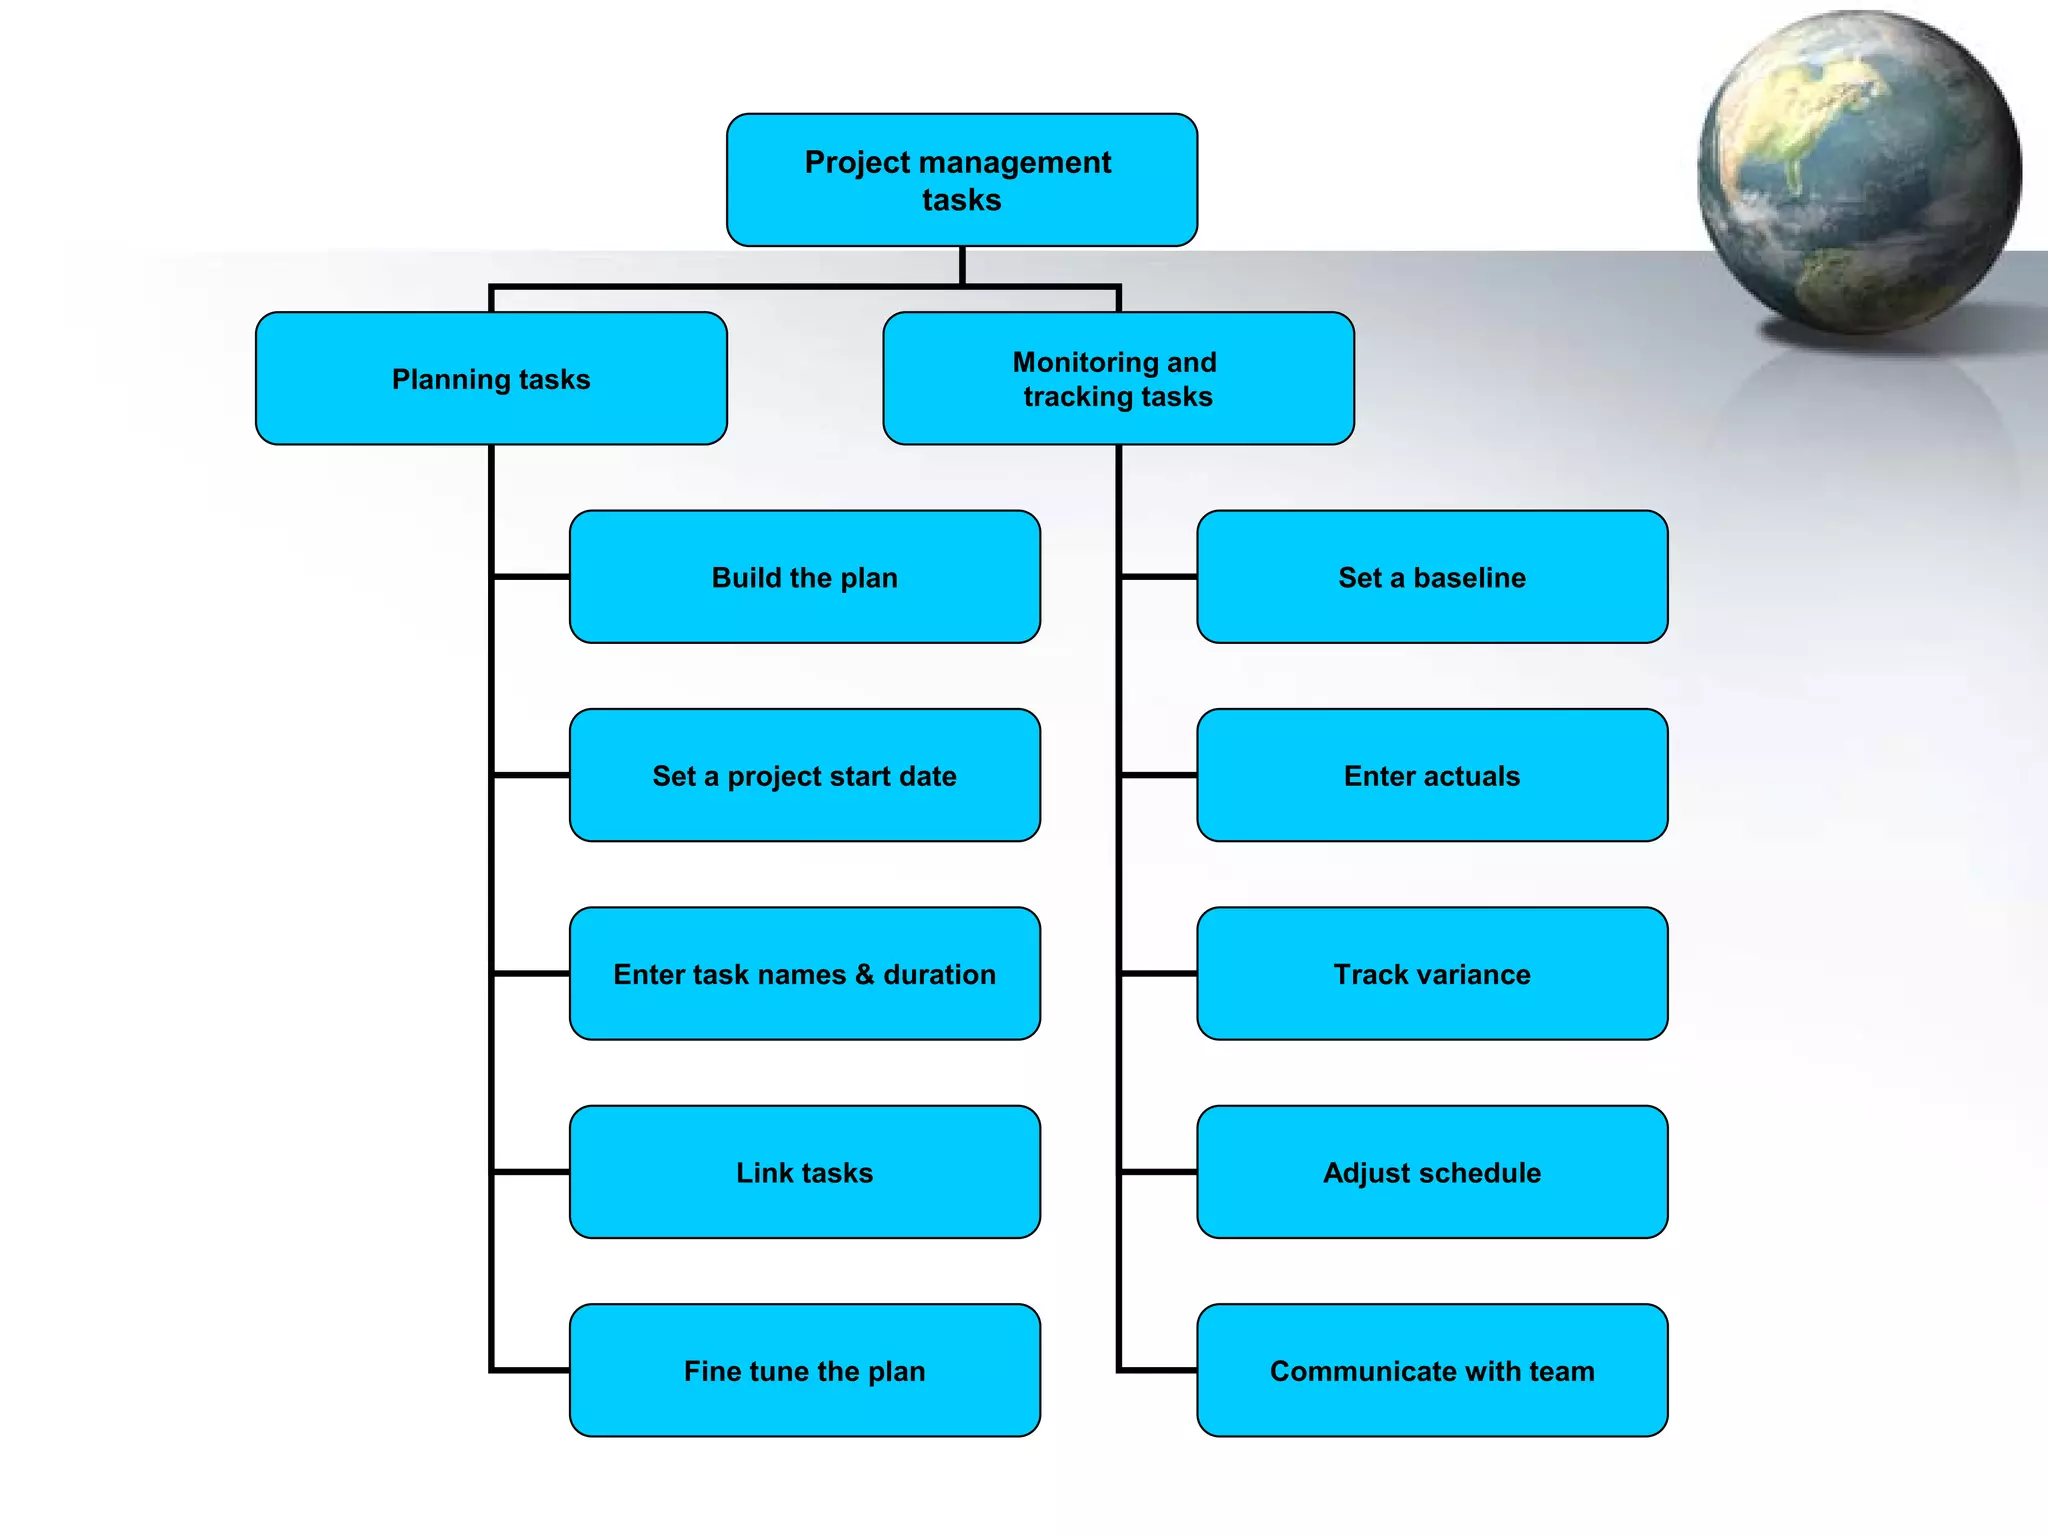
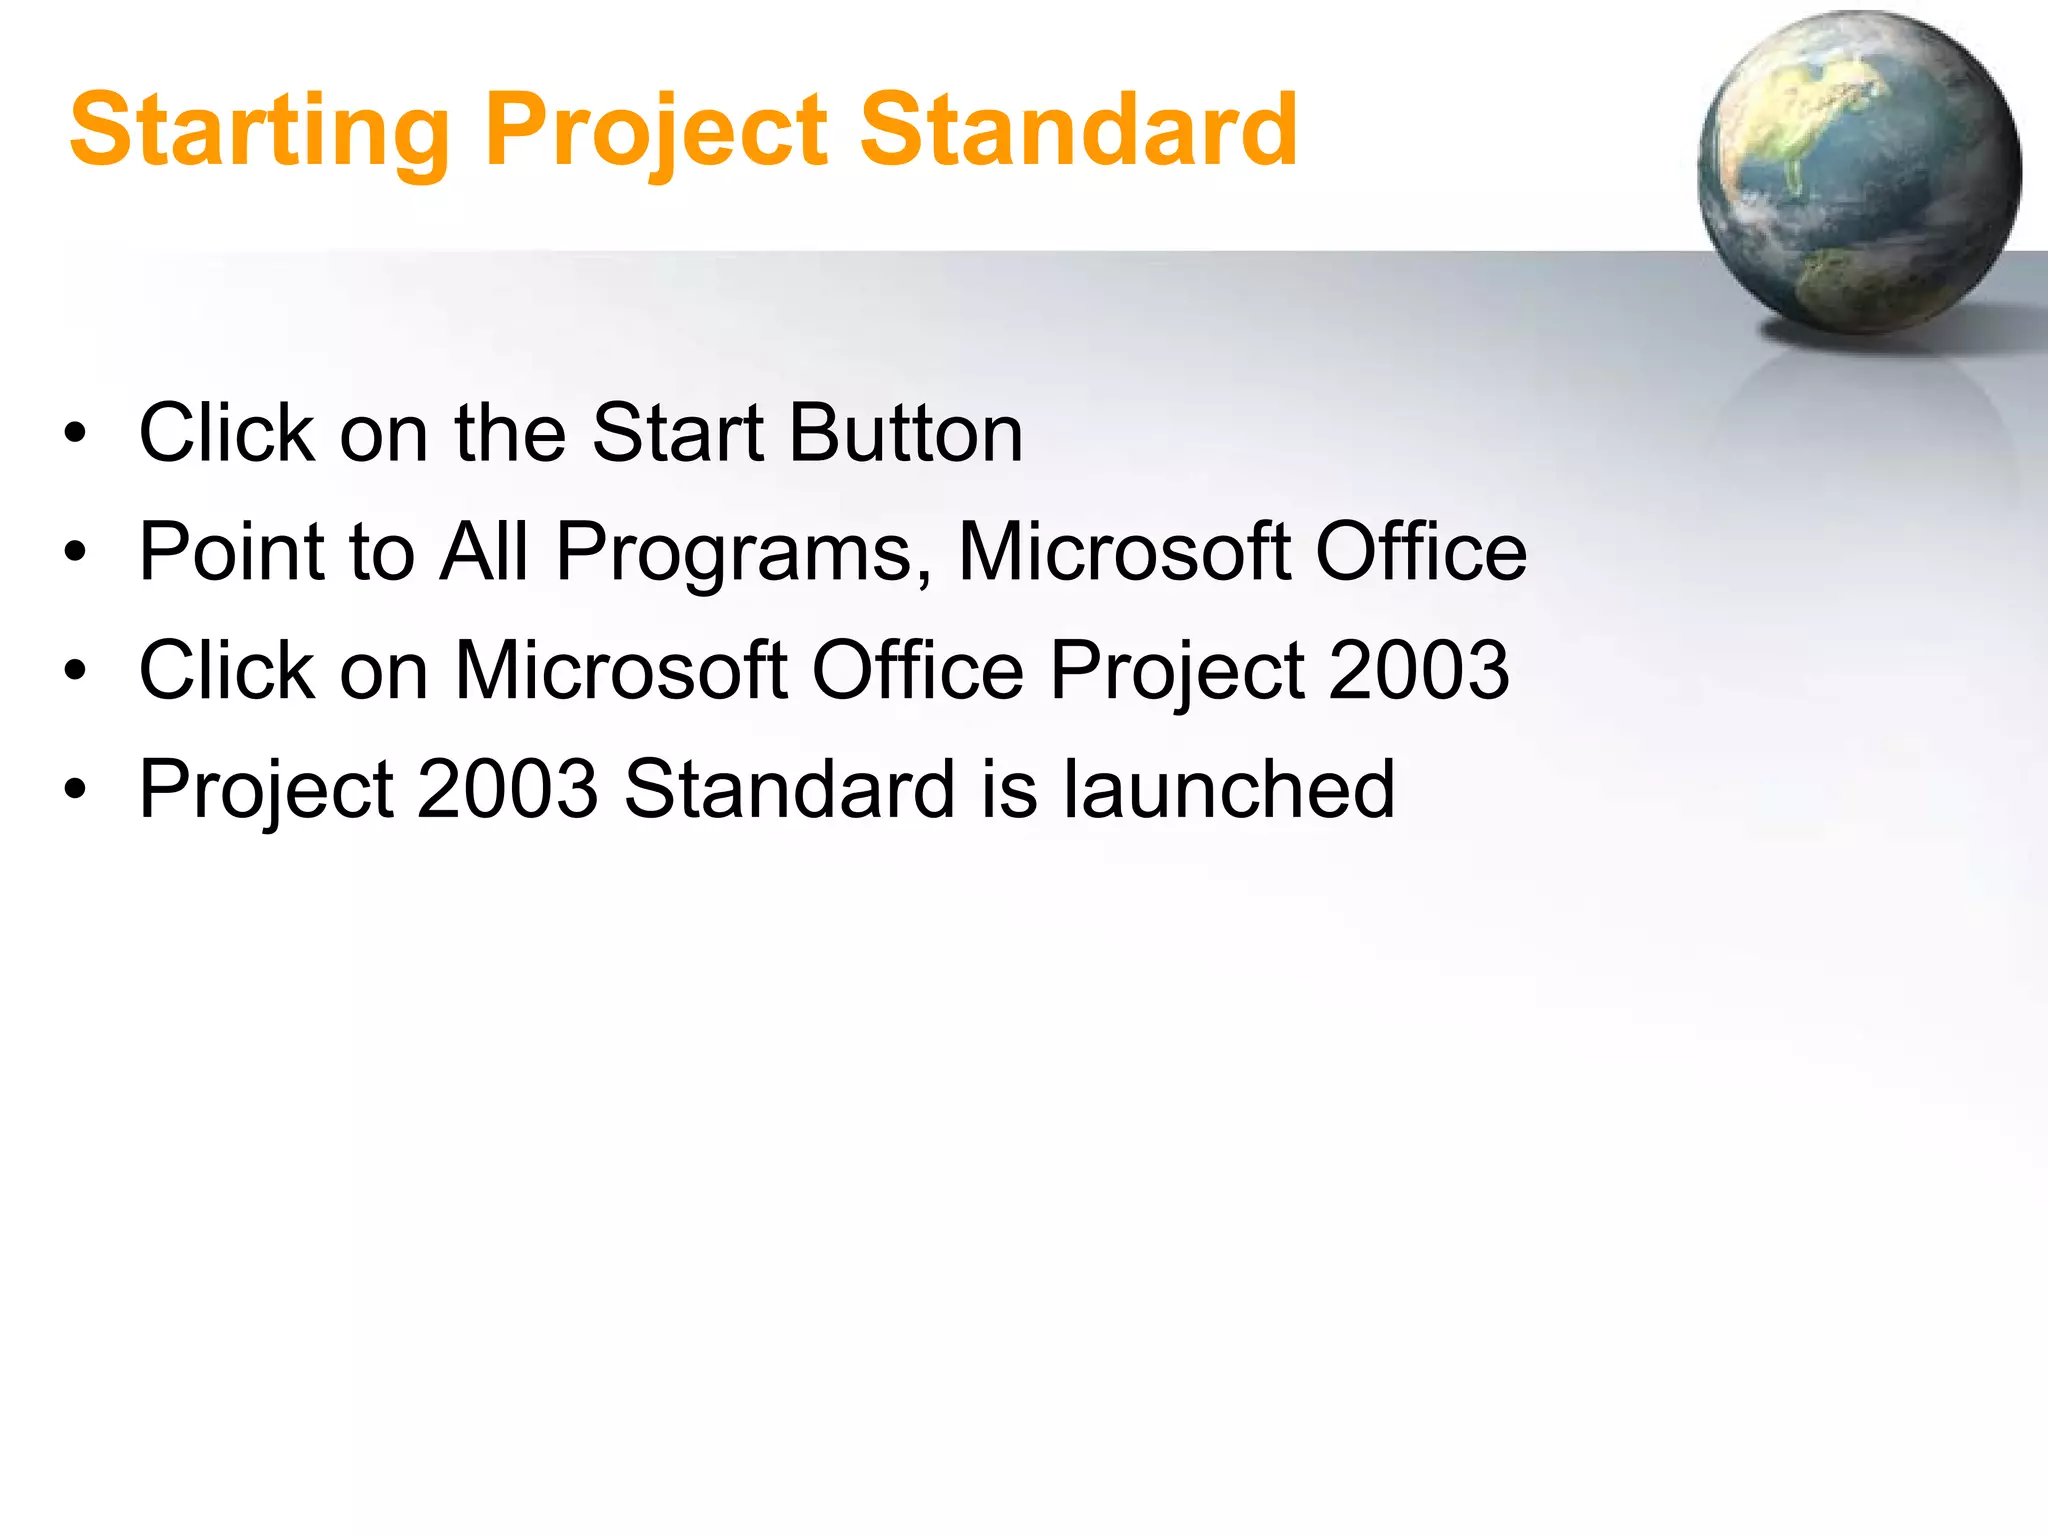
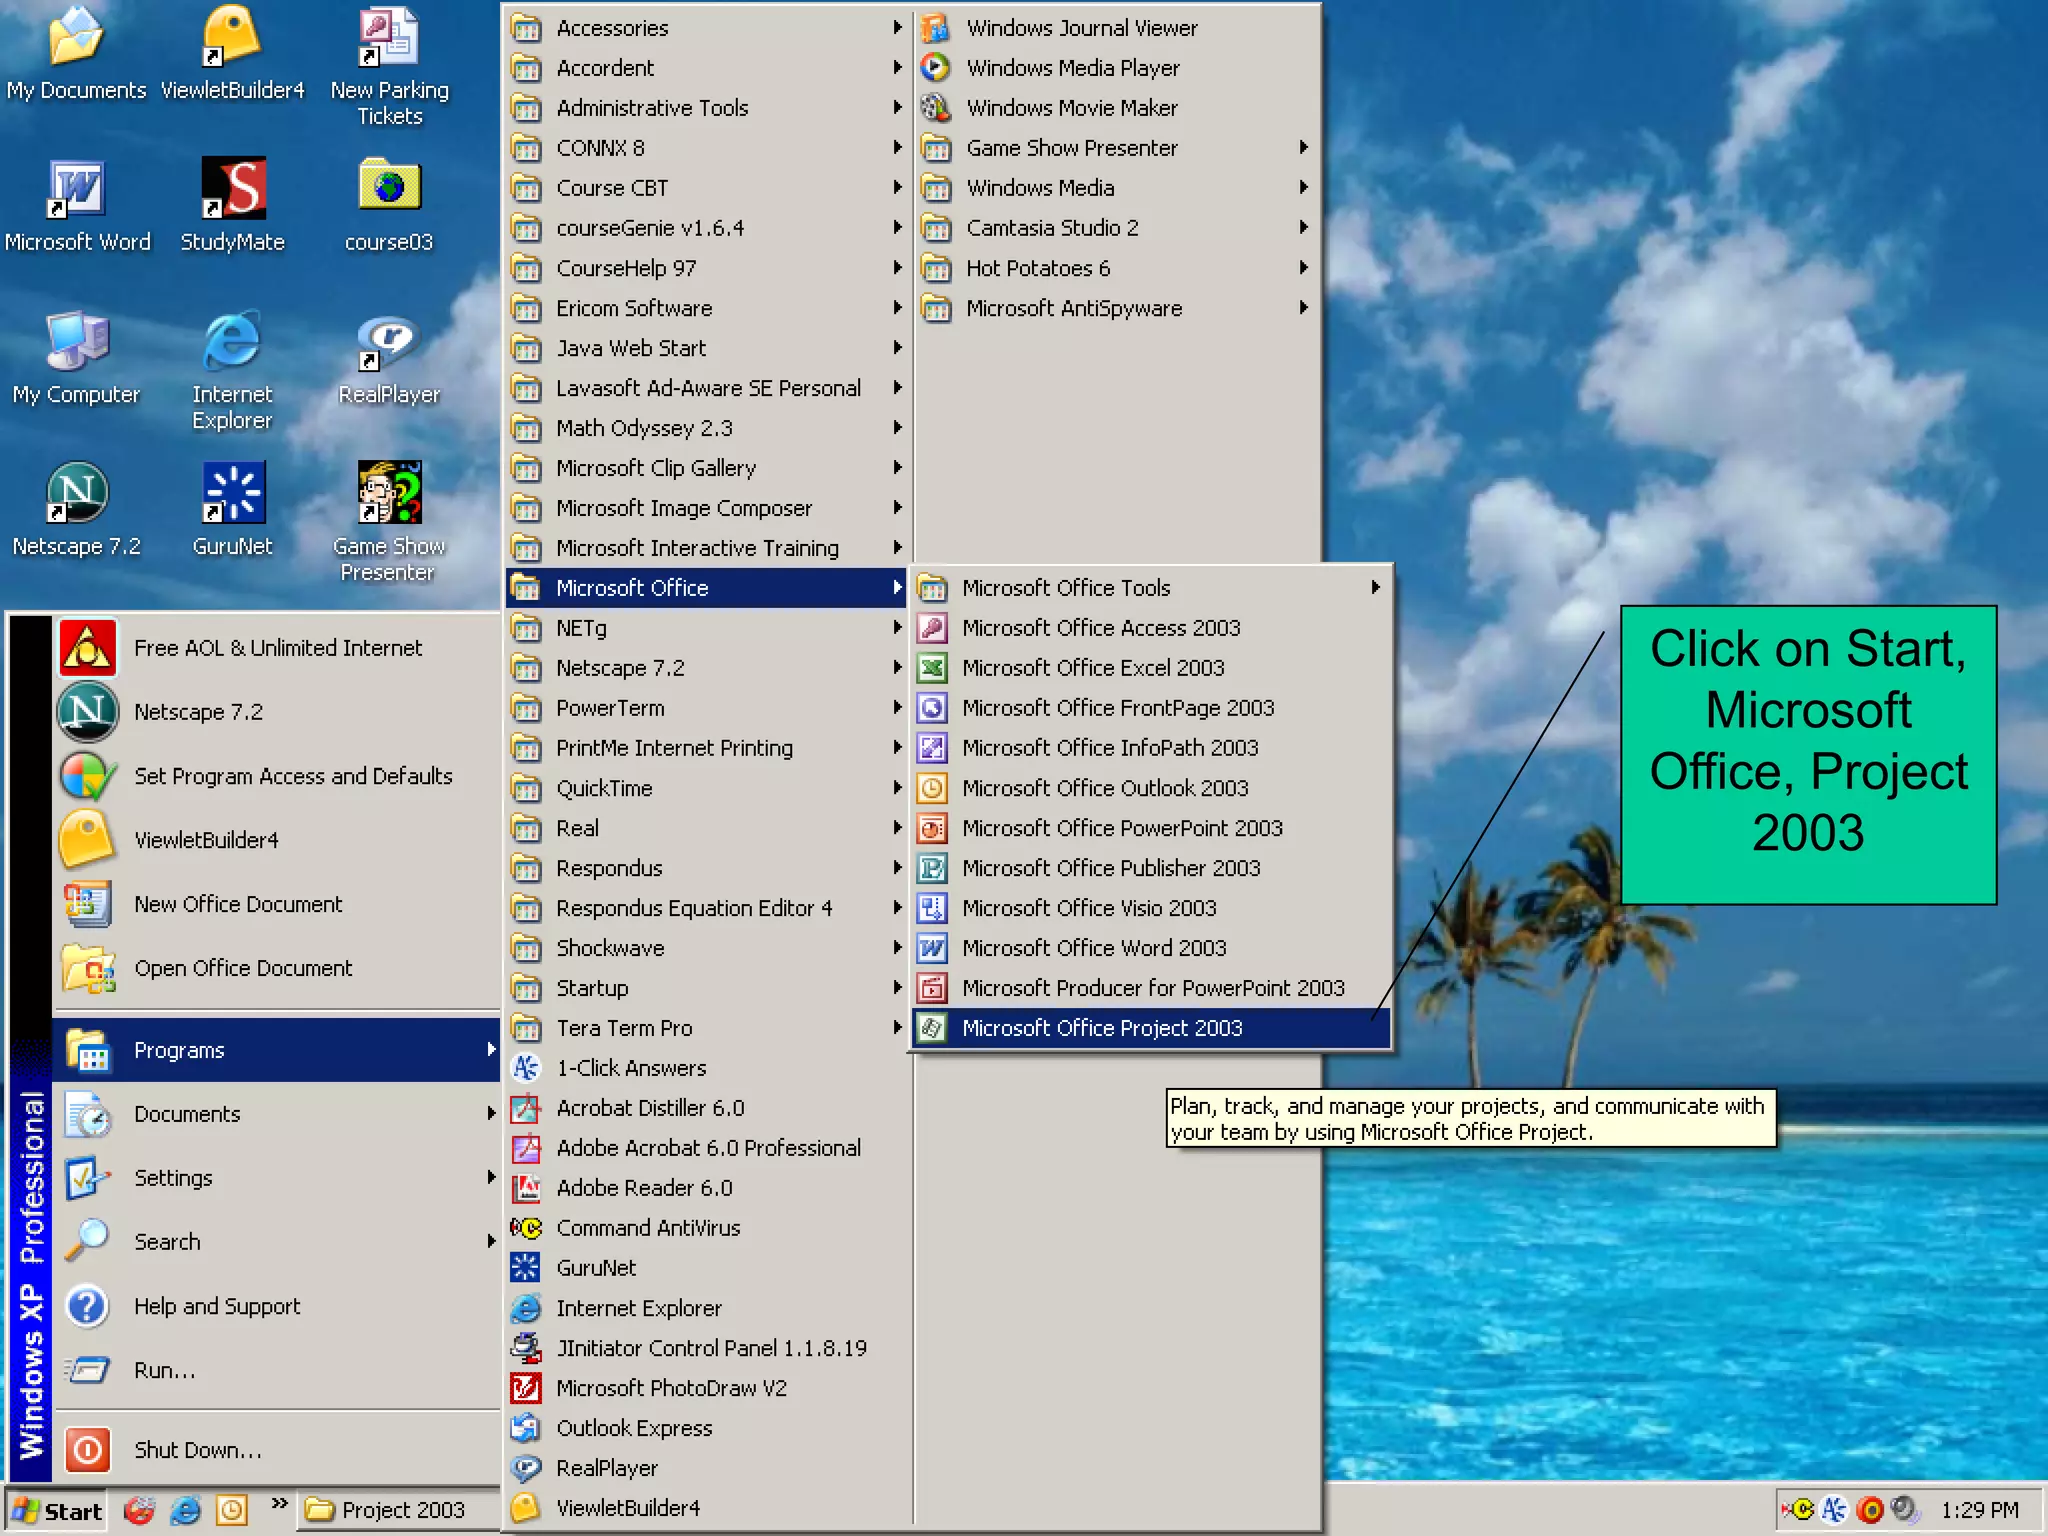
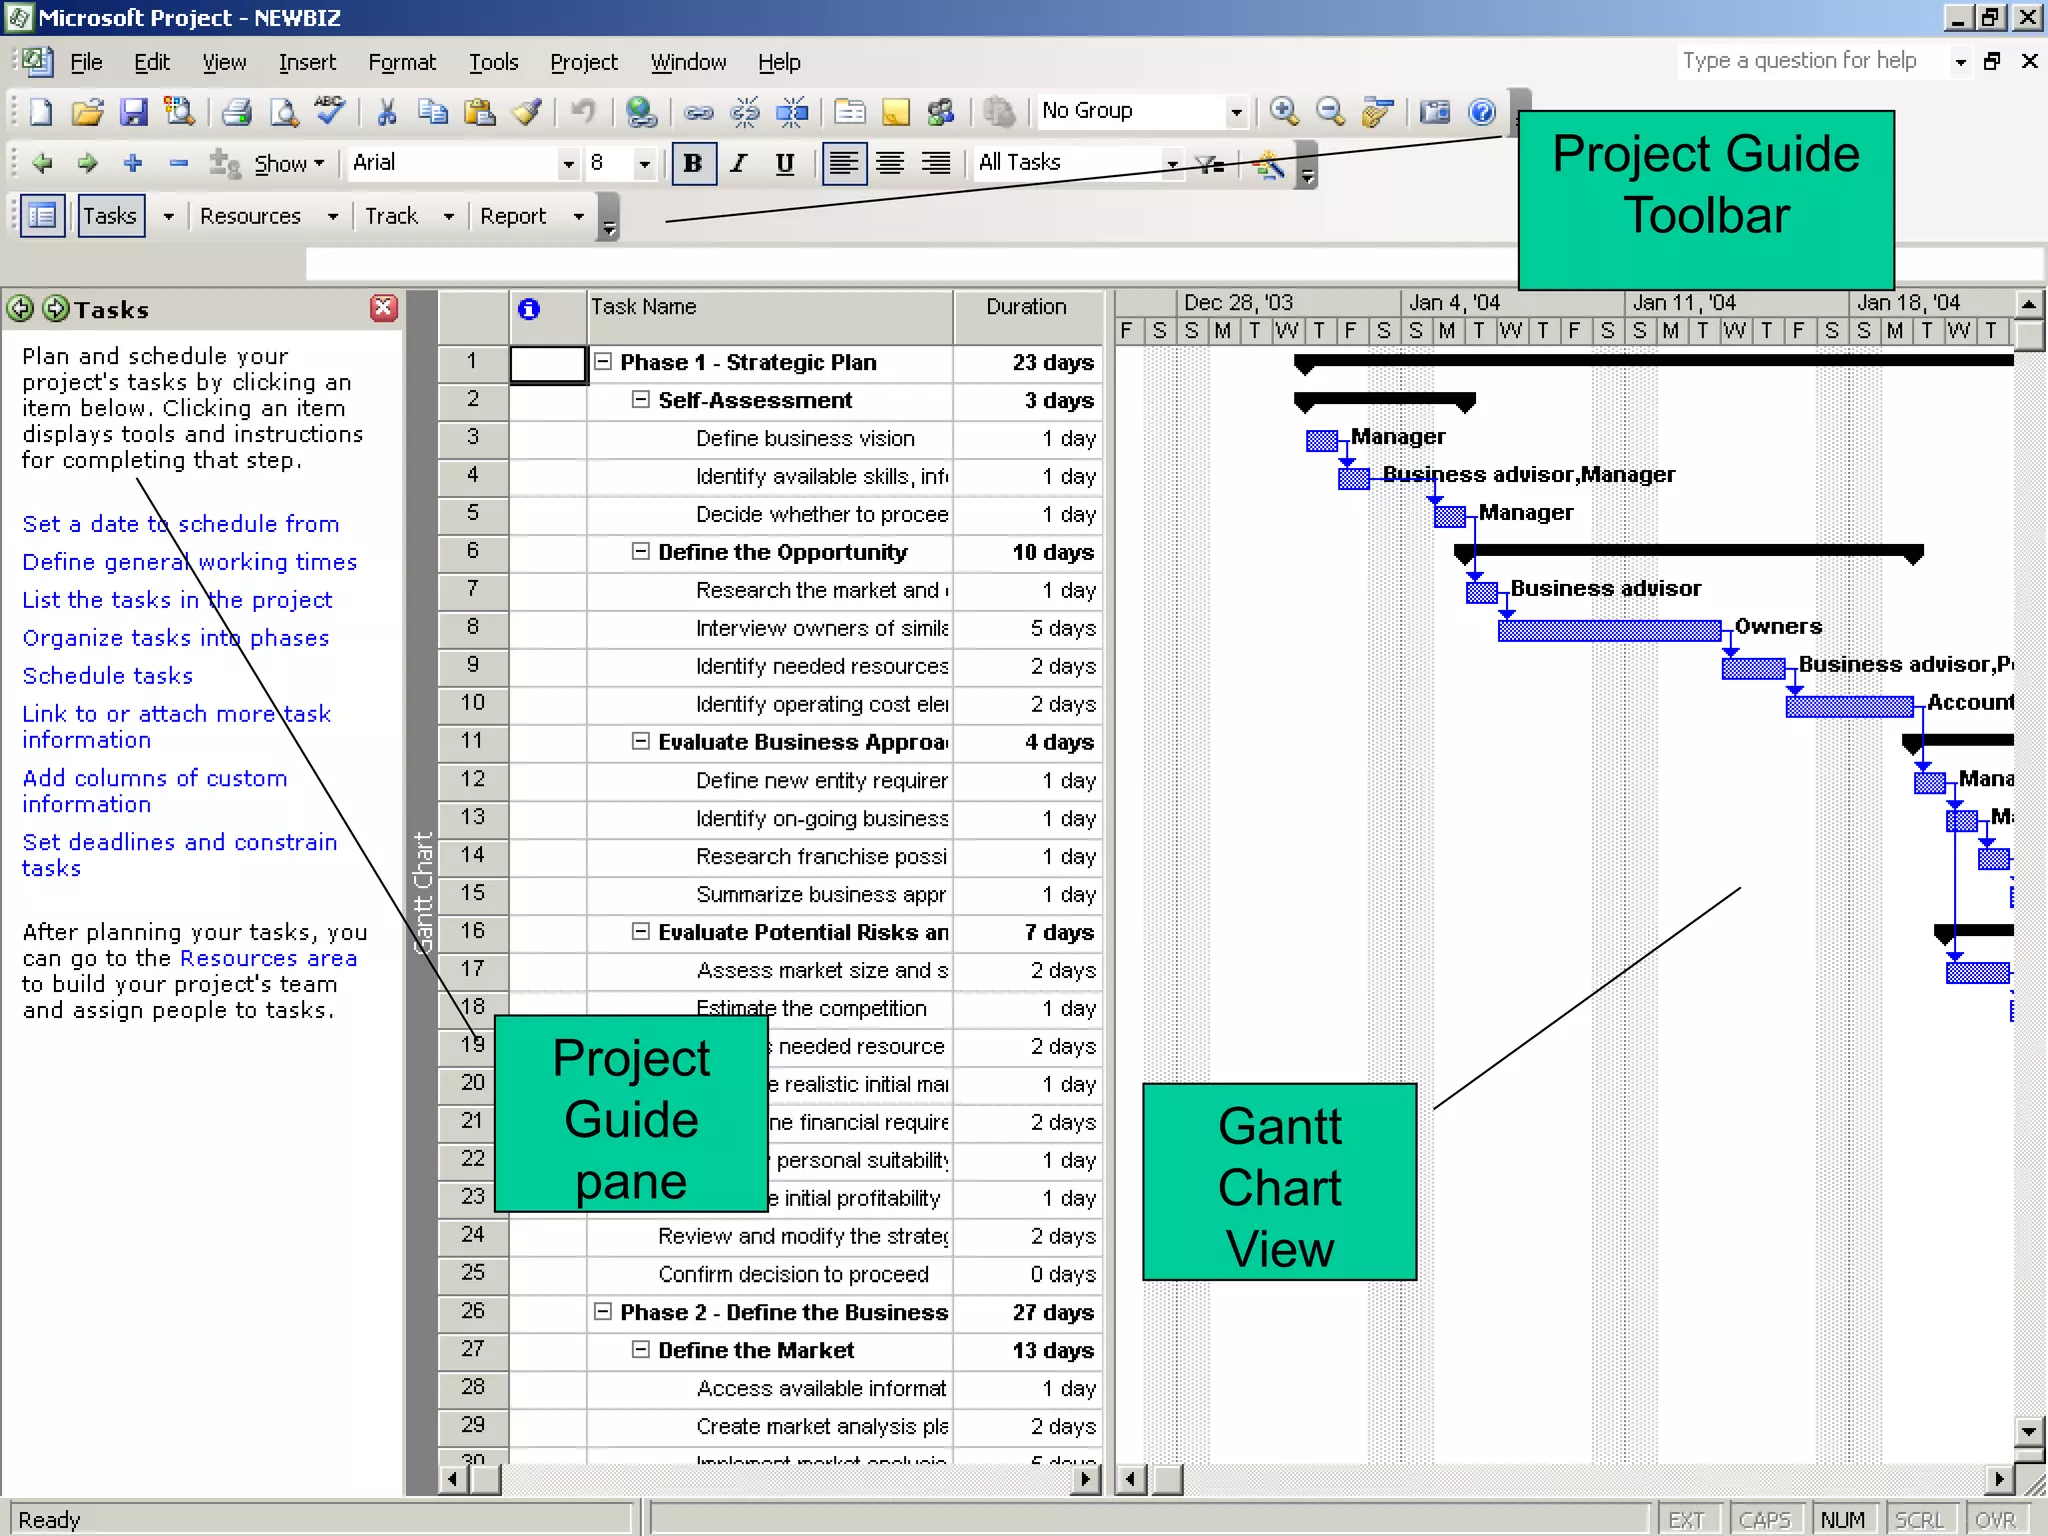
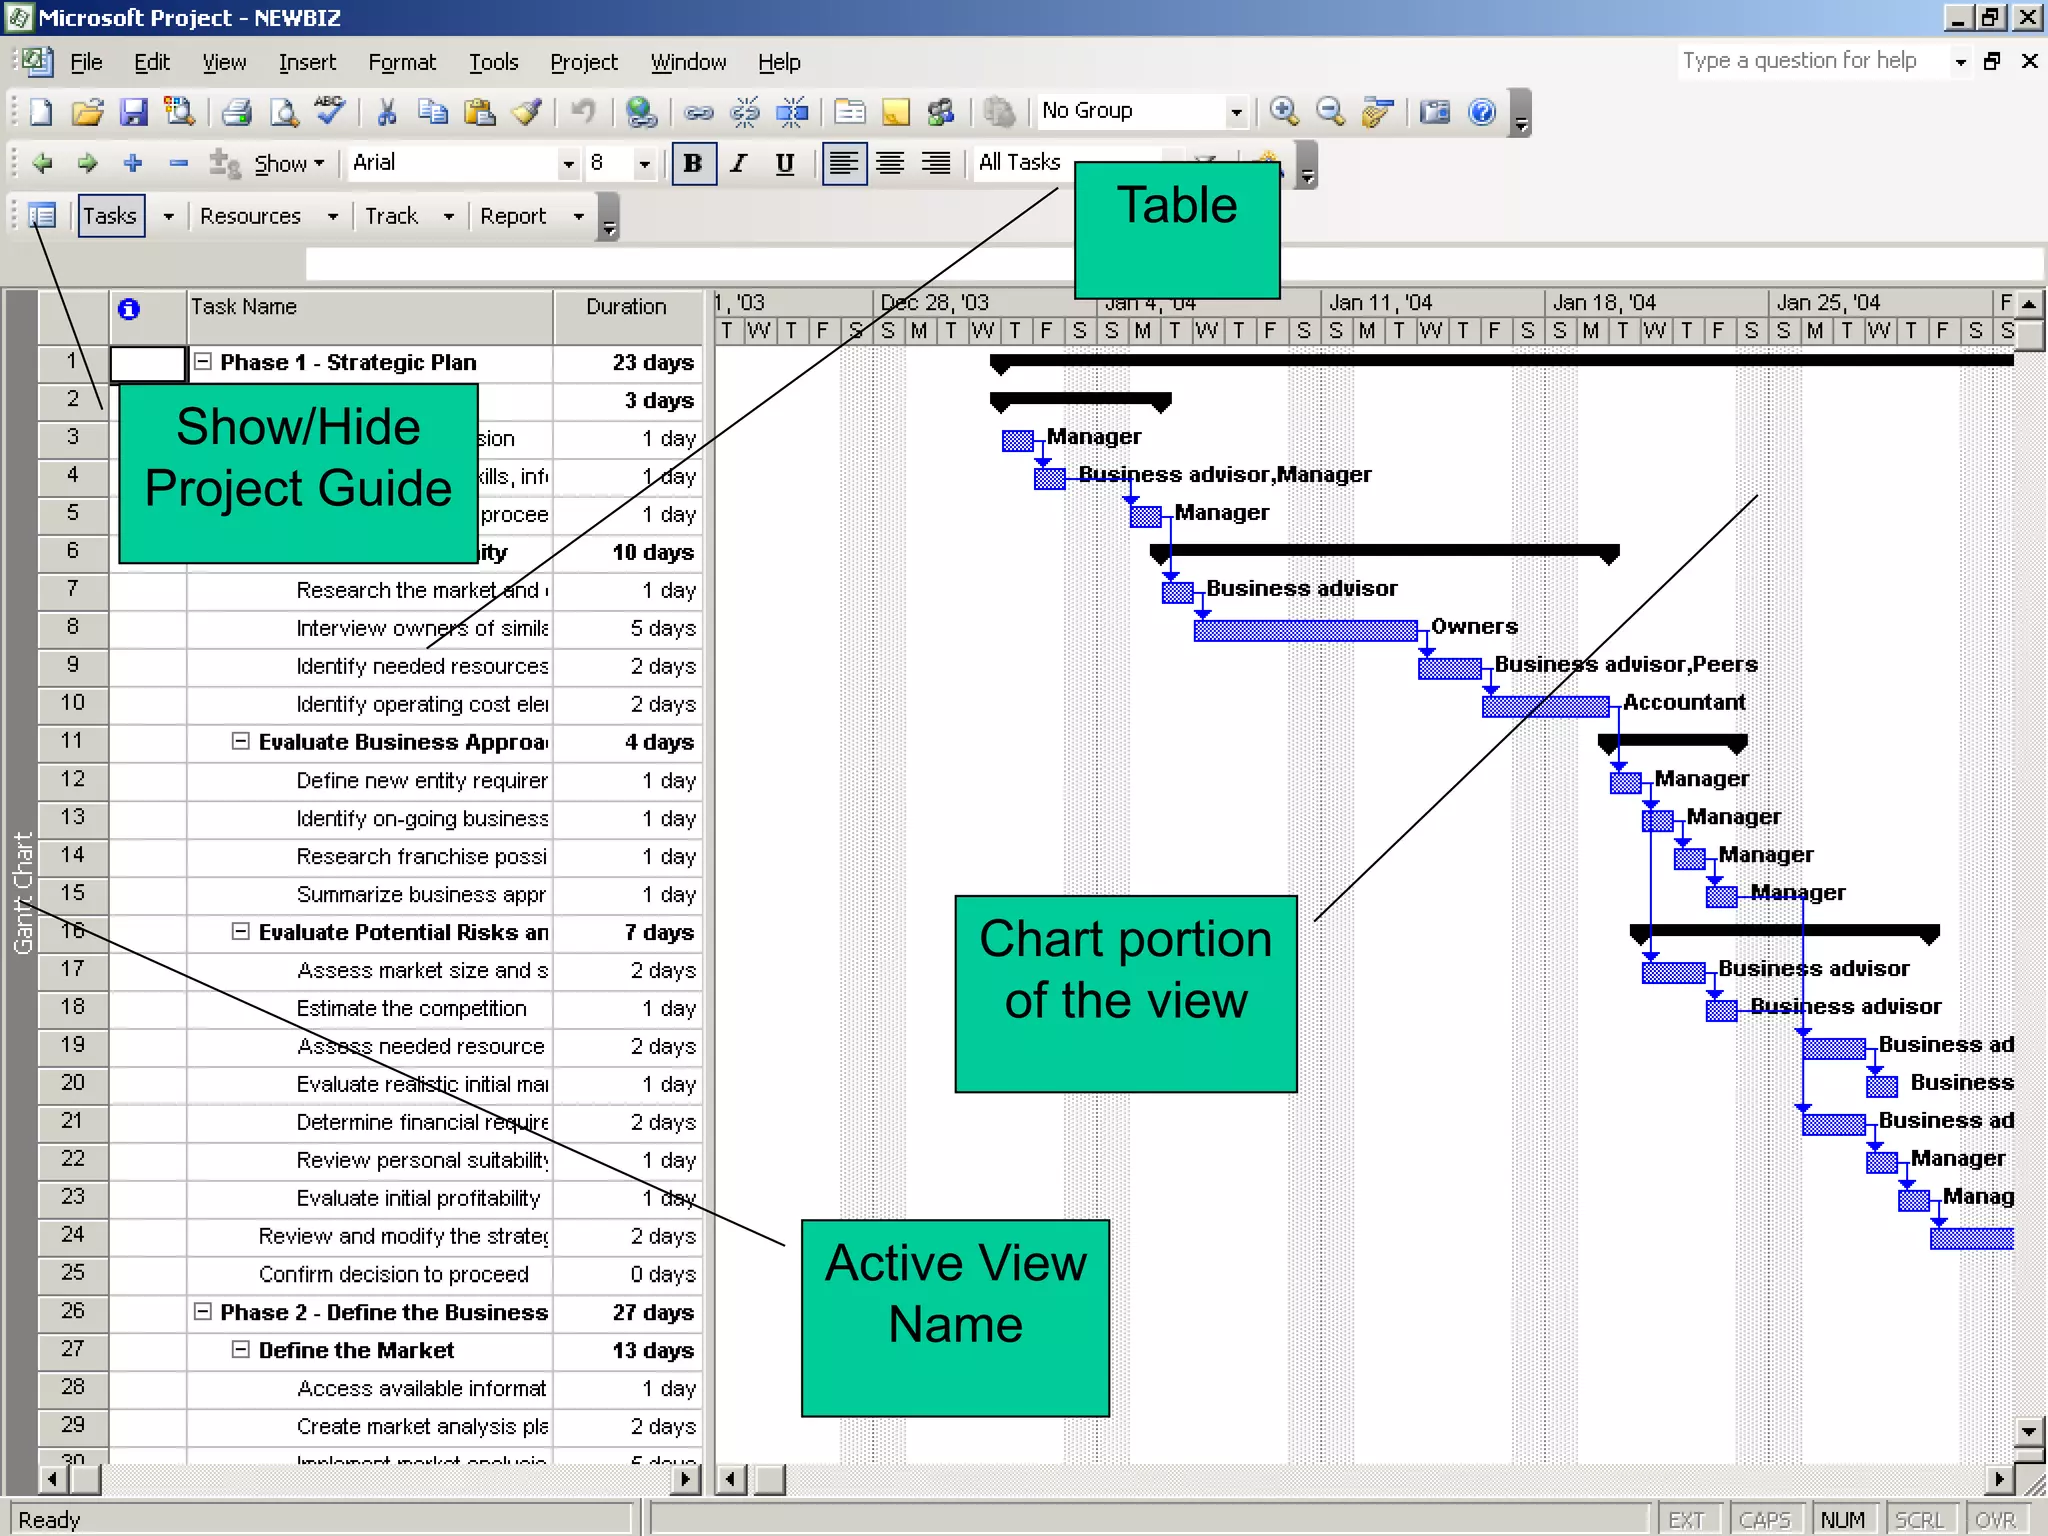
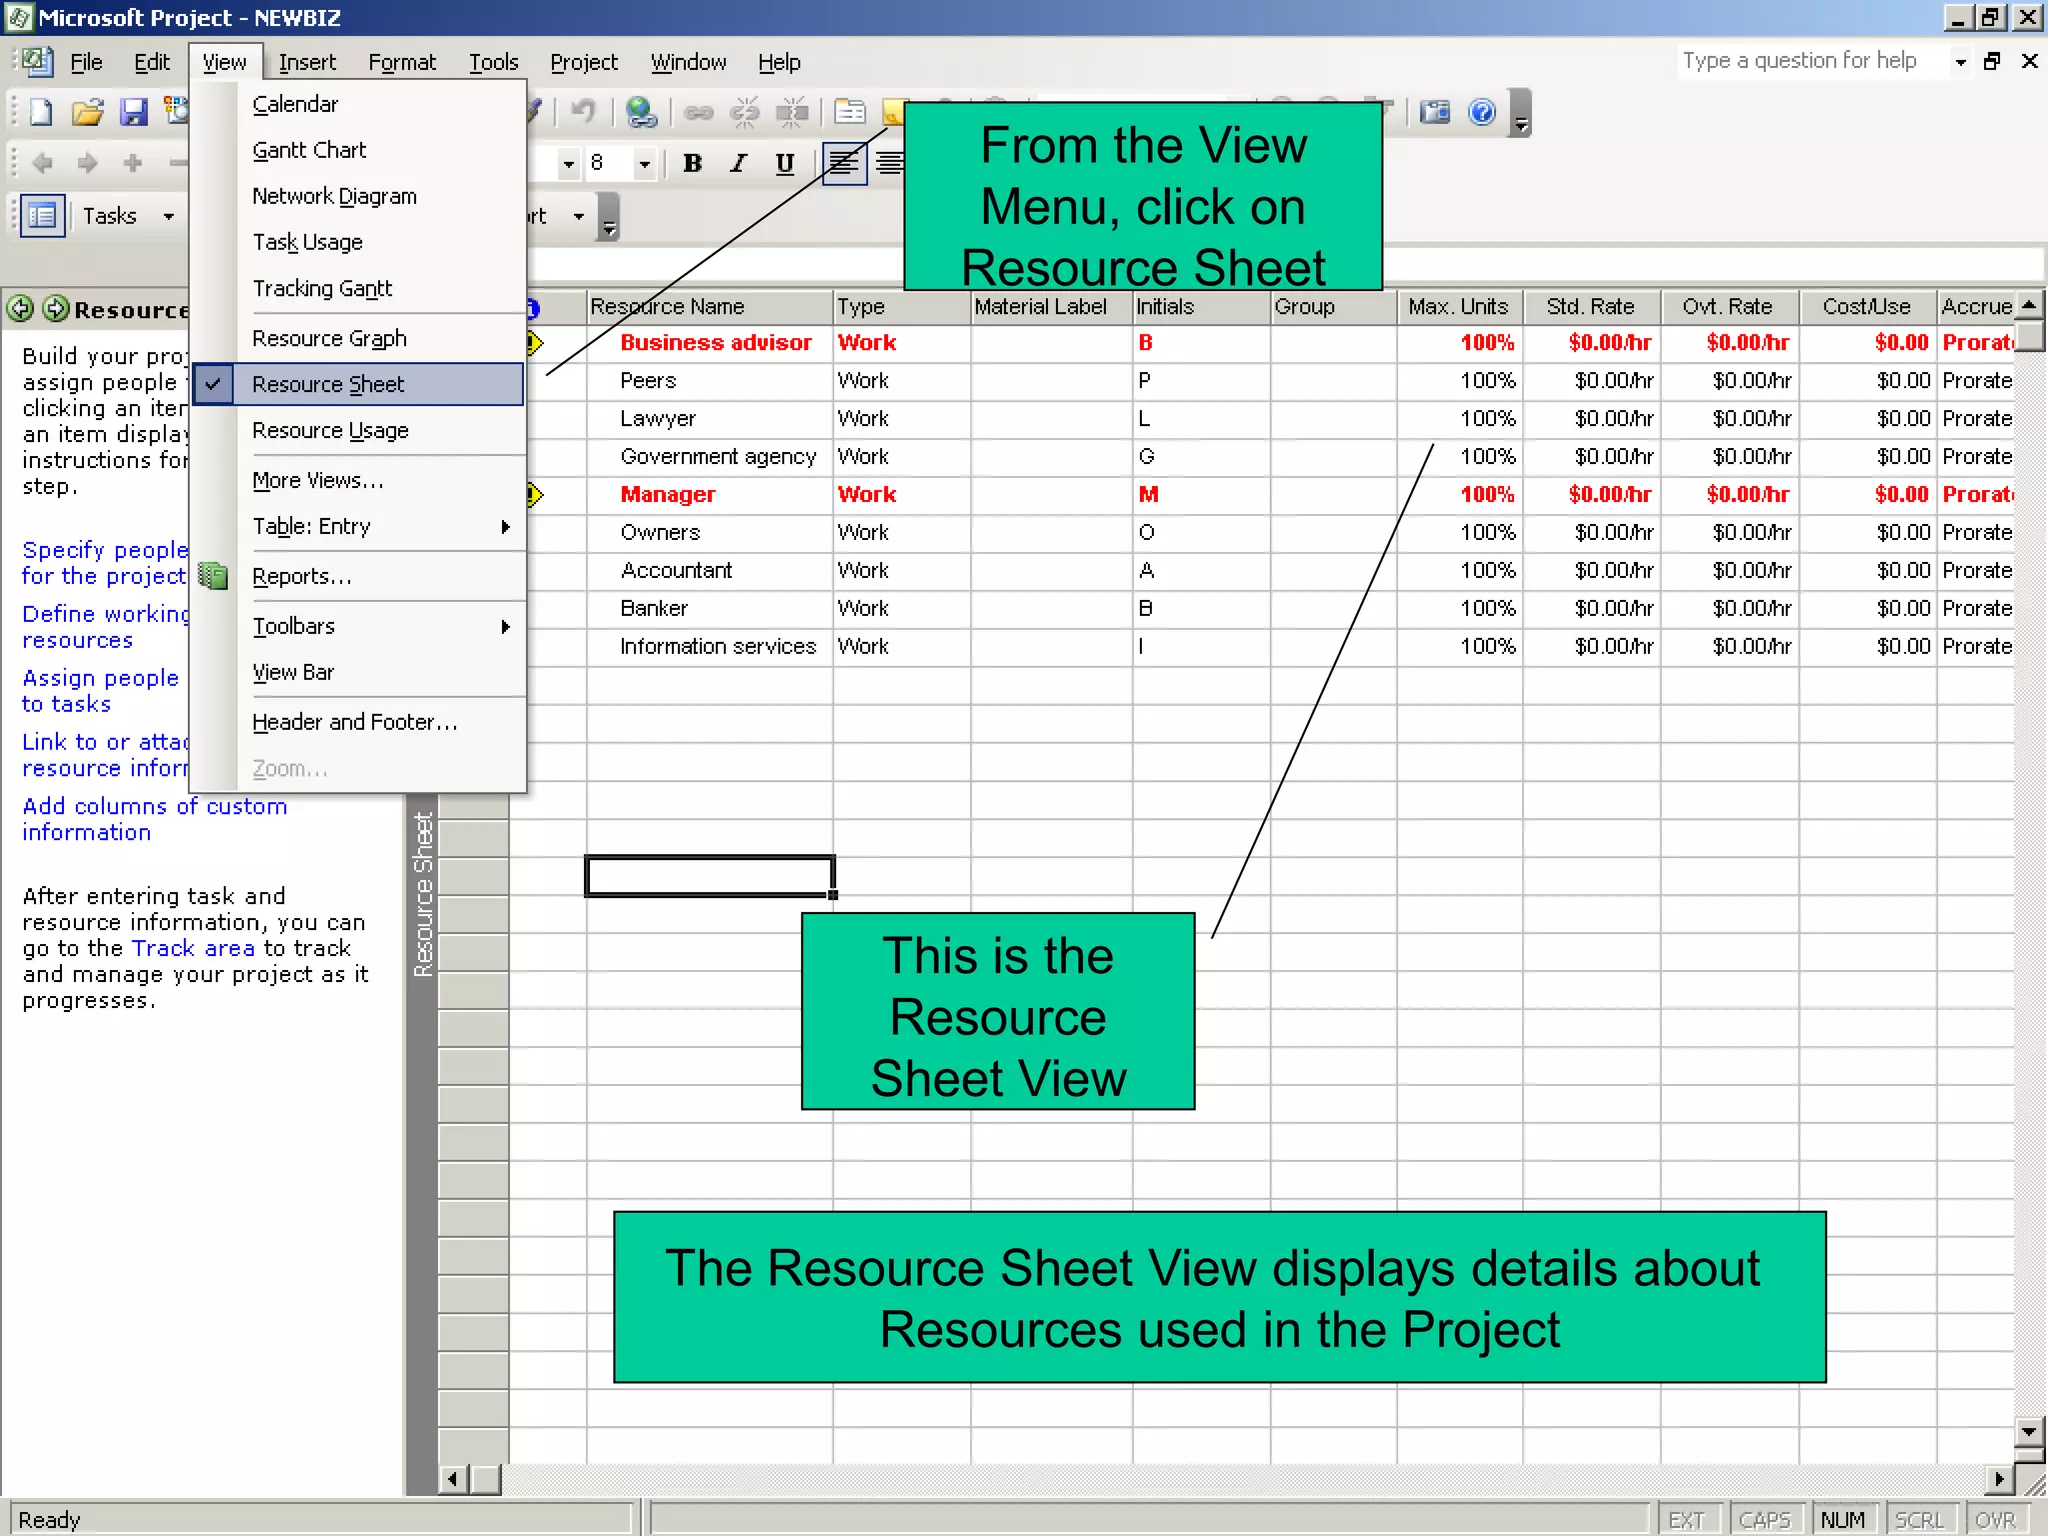
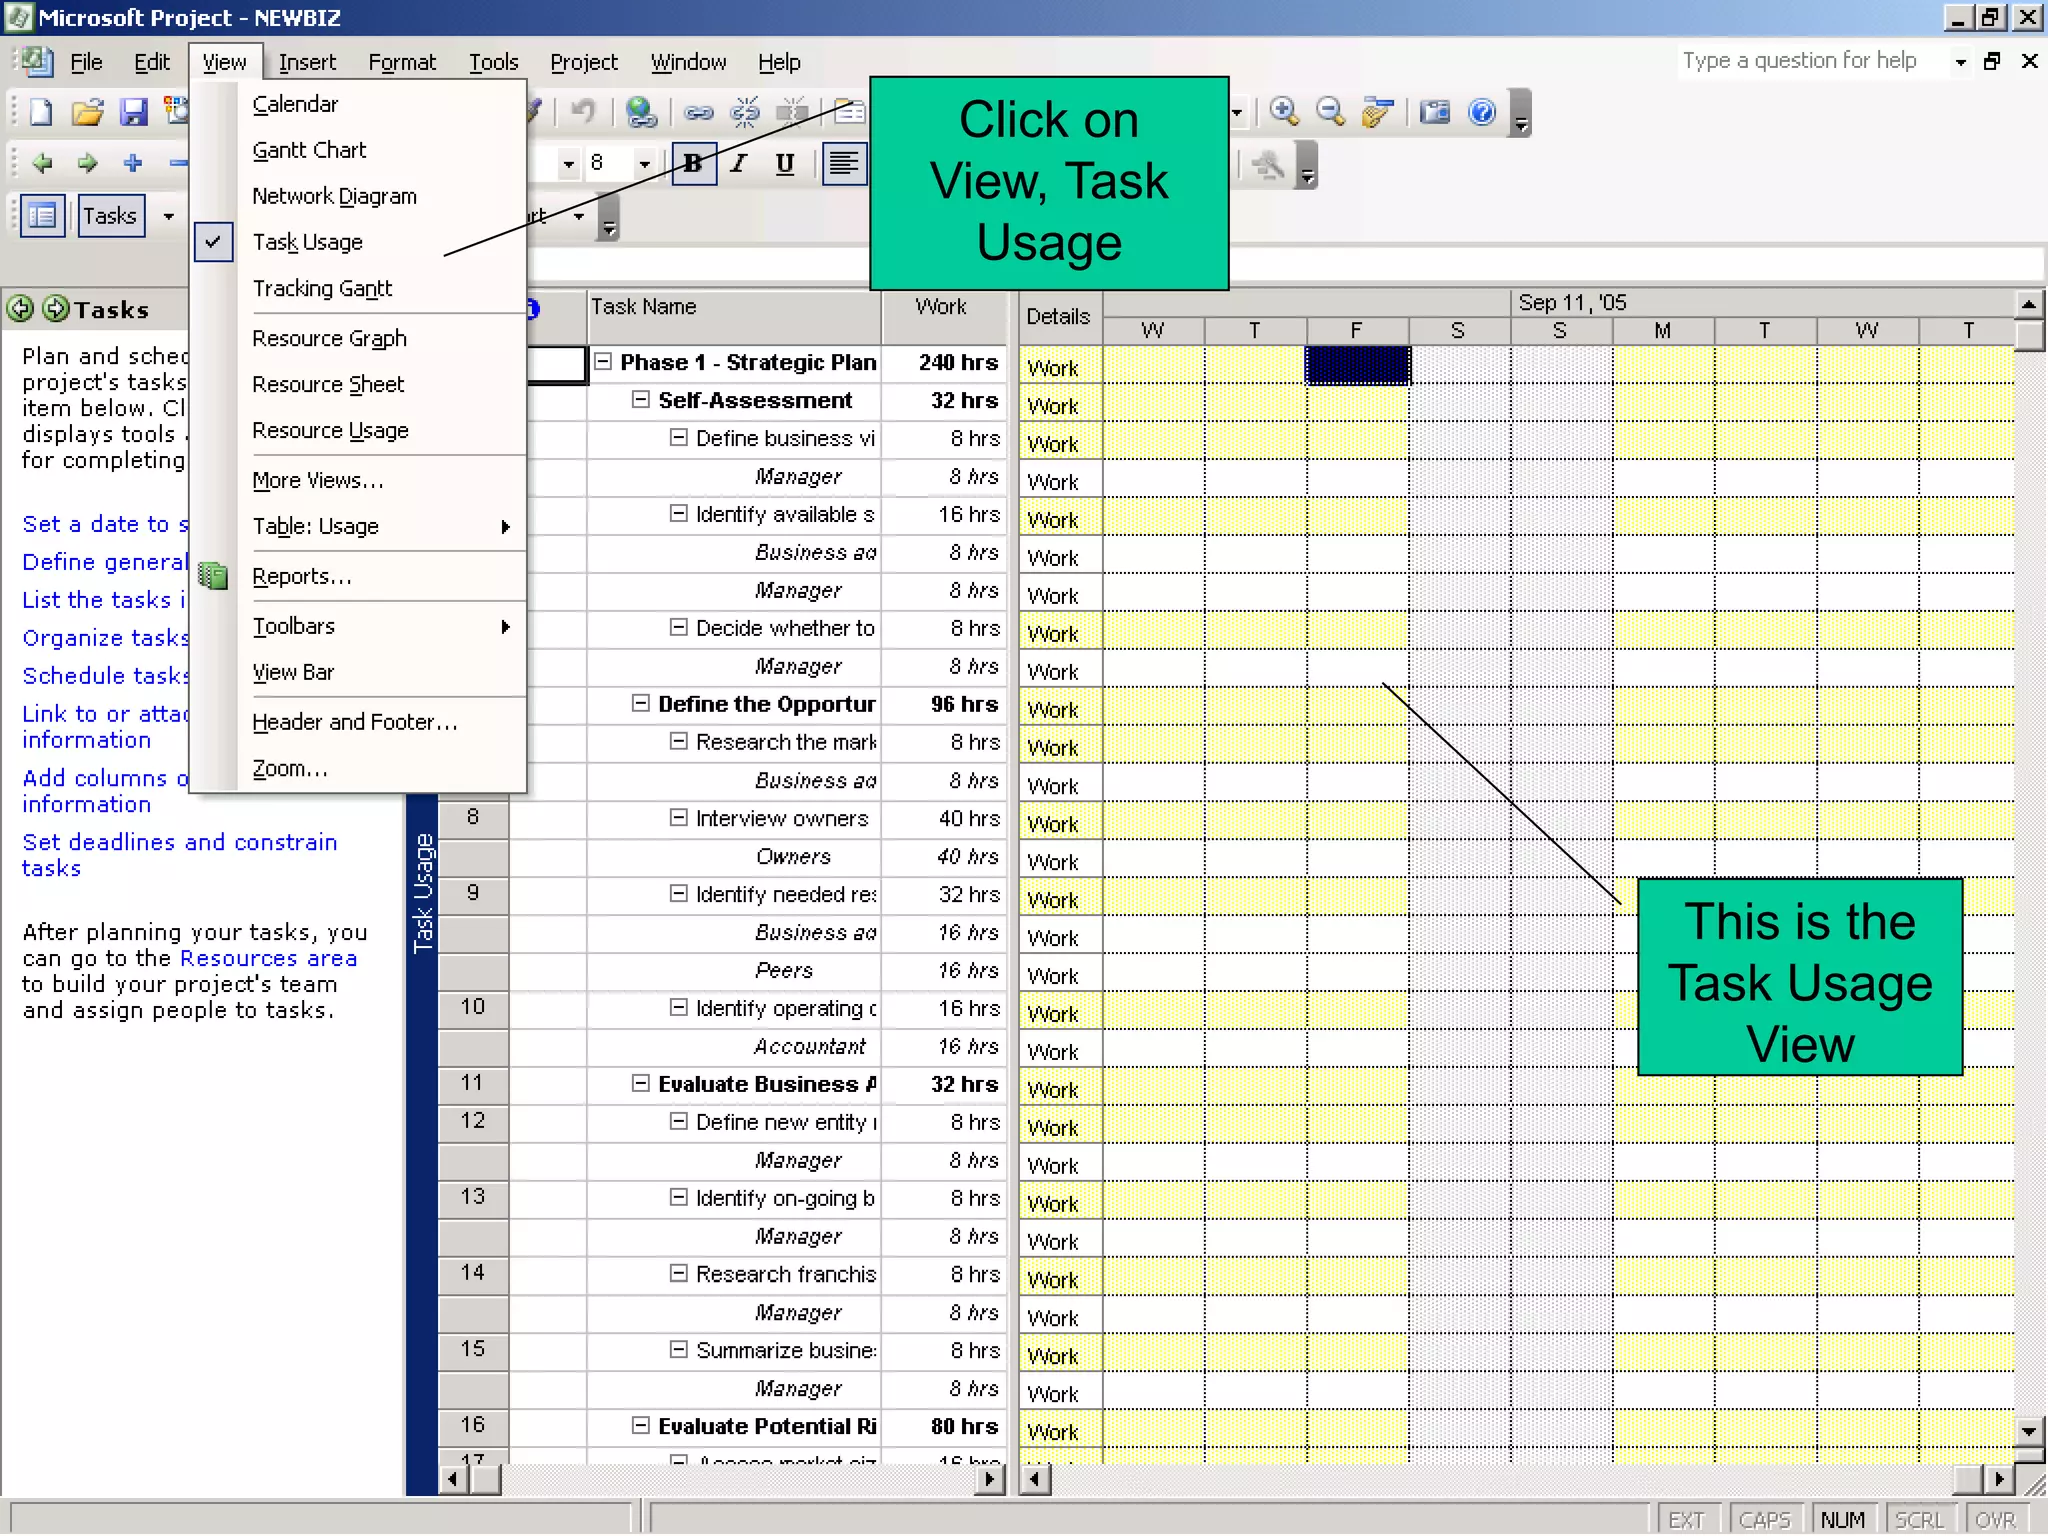
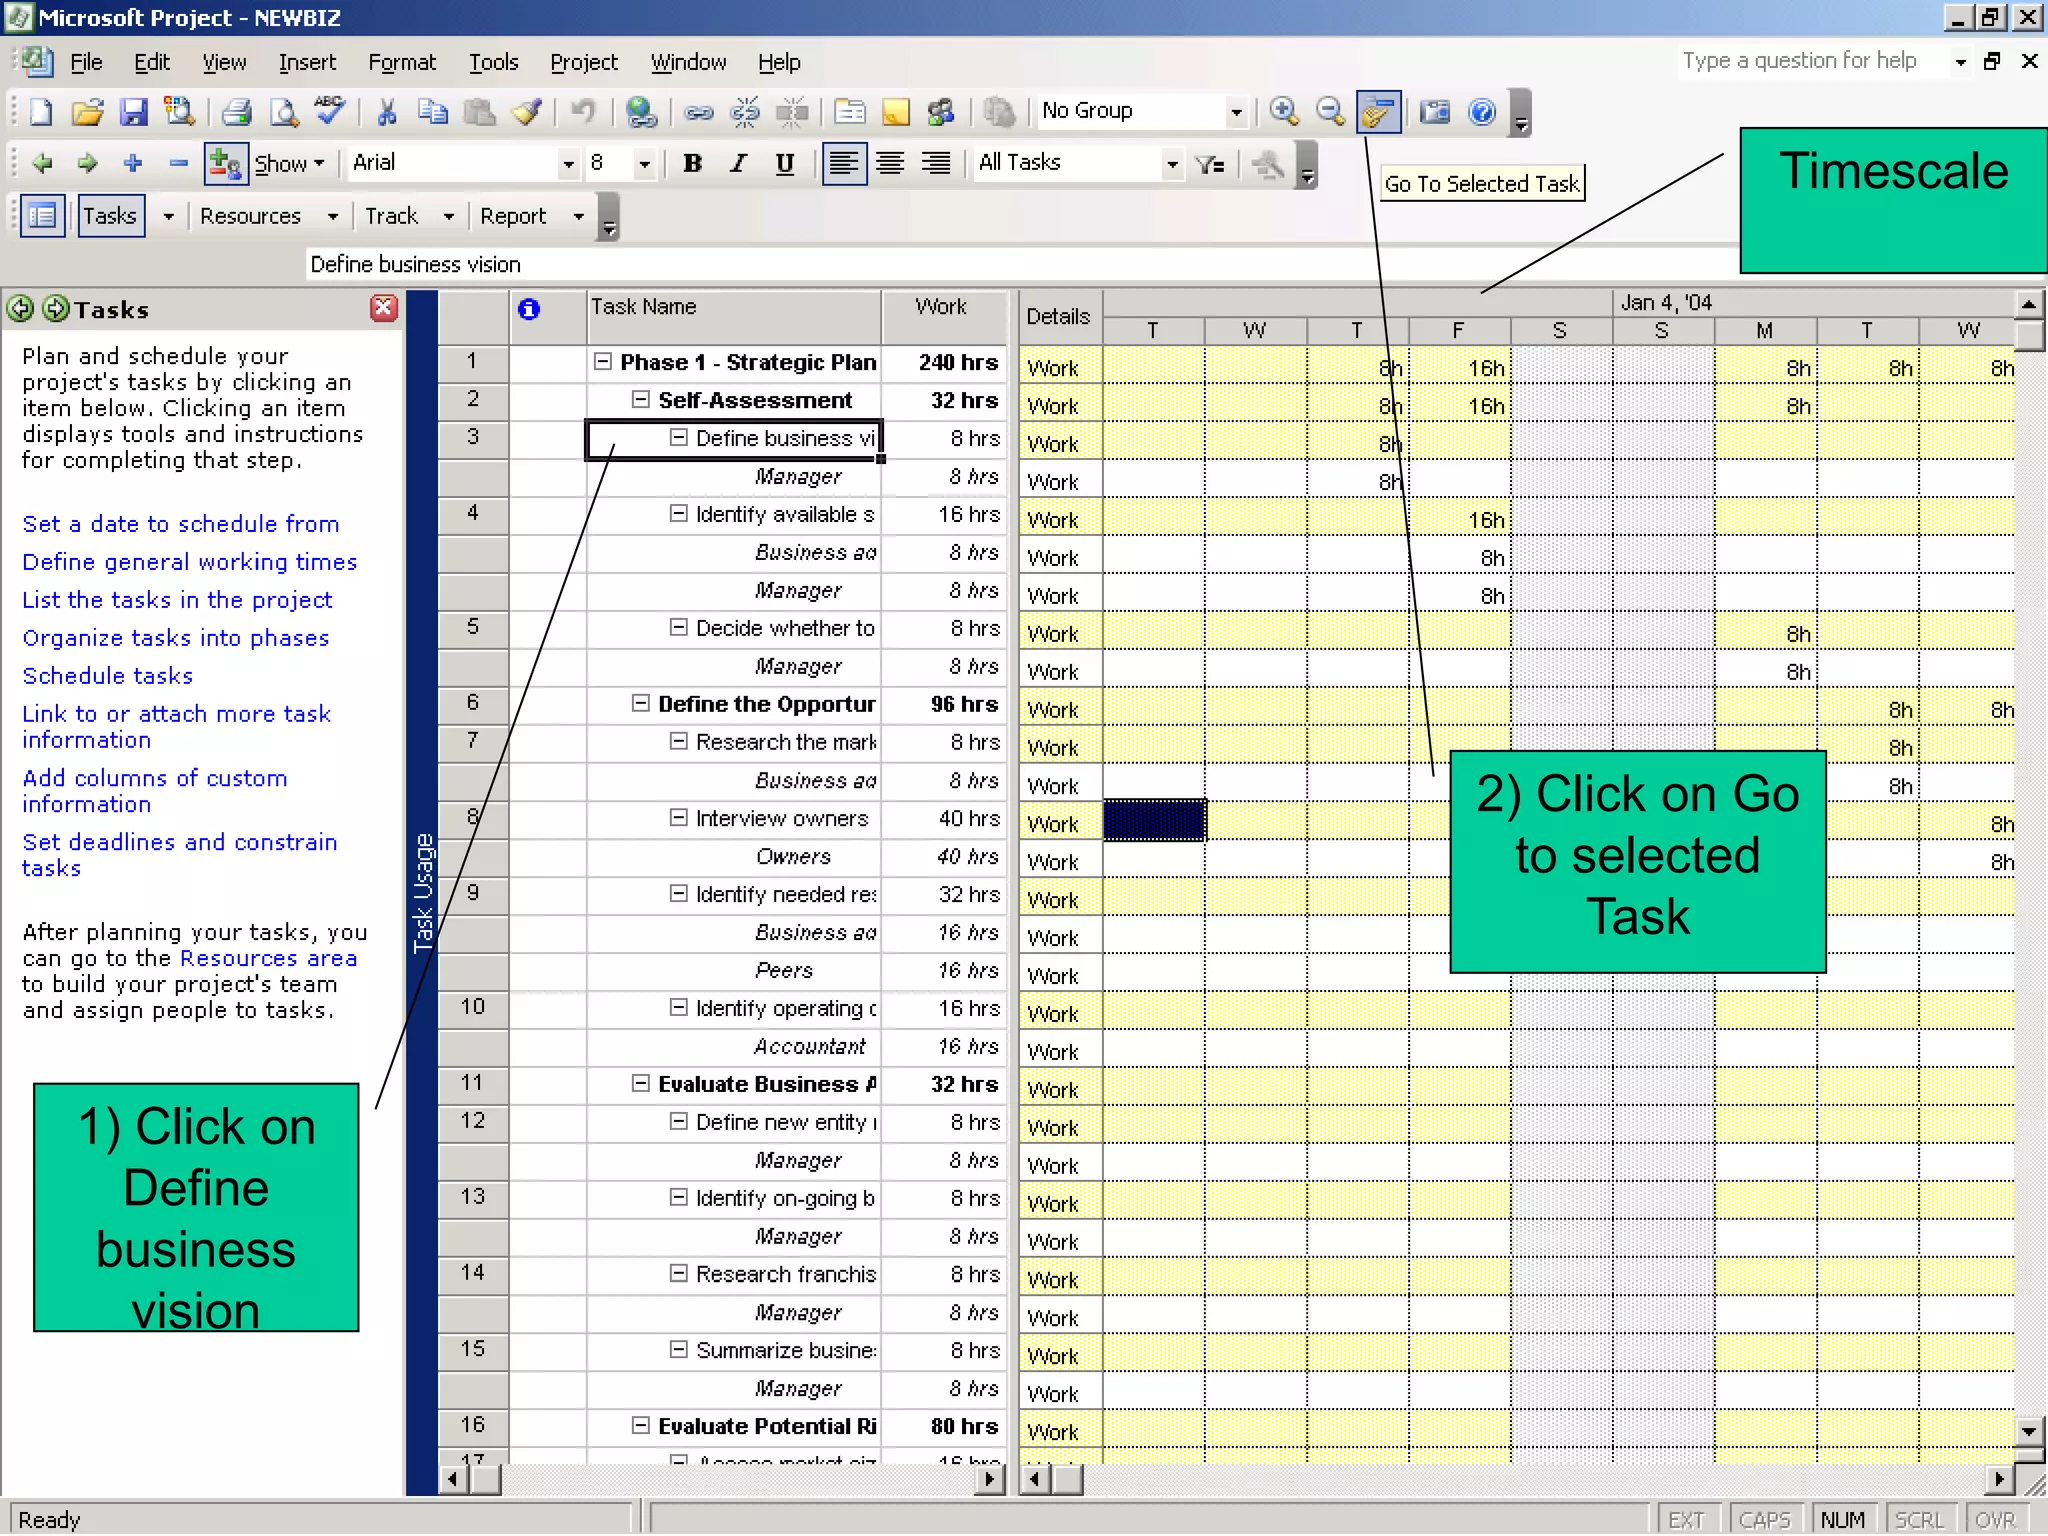
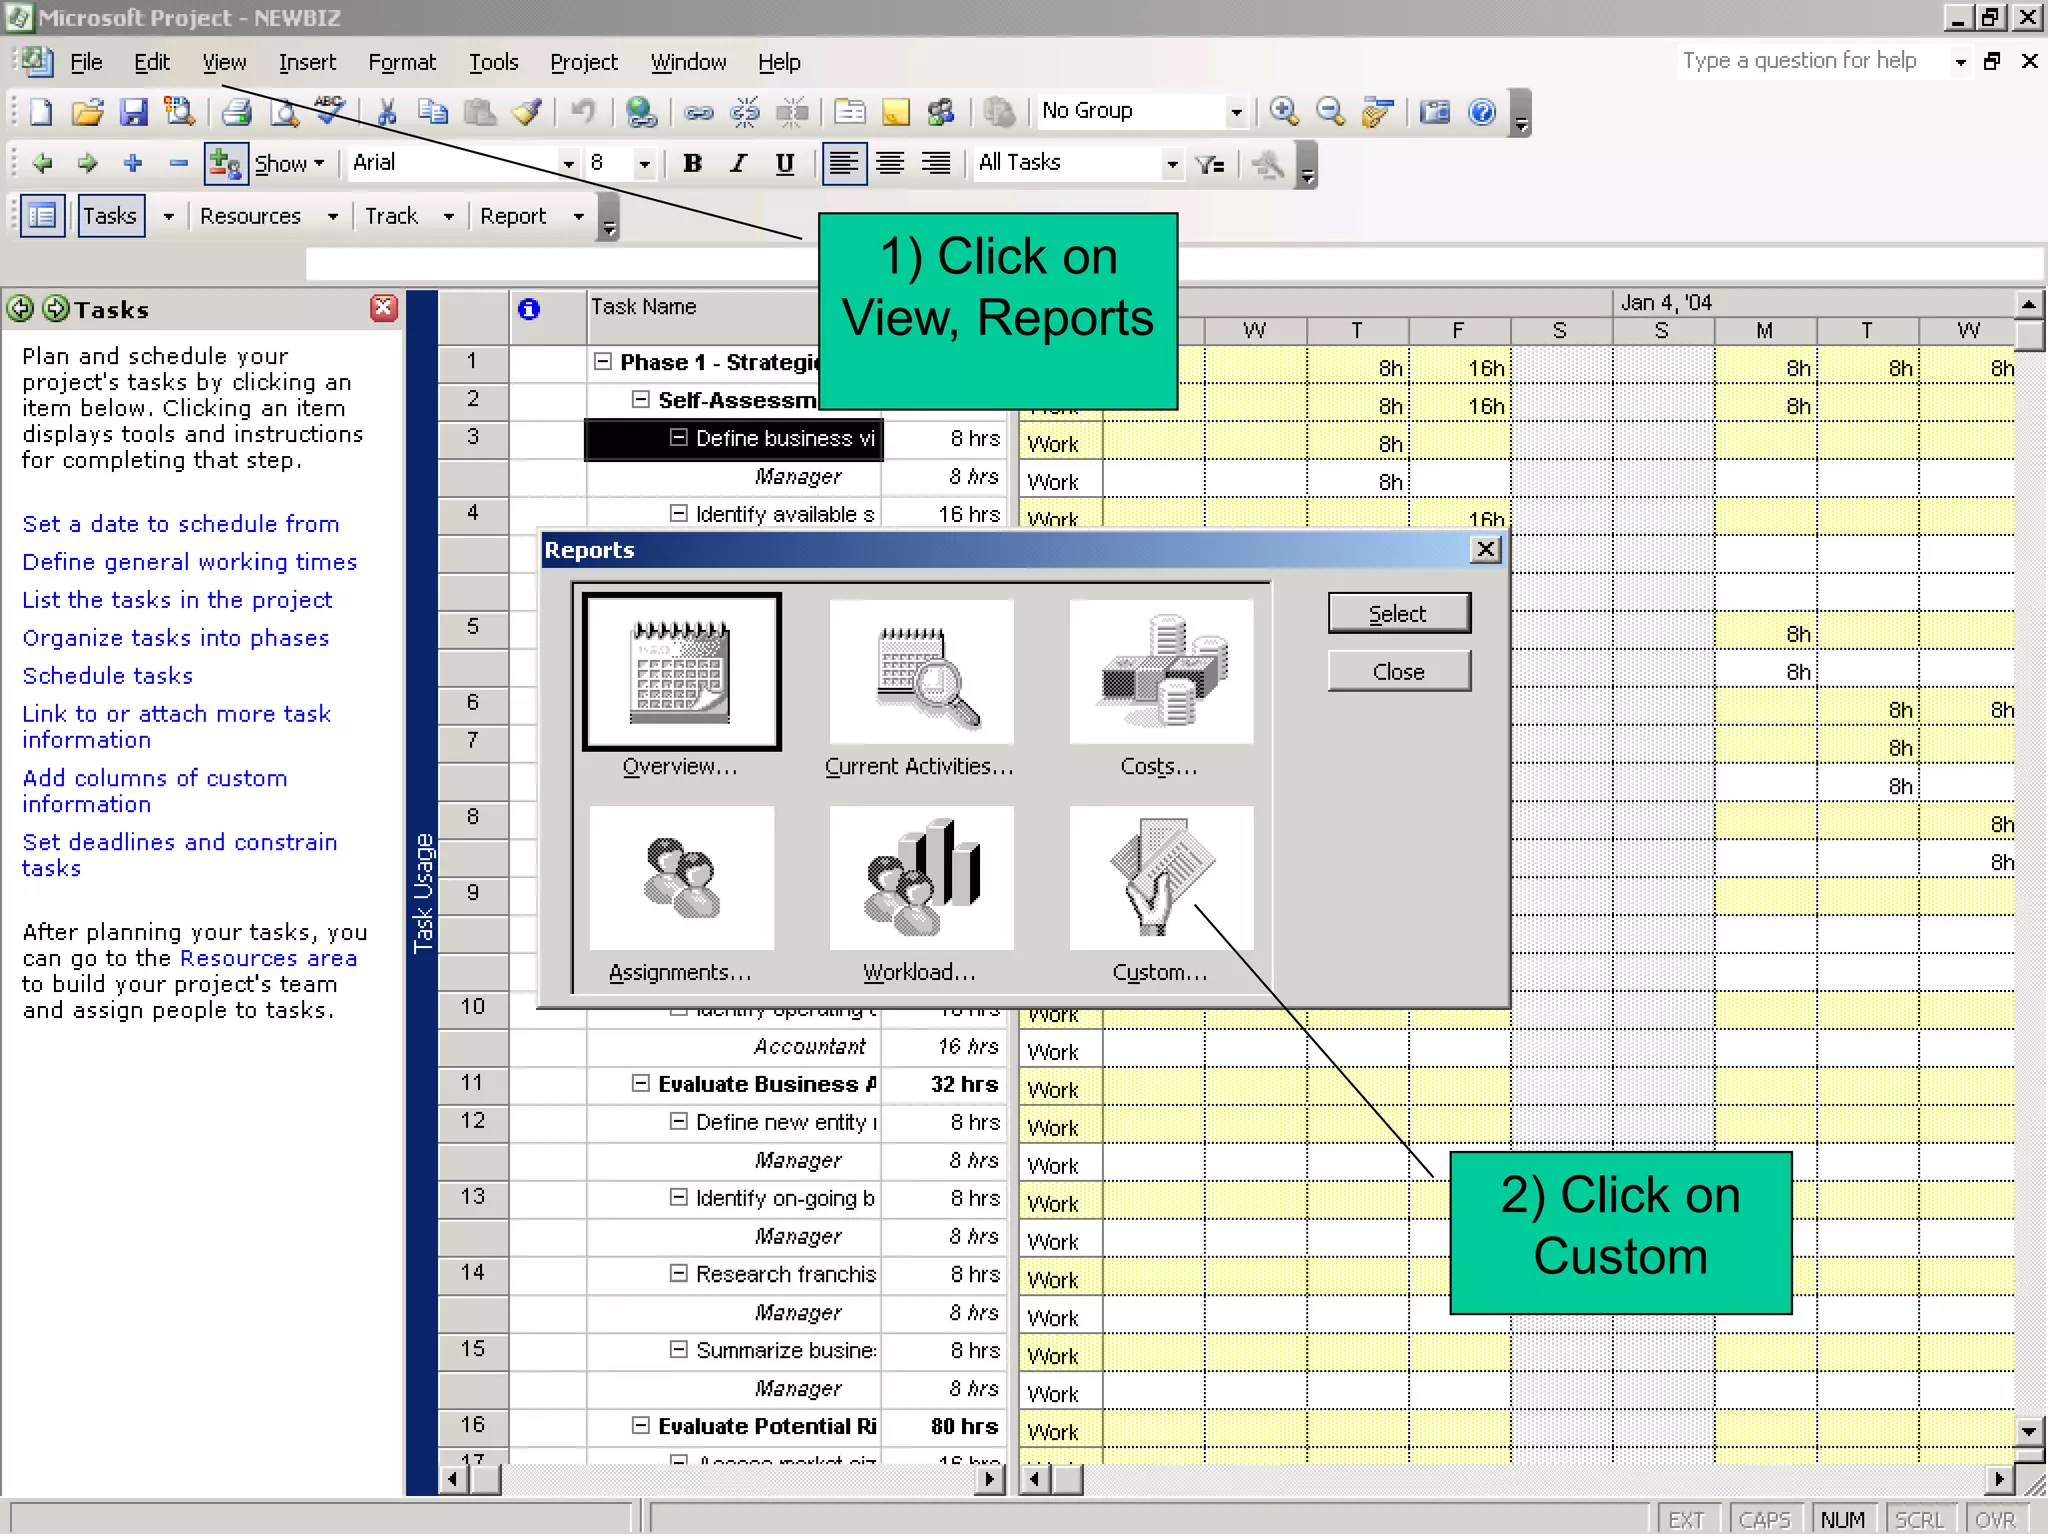
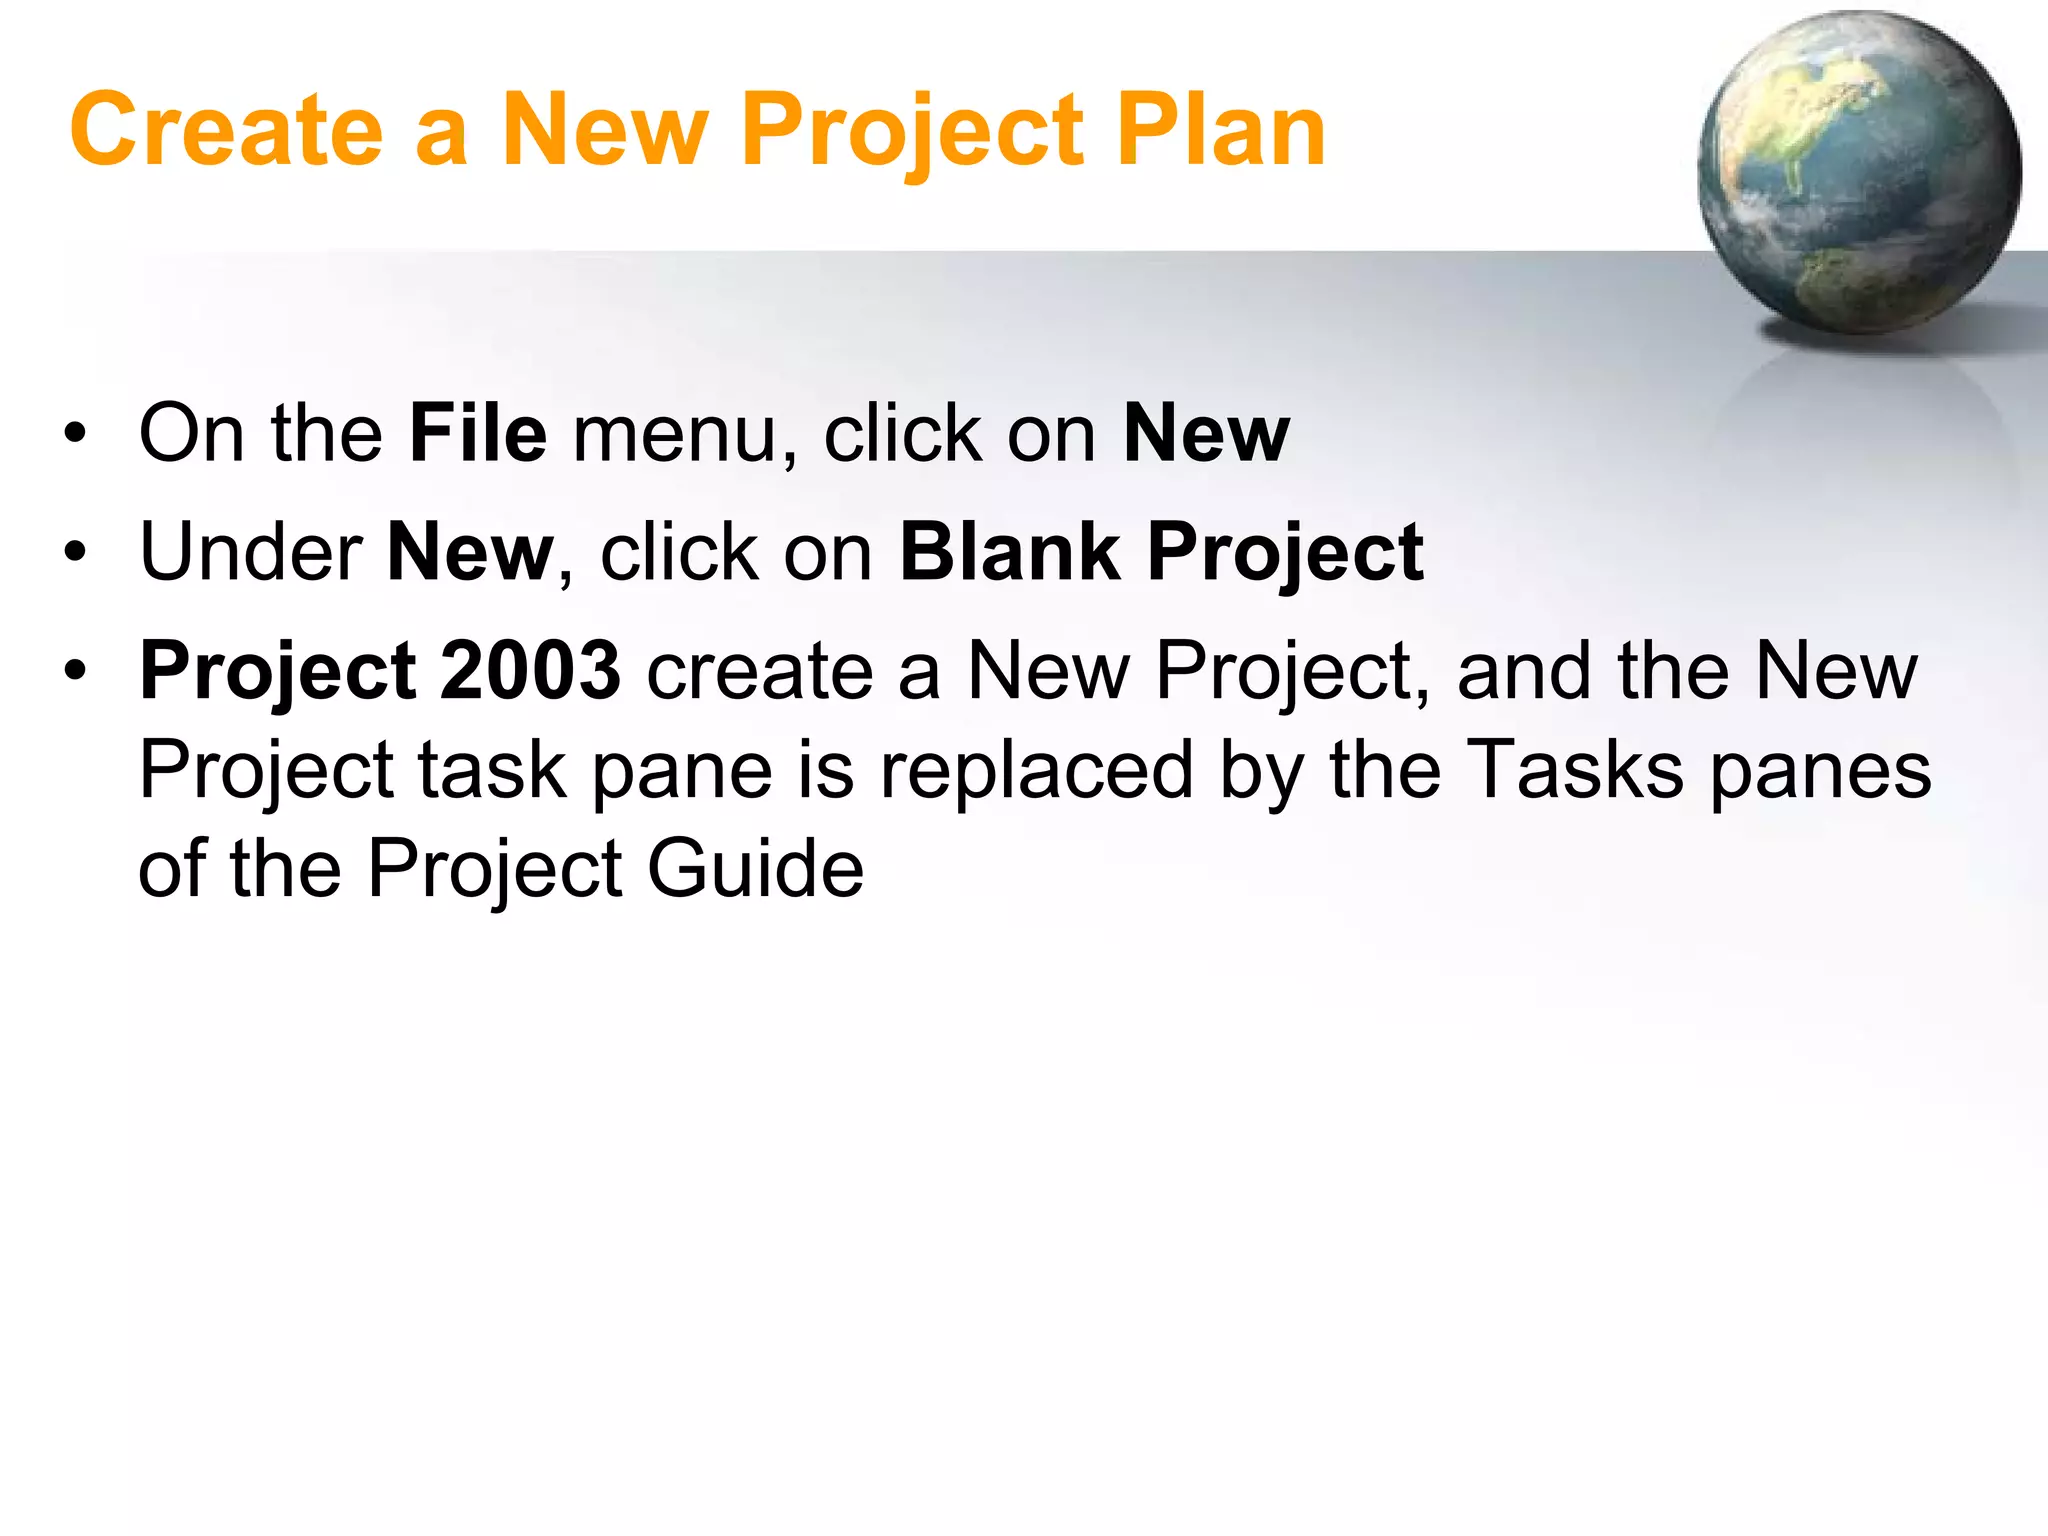
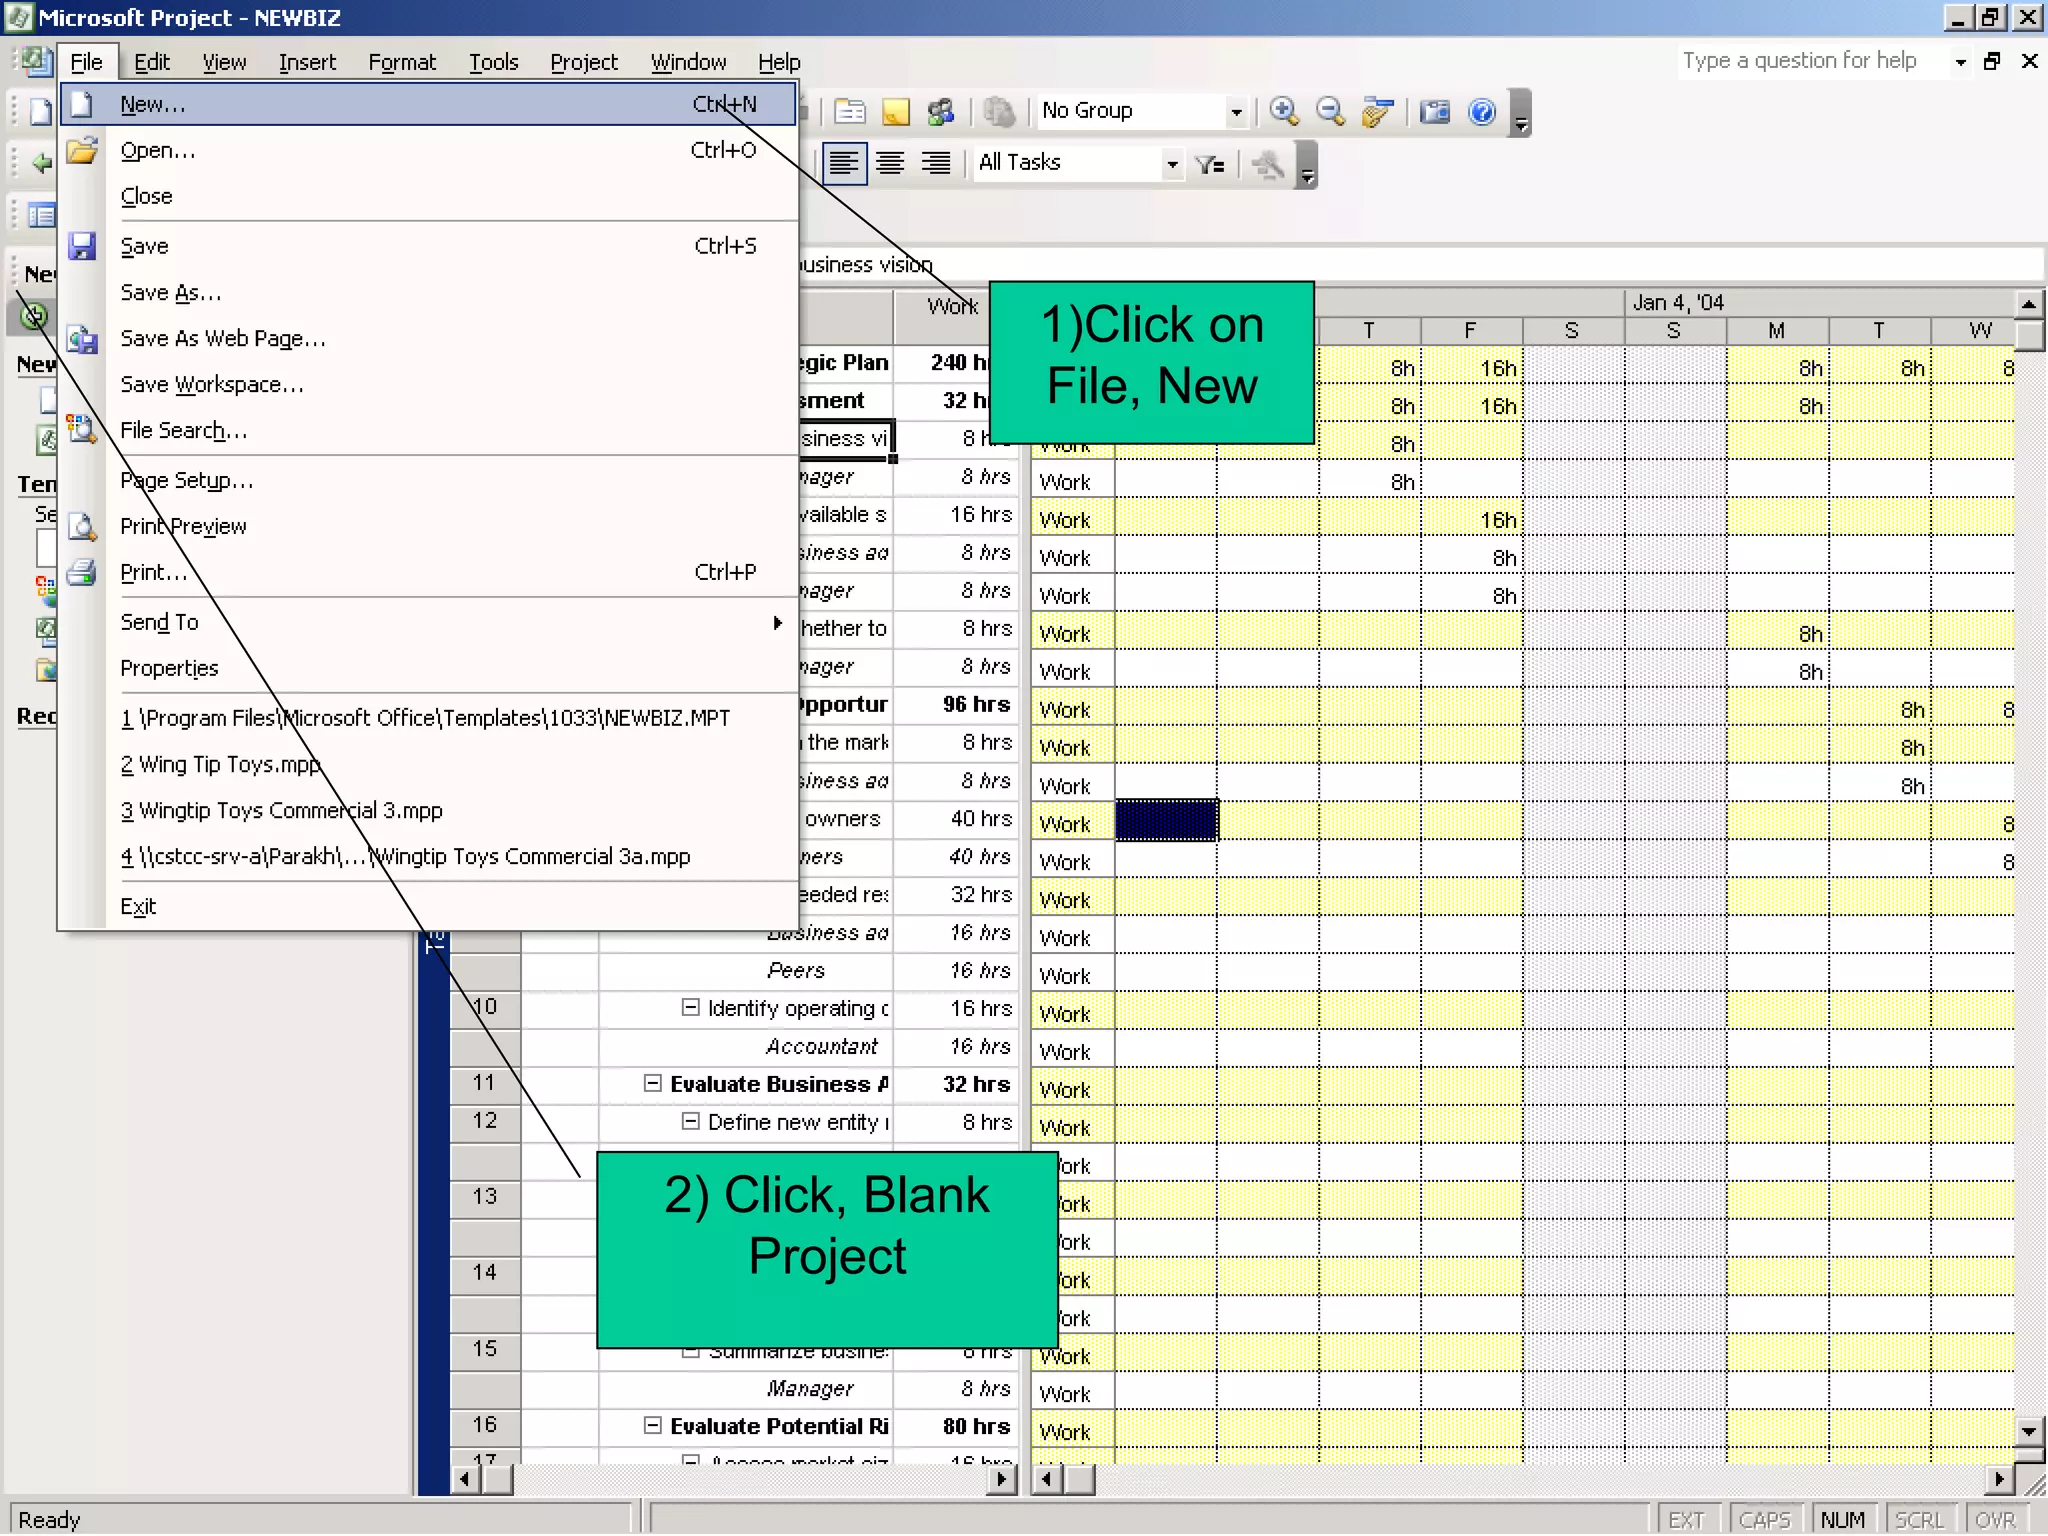
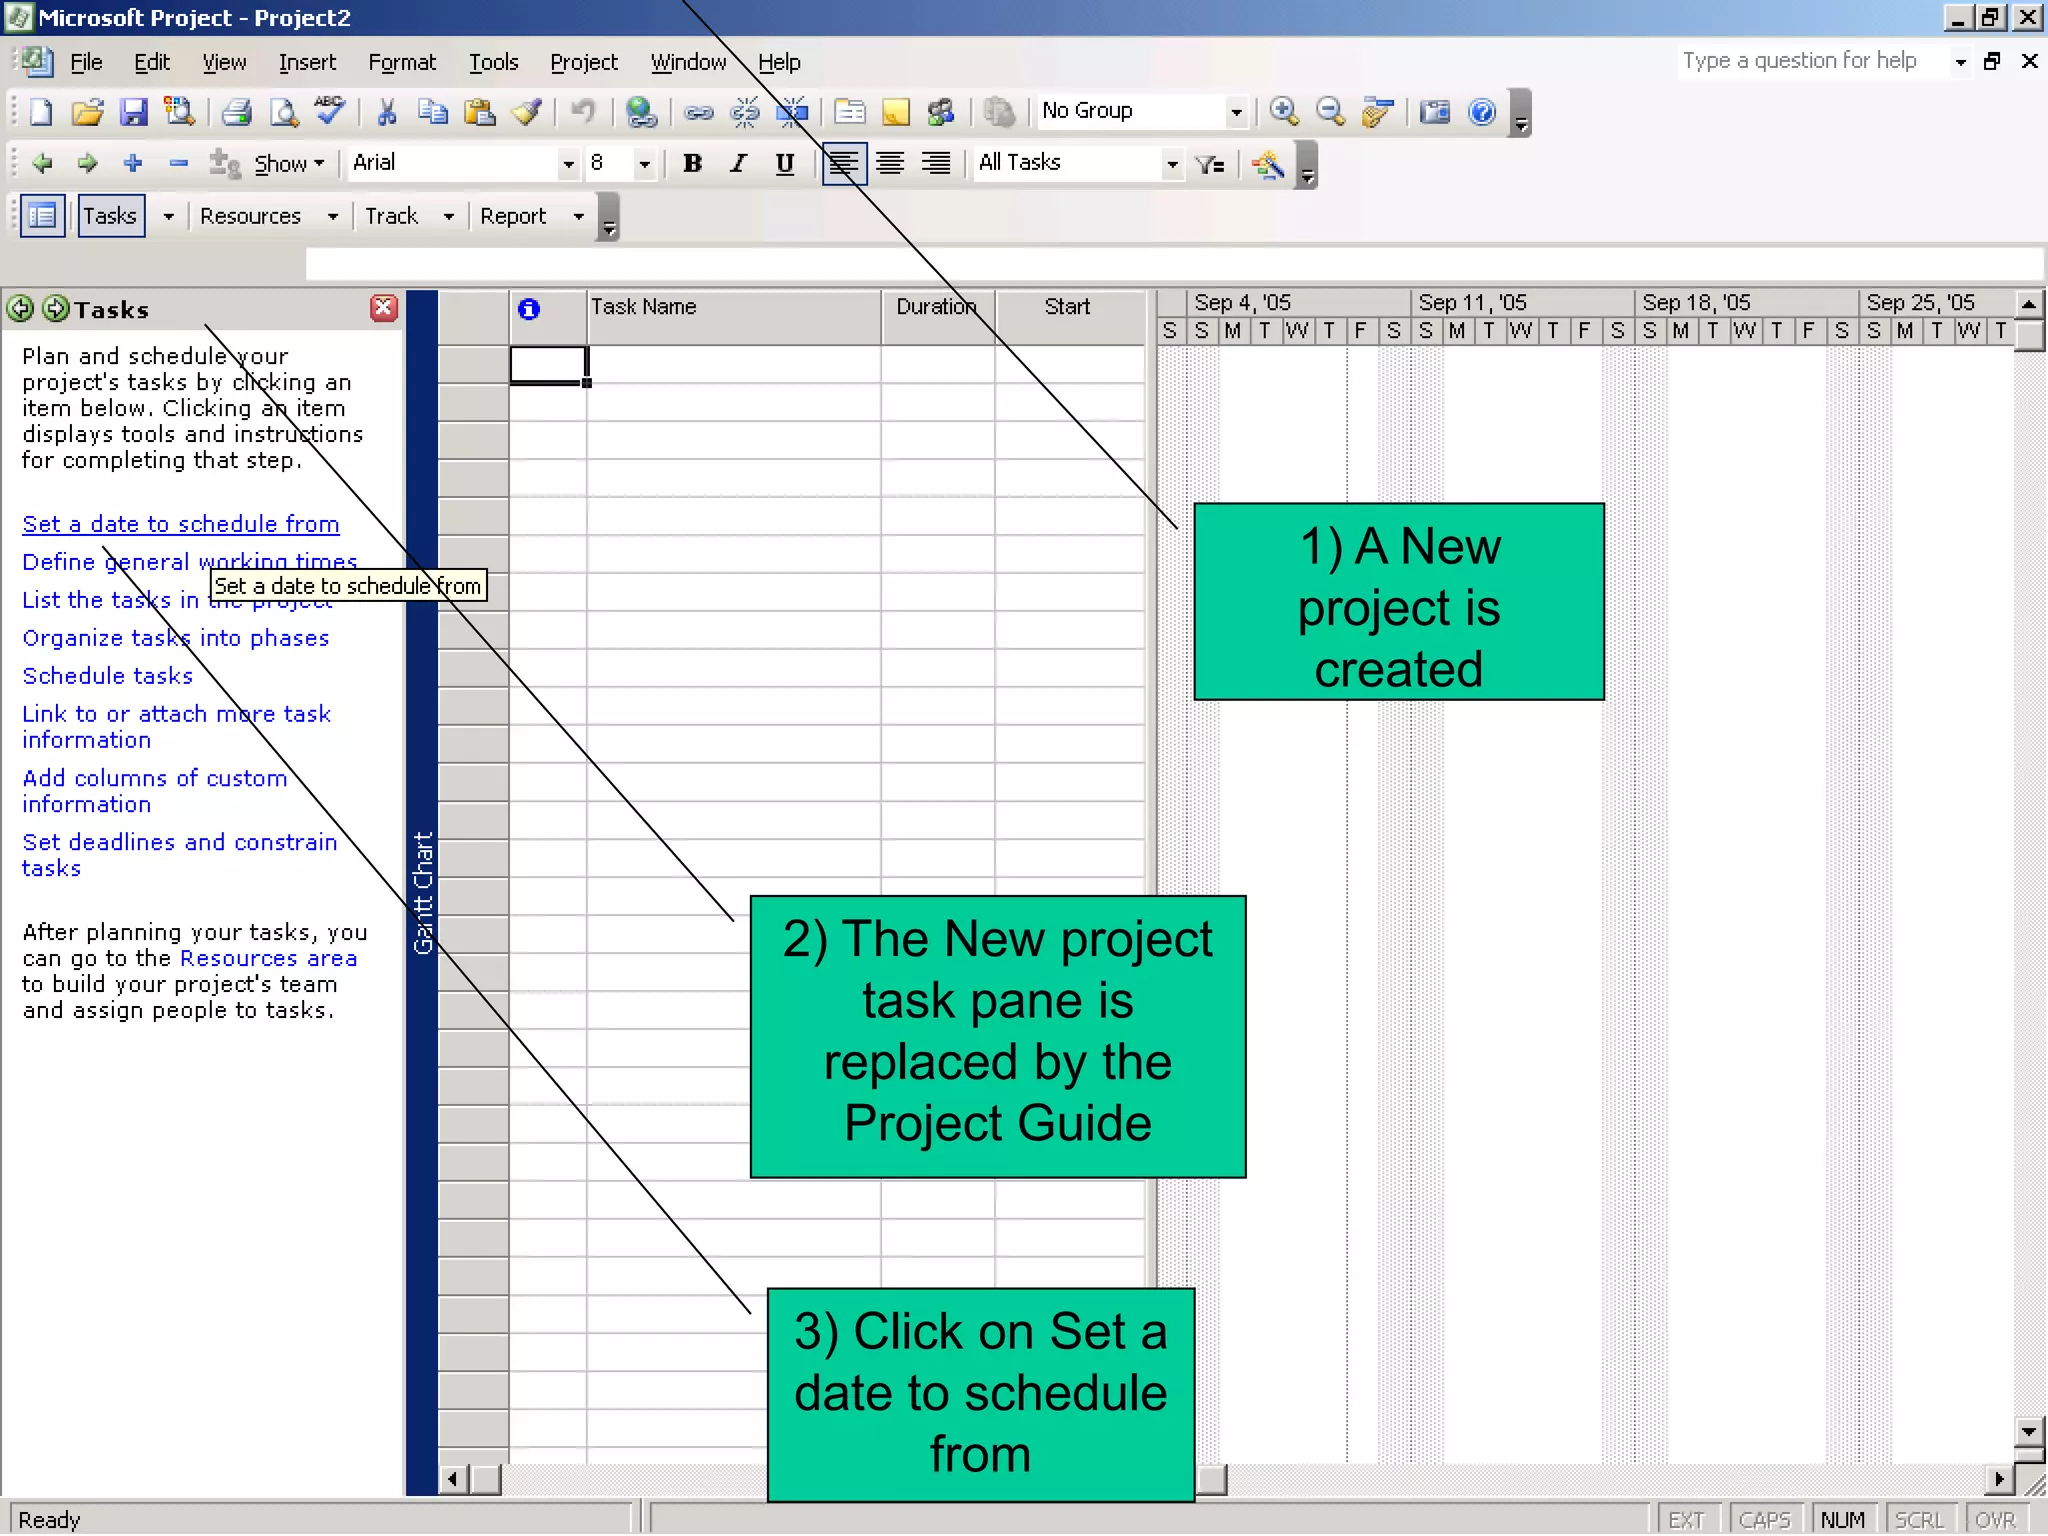
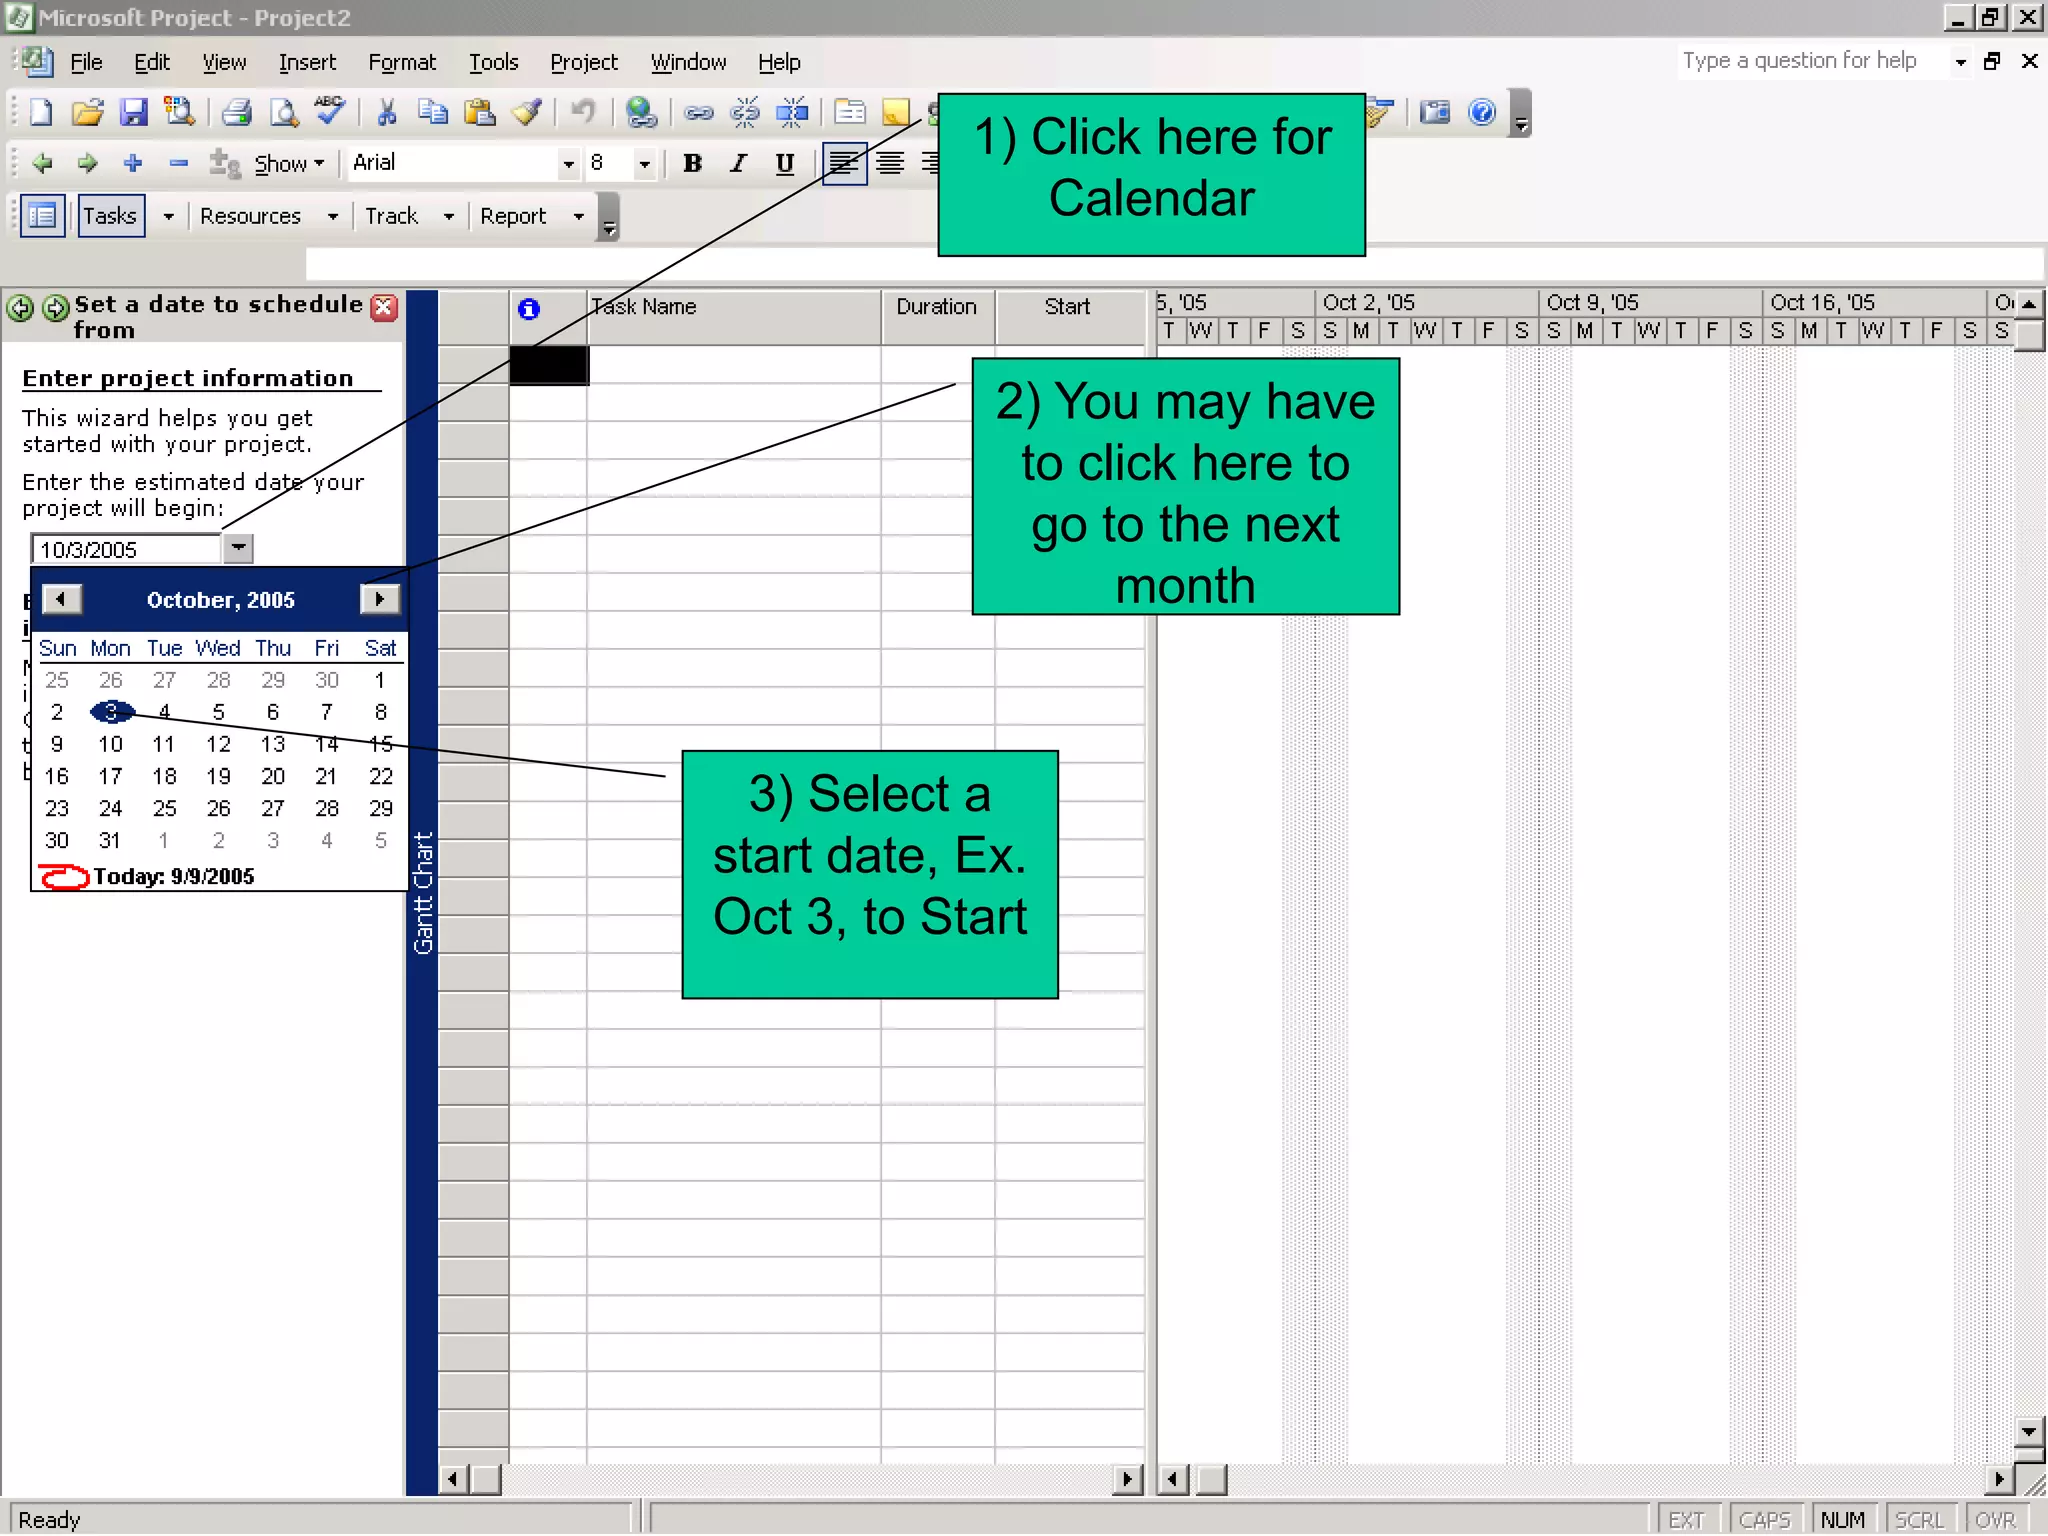
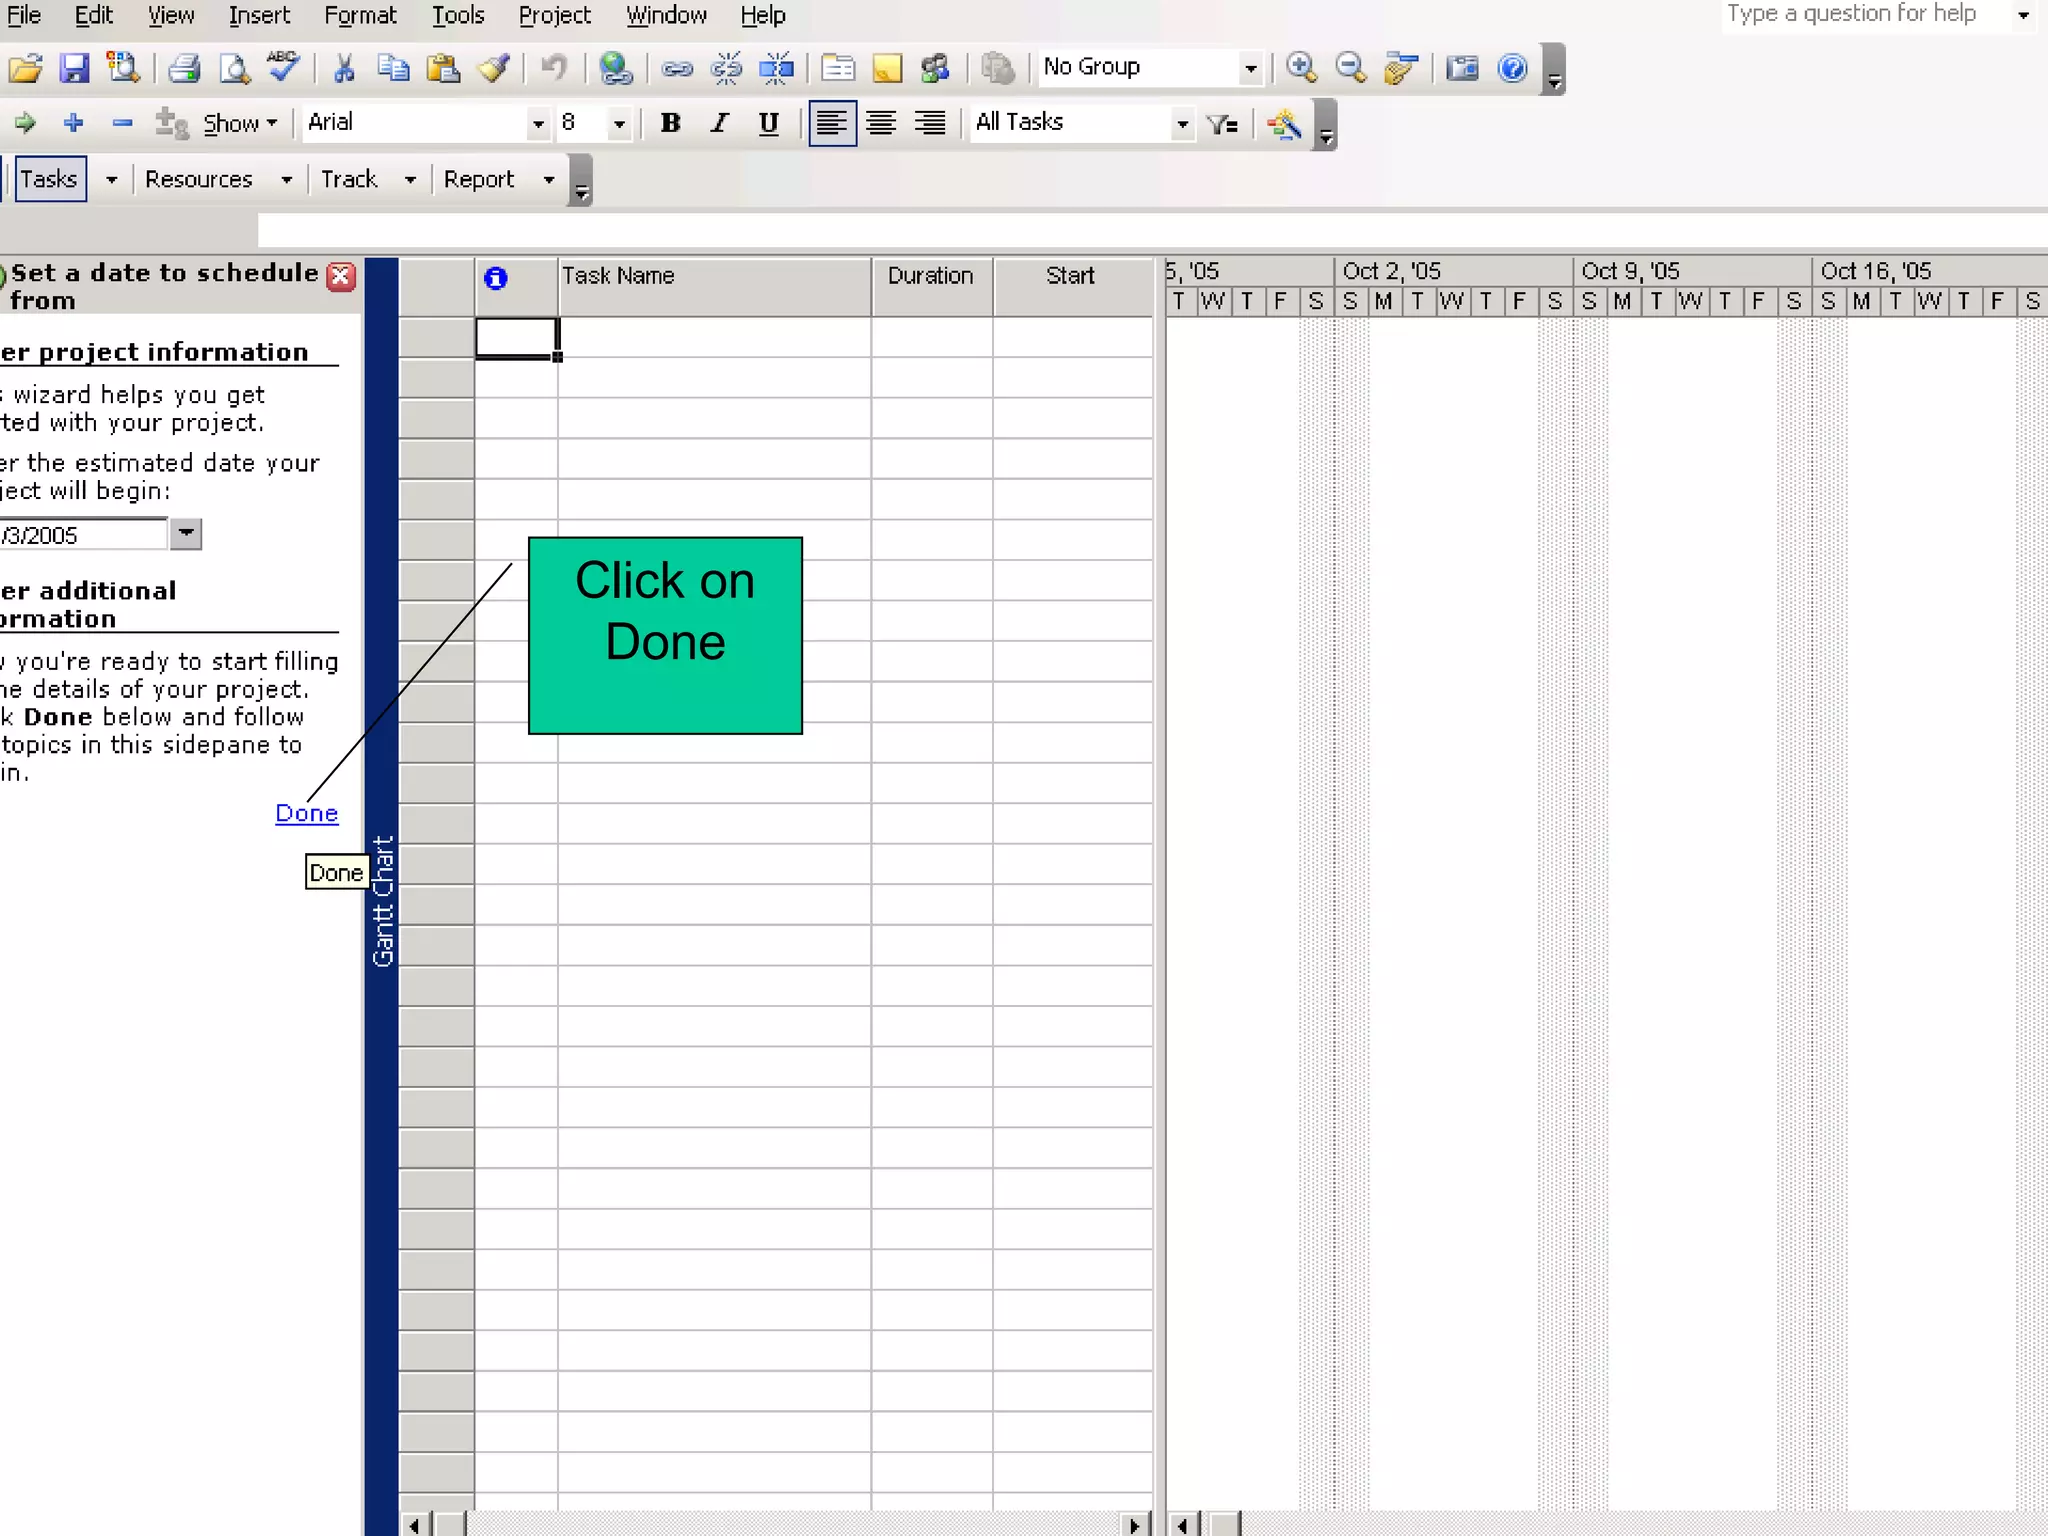
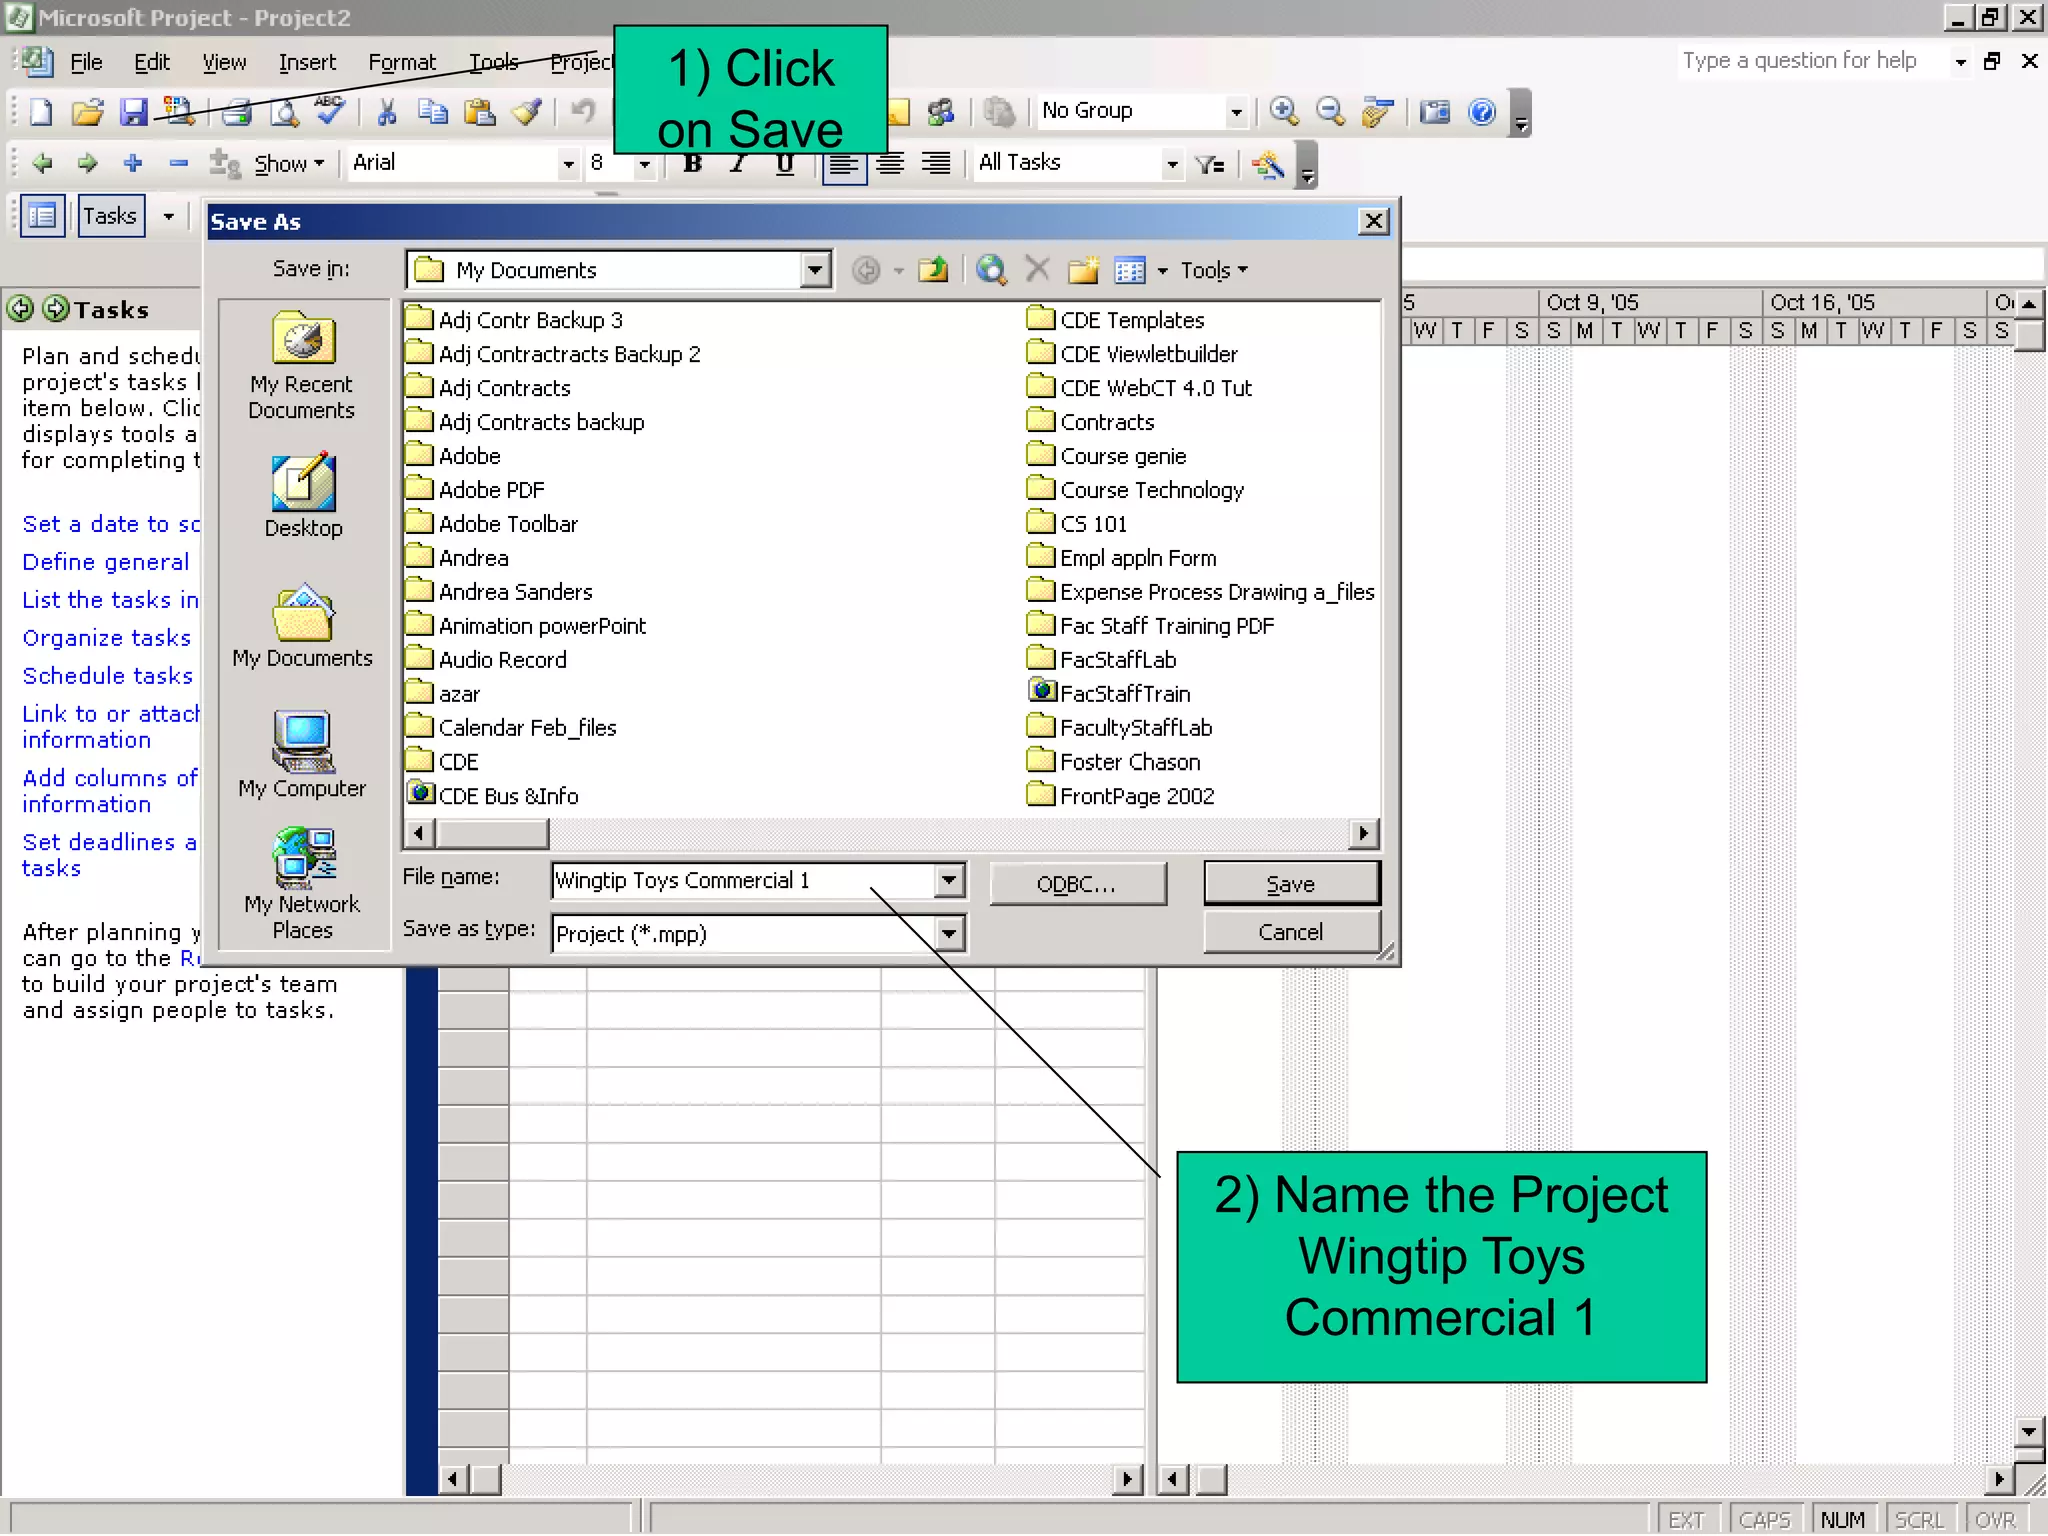
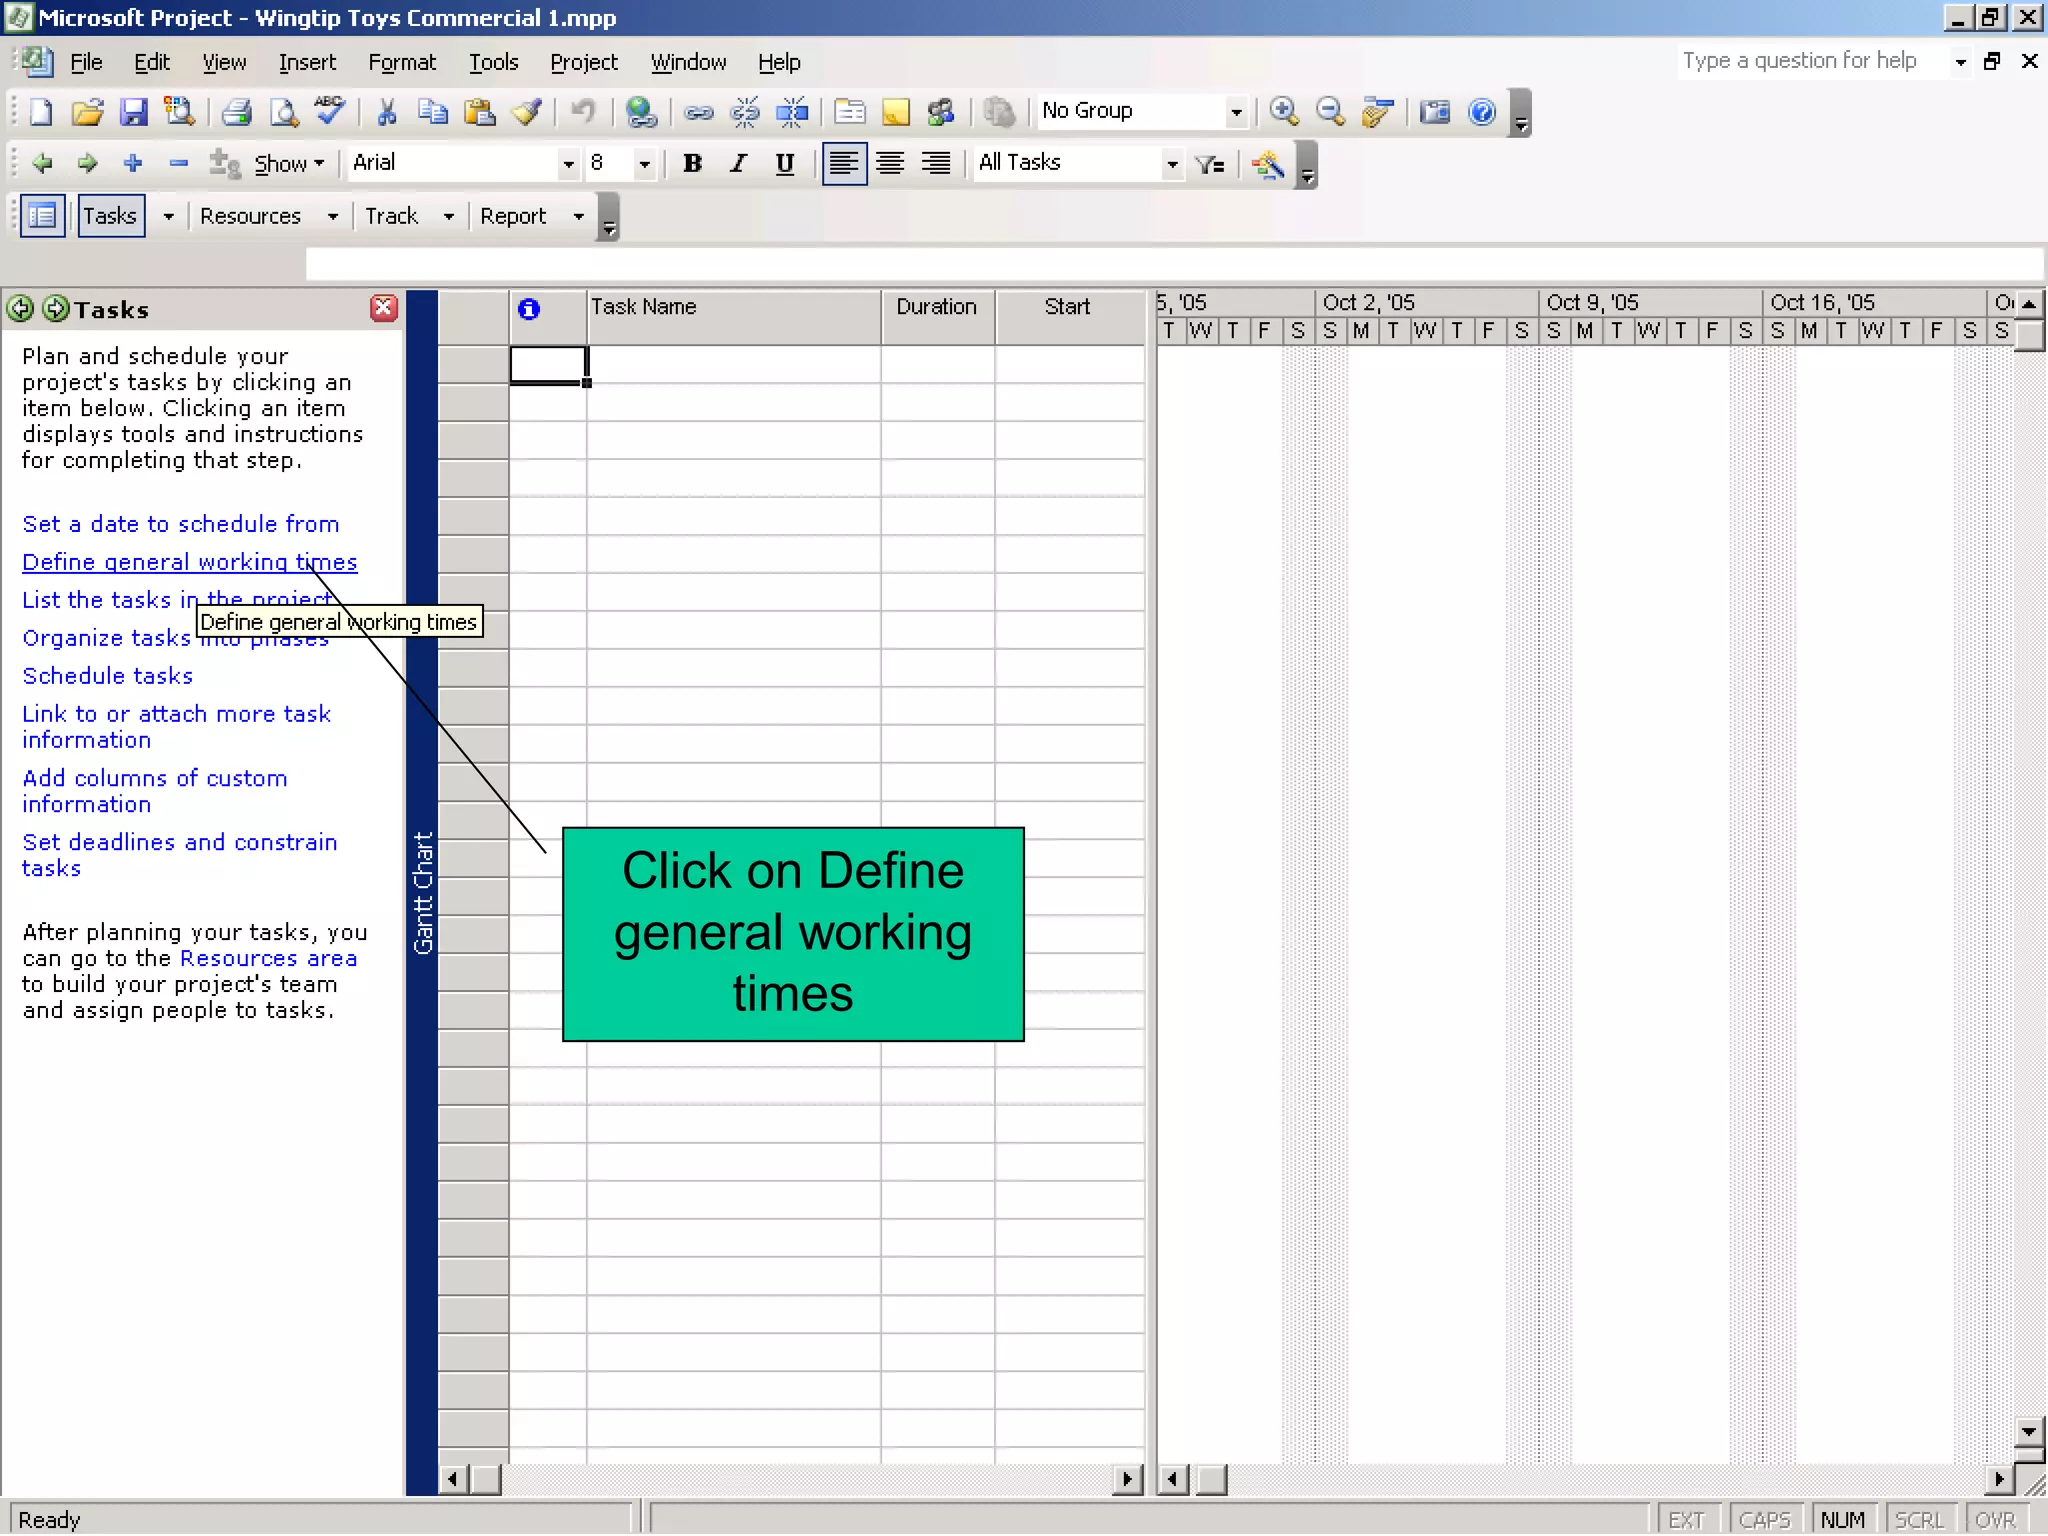
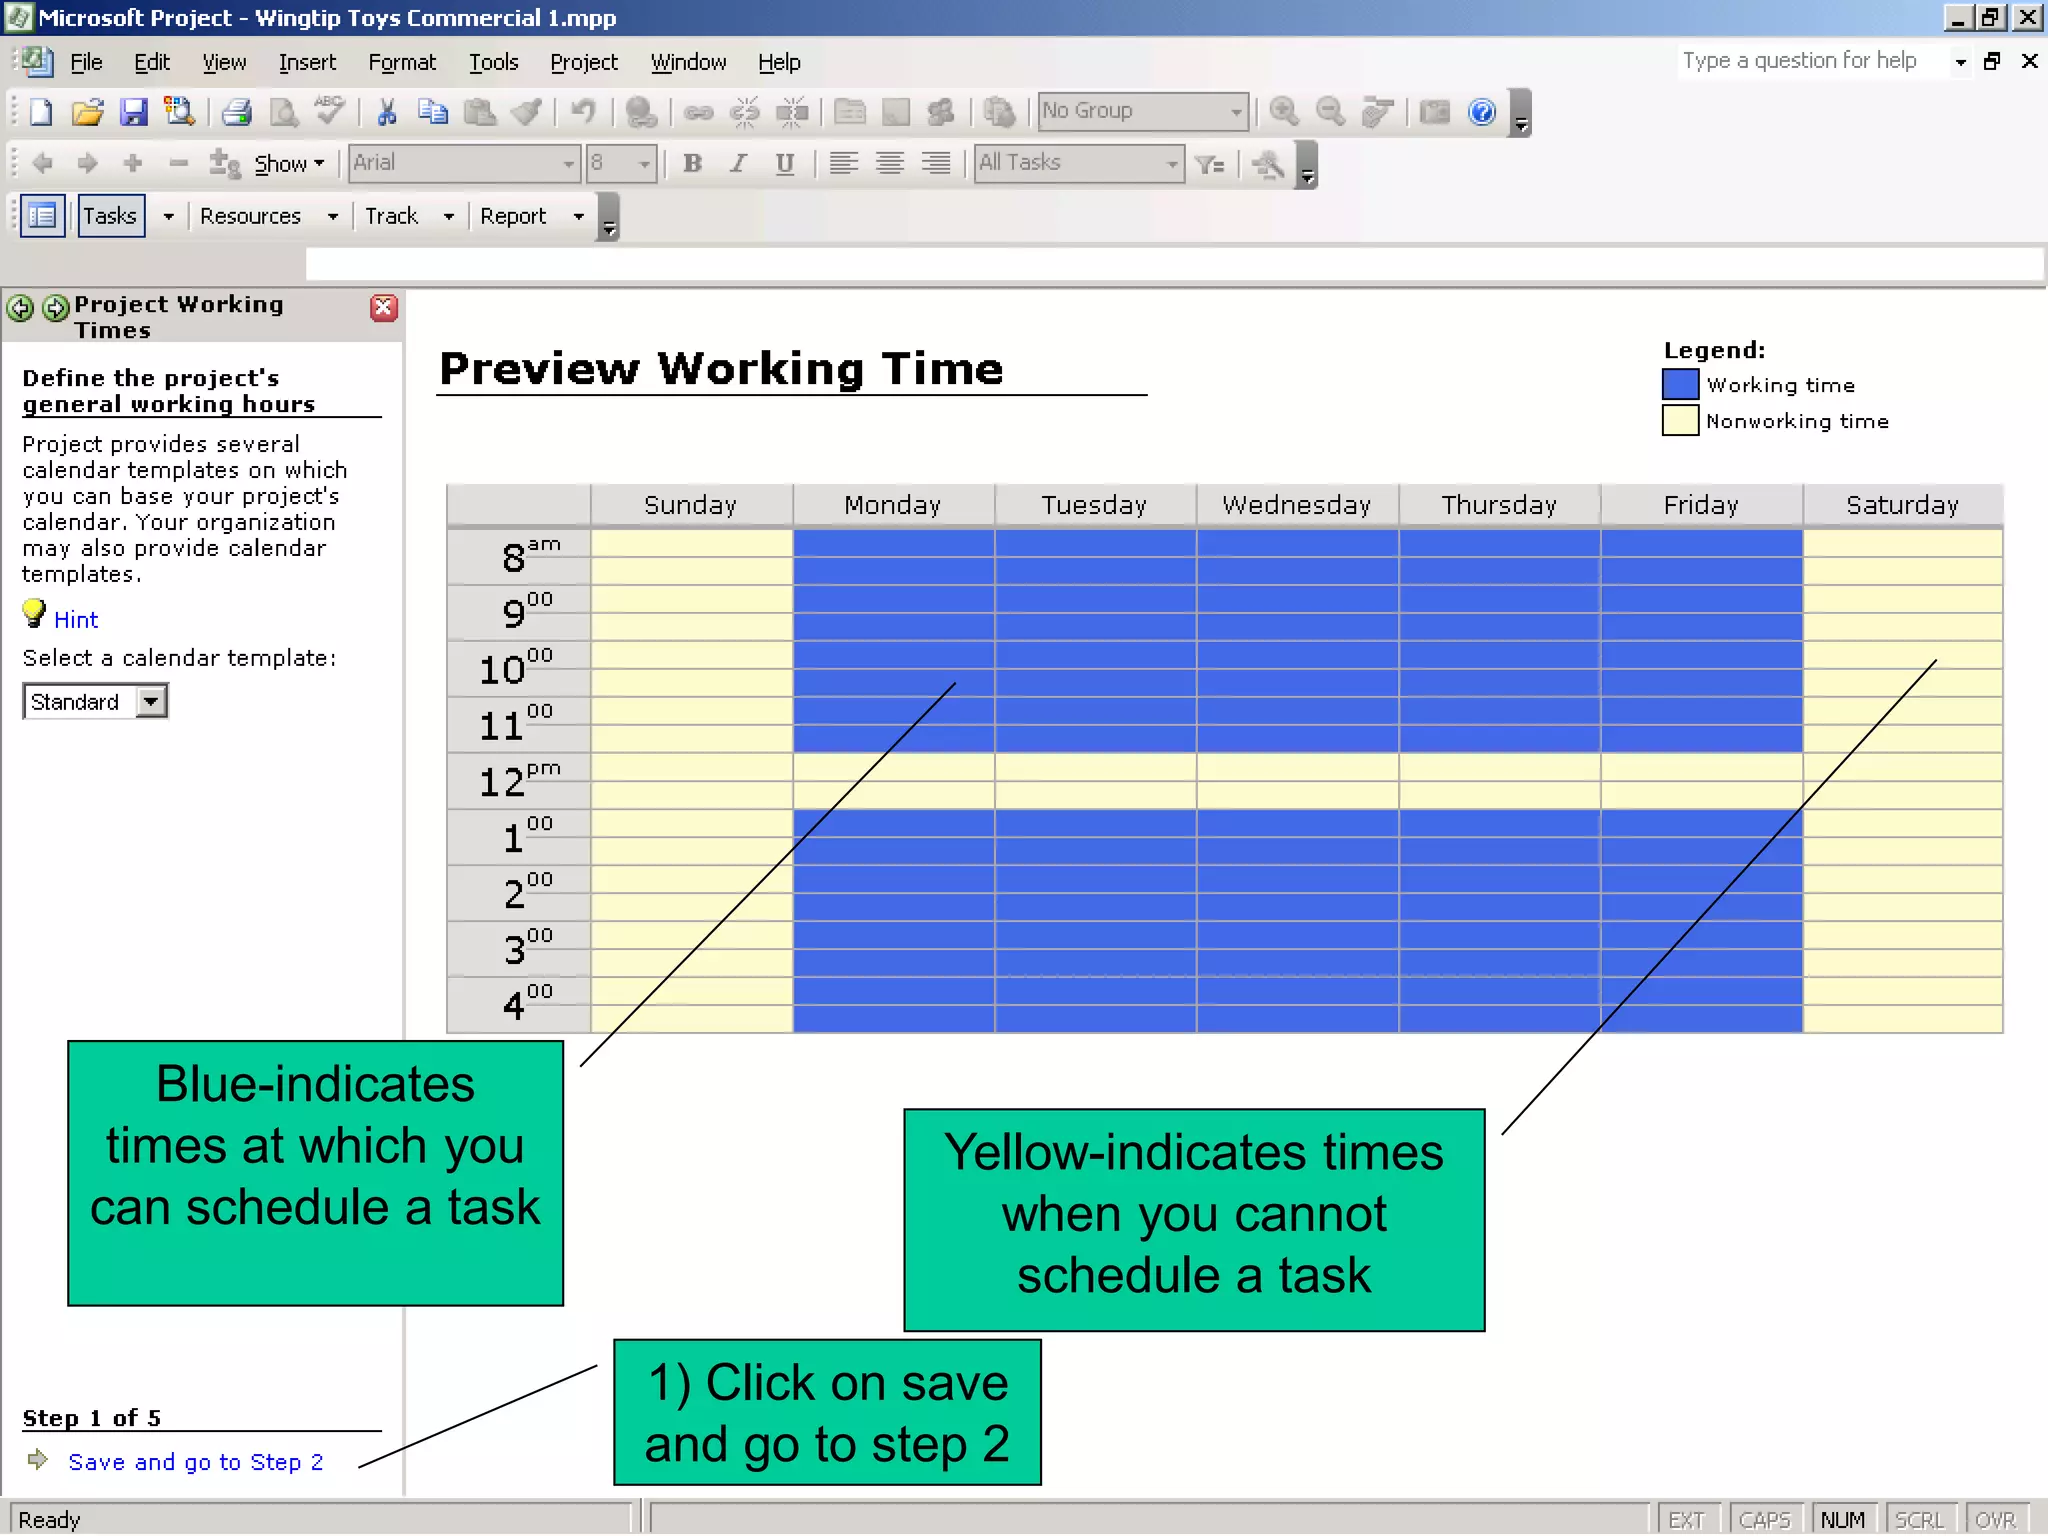
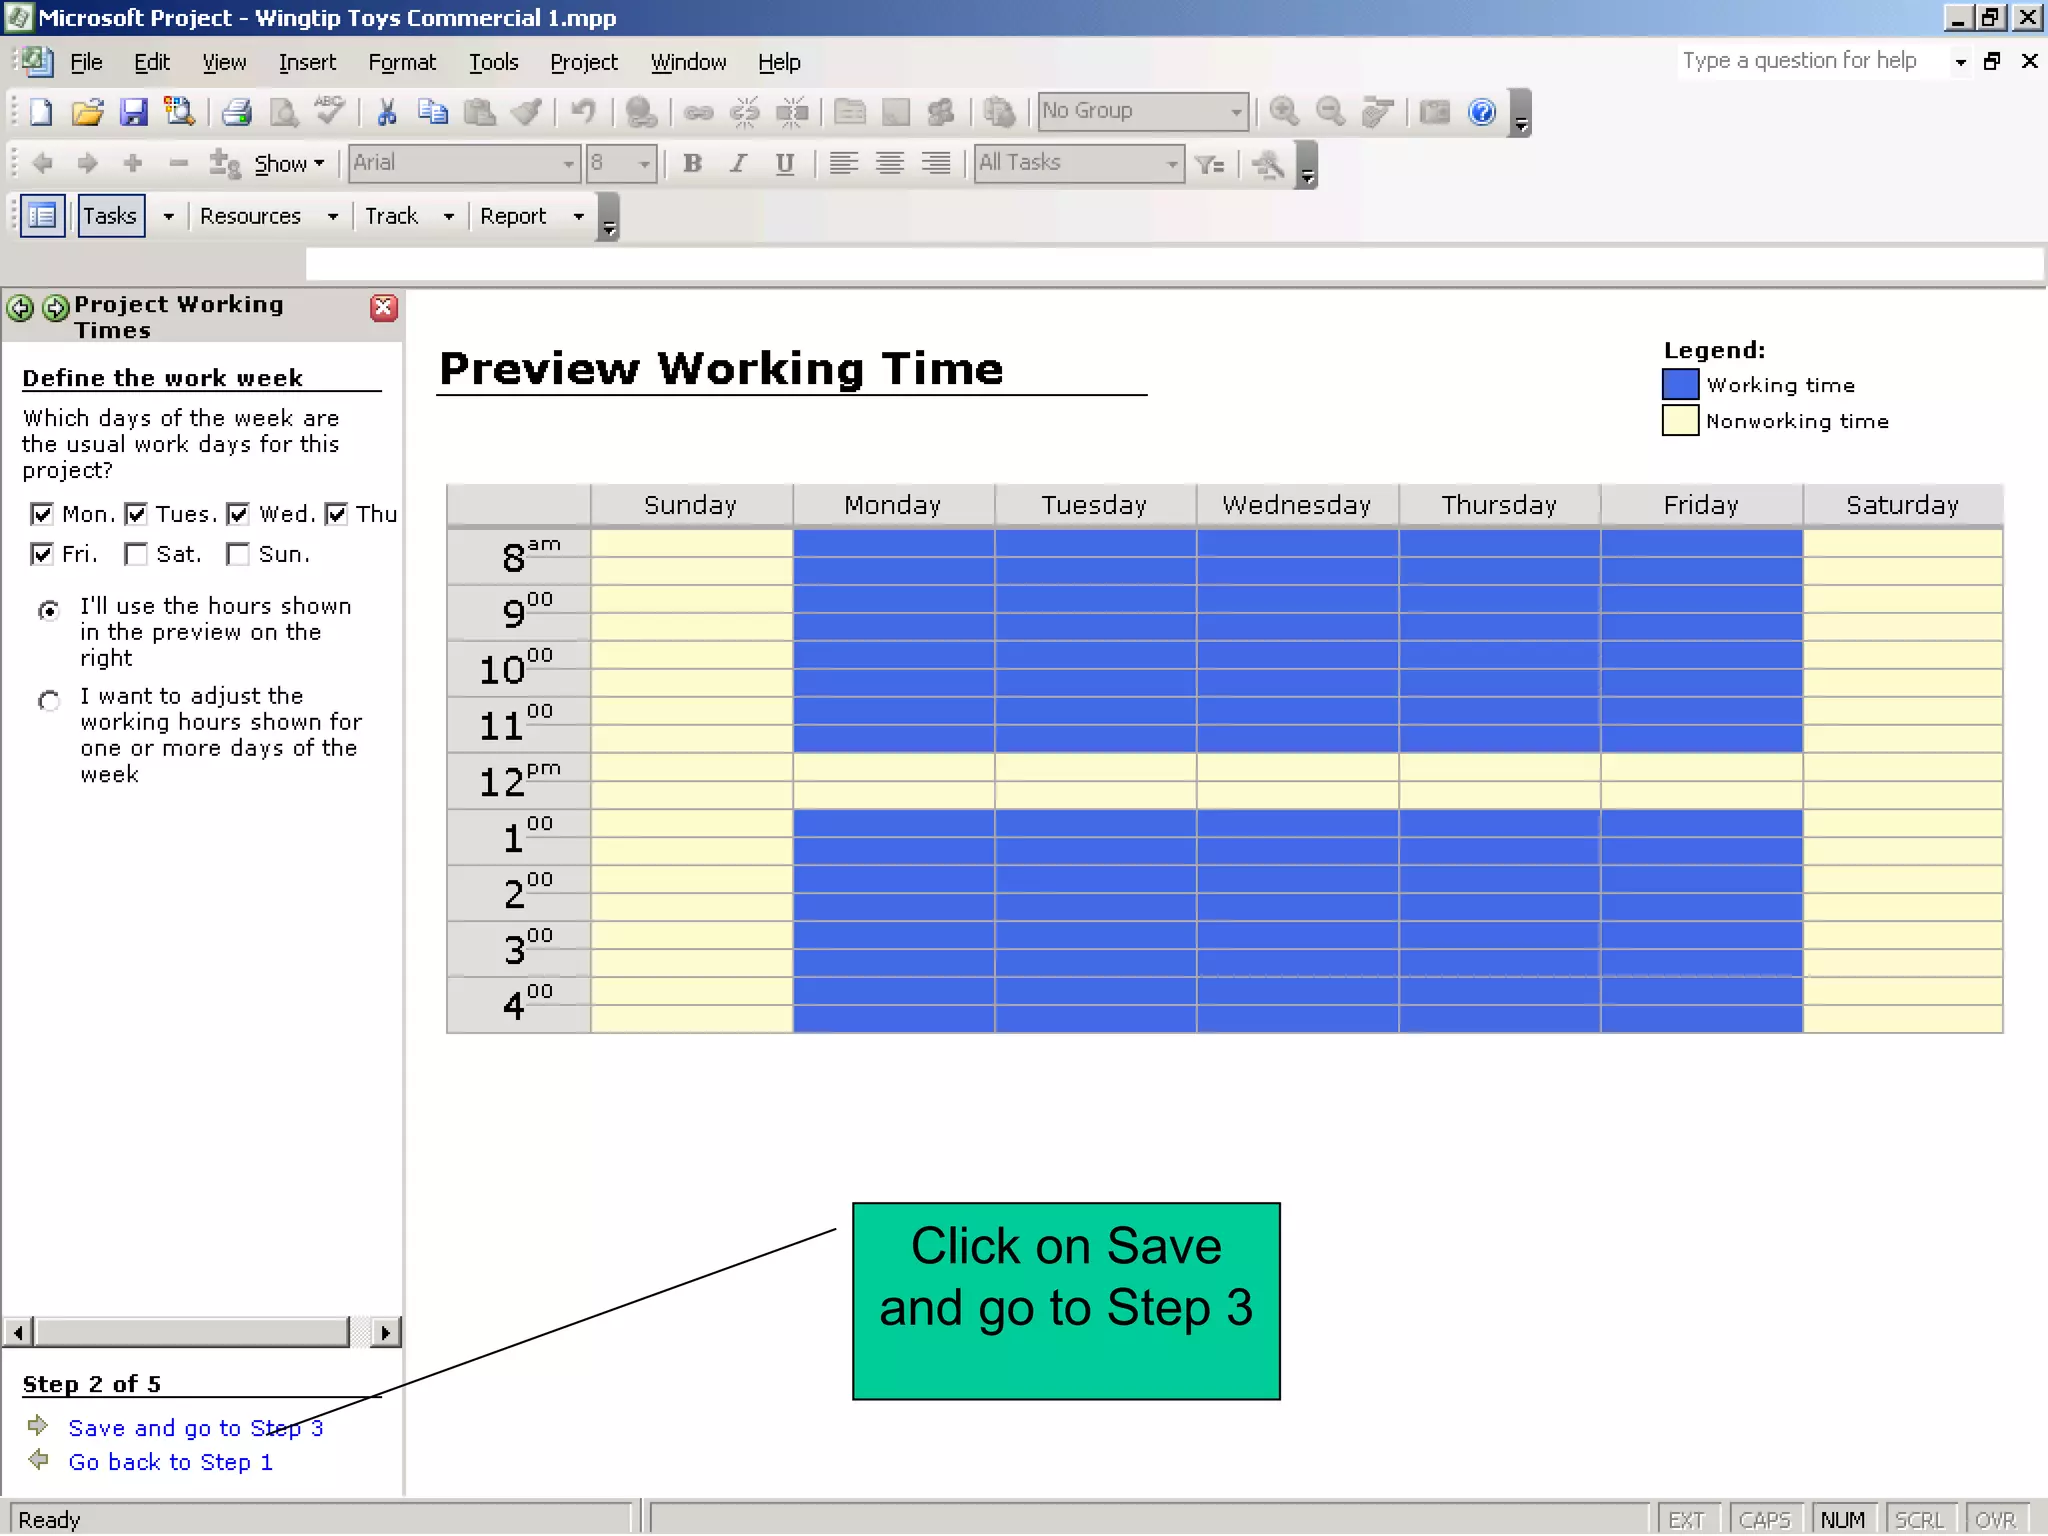
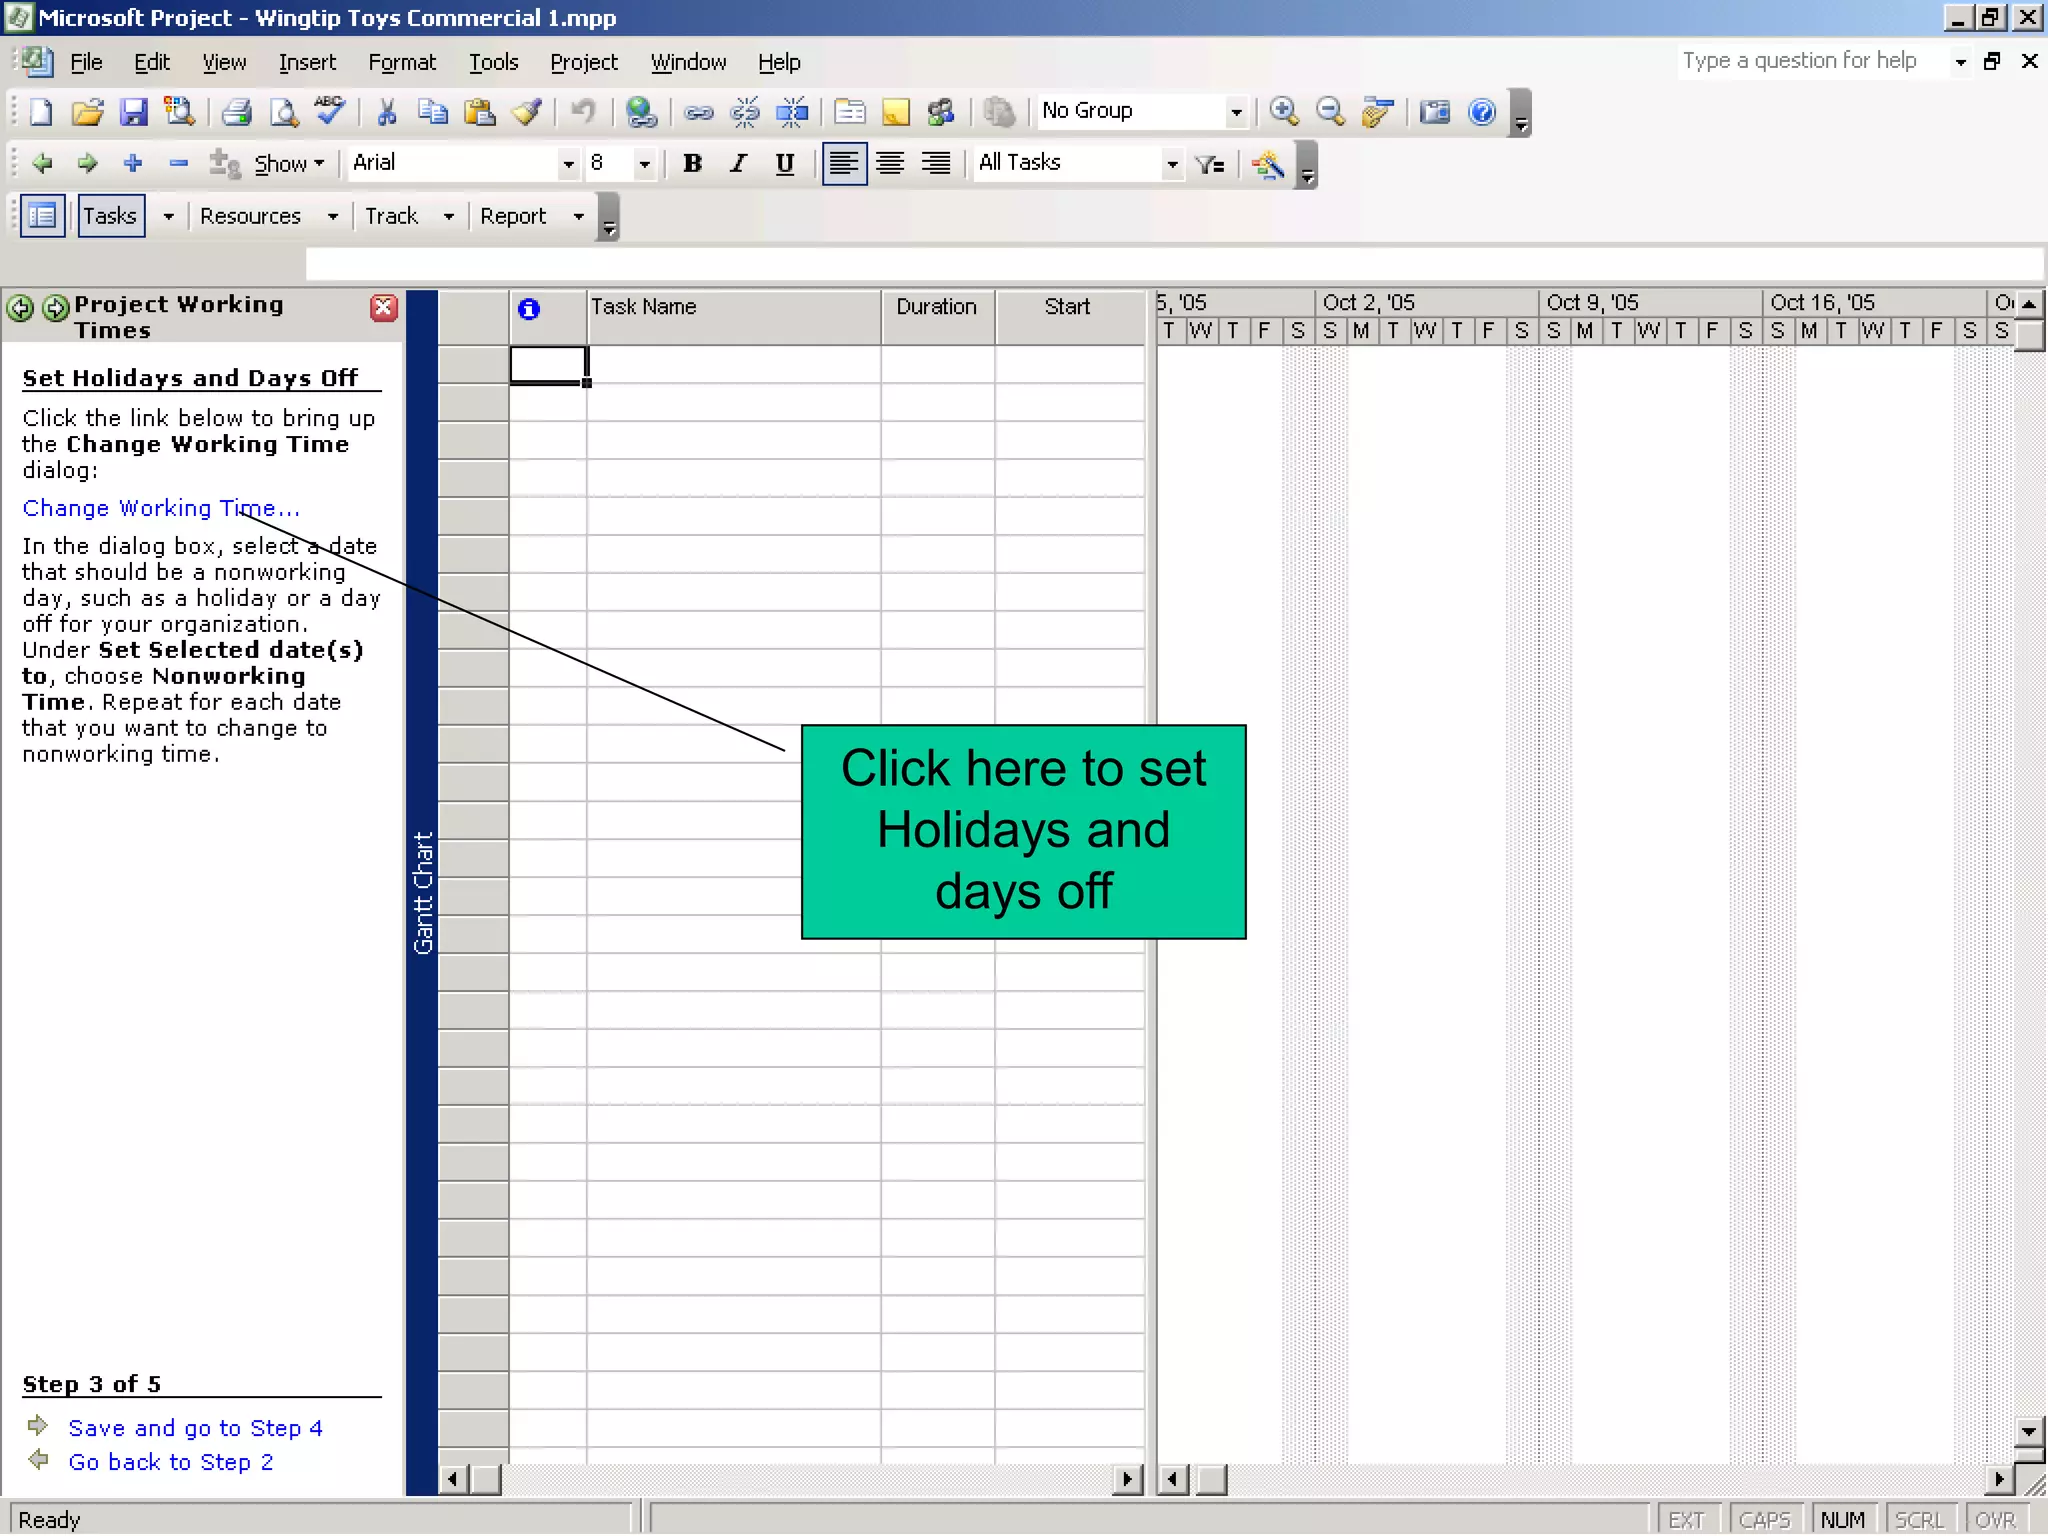
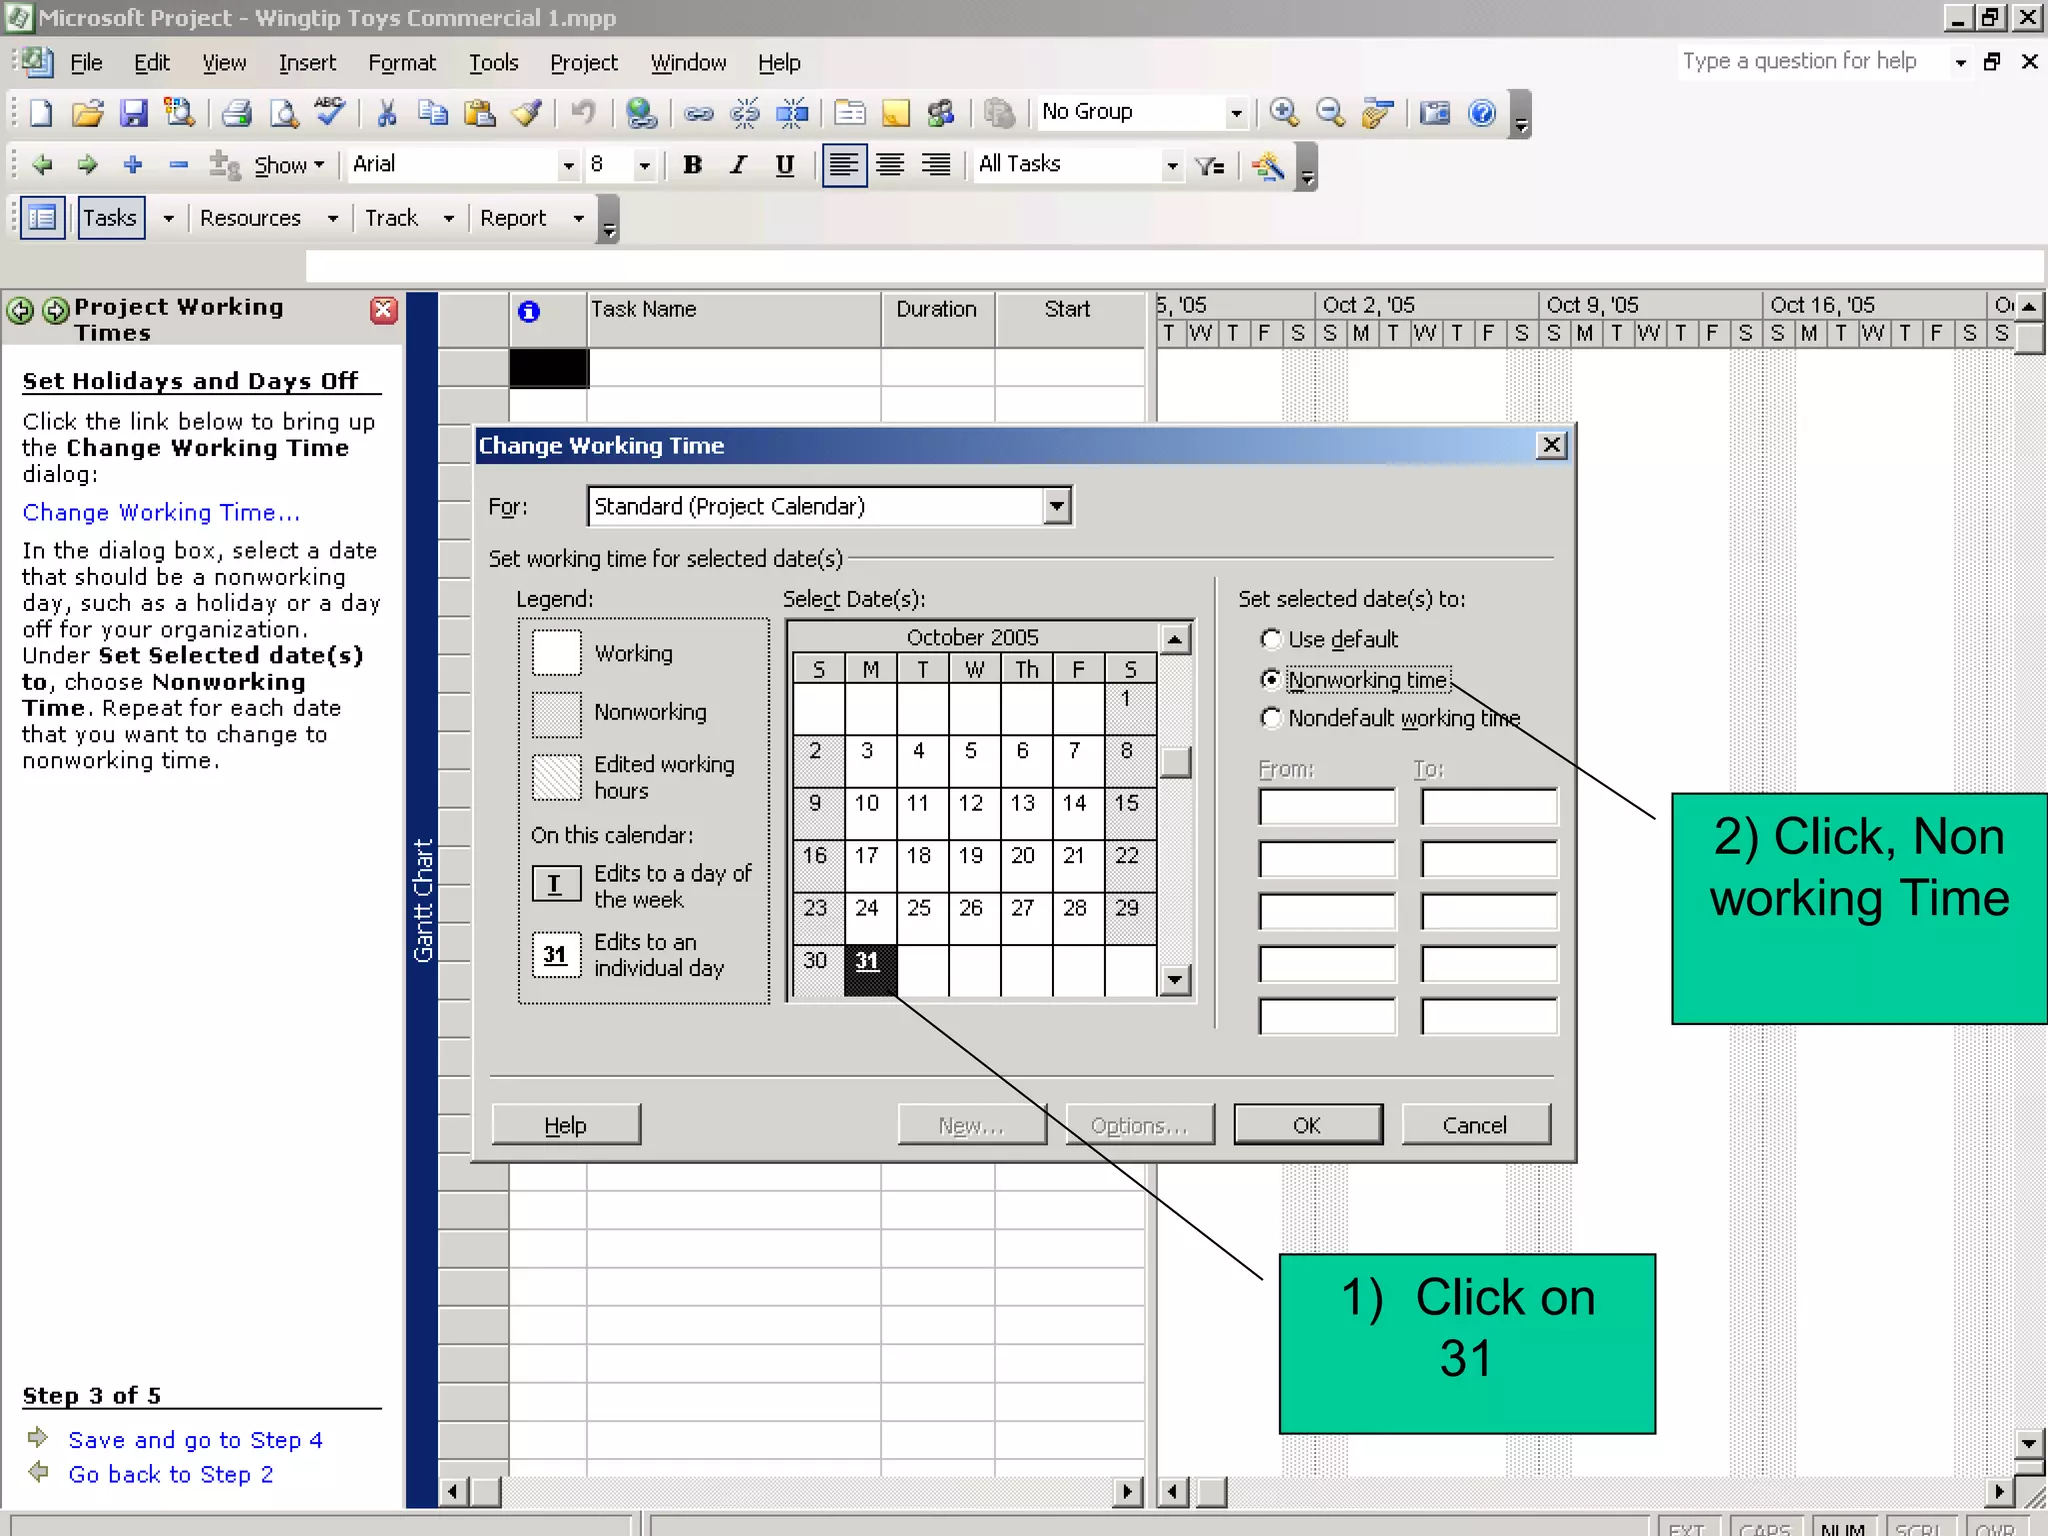
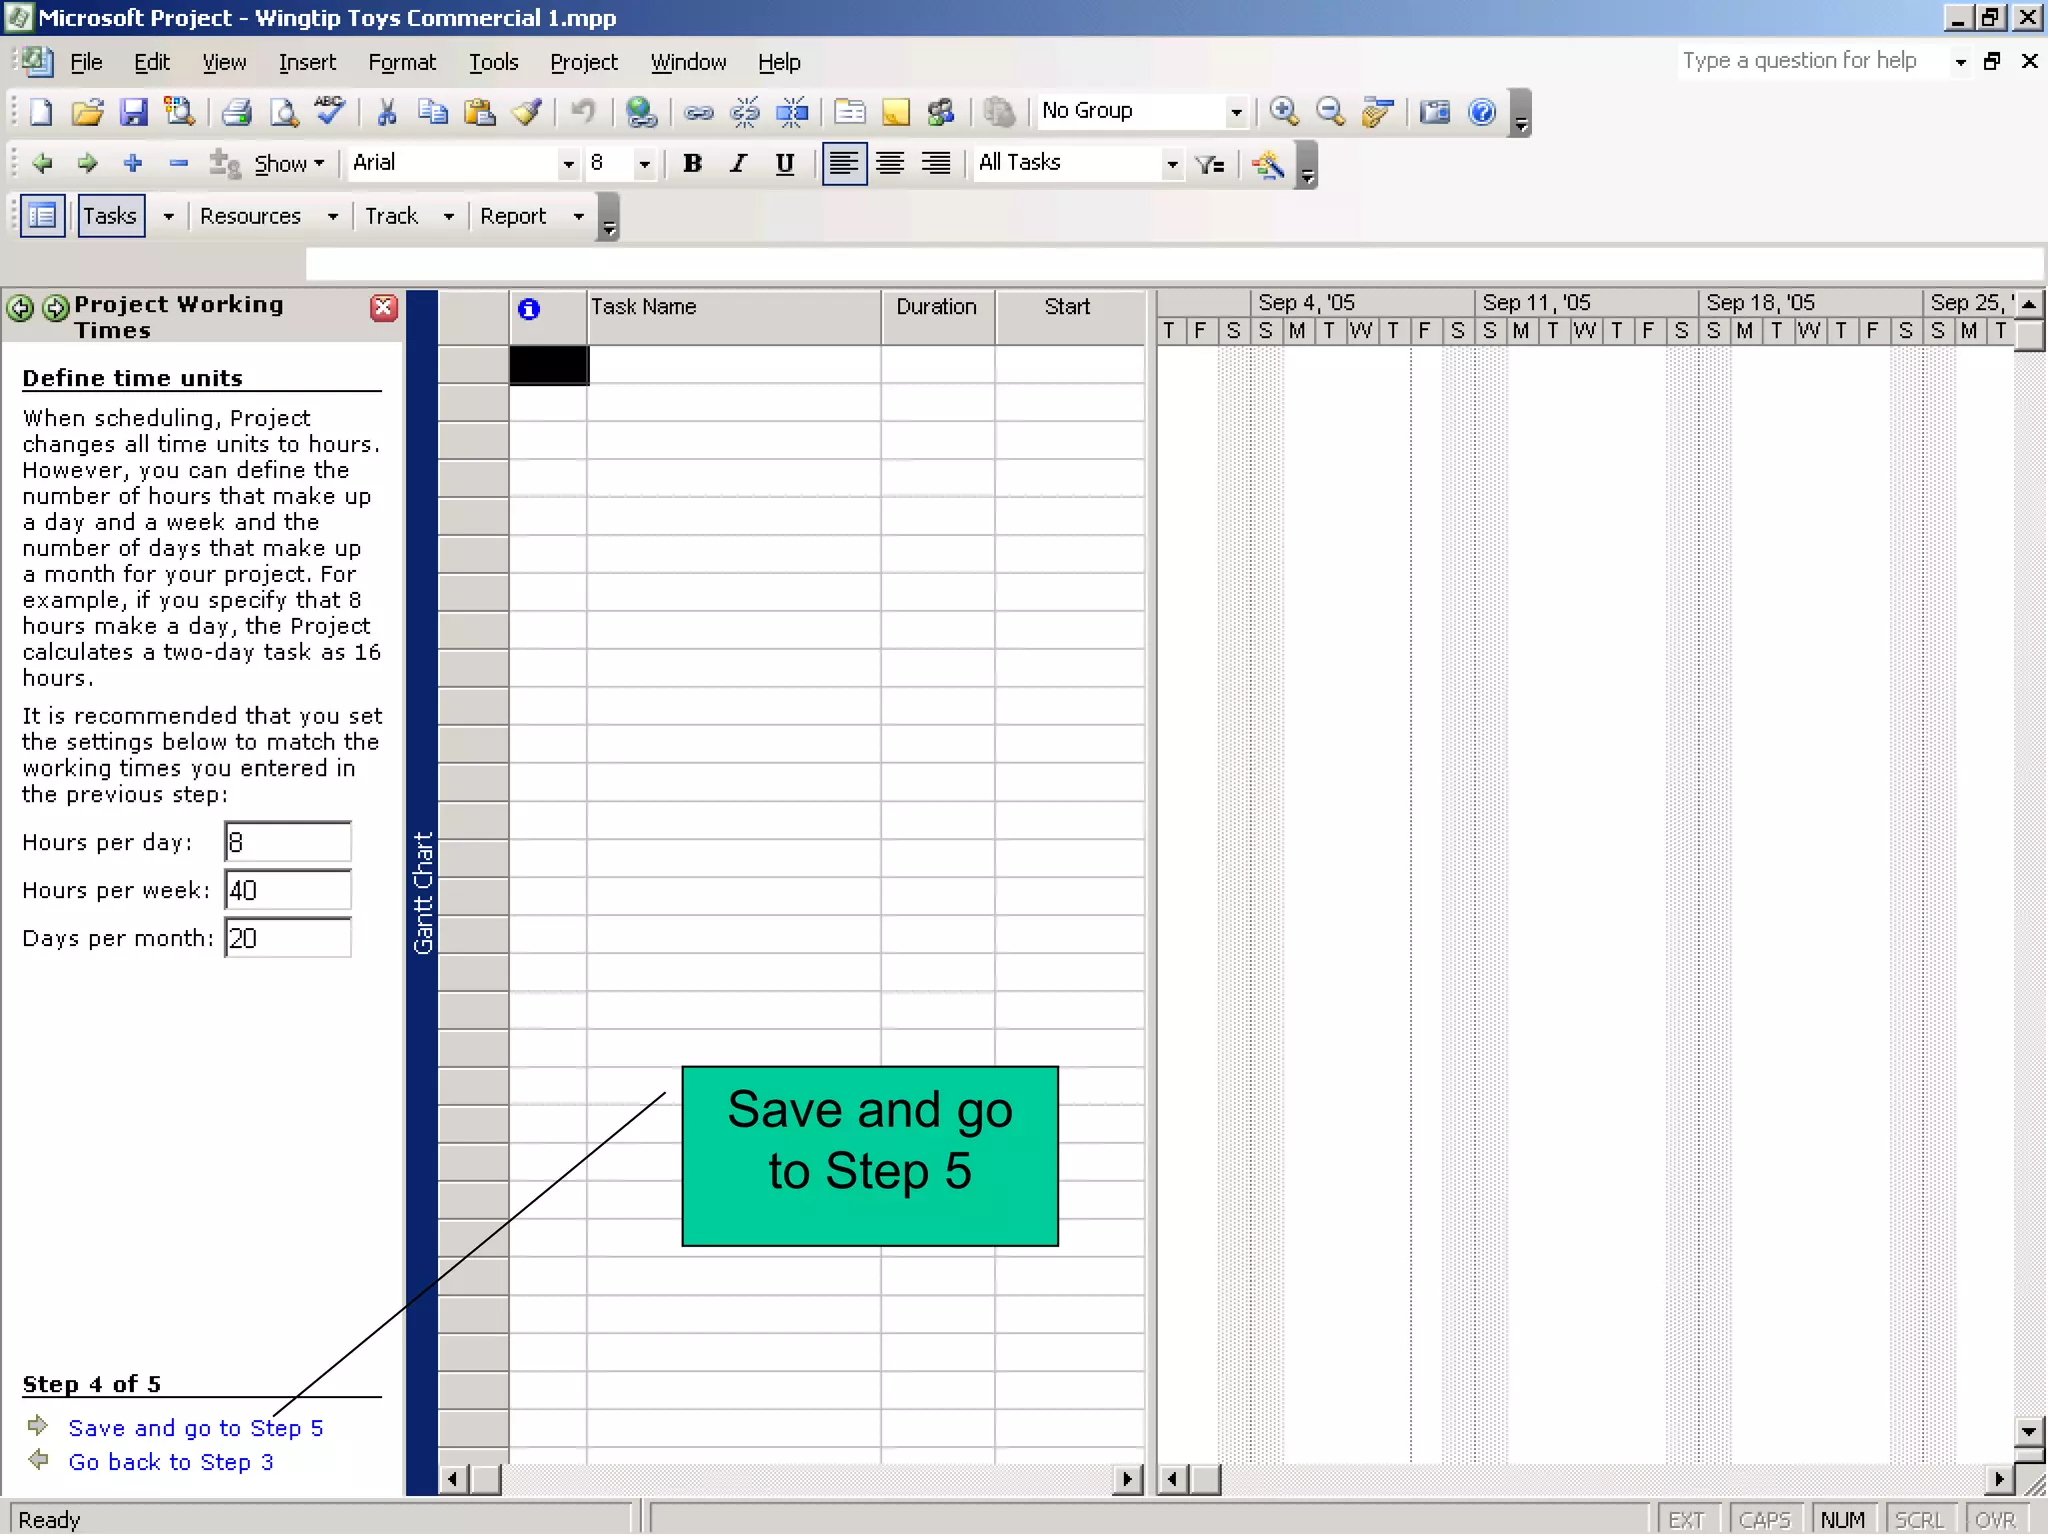
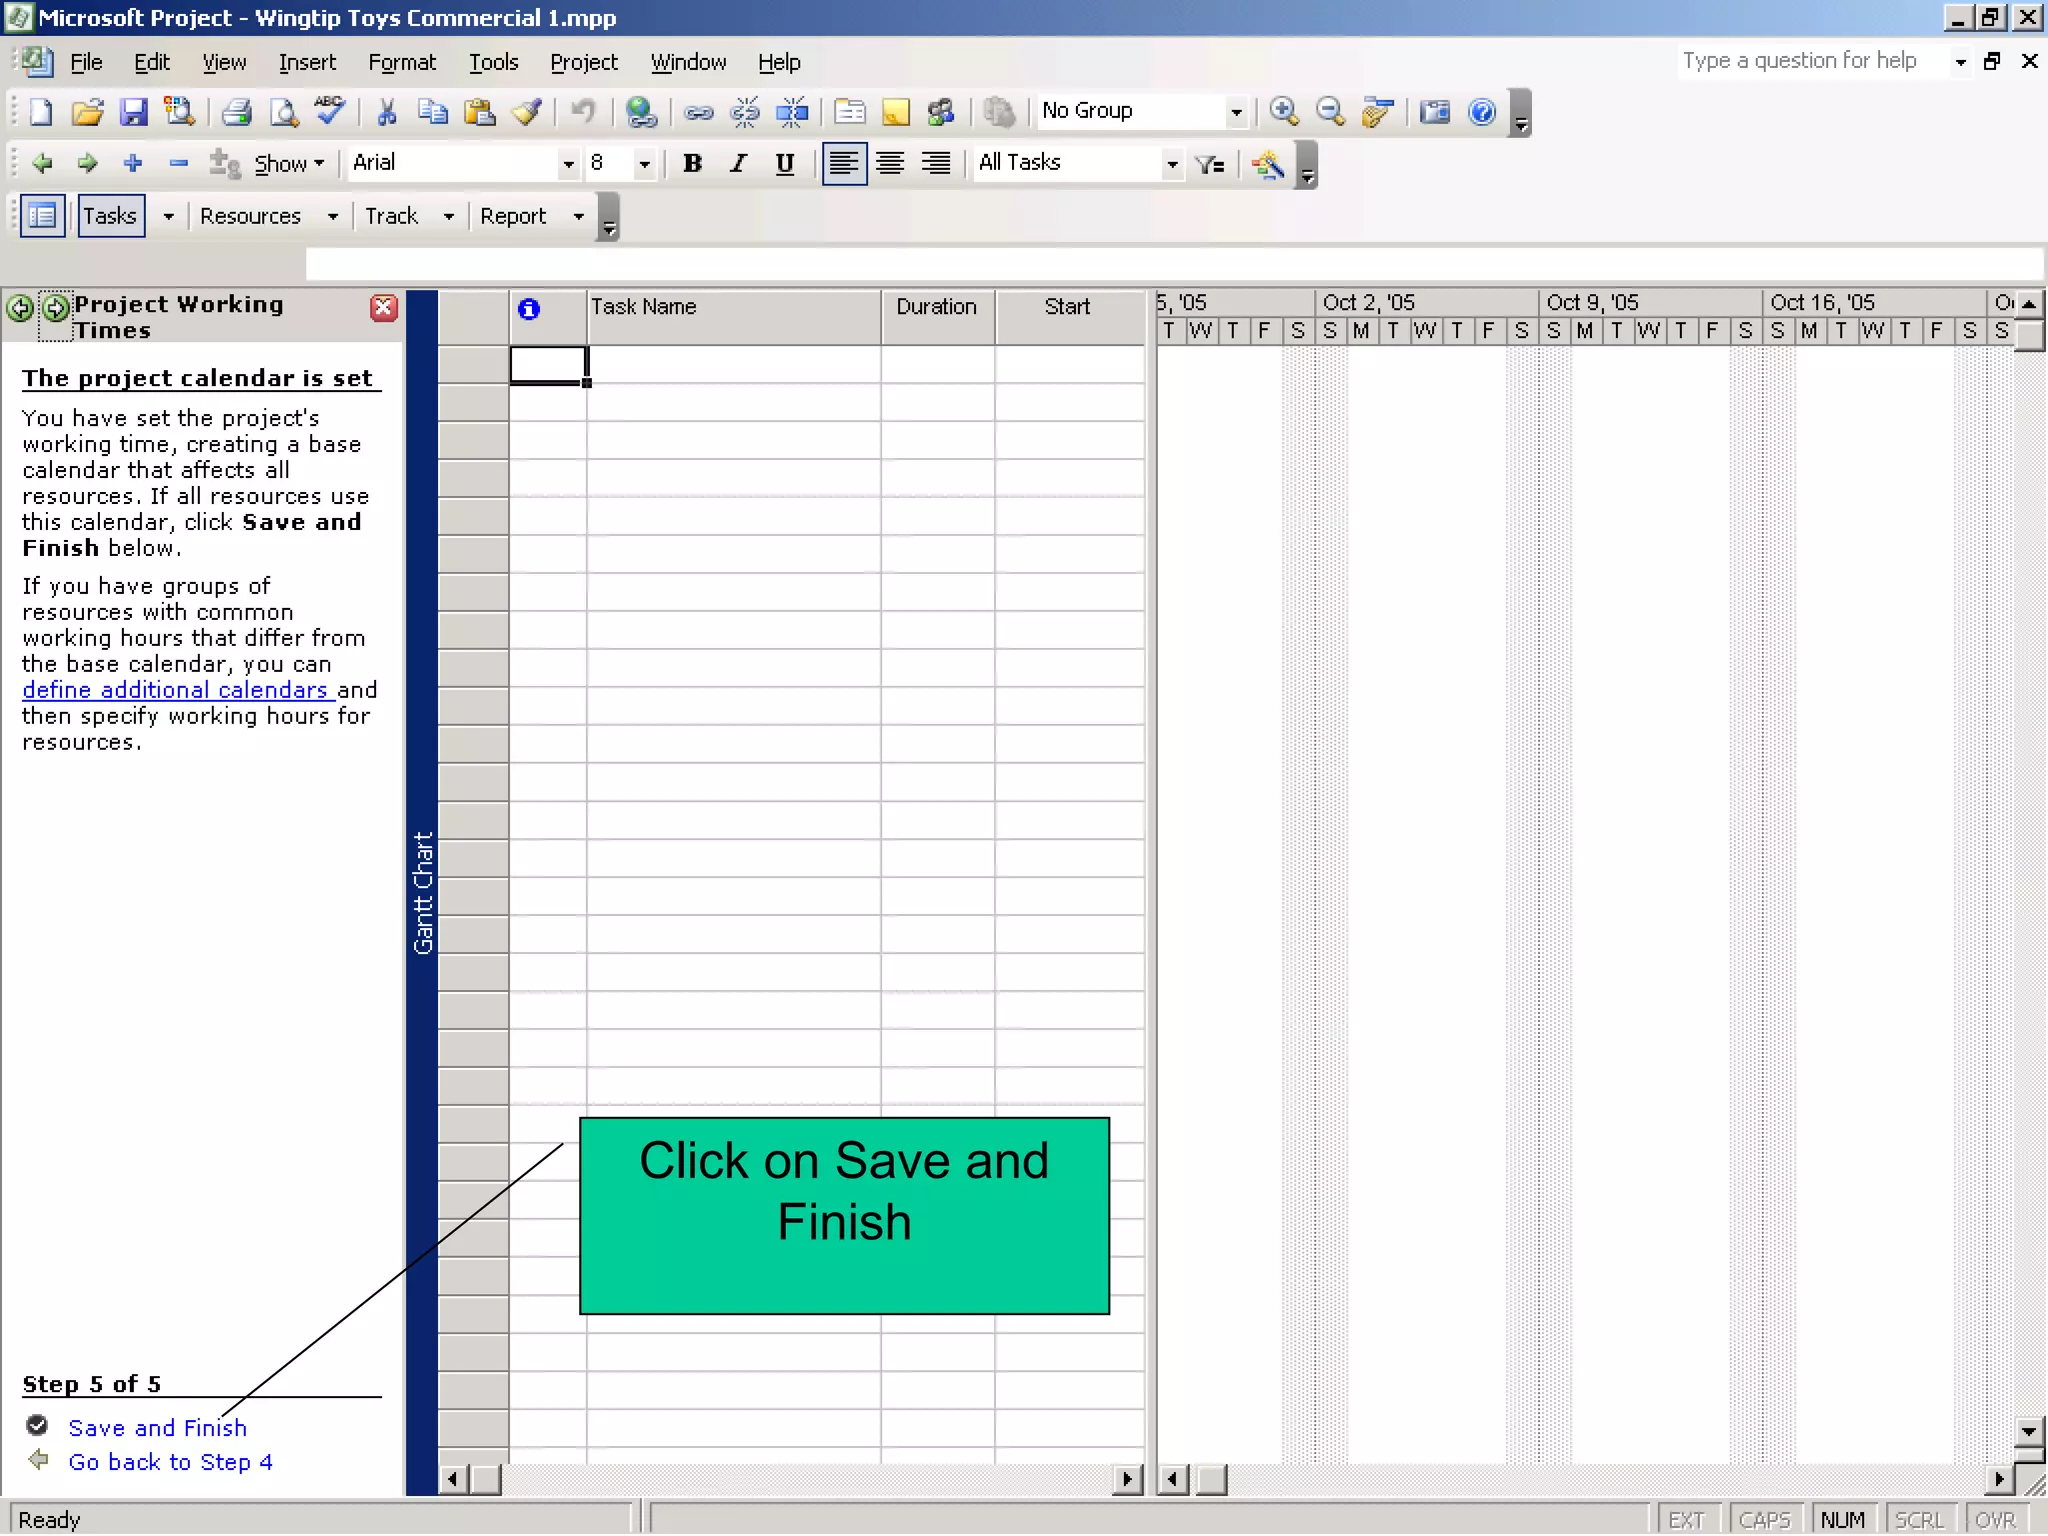

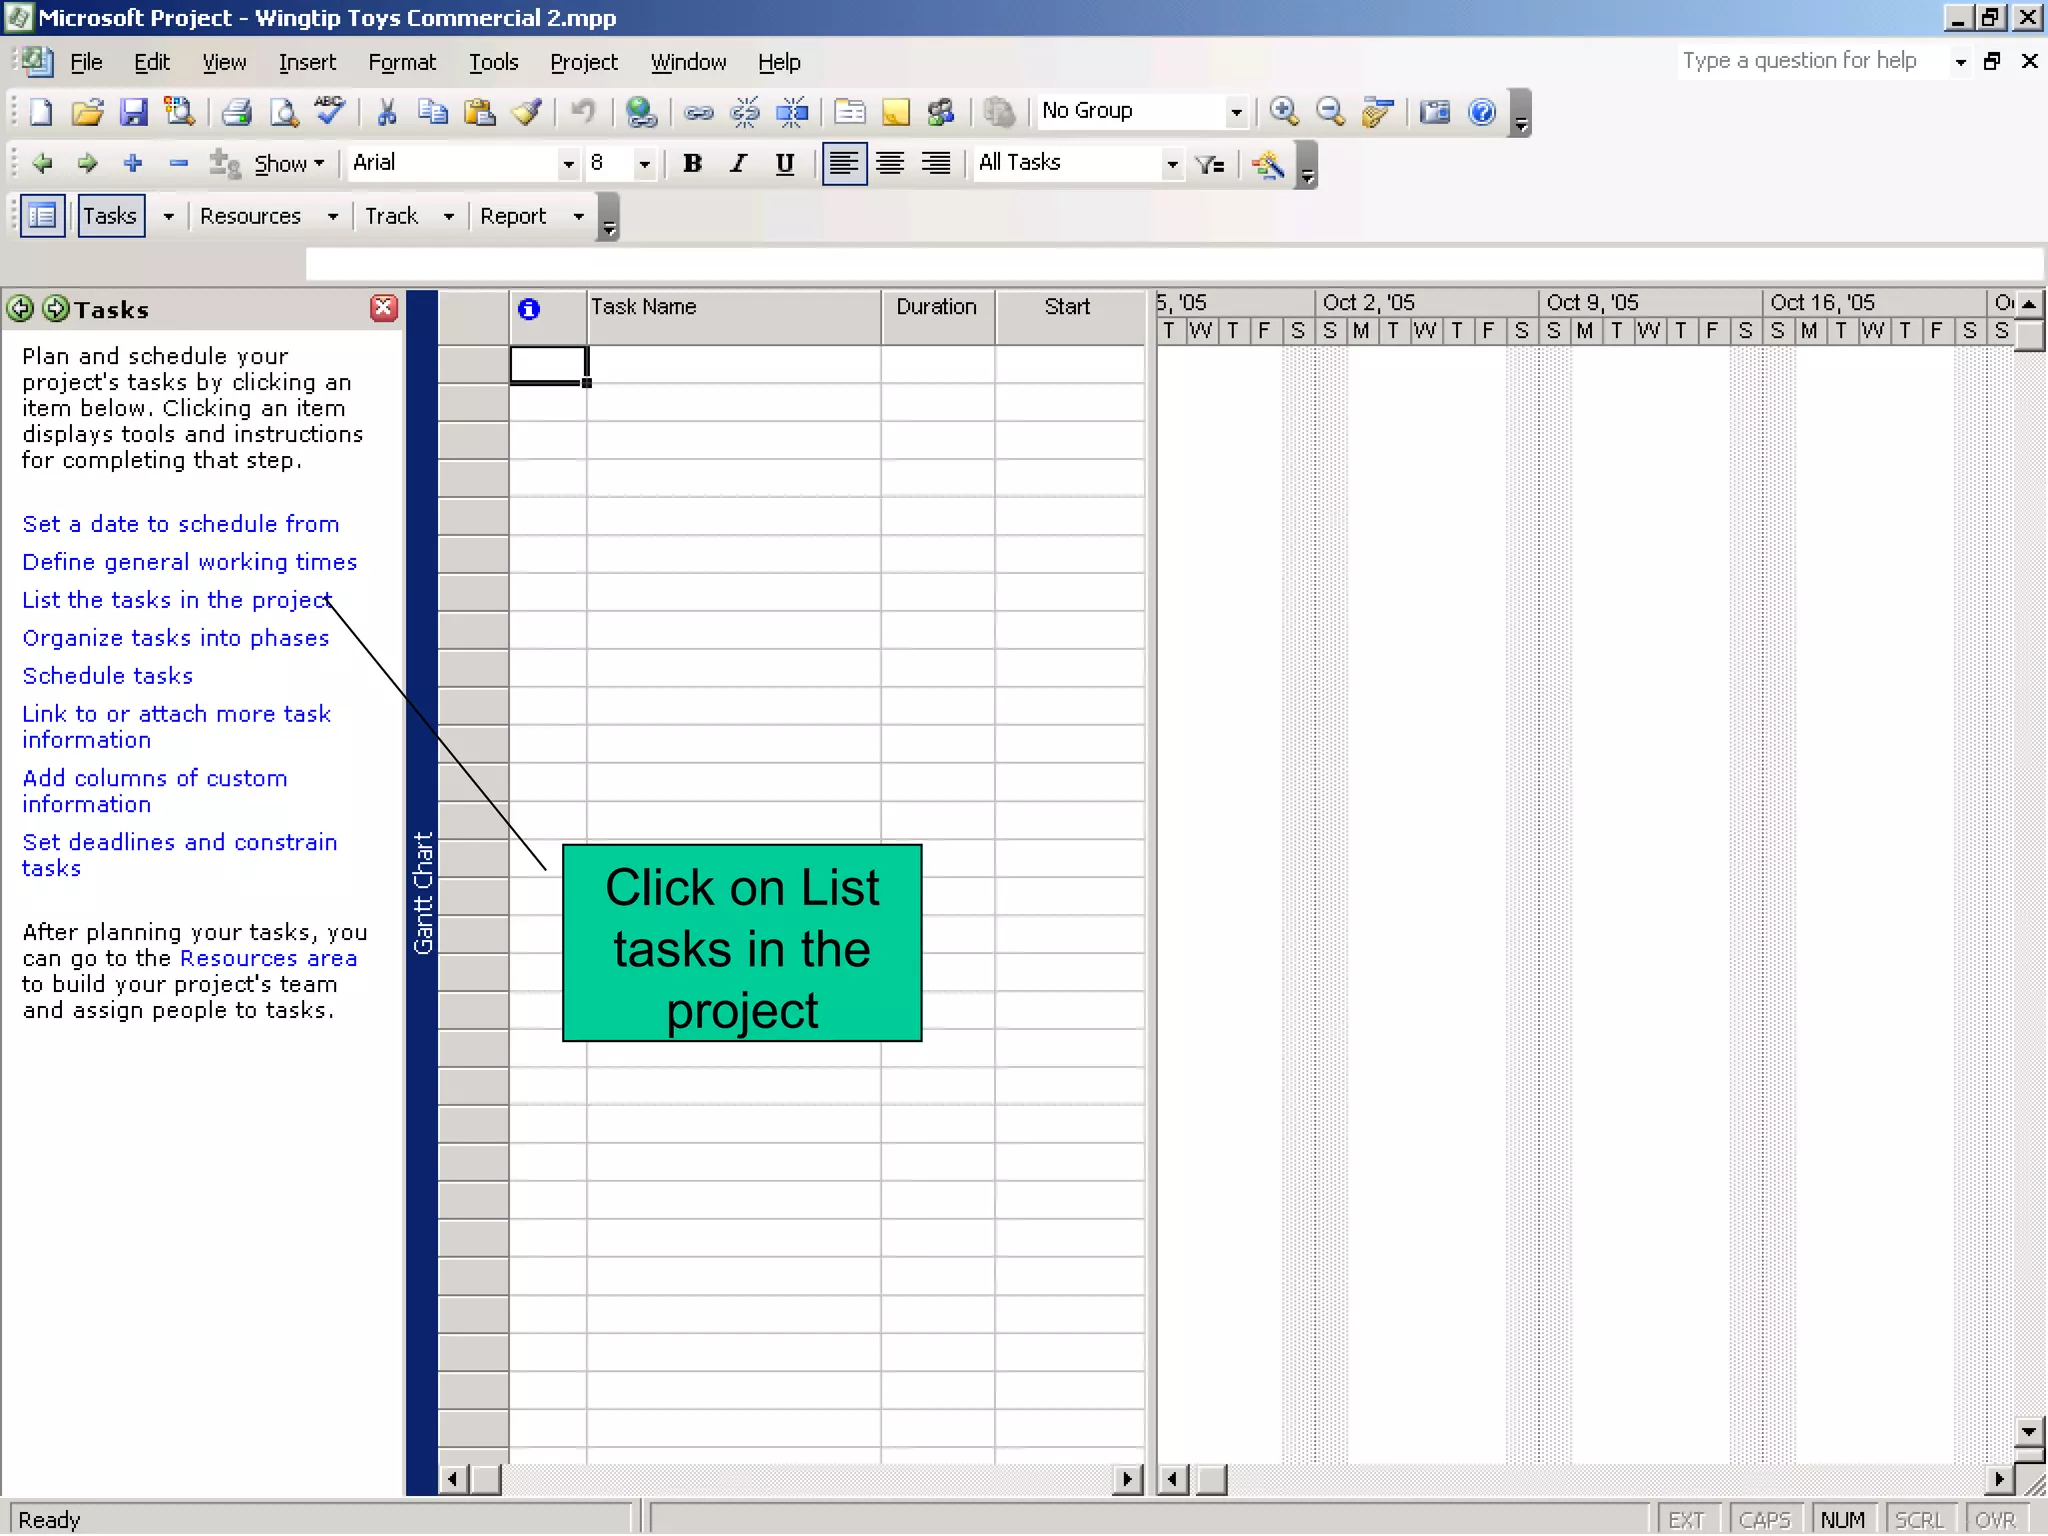
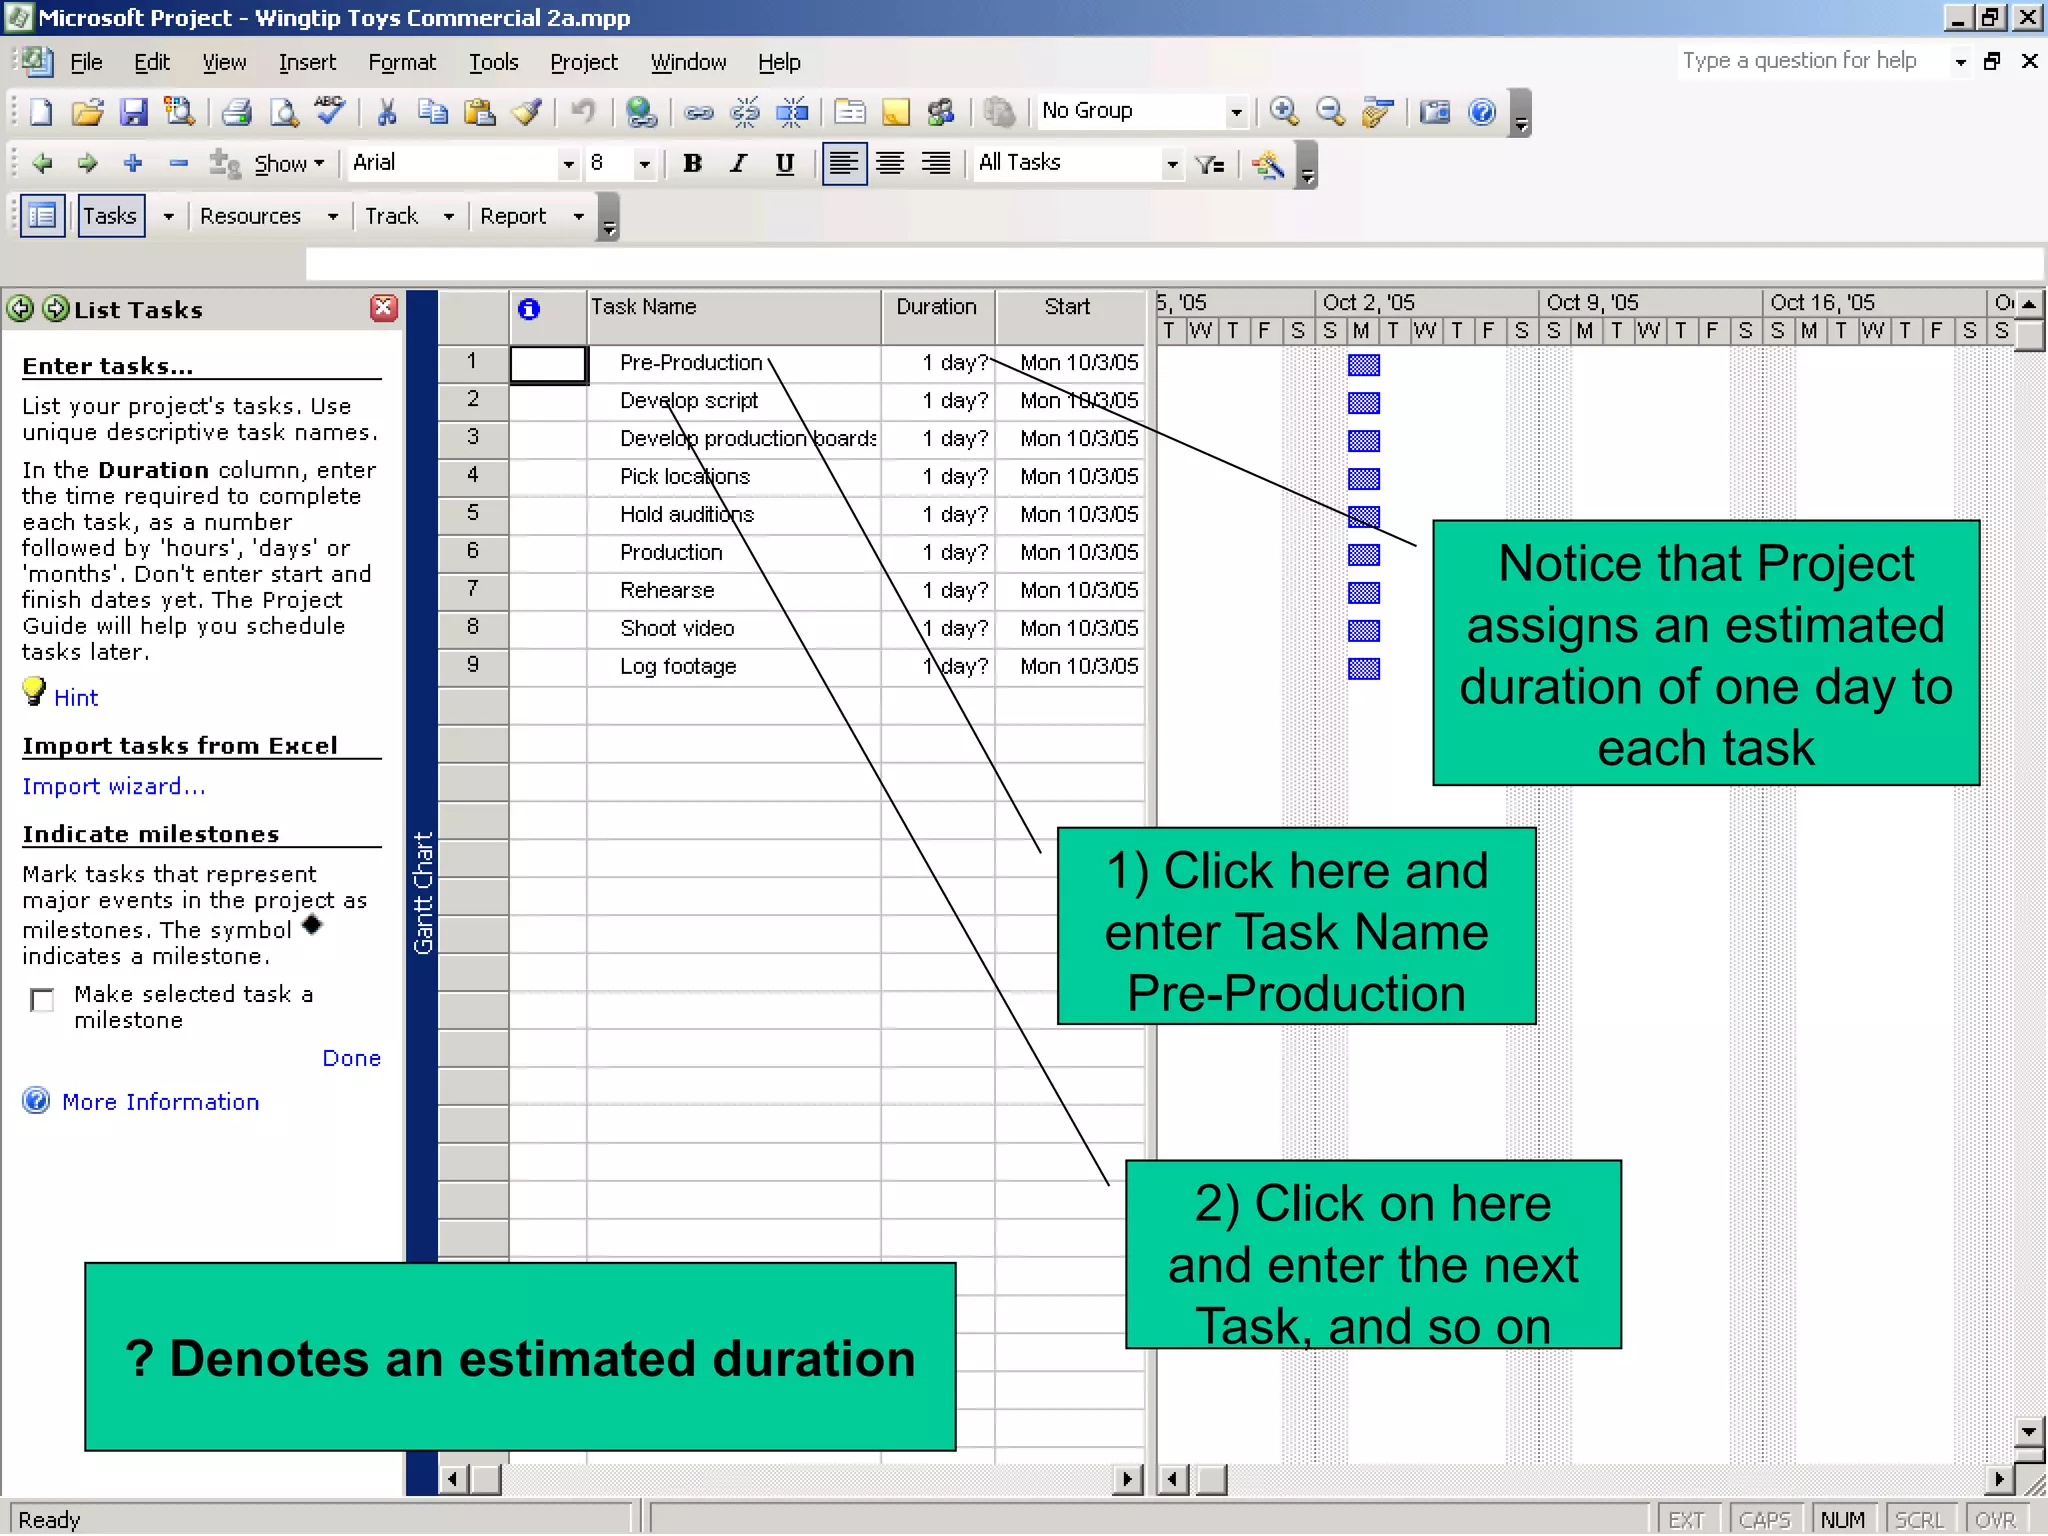
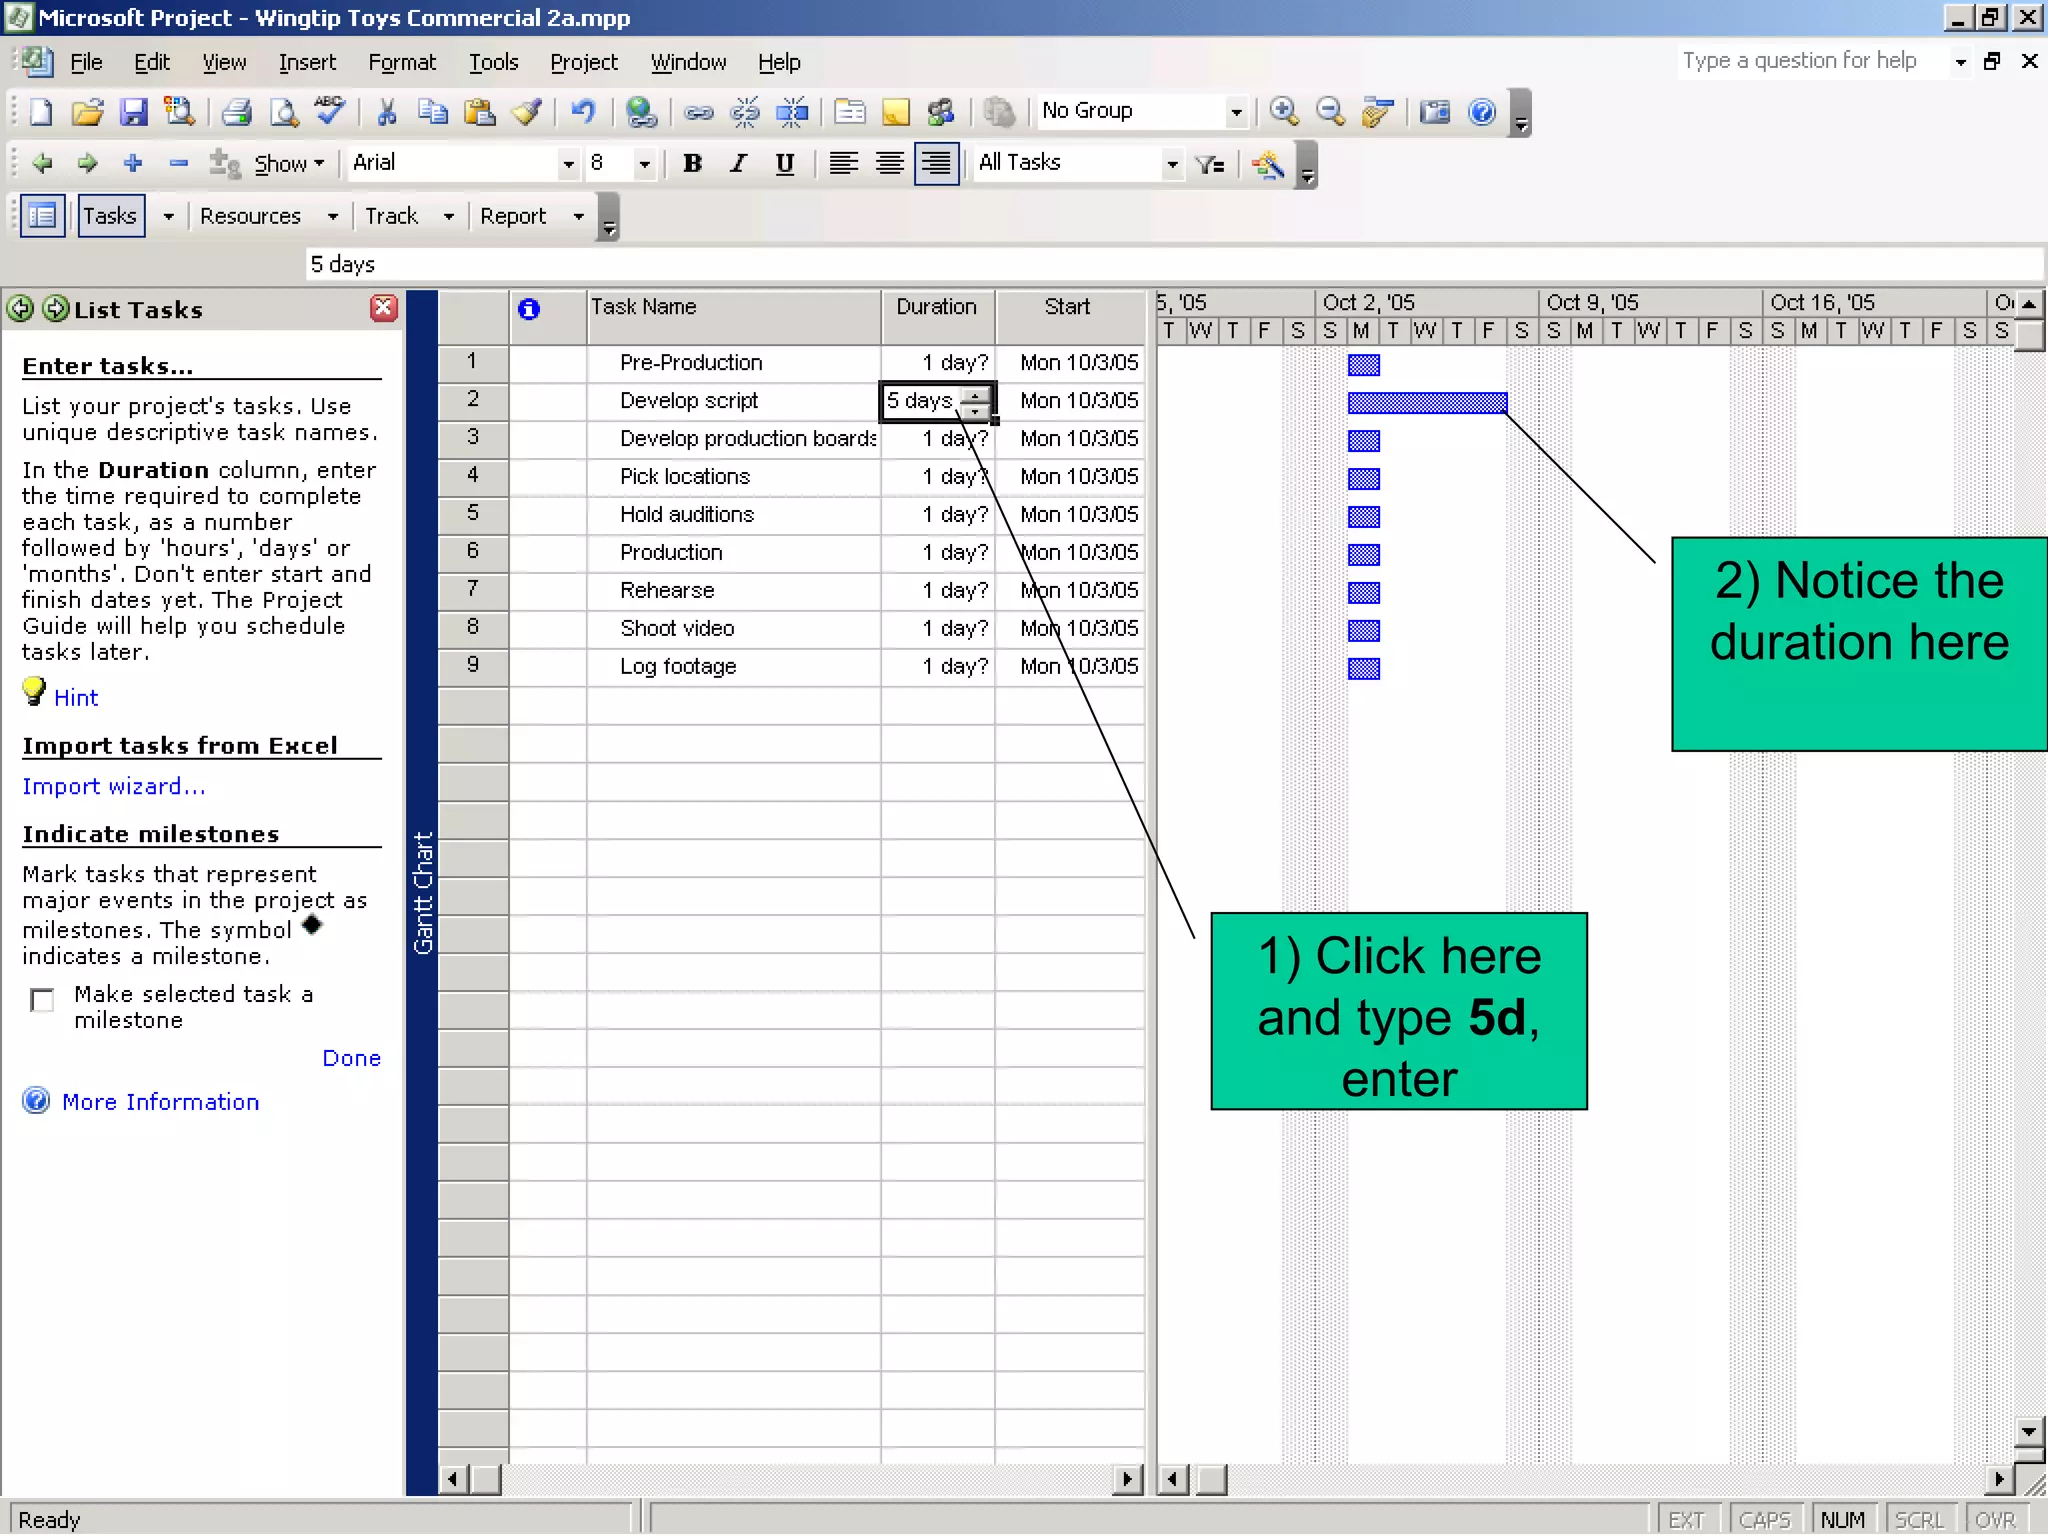
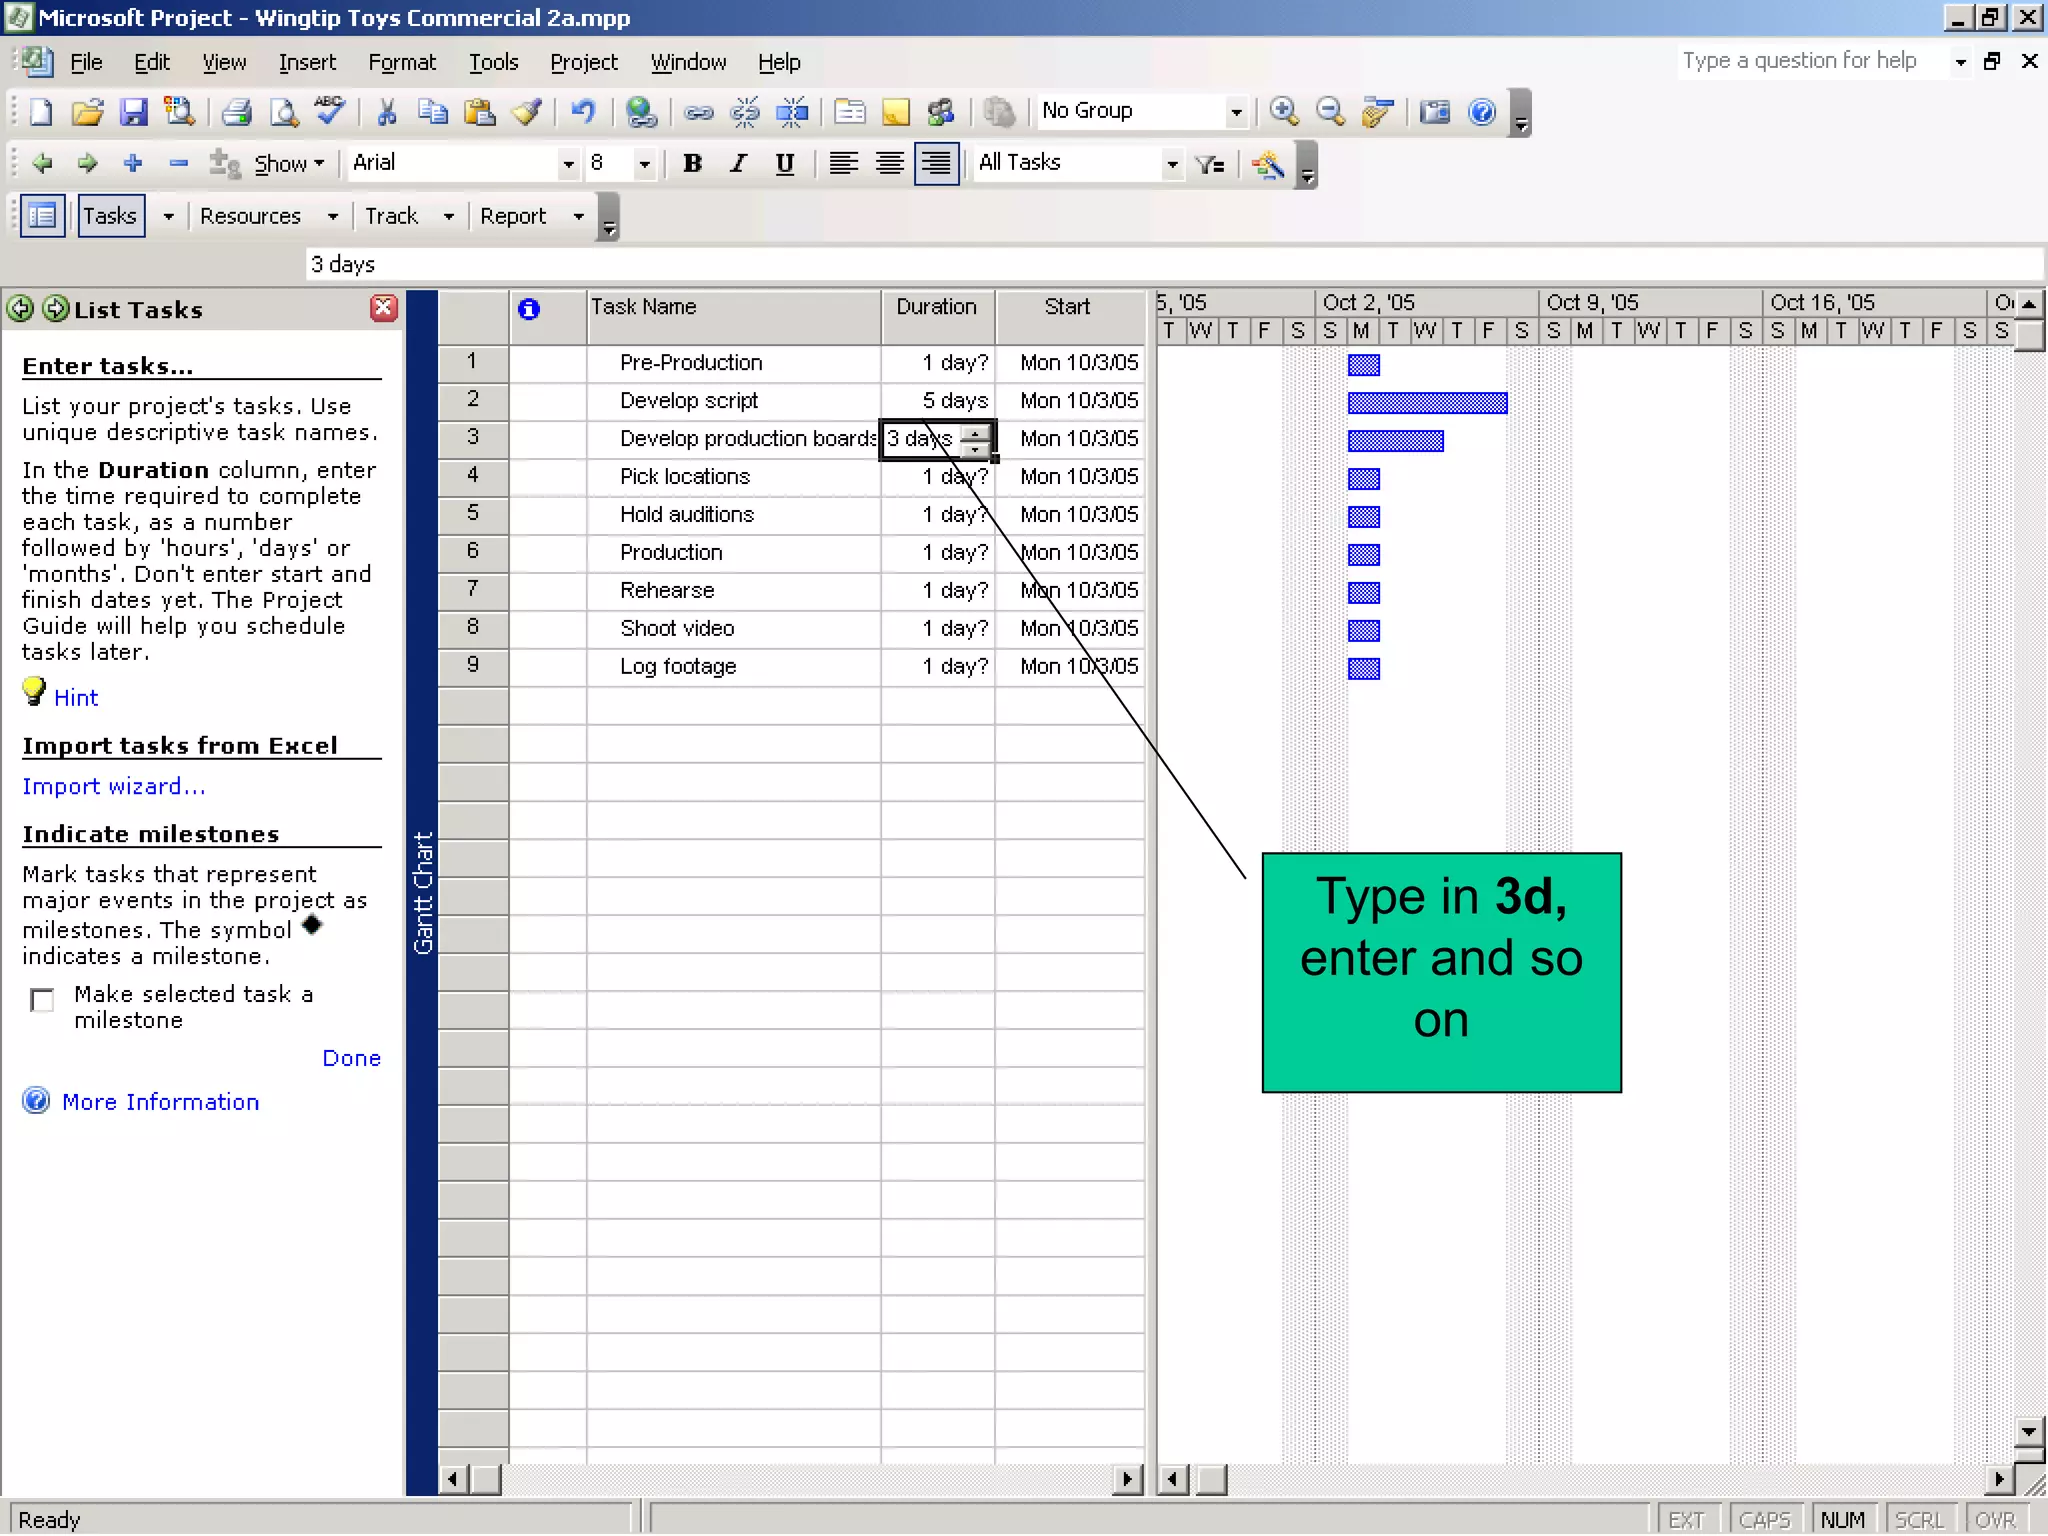
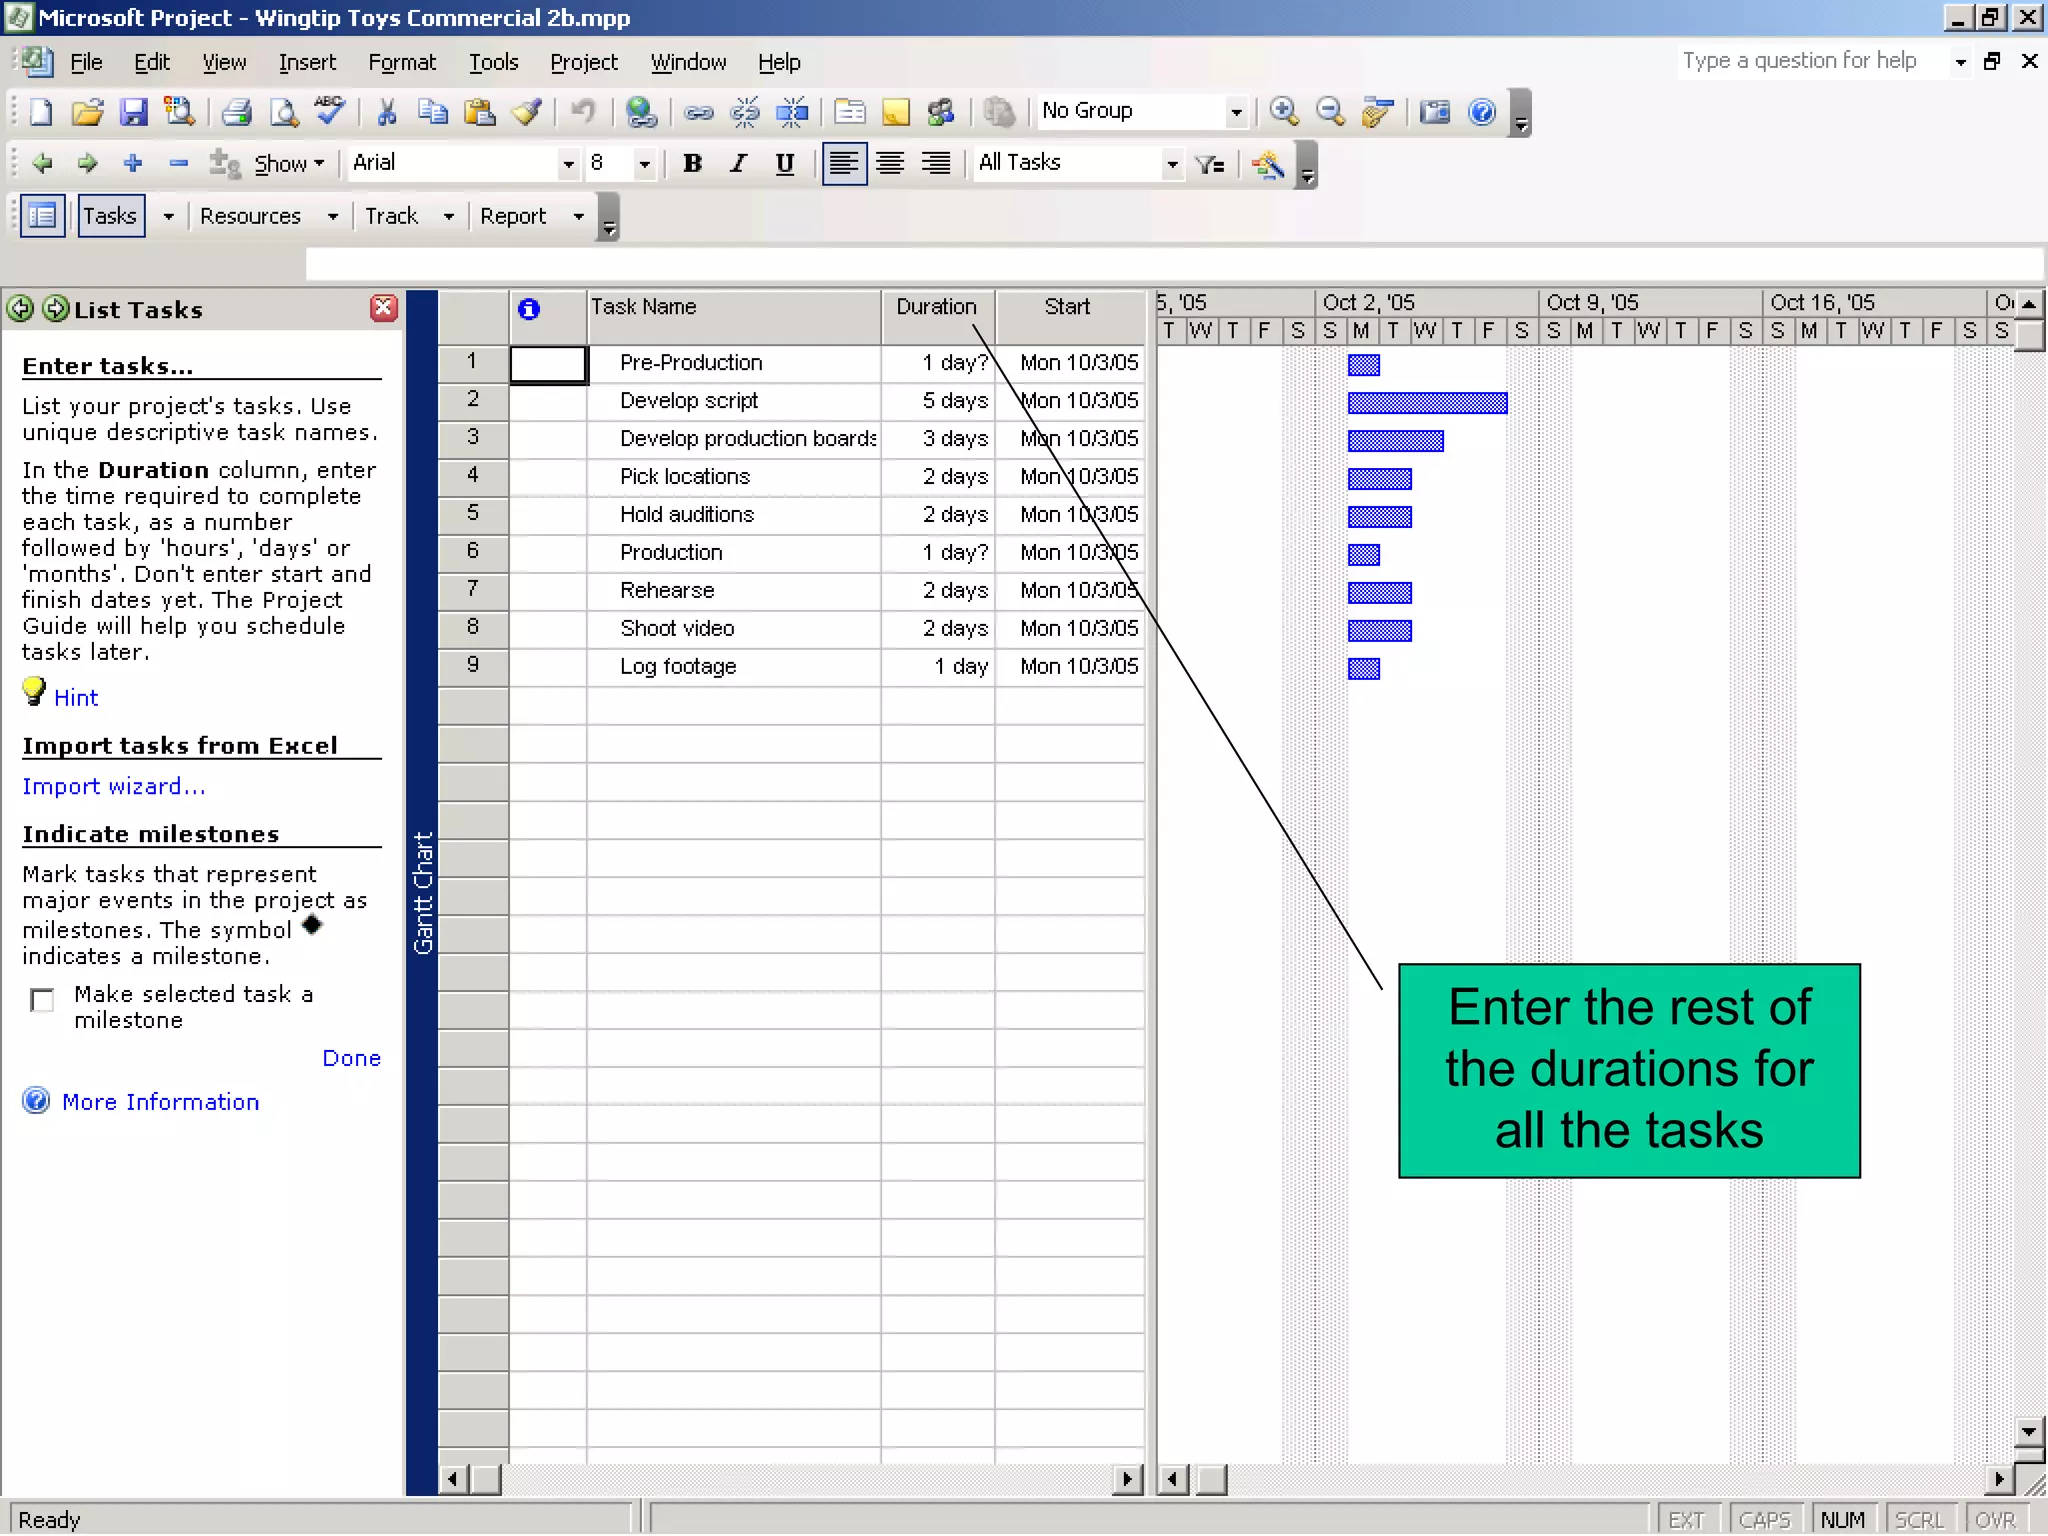
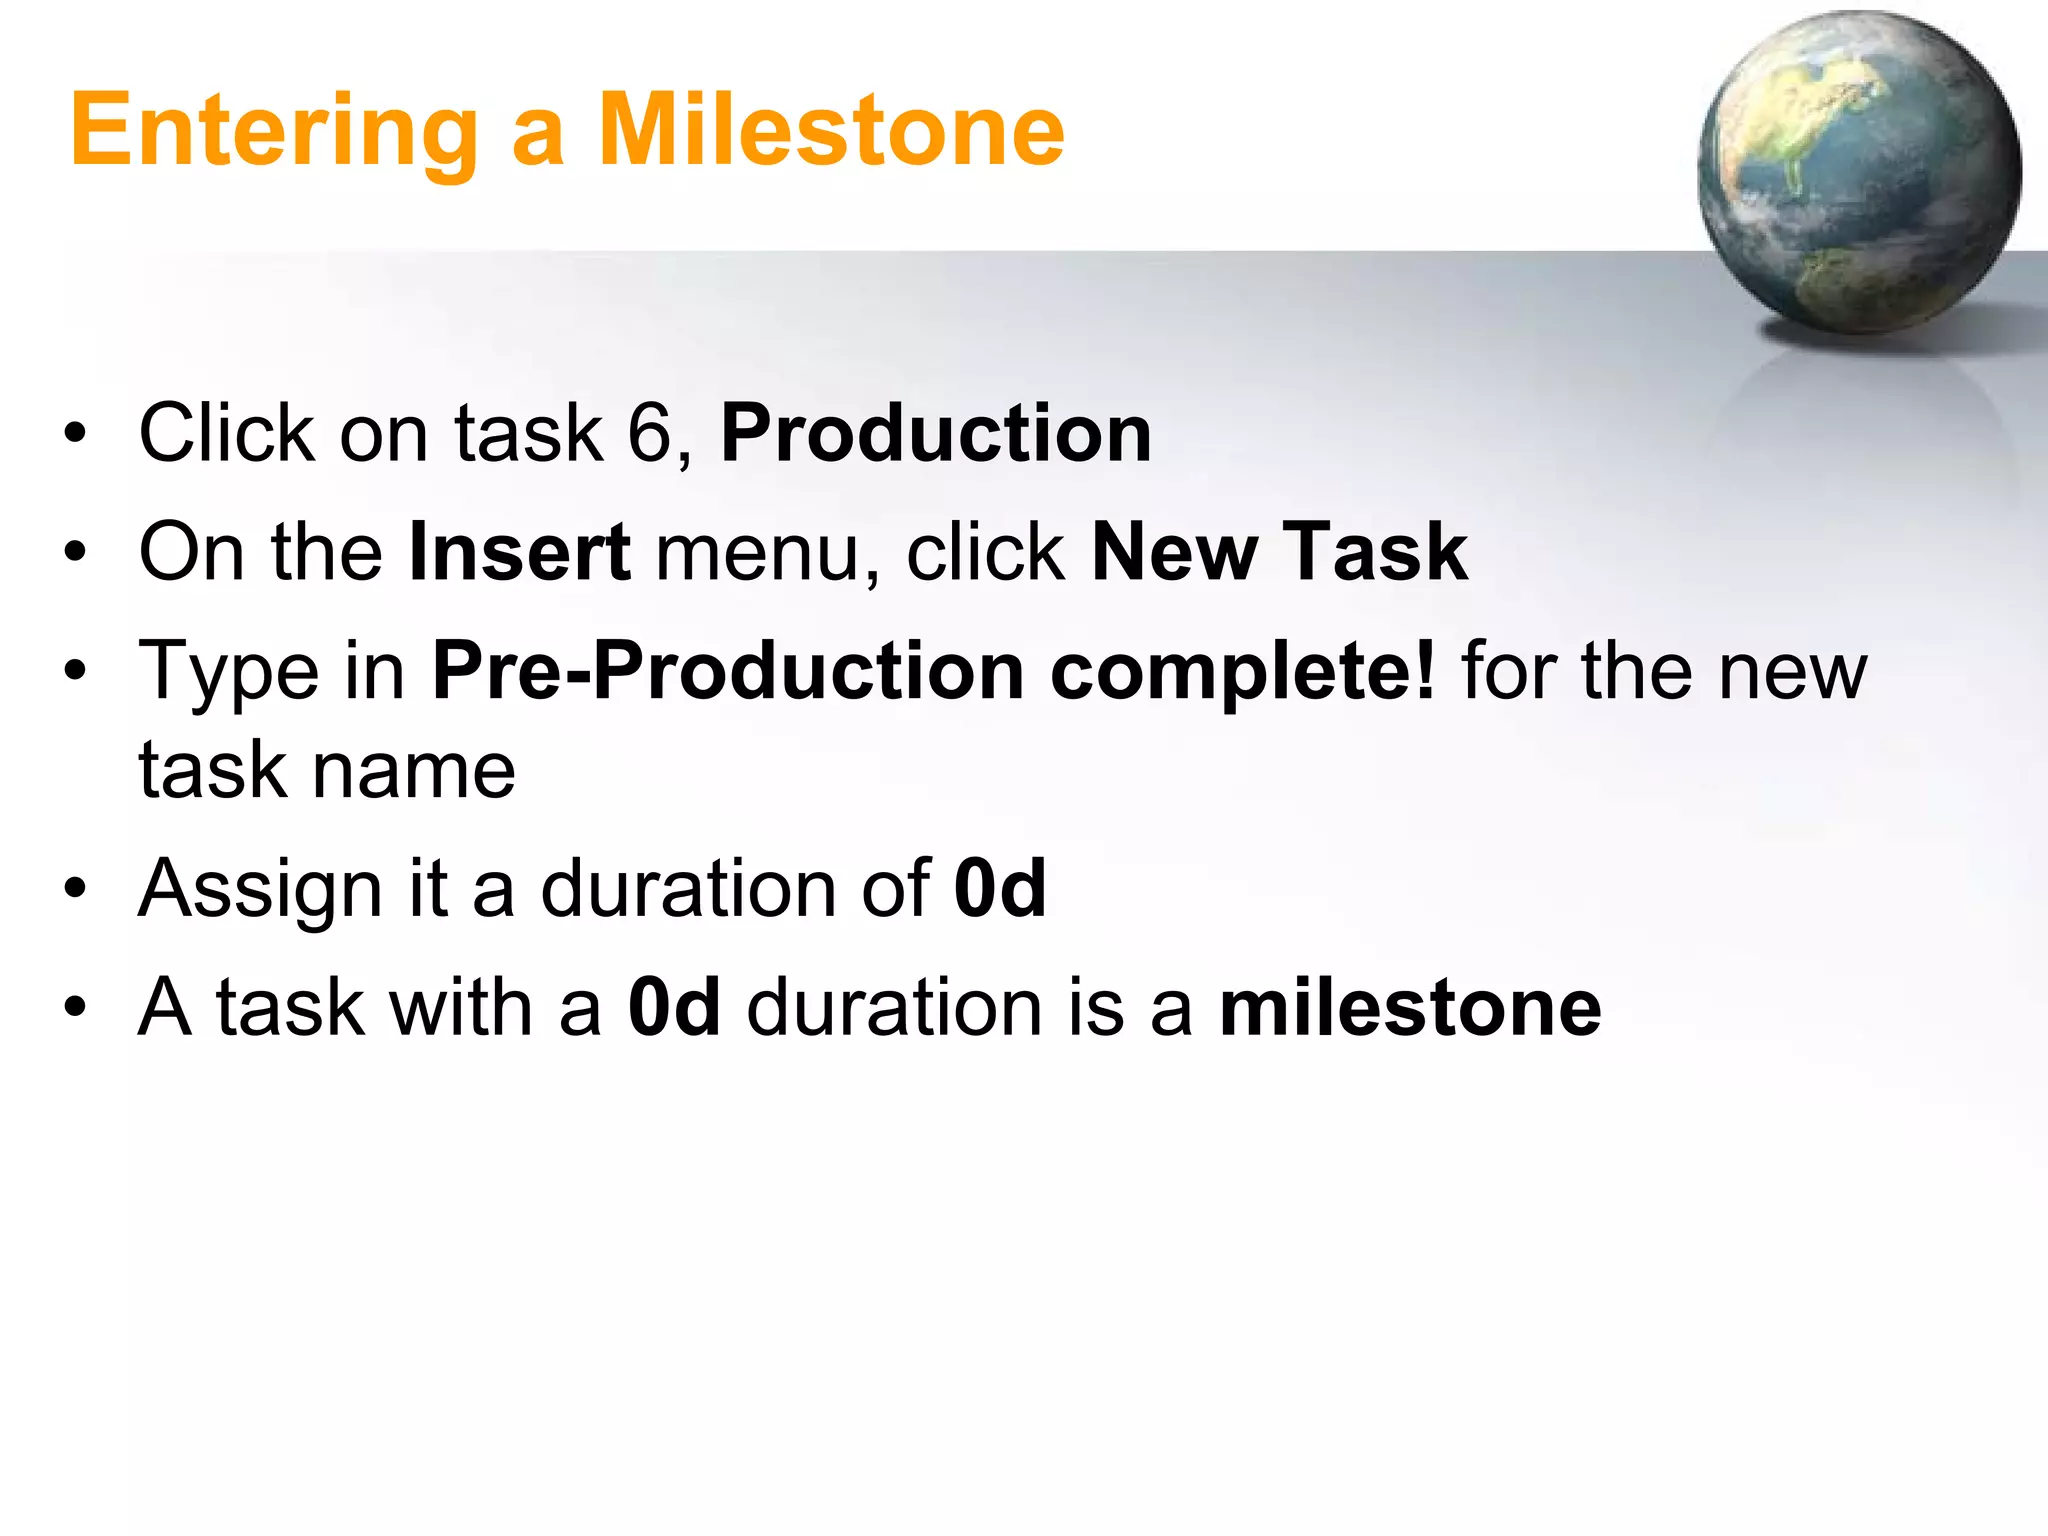

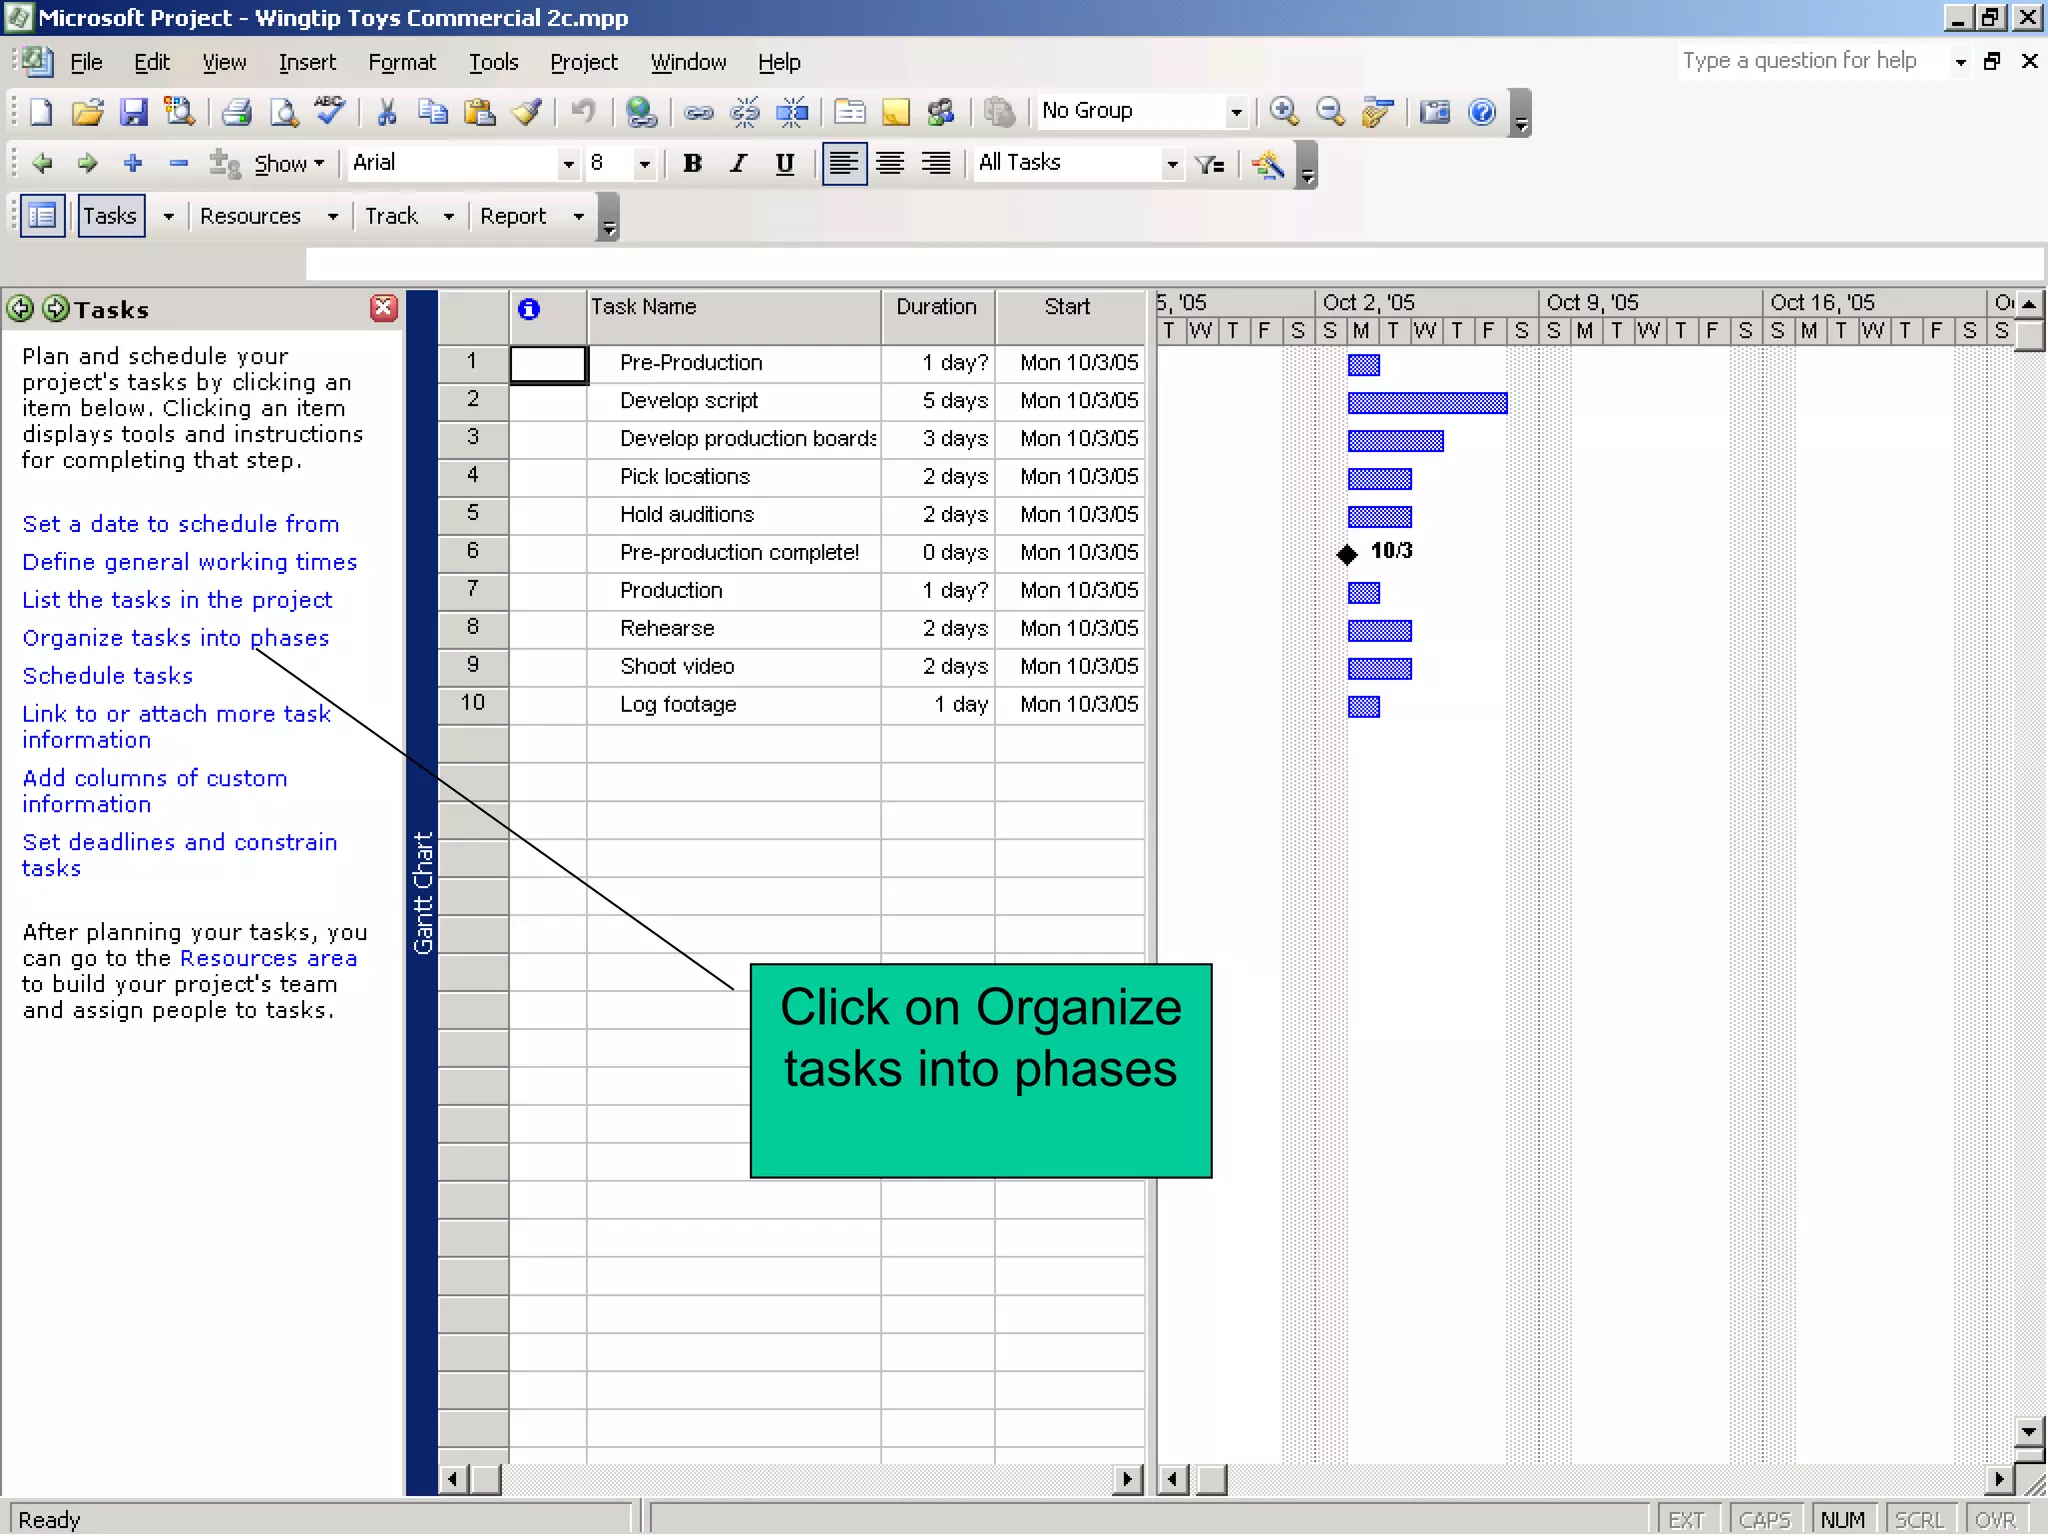
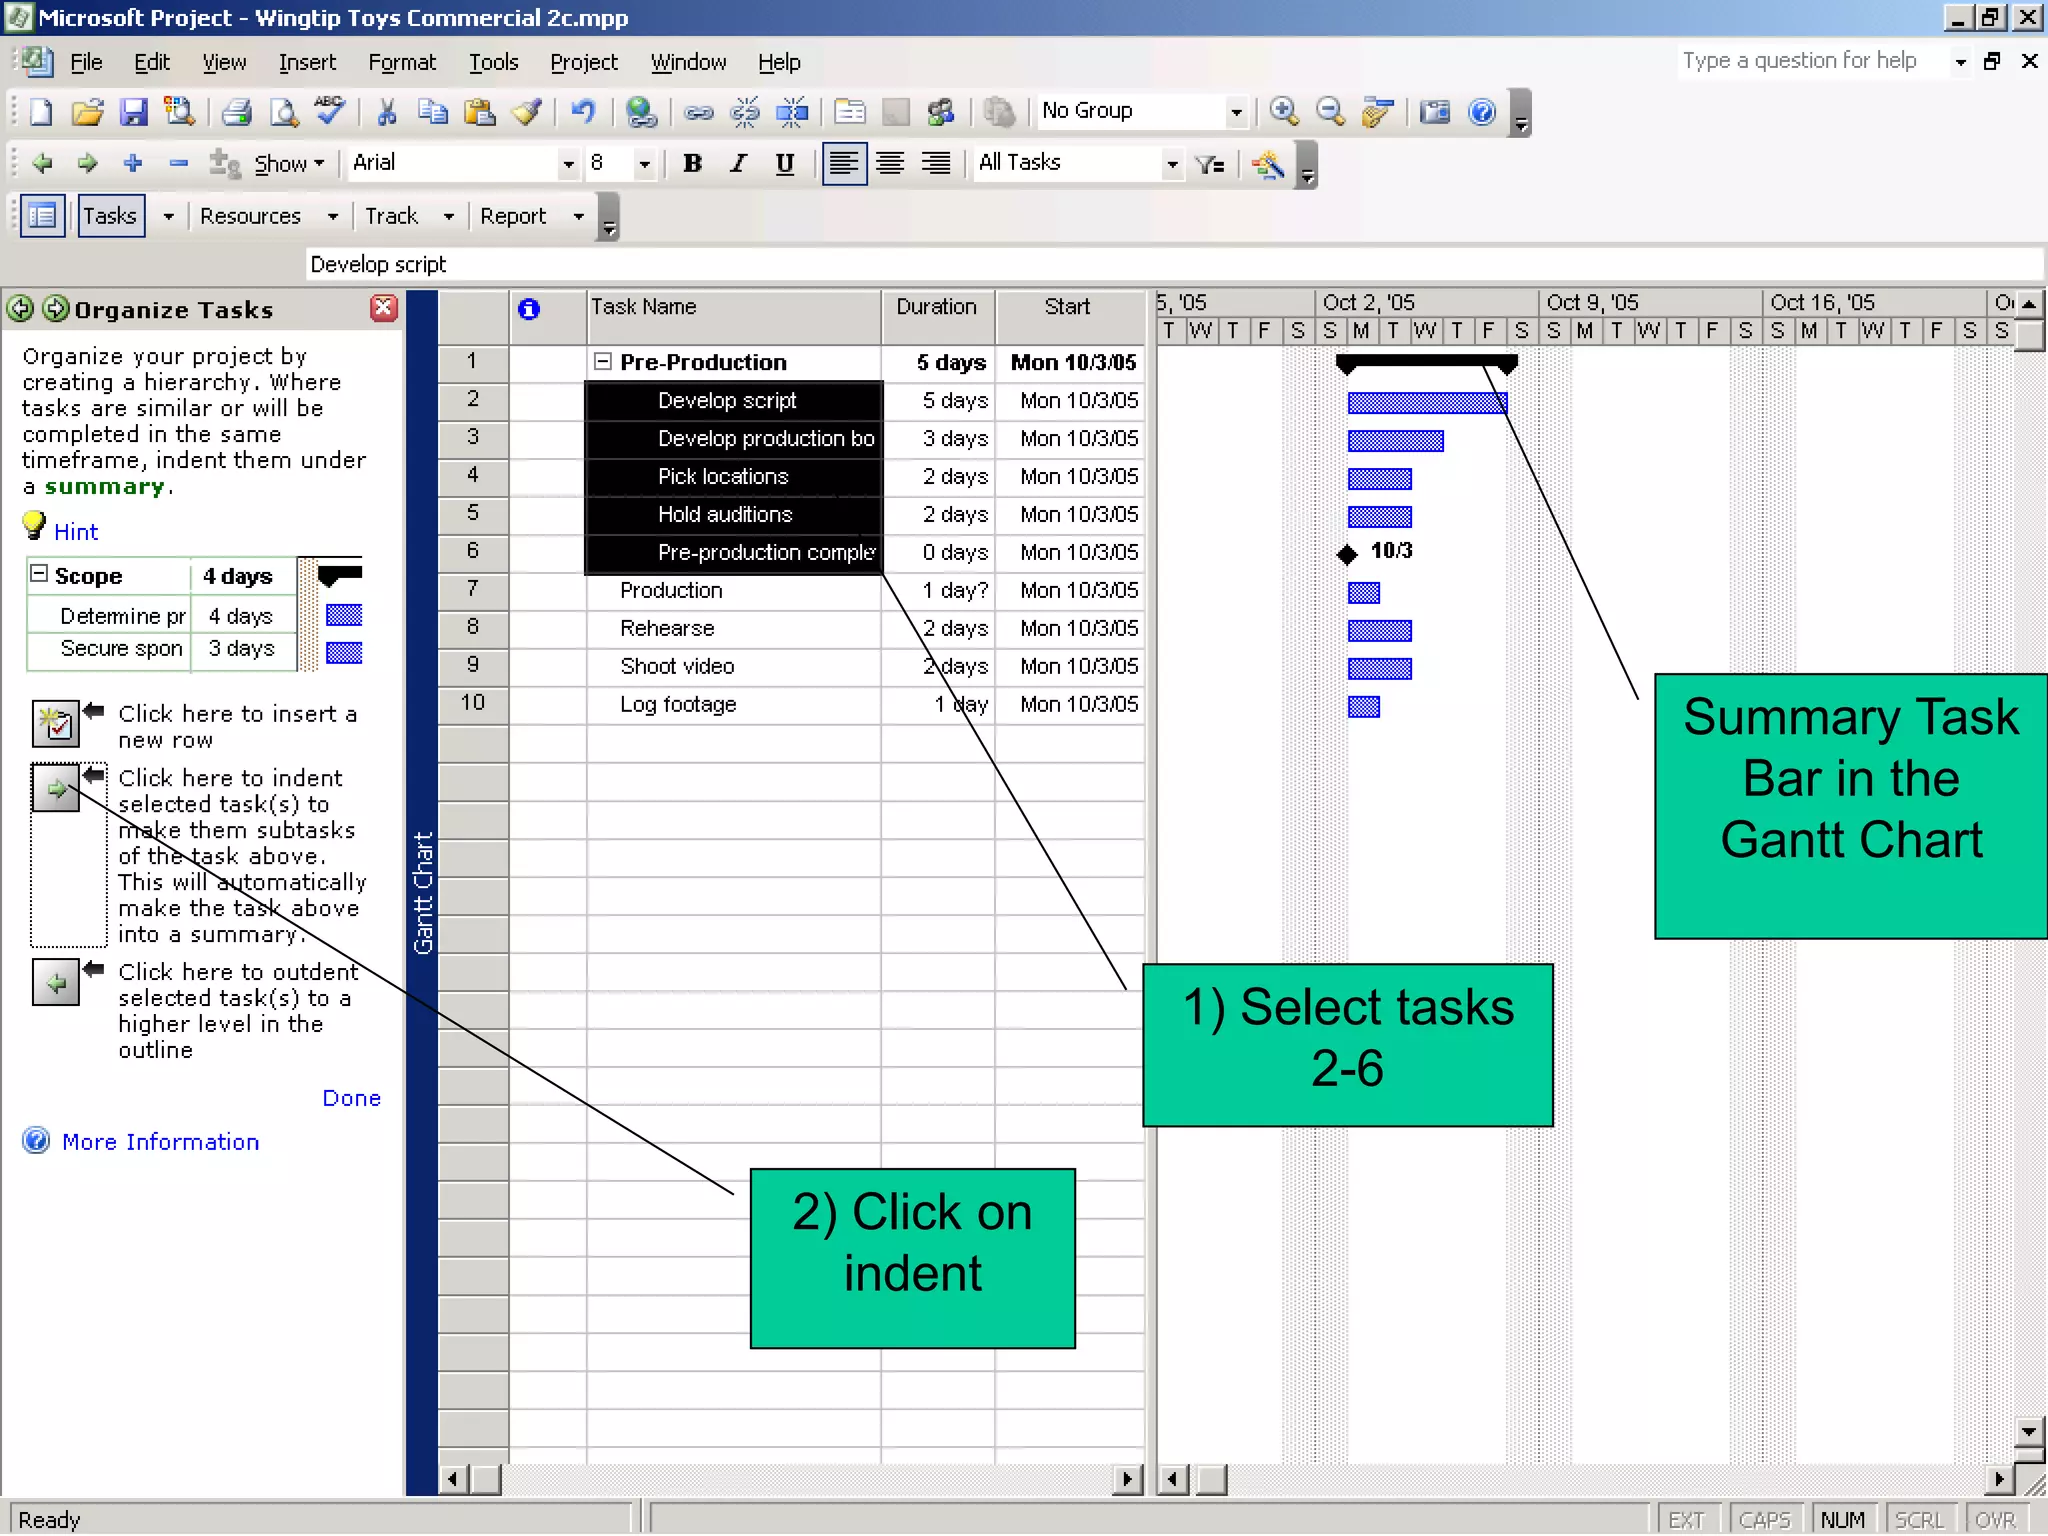
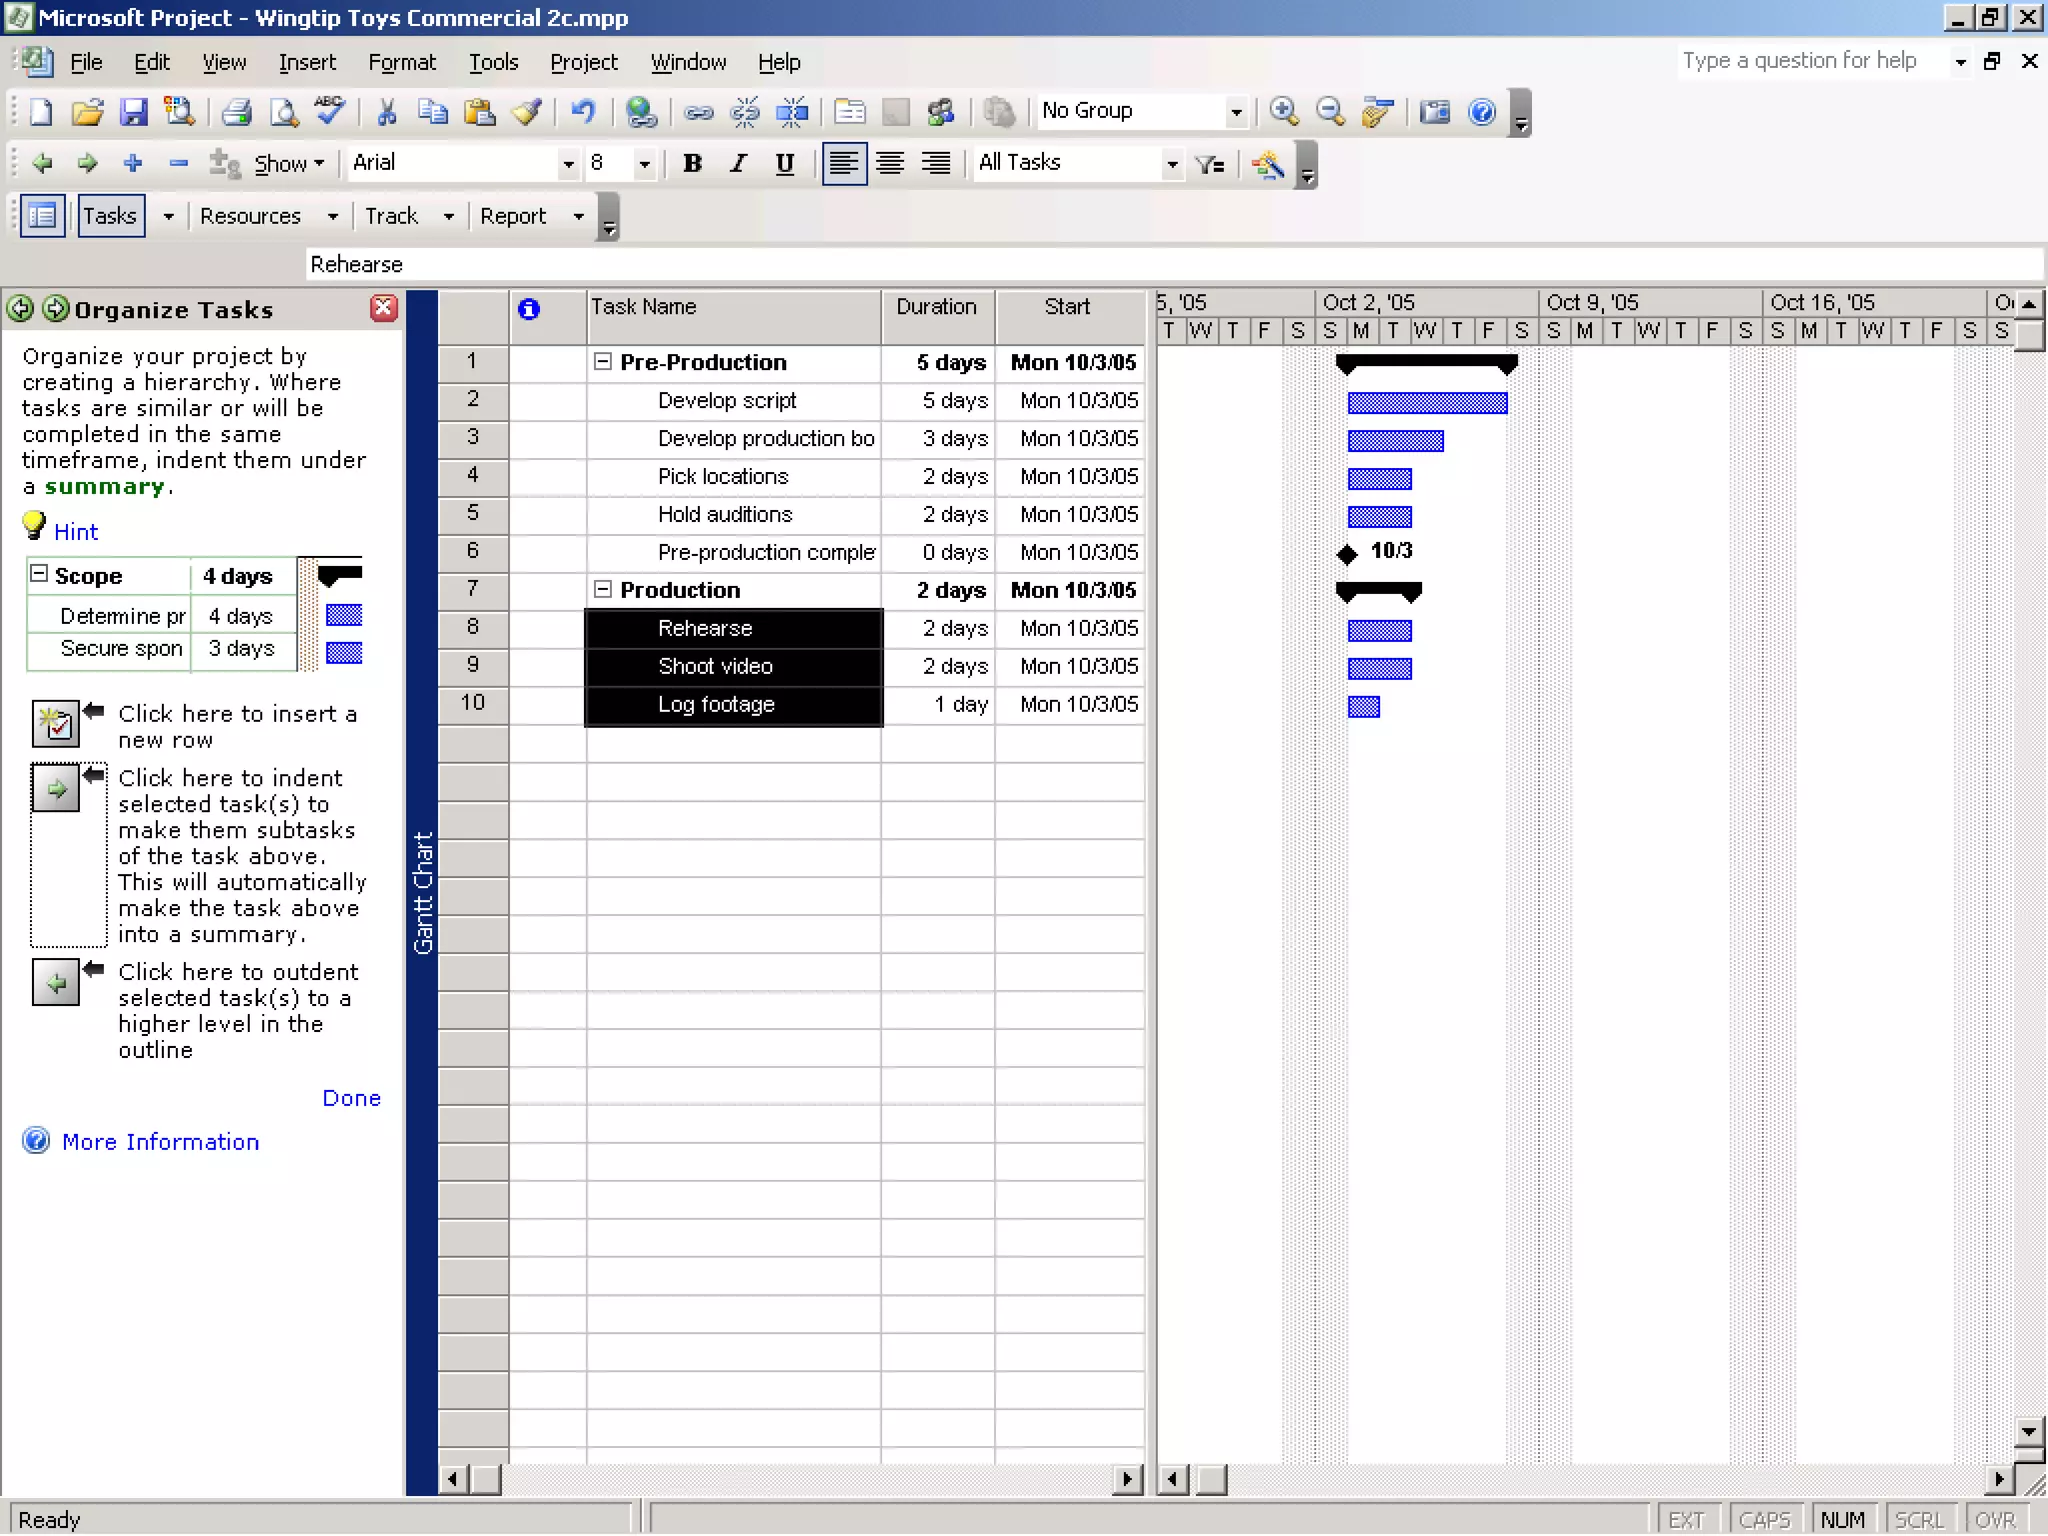
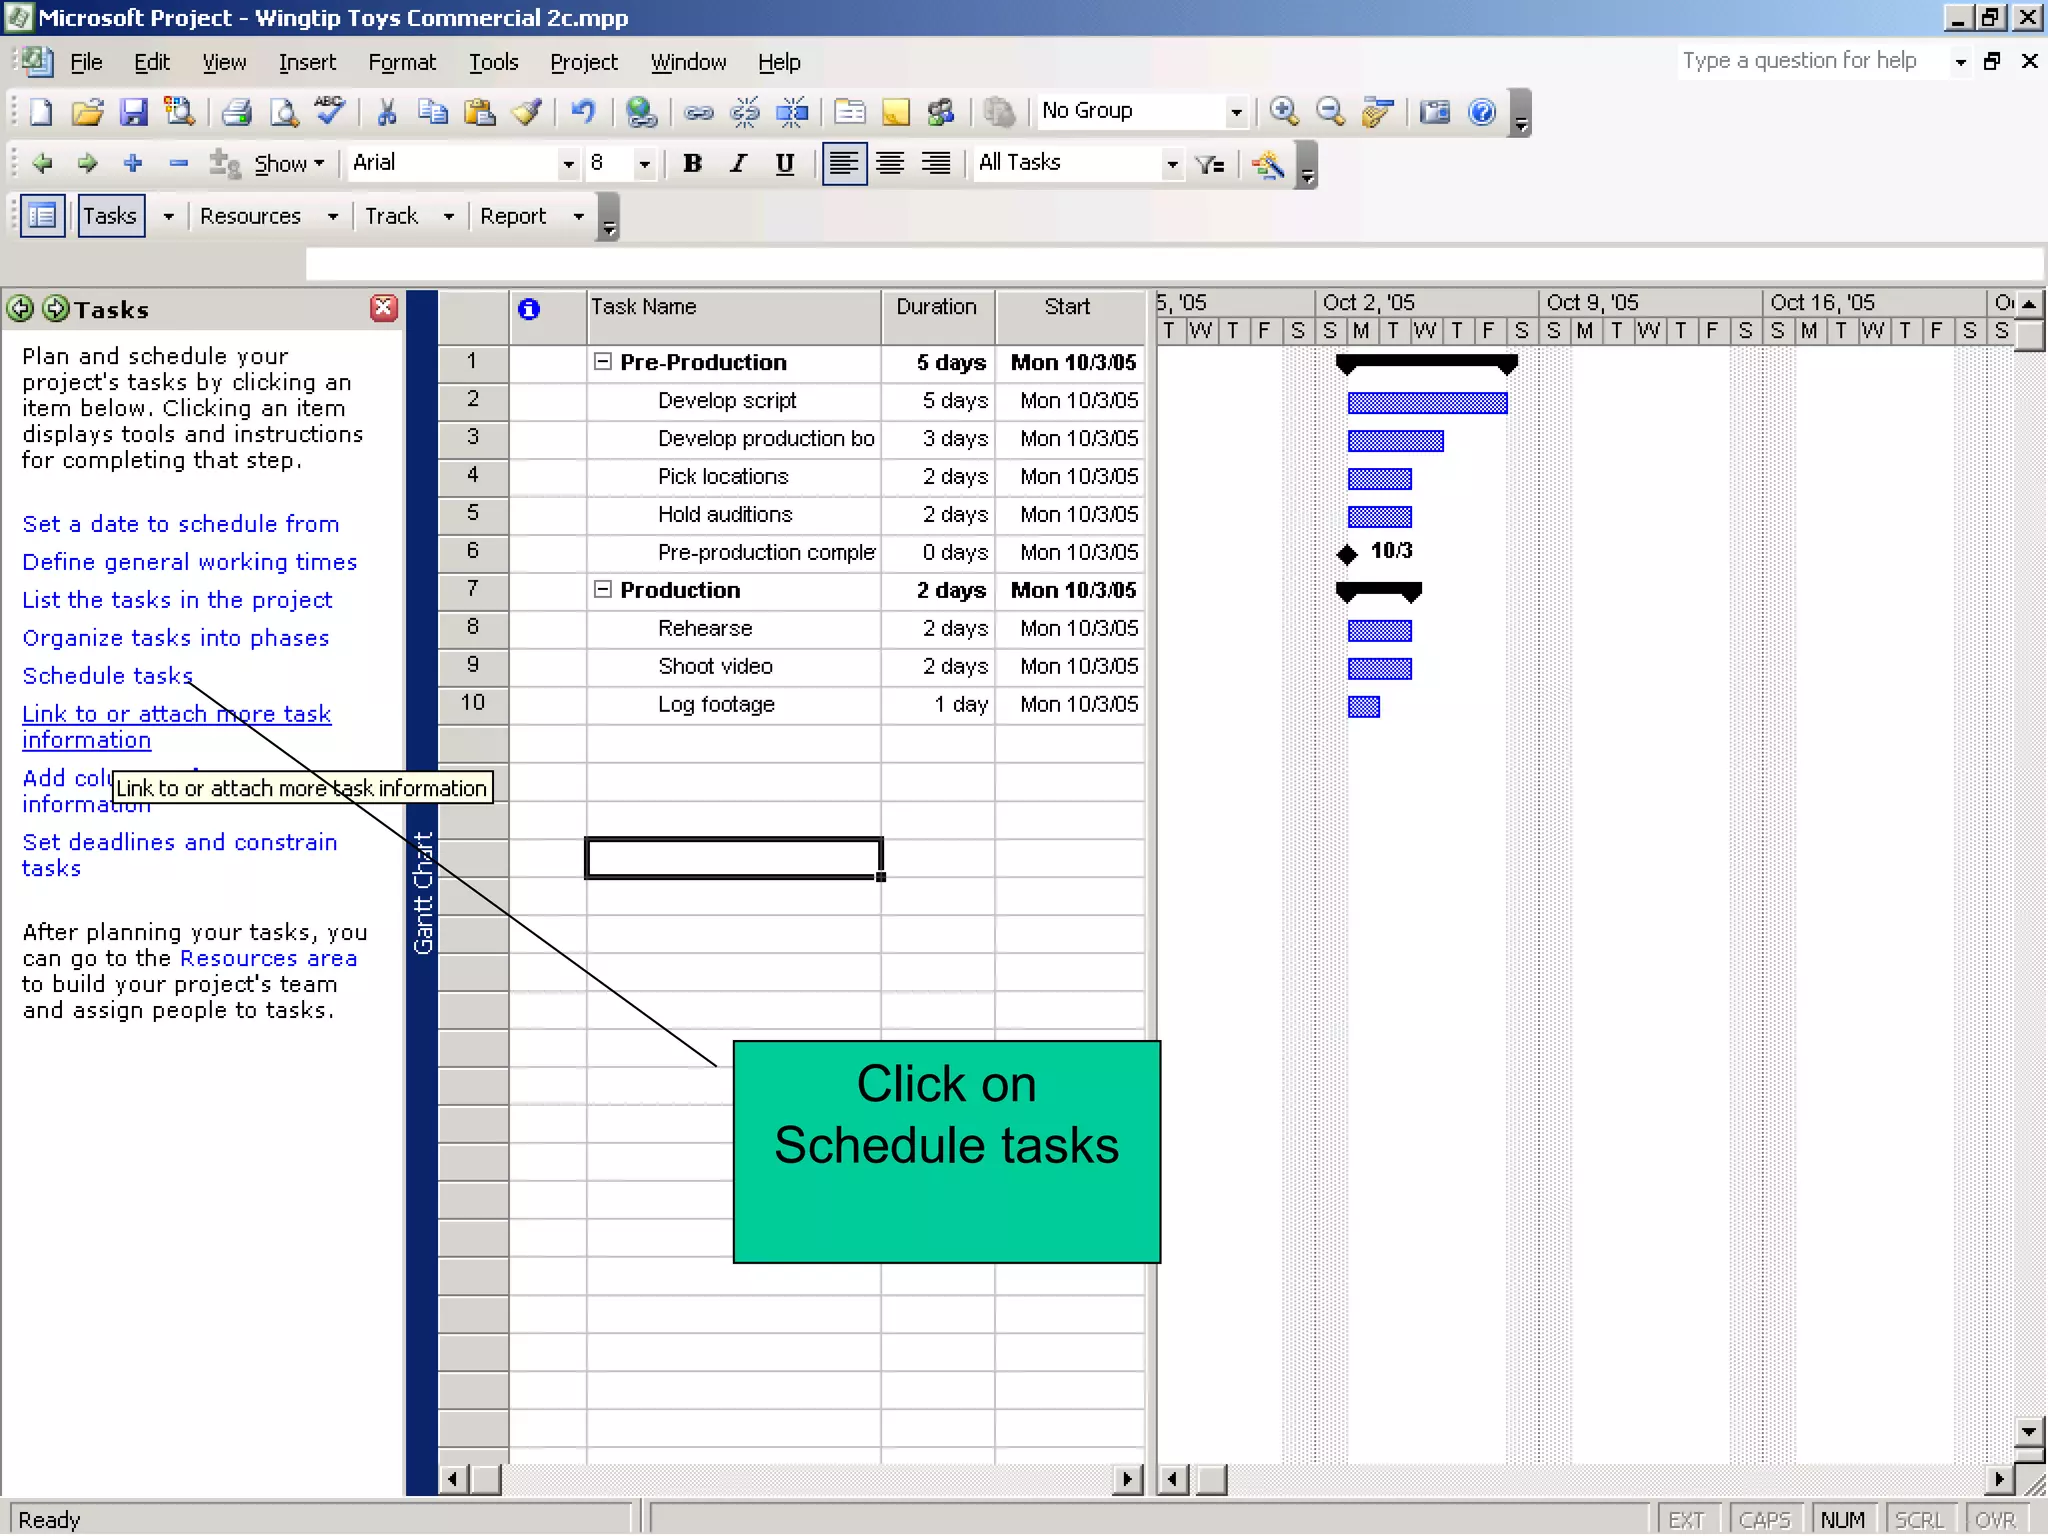
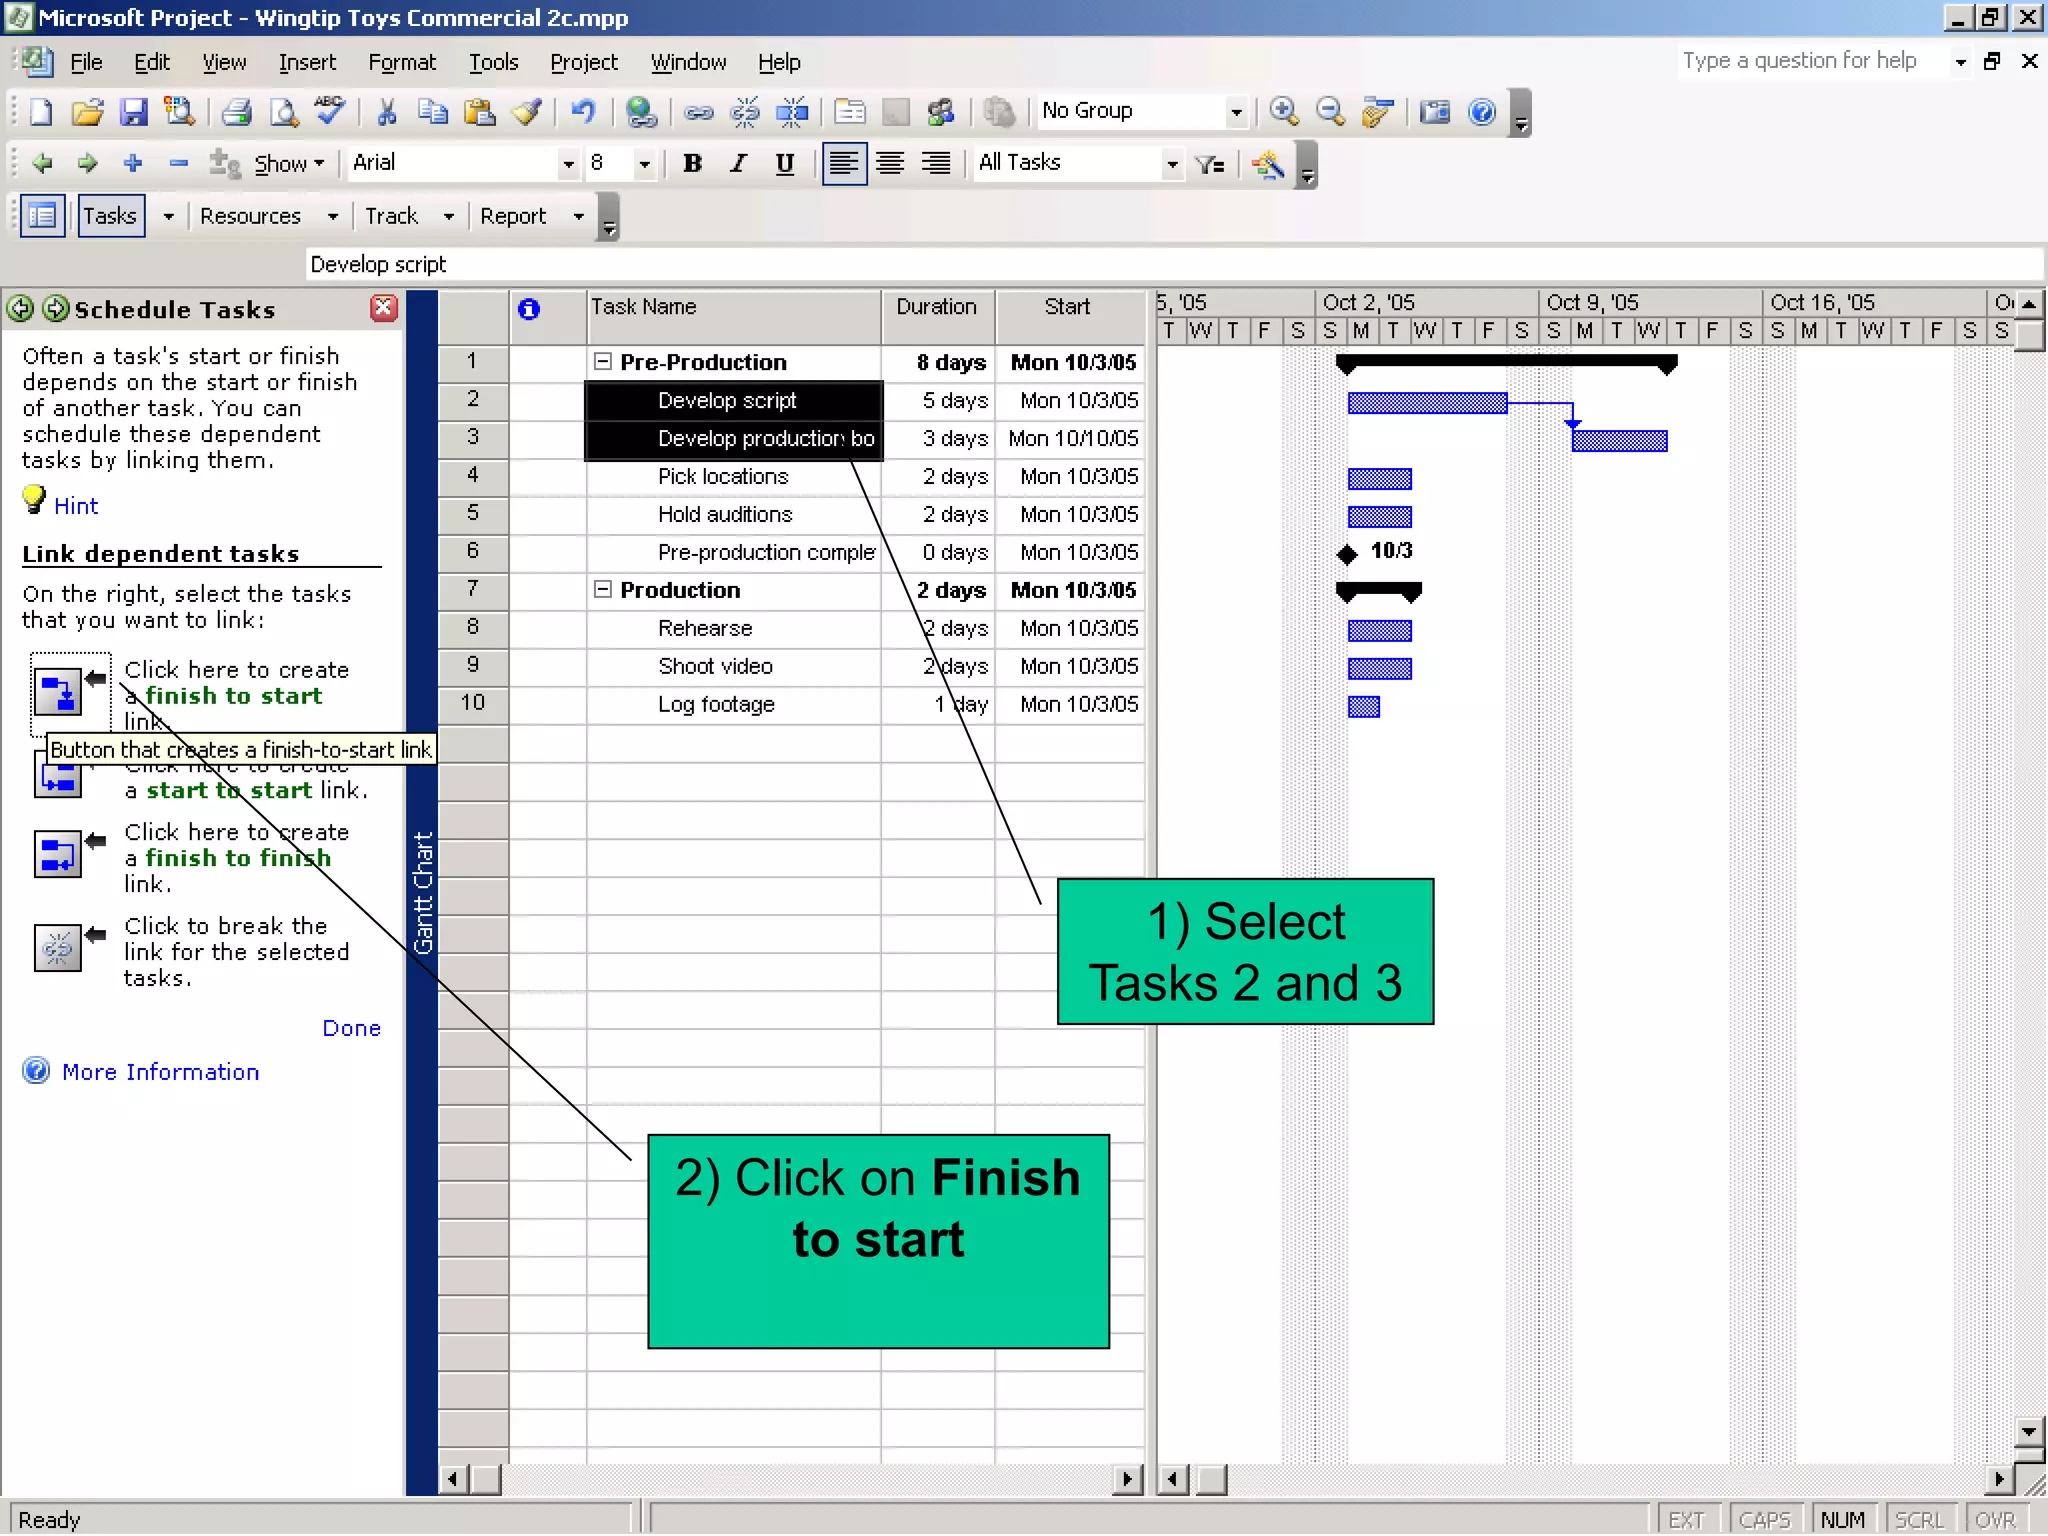
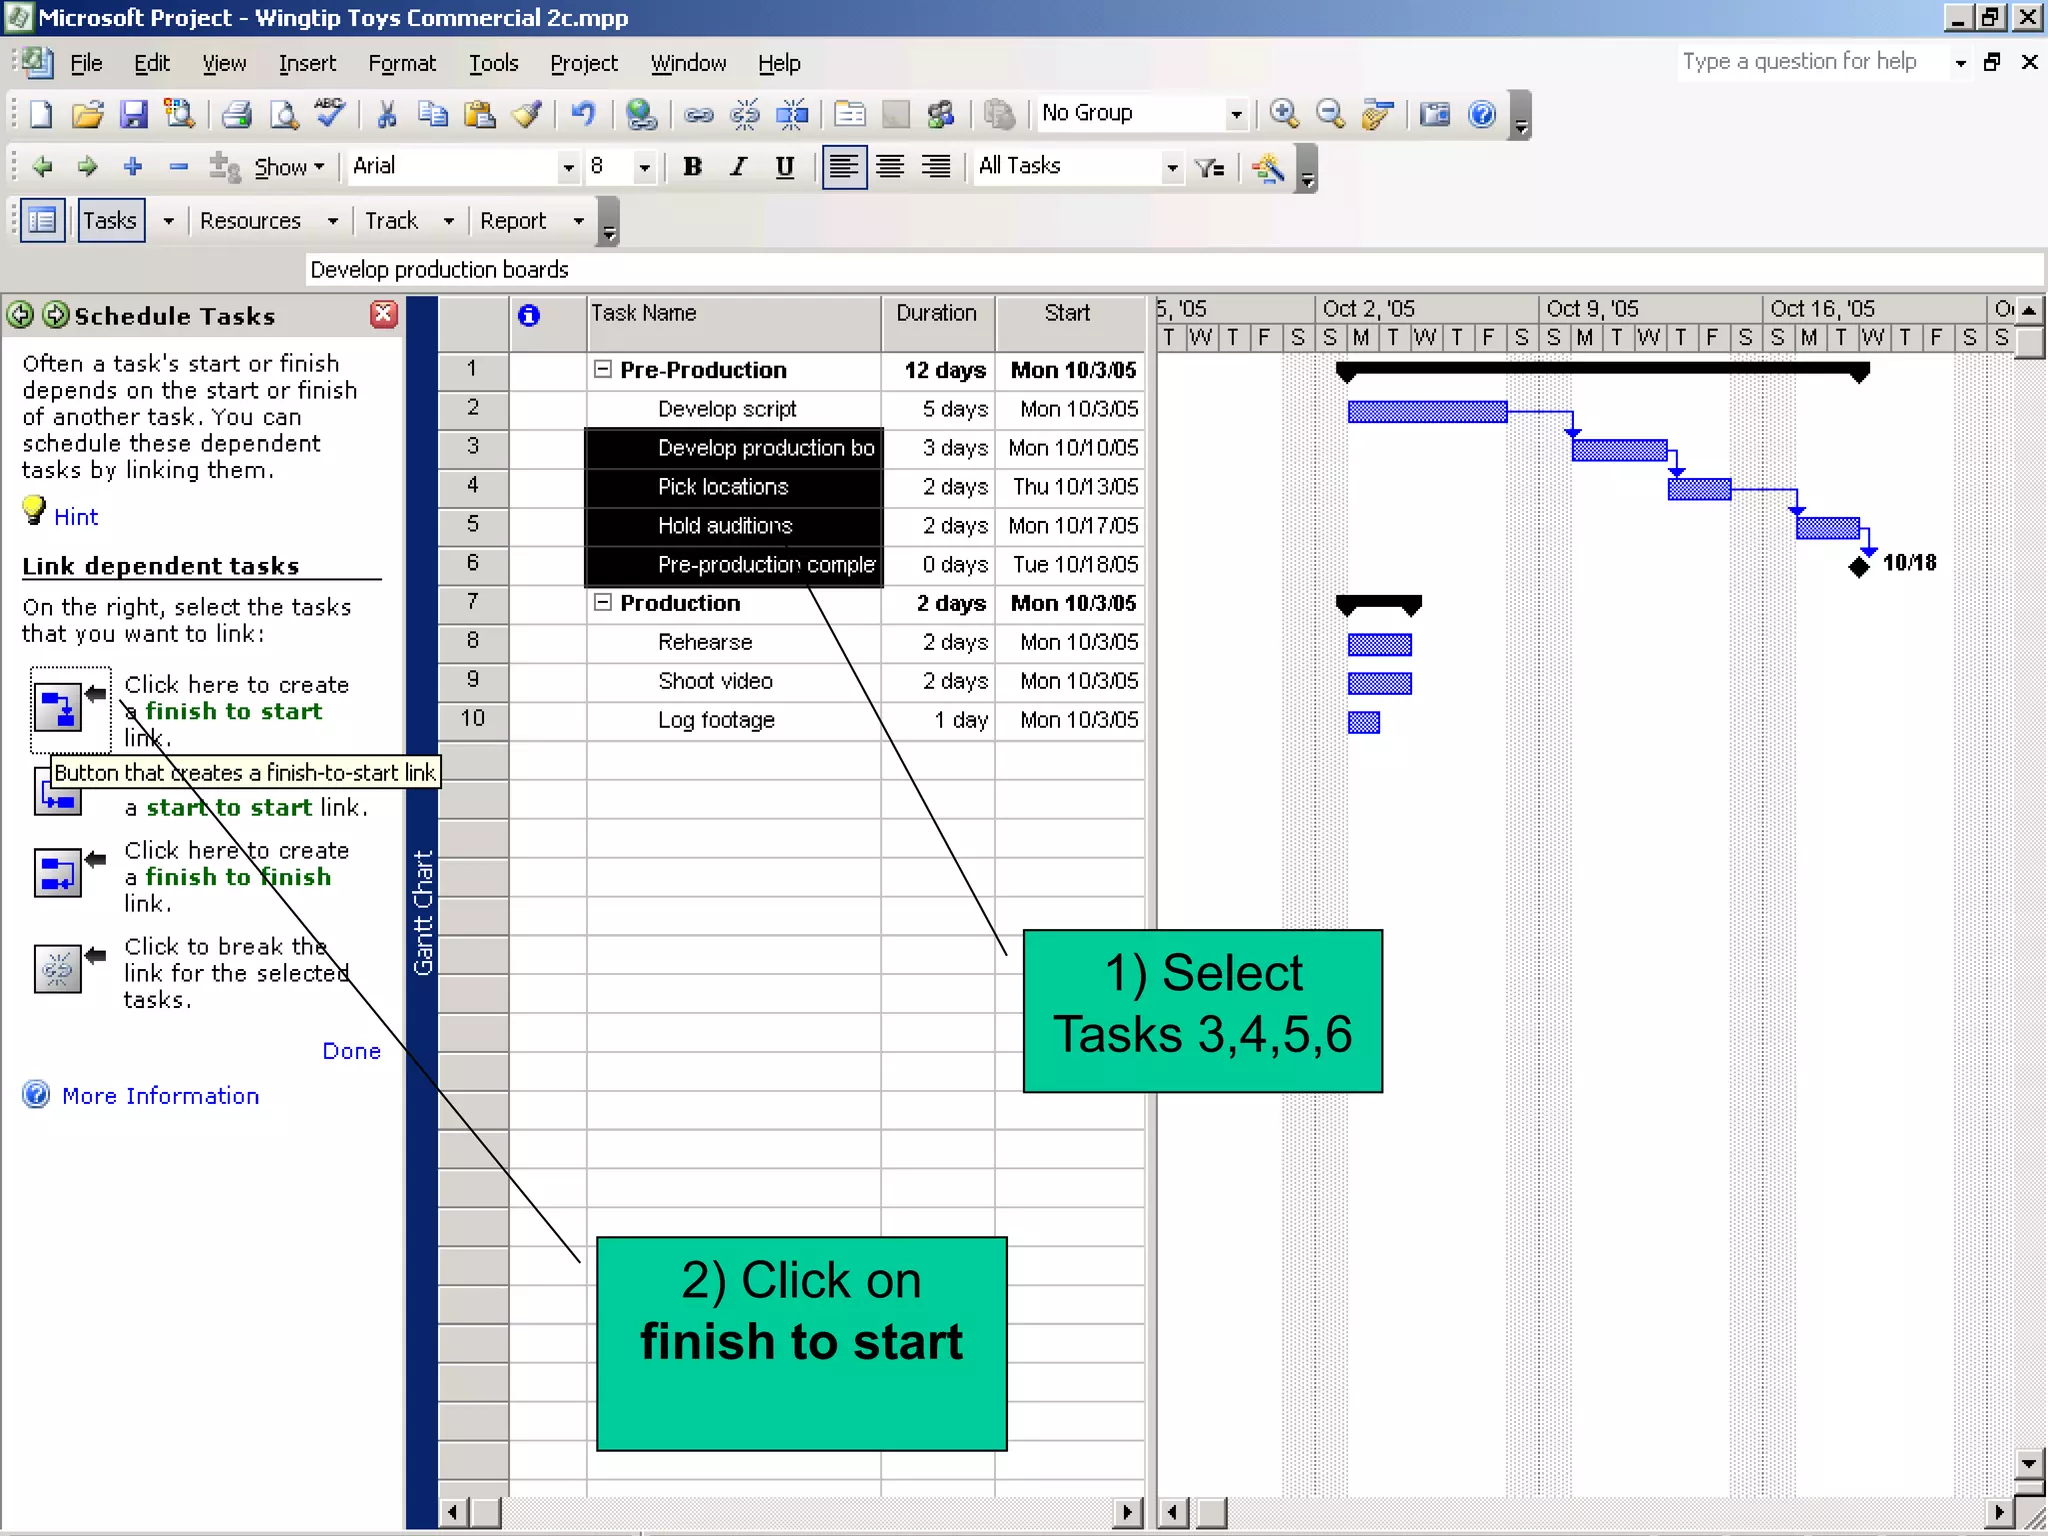
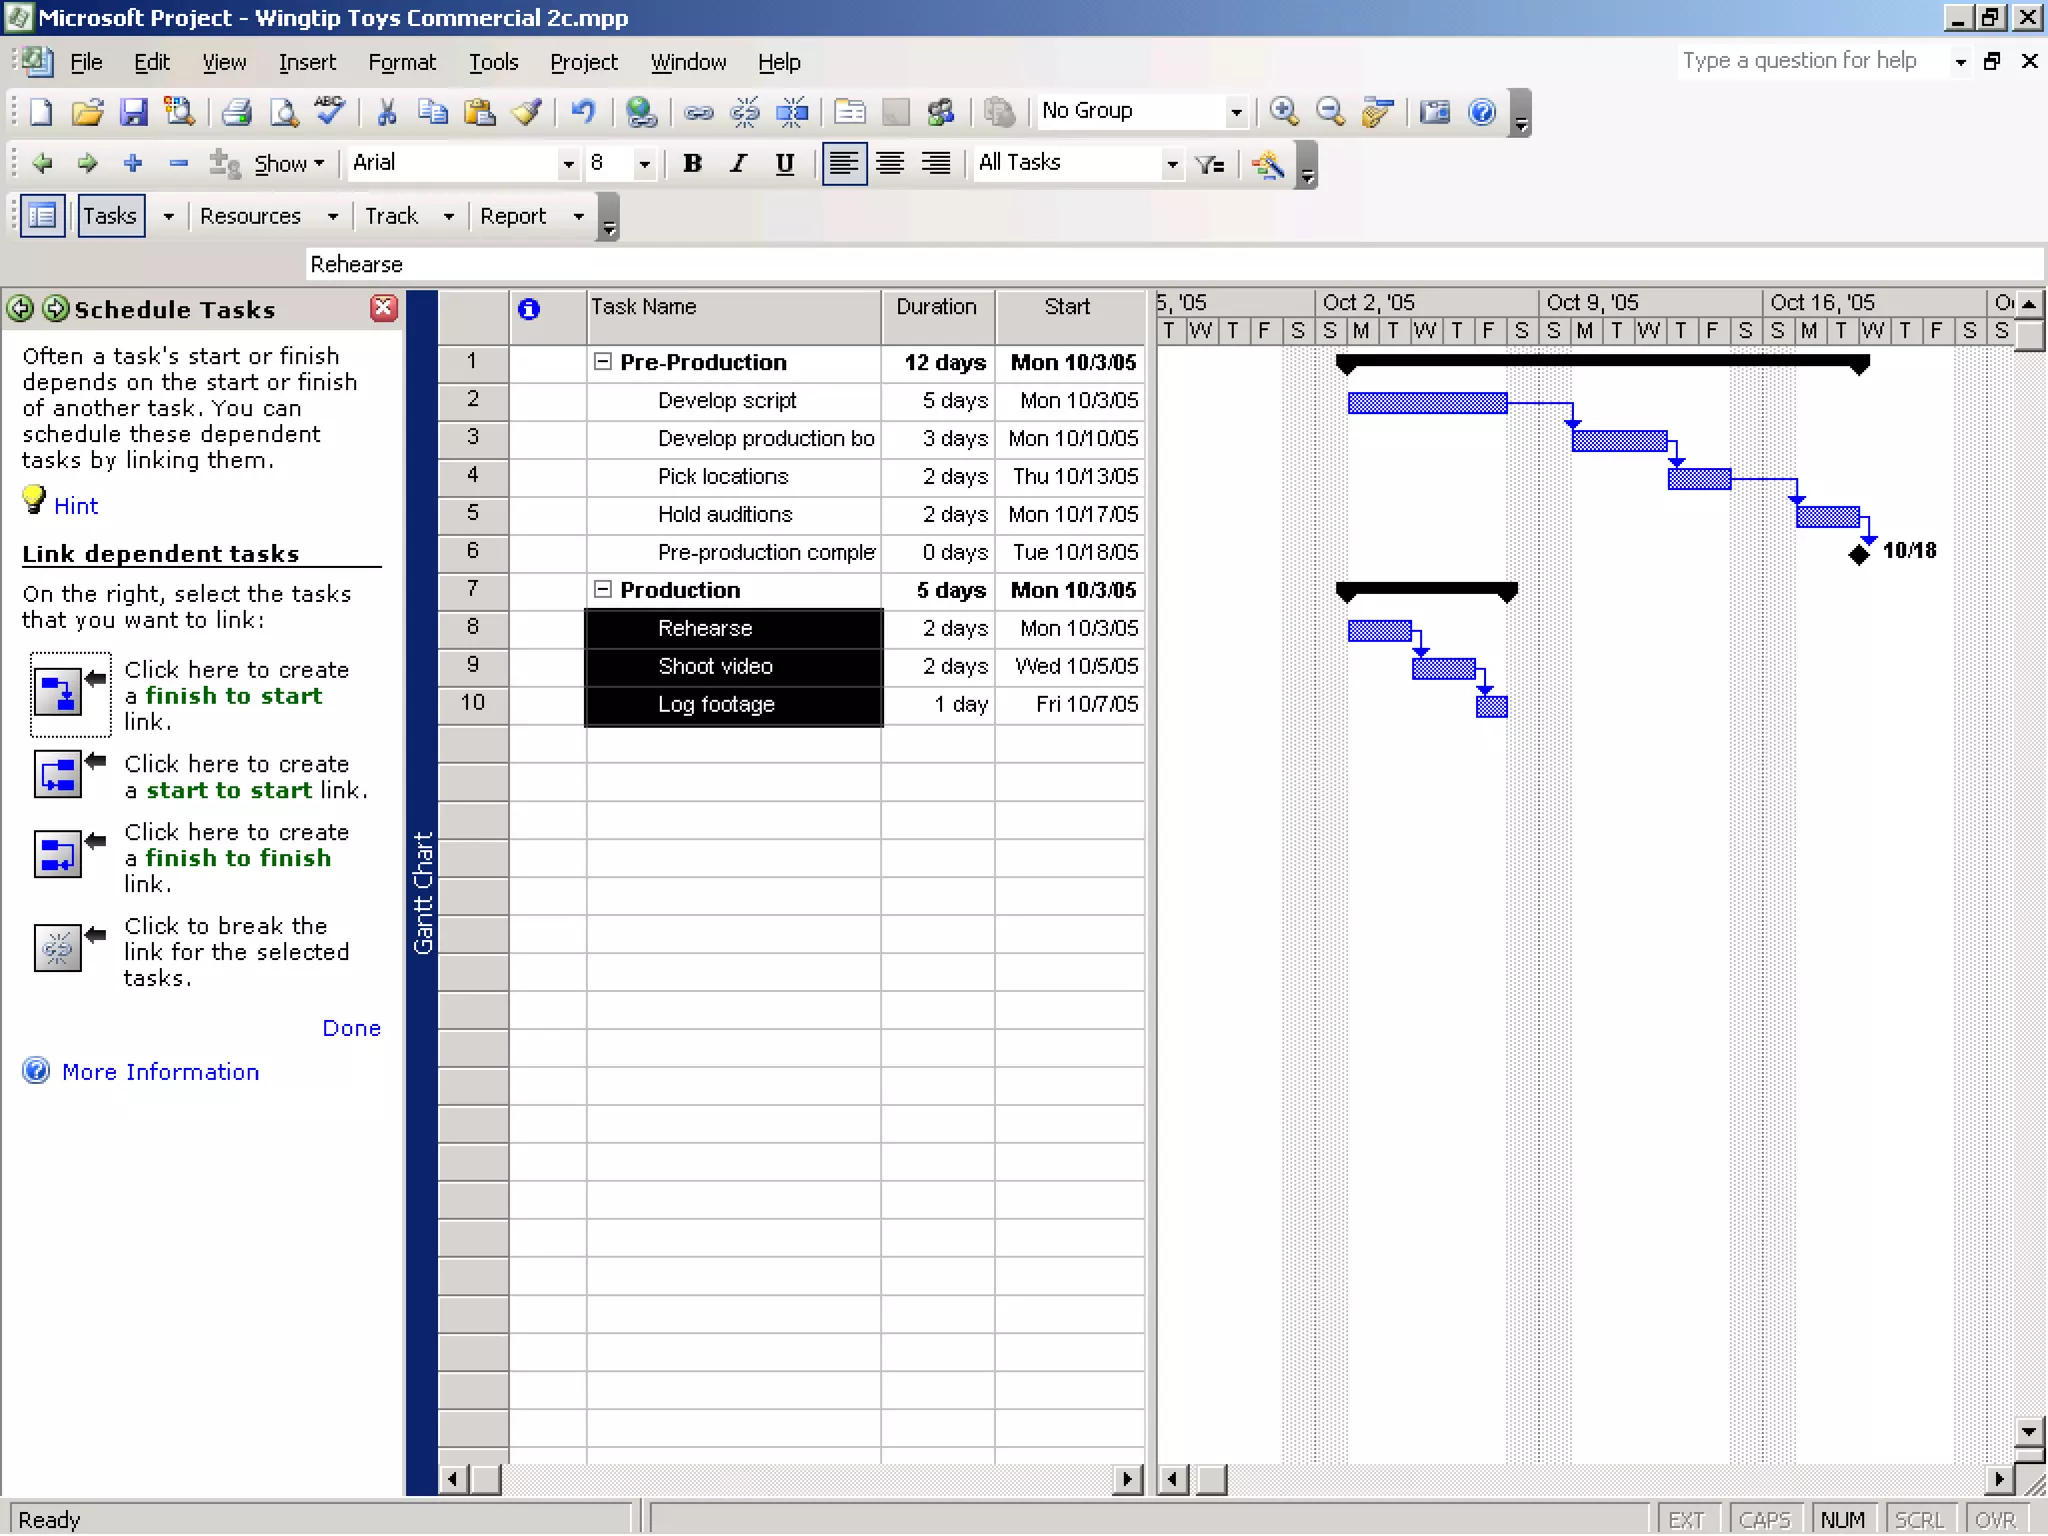
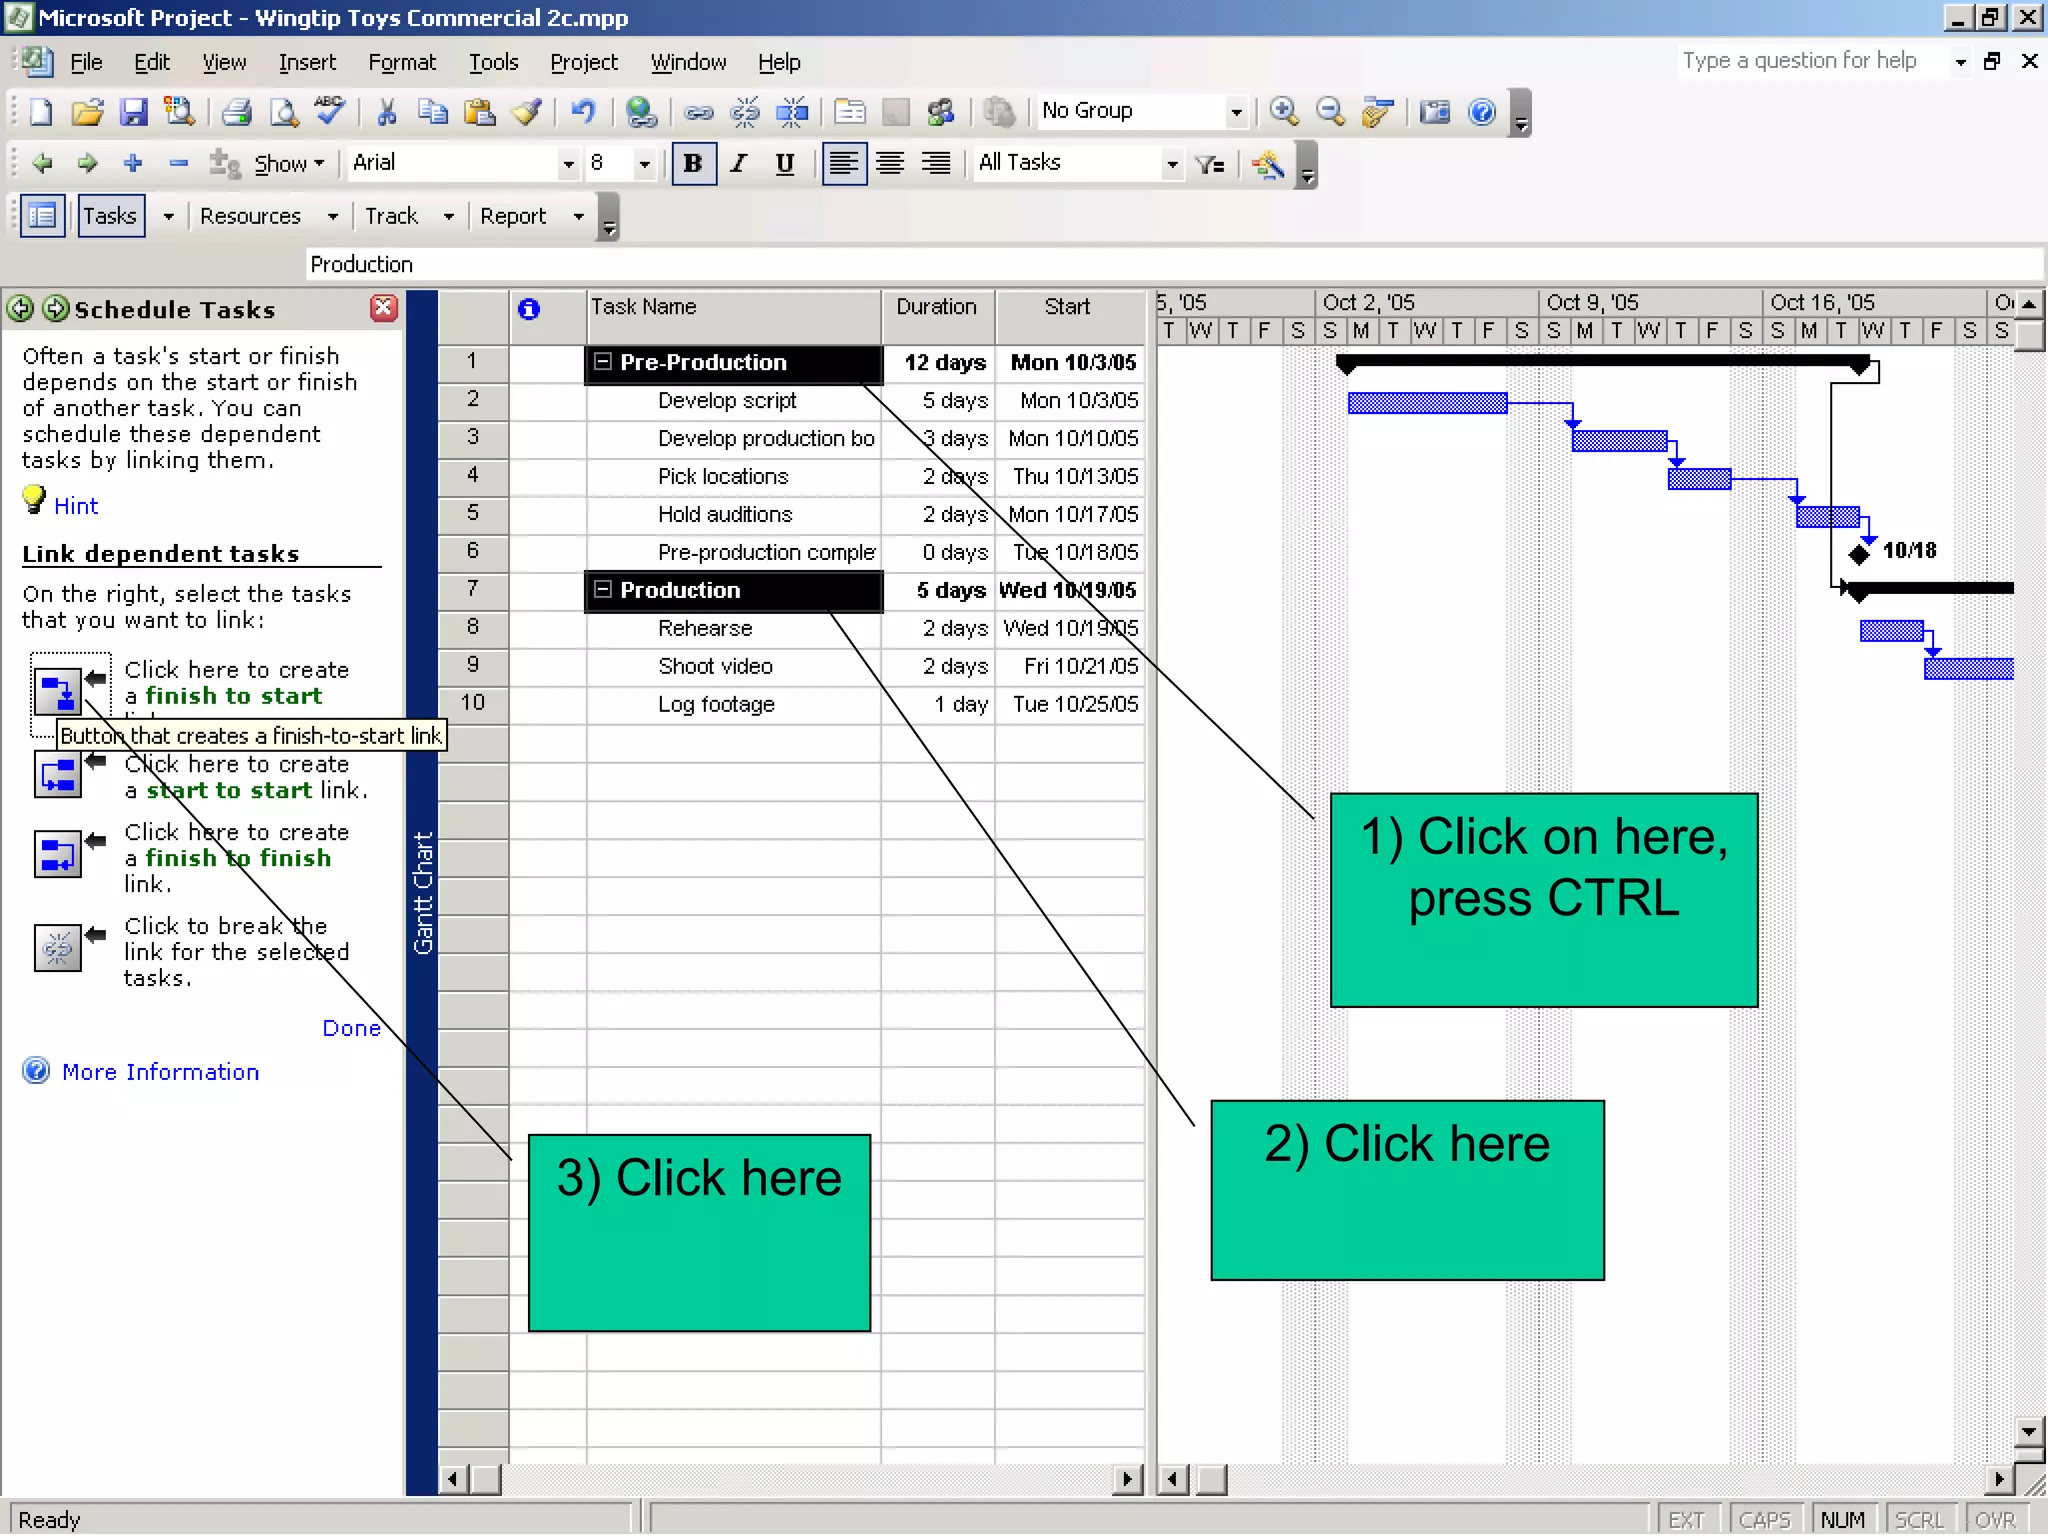
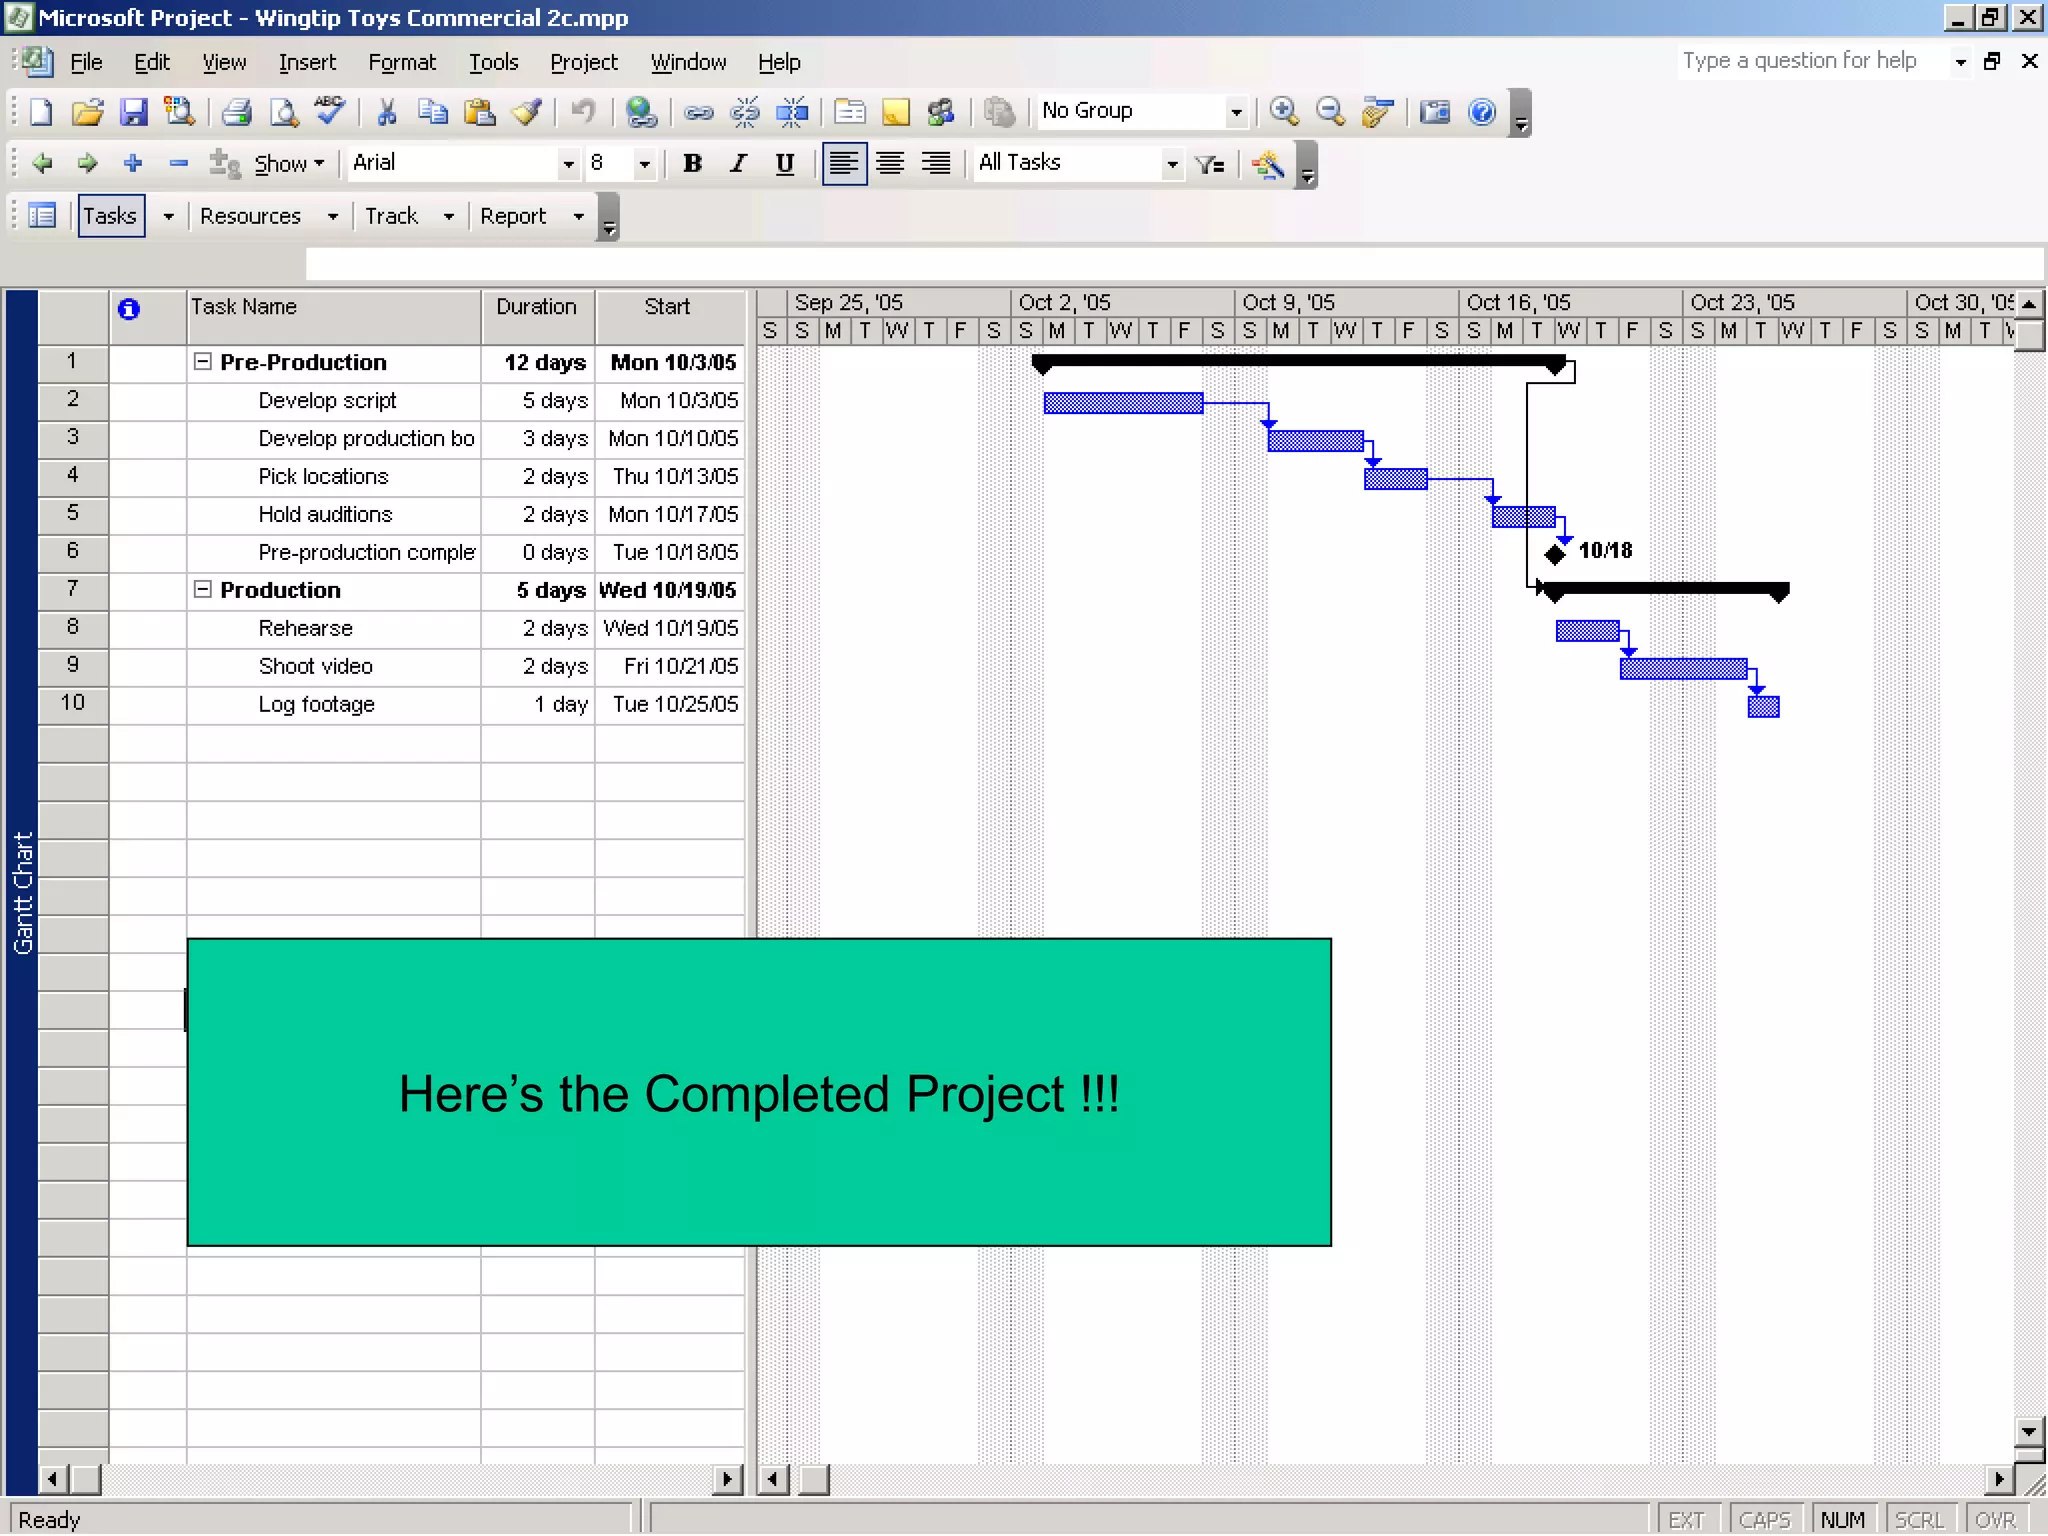

Microsoft Project 2003 is a project management software that can help track project details, visualize project plans, schedule tasks and resources, and communicate with project stakeholders. It has different editions for individual, team and enterprise use. The document provides step-by-step instructions on how to create a sample project plan in Project 2003, including setting start dates, defining work times, entering tasks and durations, adding milestones, linking task dependencies, and scheduling tasks. The completed project plan shows the tasks organized and linked in a Gantt chart view.