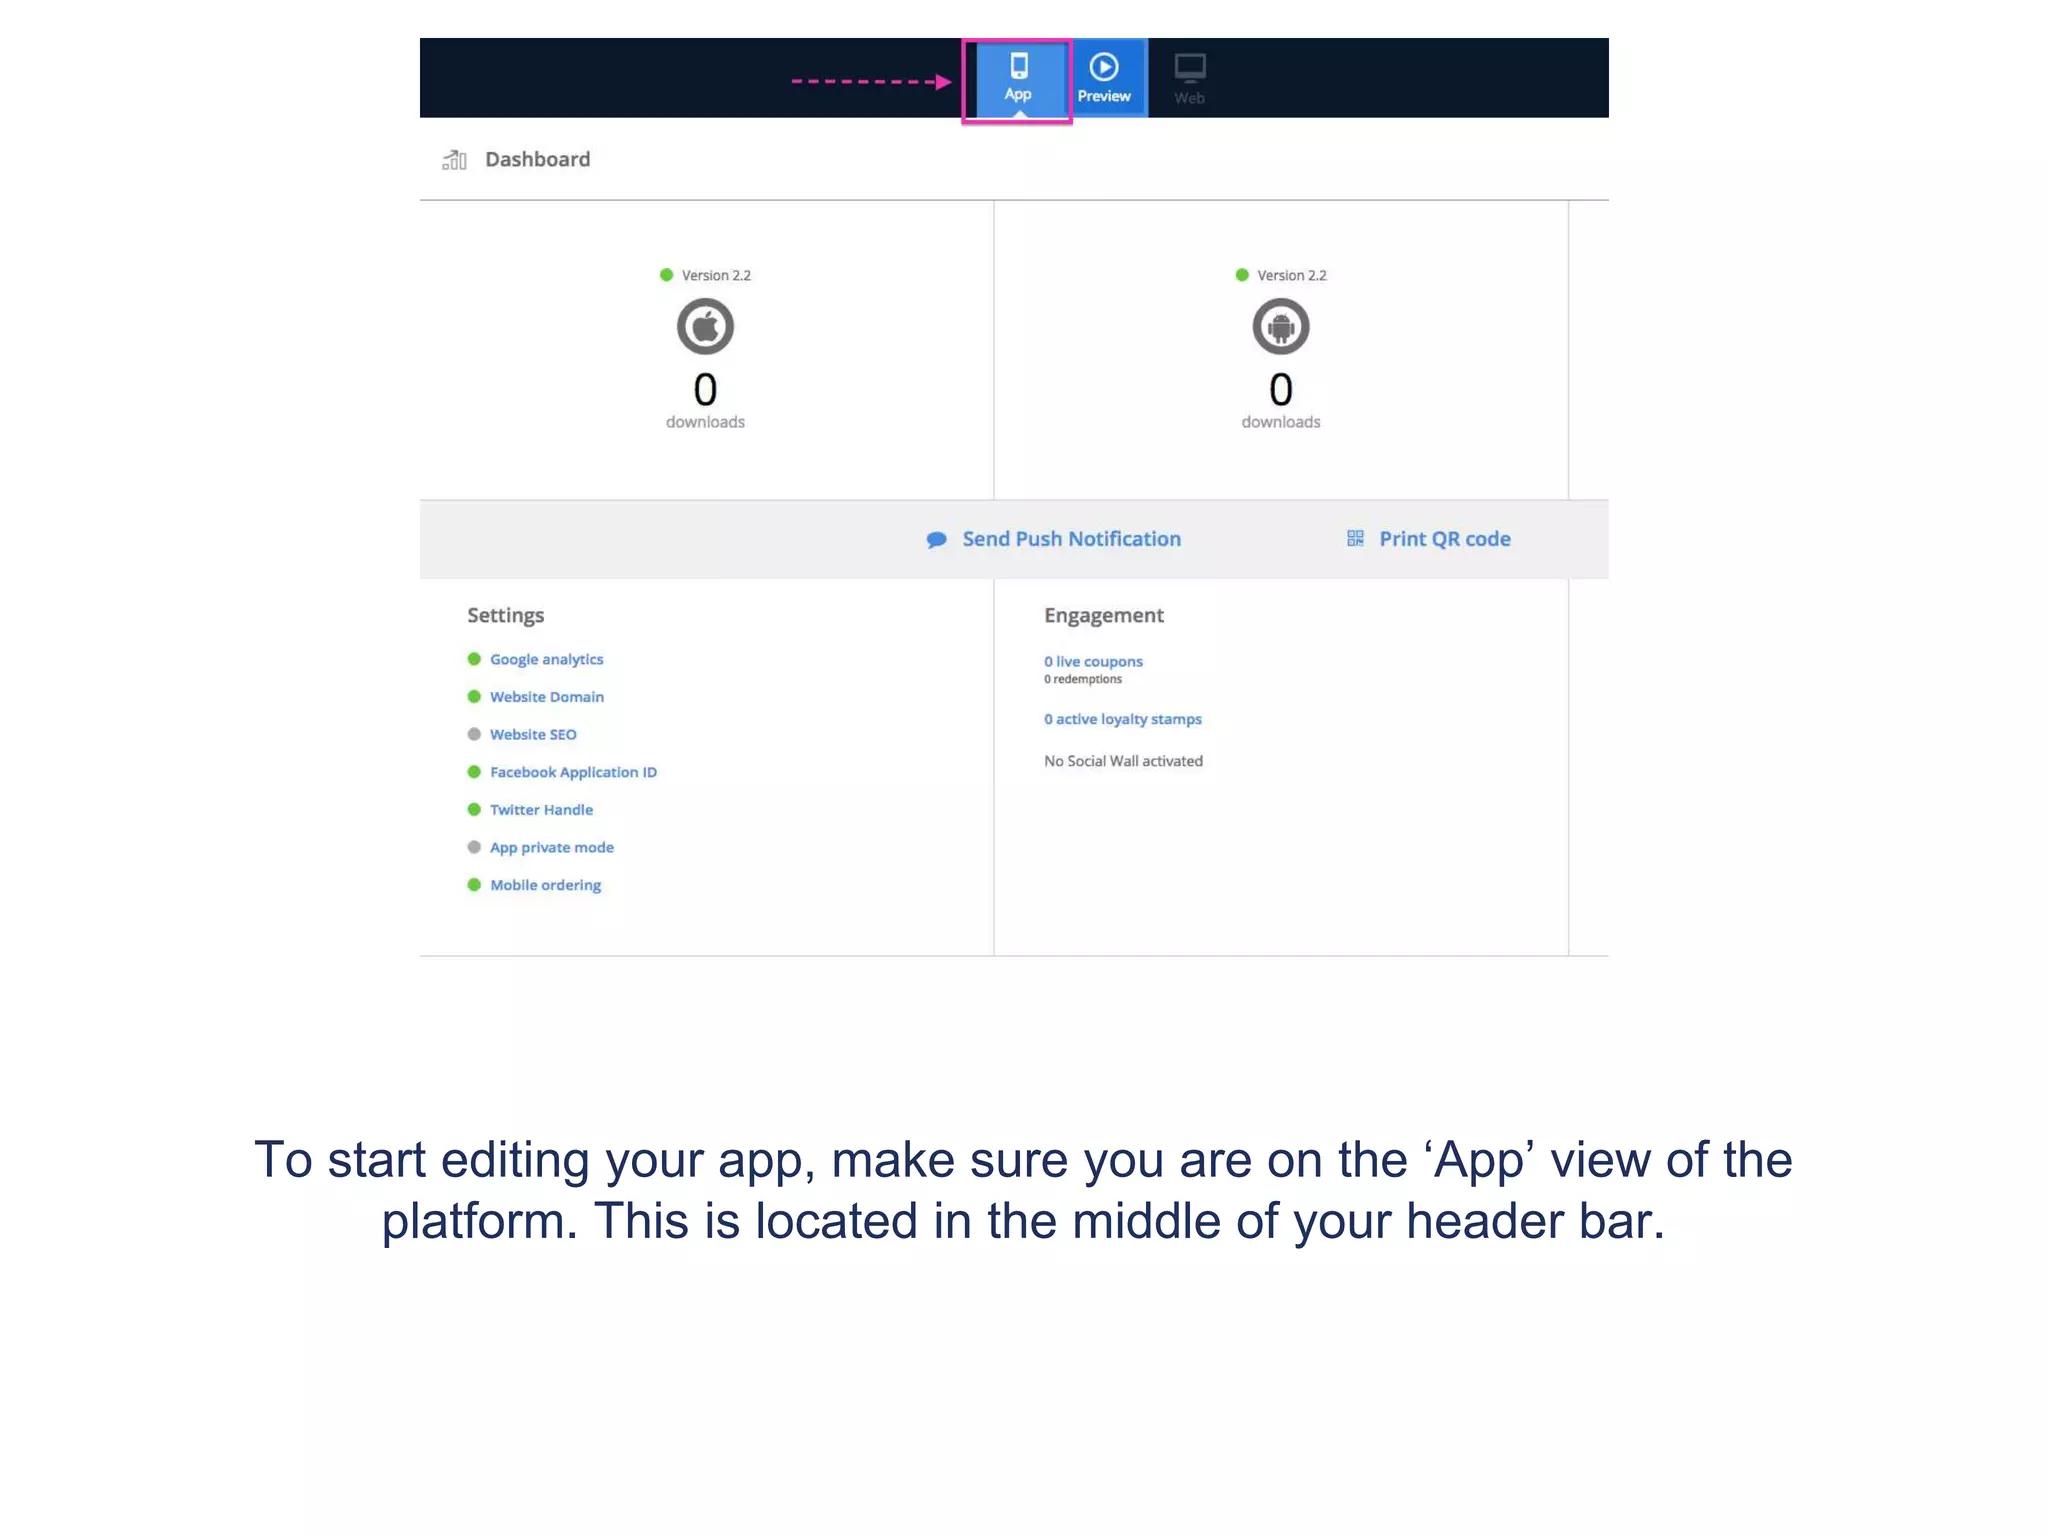
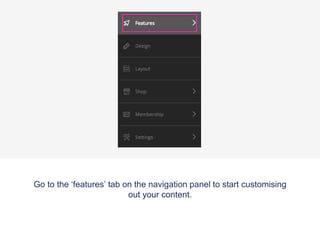
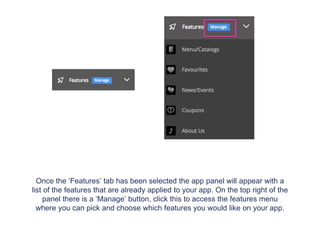
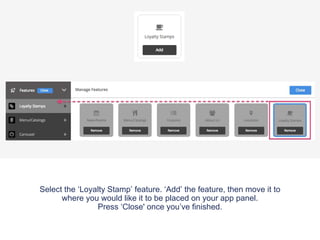
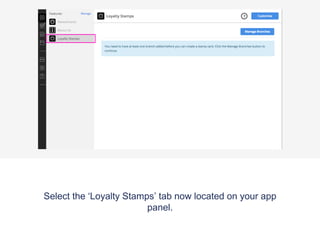
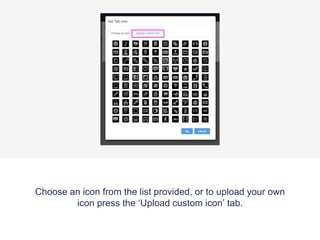
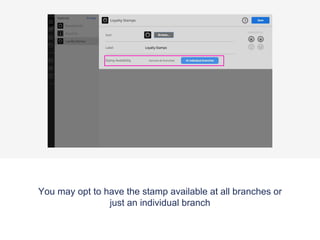
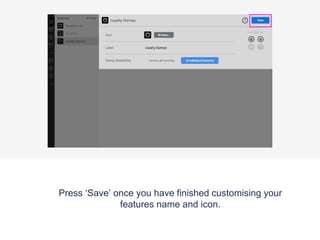
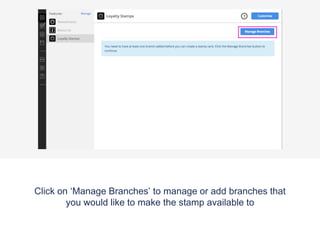
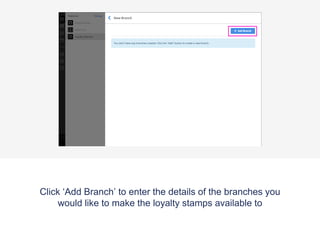
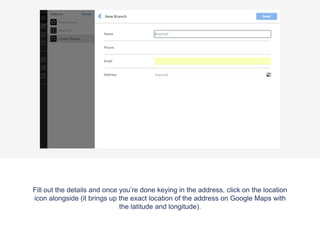
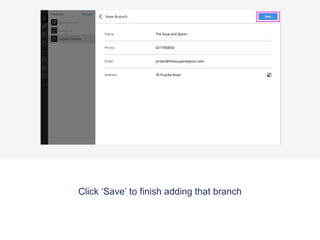
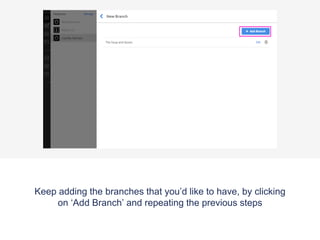
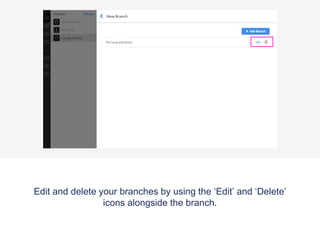
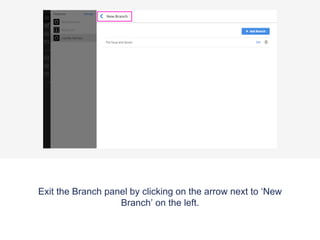
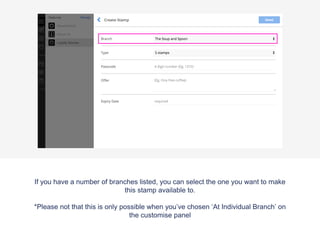
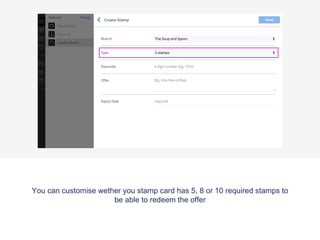
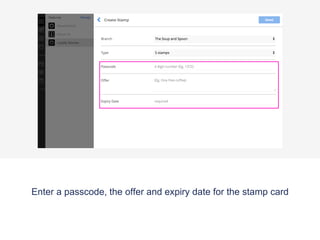
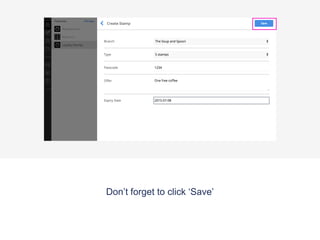
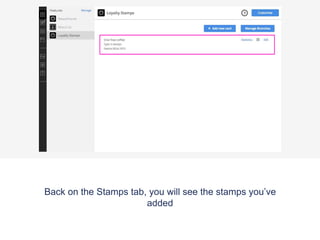
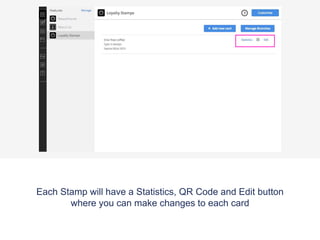
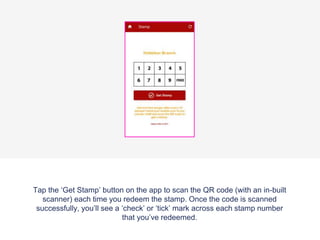
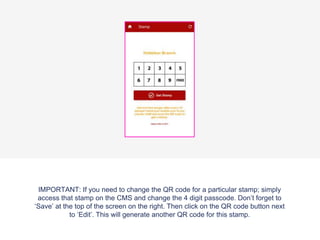
To start editing your app, make sure you are on the ‘App’ view of the
platform. This is located in the middle of your header bar.
Go to the ‘features’ tab on the navigation panel to start customising
out your content.
Once the ‘Features’ tab has been selected the app panel will appear with a
list of the features that are already applied to your app. On the top right of the
panel there is a ‘Manage’ button, click this to access the features menu
where you can pick and choose which features you would like on your app.
Select the ‘Loyalty Stamp’ feature. ‘Add’ the feature, then move it to
where you would like it to be placed on your app panel.
Press ‘Close' once you’ve finished.
Select the ‘Loyalty Stamps’ tab now located on your app
panel.
For a detailed description of what the ‘Loyalty Stamps’ feature
does hover over the question mark button
Click the customise button to change the name or the icon
of your loyalty stamps feature.
To chose an icon or to upload your own custom icon press
the ‘Browse’ button.
Choose an icon from the list provided, or to upload your own
icon press the ‘Upload custom icon’ tab.
To upload your custom icon drag and drop your 60 x 60 pixel image into the
blue area, or press browse to find your icon manually. Press set when you
have chosen your icon.
You may opt to have the stamp available at all branches or
just an individual branch
Press ‘Save’ once you have finished customising your
features name and icon.
Click on ‘Manage Branches’ to manage or add branches that
you would like to make the stamp available to
Click ‘Add Branch’ to enter the details of the branches you
would like to make the loyalty stamps available to
Fill out the details and once you’re done keying in the address, click on the location
icon alongside (it brings up the exact location of the address on Google Maps with
the latitude and longitude).
Click ‘Save’ to finish adding that branch
Keep adding the branches that you’d like to have, by clicking
on ‘Add Branch’ and repeating the previous steps
Edit and delete your branches by using the ‘Edit’ and ‘Delete’
icons alongside the branch.
Exit the Branch panel by clicking on the arrow next to ‘New
Branch’ on the left.
Click ‘Add a New Card’ to set up a loyalty card
If you have a number of branches listed, you can select the one you want to make
this stamp available to.
*Please not that this is only possible when you’ve chosen ‘At Individual Branch’ on
the customise panel
You can customise wether you stamp card has 5, 8 or 10 required stamps to
be able to redeem the offer
Enter a passcode, the offer and expiry date for the stamp card
Don’t forget to click ‘Save’
Back on the Stamps tab, you will see the stamps you’ve
added
Each Stamp will have a Statistics, QR Code and Edit button
where you can make changes to each card
Preview App
To view your new app feature download the Putti Preview
App and navigate to your Loyalty Stamps tab.
Tap the ‘Get Stamp’ button on the app to scan the QR code (with an in-built
scanner) each time you redeem the stamp. Once the code is scanned
successfully, you’ll see a ‘check’ or ‘tick’ mark across each stamp number
that you’ve redeemed.
IMPORTANT: If you need to change the QR code for a particular stamp; simply
access that stamp on the CMS and change the 4 digit passcode. Don’t forget to
‘Save’ at the top of the screen on the right. Then click on the QR code button next
to ‘Edit’. This will generate another QR code for this stamp.

Loyalty Stamp Tutorial

  • 1.
    To start editingyour app, make sure you are on the ‘App’ view of the platform. This is located in the middle of your header bar.
  • 2.
    Go to the‘features’ tab on the navigation panel to start customising out your content.
  • 3.
    Once the ‘Features’tab has been selected the app panel will appear with a list of the features that are already applied to your app. On the top right of the panel there is a ‘Manage’ button, click this to access the features menu where you can pick and choose which features you would like on your app.
  • 4.
    Select the ‘LoyaltyStamp’ feature. ‘Add’ the feature, then move it to where you would like it to be placed on your app panel. Press ‘Close' once you’ve finished.
  • 5.
    Select the ‘LoyaltyStamps’ tab now located on your app panel.
  • 6.
    For a detaileddescription of what the ‘Loyalty Stamps’ feature does hover over the question mark button
  • 7.
    Click the customisebutton to change the name or the icon of your loyalty stamps feature.
  • 8.
    To chose anicon or to upload your own custom icon press the ‘Browse’ button.
  • 9.
    Choose an iconfrom the list provided, or to upload your own icon press the ‘Upload custom icon’ tab.
  • 10.
    To upload yourcustom icon drag and drop your 60 x 60 pixel image into the blue area, or press browse to find your icon manually. Press set when you have chosen your icon.
  • 11.
    You may optto have the stamp available at all branches or just an individual branch
  • 12.
    Press ‘Save’ onceyou have finished customising your features name and icon.
  • 13.
    Click on ‘ManageBranches’ to manage or add branches that you would like to make the stamp available to
  • 14.
    Click ‘Add Branch’to enter the details of the branches you would like to make the loyalty stamps available to
  • 15.
    Fill out thedetails and once you’re done keying in the address, click on the location icon alongside (it brings up the exact location of the address on Google Maps with the latitude and longitude).
  • 16.
    Click ‘Save’ tofinish adding that branch
  • 17.
    Keep adding thebranches that you’d like to have, by clicking on ‘Add Branch’ and repeating the previous steps
  • 18.
    Edit and deleteyour branches by using the ‘Edit’ and ‘Delete’ icons alongside the branch.
  • 19.
    Exit the Branchpanel by clicking on the arrow next to ‘New Branch’ on the left.
  • 20.
    Click ‘Add aNew Card’ to set up a loyalty card
  • 21.
    If you havea number of branches listed, you can select the one you want to make this stamp available to. *Please not that this is only possible when you’ve chosen ‘At Individual Branch’ on the customise panel
  • 22.
    You can customisewether you stamp card has 5, 8 or 10 required stamps to be able to redeem the offer
  • 23.
    Enter a passcode,the offer and expiry date for the stamp card
  • 24.
    Enter a passcode,the offer and expiry date for the stamp card
  • 25.
    Don’t forget toclick ‘Save’
  • 26.
    Back on theStamps tab, you will see the stamps you’ve added
  • 27.
    Each Stamp willhave a Statistics, QR Code and Edit button where you can make changes to each card
  • 28.
    Preview App To viewyour new app feature download the Putti Preview App and navigate to your Loyalty Stamps tab.
  • 29.
    Tap the ‘GetStamp’ button on the app to scan the QR code (with an in-built scanner) each time you redeem the stamp. Once the code is scanned successfully, you’ll see a ‘check’ or ‘tick’ mark across each stamp number that you’ve redeemed.
  • 30.
    IMPORTANT: If youneed to change the QR code for a particular stamp; simply access that stamp on the CMS and change the 4 digit passcode. Don’t forget to ‘Save’ at the top of the screen on the right. Then click on the QR code button next to ‘Edit’. This will generate another QR code for this stamp.