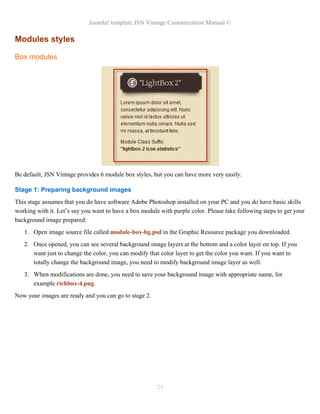
Downloaded 23 times


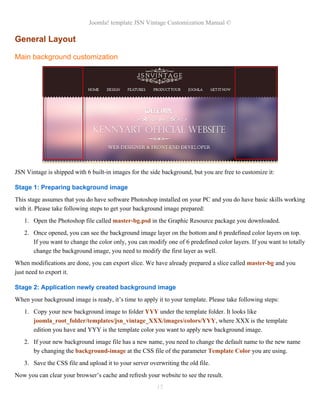

![Joomla! template JSN Vintage Customization Manual ©
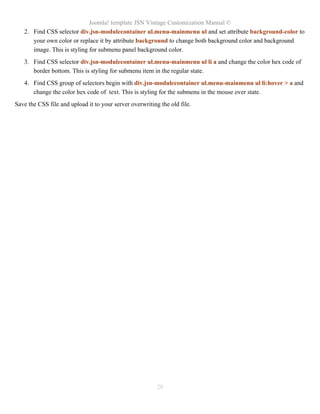
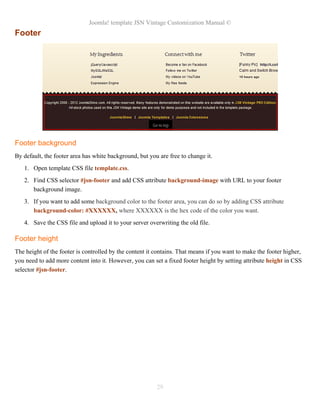
Stage 2: Modification of template code for new sprite image
1. Open file jsn_iconlinks.css in folder css and add following code to the end of file
a[href*="www.cash.com"] {
padding-right: 20px;
padding-bottom: 1px;
background: url(../images/icons/icons-ext.png) no-repeat right -2064px;
}
body.jsn-direction-rtl a[href*="www.cash.com"] {
padding-right: 0;
padding-left: 20px;
background-position: left -2064px;
}
2. Open file template.css in folder css, look for section extended link (search for the text string EXTENDED
LINK) and add following code:
.link-icon-ext.icon-ext-cash {
background: url(../images/icons/icons-ext.png) no-repeat right -2064px;
}
3. Open file jsn_rtl.css in folder css, look for section extended link (search for the text string EXTENDED
LINK) and add following code:
body.jsn-direction-rtl .icon-ext-cash {
background-position: left -2064px;
}
4. Save both CSS files and upload it to server overwriting the original file.
5. Now you can apply new icon in your content as following:
a. <a href="http://www.cash.com">Cash Website</a>
b. <a href="#"class="link-icon-ext icon-ext-cash">Cash link</a>
28](https://image.slidesharecdn.com/jsn-vintage-customization-manual-121010044312-phpapp02/85/JSN-Vintage-Customization-Manual-28-320.jpg)

The document is a comprehensive customization manual for the Joomla! template JSN Vintage, including a detailed table of contents and sections that cover setup, editing CSS files, website title configuration, translation, and various customization techniques. It emphasizes utilizing tools like Firebug and provides guidelines for modifying elements such as icons, layout, and font styles. Additionally, it includes recommendations for essential tools and a step-by-step approach to customizing the template effectively.