JOHN DEERE 5310 TRACTOR Service Repair Manualjkmsemmmd
This is the Highly Detailed factory service repair manual for theJOHN DEERE 5310 TRACTOR, this Service Manual has detailed illustrations as well as step by step instructions,It is 100 percents complete and intact. they are specifically written for the do-it-yourself-er as well as the experienced mechanic.JOHN DEERE 5310 TRACTOR Service Repair Workshop Manual provides step-by-step instructions based on the complete dis-assembly of the machine. It is this level of detail, along with hundreds of photos and illustrations, that guide the reader through each service and repair procedure. Complete download comes in pdf format which can work under all PC based windows operating system and Mac also, All pages are printable. Using this repair manual is an inexpensive way to keep your vehicle working properly.
Service Repair Manual Covers:
Introduction
General information
Engine repair
Fuel and air repair
Electrical repair
Power train repair
Steering and brake repair
Hydraulic repair
Miscellaneous repair
Operator station repair
Test and adjustment specifications / Operational checkout procedures
Engine operation, tests and adjustments
Fuel / air operation, tests and adjustments
Electrical system operation, tests & adjustments
Power train operation, tests & adjustments
Steering and brake operation, tests & adjustments
Hydraulic system operation, tests & adjustments
Operator station
Dealer fabricated tools
Index
File Format: PDF
Compatible: All Versions of Windows & Mac
Language: English
Requirements: Adobe PDF Reader
NO waiting, Buy from responsible seller and get INSTANT DOWNLOAD, Without wasting your hard-owned money on uncertainty or surprise! All pages are is great to haveJOHN DEERE 5310 TRACTOR Service Repair Workshop Manual.
Looking for some other Service Repair Manual,please check:
https://www.aservicemanualpdf.com/
Thanks for visiting!
8
JOHN DEERE 5105 TRACTOR Service Repair Manualkjmsfm eiokid
This is the Highly Detailed factory service repair manual for theJOHN DEERE 5105 TRACTOR, this Service Manual has detailed illustrations as well as step by step instructions,It is 100 percents complete and intact. they are specifically written for the do-it-yourself-er as well as the experienced mechanic.JOHN DEERE 5105 TRACTOR Service Repair Workshop Manual provides step-by-step instructions based on the complete dis-assembly of the machine. It is this level of detail, along with hundreds of photos and illustrations, that guide the reader through each service and repair procedure. Complete download comes in pdf format which can work under all PC based windows operating system and Mac also, All pages are printable. Using this repair manual is an inexpensive way to keep your vehicle working properly.
Service Repair Manual Covers:
Introduction
General information
Engine repair
Fuel and air repair
Electrical repair
Power train repair
Steering and brake repair
Hydraulic repair
Miscellaneous repair
Operator station repair
Operational checkout procedures
Engine operation, tests and adjustments
Fuel / air operation, tests and adjustments
Electrical system operation, tests & adjustments
Power train operation, tests & adjustments
Steering and brake operation, tests & adjustments
Hydraulic system operation, tests & adjustments
Dealer fabricated tools
Index
File Format: PDF
Compatible: All Versions of Windows & Mac
Language: English
Requirements: Adobe PDF Reader
NO waiting, Buy from responsible seller and get INSTANT DOWNLOAD, Without wasting your hard-owned money on uncertainty or surprise! All pages are is great to haveJOHN DEERE 5105 TRACTOR Service Repair Workshop Manual.
Looking for some other Service Repair Manual,please check:
https://www.aservicemanualpdf.com/
Thanks for visiting!
JOHN DEERE 5510 TRACTOR Service Repair Manualkkskmdmme
This is the Highly Detailed factory service repair manual for theJOHN DEERE 5510 TRACTOR, this Service Manual has detailed illustrations as well as step by step instructions,It is 100 percents complete and intact. they are specifically written for the do-it-yourself-er as well as the experienced mechanic.JOHN DEERE 5510 TRACTOR Service Repair Workshop Manual provides step-by-step instructions based on the complete dis-assembly of the machine. It is this level of detail, along with hundreds of photos and illustrations, that guide the reader through each service and repair procedure. Complete download comes in pdf format which can work under all PC based windows operating system and Mac also, All pages are printable. Using this repair manual is an inexpensive way to keep your vehicle working properly.
Service Repair Manual Covers:
Introduction
General information
Engine repair
Fuel and air repair
Electrical repair
Power train repair
Steering and brake repair
Hydraulic repair
Miscellaneous repair
Operator station repair
Test and adjustment specifications / Operational checkout procedures
Engine operation, tests and adjustments
Fuel / air operation, tests and adjustments
Electrical system operation, tests & adjustments
Power train operation, tests & adjustments
Steering and brake operation, tests & adjustments
Hydraulic system operation, tests & adjustments
Operator station
Dealer fabricated tools
Index
File Format: PDF
Compatible: All Versions of Windows & Mac
Language: English
Requirements: Adobe PDF Reader
NO waiting, Buy from responsible seller and get INSTANT DOWNLOAD, Without wasting your hard-owned money on uncertainty or surprise! All pages are is great to haveJOHN DEERE 5510 TRACTOR Service Repair Workshop Manual.
Looking for some other Service Repair Manual,please check:
https://www.aservicemanualpdf.com/
Thanks for visiting!
8
1988 LAND ROVER RANGE ROVER CLASSIC Service Repair Manualjdnnnd efjmdd
This is the Highly Detailed factory service repair manual for the1988 LAND ROVER RANGE ROVER CLASSIC , this Service Manual has detailed illustrations as well as step by step instructions,It is 100 percents complete and intact. they are specifically written for the do-it-yourself-er as well as the experienced mechanic.1988 LAND ROVER RANGE ROVER CLASSIC Service Repair Workshop Manual provides step-by-step instructions based on the complete dis-assembly of the machine. It is this level of detail, along with hundreds of photos and illustrations, that guide the reader through each service and repair procedure. Complete download comes in pdf format which can work under all PC based windows operating system and Mac also, All pages are printable. Using this repair manual is an inexpensive way to keep your vehicle working properly.
Service Repair Manual Covers:
Maintenance
Engine
Control System
Mechanical
Fuel Service Specifications
Emission Control
Intake Exhaust Cooling
Lube
Ignition Starting Charging
Auto Transmission Clutch
Manual Transmission
Transfer Propeller Shaft
Drive Shaft
Differential
Axle Suspension
Tire & Wheel
Brake Control
Brake
Parking Brake
Steering Column
Power Steering
Air Condition
Suppl Restraint System
Seat Belt
Engine Immobilizer
Cruise Control
Wiper & Washer
Door Lock
Meter Audio/Visual
Horn
Windshield/Glass Mirror
Instrument Panel
Seat
Engine Hood/ Door
Exterior & Interior
Electrical
Multiplex/ Can Communication
And much more...
File Format: PDF
Compatible: All Versions of Windows & Mac
Language: English
Requirements: Adobe PDF Reader
NO waiting, Buy from responsible seller and get INSTANT DOWNLOAD, Without wasting your hard-owned money on uncertainty or surprise! All pages are is great to have1988 LAND ROVER RANGE ROVER CLASSIC Service Repair Workshop Manual.
Looking for some other Service Repair Manual,please check:
https://www.aservicemanualpdf.com/
Thanks for visiting!
Ever been troubled by the blinking sign and didn’t know what to do?
Here’s a handy guide to dashboard symbols so that you’ll never be confused again!
Save them for later and save the trouble!
Ever been troubled by the blinking sign and didn’t know what to do?
Here’s a handy guide to dashboard symbols so that you’ll never be confused again!
Save them for later and save the trouble!
Why Is Your BMW X3 Hood Not Responding To Release CommandsDart Auto
Experiencing difficulty opening your BMW X3's hood? This guide explores potential issues like mechanical obstruction, hood release mechanism failure, electrical problems, and emergency release malfunctions. Troubleshooting tips include basic checks, clearing obstructions, applying pressure, and using the emergency release.
Comprehensive program for Agricultural Finance, the Automotive Sector, and Empowerment . We will define the full scope and provide a detailed two-week plan for identifying strategic partners in each area within Limpopo, including target areas.:
1. Agricultural : Supporting Primary and Secondary Agriculture
• Scope: Provide support solutions to enhance agricultural productivity and sustainability.
• Target Areas: Polokwane, Tzaneen, Thohoyandou, Makhado, and Giyani.
2. Automotive Sector: Partnerships with Mechanics and Panel Beater Shops
• Scope: Develop collaborations with automotive service providers to improve service quality and business operations.
• Target Areas: Polokwane, Lephalale, Mokopane, Phalaborwa, and Bela-Bela.
3. Empowerment : Focusing on Women Empowerment
• Scope: Provide business support support and training to women-owned businesses, promoting economic inclusion.
• Target Areas: Polokwane, Thohoyandou, Musina, Burgersfort, and Louis Trichardt.
We will also prioritize Industrial Economic Zone areas and their priorities.
Sign up on https://profilesmes.online/welcome/
To be eligible:
1. You must have a registered business and operate in Limpopo
2. Generate revenue
3. Sectors : Agriculture ( primary and secondary) and Automative
Women and Youth are encouraged to apply even if you don't fall in those sectors.
5 Warning Signs Your BMW's Intelligent Battery Sensor Needs AttentionBertini's German Motors
IBS monitors and manages your BMW’s battery performance. If it malfunctions, you will have to deal with an array of electrical issues in your vehicle. Recognize warning signs like dimming headlights, frequent battery replacements, and electrical malfunctions to address potential IBS issues promptly.
What Exactly Is The Common Rail Direct Injection System & How Does It WorkMotor Cars International
Learn about Common Rail Direct Injection (CRDi) - the revolutionary technology that has made diesel engines more efficient. Explore its workings, advantages like enhanced fuel efficiency and increased power output, along with drawbacks such as complexity and higher initial cost. Compare CRDi with traditional diesel engines and discover why it's the preferred choice for modern engines.
𝘼𝙣𝙩𝙞𝙦𝙪𝙚 𝙋𝙡𝙖𝙨𝙩𝙞𝙘 𝙏𝙧𝙖𝙙𝙚𝙧𝙨 𝙞𝙨 𝙫𝙚𝙧𝙮 𝙛𝙖𝙢𝙤𝙪𝙨 𝙛𝙤𝙧 𝙢𝙖𝙣𝙪𝙛𝙖𝙘𝙩𝙪𝙧𝙞𝙣𝙜 𝙩𝙝𝙚𝙞𝙧 𝙥𝙧𝙤𝙙𝙪𝙘𝙩𝙨. 𝙒𝙚 𝙝𝙖𝙫𝙚 𝙖𝙡𝙡 𝙩𝙝𝙚 𝙥𝙡𝙖𝙨𝙩𝙞𝙘 𝙜𝙧𝙖𝙣𝙪𝙡𝙚𝙨 𝙪𝙨𝙚𝙙 𝙞𝙣 𝙖𝙪𝙩𝙤𝙢𝙤𝙩𝙞𝙫𝙚 𝙖𝙣𝙙 𝙖𝙪𝙩𝙤 𝙥𝙖𝙧𝙩𝙨 𝙖𝙣𝙙 𝙖𝙡𝙡 𝙩𝙝𝙚 𝙛𝙖𝙢𝙤𝙪𝙨 𝙘𝙤𝙢𝙥𝙖𝙣𝙞𝙚𝙨 𝙗𝙪𝙮 𝙩𝙝𝙚 𝙜𝙧𝙖𝙣𝙪𝙡𝙚𝙨 𝙛𝙧𝙤𝙢 𝙪𝙨.
Over the 10 years, we have gained a strong foothold in the market due to our range's high quality, competitive prices, and time-lined delivery schedules.
Core technology of Hyundai Motor Group's EV platform 'E-GMP'Hyundai Motor Group
What’s the force behind Hyundai Motor Group's EV performance and quality?
Maximized driving performance and quick charging time through high-density battery pack and fast charging technology and applicable to various vehicle types!
Discover more about Hyundai Motor Group’s EV platform ‘E-GMP’!
Things to remember while upgrading the brakes of your carjennifermiller8137
Upgrading the brakes of your car? Keep these things in mind before doing so. Additionally, start using an OBD 2 GPS tracker so that you never miss a vehicle maintenance appointment. On top of this, a car GPS tracker will also let you master good driving habits that will let you increase the operational life of your car’s brakes.
Fleet management these days is next to impossible without connected vehicle solutions. Why? Well, fleet trackers and accompanying connected vehicle management solutions tend to offer quite a few hard-to-ignore benefits to fleet managers and businesses alike. Let’s check them out!
What Does the PARKTRONIC Inoperative, See Owner's Manual Message Mean for You...Autohaus Service and Sales
Learn what "PARKTRONIC Inoperative, See Owner's Manual" means for your Mercedes-Benz. This message indicates a malfunction in the parking assistance system, potentially due to sensor issues or electrical faults. Prompt attention is crucial to ensure safety and functionality. Follow steps outlined for diagnosis and repair in the owner's manual.
"Trans Failsafe Prog" on your BMW X5 indicates potential transmission issues requiring immediate action. This safety feature activates in response to abnormalities like low fluid levels, leaks, faulty sensors, electrical or mechanical failures, and overheating.
What Causes 'Trans Failsafe Prog' to Trigger in BMW X5
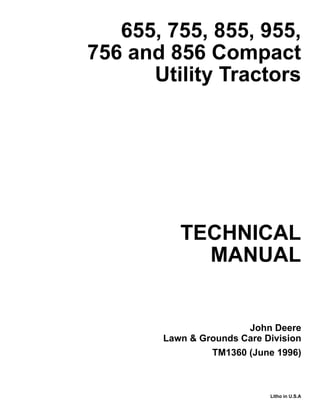
John deere 756 compact utility tractor service repair manual
1. TECHNICAL
MANUAL
Litho in U.S.A
John Deere
Lawn & Grounds Care Division
655, 755, 855, 955,
756 and 856 Compact
Utility Tractors
TM1360 (June 1996)
2. FOREWORD
This manual is written for an experienced technician.
Essential tools required in performing certain service
work are identified in this manual and are
recommended for use.
LIVE WITH SAFETY: Read the safety messages in
the introduction of this manual and the cautions
presented throughout the text of the manual.
PThis is the safety-alert symbol. When you see
this symbol on the machine or in this manual,
be alert to the potential for personal injury.
Technical manuals are divided in two parts: repair
and diagnostics. Repair sections tell how to repair the
components. Diagnostic sections help you identify the
majority of routine failures quickly.
Information is organized in groups for the various
components requiring service instruction. At the
beginning of each group are summary listings of all
applicable essential tools, service equipment and
tools, other materials needed to do the job, service
parts kits, specifications, wear tolerances, and torque
values.
Binders, binder labels, and tab sets can be ordered
by John Deere dealers direct from the John Deere
Distribution Service Center.
This manual is part of a total product support
program.
FOS MANUALS—REFERENCE
TECHNICAL MANUALS—MACHINE SERVICE
COMPONENT MANUALS—COMPONENT SERVICE
Fundamentals of Service (FOS) Manuals cover basic
theory of operation, fundamentals of troubleshooting,
general maintenance, and basic type of failures and
their causes. FOS Manuals are for training new
personnel and for reference by experienced
technicians.
Technical Manuals are concise guides for specific
machines. Technical manuals are on-the-job guides
containing only the vital information needed for
diagnosis, analysis, testing, and repair.
Component Technical Manuals are concise service
guides for specific components. Component technical
manuals are written as stand-alone manuals covering
multiple machine applications.
NOTE: The 756 and 856 tractors are identical to the
755 and 855 tractors; therefore, all information
pertaining to the 755 also pertains to the 756
and the same is true for the 855 and the 856
tractors. The 655, 756 and 856 tractors were
all discontinued before the late model 755 and
855 tractors and the new 955 tractors were
produced. Therefore, any late model
references do not include the 655, 756, and
856 tractors.
MX,TM1360,IFC -19-16OCT91
Introduction
TM1360 (16OCT91) 55, 56 Series Tractors
010395
5. HANDLE FLUIDS SAFELY—AVOID FIRES
When you work around fuel, do not smoke or work near
heaters or other fire hazards.
Store flammable fluids away from fire hazards. Do not
incinerate or puncture pressurized containers.
Make sure machine is clean of trash, grease, and debris.
Do not store oily rags; they can ignite and burn
spontaneously.
TS227
-UN-23AUG88
PREVENT BATTERY EXPLOSIONS
Keep sparks, lighted matches, and open flame away
from the top of battery. Battery gas can explode.
Never check battery charge by placing a metal object
across the posts. Use a volt-meter or hydrometer.
Do not charge a frozen battery; it may explode. Warm
battery to 16˚C (60˚F).
TS204
-UN-23AUG88
PREPARE FOR EMERGENCIES
Be prepared if a fire starts.
Keep a first aid kit and fire extinguisher handy.
Keep emergency numbers for doctors, ambulance
service, hospital, and fire department near your
telephone.
TS291
-UN-23AUG88
DX,FLAME -19-04JUN90
DX,SPARKS -19-04JUN90
DX,FIRE2 -19-04JUN90
Group 05
Safety
TM1360 (16OCT91) 10-05-1 55, 56 Series Tractors
010395
10
05
1
6. PREVENT ACID BURNS
Sulfuric acid in battery electrolyte is poisonous. It is
strong enough to burn skin, eat holes in clothing, and
cause blindness if splashed into eyes.
Avoid the hazard by:
1. Filling batteries in a well-ventilated area.
2. Wearing eye protection and rubber gloves.
3. Avoiding breathing fumes when electrolyte is added.
4. Avoiding spilling or dripping electrolyte.
5. Use proper jump start procedure.
If you spill acid on yourself:
1. Flush your skin with water.
2. Apply baking soda or lime to help neutralize the acid.
3. Flush your eyes with water for 10—15 minutes. Get
medical attention immediately.
If acid is swallowed:
1. Drink large amounts of water or milk.
2. Then drink milk of magnesia, beaten eggs, or
vegetable oil.
3. Get medical attention immediately.
TS203
-UN-23AUG88
DX,POISON -19-04JUN90
Safety
TM1360 (16OCT91) 10-05-2 55, 56 Series Tractors
010395
10
05
2
7. AVOID HIGH-PRESSURE FLUIDS
Escaping fluid under pressure can penetrate the skin
causing serious injury.
Avoid the hazard by relieving pressure before
disconnecting hydraulic or other lines. Tighten all
connections before applying pressure.
Search for leaks with a piece of cardboard. Protect
hands and body from high pressure fluids.
If an accident occurs, see a doctor immediately. Any
fluid injected into the skin must be surgically removed
within a few hours or gangrene may result. Doctors
unfamiliar with this type of injury should reference a
knowledgeable medical source. Such information is
available from Deere & Company Medical Department in
Moline, Illinois, U.S.A.
X9811
-UN-23AUG88
PARK MACHINE SAFELY
Before working on the machine:
• Lower all equipment to the ground.
• Stop the engine and remove the key.
• Disconnect the battery ground strap.
• Hang a “DO NOT OPERATE” tag in operator station.
TS230
-UN-24MAY89
DX,FLUID -19-09AUG91
DX,PARK -19-04JUN90
Safety
TM1360 (16OCT91) 10-05-3 55, 56 Series Tractors
010395
10
05
3
8. Hydrostatic Transmission/Remove/Install Sheet Metal Panels
SPECIFICATIONS
Item Measurement Specification
Charge Pump Cap Screw Torque 37—50 N•m (27—37 lb-ft)
Charge Inlet Fitting Torque 95—230 N•m (70—170 lb-ft)
Drive Shaft-to-Engine Cap Screw Torque 49 N•m (35 lb-ft)
Drive Shaft-to-Hydro Cap Screw Torque 60 N•m (45 lb-ft)
Neutral Return Lever Bushing Inside Diameter 19.088 ± 0.025 mm
(0.7515 ± 0.001 in)
Drive Shaft Coupler to Hydro Input
Shaft
Torque 60 N•m (45 lb-ft)
Swash Plate End Caps Cap Screw Torque 8—9 N•m (72—84 lb-in)
Transmission Center
Section-to-Housing
Cap Screw Torque 44—55 N•m (33—41 lb-ft)
Gear-to-Output Shaft Cap Screw Torque (Early Models)
Castle Nut Torque (Late Models)
54 N•m (40 lb-ft)
109 N•m (80 lb-ft)
Transmission Attaching Cap Screw Torque 142 N•m (105 lb-ft)
Neutral Return Lever Spring Adjusted Coil Length 133 mm (5.25 in)
Plugs:
3/4-16 SAE O-ring Torque 45—95 N•m (33—70 lb-ft)
1/4-20 SAE O-ring Torque 4—7 N•m (36—60 lb-in)
REMOVE AND INSTALL SHEET METAL
PANELS
1. Park tractor safely. Lock park brake, remove key.
2. Turn depth control lever (A) clockwise until it stops.
3. Remove four cap screws. To remove panel (B), lift up
on right rear corner of panel first, then lift left side to
clear head of depth control bolt, and move panel out
from the right side of the tractor.
50-05-2
50
05
2
B
M43634
A
9. NOTE: 755/756, 855/856, and 955 tractors have two
additional side cap screws under each fender.
4. Remove panel (A).
NOTE: Panel need not be removed for driveshaft and
charge pump repair.
5. Install in reverse order. Be sure depth control lever
aligns with bolt head.
655 Shown
M43638
-UN-31AUG88
REMOVE DRIVE SHAFT
1. Loosen two bolts (A) of drive shaft coupler.
M43635
-UN-31AUG88
2. Remove six cap screws (A).
3. Push driveshaft (B) back to remove isolator (C).
4. Remove driveshaft. M43512
-UN-31AUG88
MX,HU,5005,7 -19-16OCT91
MX,HU,5005,8 -19-16OCT91
MX,HU,5005,9 -19-16OCT91
Hydrostatic Transmission/Remove Drive Shaft
TM1360 (16OCT91) 50-05-3 55, 56 Series Tractors
010395
50
05
3
10. INSTALL DRIVE SHAFT
1. Put drive shaft (B) on transmission.
2. Install isolator (C). Be sure raised portion of
unthreaded holes are toward engine.
3. Fasten isolator to engine with three longer cap screws
and fasten drive shaft to isolator with three shorter cap
screws (A). Tighten cap screws to 49 N·m (36 lb-ft).
M43512
-UN-31AUG88
4. Tighten two bolts (A) of drive shaft coupler to 60 N·m
(45 lb-ft).
M43511
-UN-31AUG88
REMOVE AND INSTALL MFWD DRIVE
SHAFT
1. Loosen clamps. Slide front and rear covers away from
universal joints.
M37522
-UN-06SEP88
MX,HU,5005,10 -19-16OCT91
MX,HU,5005,11 -19-16OCT91
MX,HU,5005,11A -19-16OCT91
Hydrostatic Transmission/Remove/Install MFWD Drive Shaft
TM1360 (16OCT91) 50-05-4 55, 56 Series Tractors
010395
50
05
4
11. 2. Drive pin out of front universal joint to remove shaft.
3. To install, align pin holes of drive shaft front U-joint
and MFWD input shaft as you slide the shaft into
position.
4. Fasten with spring pin removed earlier.
5. Fasten front cover in place with band clamps.
6. Fasten rear U-joint of drive shaft to transaxle output
shaft.
7. Fasten rear cover in place with band clamps.
M37523
-UN-06SEP88
REMOVE AND INSTALL CHARGE PUMP
NOTE: Orientation of charge pump: Flat on charge pump
housing must be on right-hand side. If turned
180˚, pump will not function.
1. Remove two cap screws (A) to remove charge pump.
M43636
-UN-31AUG88
MX,HU,5005,12 -19-16OCT91
MX,HU,5005,13 -19-16OCT91
Hydrostatic Transmission/Remove/Install Charge Pump
TM1360 (16OCT91) 50-05-5 55, 56 Series Tractors
010395
50
05
5
12. 2. Remove pin (A). Inspect pin for damage or wear.
Replace if necessary.
3. Inspect machined surface of transmission for severe
scoring. If scoring is noted, replace transmission.
4. Clean and dry all parts. Machined surface of
transmission must be clean.
5. Apply clean transmission oil on all internal parts.
6. Install pin (A). Apply petroleum jelly to pin and shaft to
hold pin in place during installation of charge pump.
7. Be sure O-ring is in place on pump.
8. Torque cap screws (Step 1) to specification.
TORQUE SPECIFICATION
Charge Pump Cap Screws . . . . . . . . . . . . . . 37-50 N·m (27-37 lb-ft)
M43637
-UN-19JAN90
REMOVE HYDROSTATIC TRANSMISSION
1. Drain transaxle. Oil capacity is approximately 17 L
(4.5 gal).
2. Remove the following:
• Drawbar
• Sheet Metal Panels (see procedures in this group)
• Transmission Drive Shaft (see procedures in this
group)
• MFWD Drive Shaft (see procedures in this group). M43506
-UN-31AUG88
MX,HU,5005,14 -19-16OCT91
MX,HU,5005,16 -19-16OCT91
Hydrostatic Transmission/Remove Hydrostatic Transmission
TM1360 (16OCT91) 50-05-6 55, 56 Series Tractors
010395
50
05
6
13. 3. Disconnect spring (A) from lever (B).
4. Remove bolt (C) to disconnect linkage from
transmission (D).
A—Spring
B—Transmission Neutral Return Lever
C—Bolt
D—Transmission
M43639
-UN-31AUG88
IMPORTANT: Close all openings with caps and plugs
to keep dirt out of the hydraulic
system.
5. Disconnect fitting (A). Loosen clamp on other end and
turn tube (B) to permit transmission removal.
6. Disconnect line (C).
7. Disconnect lines (D).
8. Disconnect wiring (E).
A—Fitting
B—Suction Line
C—Steering Line
D—Oil Cooler Lines (2)
E—Neutral Start Wire
M43640
-UN-31AUG88
MX,HU,5005,17 -19-16OCT91
MX,HU,5005,18 -19-16OCT91
Hydrostatic Transmission/Remove Hydrostatic Transmission
TM1360 (16OCT91) 50-05-7 55, 56 Series Tractors
010395
50
05
7
14. 9. Fasten a lifting eye to the transmission and hold
transmission with an overhead hoist.
10. Remove two cap screws (A).
11. Move transmission forward so that output gear clears
transaxle, then lower transmission to remove it.
M43641
-UN-31AUG88
M43642
-UN-31AUG88
12. Remove cap screw and speed control lever (A).
13. Remove cap screw and neutral return lever (B).
14. Remove O-rings (C).
15. Remove three fittings (D).
A—Cap Screw/Speed Control Lever
B—Cap Screw/Neutral Return Lever
C—O-ring
D—Fittings
M43678
-UN-31AUG88
16. If neutral start switch is being replaced, be sure to
install spacer (A) between switch and speed control
lever.
M43680
-UN-31AUG88
MX,HU,5005,19 -19-16OCT91
MX,HU,5005,20 -19-16OCT91
MX,HU,5005,21 -19-16OCT91
Hydrostatic Transmission/Remove Hydrostatic Transmission
TM1360 (16OCT91) 50-05-8 55, 56 Series Tractors
010395
50
05
8
15. 17. Inspect neutral return lever rollers (B). Replace them
if they DO NOT turn freely.
18. Inspect bronze bushing in neutral return lever (D) for
excessive wear on the inside diameter. If bushing is
being replaced, be sure to align hole in bushing with
grease fitting hole in lever. Ream bushing to 19.088 ±
0.025 mm (0.7515 ± 0.001 in.) diameter.
A—Lock nut
B—Roller (2 used)
C—Washer (2 used)
D—Neutral Return Lever
E—Thin Washer
F—Short Cap Screw
G—Long Cap Screw
H—Eccentric Pivot
I—Seal Cover (2 used)
J—Felt Seal (2 used)
M43679
-UN-31AUG88
MX,HU,5005,22 -19-16OCT91
Hydrostatic Transmission/Remove Hydrostatic Transmission
TM1360 (16OCT91) 50-05-9 55, 56 Series Tractors
010395
50
05
9
17. Hydrostatic Transmission/Remove Hydrostatic Transmission
DISASSEMBLE TRANSMISSION
1. Thoroughly clean outside surface of transmission
using wire brush and solvent.
2. Install transmission on a bench fixture.
3. Remove and inspect charge pump (A). (See
procedures previously in this section.)
4. Remove filter (B).
5. (Early Models) Rotate fixture 180°. Remove cap
screw (A), and washer (B) to remove output shaft drive
gear (C) (19 teeth).
IMPORTANT: Late model Hydrostatic
Transmissions have cotter pin (F) and
castle nut (D) assembly (Hydrostatic
Driveshaft Kit AM118962 for positive
gear retention) instead of cap screw
(A) assembly.
5. (Late Models) Rotate fixture 180°. Remove cotter pin
(F), castle nut (D), and washer (E) to remove output
shaft drive gear (C) (19 teeth).
M43813
B
A
M43814
C
A
B
M85124
D
F
E
C
50-05-11
50
05
11
18. Thank you very much for
your reading. Please Click
Here. Then Get COMPLETE
MANUAL. NO WAITING
NOTE:
If there is no response to
click on the link above,
please download the PDF
document first and then
click on it.
19. IMPORTANT: Do not allow internal parts to fall when
removing center section.
6. Rotate fixture 180˚. Loosen six cap screws (DO NOT
remove). Remove transmission from bench fixture.
7. Put transmission on its side on a work bench and
remove six cap screws, center section and gasket (A).
M43815
-UN-31AUG88
M43816
-UN-31AUG88
IMPORTANT: Do not nick or scratch lapped or
machined surfaces of the center
section, valve plates or cylinder blocks.
Keep pump and motor components
separate, they are not interchangeable.
8. Remove valve plates (A and B). If it is necessary to
pry valve plates loose from center section, use a wooden
dowel and pry only at dowel pin grooves.
If valve plates DO NOT come off with center section,
remove valve plates from cylinder block assemblies.
It may be necessary to apply diesel fuel between valve
plate and cylinder block to cut oil film.
M43817
-UN-31AUG88
MX,HU,5005,26 -19-16OCT91
MX,HU,5005,27 -19-16OCT91
Hydrostatic Transmission/Disassemble Transmission
TM1360 (16OCT91) 50-05-12 55, 56 Series Tractors
010395
50
05
12
20. 9. Inspect valve plates. Valve plates should be flat, free
of all nicks, burrs, scratches, and erosion around the
ports. The bronze metal should show no scoring,
smearing, or be discolored.
NOTE: Scoring is indicated by fine scratches or grooves
cut into the plate.
When these scratches can be detected by feel,
fingernail or lead pencil, the plate should be
replaced.
M43818
-UN-31AUG88
10. Inspect both bearings in center section. Replace if
necessary. Remove bearing using a 2-jaw slide hammer
puller.
11. For disassembly of center section, see Cross-Section
View—Center Section later in this section.
M43819
-UN-31AUG88
IMPORTANT: Do not nick or scratch lapped surface
of cylinder blocks.
Piston-to-bore relationship need not be
maintained; keep pump and motor
components separate, they are not
interchangeable.
12. Remove motor and pump cylinder blocks.
M43820
-UN-31AUG88
13. Inspect cylinder block assemblies.
IMPORTANT: Do not interchange pistons between
motor and pump cylinder blocks.
Pistons and cylinder blocks are
matched.
Lift piston retainer and pistons from cylinder block.
Check for free movement of pistons in cylinder bores.
M36111
-UN-29AUG88
MX,HU,5005,28 -19-16OCT91
MX,HU,5005,29 -19-16OCT91
MX,HU,5005,30 -19-16OCT91
MX,HU,5005,31 -19-16OCT91
Hydrostatic Transmission/Disassemble Transmission
TM1360 (16OCT91) 50-05-13 55, 56 Series Tractors
010395
50
05
13
21. 14. Remove and inspect all pistons.
Check barrel (B) for scoring, discoloration, or any signs
of separation of slippers.
Check slipper (A) for scoring, smearing, rolled edges and
a full 360˚ free rotation on barrel.
Check lubrication hole (C) for blockage. Clean with
compressed air.
If any component of the piston is damaged, the cylinder
block assembly must be replaced.
M36112
-UN-29AUG88
15. Remove and inspect both piston retainers.
Check retainer for flatness, nicks, burrs, and
discoloration.
Check area around piston slippers (A) for scoring.
If any part of the piston retainer is damaged, the cylinder
block assembly must be replaced.
M36113
-UN-29AUG88
MX,HU,5005,32 -19-16OCT91
MX,HU,5005,33 -19-16OCT91
Hydrostatic Transmission/Disassemble Transmission
TM1360 (16OCT91) 50-05-14 55, 56 Series Tractors
010395
50
05
14