Downloaded 177 times


![Contact me via [email_address] [email_address] [email_address] arunprasadvidhyaarthi – skype Arunprasadvidhyaarthi – slideshare.com Arun85prasad – twitter Arunprasad – scribd.com](https://image.slidesharecdn.com/extlesson01-100401125905-phpapp01/85/Introduction-to-ExtJS-14-320.jpg)

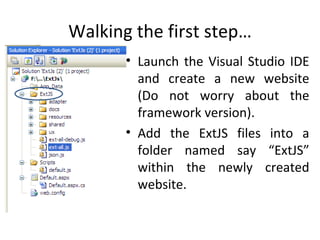
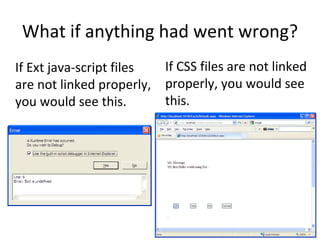
The document is a simplified guide to using the ExtJS JavaScript framework with ASP.NET for developing rich internet applications. It provides step-by-step instructions on downloading, setting up the framework, and integrating it into a Visual Studio website project. Additionally, it includes troubleshooting tips for fixing common issues related to linking JavaScript and CSS files.


![Sencha ExtJs Learning Part 2 - MVC And MVVM Architecture in ExtJs [ENGLISH]](https://cdn.slidesharecdn.com/ss_thumbnails/senchaextjslearningpart2-mvcandmvvmarchitectureinextjsenglish-150615094157-lva1-app6891-thumbnail.jpg?width=640&height=640&fit=bounds)