HTML Introduction
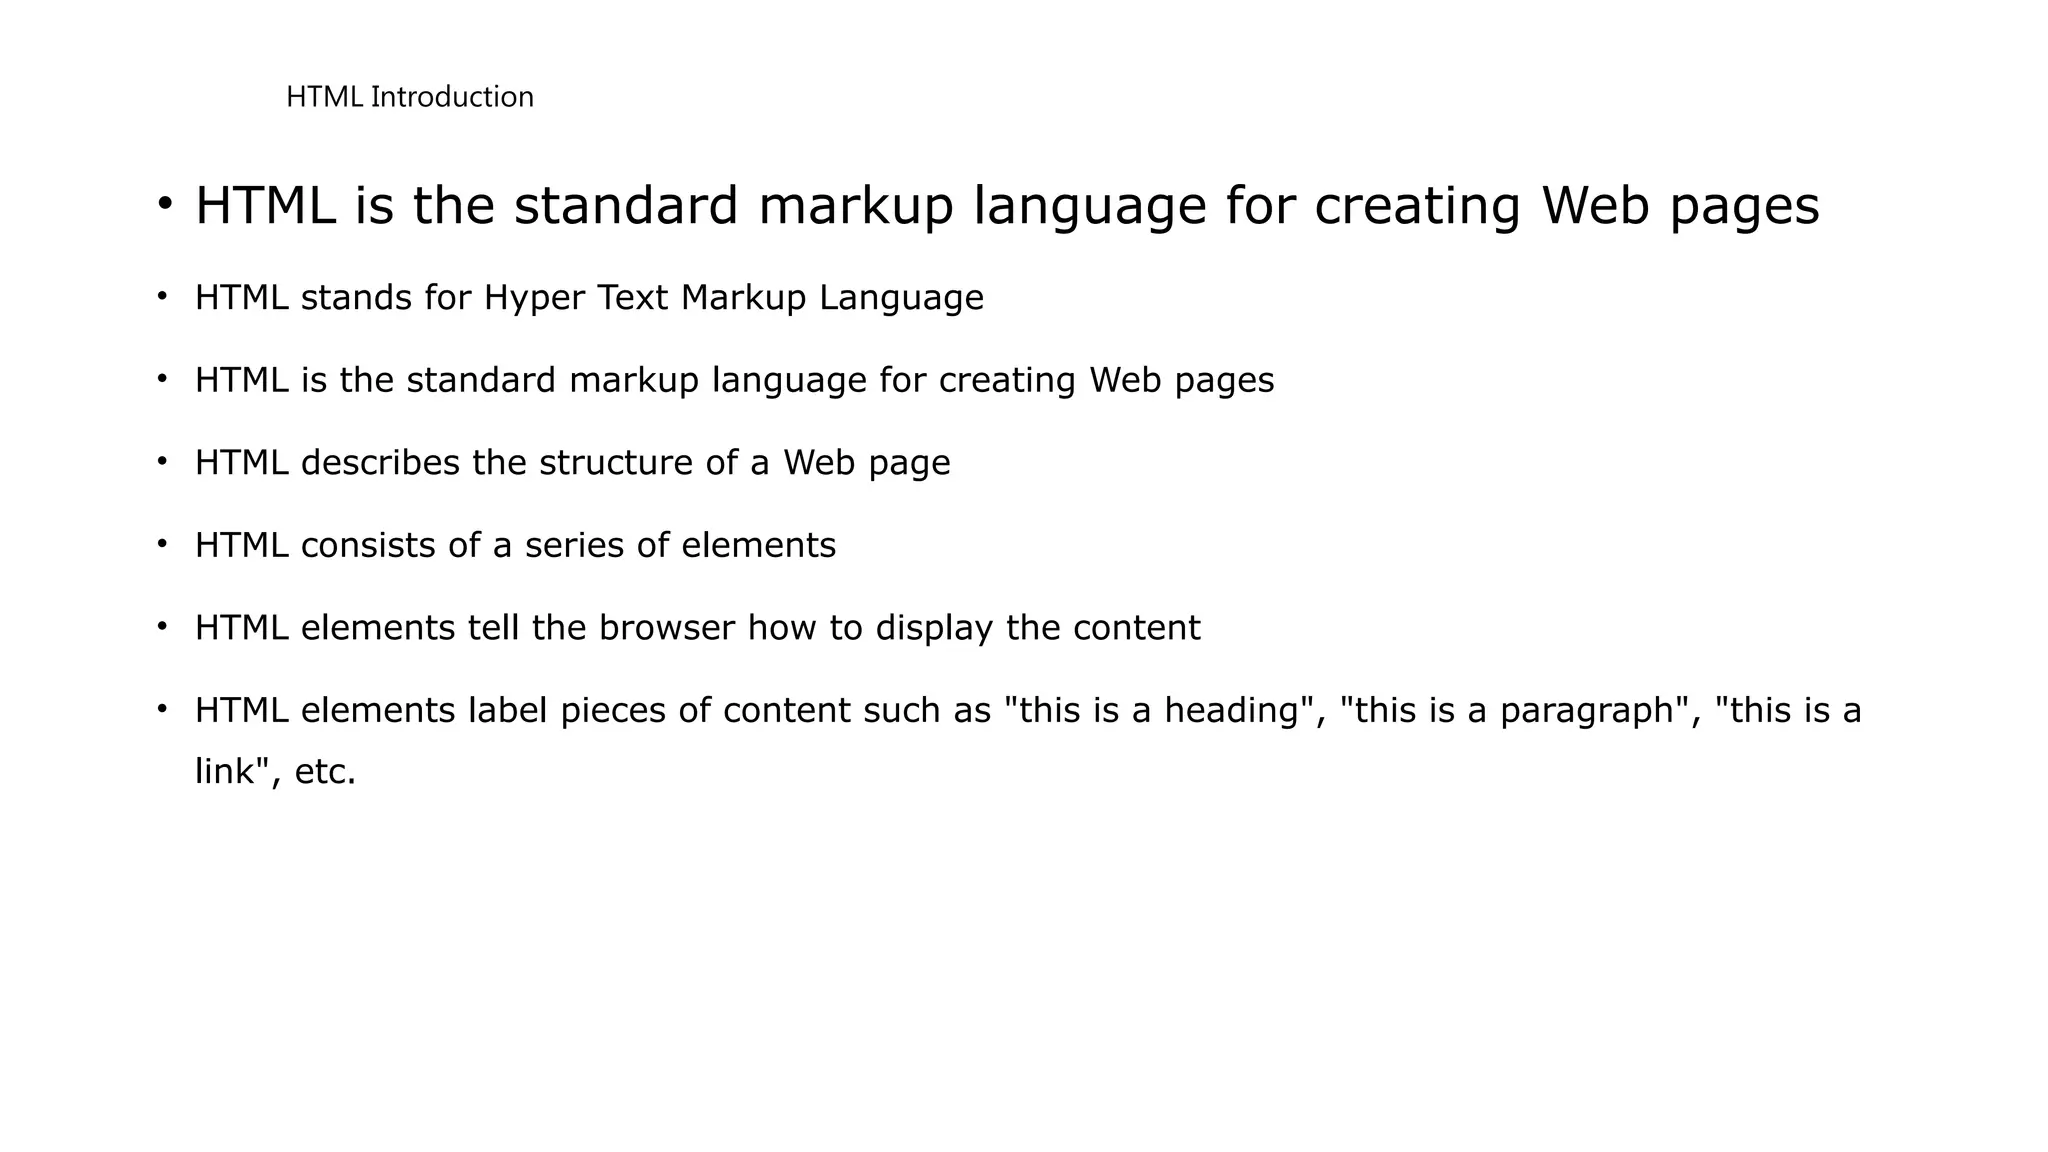
• HTMLis the standard markup language for creating Web pages
• HTML stands for Hyper Text Markup Language
• HTML is the standard markup language for creating Web pages
• HTML describes the structure of a Web page
• HTML consists of a series of elements
• HTML elements tell the browser how to display the content
• HTML elements label pieces of content such as "this is a heading", "this is a paragraph", "this is a
link", etc.
4.
A Simple HTMLDocument
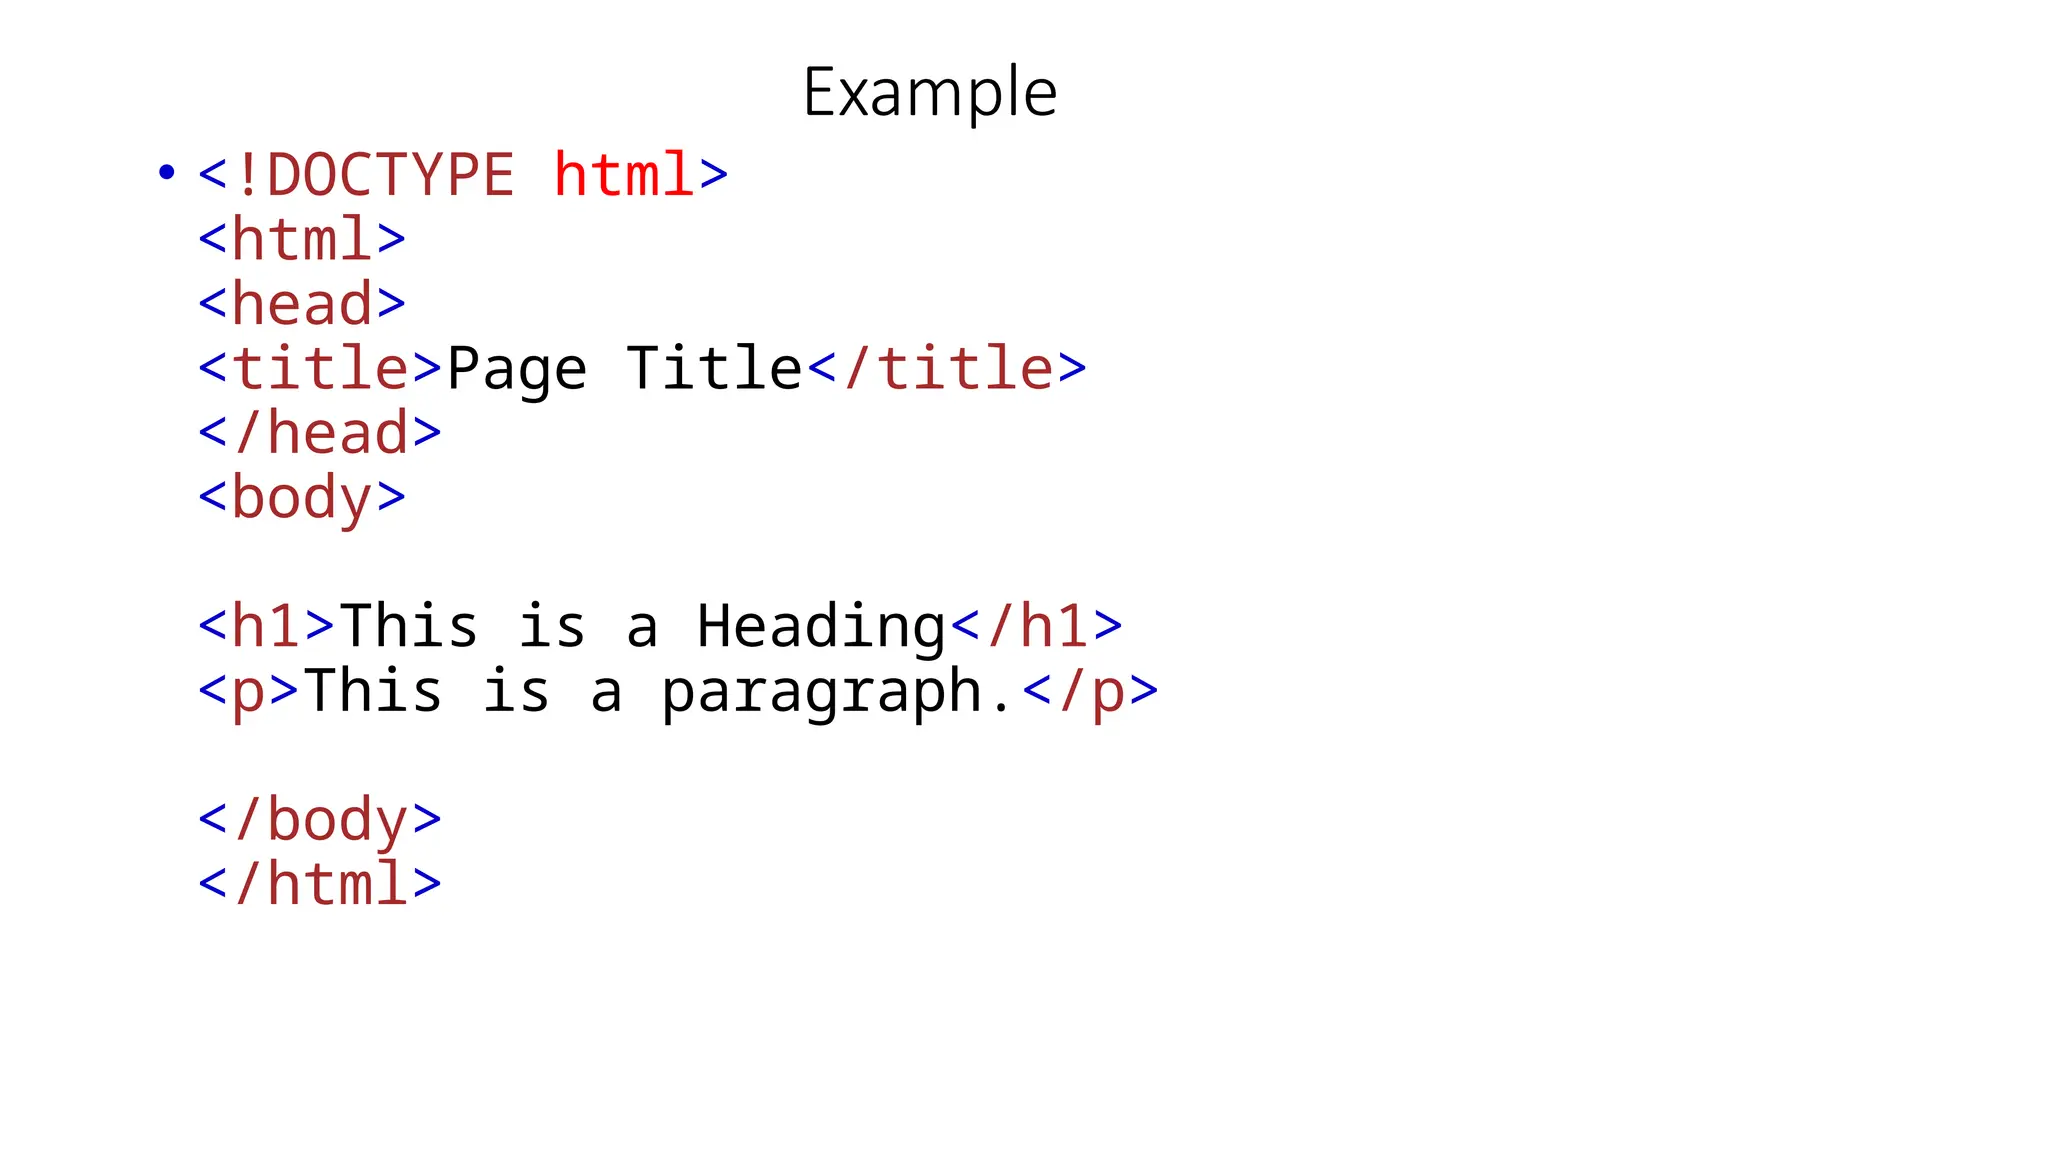
• <!DOCTYPE html>
<html>
<head>
<title>Page Title</title>
</head>
<body>
<h1>My First Heading</h1>
<p>My first paragraph.</p>
</body>
</html>
5.
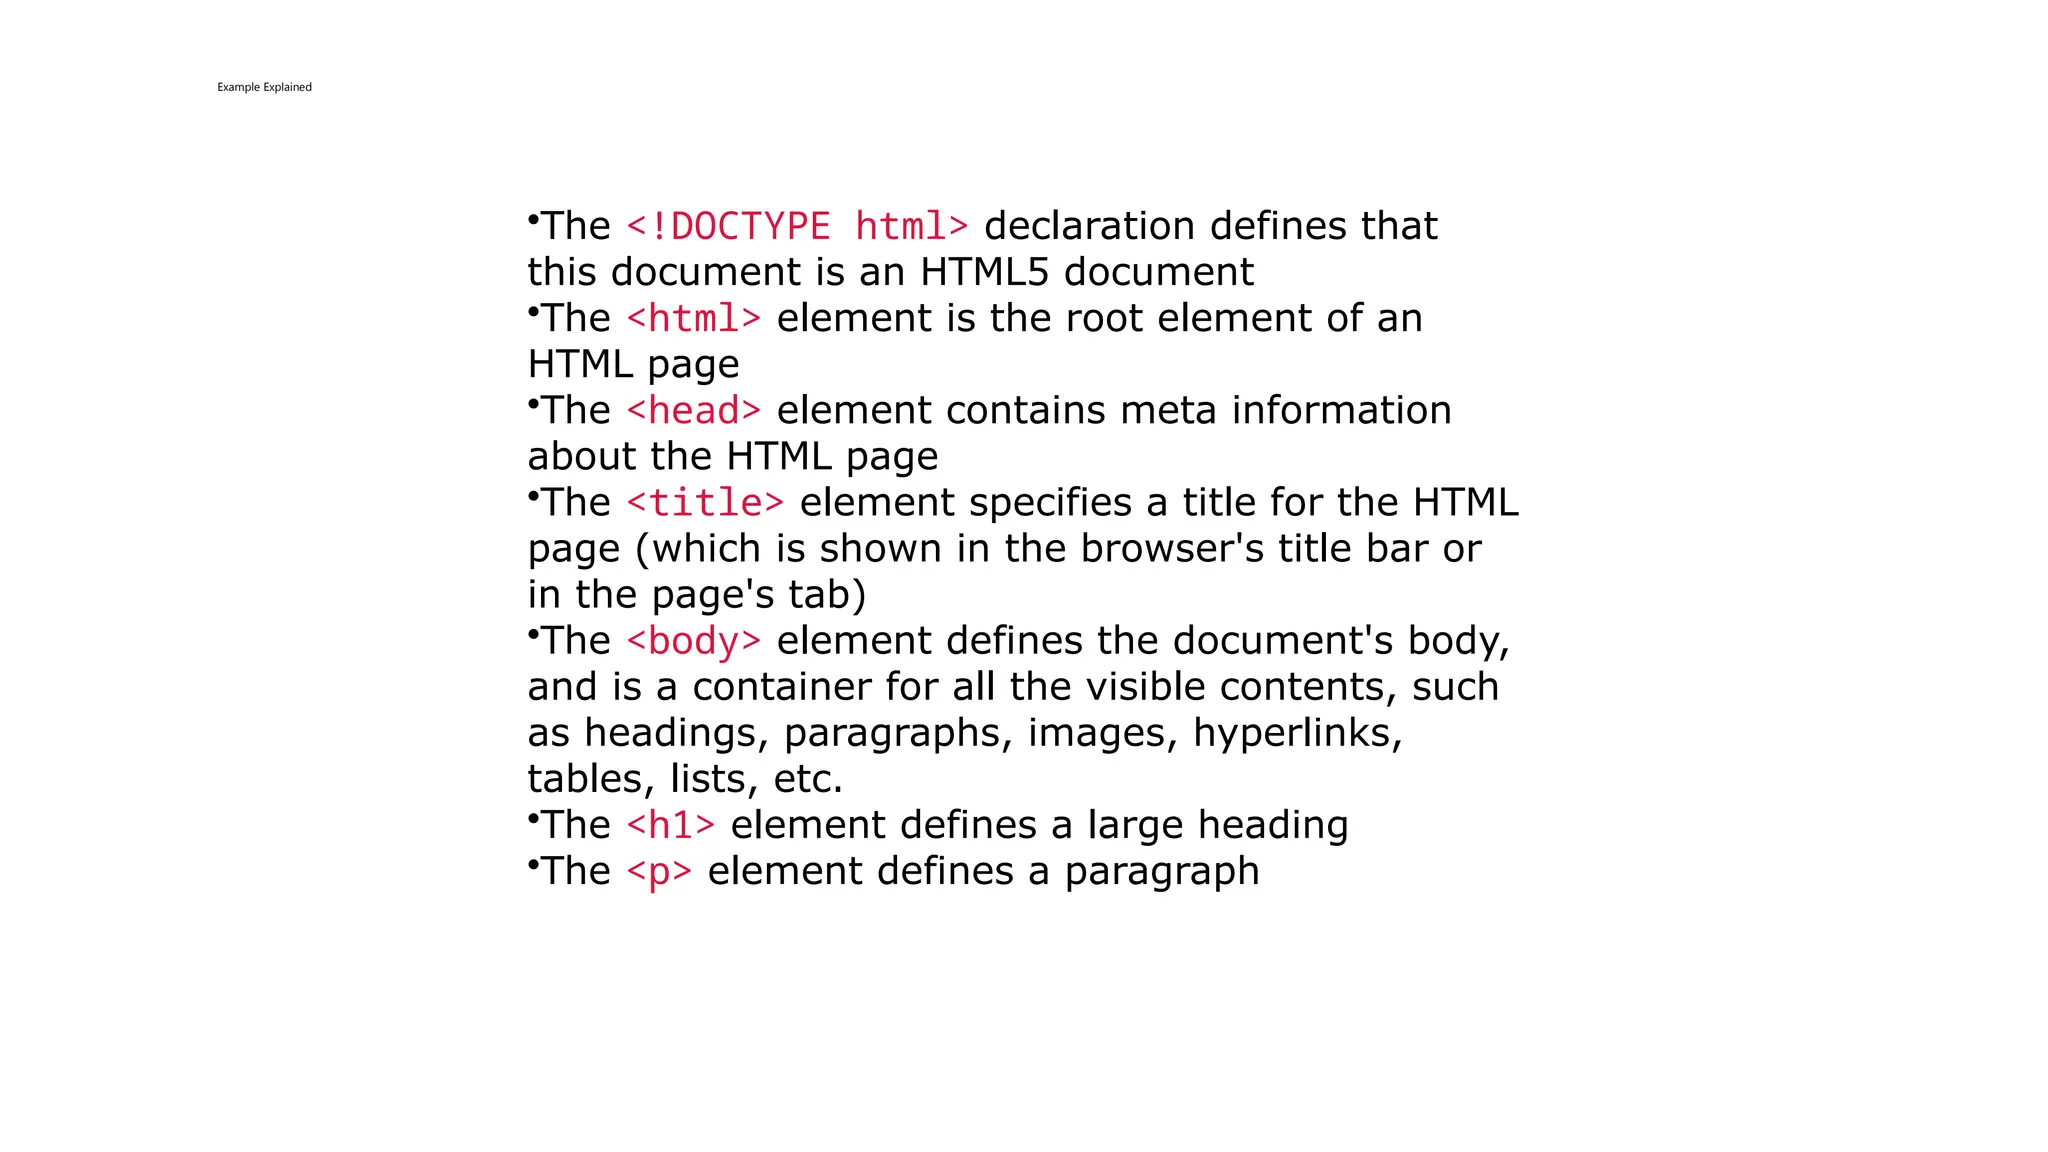
Example Explained
•The <!DOCTYPEhtml> declaration defines that
this document is an HTML5 document
•The <html> element is the root element of an
HTML page
•The <head> element contains meta information
about the HTML page
•The <title> element specifies a title for the HTML
page (which is shown in the browser's title bar or
in the page's tab)
•The <body> element defines the document's body,
and is a container for all the visible contents, such
as headings, paragraphs, images, hyperlinks,
tables, lists, etc.
•The <h1> element defines a large heading
•The <p> element defines a paragraph
6.
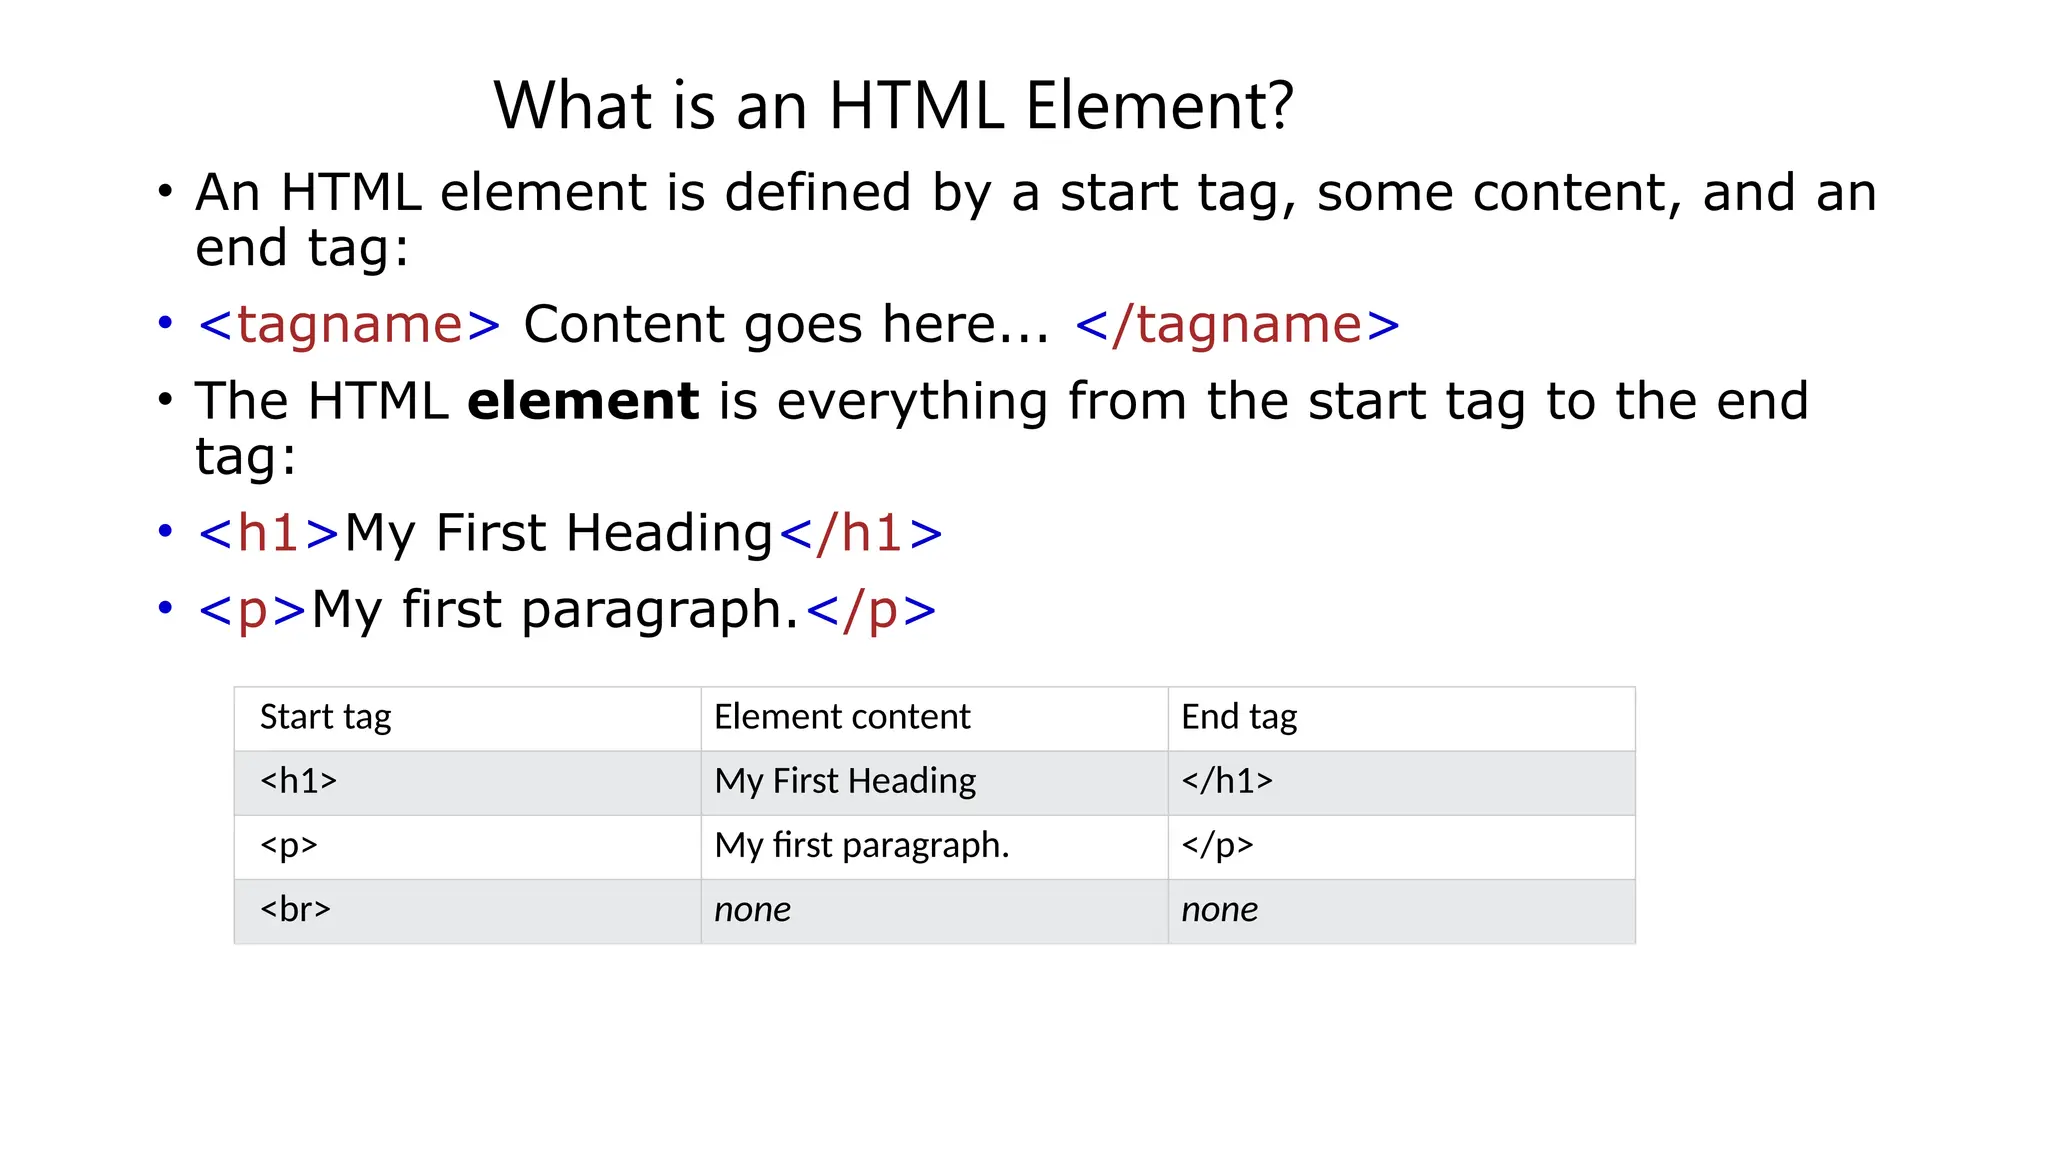
What is anHTML Element?
• An HTML element is defined by a start tag, some content, and an
end tag:
• <tagname> Content goes here... </tagname>
• The HTML element is everything from the start tag to the end
tag:
• <h1>My First Heading</h1>
• <p>My first paragraph.</p>
Start tag Element content End tag
<h1> My First Heading </h1>
<p> My first paragraph. </p>
<br> none none
7.
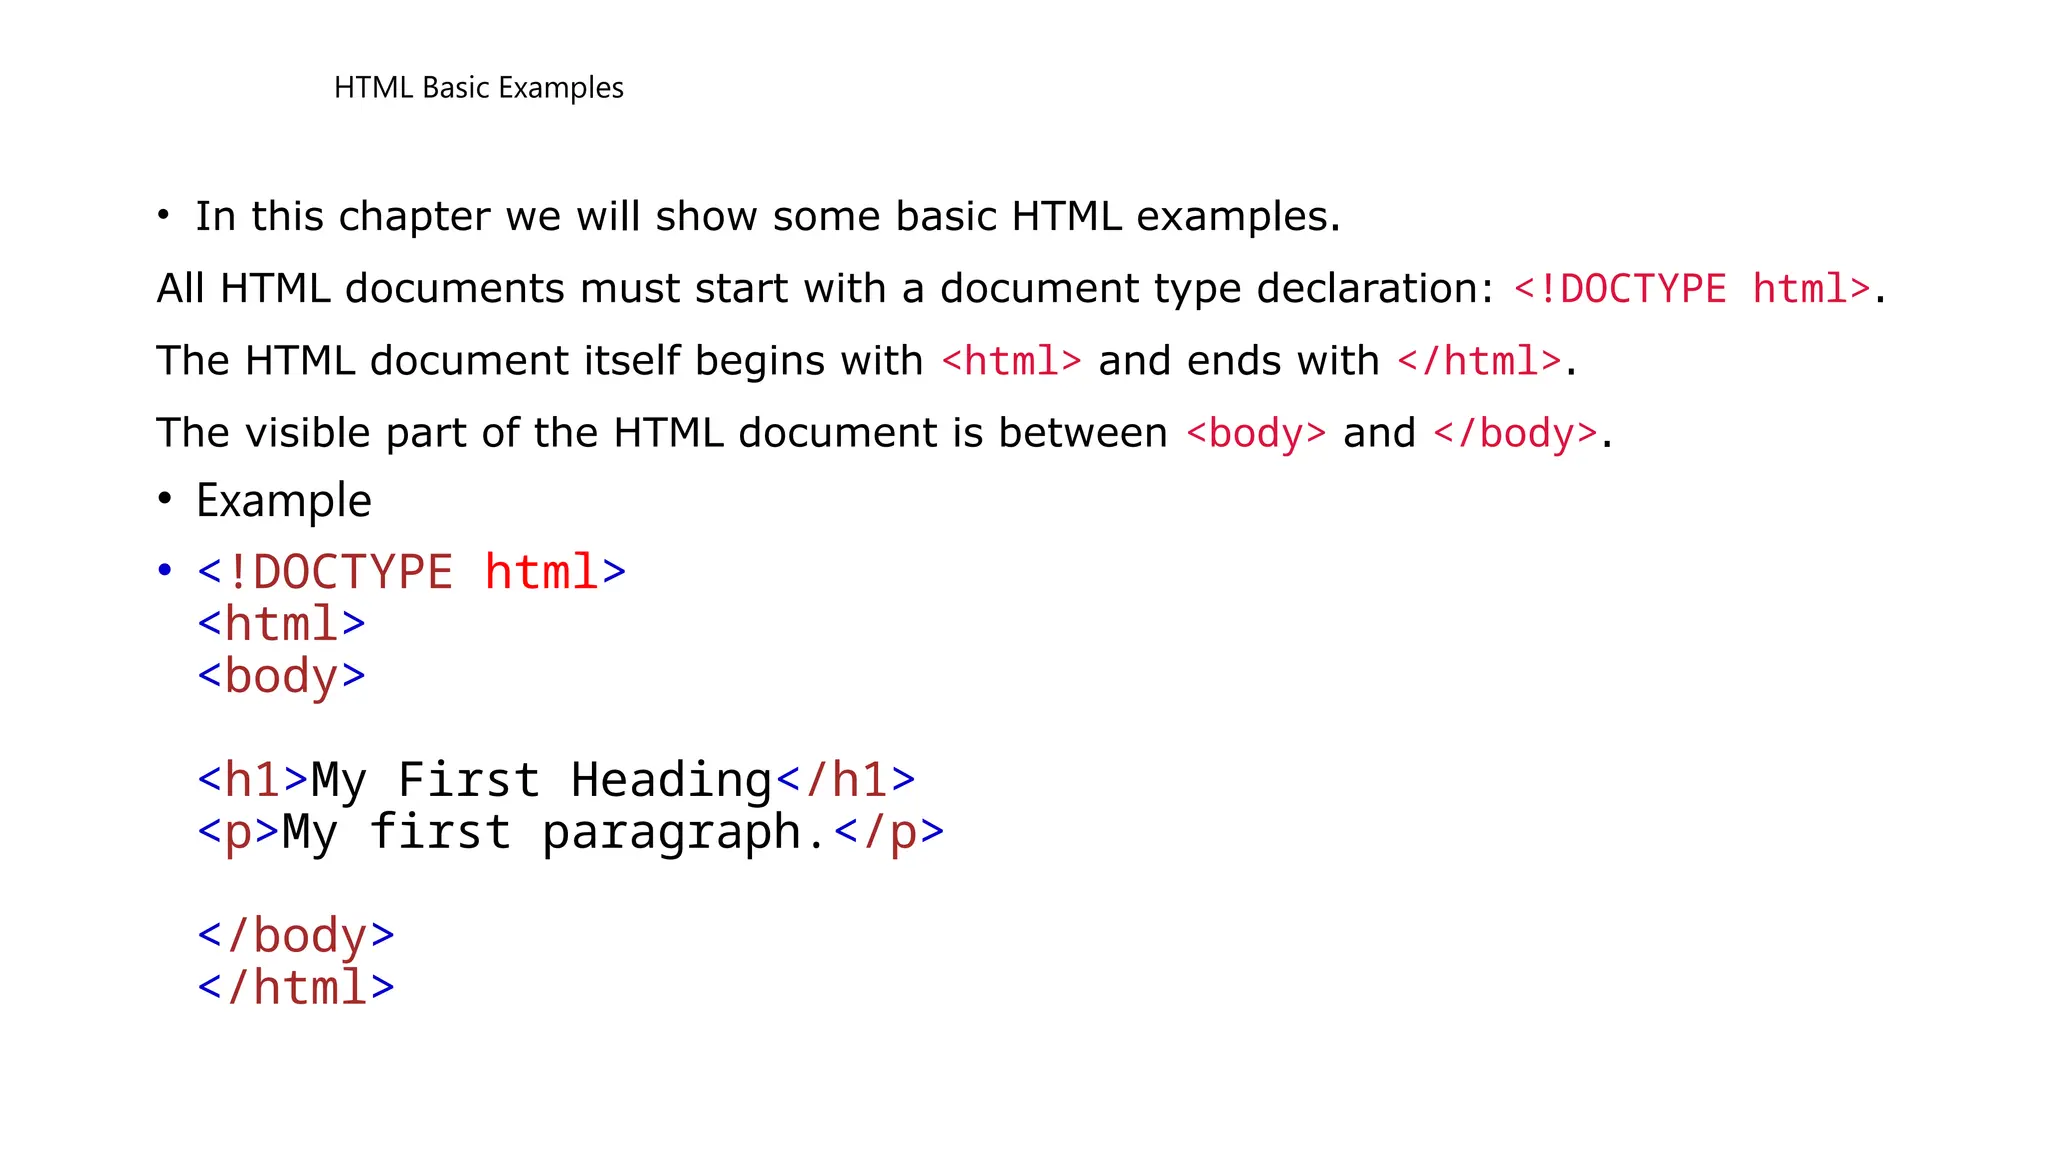
HTML Basic Examples
•In this chapter we will show some basic HTML examples.
All HTML documents must start with a document type declaration: <!DOCTYPE html>.
The HTML document itself begins with <html> and ends with </html>.
The visible part of the HTML document is between <body> and </body>.
• Example
• <!DOCTYPE html>
<html>
<body>
<h1>My First Heading</h1>
<p>My first paragraph.</p>
</body>
</html>
8.
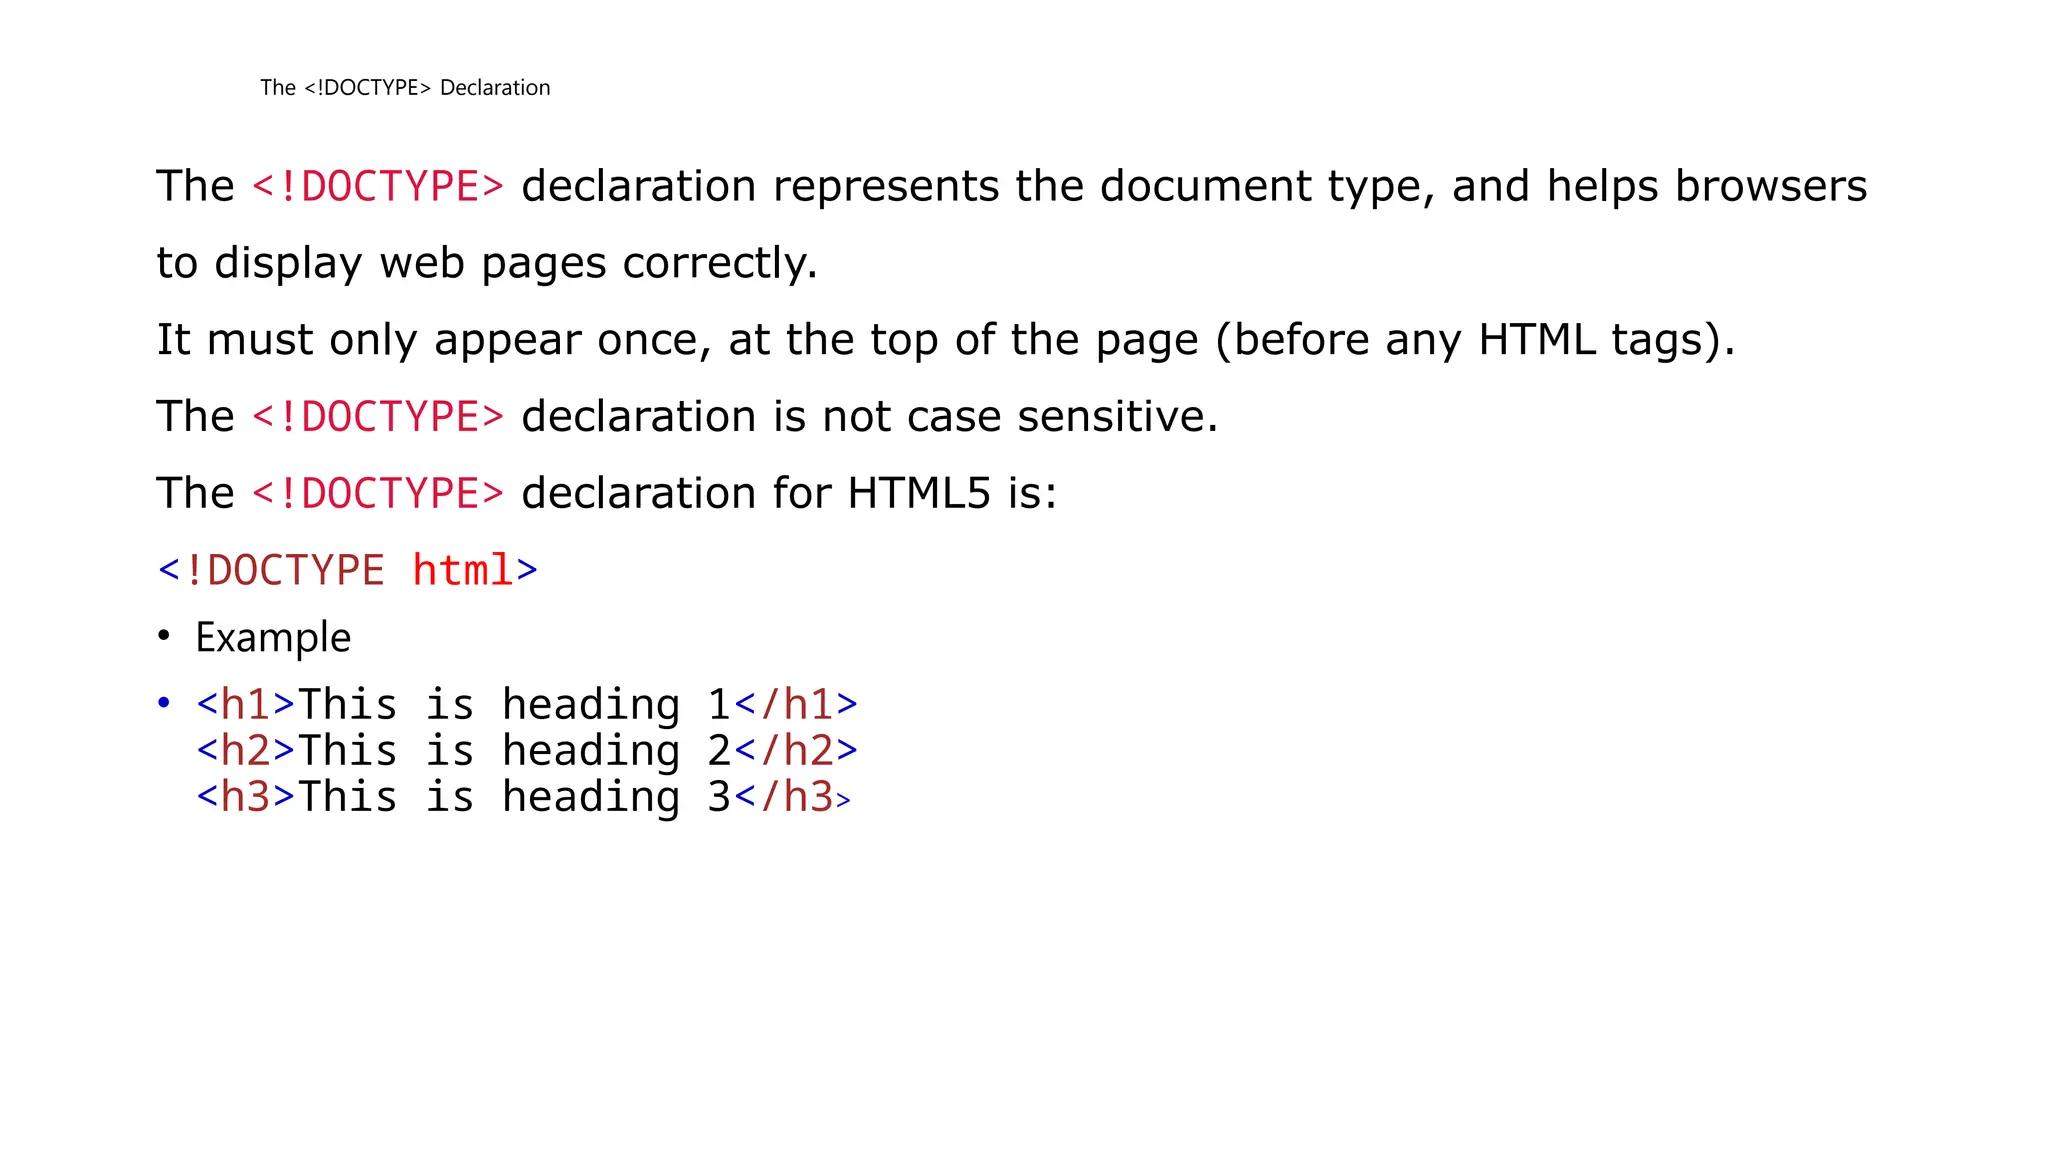
The <!DOCTYPE> Declaration
The<!DOCTYPE> declaration represents the document type, and helps browsers
to display web pages correctly.
It must only appear once, at the top of the page (before any HTML tags).
The <!DOCTYPE> declaration is not case sensitive.
The <!DOCTYPE> declaration for HTML5 is:
<!DOCTYPE html>
• Example
• <h1>This is heading 1</h1>
<h2>This is heading 2</h2>
<h3>This is heading 3</h3>
9.
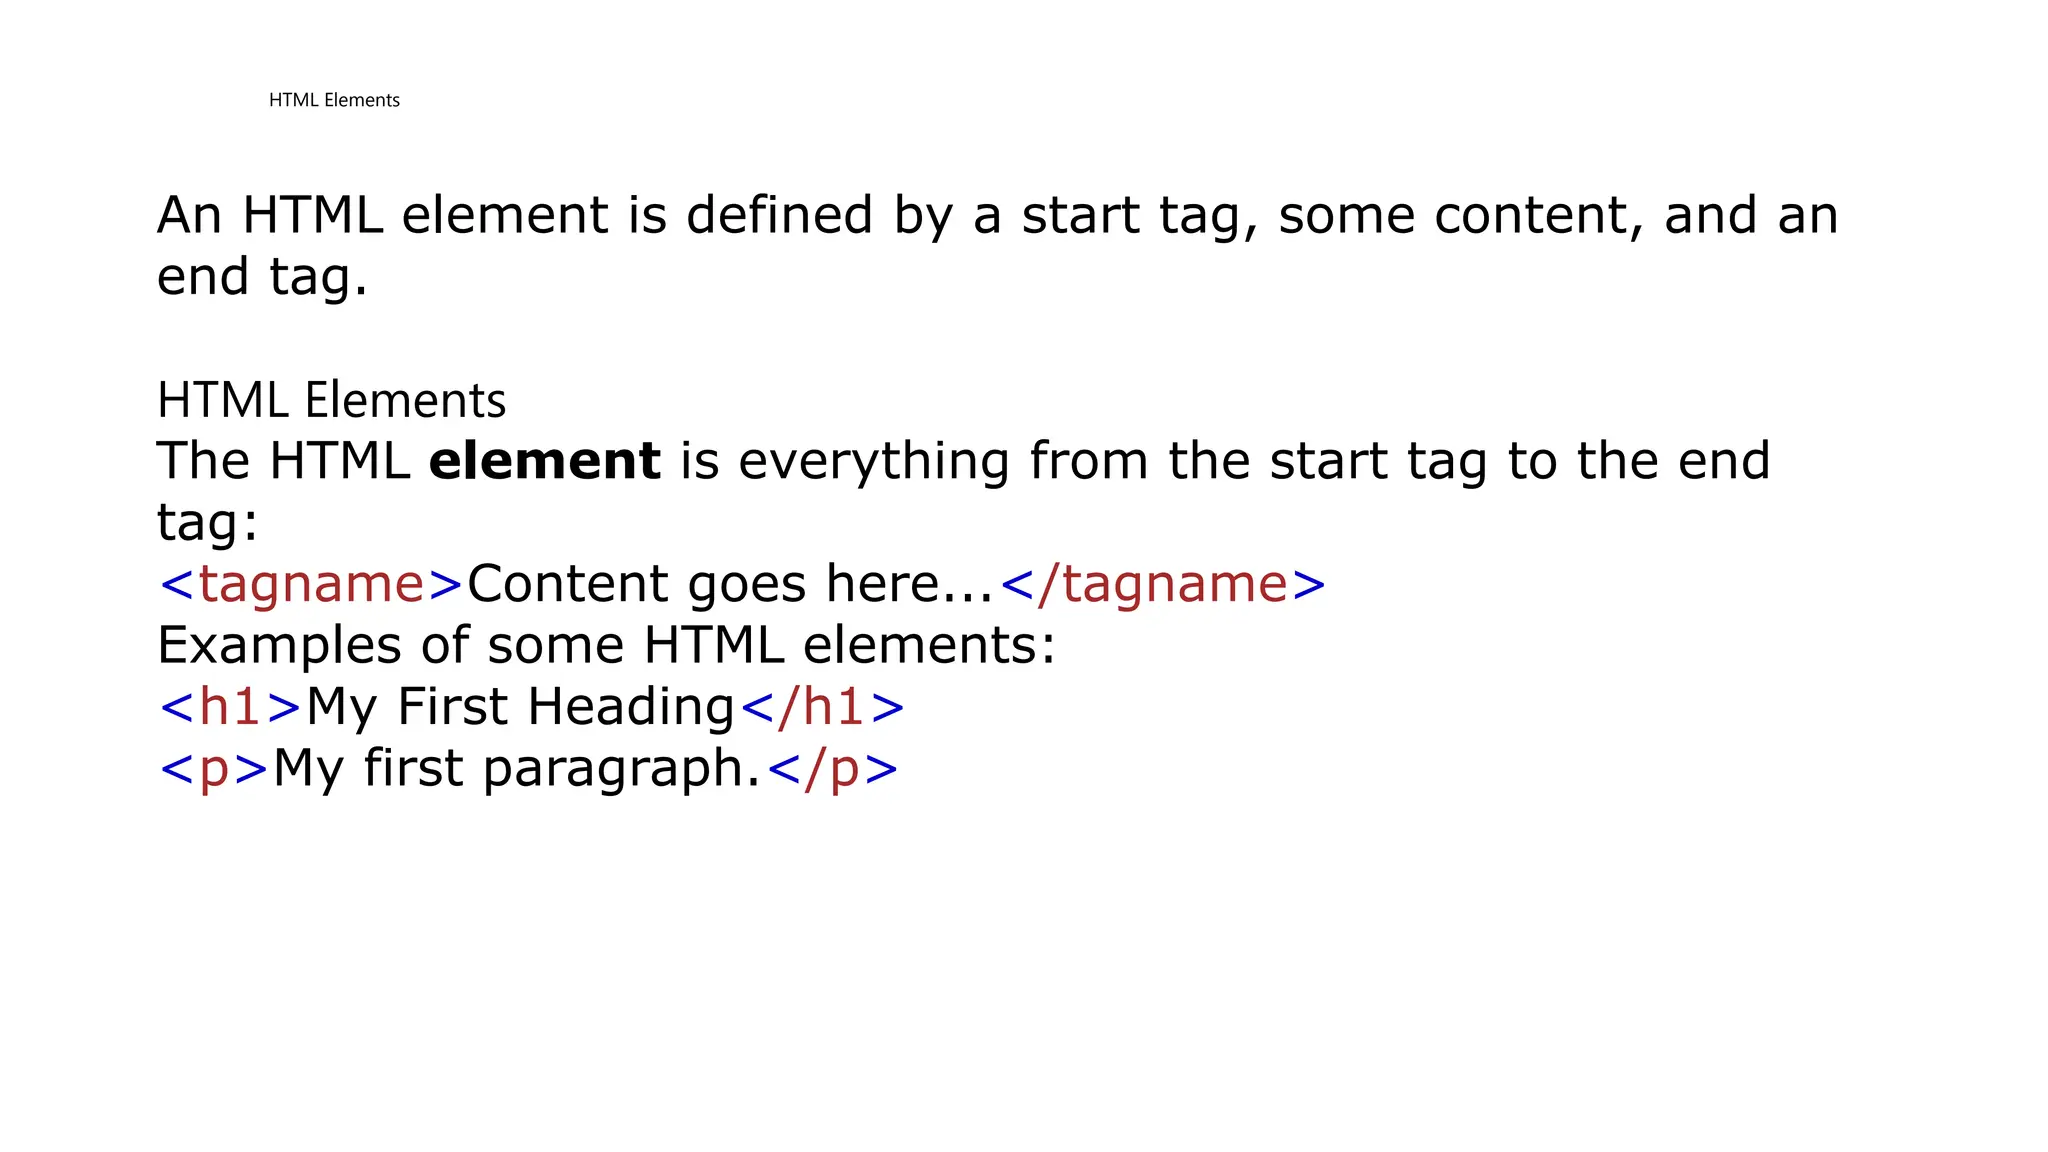
HTML Elements
An HTMLelement is defined by a start tag, some content, and an
end tag.
HTML Elements
The HTML element is everything from the start tag to the end
tag:
<tagname>Content goes here...</tagname>
Examples of some HTML elements:
<h1>My First Heading</h1>
<p>My first paragraph.</p>
10.
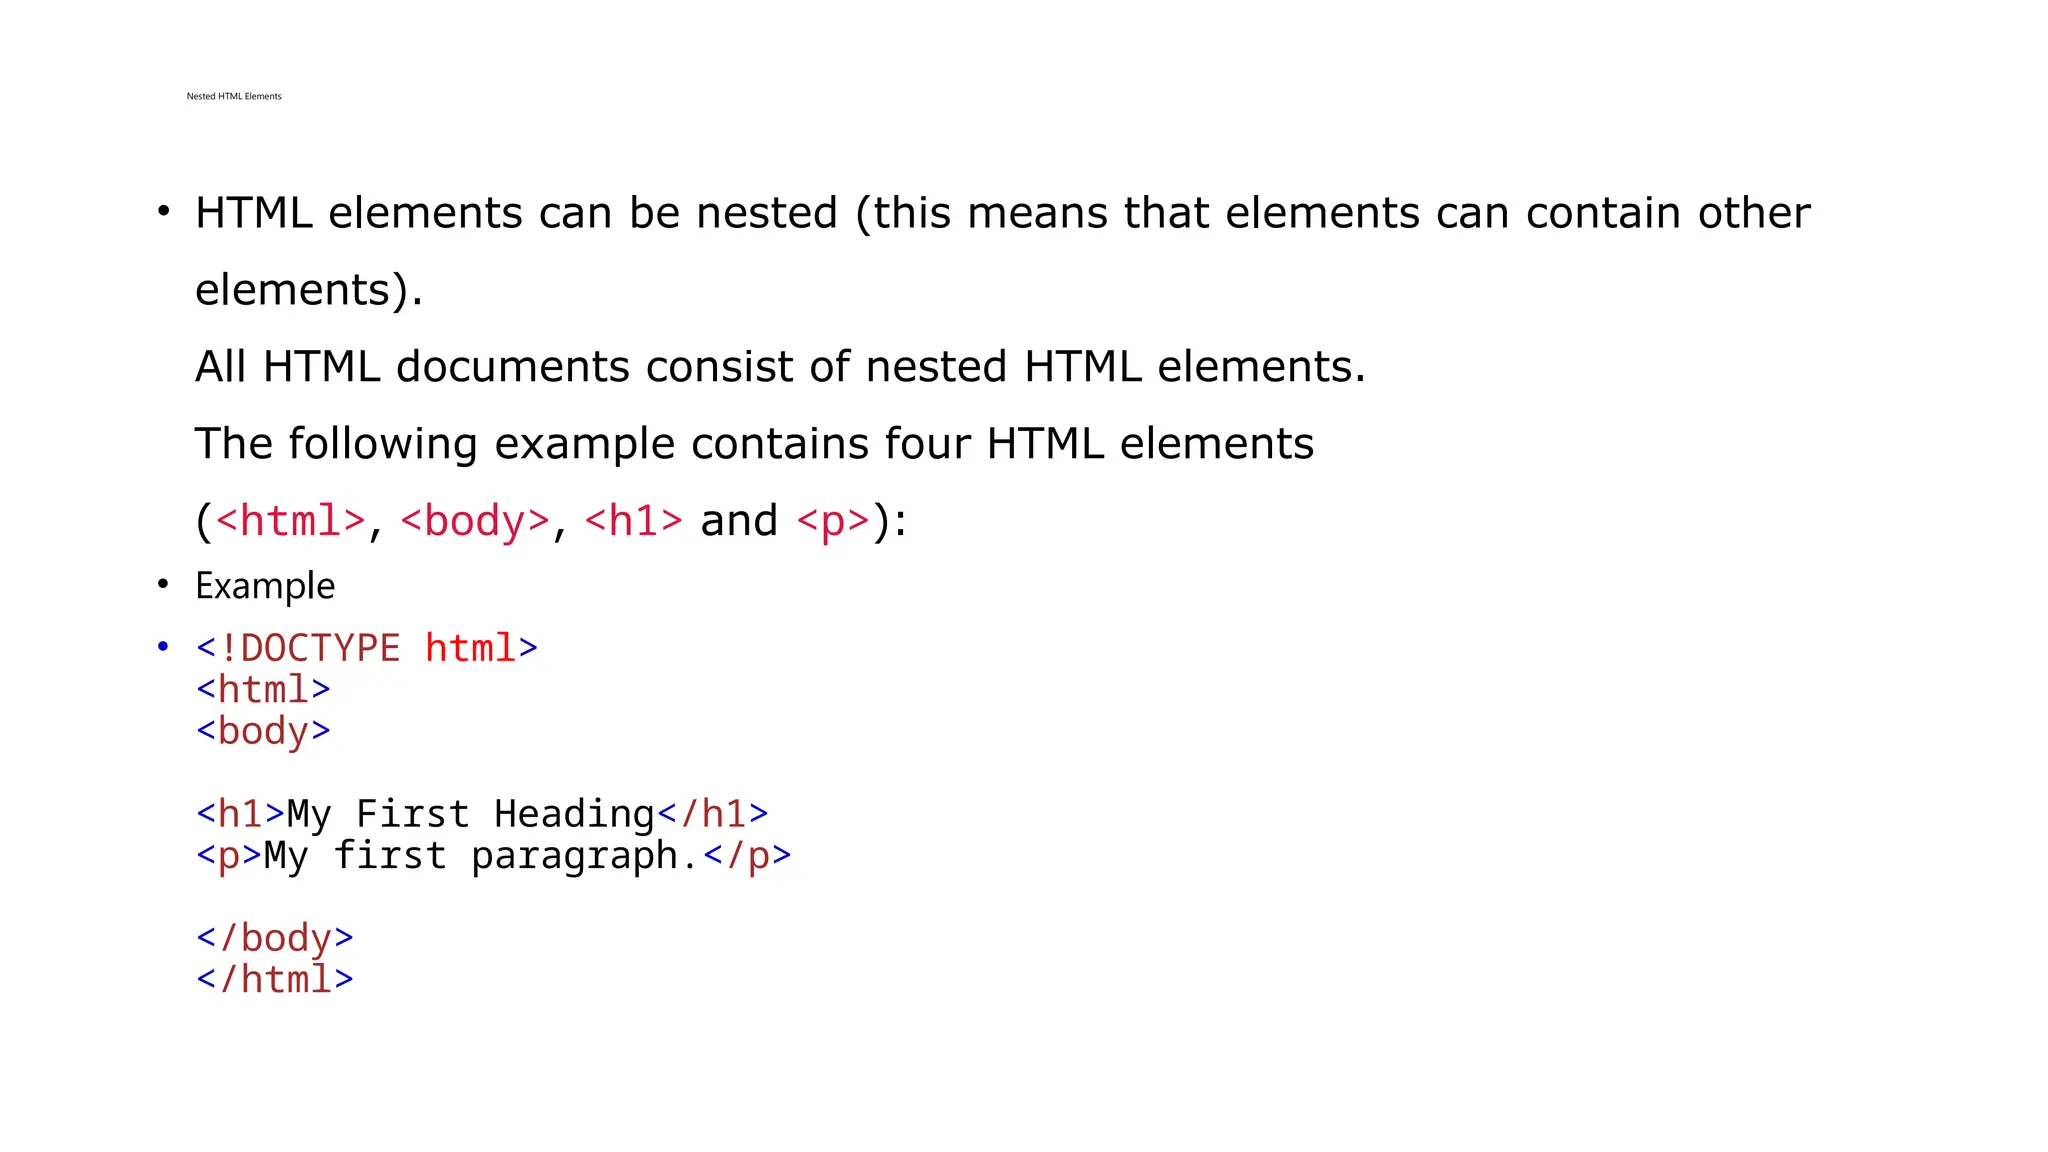
Nested HTML Elements
•HTML elements can be nested (this means that elements can contain other
elements).
All HTML documents consist of nested HTML elements.
The following example contains four HTML elements
(<html>, <body>, <h1> and <p>):
• Example
• <!DOCTYPE html>
<html>
<body>
<h1>My First Heading</h1>
<p>My first paragraph.</p>
</body>
</html>
11.
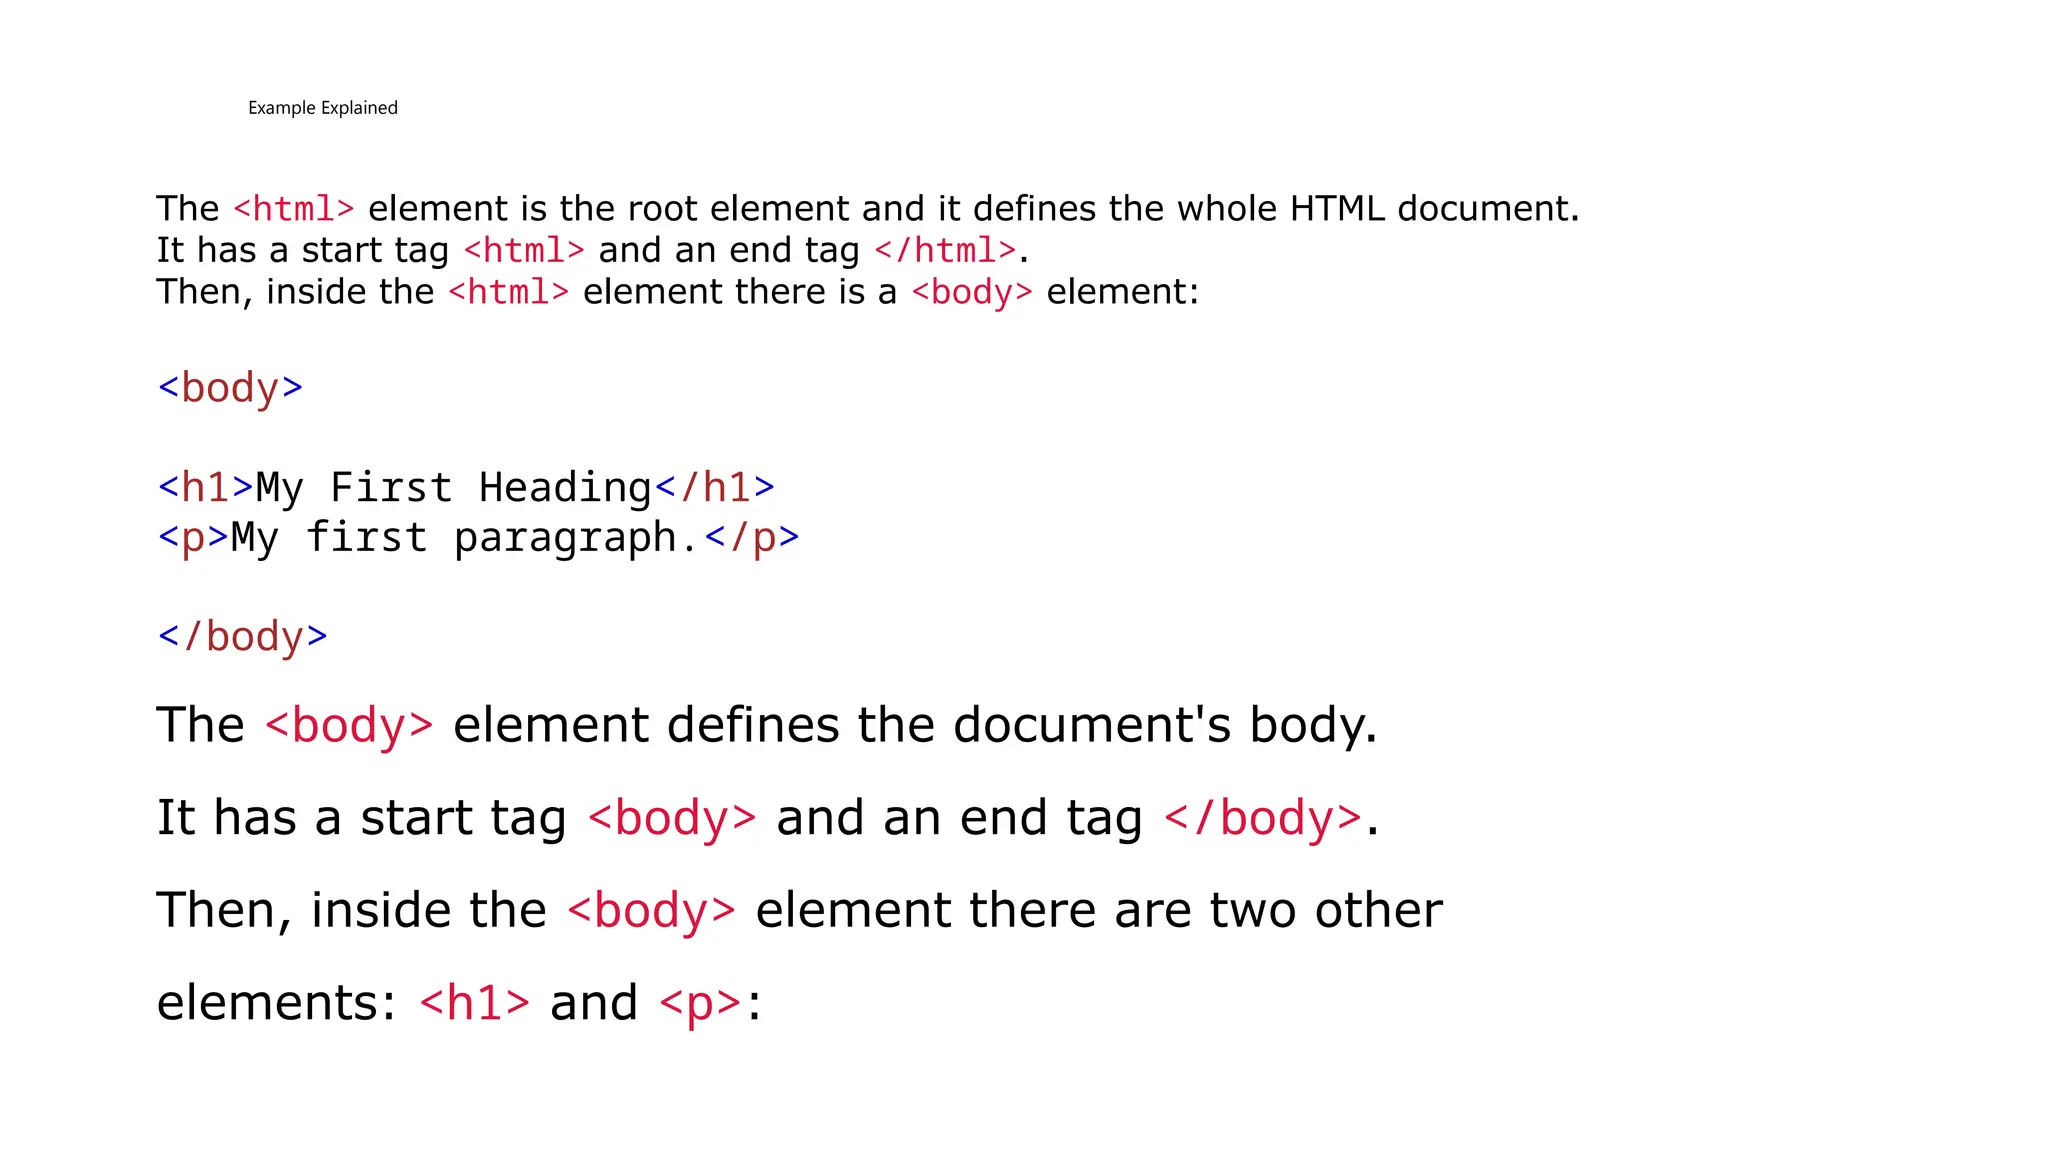
Example Explained
The <html>element is the root element and it defines the whole HTML document.
It has a start tag <html> and an end tag </html>.
Then, inside the <html> element there is a <body> element:
<body>
<h1>My First Heading</h1>
<p>My first paragraph.</p>
</body>
The <body> element defines the document's body.
It has a start tag <body> and an end tag </body>.
Then, inside the <body> element there are two other
elements: <h1> and <p>:
12.
<h1>My First Heading</h1>
<p>Myfirst paragraph.</p>
The <h1> element defines a heading.
It has a start tag <h1> and an end tag </h1>:
<h1>My First Heading</h1>
The <p> element defines a paragraph.
It has a start tag <p> and an end tag </p>:
<p>My first paragraph.</p>
13.
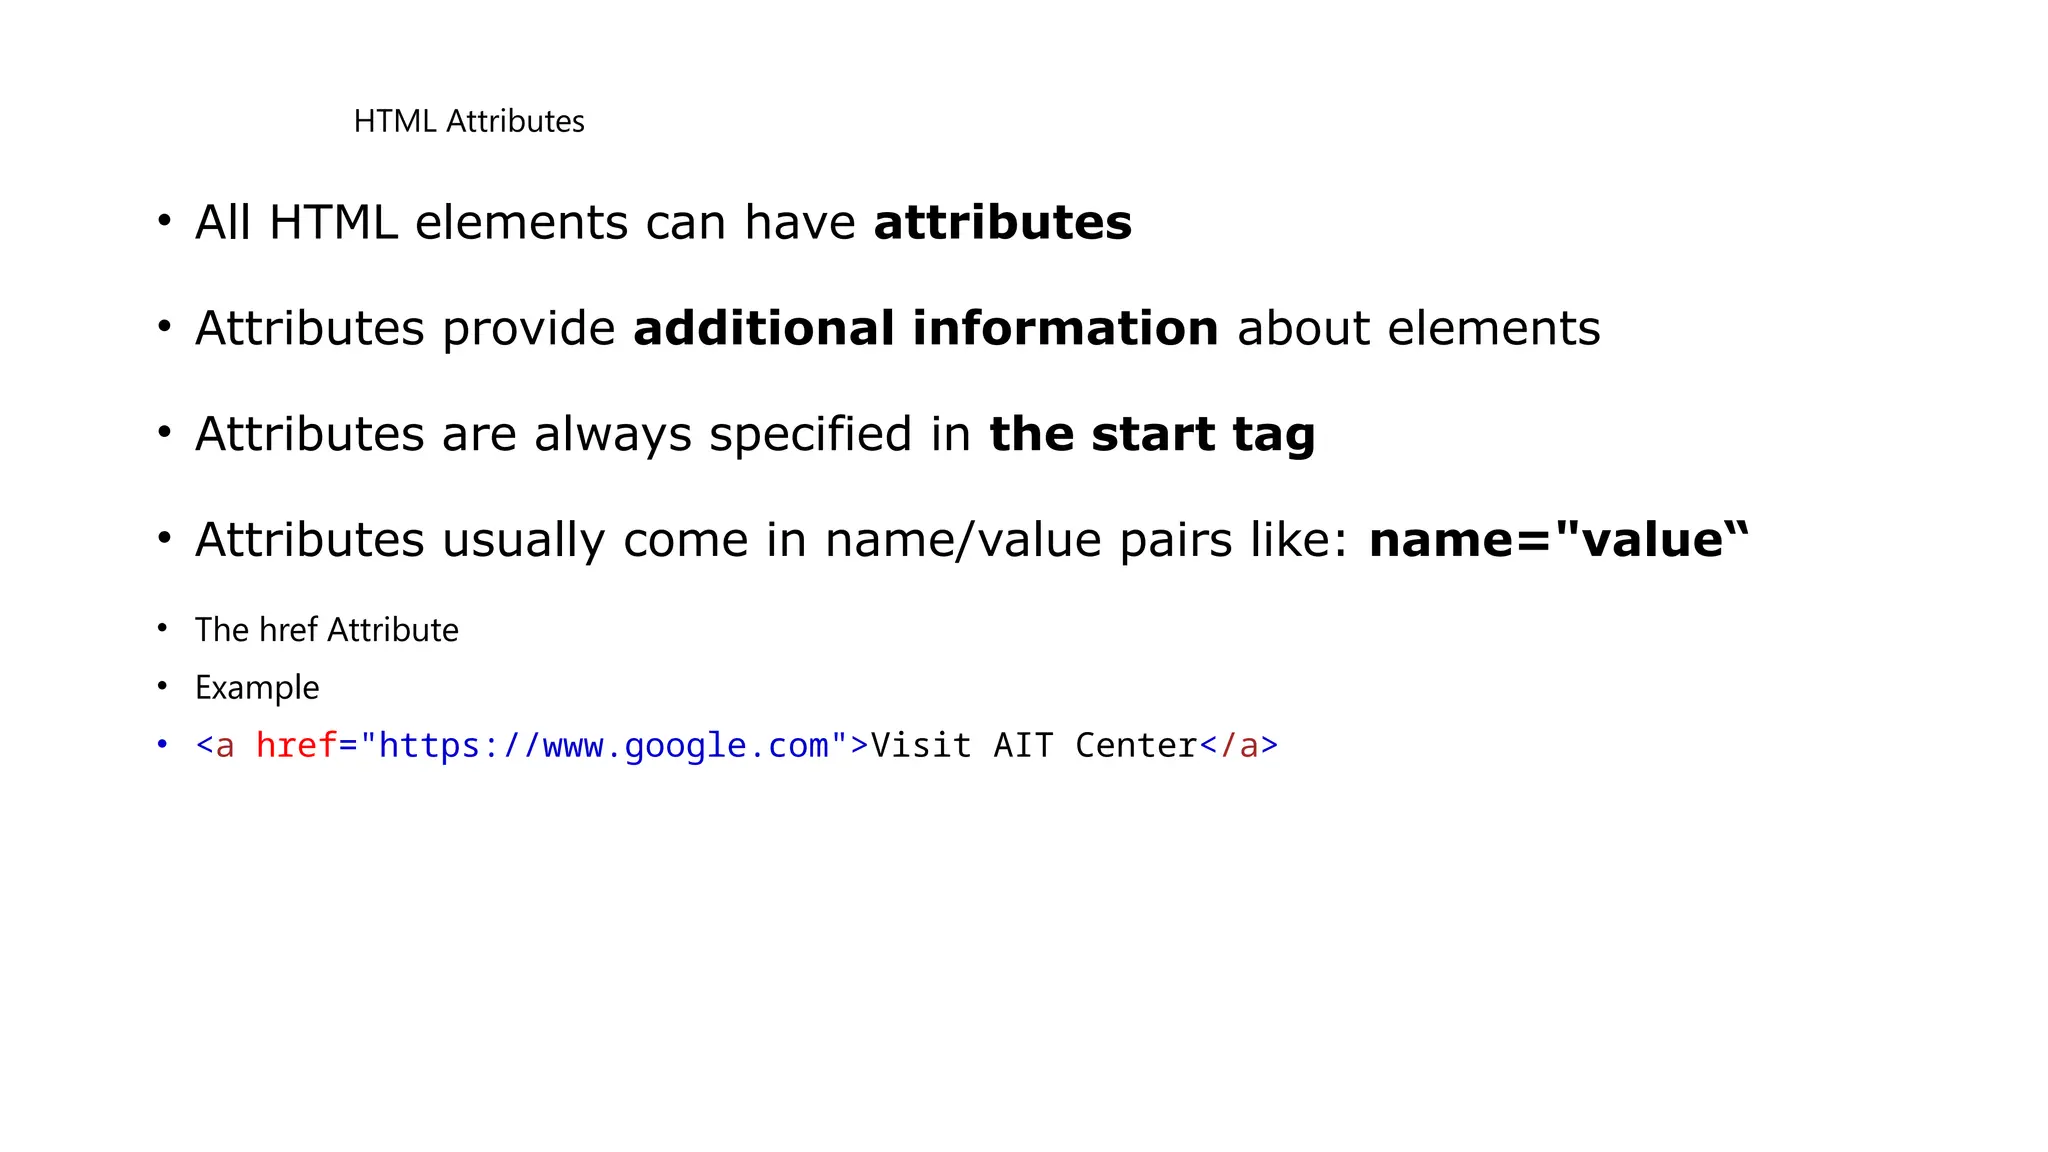
HTML Attributes
• AllHTML elements can have attributes
• Attributes provide additional information about elements
• Attributes are always specified in the start tag
• Attributes usually come in name/value pairs like: name="value“
• The href Attribute
• Example
• <a href="https://www.google.com">Visit AIT Center</a>
14.
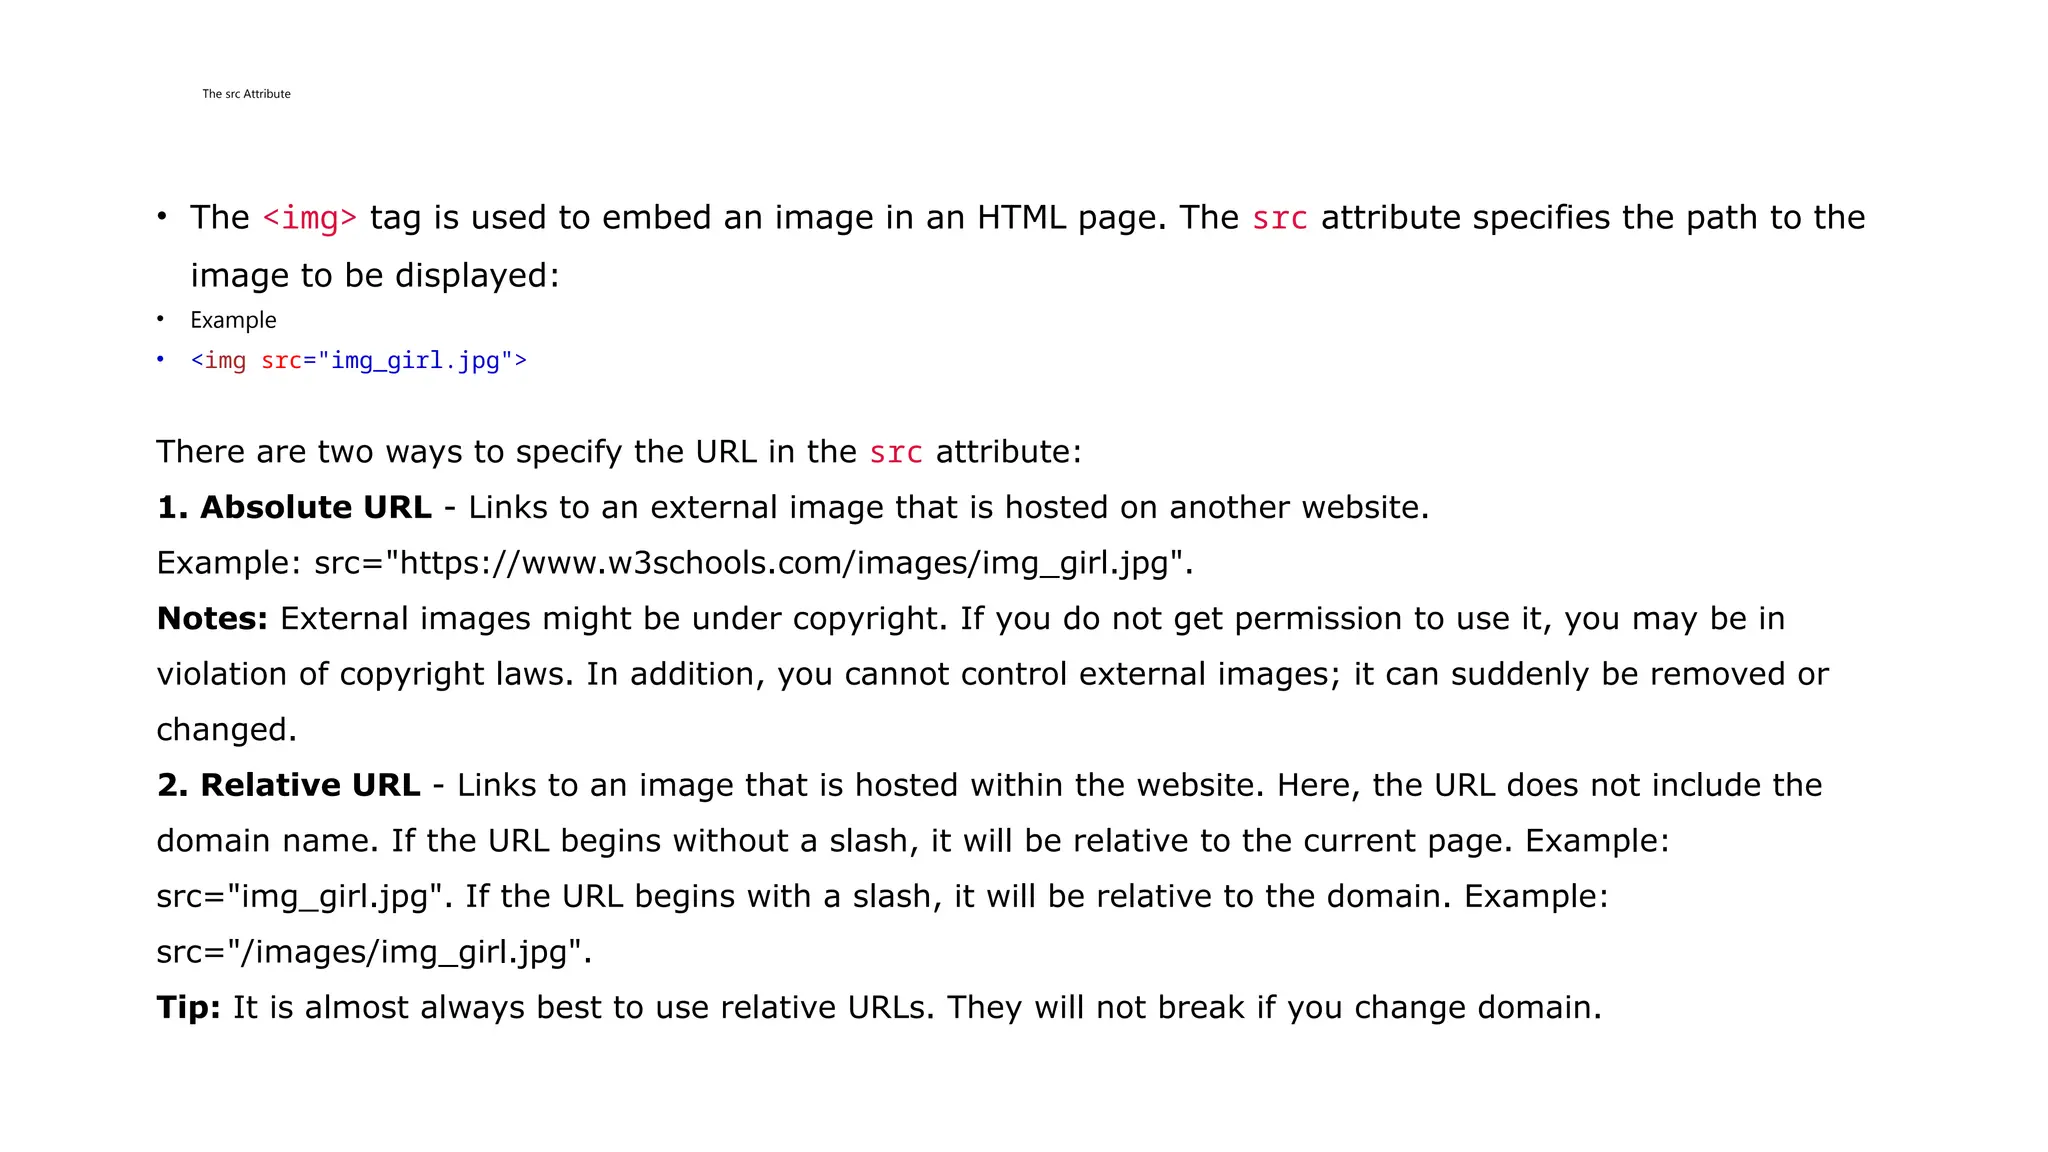
The src Attribute
•The <img> tag is used to embed an image in an HTML page. The src attribute specifies the path to the
image to be displayed:
• Example
• <img src="img_girl.jpg">
There are two ways to specify the URL in the src attribute:
1. Absolute URL - Links to an external image that is hosted on another website.
Example: src="https://www.w3schools.com/images/img_girl.jpg".
Notes: External images might be under copyright. If you do not get permission to use it, you may be in
violation of copyright laws. In addition, you cannot control external images; it can suddenly be removed or
changed.
2. Relative URL - Links to an image that is hosted within the website. Here, the URL does not include the
domain name. If the URL begins without a slash, it will be relative to the current page. Example:
src="img_girl.jpg". If the URL begins with a slash, it will be relative to the domain. Example:
src="/images/img_girl.jpg".
Tip: It is almost always best to use relative URLs. They will not break if you change domain.
15.
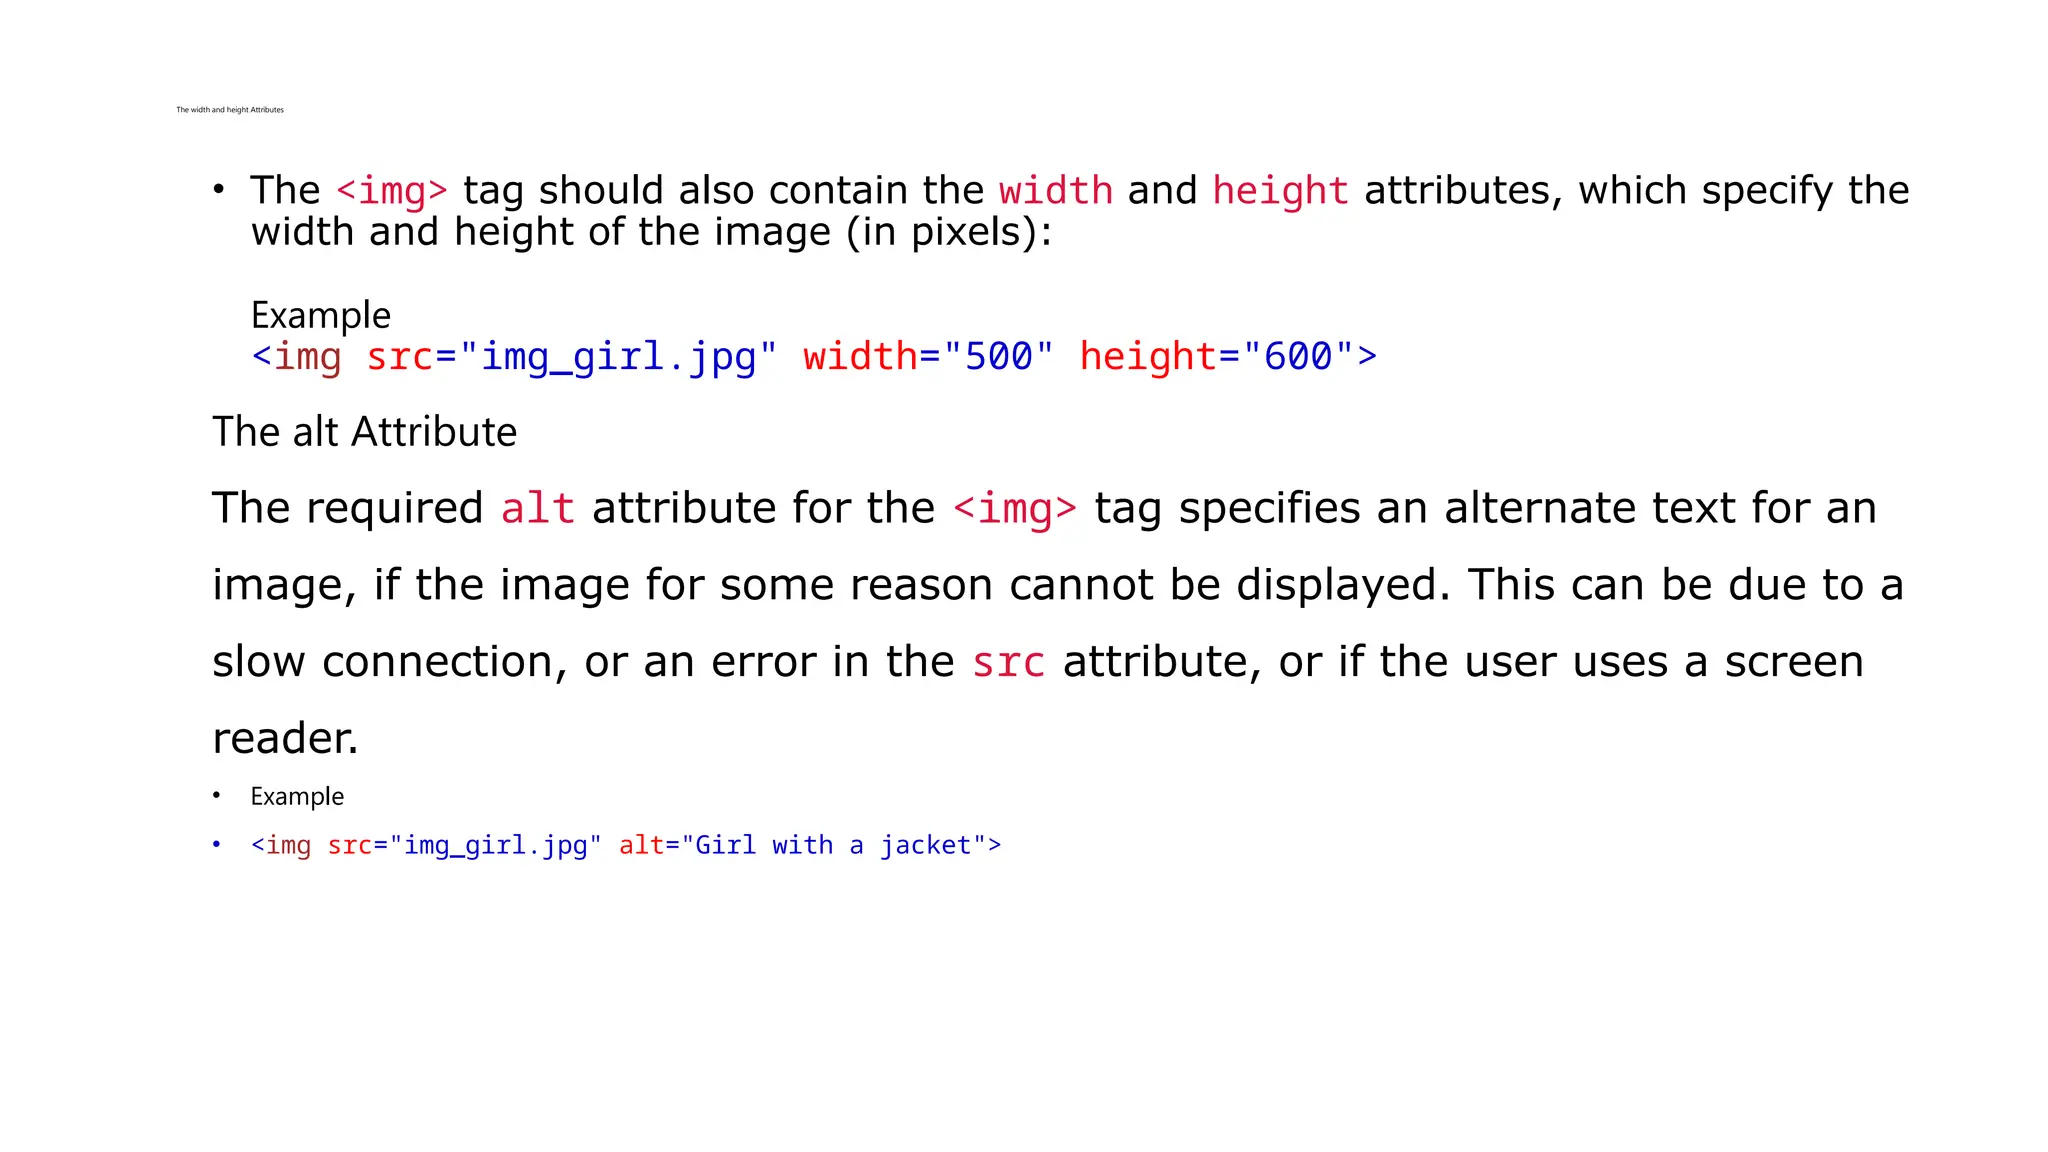
The width andheight Attributes
• The <img> tag should also contain the width and height attributes, which specify the
width and height of the image (in pixels):
Example
<img src="img_girl.jpg" width="500" height="600">
The alt Attribute
The required alt attribute for the <img> tag specifies an alternate text for an
image, if the image for some reason cannot be displayed. This can be due to a
slow connection, or an error in the src attribute, or if the user uses a screen
reader.
• Example
• <img src="img_girl.jpg" alt="Girl with a jacket">
16.
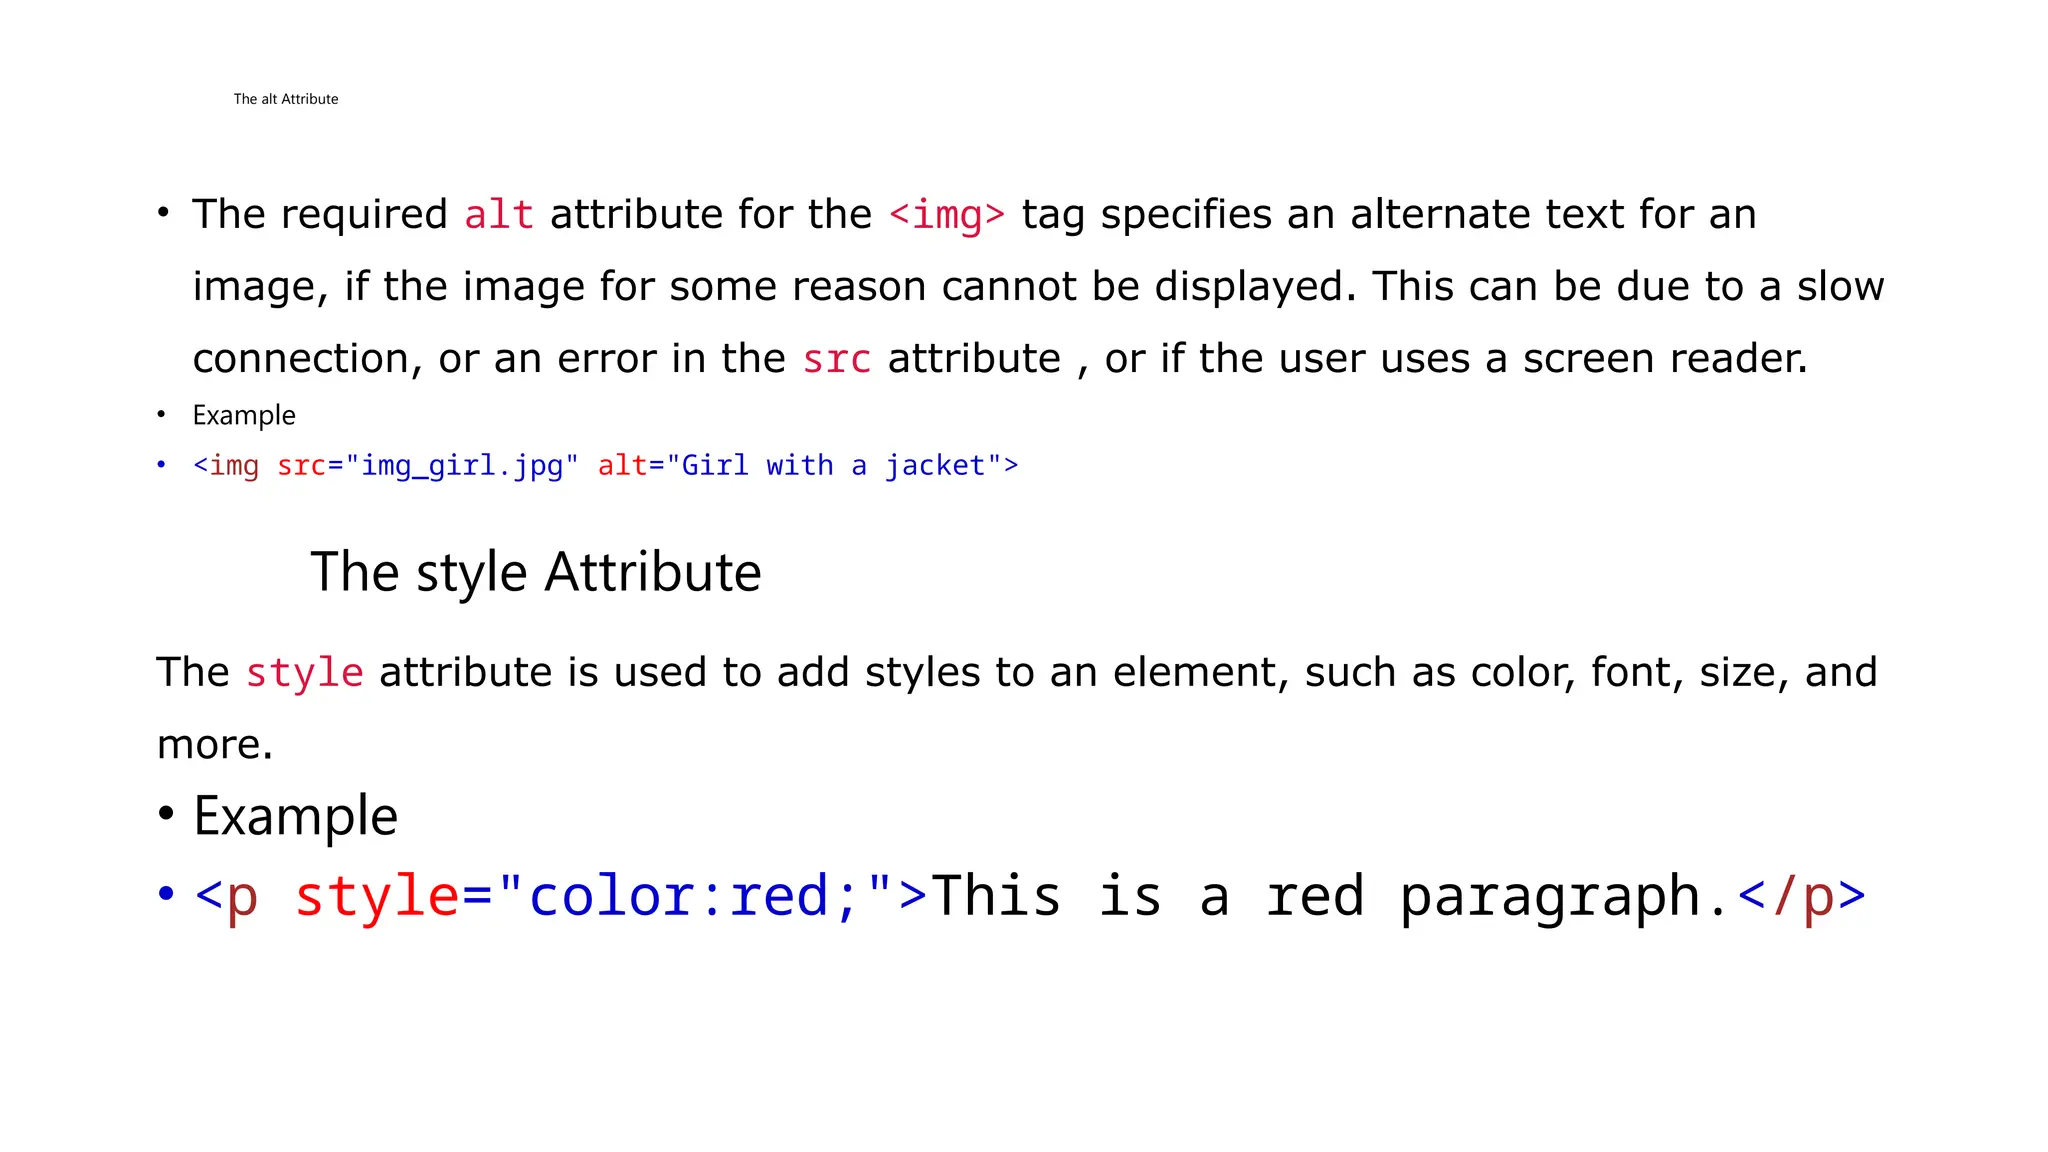
The alt Attribute
•The required alt attribute for the <img> tag specifies an alternate text for an
image, if the image for some reason cannot be displayed. This can be due to a slow
connection, or an error in the src attribute , or if the user uses a screen reader.
• Example
• <img src="img_girl.jpg" alt="Girl with a jacket">
The style Attribute
The style attribute is used to add styles to an element, such as color, font, size, and
more.
• Example
• <p style="color:red;">This is a red paragraph.</p>
17.
The lang Attribute
•You should always include the lang attribute inside the <html> tag, to declare the
language of the Web page. This is meant to assist search engines and browsers.
• The following example specifies English as the language:
• <!DOCTYPE html>
<html lang=">
<body>"en
...
</body>
</html>
Country codes can also be added to the language code in the lang attribute. So,
the first two characters define the language of the HTML page, and the last two
characters define the country.
The following example specifies English as the language and United States as the
country:
18.
• <!DOCTYPE html>
<htmllang="en-US">
<body>
...
</body>
</html
The title Attribute
The title attribute defines some extra information about an element.
<p title=“Welcome to AIT center">This is a paragraph.</p>
Headings Are Important
Search engines use the headings to index the structure and content of your web
pages.
Users often skim a page by its headings. It is important to use headings to
show the document structure.
<h1> headings should be used for main headings, followed by <h2> headings,
then the less important <h3>, and so on.
19.
• Note: UseHTML headings for headings only. Don't use headings to make
text BIG or bold.
Bigger Headings
Each HTML heading has a default size. However, you can specify the size for any
heading with the style attribute, using the CSS font-size property:
• Example
• <h1 style="font-size:60px;">Heading 1</h1>
20.
HTML Paragraphs
• Aparagraph always starts on a new line, and is usually a block of text.
• The HTML <p> element defines a paragraph.
• A paragraph always starts on a new line, and browsers automatically add
some white space (a margin) before and after a paragraph.
Example
<p>This is a paragraph.</p>
<p>This is another paragraph.</p>
HTML Display
• You cannot be sure how HTML will be displayed.
• Large or small screens, and resized windows will create different results.
21.
• With HTML,you cannot change the display by adding extra spaces or extra lines in
your HTML code.
• The browser will automatically remove any extra spaces and lines when the page is
displayed:
• Example
• <p>
This paragraph
contains a lot of lines
in the source code,
but the browser
ignores it.
</p>
<p>
This paragraph
contains a lot of spaces
in the source code,
but the browser
ignores it.
</p>
22.
HTML Horizontal Rules
The<hr> tag defines a thematic break in an HTML page, and is most often
displayed as a horizontal rule.
The <hr> element is used to separate content (or define a change) in an HTML
page:
Example
<h1>This is heading 1</h1>
<p>This is some text.</p>
<hr>
<h2>This is heading 2</h2>
<p>This is some other text.</p>
<hr>
• The <hr> tag is an empty tag, which means that it has no end tag.
23.
HTML Line Breaks
•The HTML <br> element defines a line break.
Use <br> if you want a line break (a new line) without starting a new paragraph:
Example
<p>This is<br>a paragraph<br>with line breaks.</p>
The Poem Problem
This poem will display on a single line:
• Example
• <p>
My Bonnie lies over the ocean.
My Bonnie lies over the sea.
My Bonnie lies over the ocean.
Oh, bring back my Bonnie to me.
</p>
24.
Solution - TheHTML <pre> Element
• The HTML <pre> element defines preformatted text.
The text inside a <pre> element is displayed in a fixed-width font (usually Courier), and it preserves both
spaces and line breaks:
• Example
• <pre>
My Bonnie lies over the ocean.
My Bonnie lies over the sea.
My Bonnie lies over the ocean.
Oh, bring back my Bonnie to me.
</pre>
25.
The HTML StyleAttribute
• Setting the style of an HTML element, can be done with the style attribute.
The HTML style attribute has the following syntax:
• <tagname style="property:value;">
• The property is a CSS property. The value is a CSS value.
Background Color
• The CSS background-color property defines the background color for an
HTML element.
26.
Example
• Set thebackground color for a page to powderblue:
<body style="background-color:powderblue;">
<h1>This is a heading</h1>
<p>This is a paragraph.</p>
</body>
• Example
• Set background color for two different elements:
• <body>
<h1 style="background-color:powderblue;">This is a heading</h1>
<p style="background-color:tomato;">This is a paragraph.</p>
</body>
27.
HTML Formatting Elements
•Formatting elements were designed to display special types of text:
<b> - Bold text
<strong> - Important text
<i> - Italic text
<em> - Emphasized text
<mark> - Marked text
<small> - Smaller text
<del> - Deleted text
<ins> - Inserted text
<sub> - Subscript text
<sup> - Superscript text
28.
HTML Text FormattingElements
Tag Description
<b> Defines bold text
<em> Defines emphasized text
<i> Defines a part of text in an alternate voice or mood
<small> Defines smaller text
<strong> Defines important text
<sub> Defines subscripted text
<sup> Defines superscripted text
<ins> Defines inserted text
<del> Defines deleted text
<mark> Defines marked/highlighted text
29.
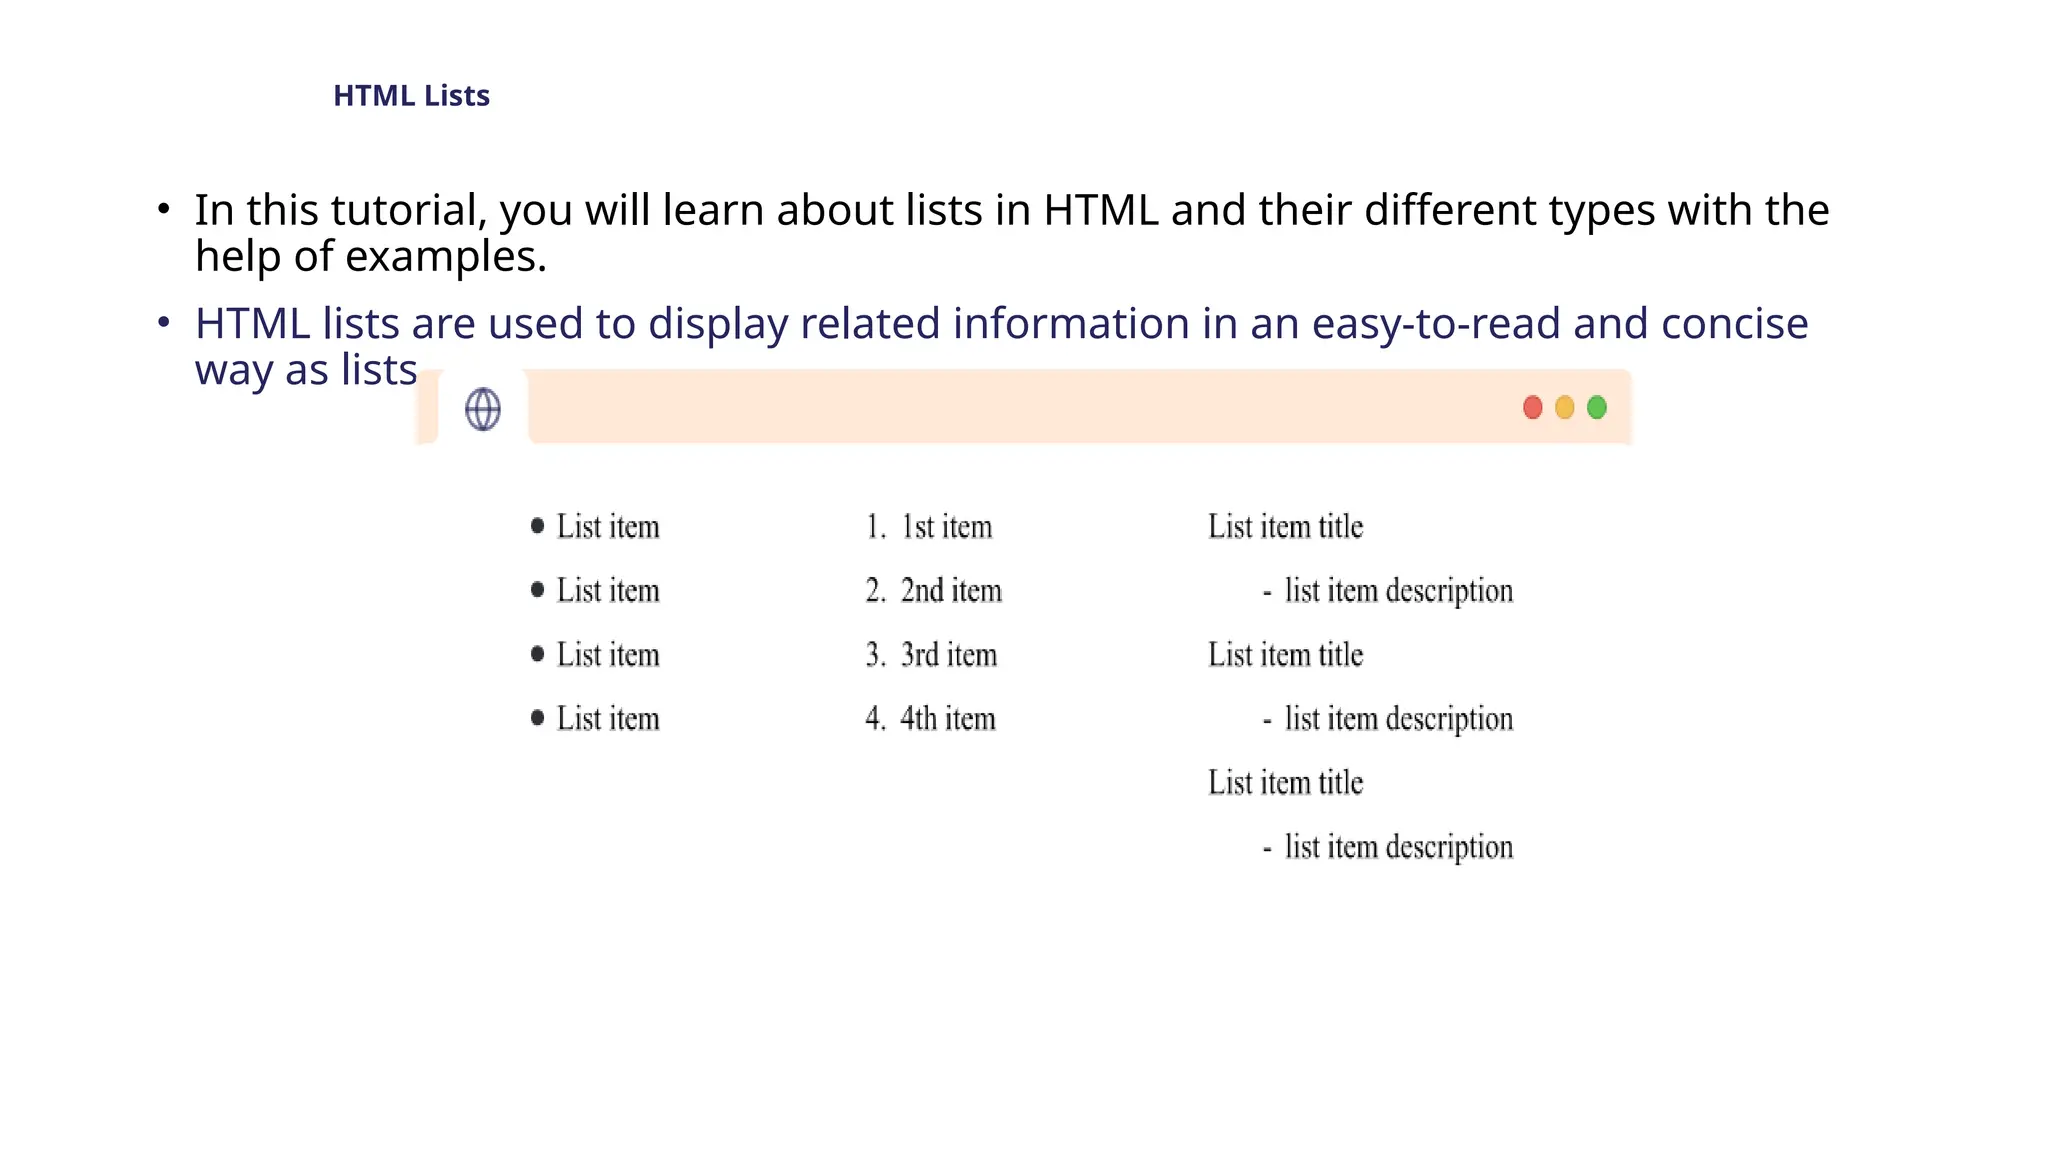
HTML Lists
• Inthis tutorial, you will learn about lists in HTML and their different types with the
help of examples.
• HTML lists are used to display related information in an easy-to-read and concise
way as lists.
30.
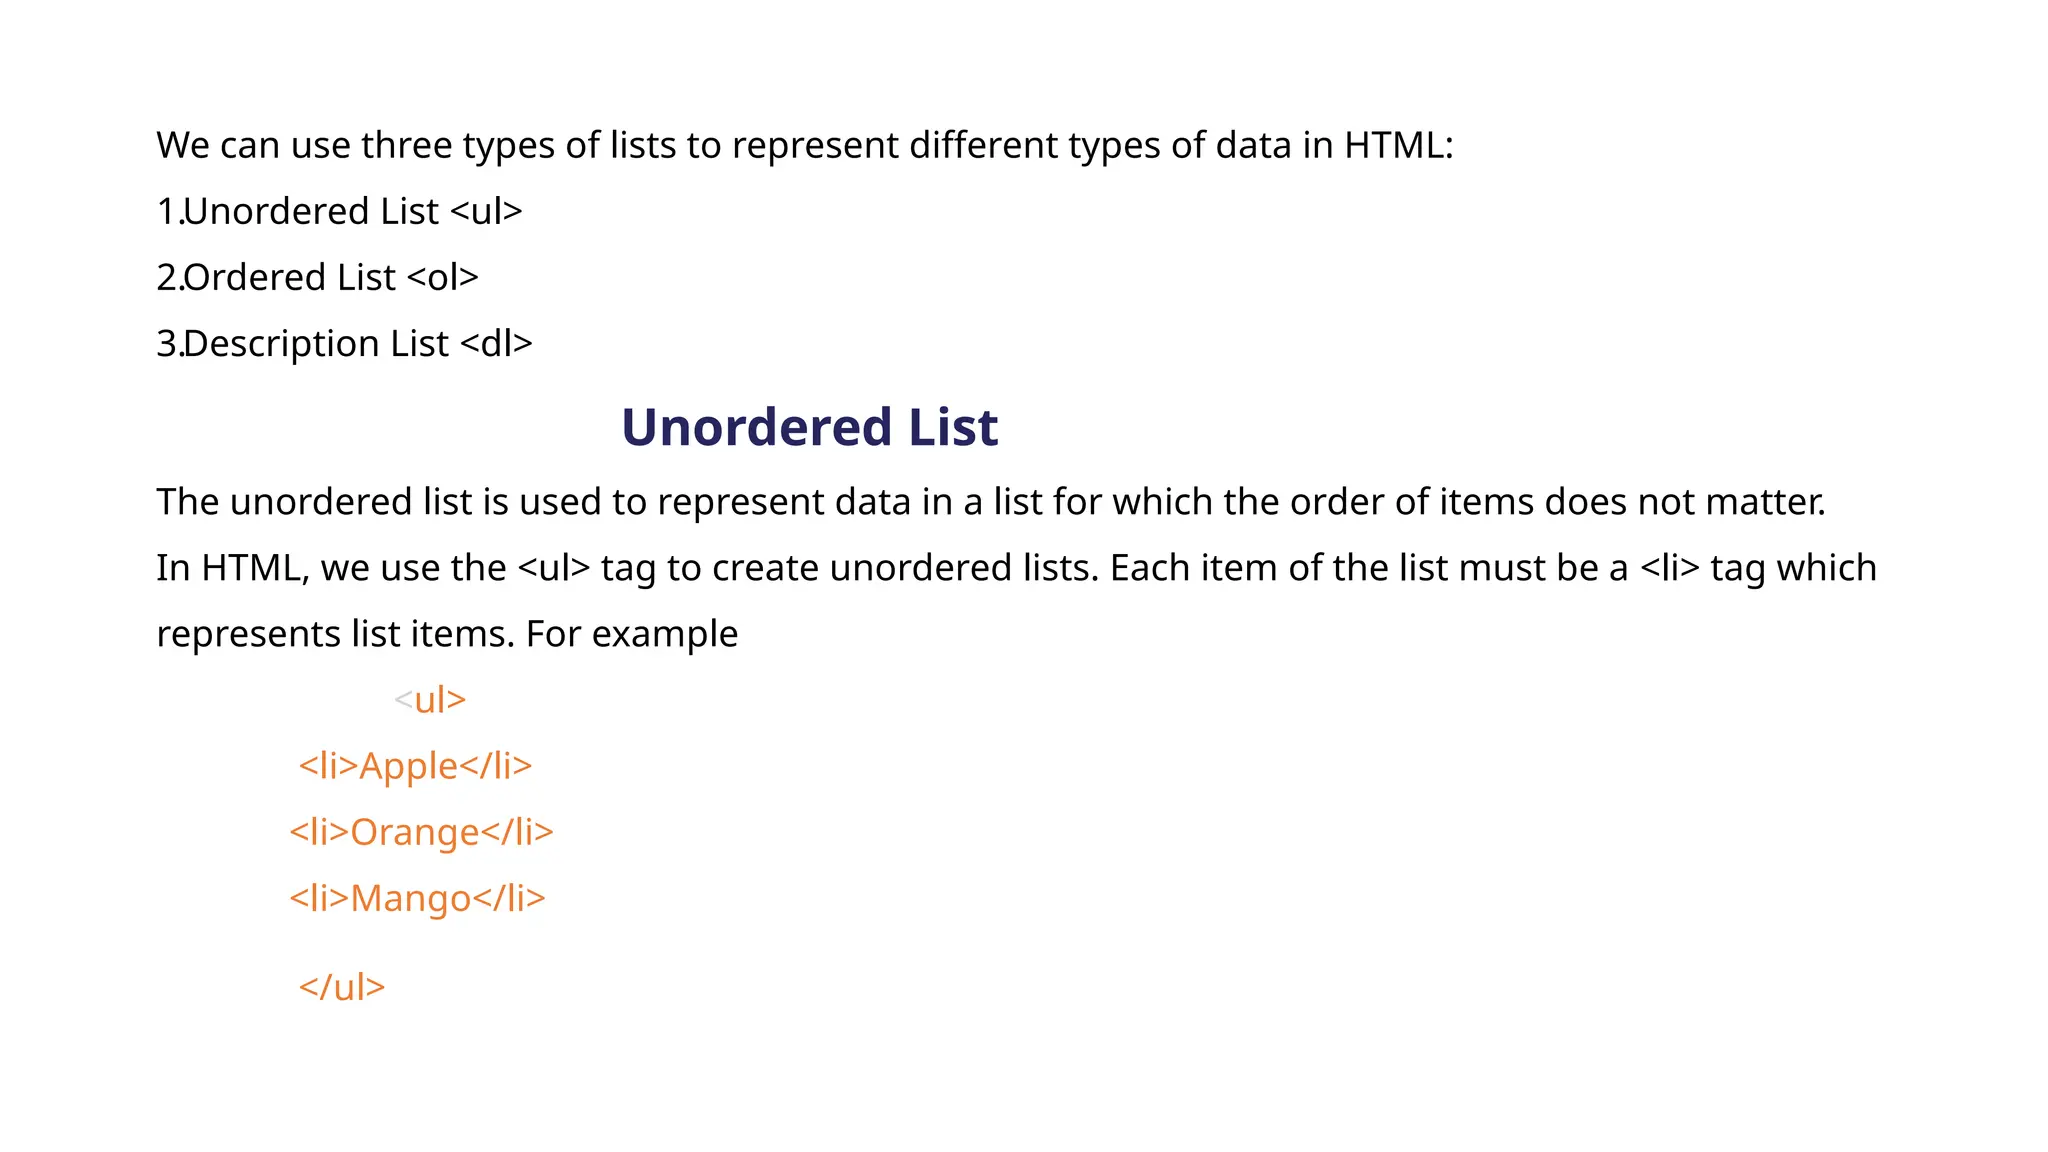
We can usethree types of lists to represent different types of data in HTML:
1.Unordered List <ul>
2.Ordered List <ol>
3.Description List <dl>
Unordered List
The unordered list is used to represent data in a list for which the order of items does not matter.
In HTML, we use the <ul> tag to create unordered lists. Each item of the list must be a <li> tag which
represents list items. For example
<ul>
<li>Apple</li>
<li>Orange</li>
<li>Mango</li>
</ul>
31.
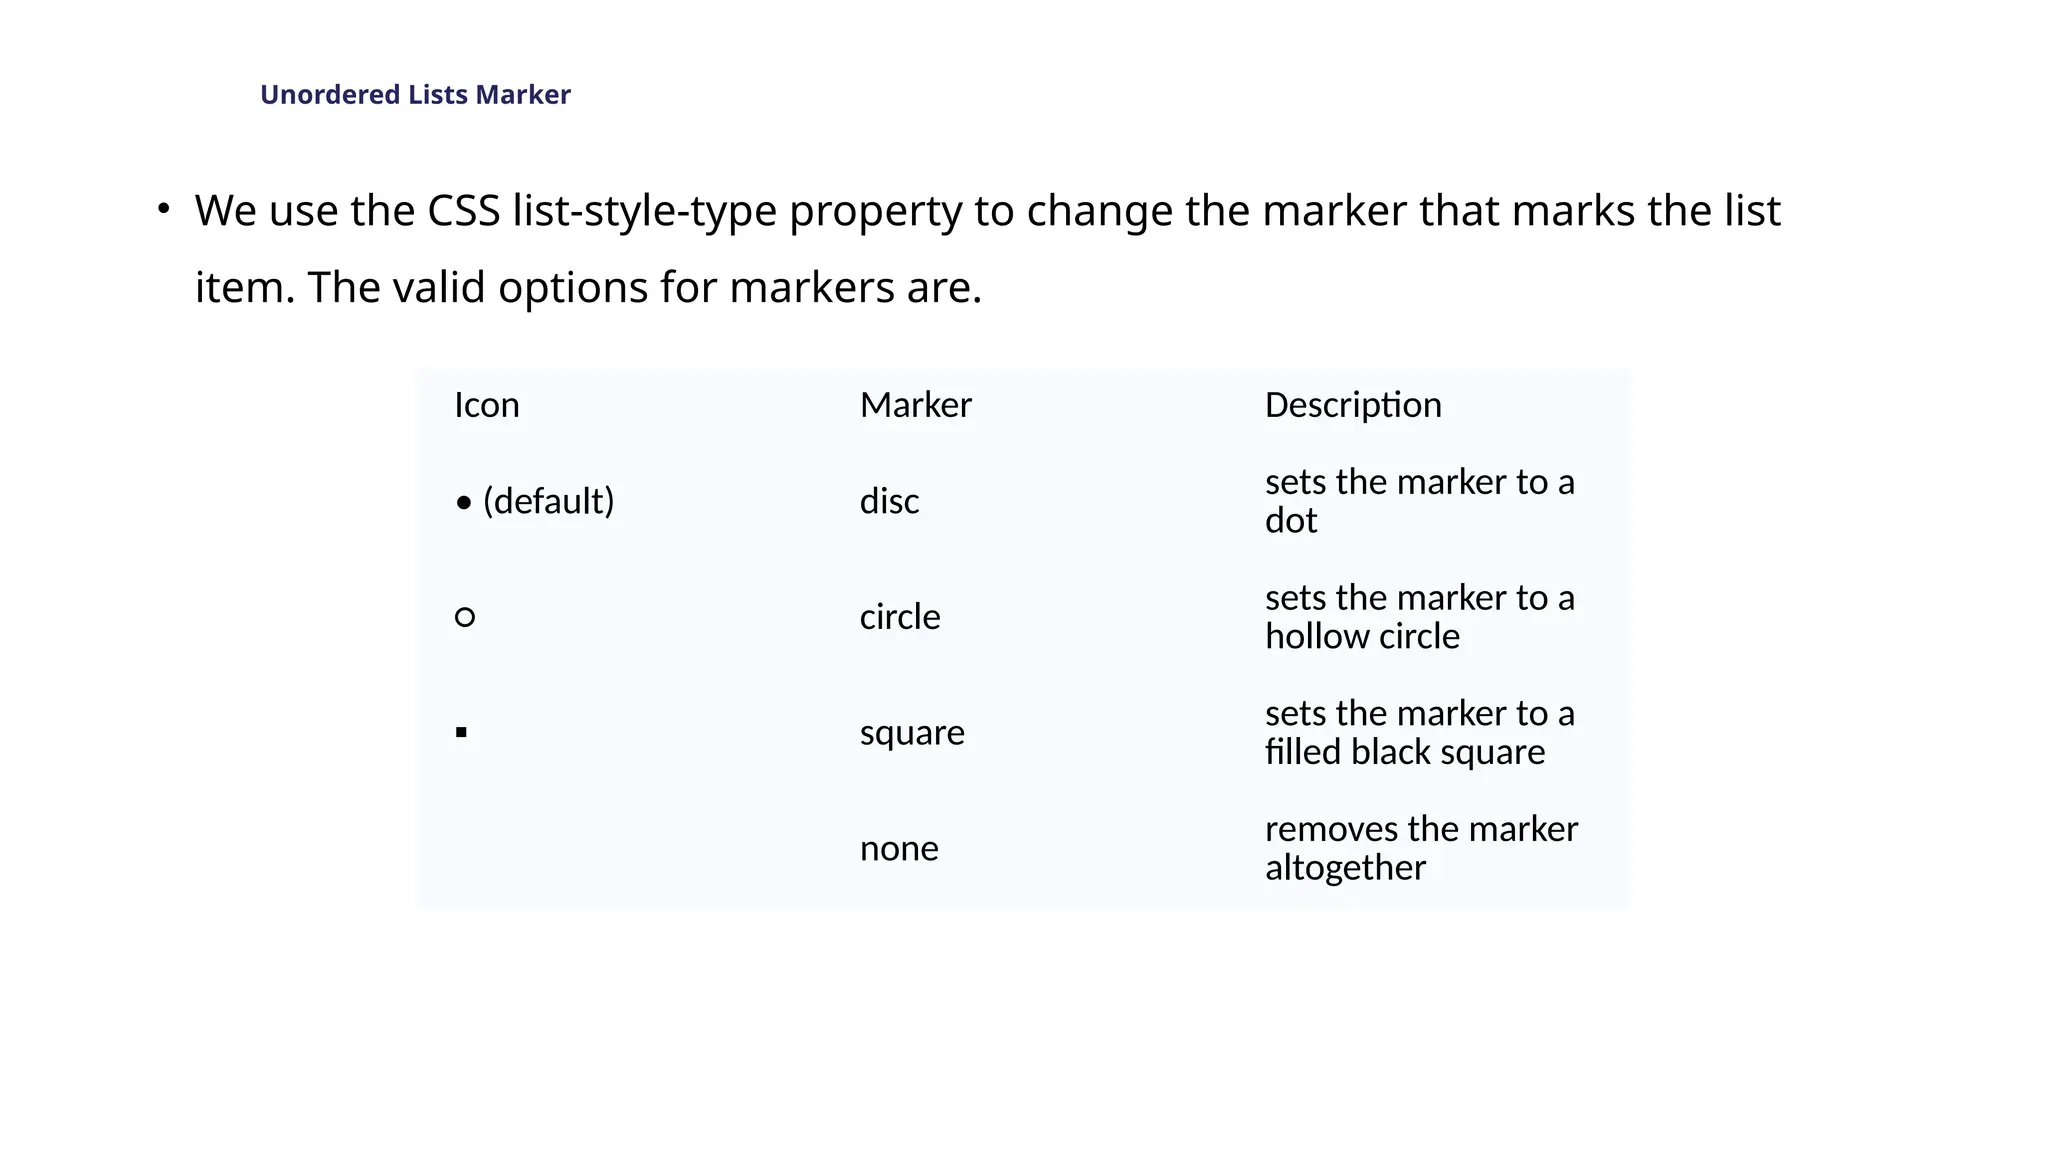
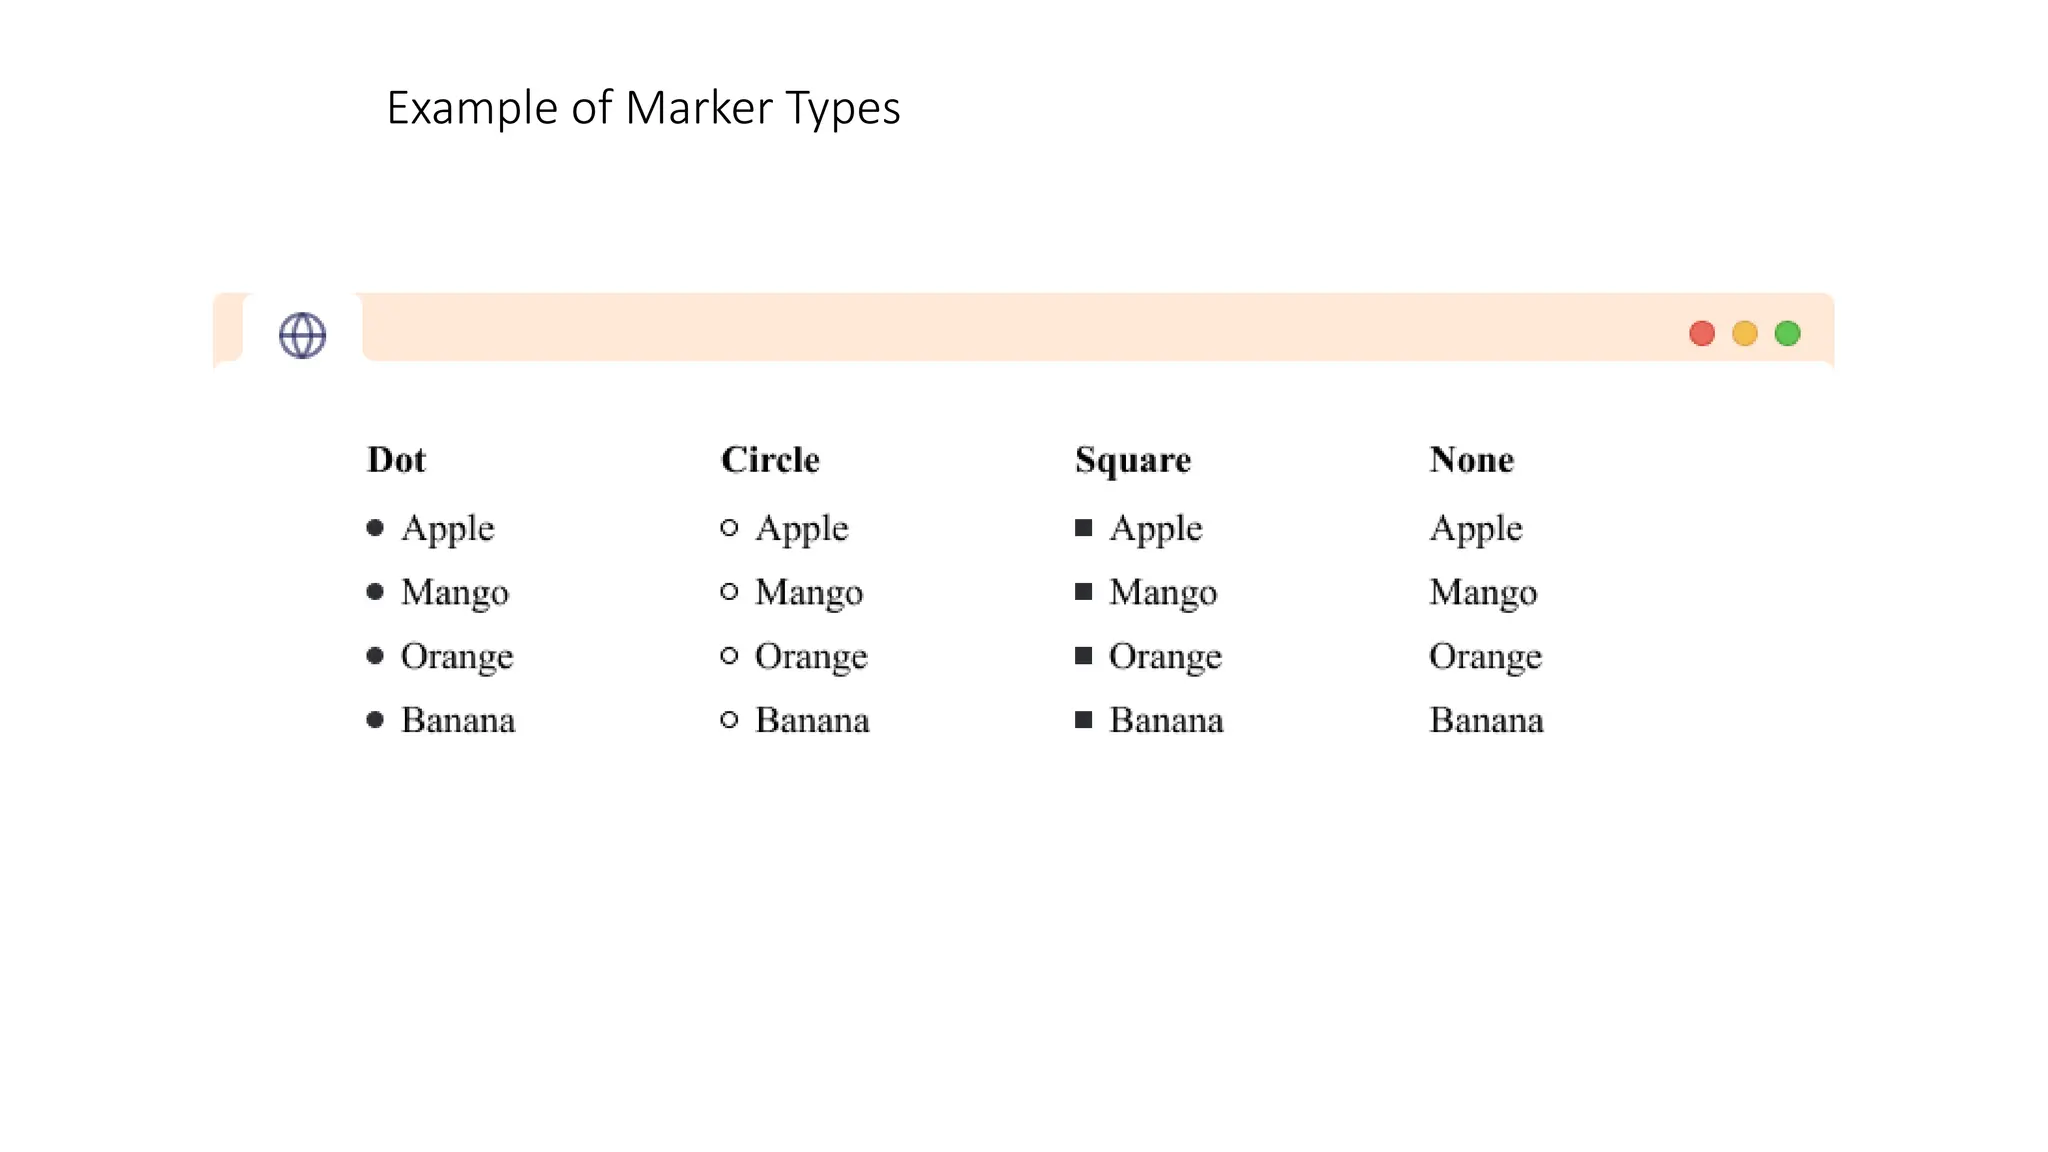
• Each itemof the list is enclosed inside the <li> tag and they
are represented by the dot bullet point symbol.
By default, the symbol to represent an unordered list in
HTML is a dot bullet point, however, we can change them as
per our choice.
32.
Unordered Lists Marker
•We use the CSS list-style-type property to change the marker that marks the list
item. The valid options for markers are.
Icon Marker Description
• (default) disc
sets the marker to a
dot
○ circle
sets the marker to a
hollow circle
▪ square
sets the marker to a
filled black square
none
removes the marker
altogether
Nesting Lists
• InHTML, we can create a nested list by adding one list inside another.
• For example,
• <ul>
• <li>
• Coffee
• <ul>
• <li>Cappuccino</li>
• <li>Americano</li>
• <li>Espresso</li>
• </ul>
• </li>
• <li>
• Tea
• <ul>
• <li>Milk Tea</li>
• <li>Black Tea</li>
• </ul>
• </li>
• <li>Milk</li>
• </ul>
35.
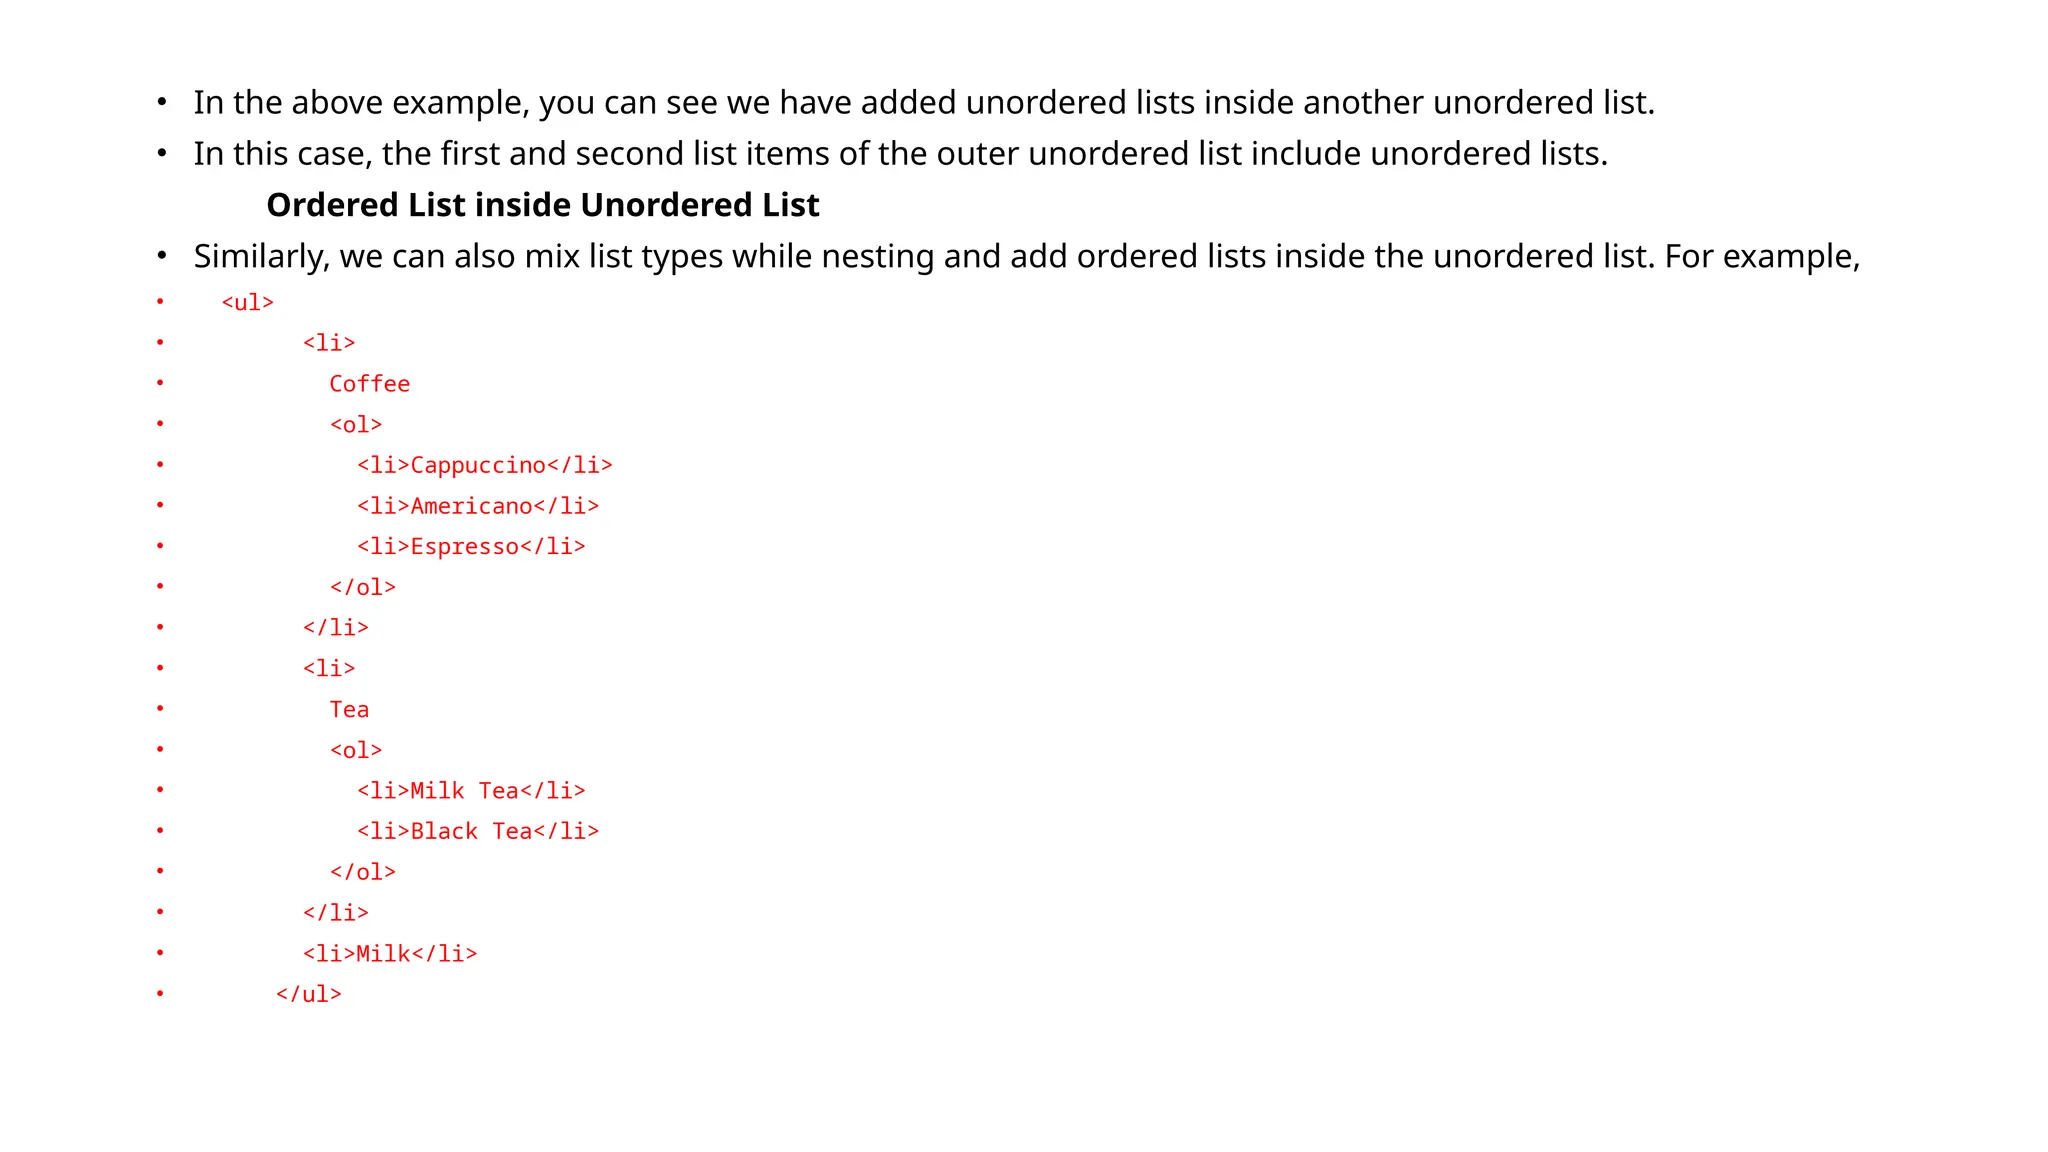
• In theabove example, you can see we have added unordered lists inside another unordered list.
• In this case, the first and second list items of the outer unordered list include unordered lists.
Ordered List inside Unordered List
• Similarly, we can also mix list types while nesting and add ordered lists inside the unordered list. For example,
• <ul>
• <li>
• Coffee
• <ol>
• <li>Cappuccino</li>
• <li>Americano</li>
• <li>Espresso</li>
• </ol>
• </li>
• <li>
• Tea
• <ol>
• <li>Milk Tea</li>
• <li>Black Tea</li>
• </ol>
• </li>
• <li>Milk</li>
• </ul>
36.
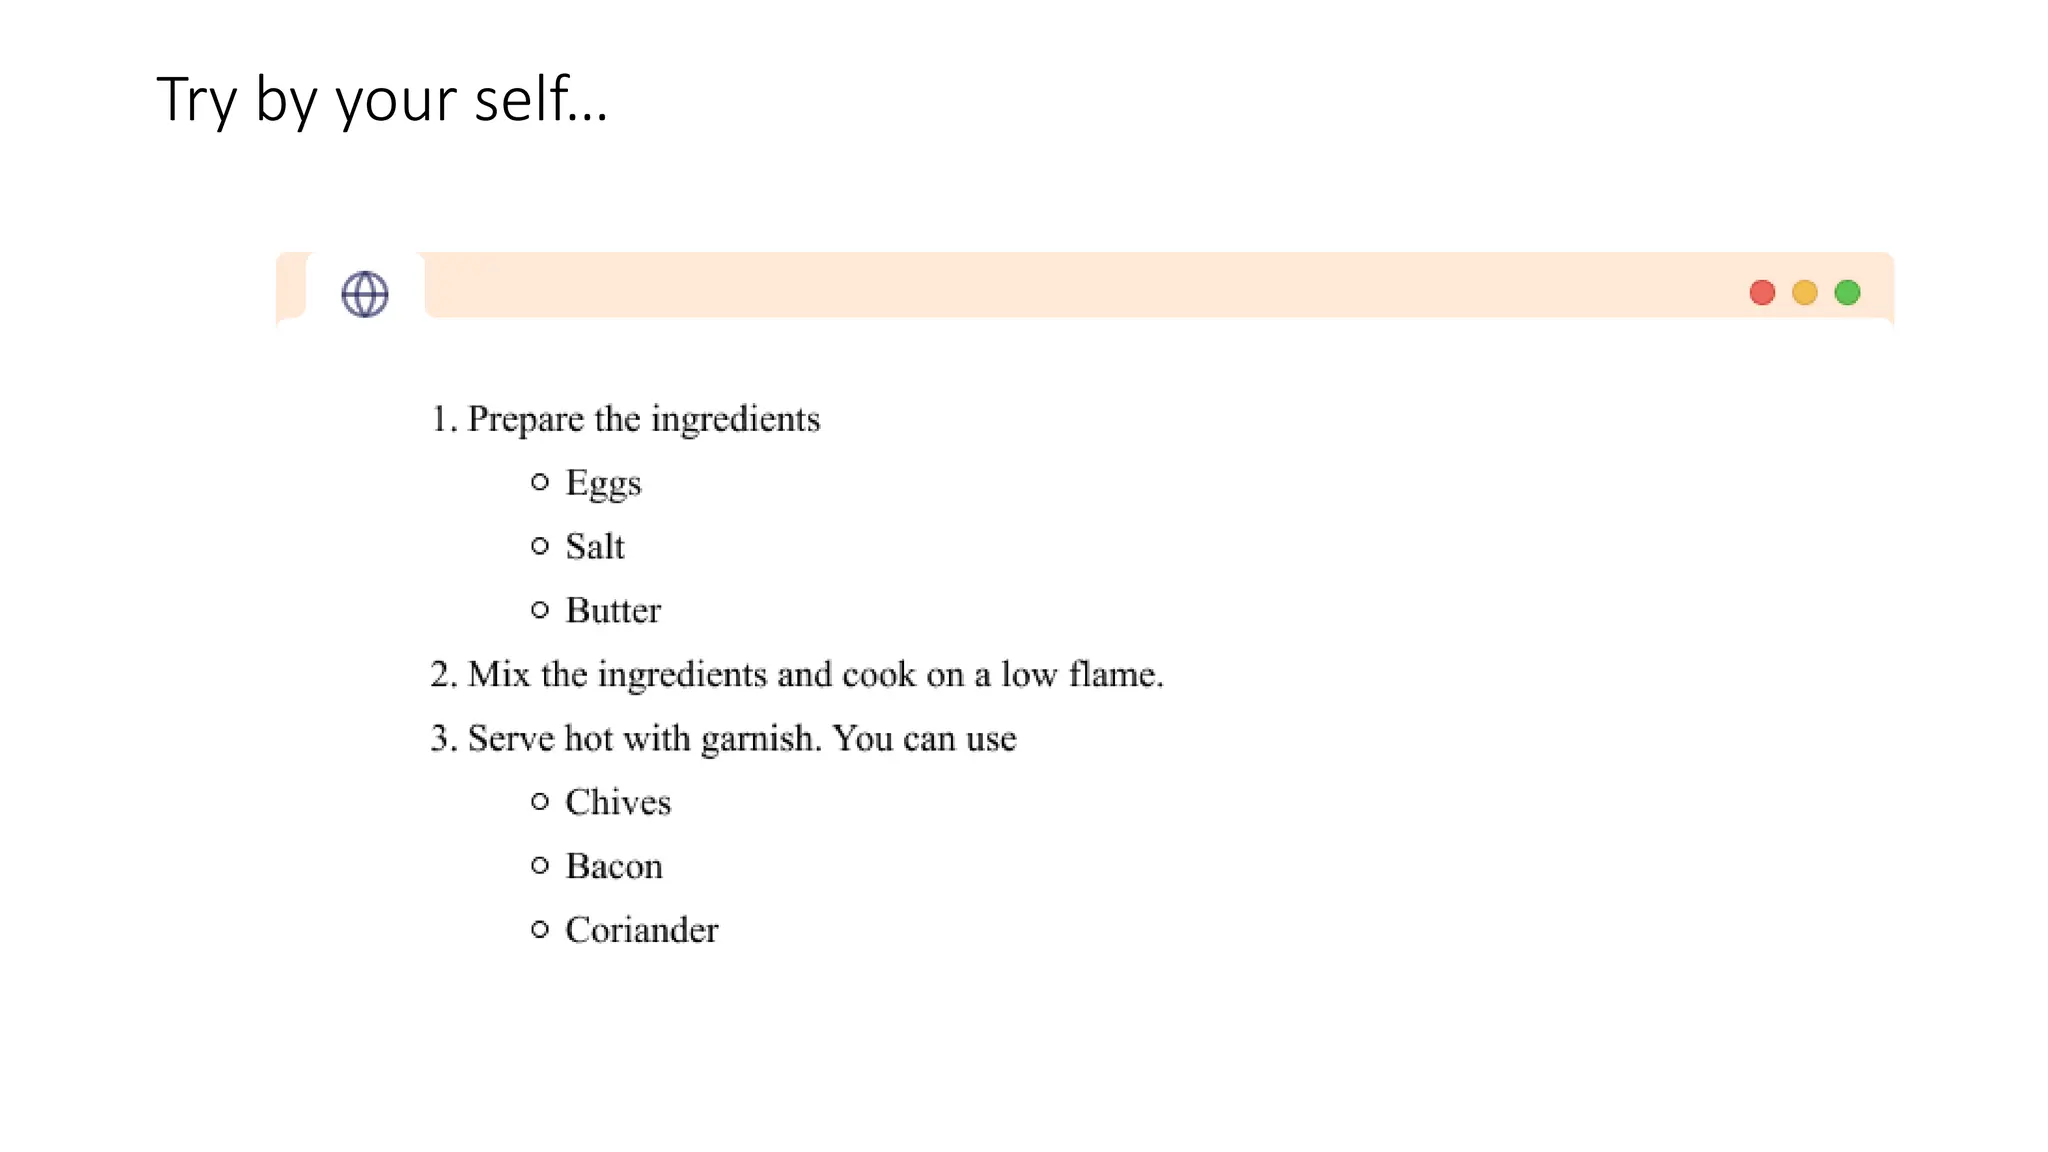
Multi-level Nesting ofUnordered List
• In our examples, we are nesting the list up to a single level, however, we can also
nest lists up to multiple levels. This might be important while creating lists like Table
of Content.
• Try Example of the next page by your self…
38.
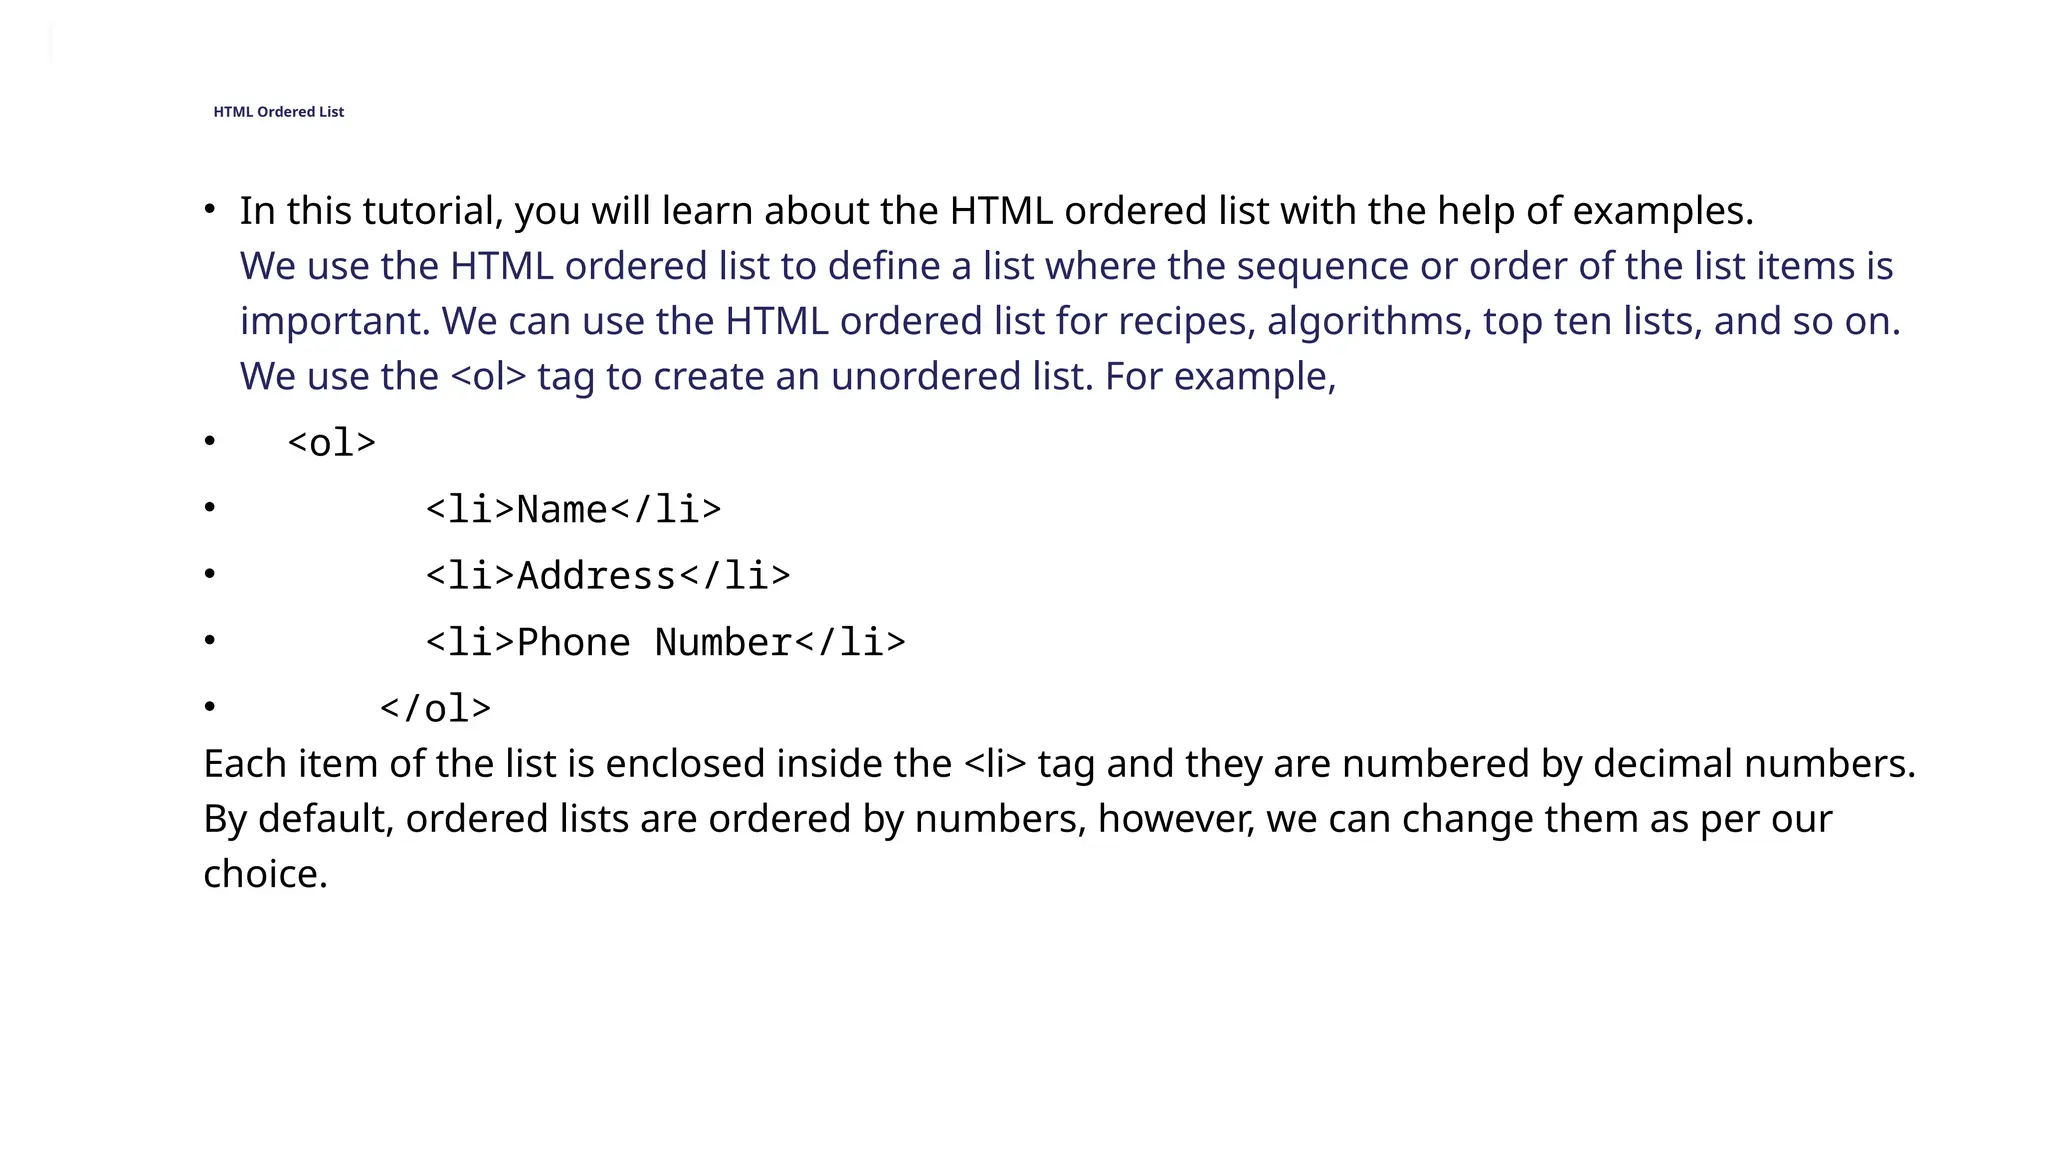
HTML Ordered List
•In this tutorial, you will learn about the HTML ordered list with the help of examples.
We use the HTML ordered list to define a list where the sequence or order of the list items is
important. We can use the HTML ordered list for recipes, algorithms, top ten lists, and so on.
We use the <ol> tag to create an unordered list. For example,
• <ol>
• <li>Name</li>
• <li>Address</li>
• <li>Phone Number</li>
• </ol>
Each item of the list is enclosed inside the <li> tag and they are numbered by decimal numbers.
By default, ordered lists are ordered by numbers, however, we can change them as per our
choice.
39.
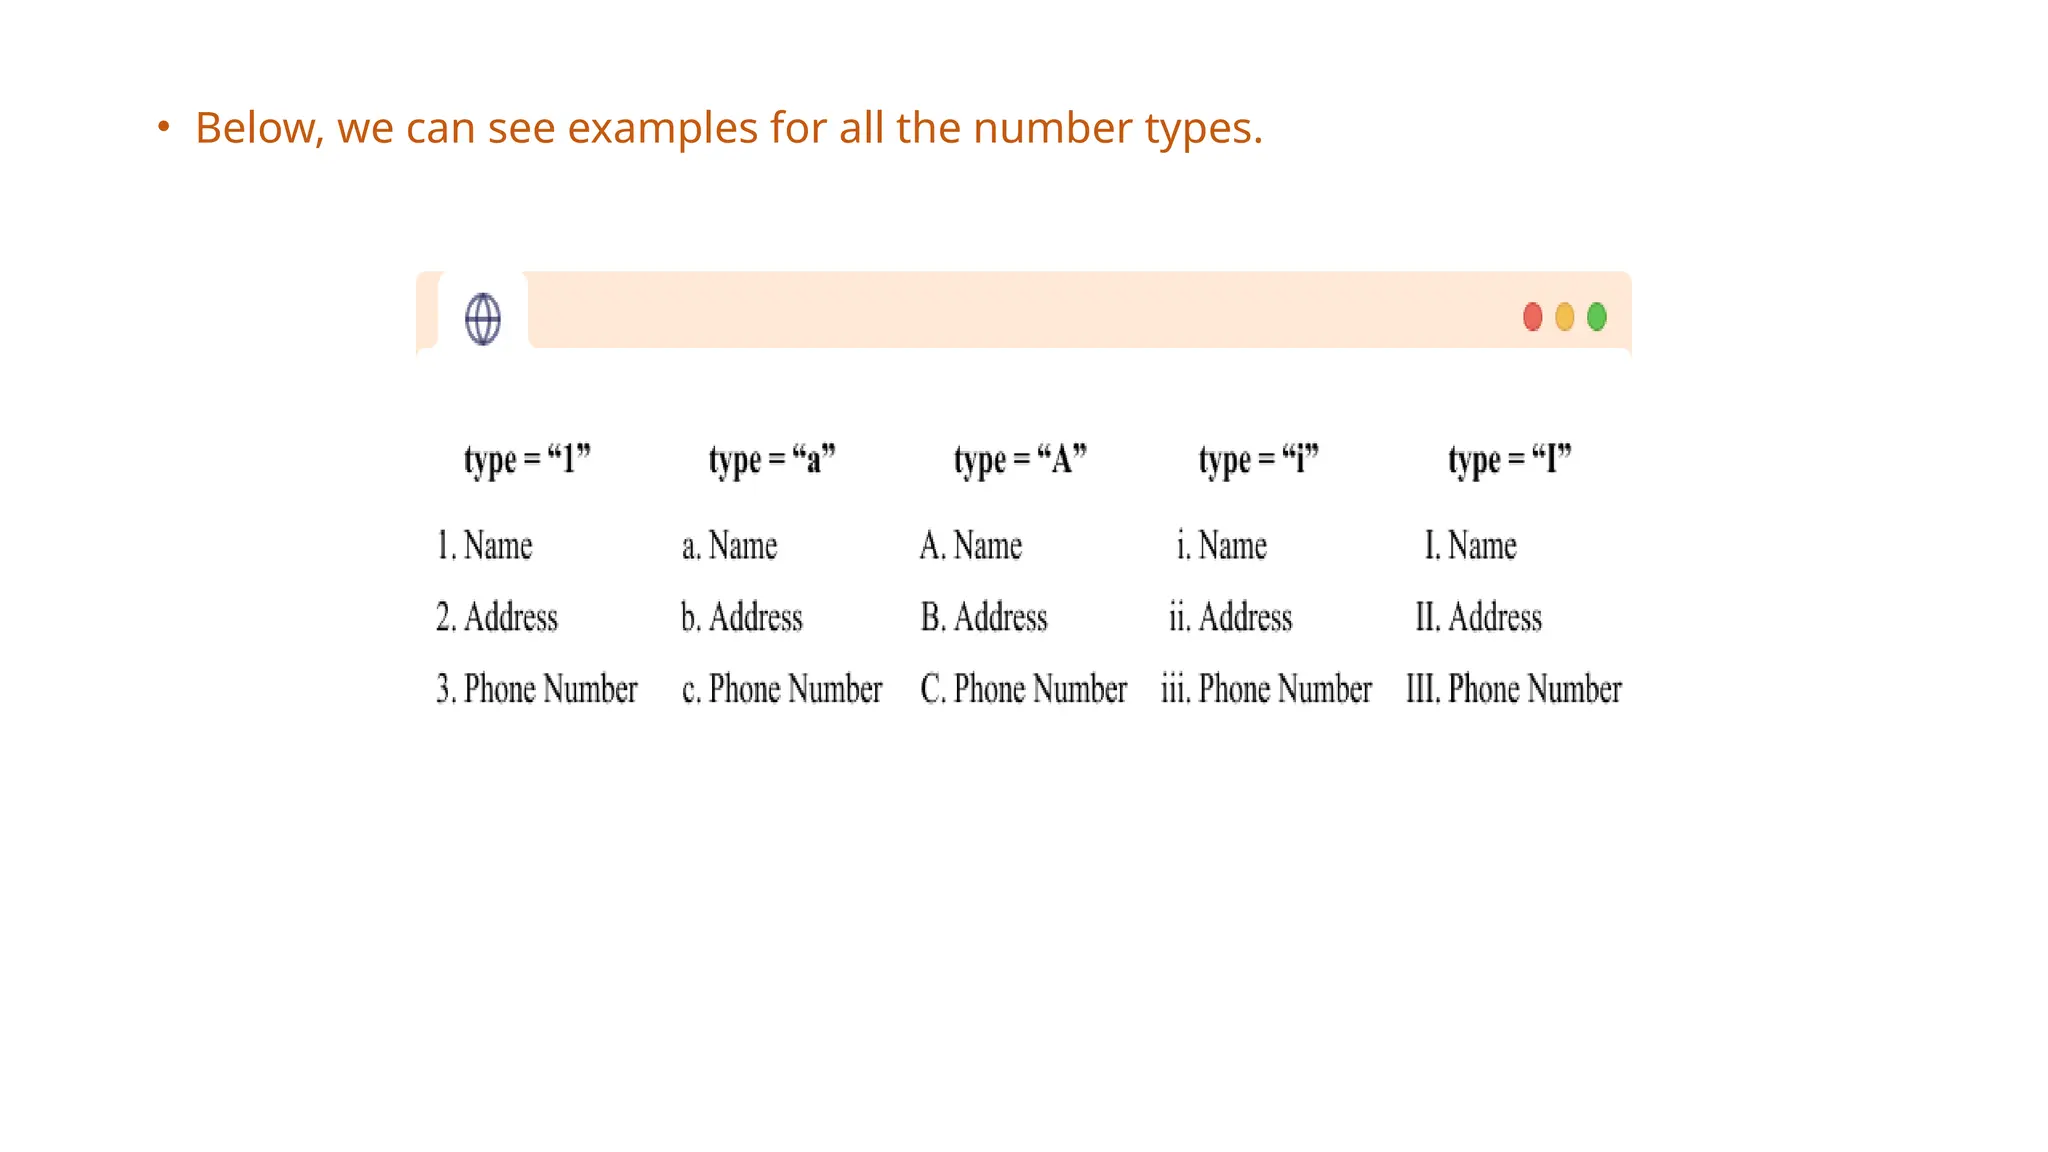
• Below, wecan see examples for all the number types.
40.
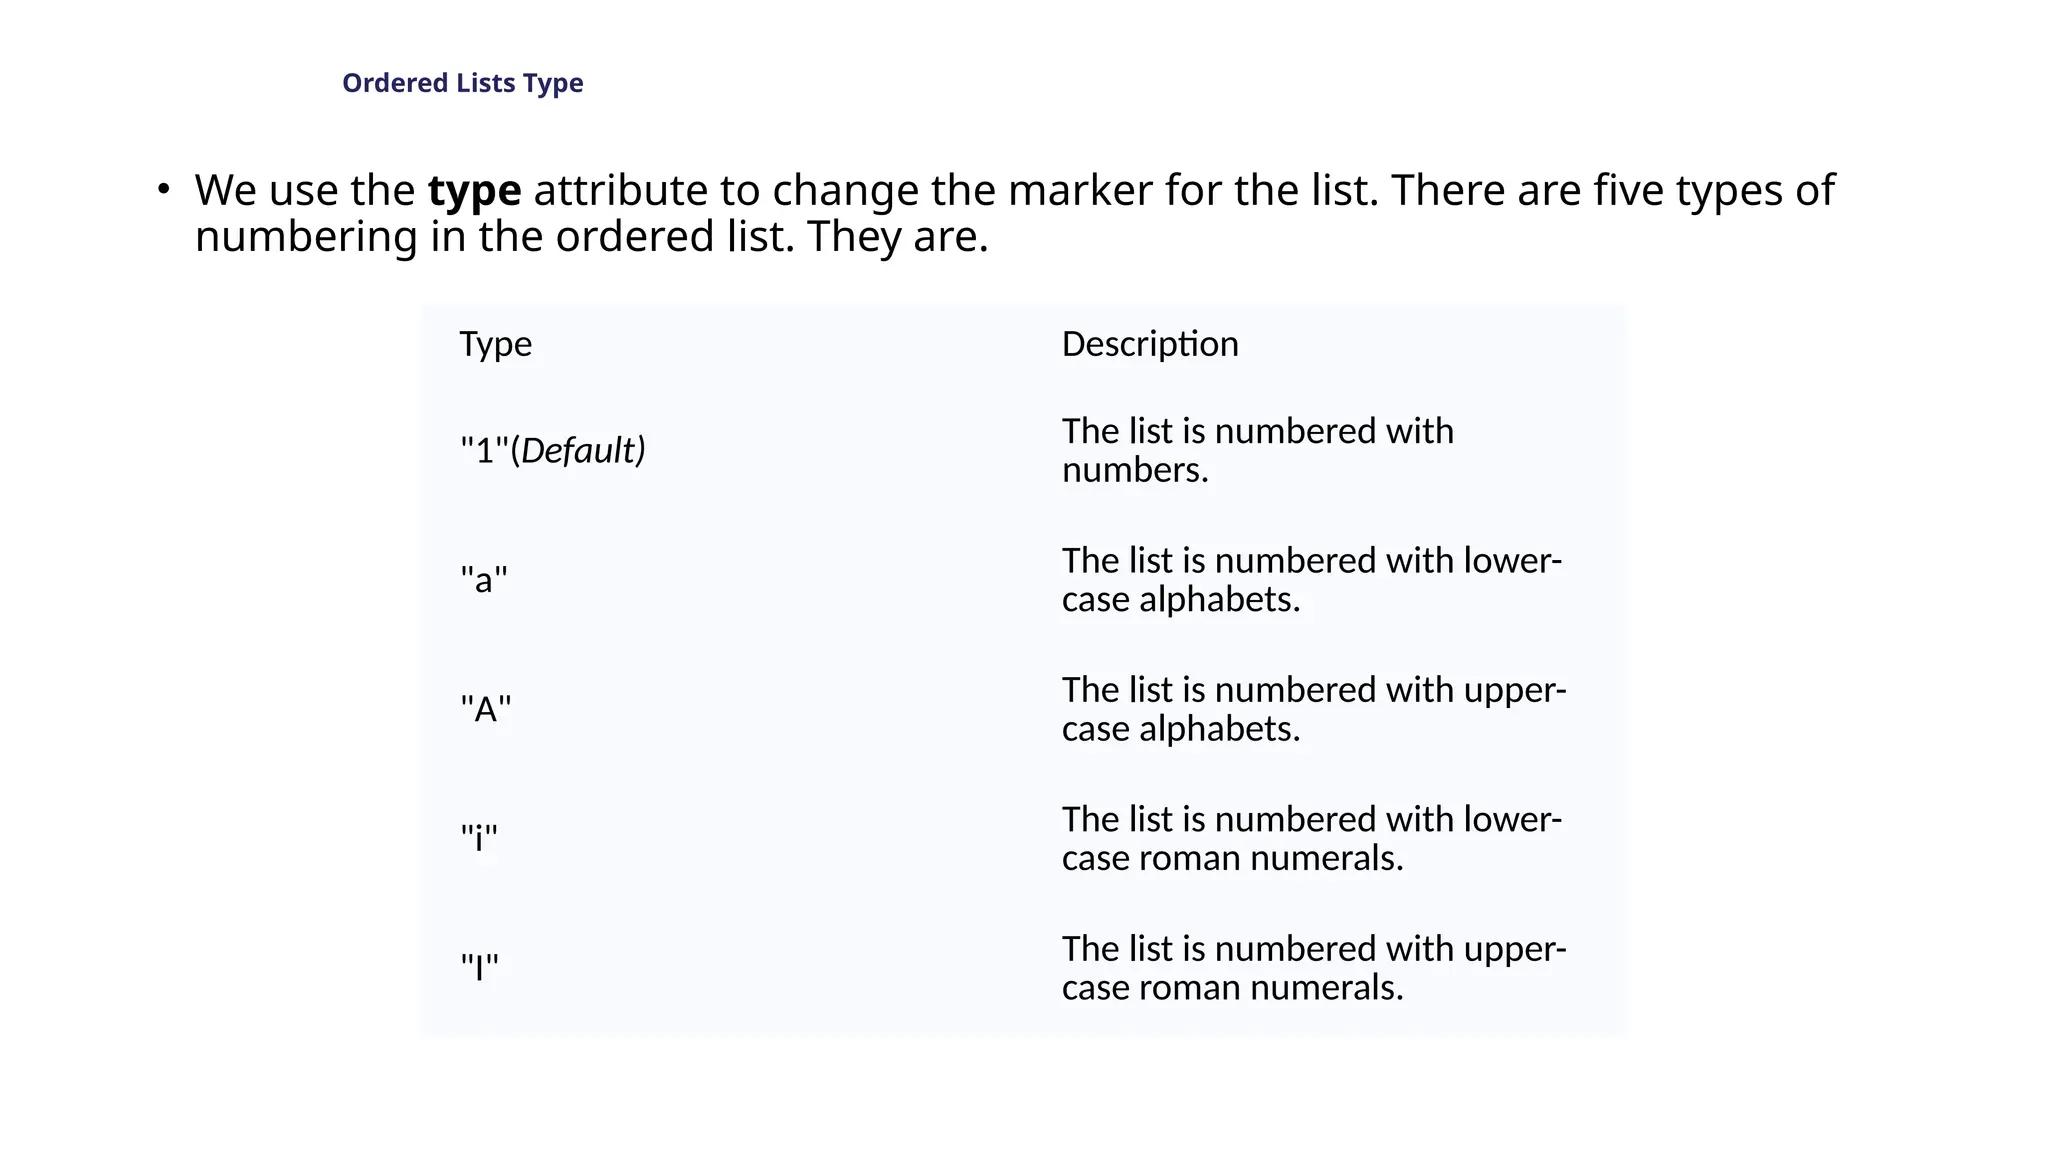
Ordered Lists Type
•We use the type attribute to change the marker for the list. There are five types of
numbering in the ordered list. They are.
Type Description
"1"(Default)
The list is numbered with
numbers.
"a"
The list is numbered with lower-
case alphabets.
"A"
The list is numbered with upper-
case alphabets.
"i"
The list is numbered with lower-
case roman numerals.
"I"
The list is numbered with upper-
case roman numerals.
41.
start Attribute
• Weuse the start attribute to change the starting point for the numbering of the list. For
example,
<ol start='5’>
<li>Harry</li>
<li>Ron</li>
<li>Sam</li>
</ol>
This attribute also works with other types. For example,
• <ol type="a" start='5’>
<li>Harry</li>
<li>Ron</li>
<li>Sam</li>
</ol>
42.
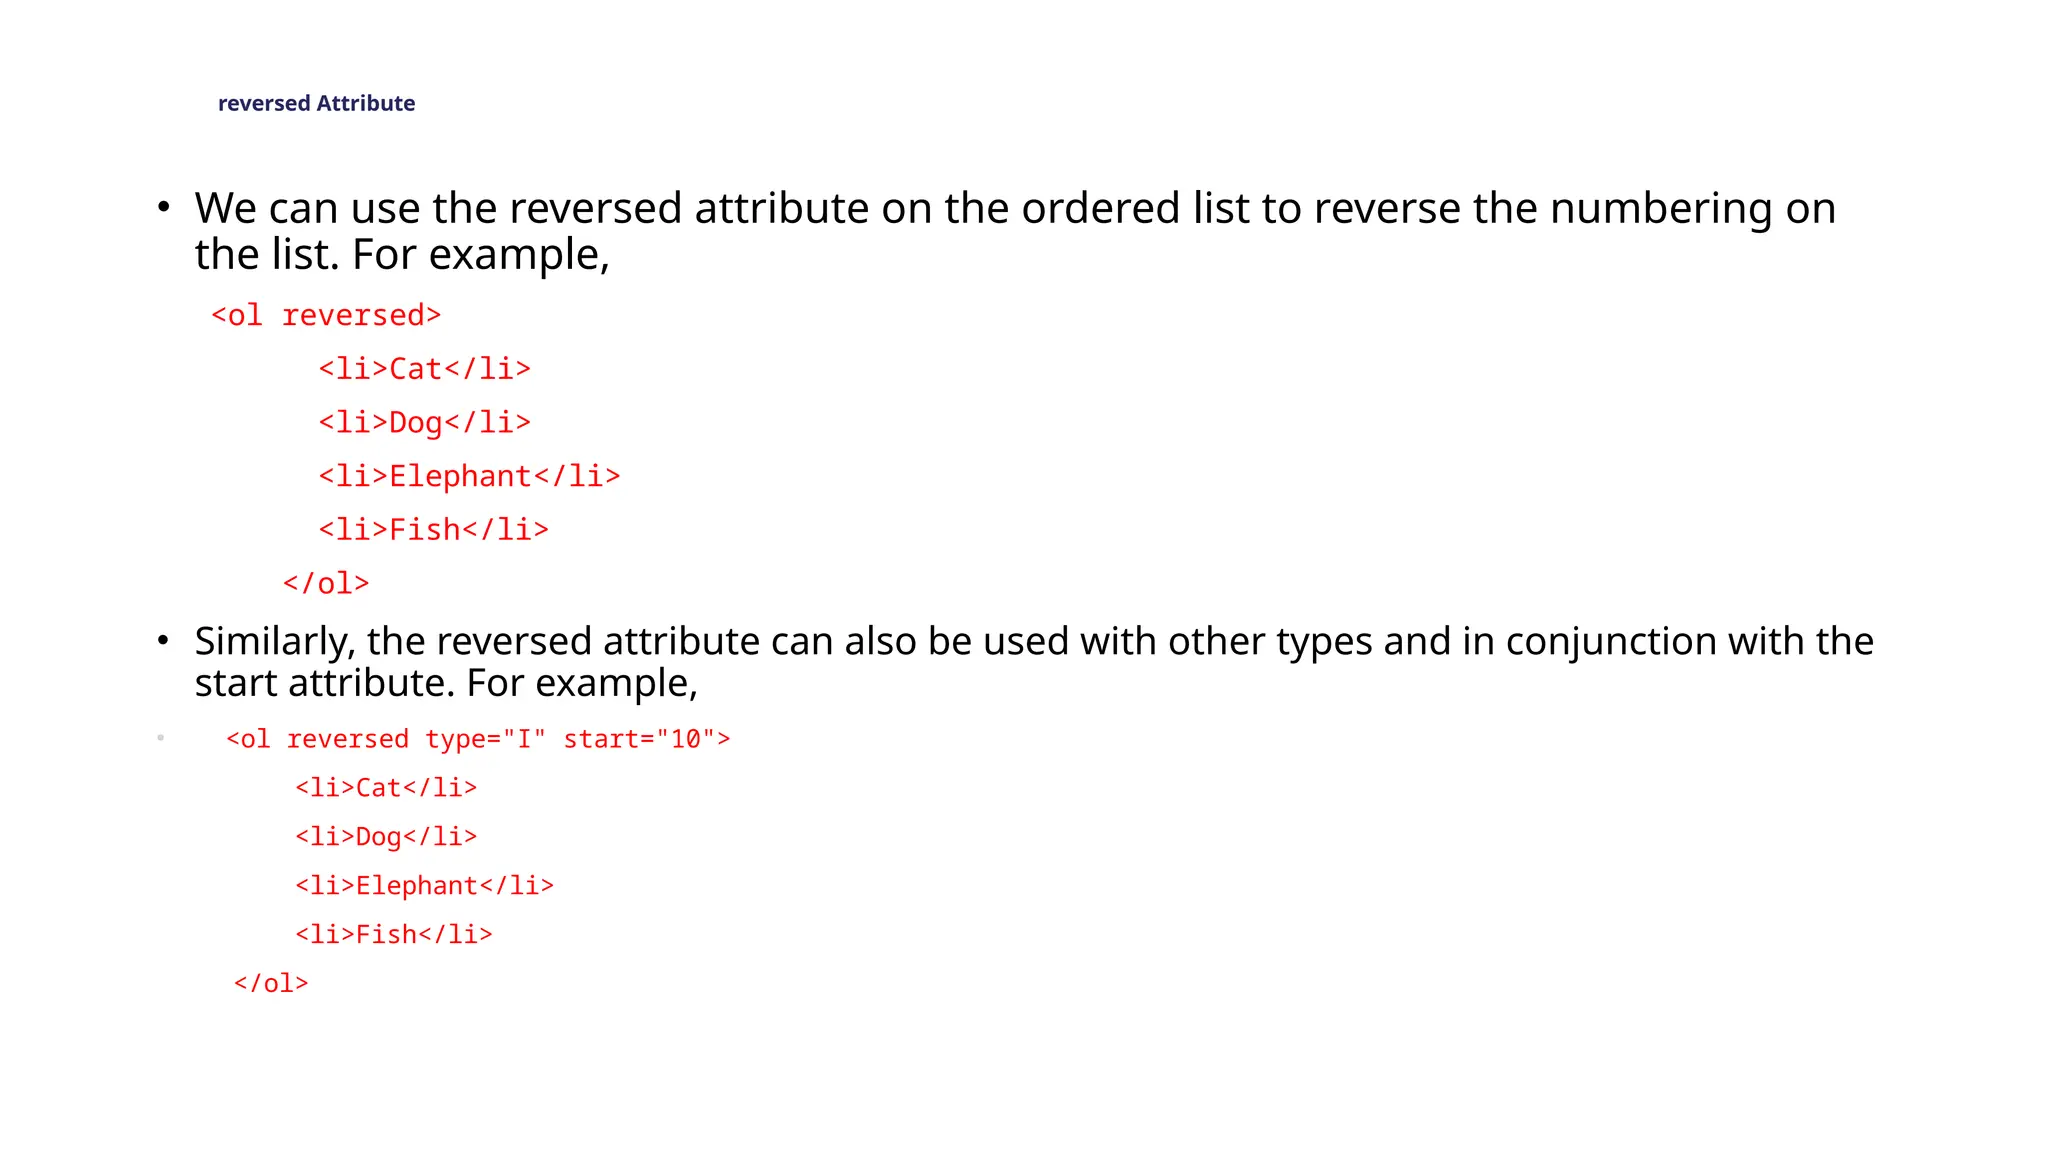
reversed Attribute
• Wecan use the reversed attribute on the ordered list to reverse the numbering on
the list. For example,
<ol reversed>
<li>Cat</li>
<li>Dog</li>
<li>Elephant</li>
<li>Fish</li>
</ol>
• Similarly, the reversed attribute can also be used with other types and in conjunction with the
start attribute. For example,
• <ol reversed type="I" start="10">
<li>Cat</li>
<li>Dog</li>
<li>Elephant</li>
<li>Fish</li>
</ol>
43.
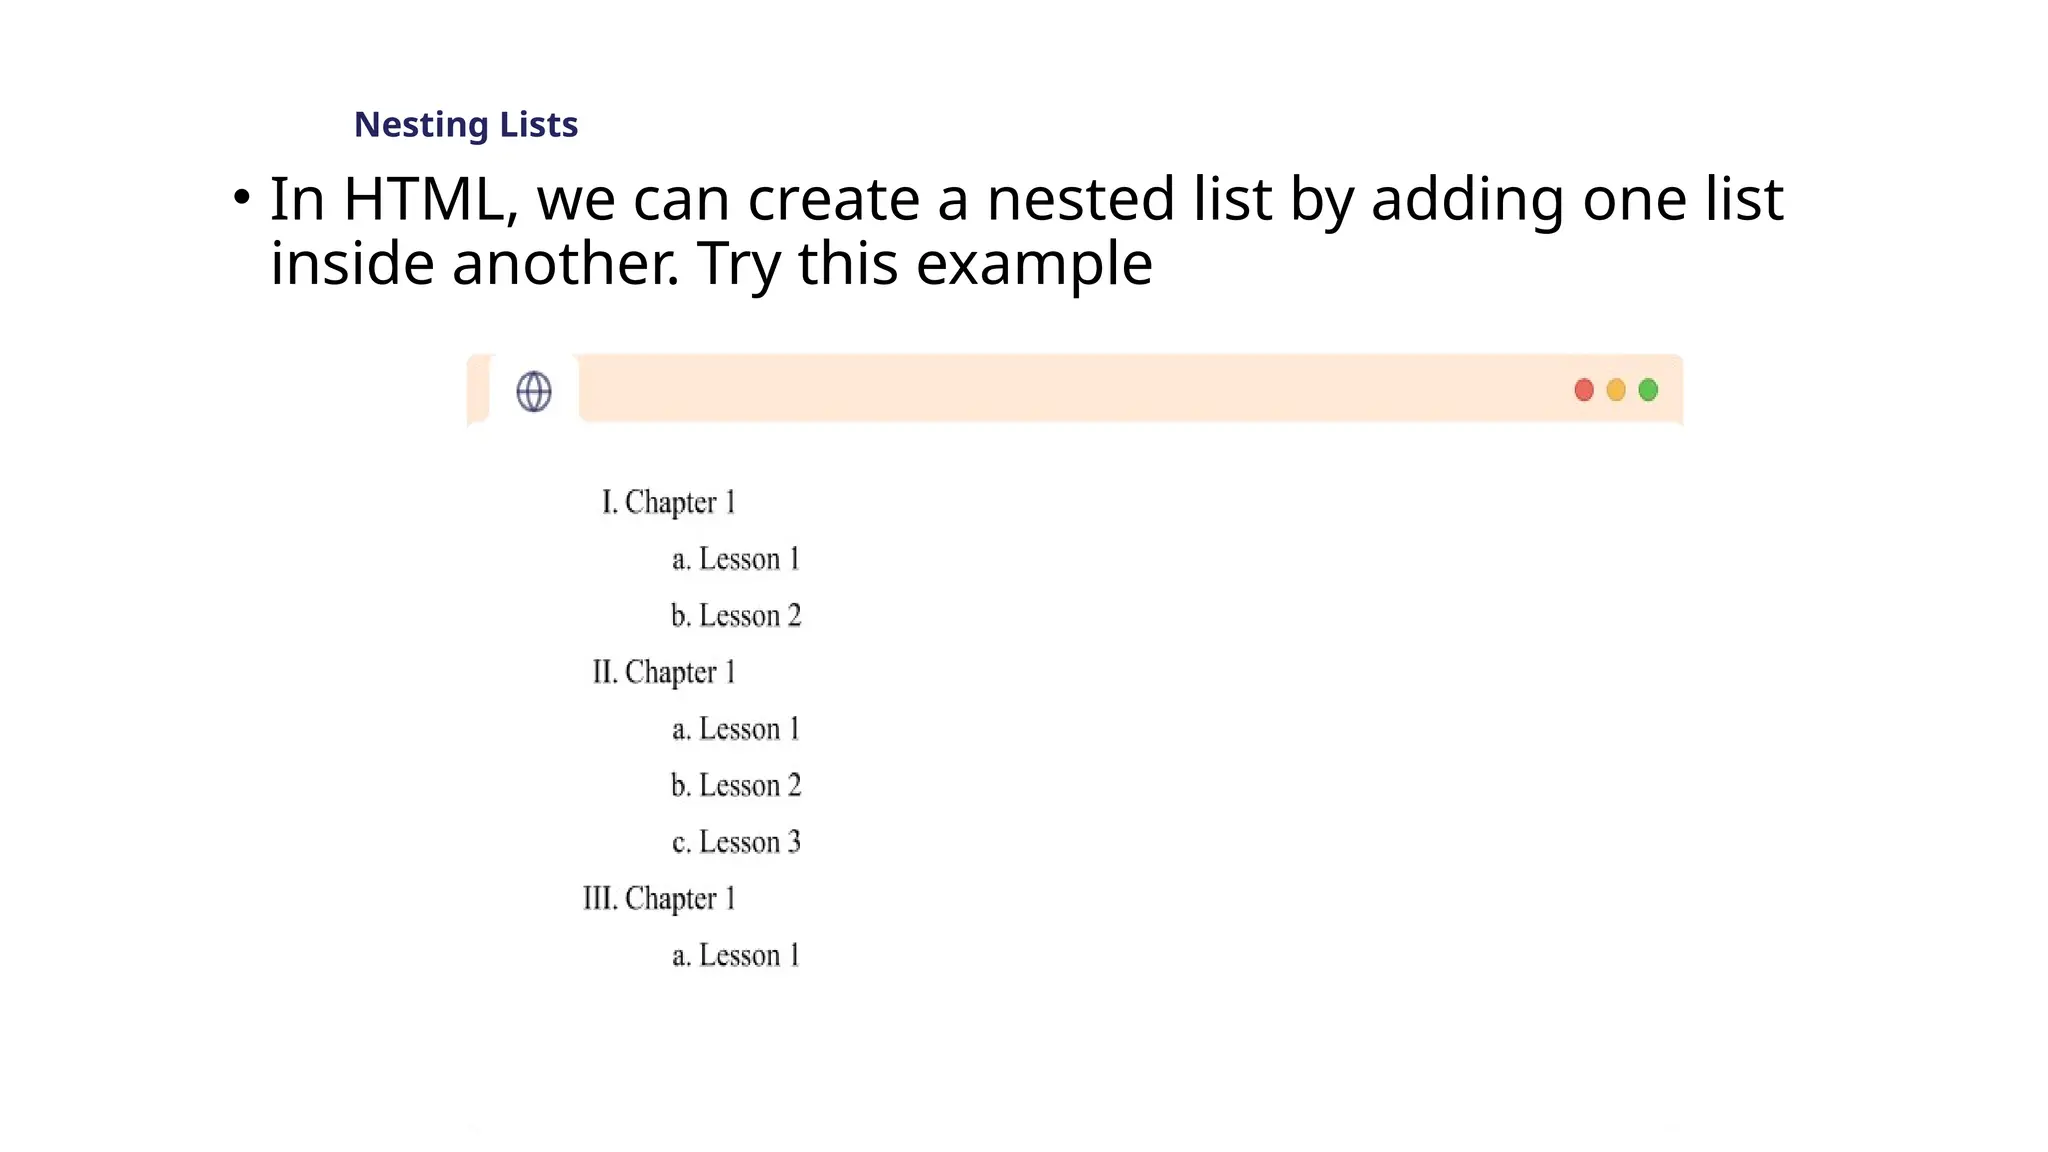
Nesting Lists
• InHTML, we can create a nested list by adding one list
inside another. Try this example
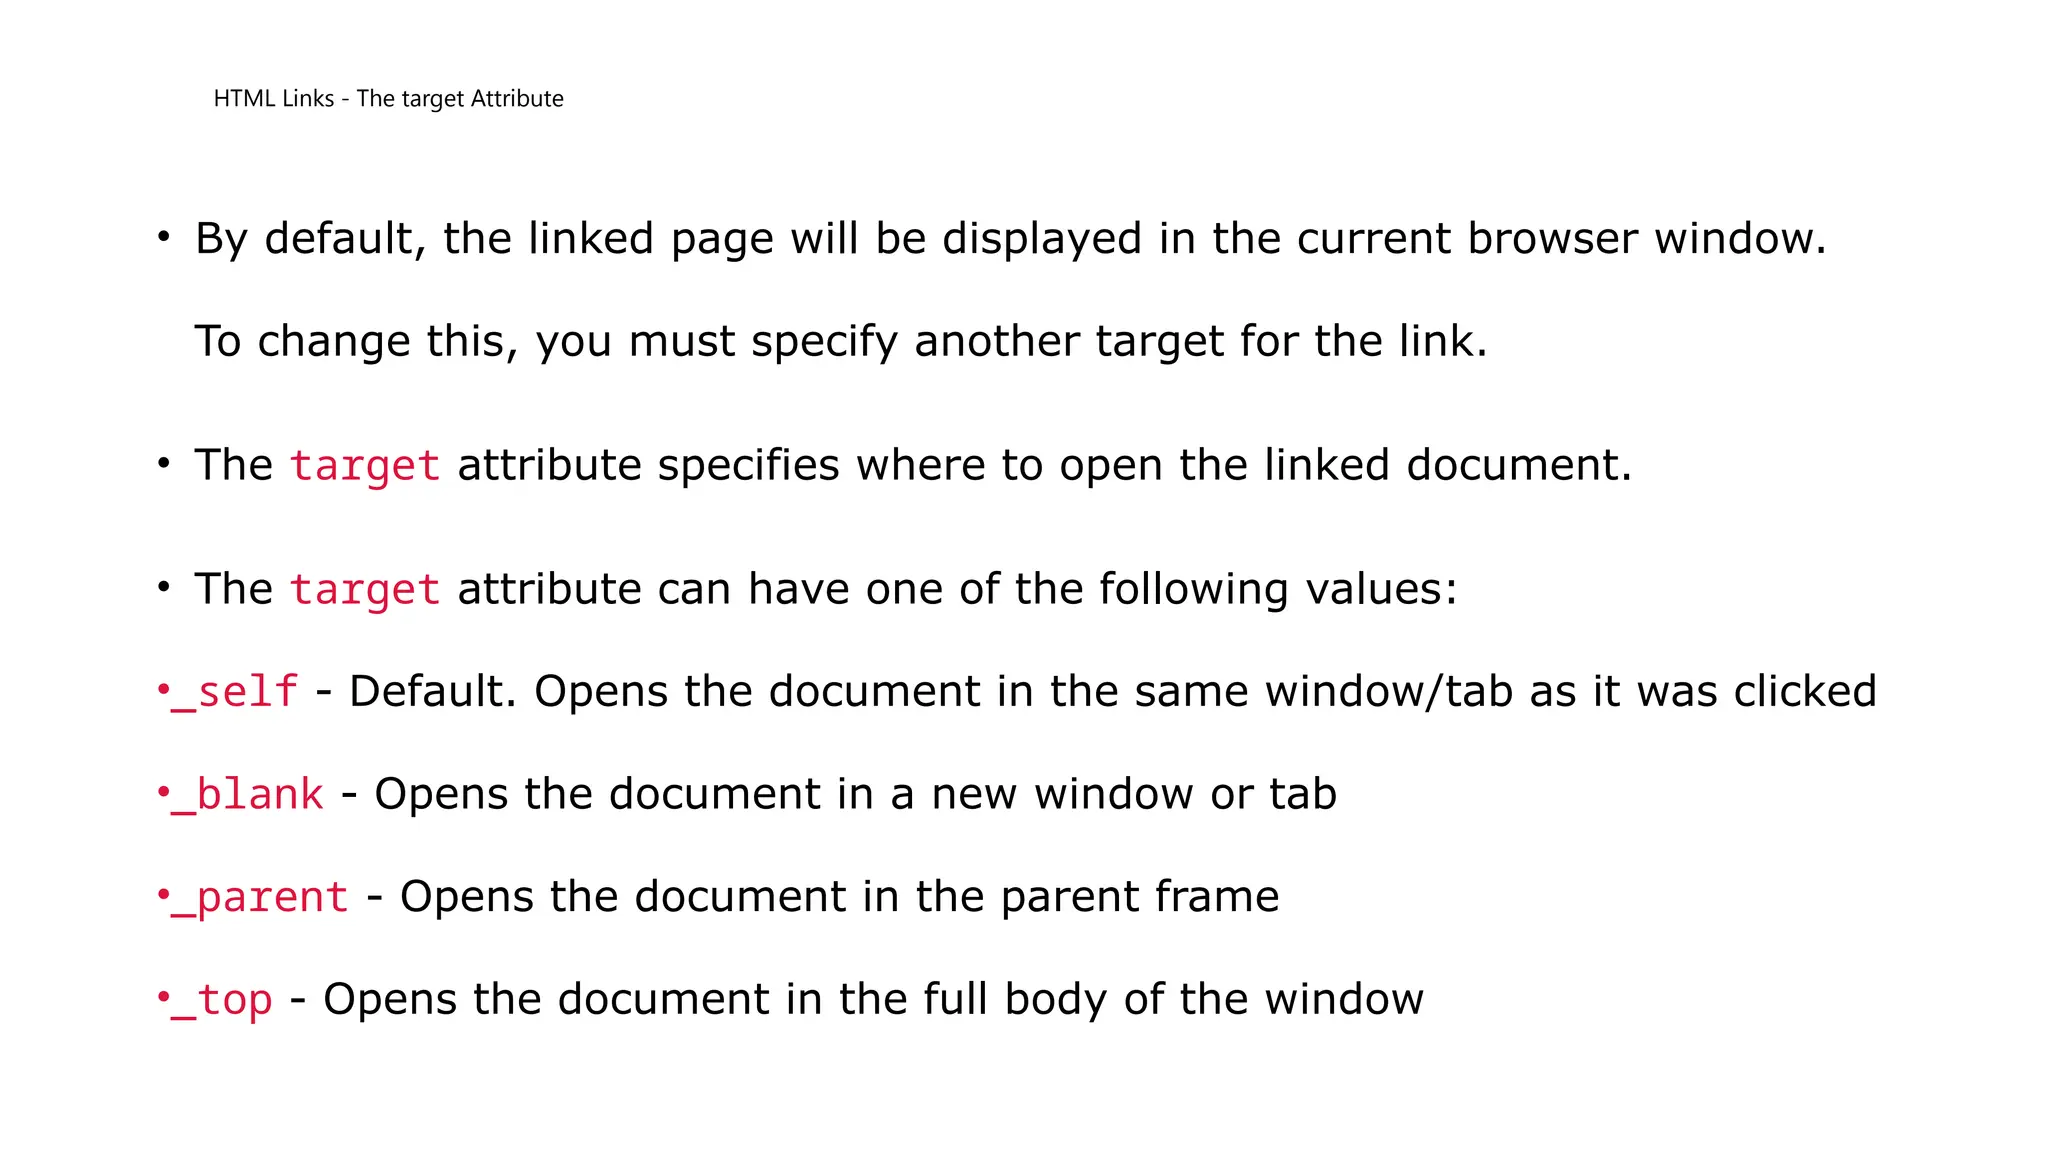
HTML Links -The target Attribute
• By default, the linked page will be displayed in the current browser window.
To change this, you must specify another target for the link.
• The target attribute specifies where to open the linked document.
• The target attribute can have one of the following values:
•_self - Default. Opens the document in the same window/tab as it was clicked
•_blank - Opens the document in a new window or tab
•_parent - Opens the document in the parent frame
•_top - Opens the document in the full body of the window
46.
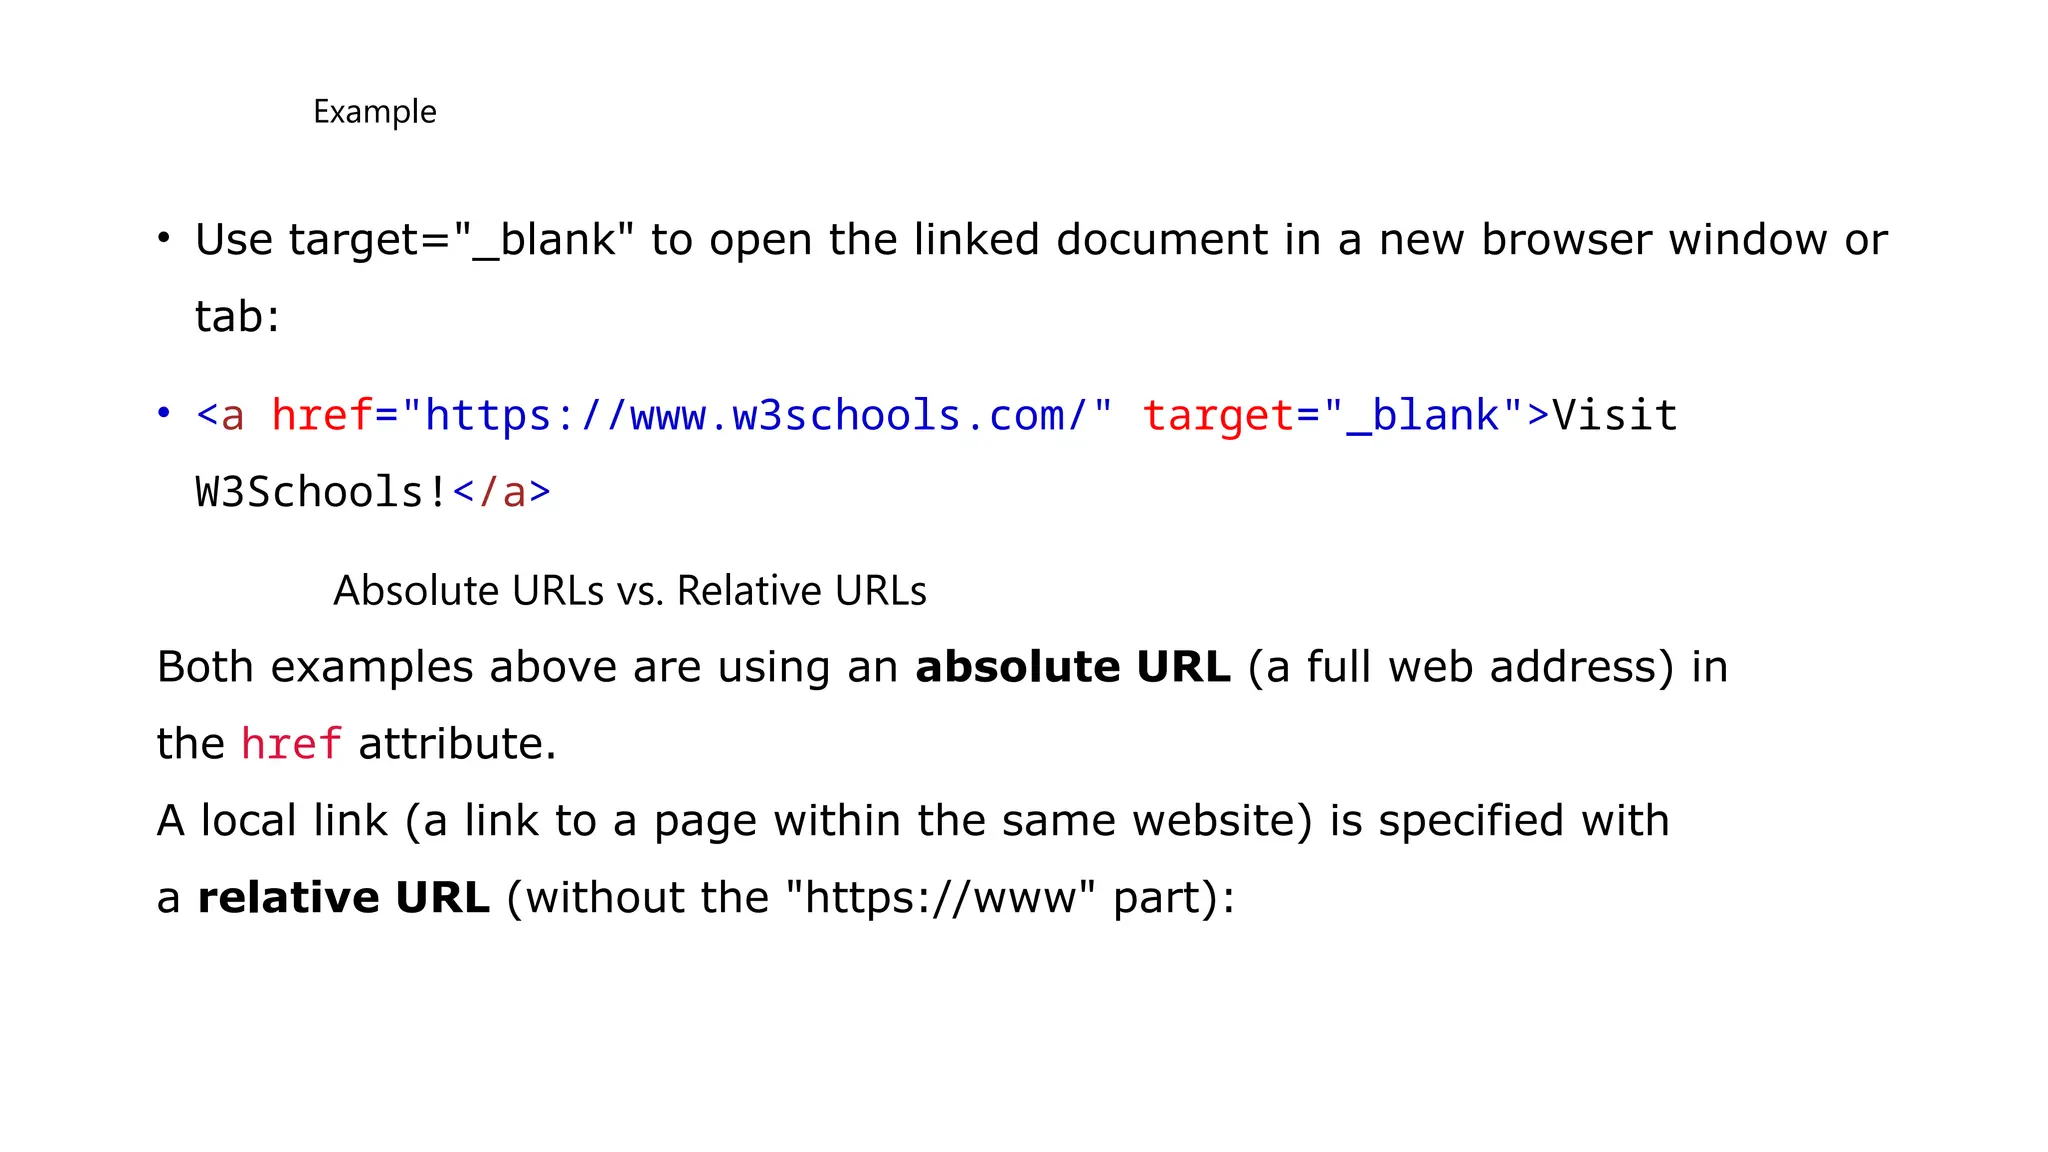
Example
• Use target="_blank"to open the linked document in a new browser window or
tab:
• <a href="https://www.w3schools.com/" target="_blank">Visit
W3Schools!</a>
Absolute URLs vs. Relative URLs
Both examples above are using an absolute URL (a full web address) in
the href attribute.
A local link (a link to a page within the same website) is specified with
a relative URL (without the "https://www" part):
HTML Links -Use an Image as a Link
• To use an image as a link, just put the <img> tag inside the <a> tag:
Example
<a href="default.asp">
<img src="smiley.gif" alt="HTML
tutorial" style="width:42px;height:42px;">
</a>
Link to an Email Address
Use mailto: inside the href attribute to create a link that opens
the user's email program (to let them send a new email):
• Example
• <a href="mailto:someone@example.com">Send
email</a>
49.
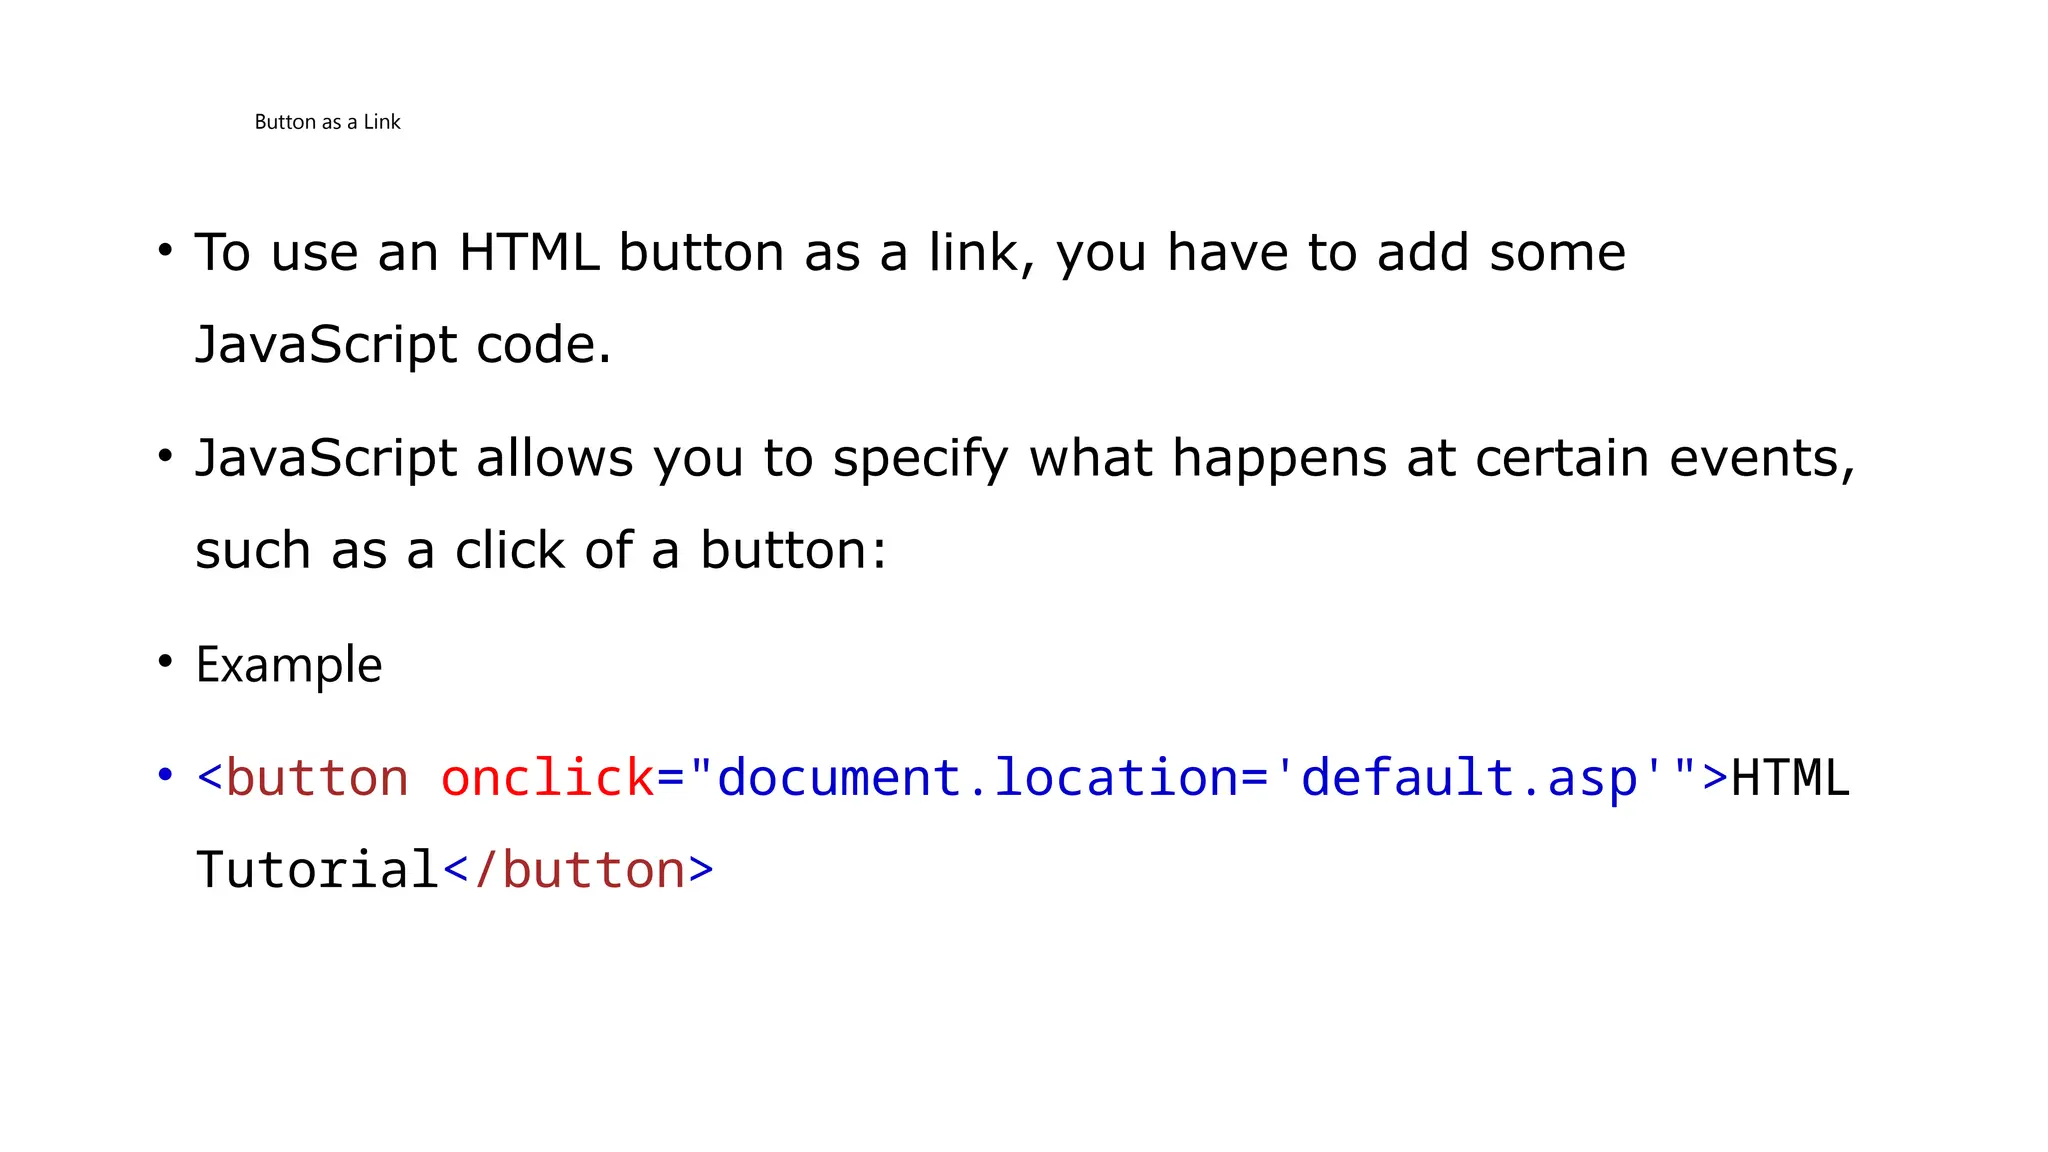
Button as aLink
• To use an HTML button as a link, you have to add some
JavaScript code.
• JavaScript allows you to specify what happens at certain events,
such as a click of a button:
• Example
• <button onclick="document.location='default.asp'">HTML
Tutorial</button>
50.
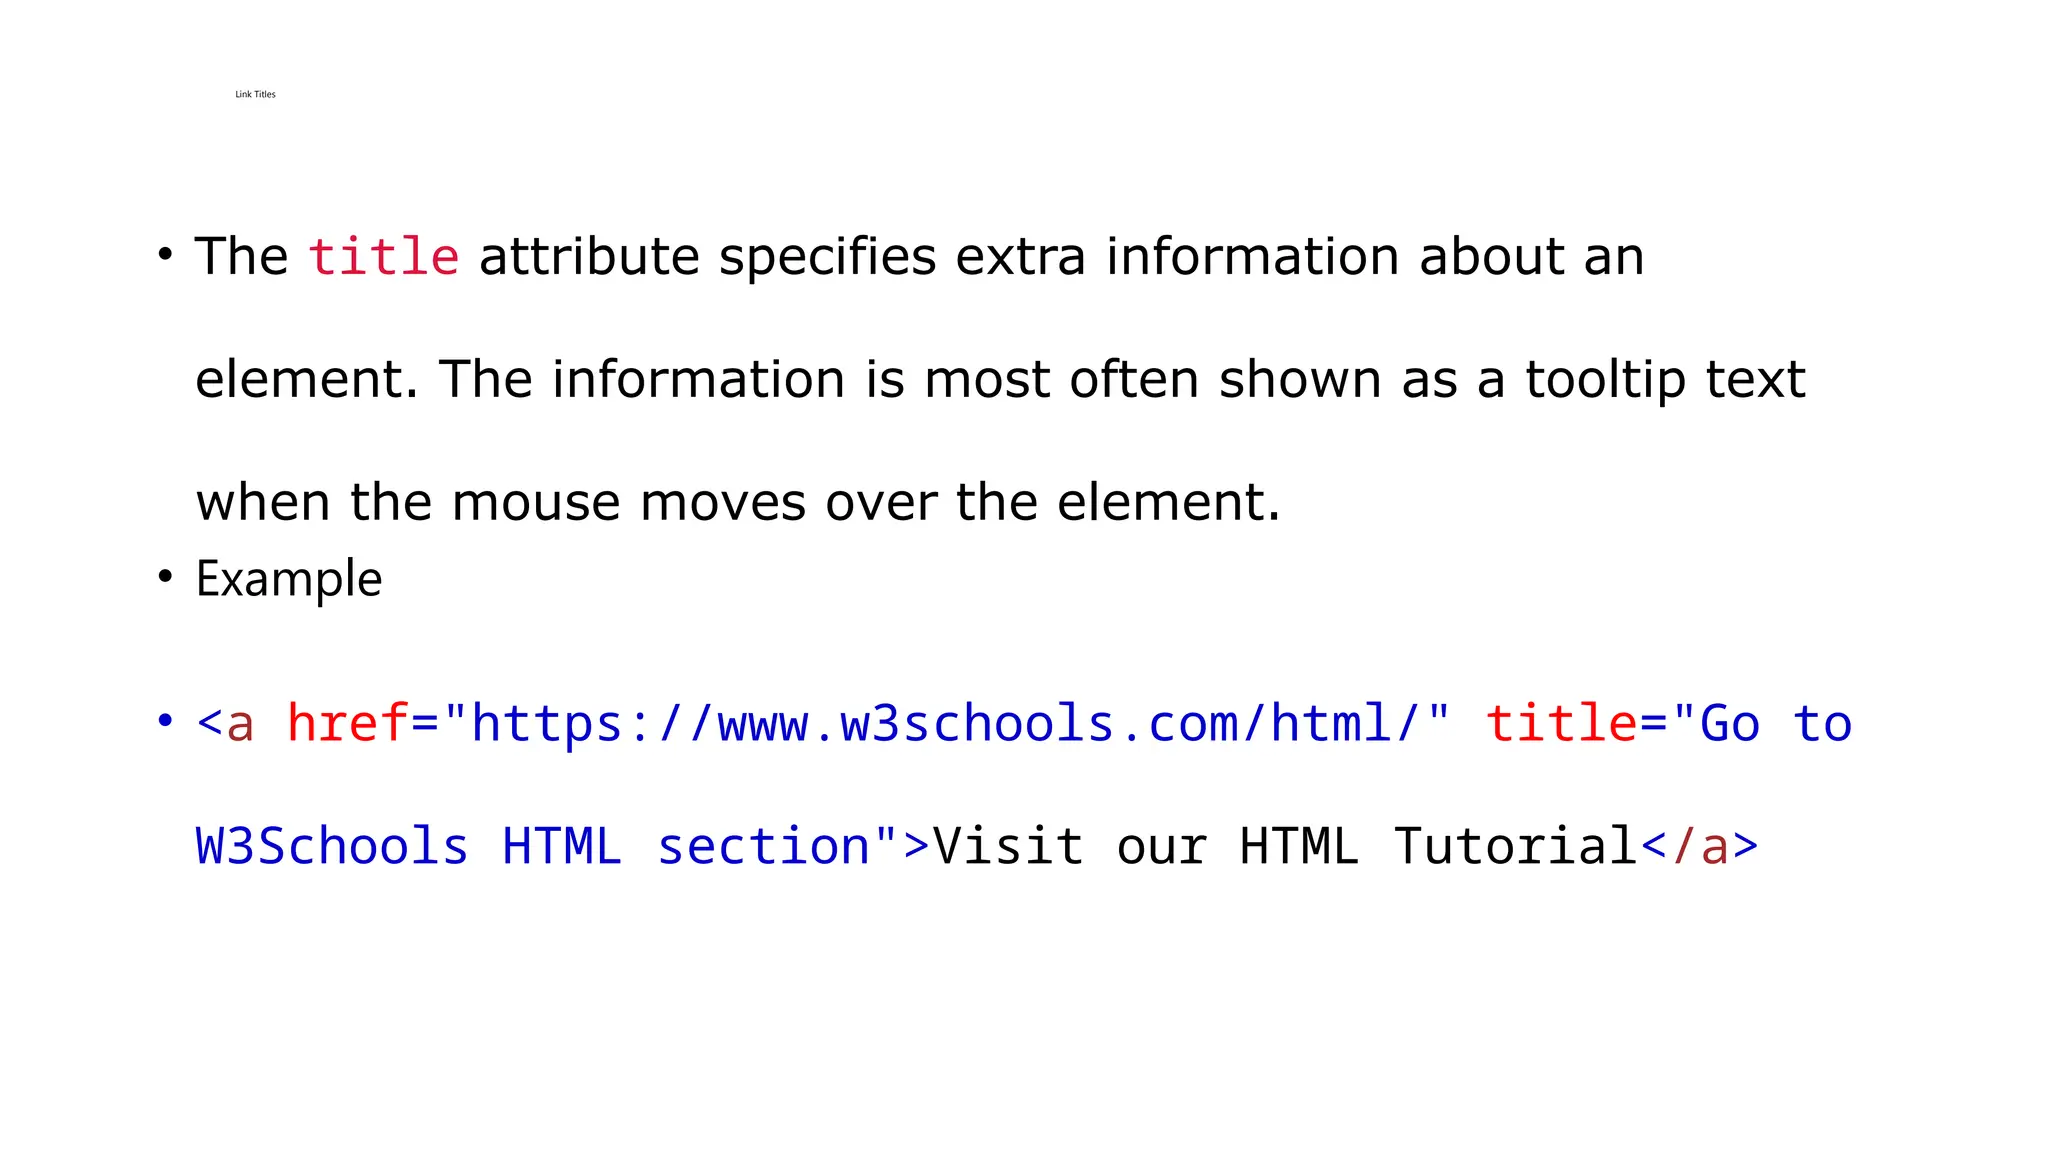
Link Titles
• Thetitle attribute specifies extra information about an
element. The information is most often shown as a tooltip text
when the mouse moves over the element.
• Example
• <a href="https://www.w3schools.com/html/" title="Go to
W3Schools HTML section">Visit our HTML Tutorial</a>
51.
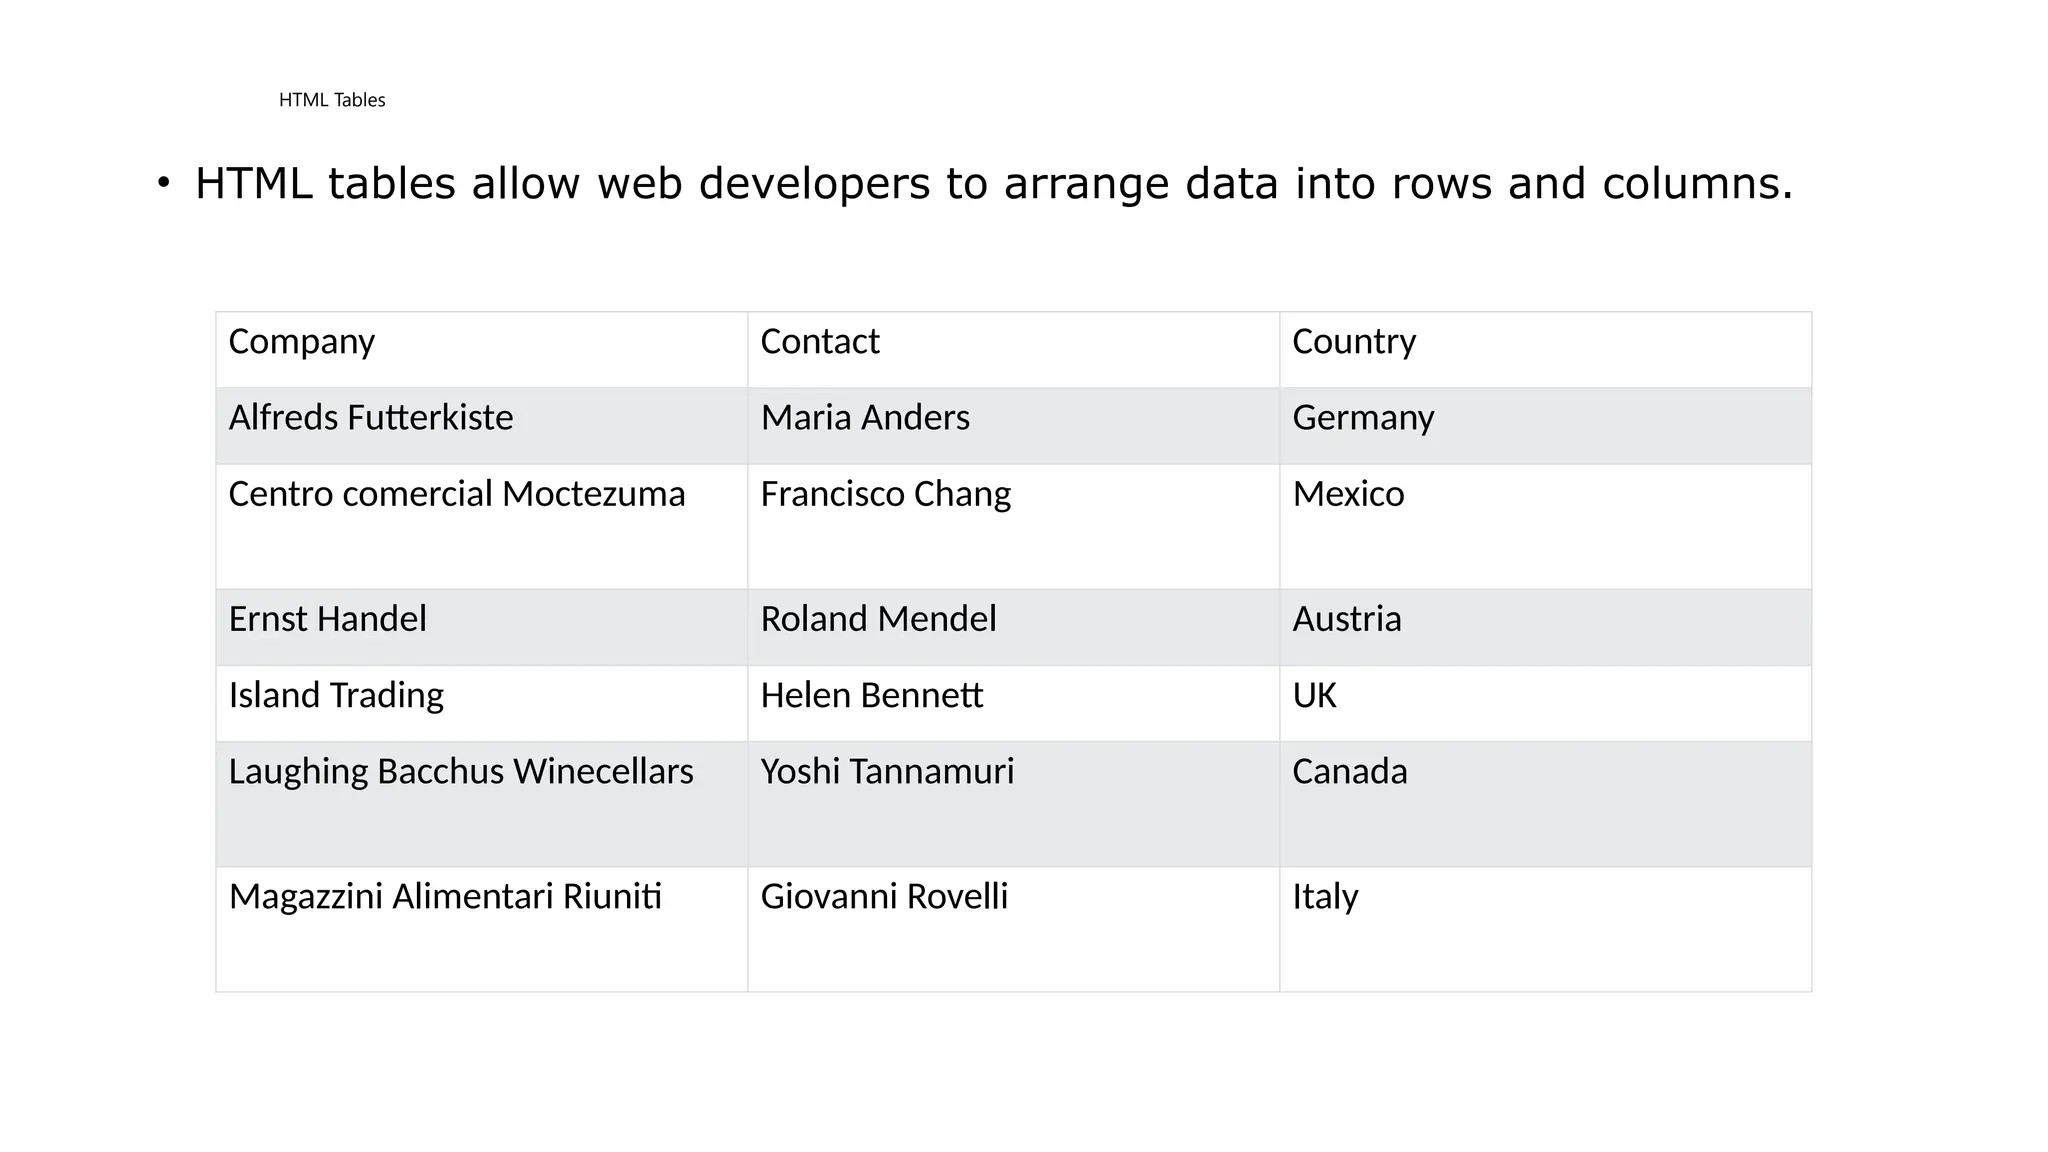
HTML Tables
• HTMLtables allow web developers to arrange data into rows and columns.
Company Contact Country
Alfreds Futterkiste Maria Anders Germany
Centro comercial Moctezuma Francisco Chang Mexico
Ernst Handel Roland Mendel Austria
Island Trading Helen Bennett UK
Laughing Bacchus Winecellars Yoshi Tannamuri Canada
Magazzini Alimentari Riuniti Giovanni Rovelli Italy
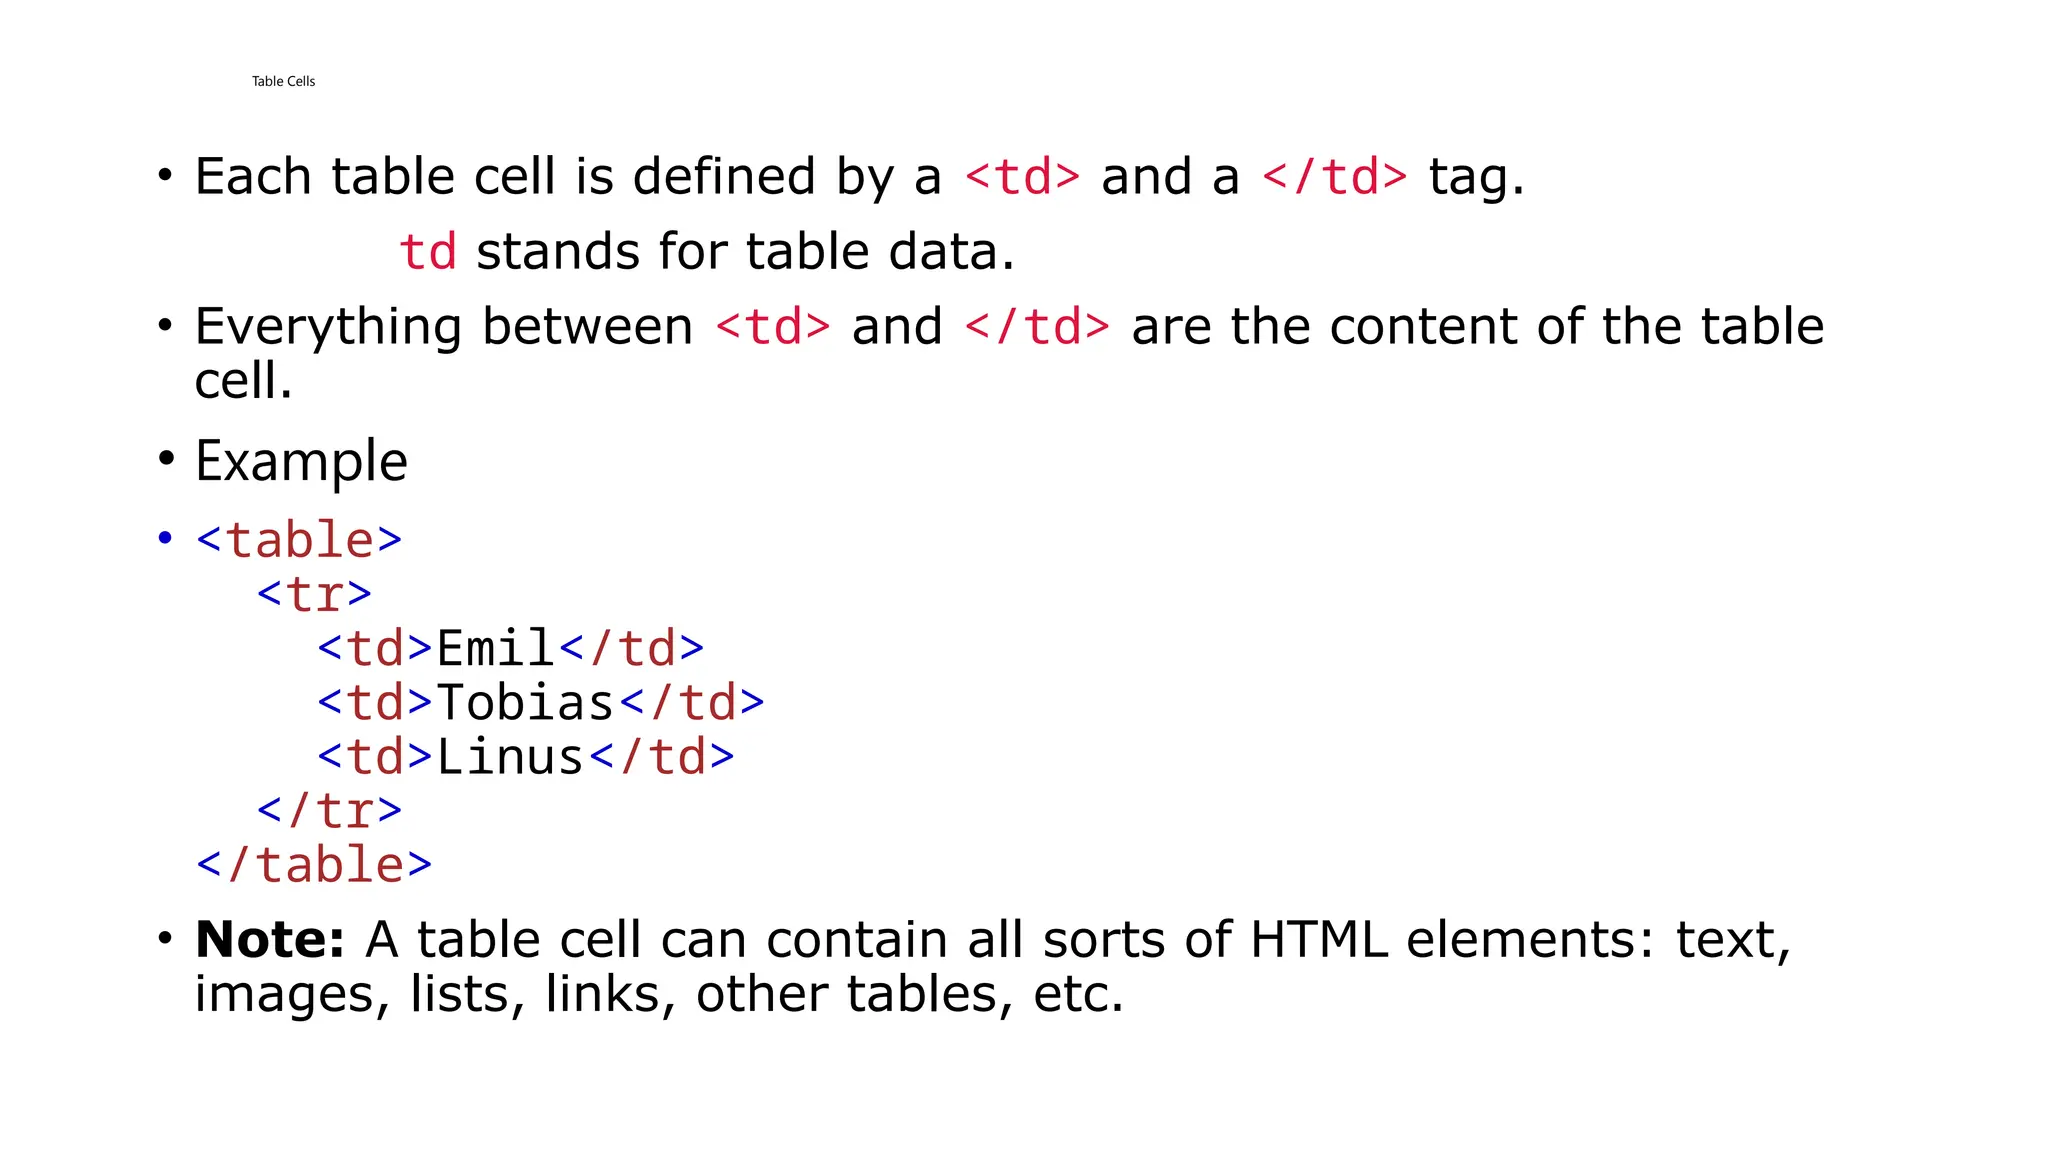
Table Cells
• Eachtable cell is defined by a <td> and a </td> tag.
td stands for table data.
• Everything between <td> and </td> are the content of the table
cell.
• Example
• <table>
<tr>
<td>Emil</td>
<td>Tobias</td>
<td>Linus</td>
</tr>
</table>
• Note: A table cell can contain all sorts of HTML elements: text,
images, lists, links, other tables, etc.
54.
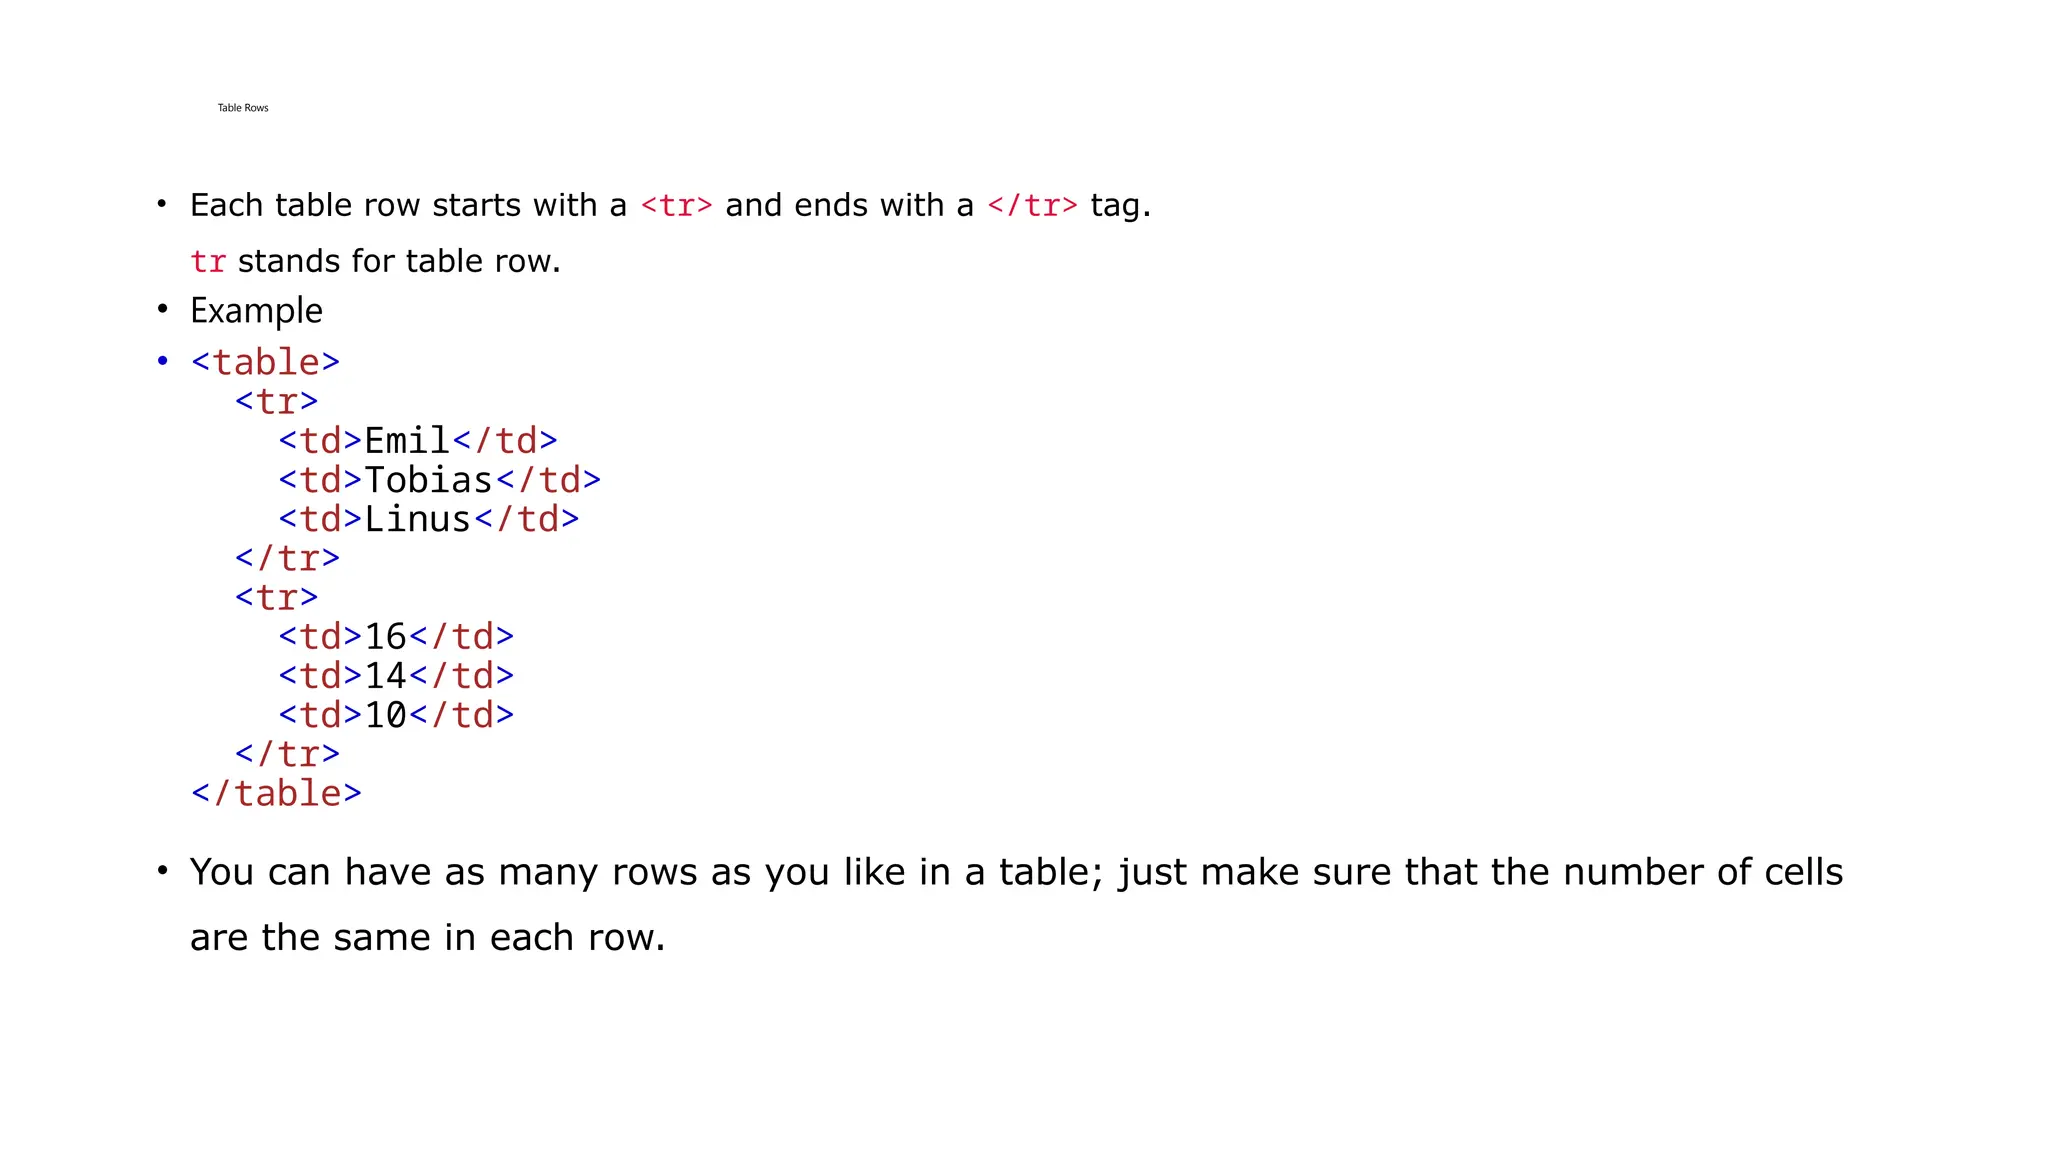
Table Rows
• Eachtable row starts with a <tr> and ends with a </tr> tag.
tr stands for table row.
• Example
• <table>
<tr>
<td>Emil</td>
<td>Tobias</td>
<td>Linus</td>
</tr>
<tr>
<td>16</td>
<td>14</td>
<td>10</td>
</tr>
</table>
• You can have as many rows as you like in a table; just make sure that the number of cells
are the same in each row.
55.
Table Headers
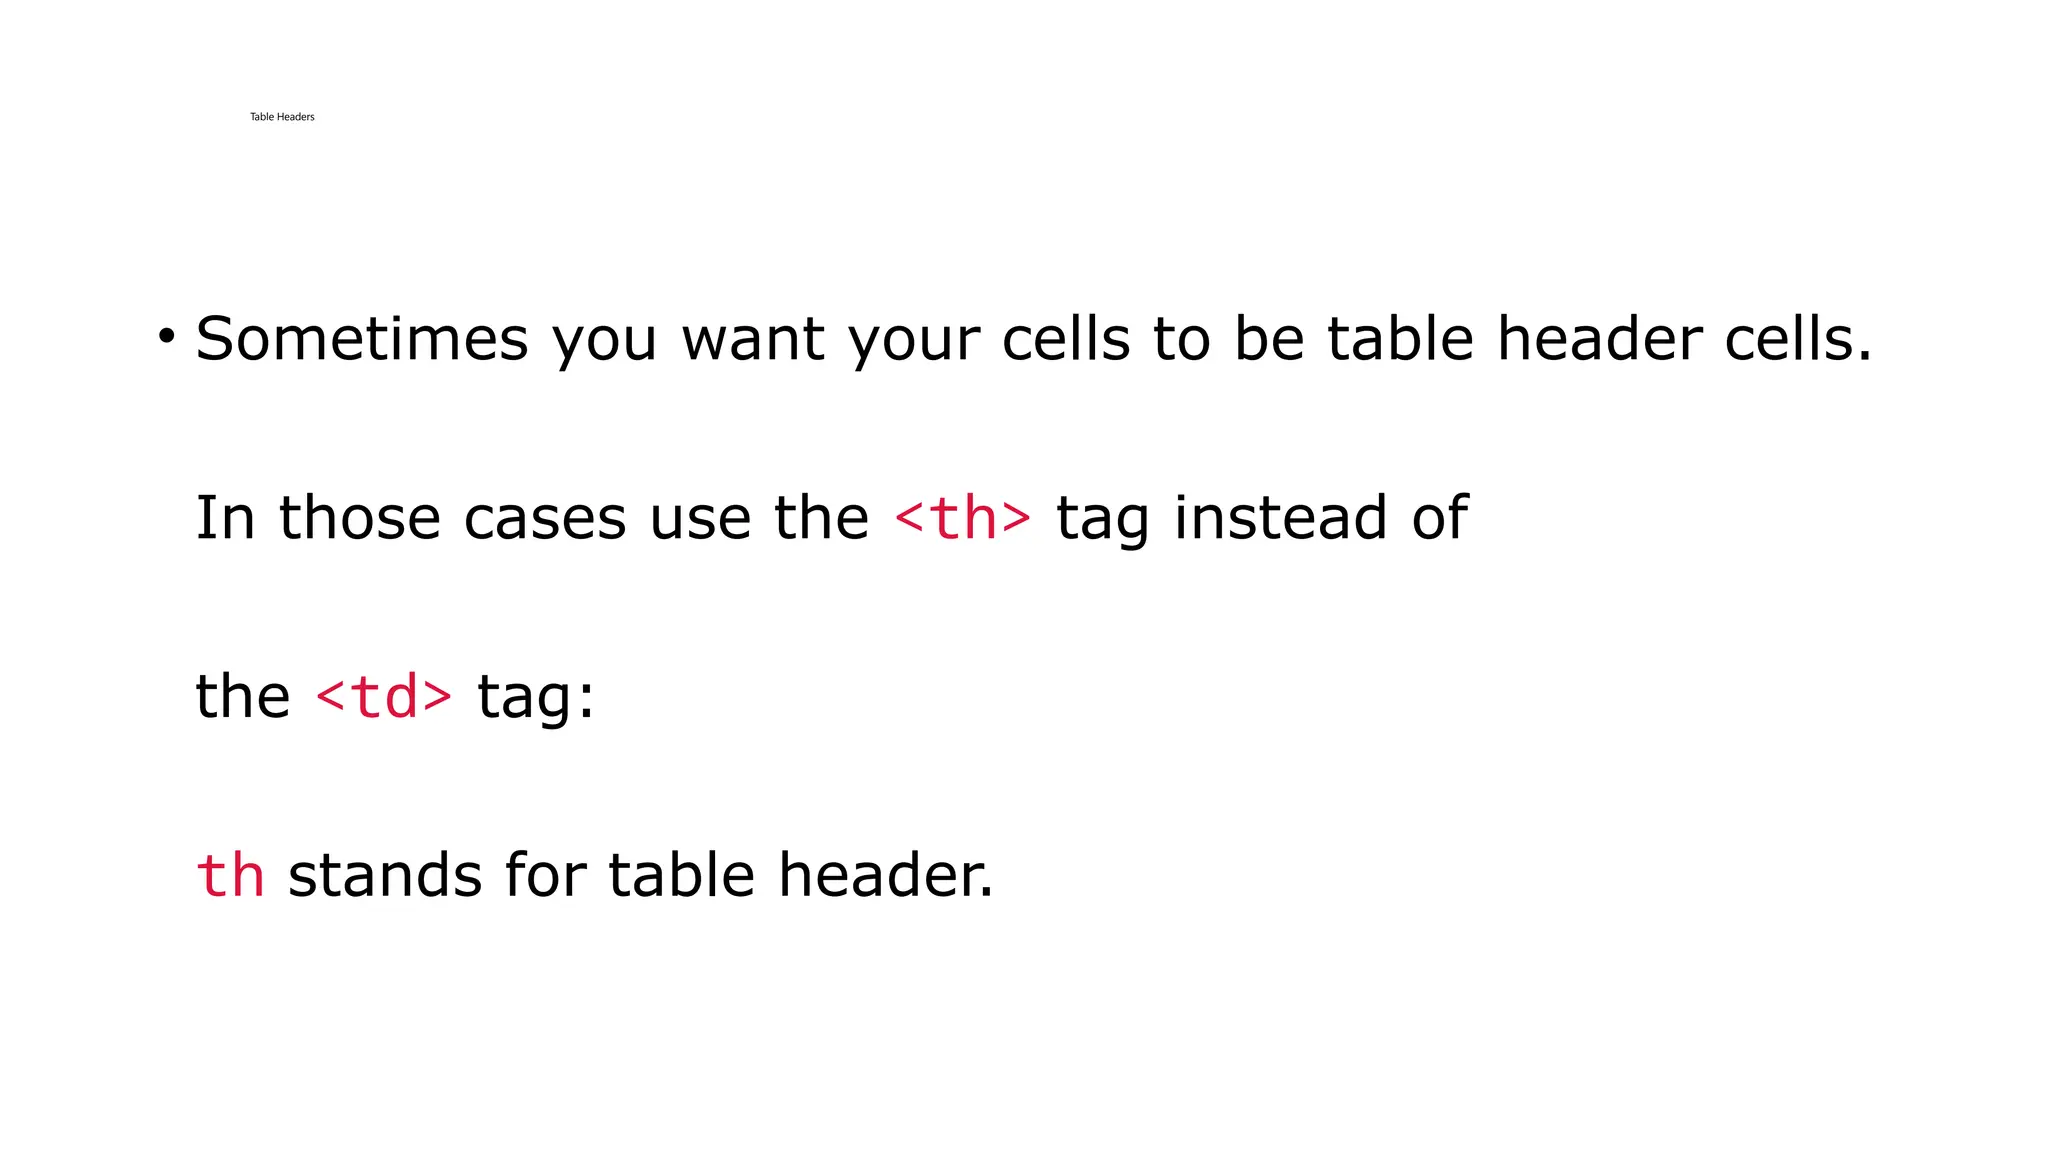
• Sometimesyou want your cells to be table header cells.
In those cases use the <th> tag instead of
the <td> tag:
th stands for table header.
56.
Example
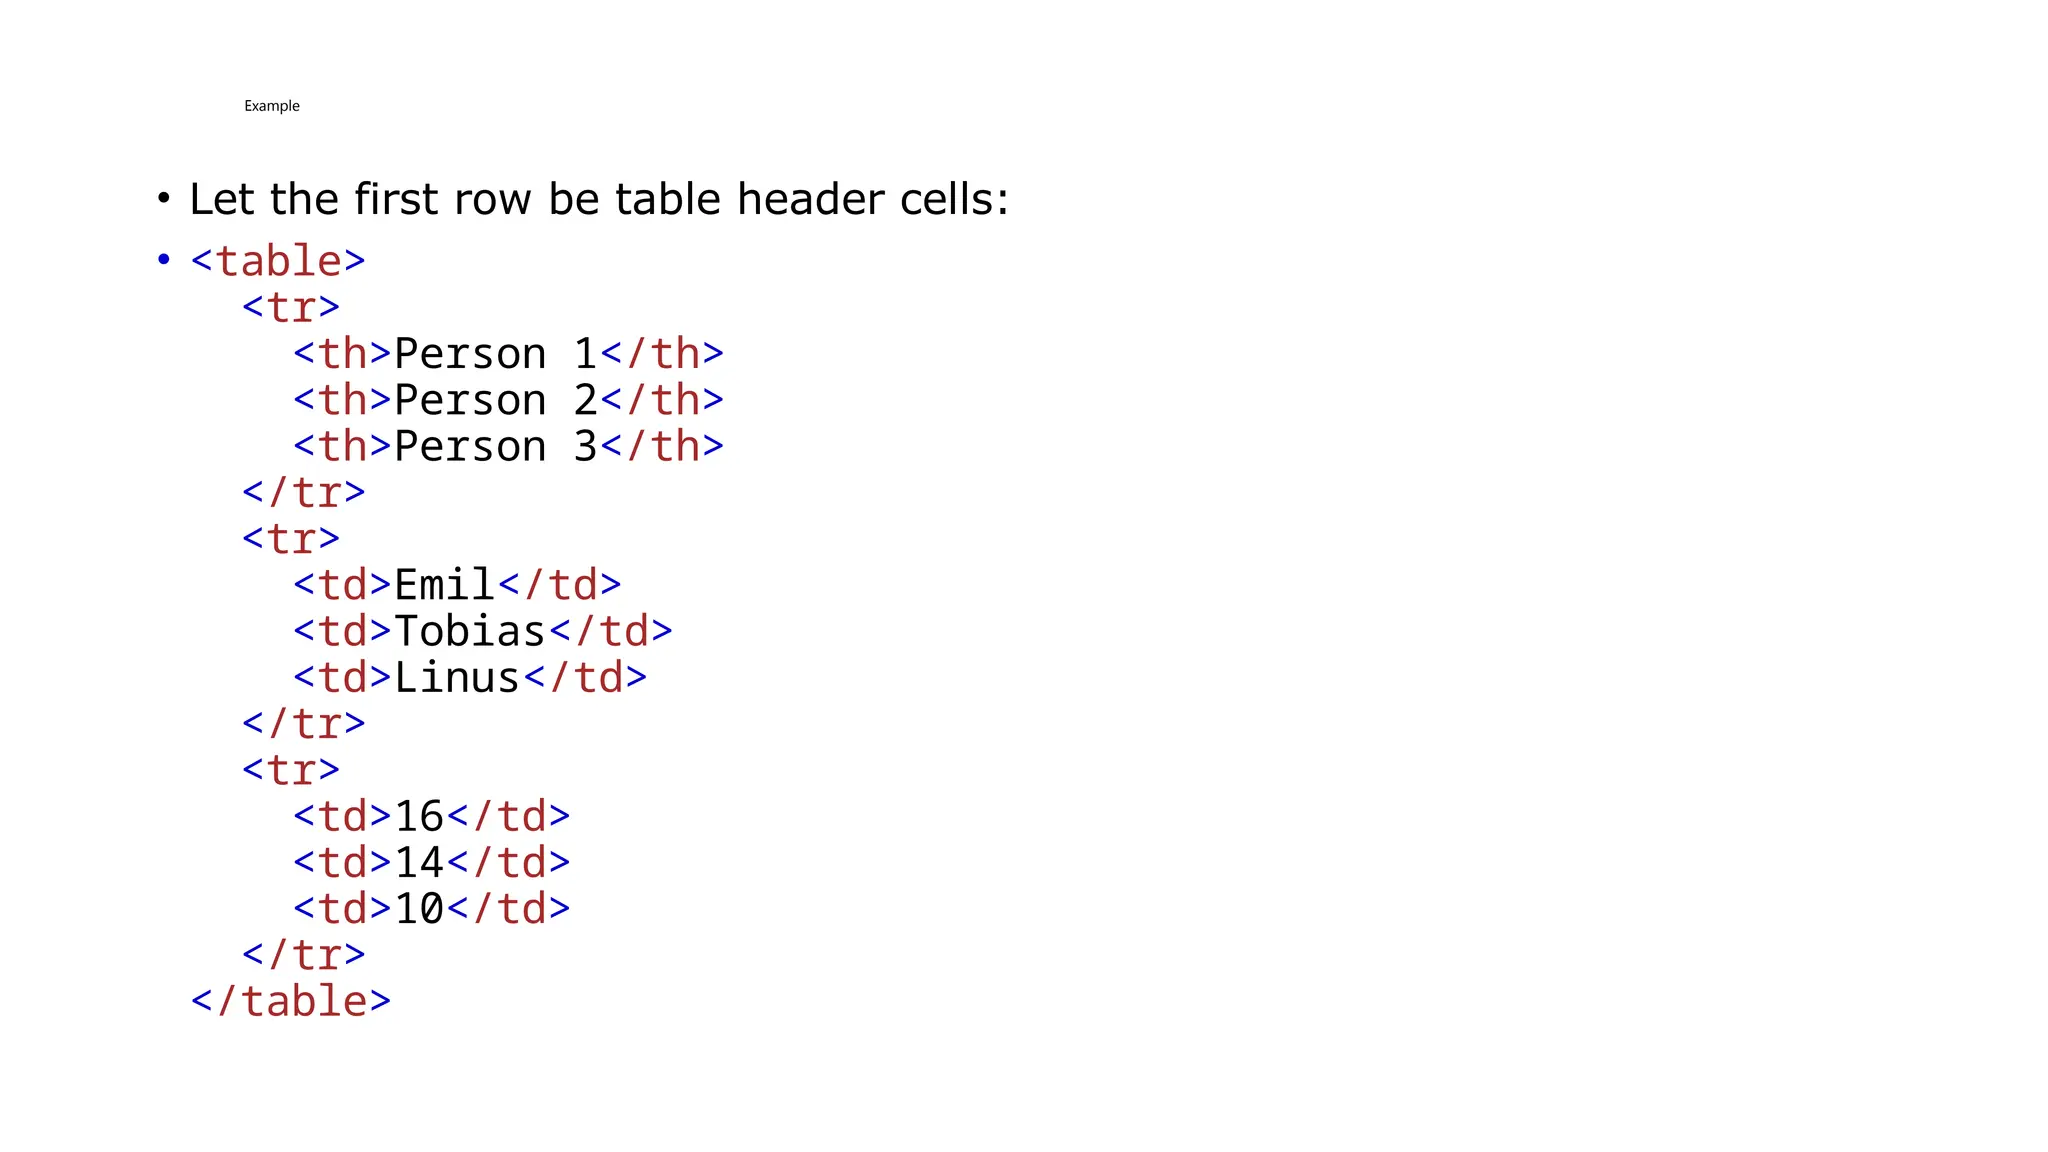
• Let thefirst row be table header cells:
• <table>
<tr>
<th>Person 1</th>
<th>Person 2</th>
<th>Person 3</th>
</tr>
<tr>
<td>Emil</td>
<td>Tobias</td>
<td>Linus</td>
</tr>
<tr>
<td>16</td>
<td>14</td>
<td>10</td>
</tr>
</table>
57.
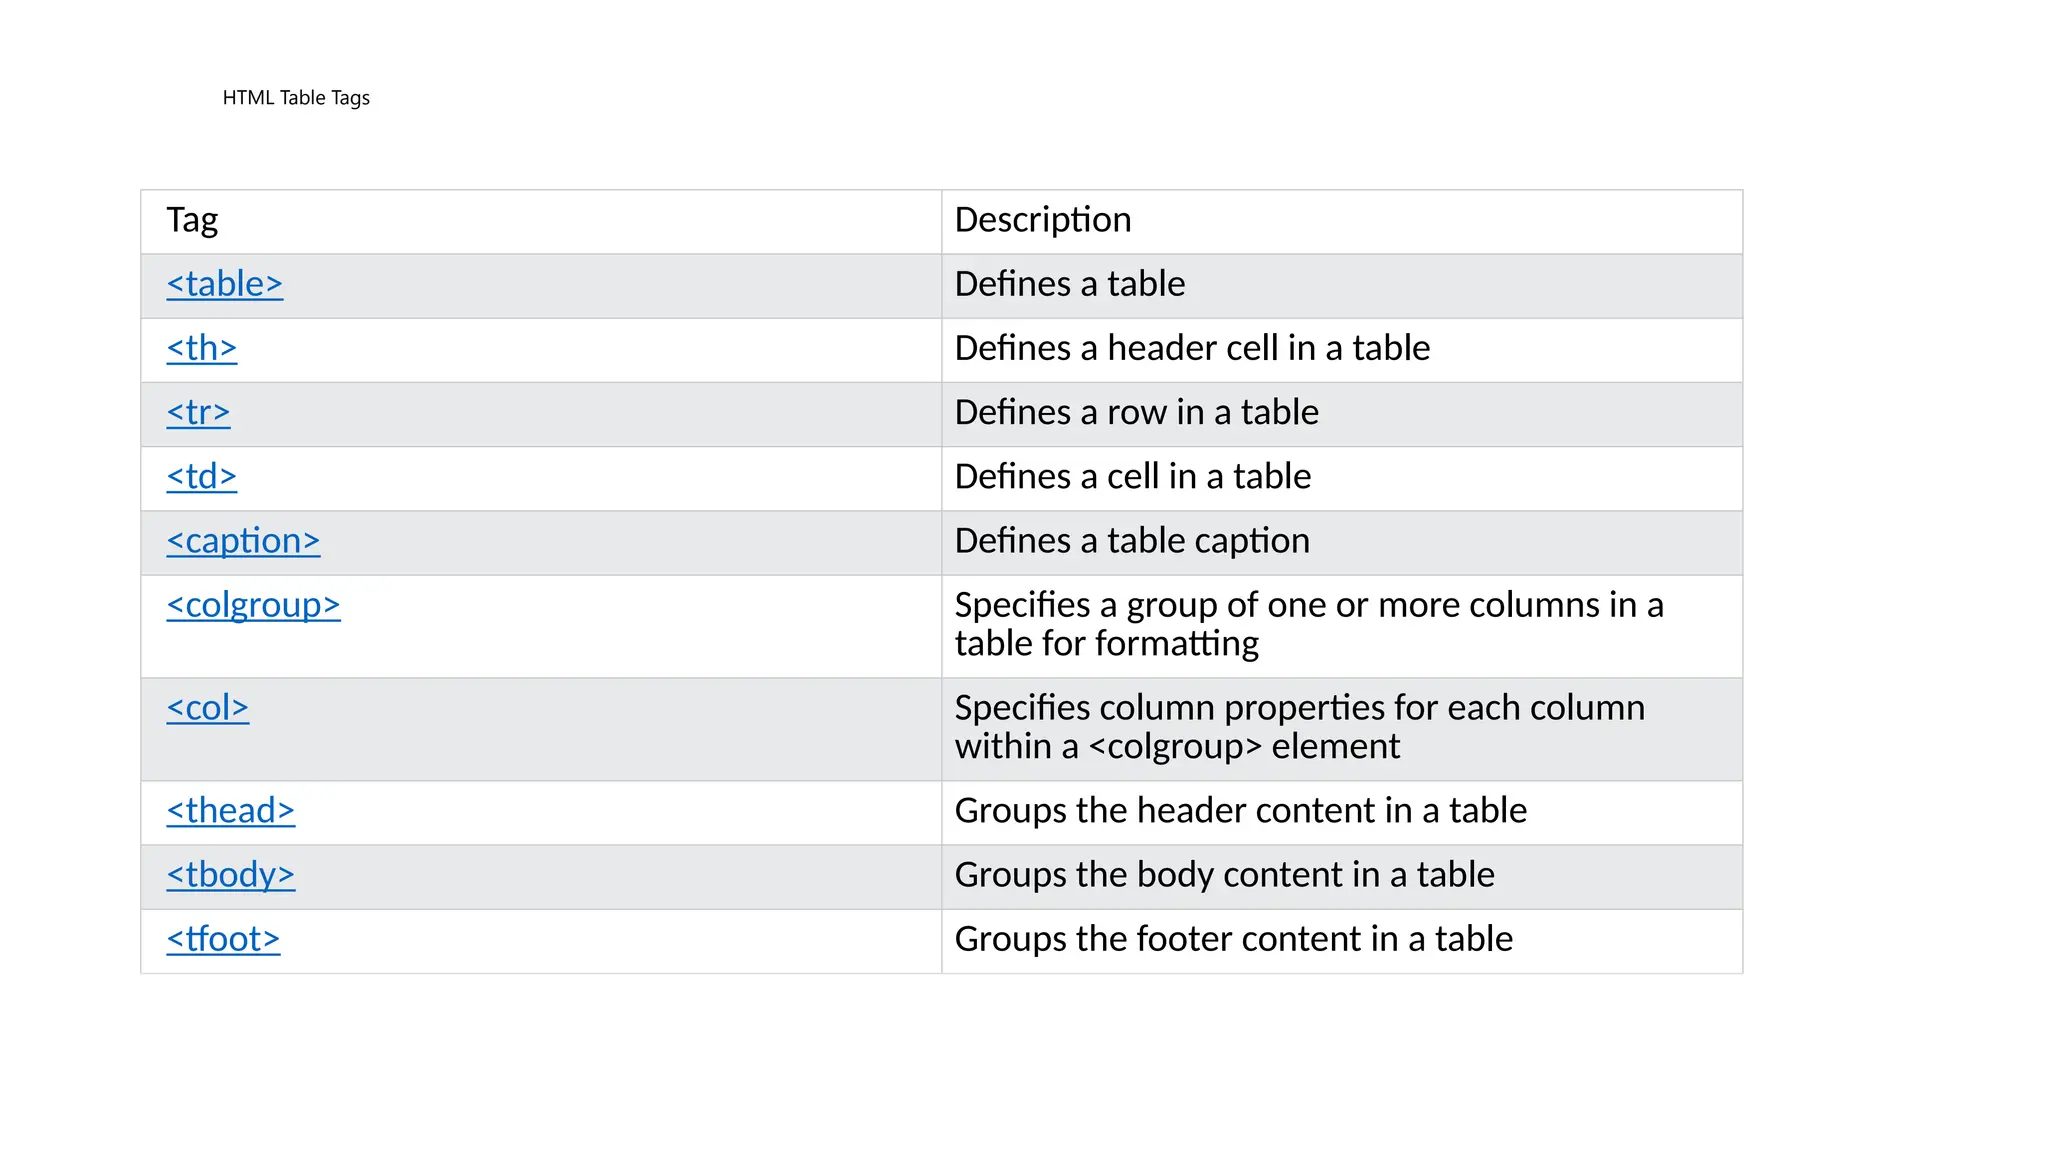
HTML Table Tags
TagDescription
<table> Defines a table
<th> Defines a header cell in a table
<tr> Defines a row in a table
<td> Defines a cell in a table
<caption> Defines a table caption
<colgroup> Specifies a group of one or more columns in a
table for formatting
<col> Specifies column properties for each column
within a <colgroup> element
<thead> Groups the header content in a table
<tbody> Groups the body content in a table
<tfoot> Groups the footer content in a table
58.
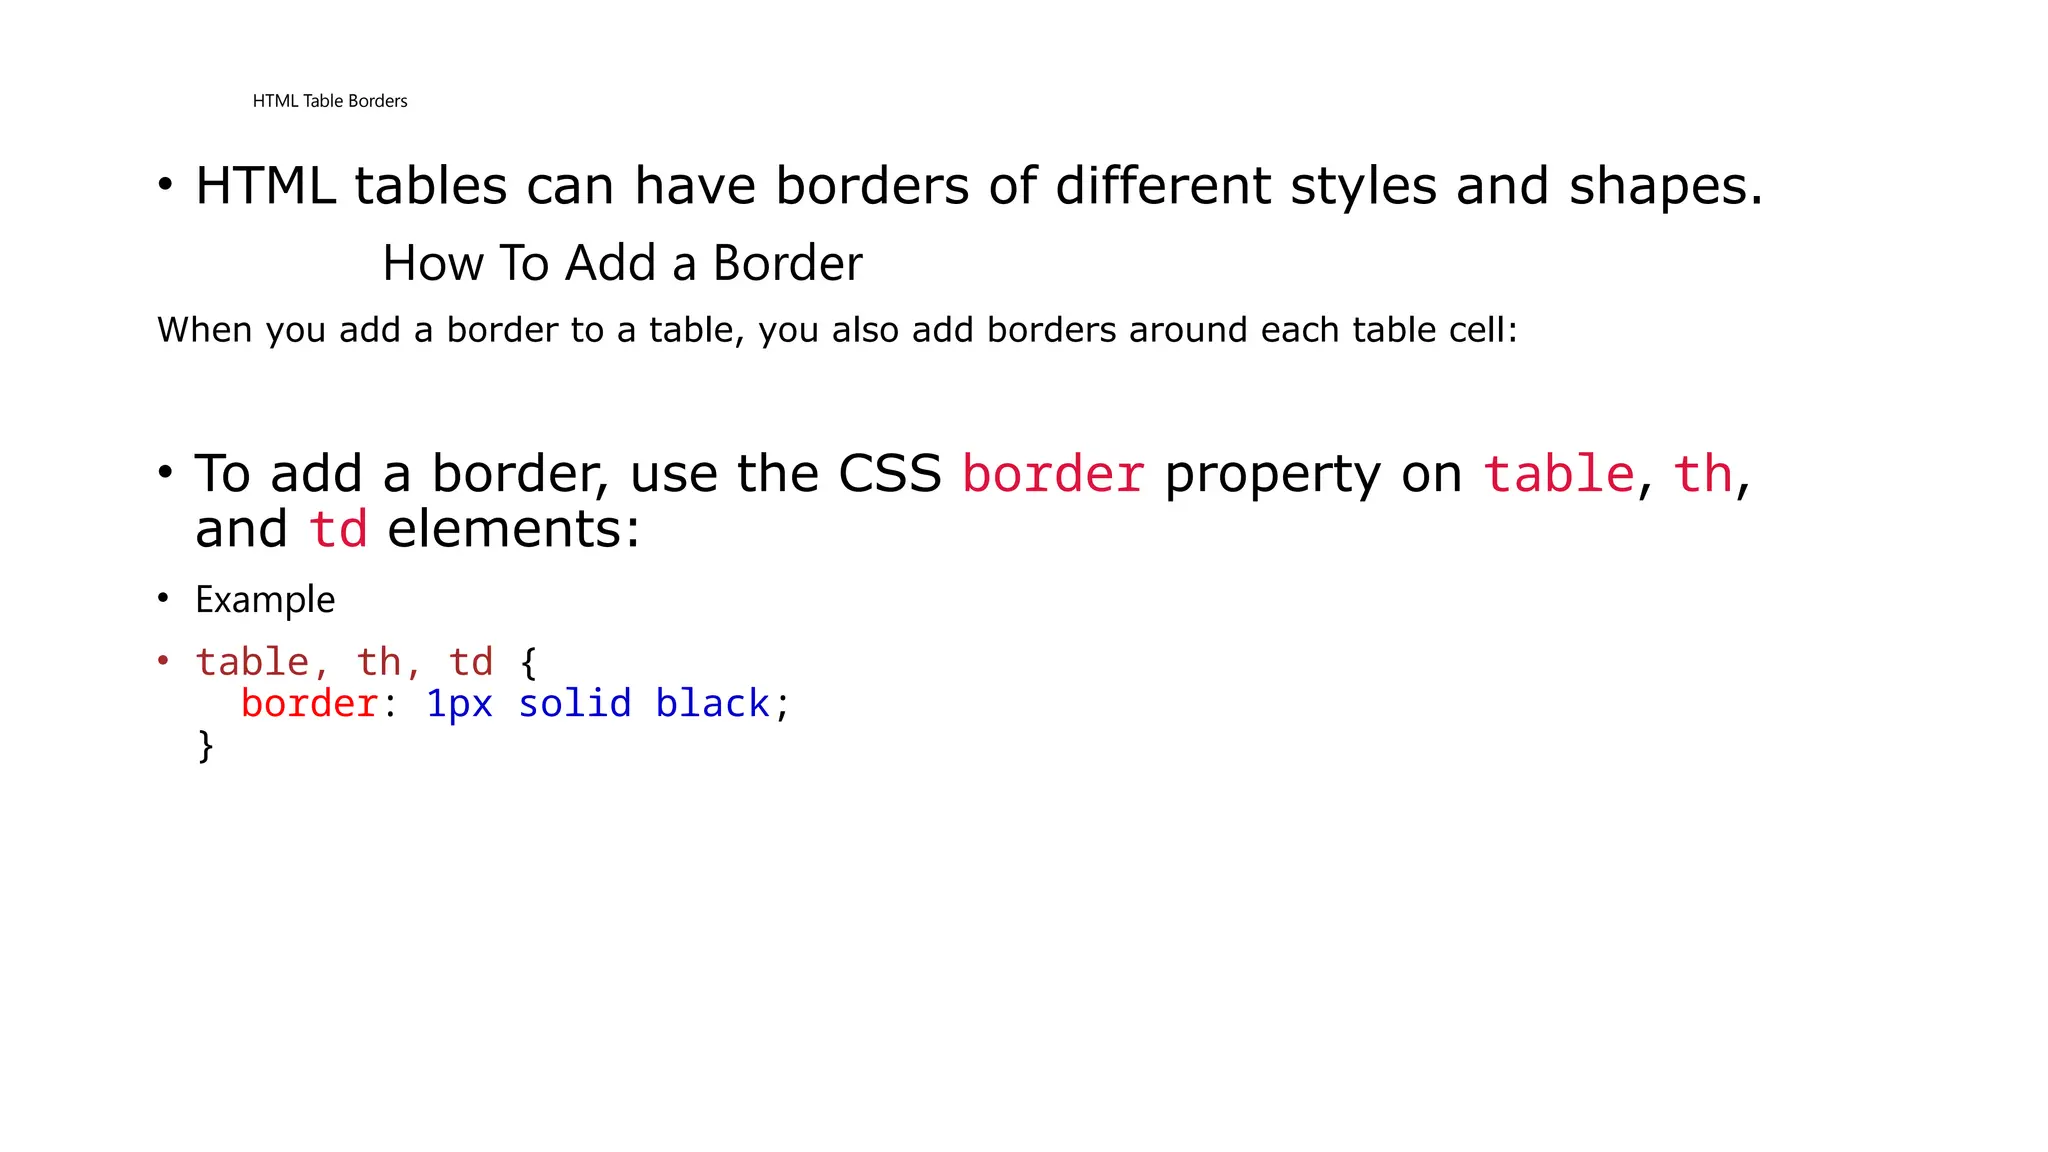
HTML Table Borders
•HTML tables can have borders of different styles and shapes.
How To Add a Border
When you add a border to a table, you also add borders around each table cell:
• To add a border, use the CSS border property on table, th,
and td elements:
• Example
• table, th, td {
border: 1px solid black;
}
59.
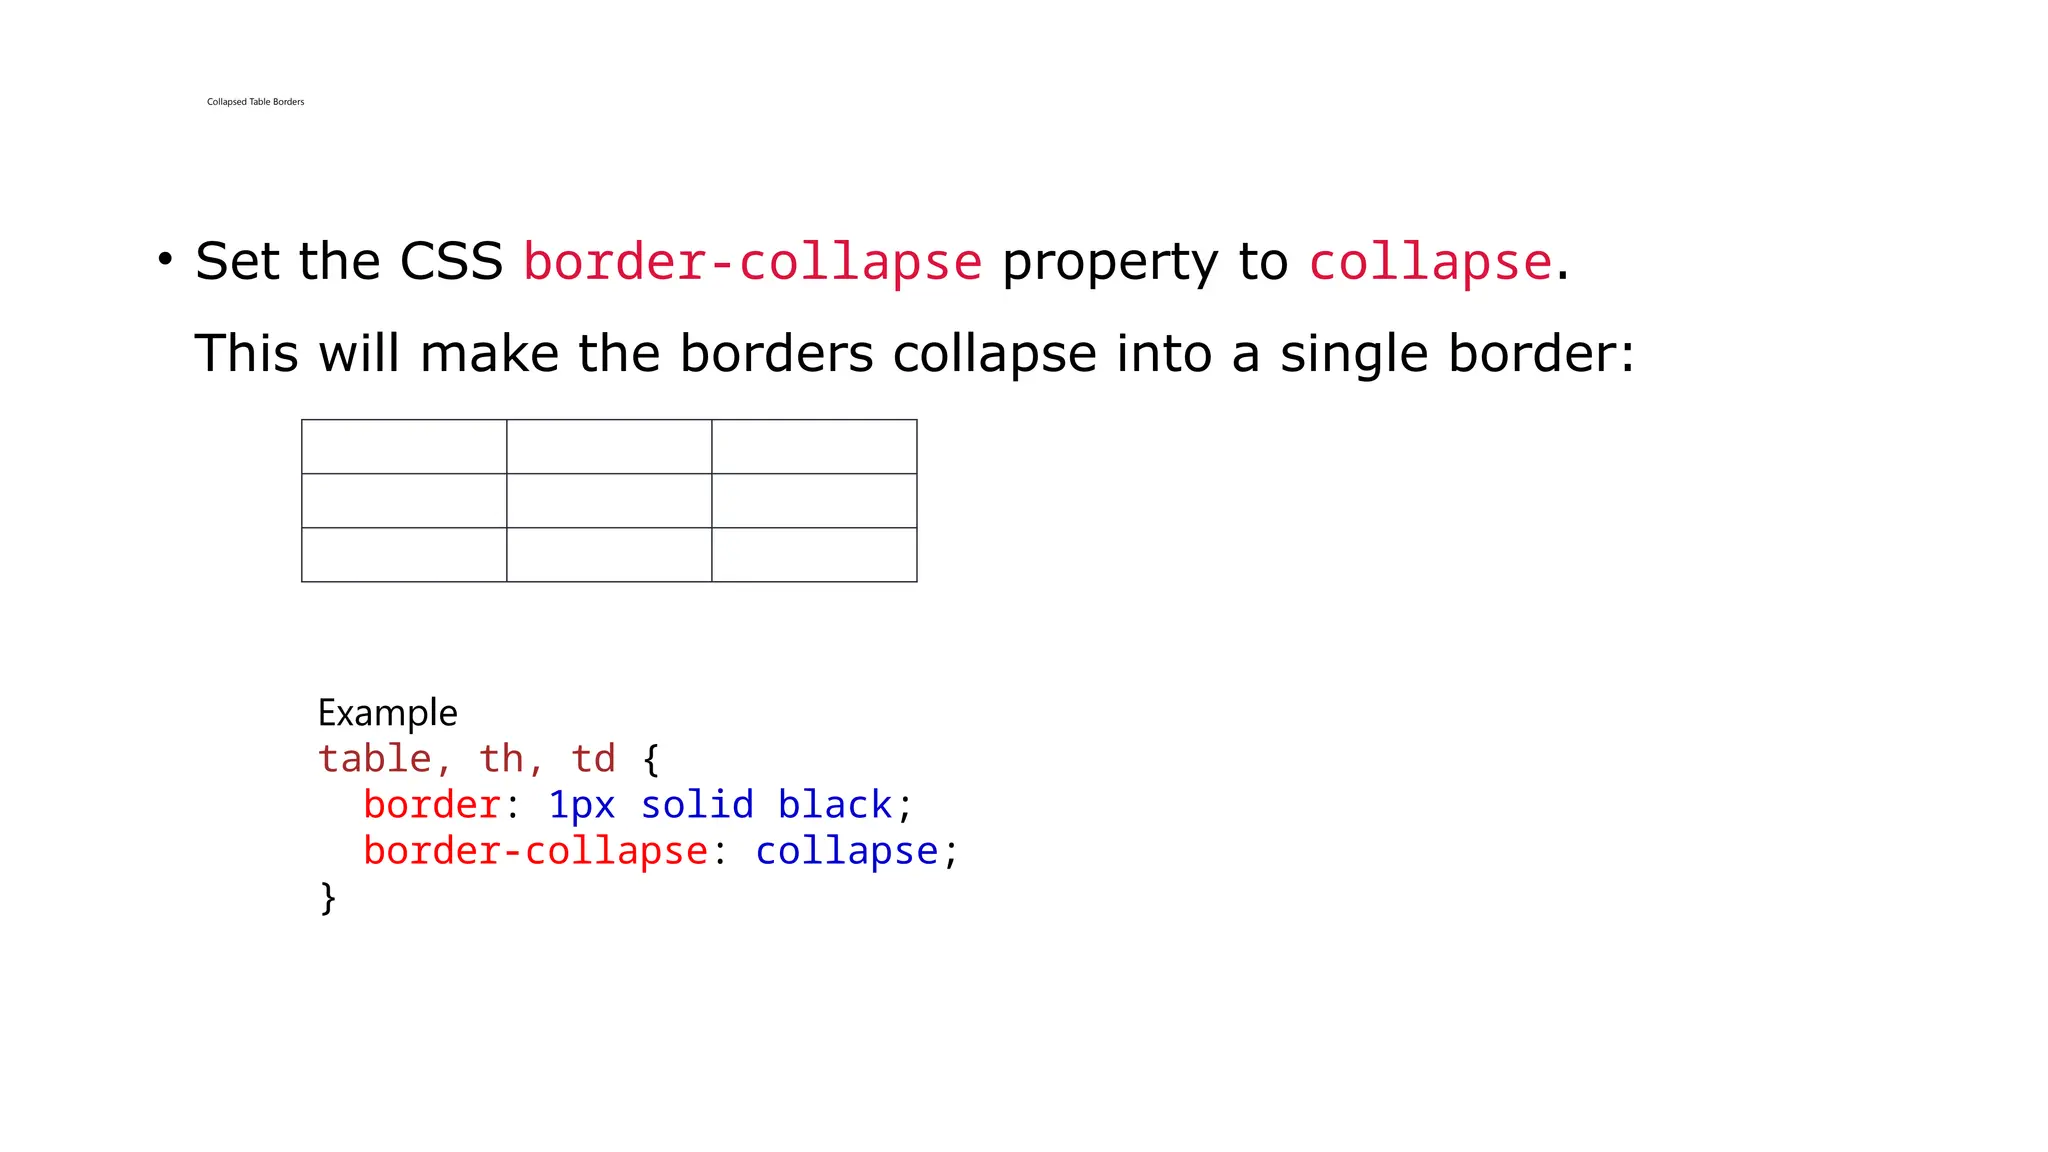
Collapsed Table Borders
•Set the CSS border-collapse property to collapse.
This will make the borders collapse into a single border:
Example
table, th, td {
border: 1px solid black;
border-collapse: collapse;
}
60.
Style Table Borders
•If you set a background color of each cell, and give the border a white color
(the same as the document background), you get the impression of an
invisible border:
Example
table, th, td {
border: 1px solid white;
border-collapse: collapse;
}
th, td {
background-color: #96D4D4;
}
61.
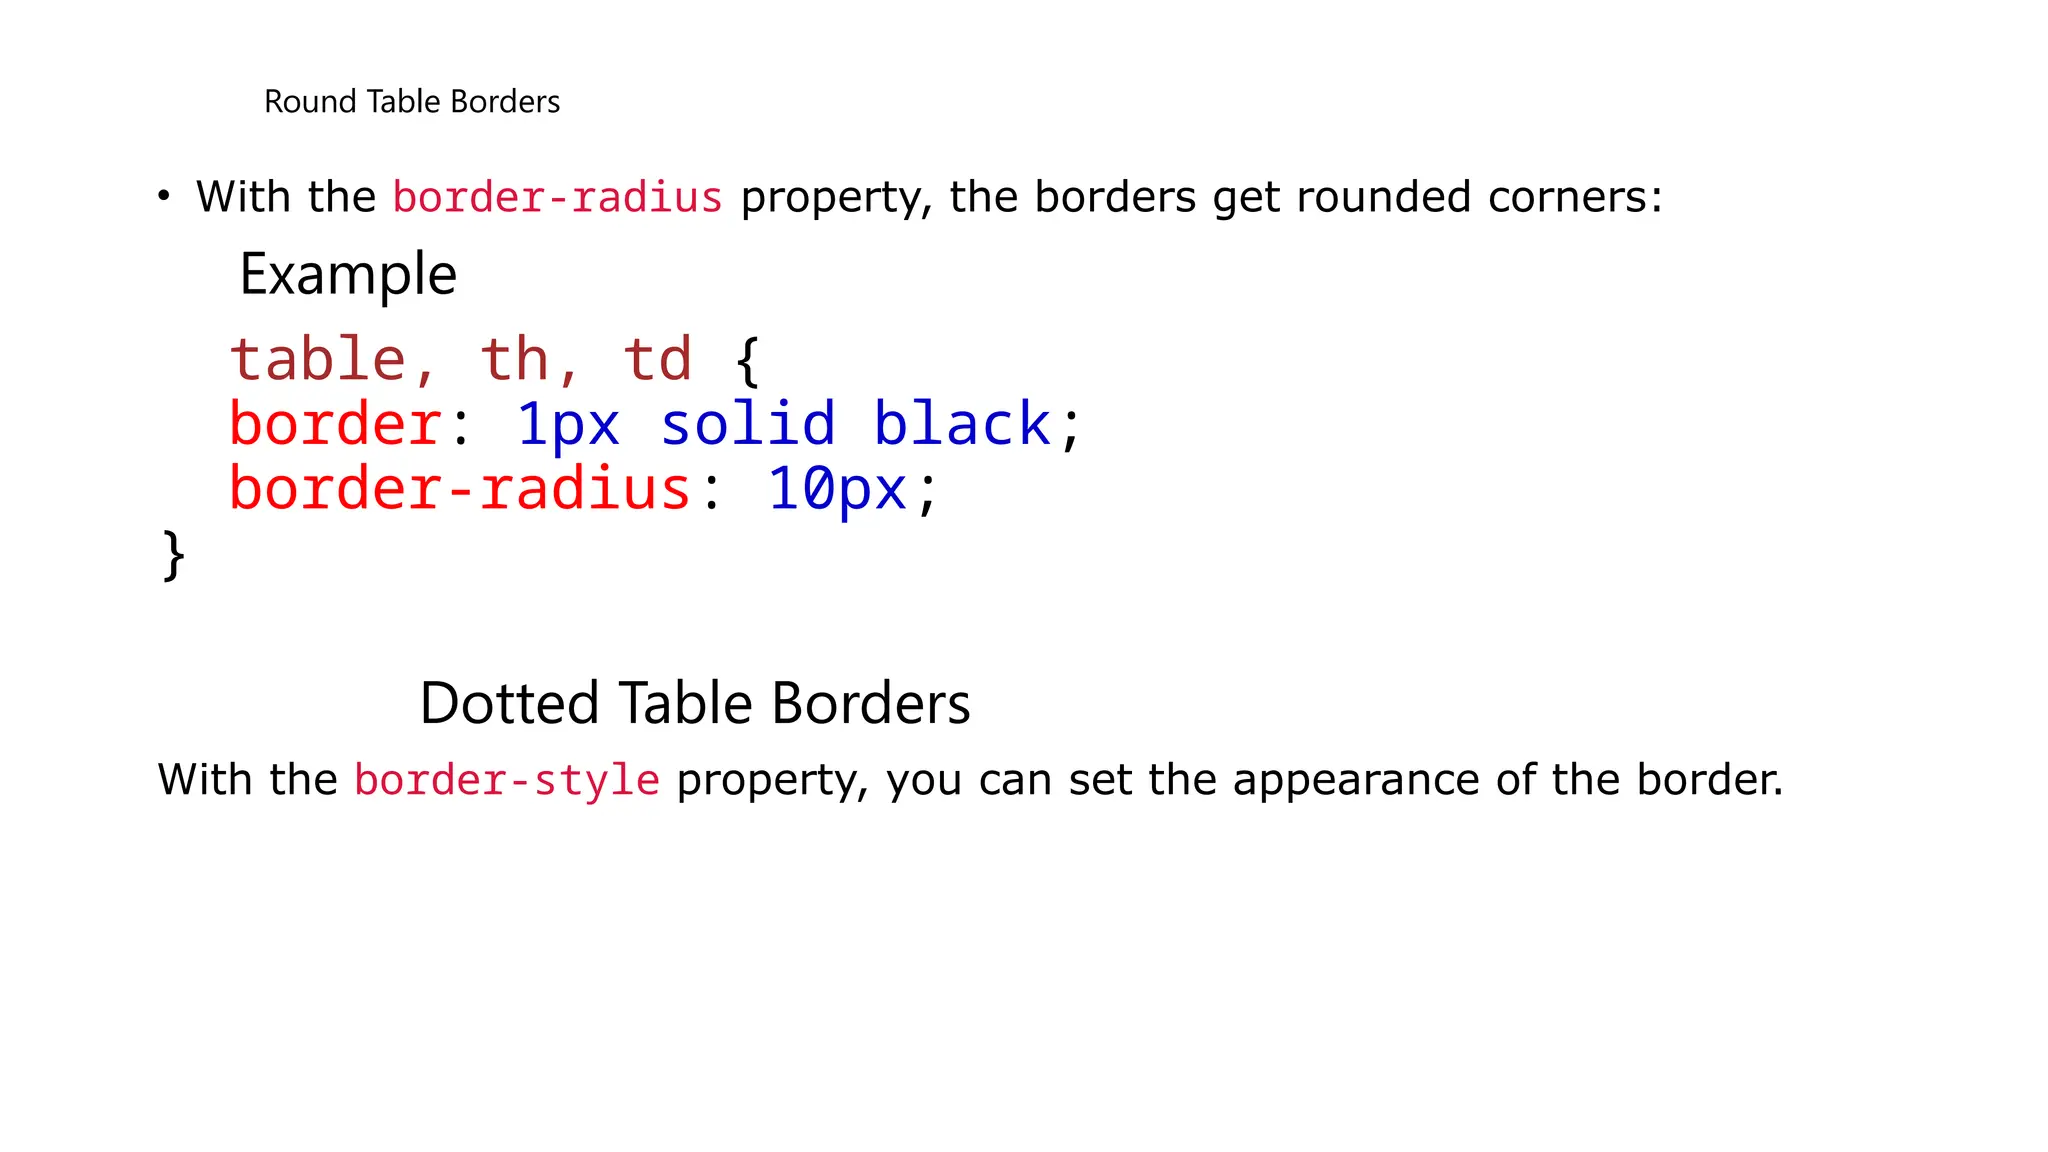
Round Table Borders
•With the border-radius property, the borders get rounded corners:
Example
table, th, td {
border: 1px solid black;
border-radius: 10px;
}
Dotted Table Borders
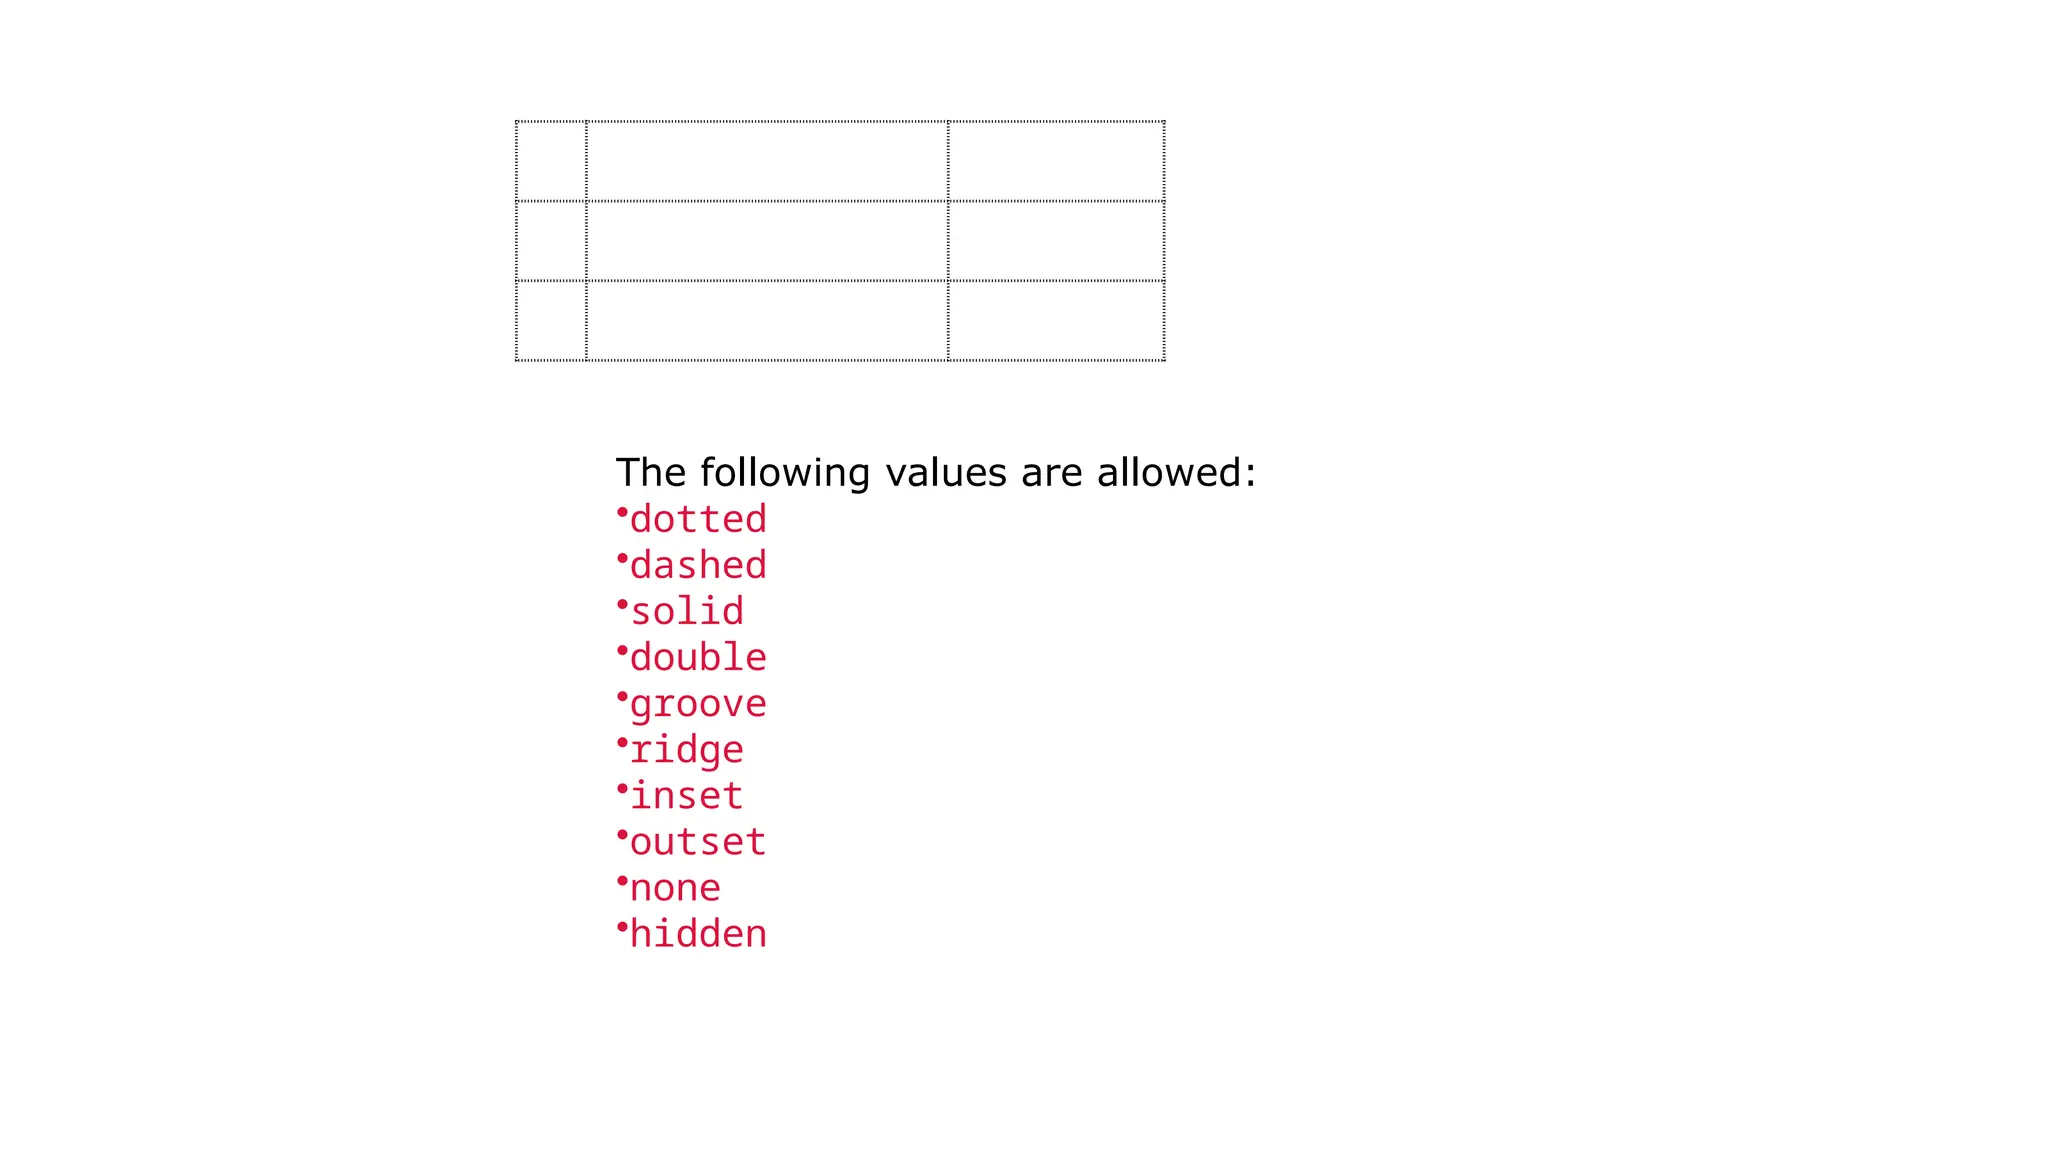
With the border-style property, you can set the appearance of the border.
62.
The following valuesare allowed:
•dotted
•dashed
•solid
•double
•groove
•ridge
•inset
•outset
•none
•hidden
63.
Example
th, td {
border-style:dotted;
}
Border Color
With the border-color property, you can set the color of the border.
Example
th, td {
border-color: #96D4D4;
}
64.
HTML Table Sizes
•HTML tables can have different sizes for each column, row or the entire table.
• Use the style attribute with the width or height properties to specify the
size of a table, row or column.
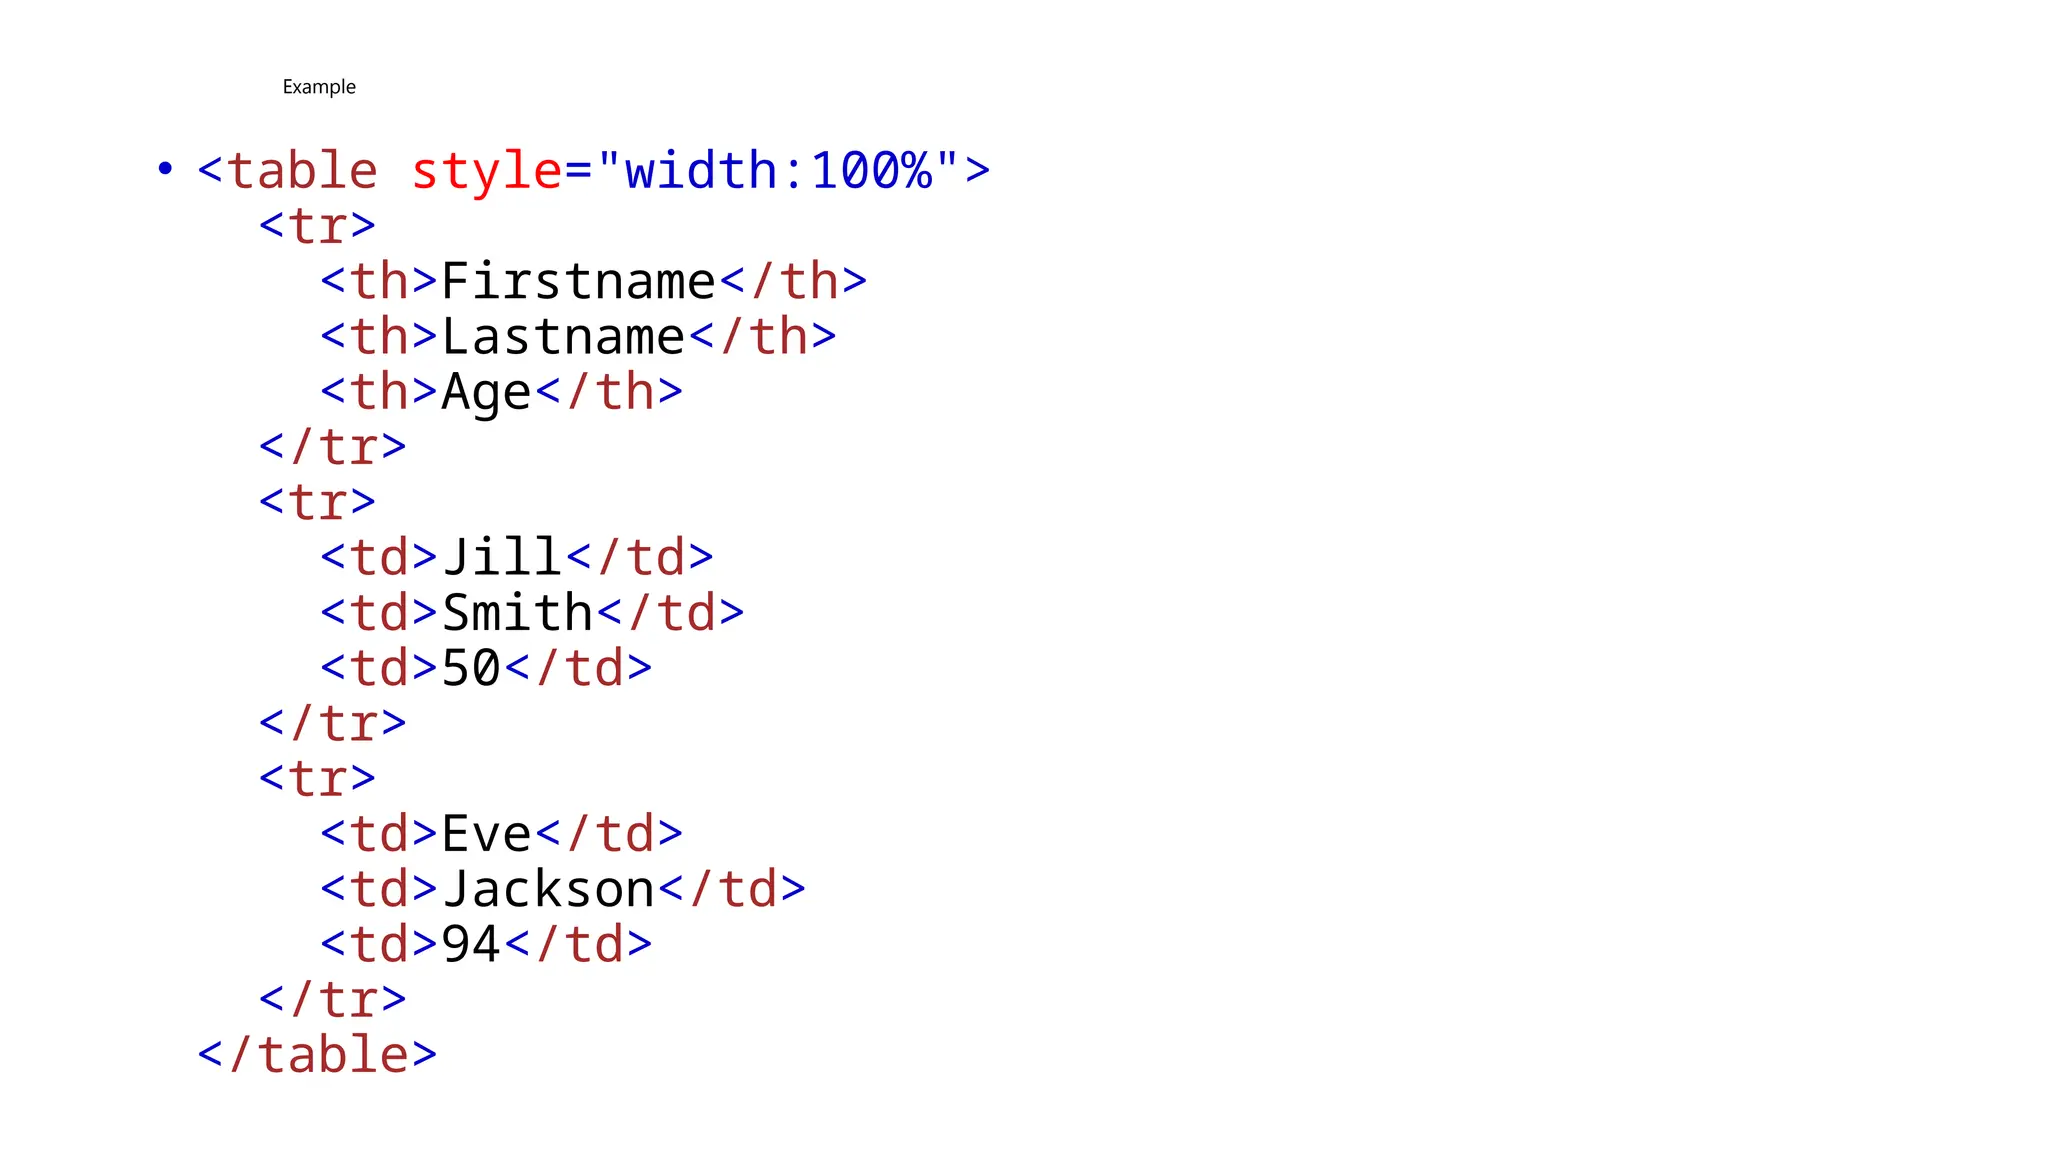
HTML Table Width
To set the width of a table, add the style attribute to
the <table> element:
HTML Table ColumnWidth
• To set the size of a specific column, add the style attribute on a <th> or <td> element:
• Example
• Set the width of the first column to 70%:
• <table style="width:100%">
<tr>
<th style="width:70%">Firstname</th>
<th>Lastname</th>
<th>Age</th>
</tr>
<tr>
<td>Jill</td>
<td>Smith</td>
<td>50</td>
</tr>
<tr>
<td>Eve</td>
<td>Jackson</td>
<td>94</td>
</tr>
</table>
67.
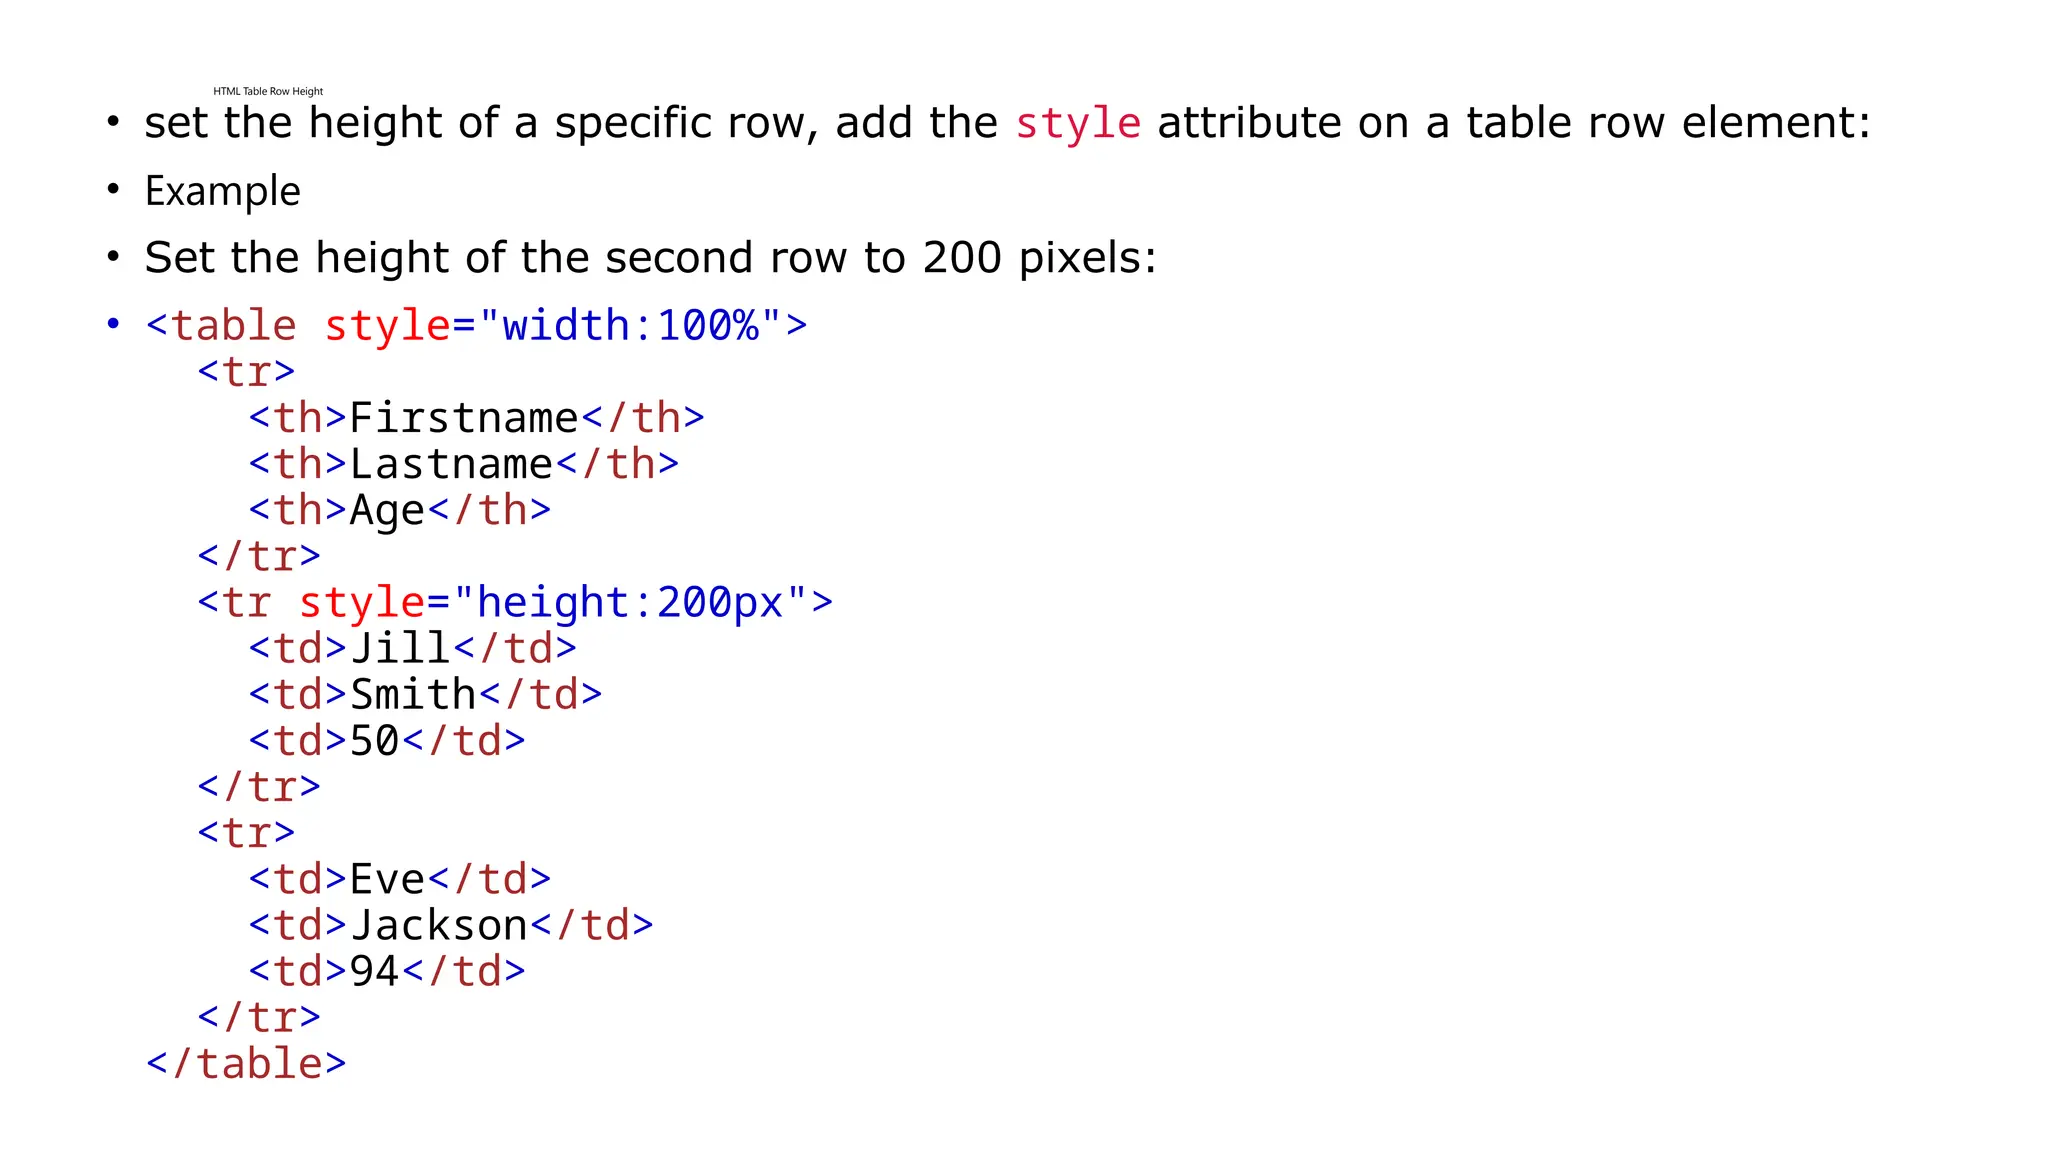
HTML Table RowHeight
• set the height of a specific row, add the style attribute on a table row element:
• Example
• Set the height of the second row to 200 pixels:
• <table style="width:100%">
<tr>
<th>Firstname</th>
<th>Lastname</th>
<th>Age</th>
</tr>
<tr style="height:200px">
<td>Jill</td>
<td>Smith</td>
<td>50</td>
</tr>
<tr>
<td>Eve</td>
<td>Jackson</td>
<td>94</td>
</tr>
</table>
68.
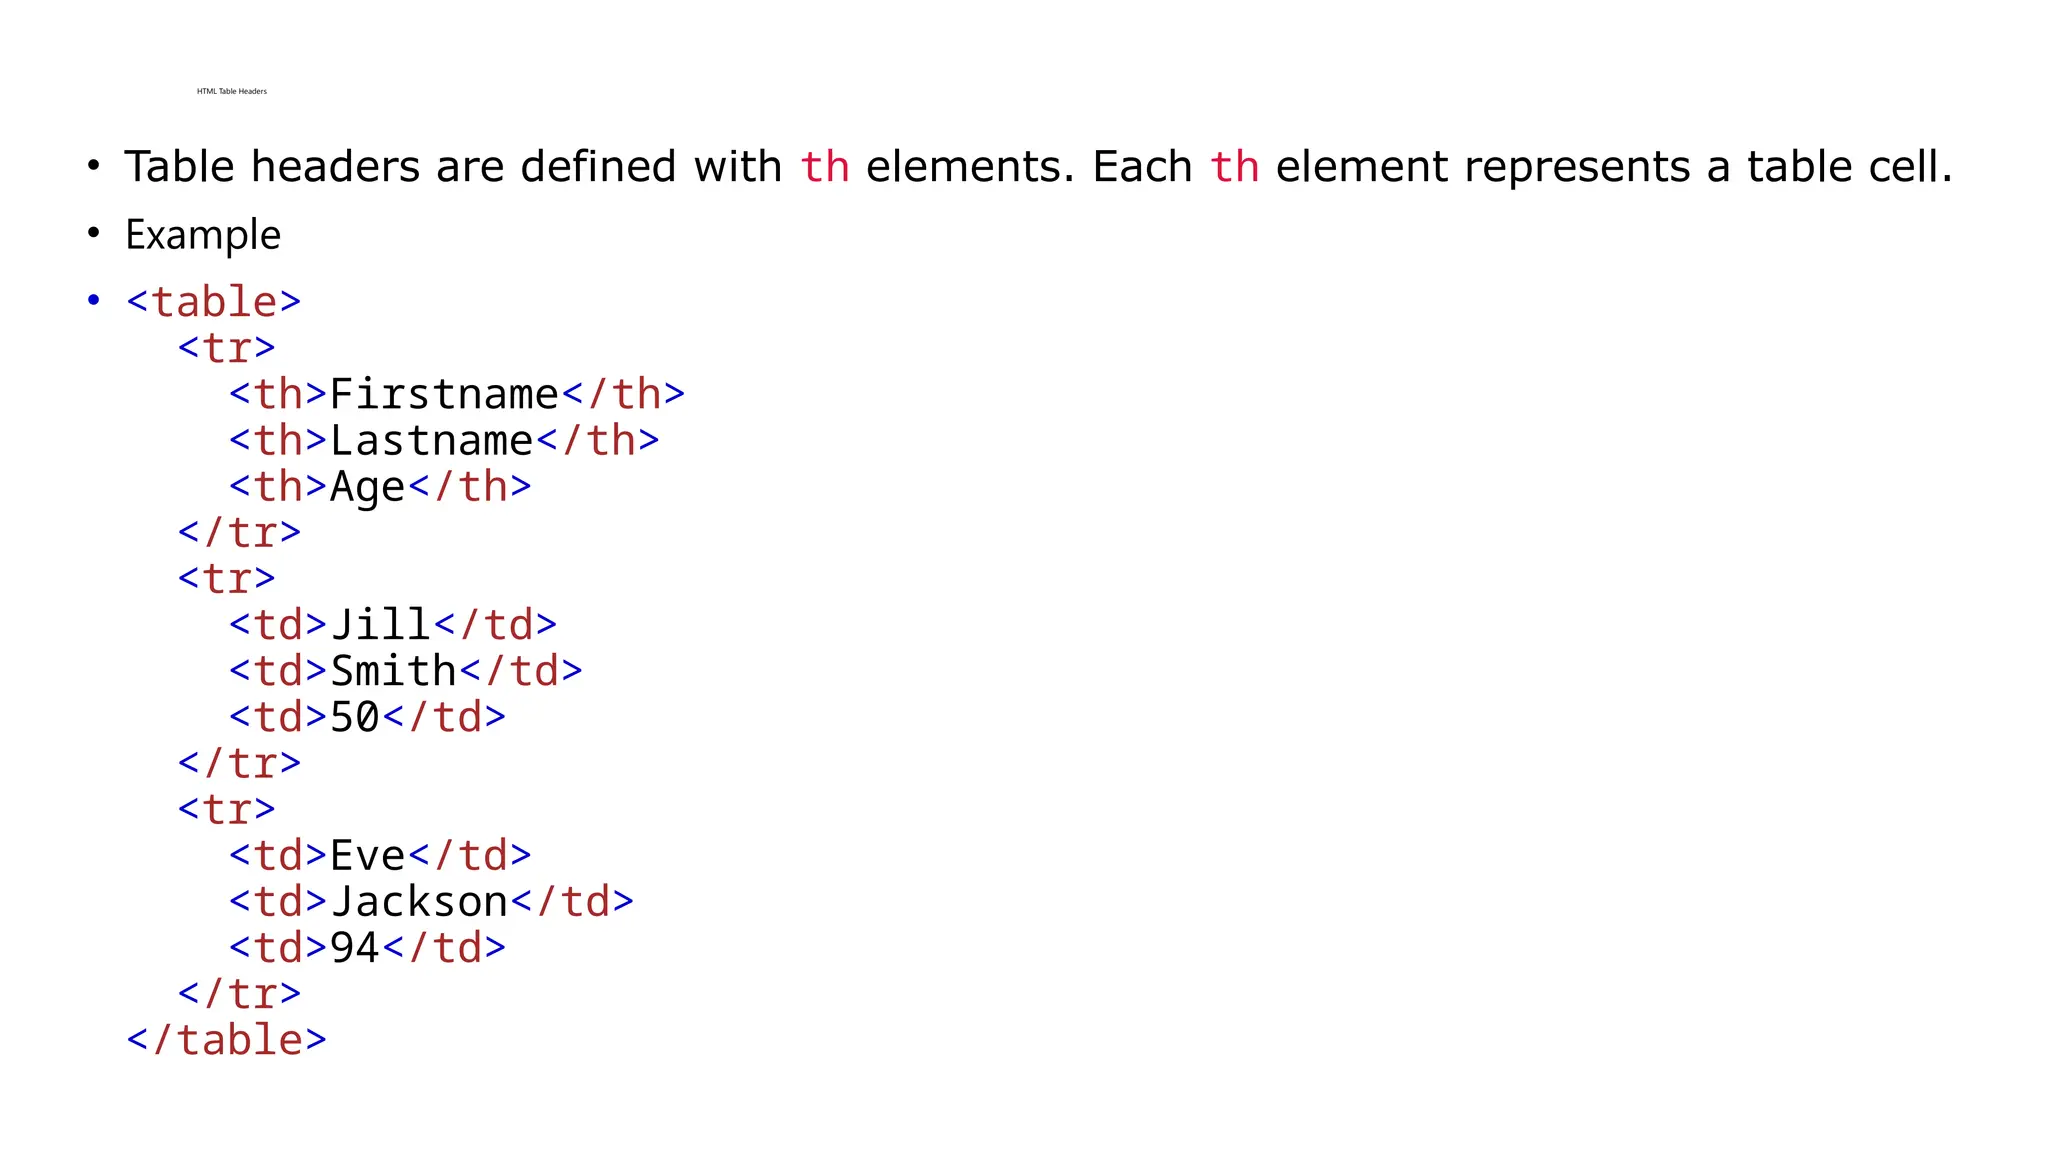
HTML Table Headers
•Table headers are defined with th elements. Each th element represents a table cell.
• Example
• <table>
<tr>
<th>Firstname</th>
<th>Lastname</th>
<th>Age</th>
</tr>
<tr>
<td>Jill</td>
<td>Smith</td>
<td>50</td>
</tr>
<tr>
<td>Eve</td>
<td>Jackson</td>
<td>94</td>
</tr>
</table>
69.
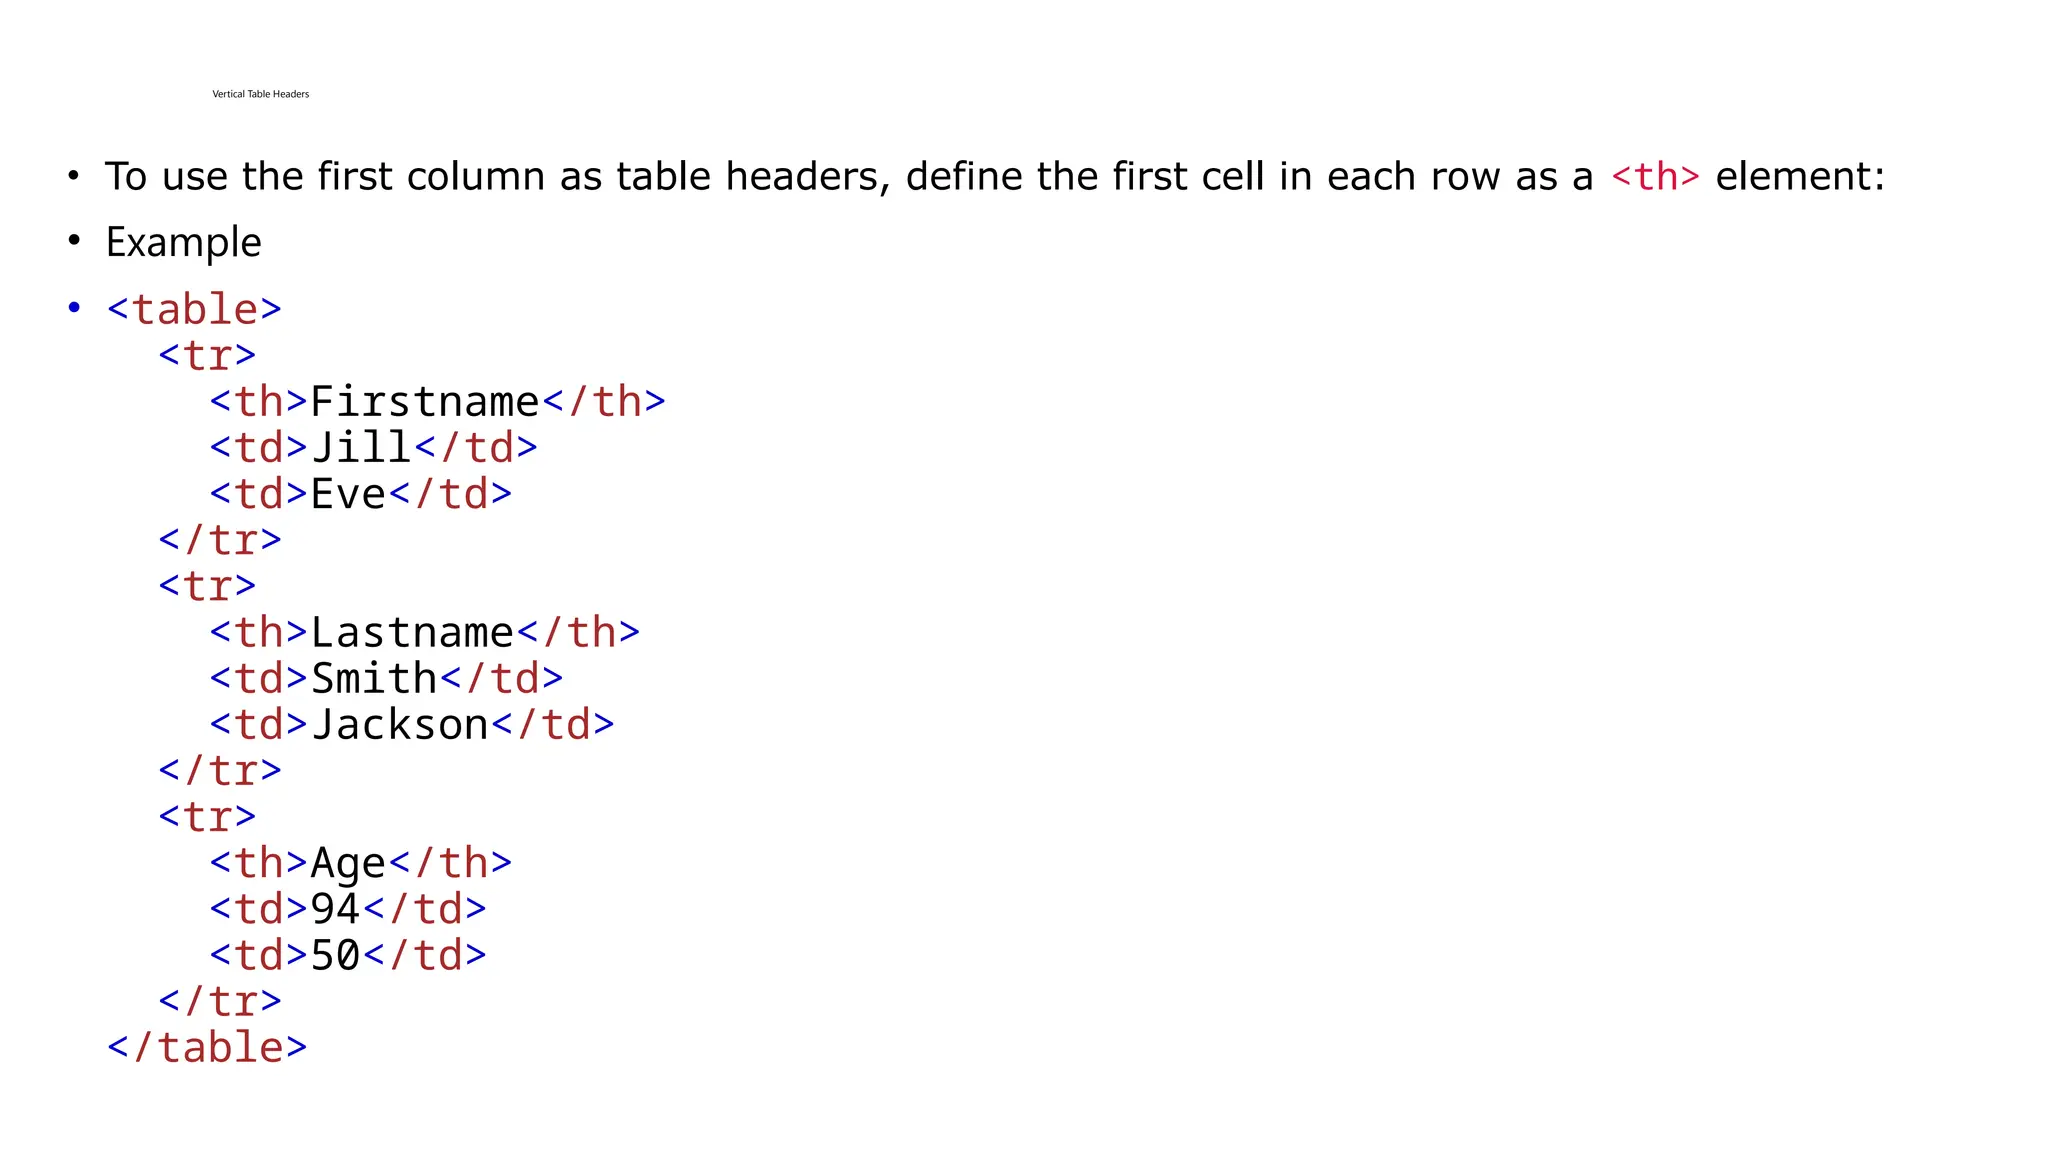
Vertical Table Headers
•To use the first column as table headers, define the first cell in each row as a <th> element:
• Example
• <table>
<tr>
<th>Firstname</th>
<td>Jill</td>
<td>Eve</td>
</tr>
<tr>
<th>Lastname</th>
<td>Smith</td>
<td>Jackson</td>
</tr>
<tr>
<th>Age</th>
<td>94</td>
<td>50</td>
</tr>
</table>
70.
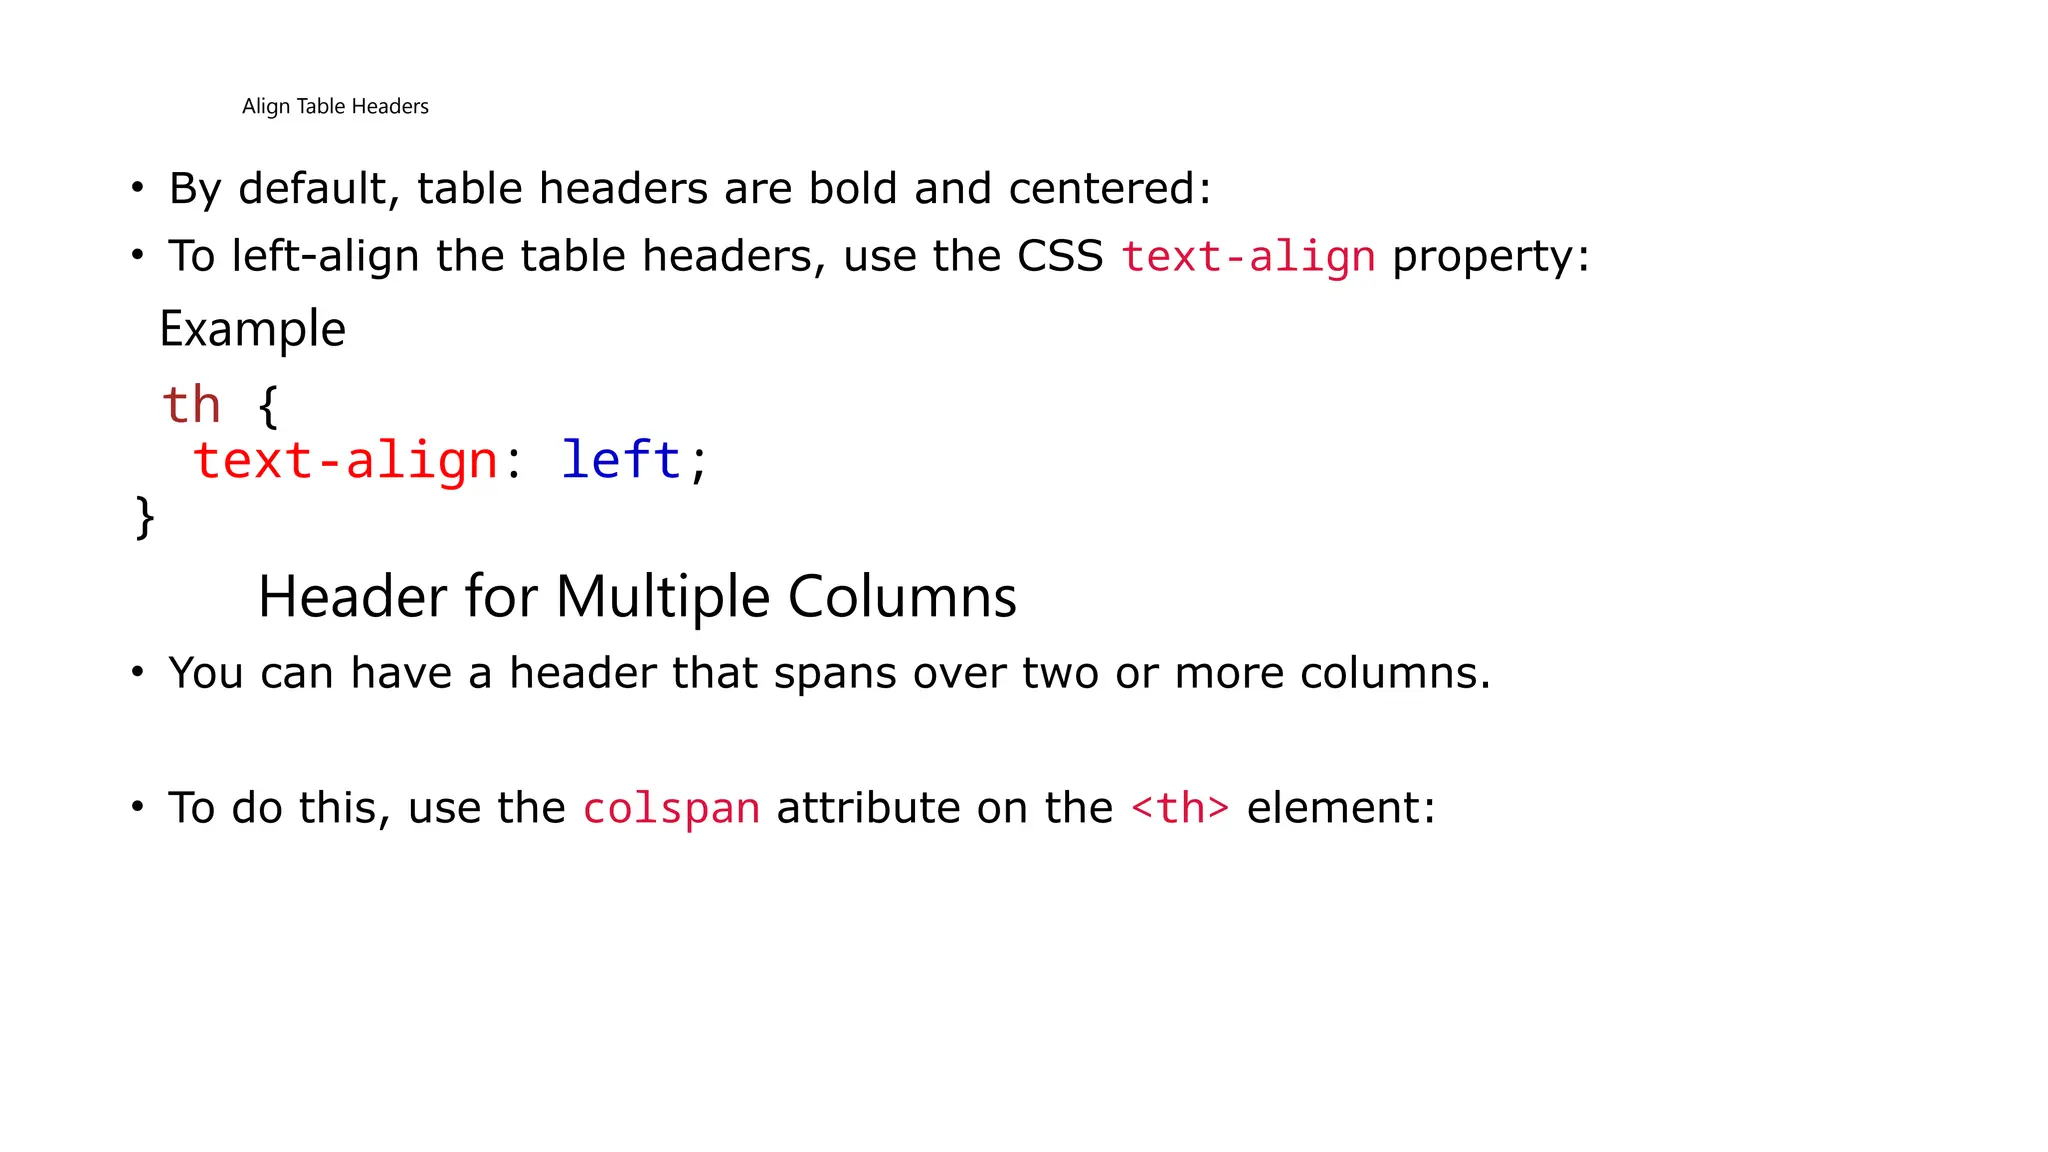
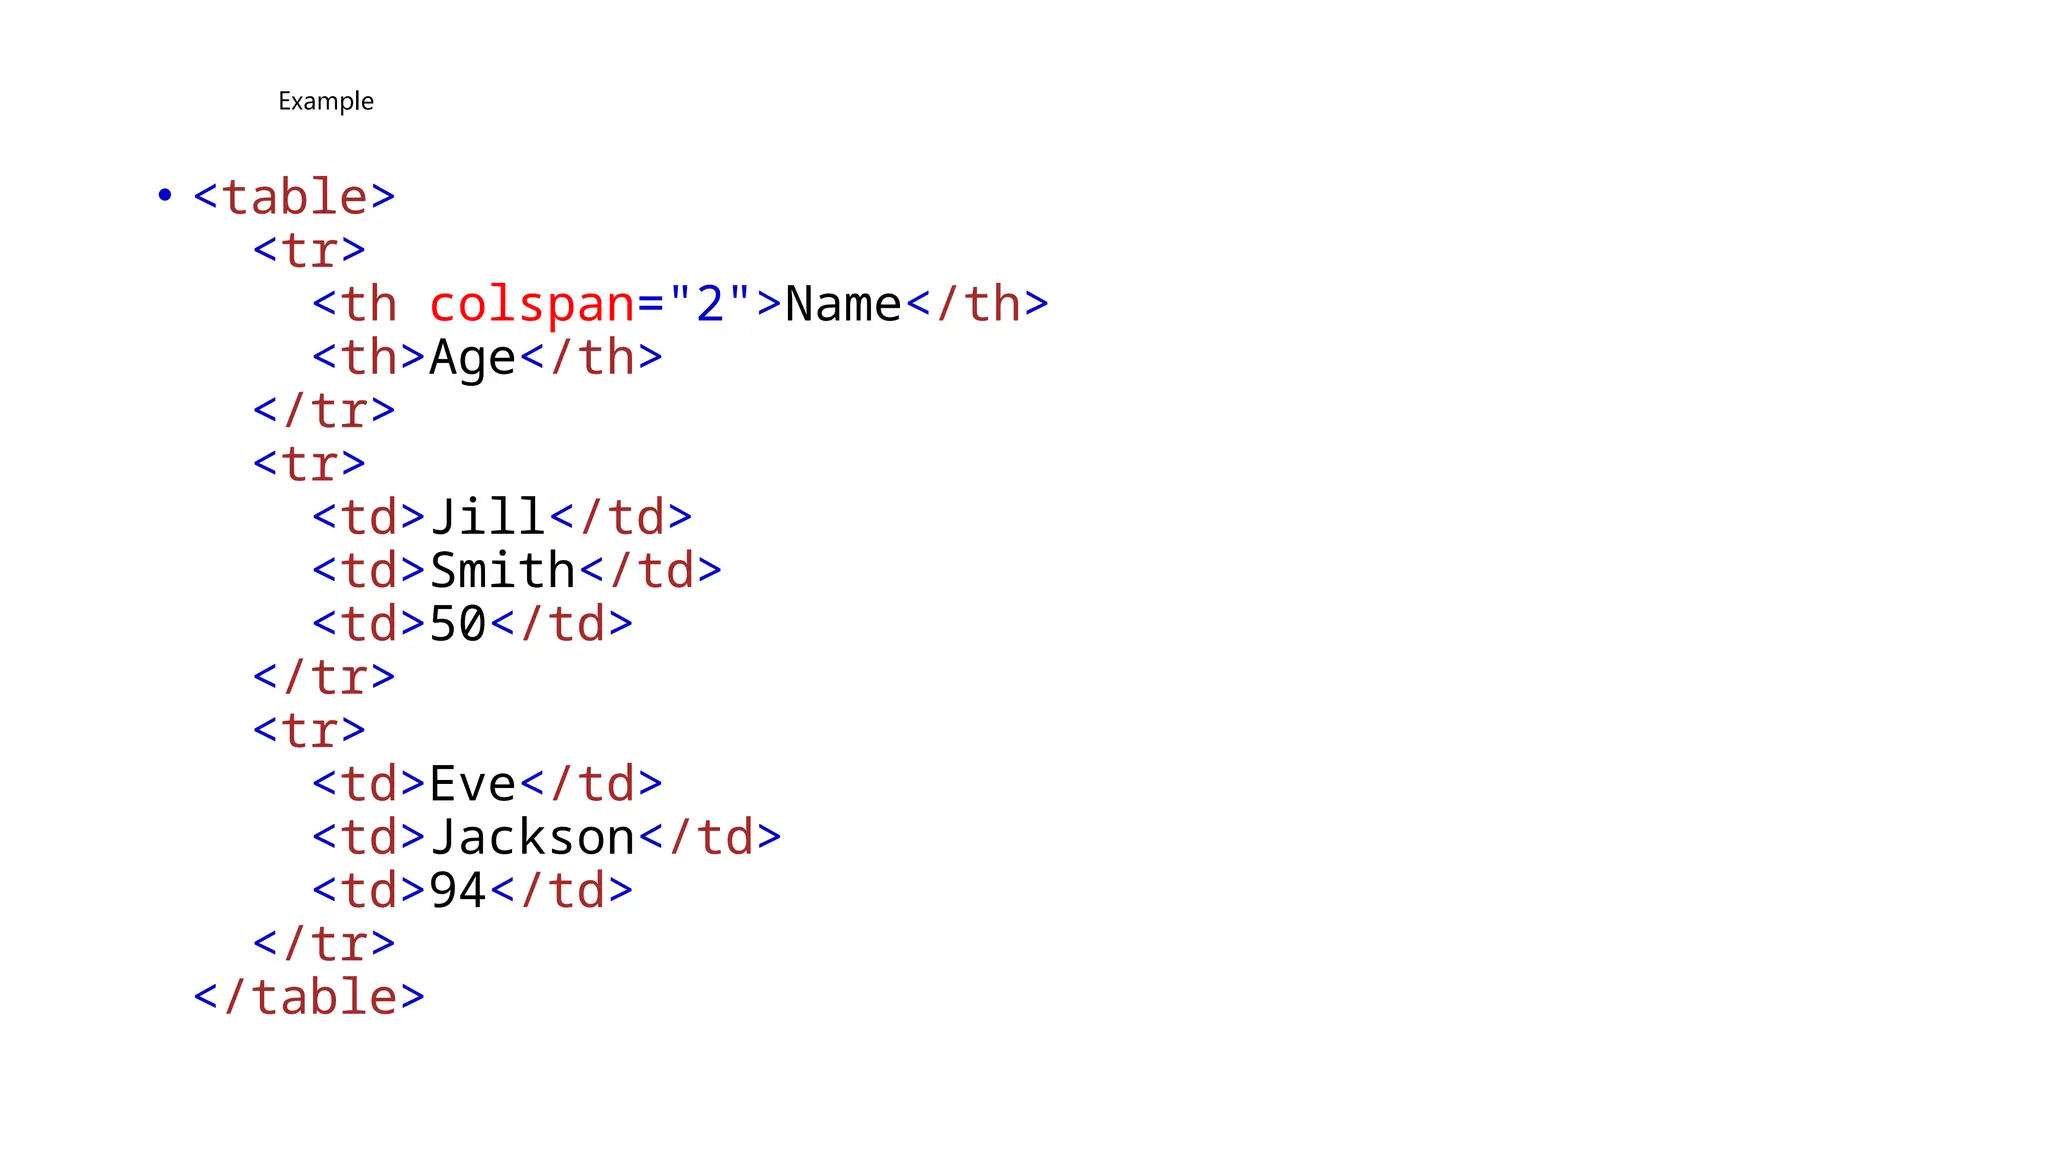
Align Table Headers
•By default, table headers are bold and centered:
• To left-align the table headers, use the CSS text-align property:
Example
th {
text-align: left;
}
Header for Multiple Columns
• You can have a header that spans over two or more columns.
• To do this, use the colspan attribute on the <th> element:
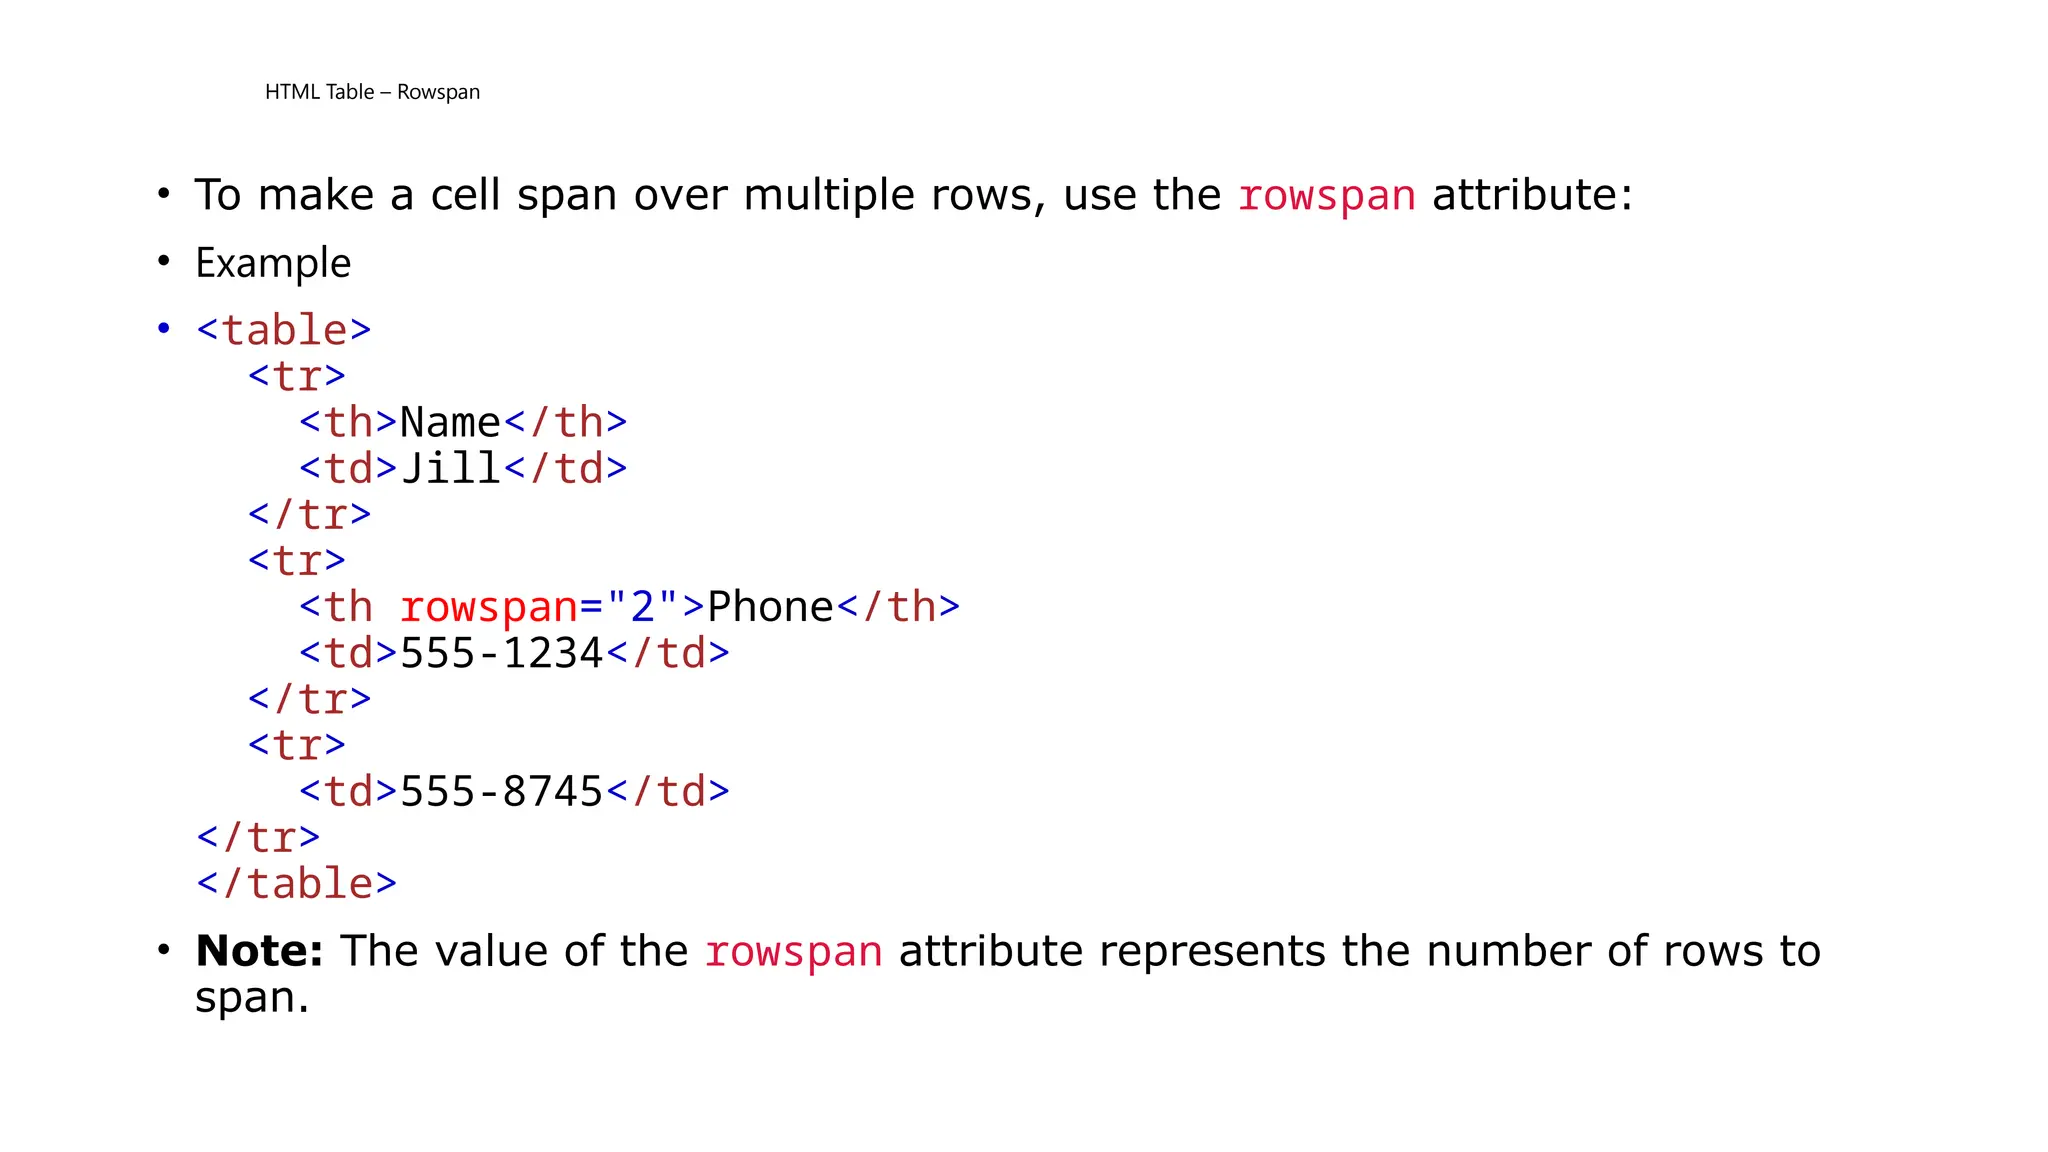
HTML Table –Rowspan
• To make a cell span over multiple rows, use the rowspan attribute:
• Example
• <table>
<tr>
<th>Name</th>
<td>Jill</td>
</tr>
<tr>
<th rowspan="2">Phone</th>
<td>555-1234</td>
</tr>
<tr>
<td>555-8745</td>
</tr>
</table>
• Note: The value of the rowspan attribute represents the number of rows to
span.
73.
HTML Block andInline Elements
• Every HTML element has a default display value, depending on what type of
element it is.
• There are two display values: block and inline.
• A block-level element always starts on a new line, and the browsers
automatically add some space (a margin) before and after the element.
A block-level element always takes up the full width available (stretches out to
the left and right as far as it can).
Two commonly used block elements are: <p> and <div>.
The <p> element defines a paragraph in an HTML document.
The <div> element defines a division or a section in an HTML document.
74.
Example
• <p>Hello World</p>
<div>HelloWorld</div>
• Here are the block-level elements in HTML:
• <address> <article> <aside> <blockquote> <canvas> <add> <div>
• <dl> <dt> <fieldset> <figcaption> <figure> <footer> <form>
• <h1><h6> <header> <hr> <li> <main> <nav> <noscript>
• <ol> <video> <p> <pre> <section> <table> <ul>
75.
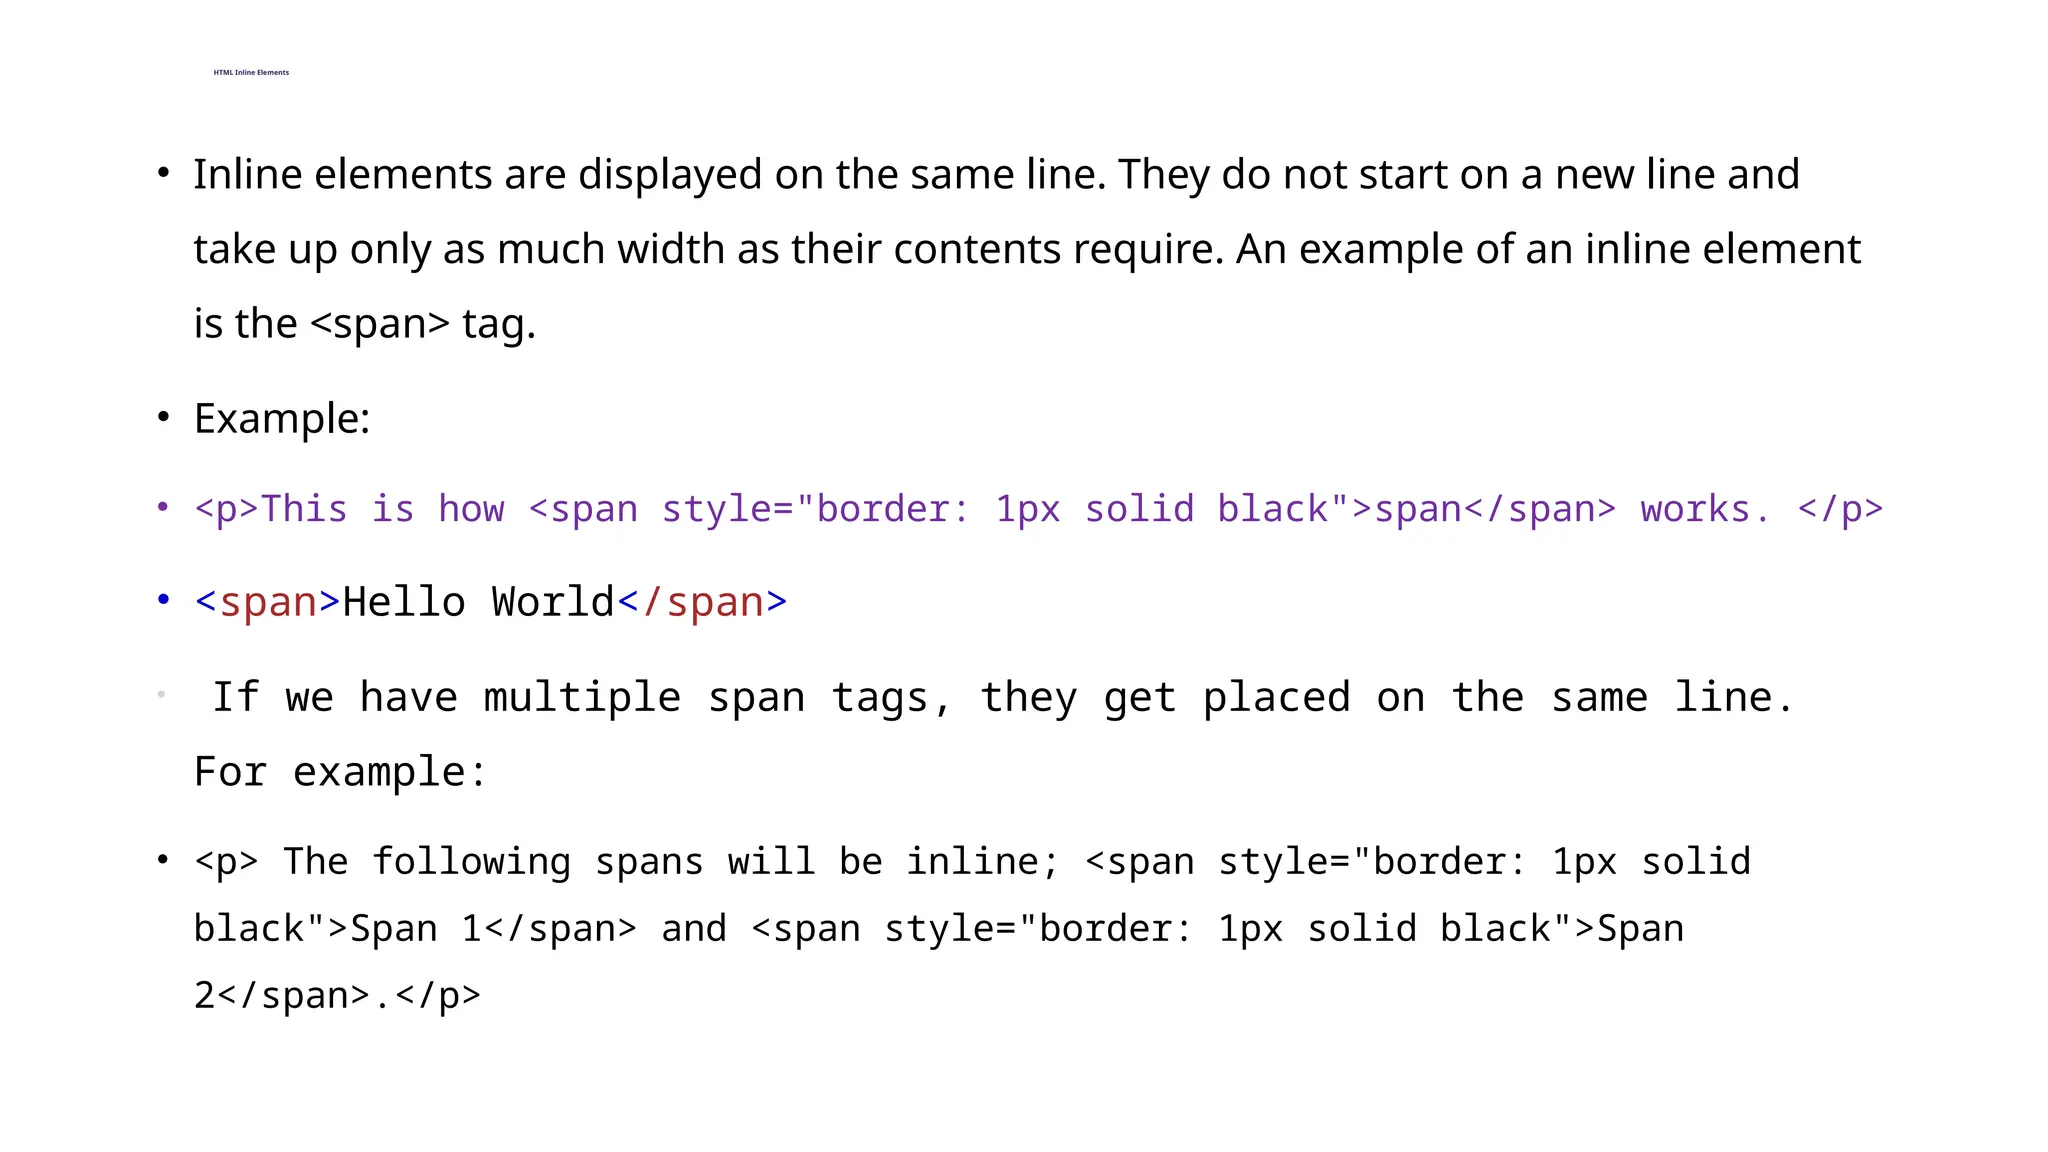
HTML Inline Elements
•Inline elements are displayed on the same line. They do not start on a new line and
take up only as much width as their contents require. An example of an inline element
is the <span> tag.
• Example:
• <p>This is how <span style="border: 1px solid black">span</span> works. </p>
• <span>Hello World</span>
• If we have multiple span tags, they get placed on the same line.
For example:
• <p> The following spans will be inline; <span style="border: 1px solid
black">Span 1</span> and <span style="border: 1px solid black">Span
2</span>.</p>
76.
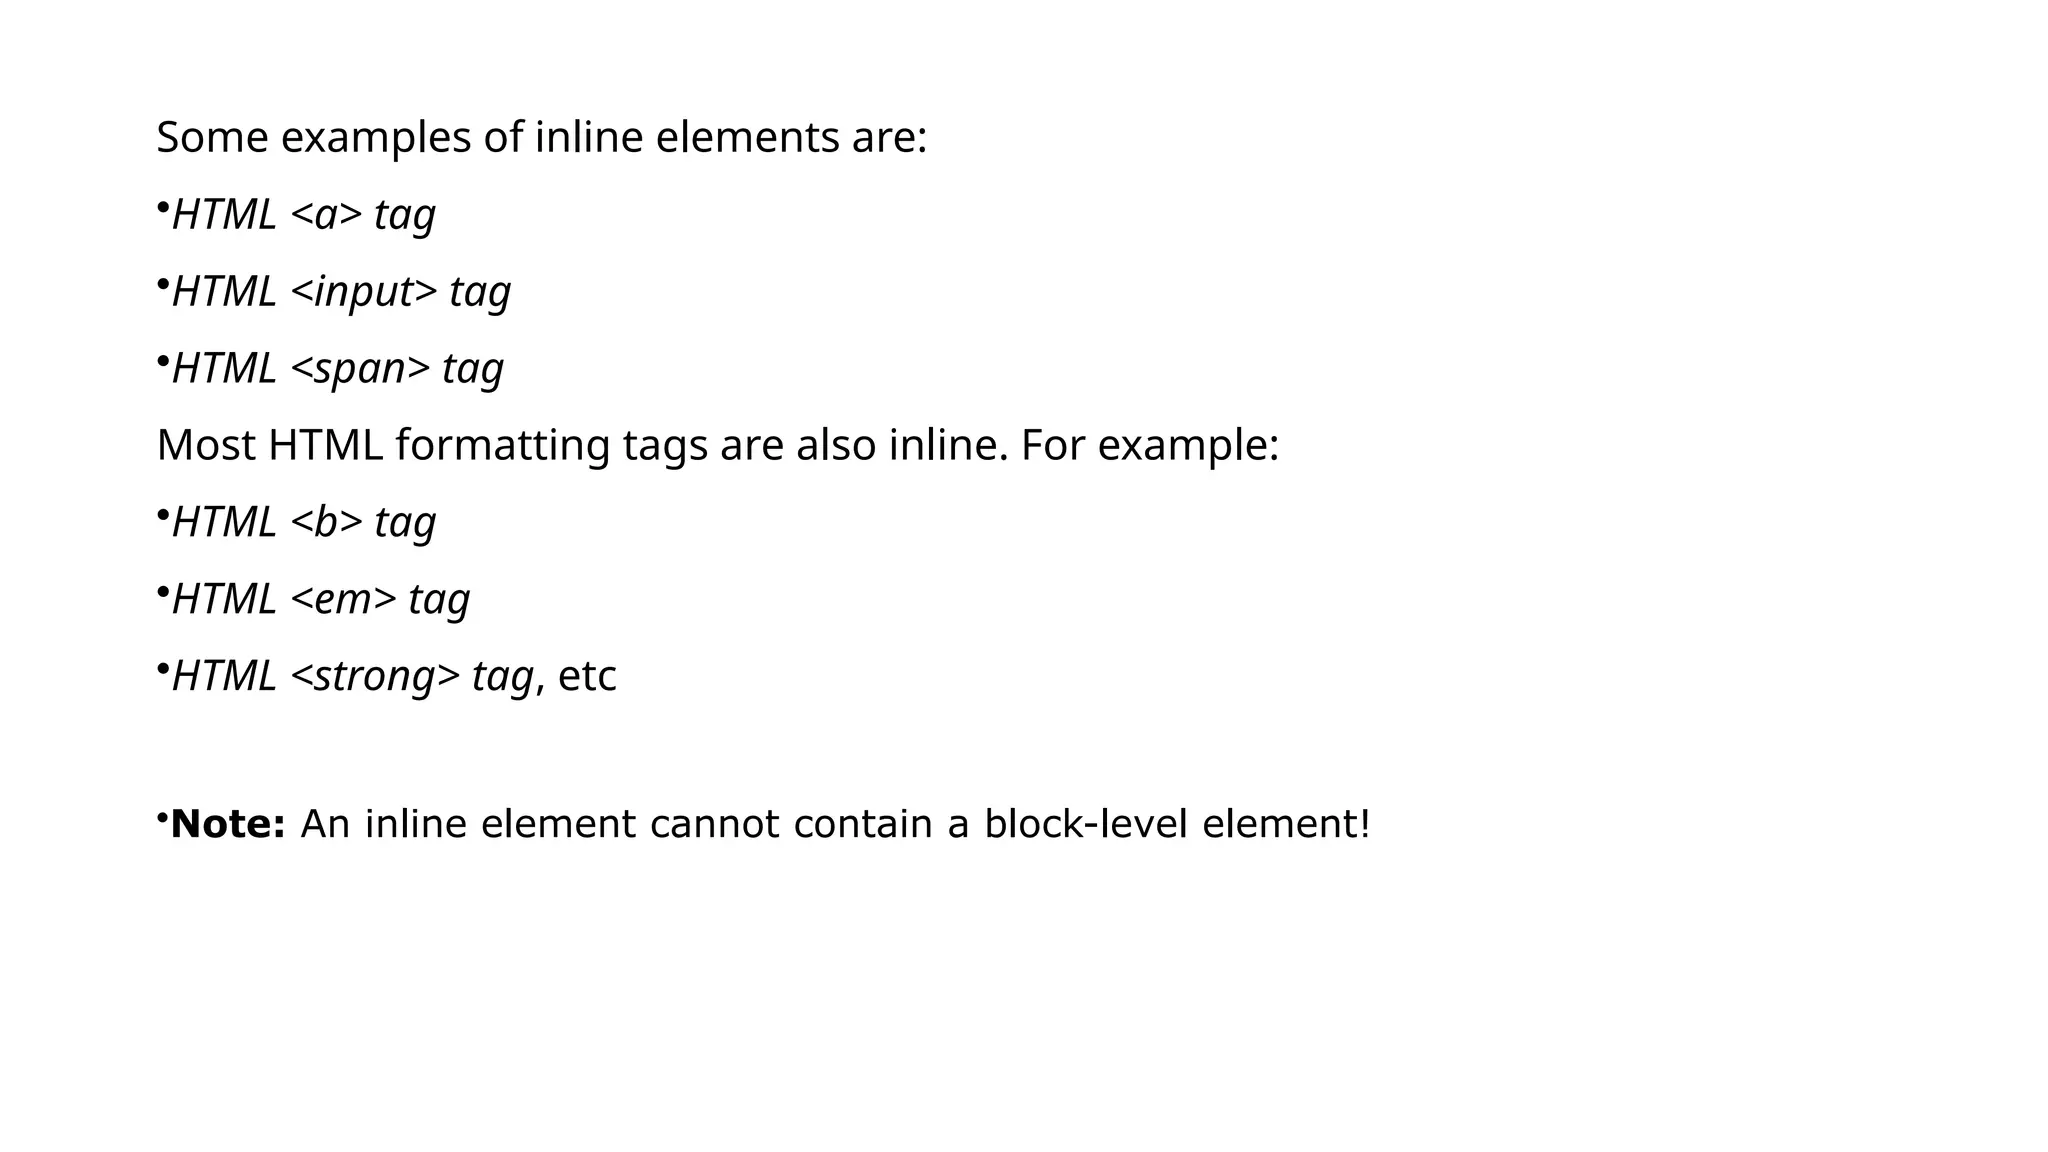
Some examples ofinline elements are:
•HTML <a> tag
•HTML <input> tag
•HTML <span> tag
Most HTML formatting tags are also inline. For example:
•HTML <b> tag
•HTML <em> tag
•HTML <strong> tag, etc
•Note: An inline element cannot contain a block-level element!
77.
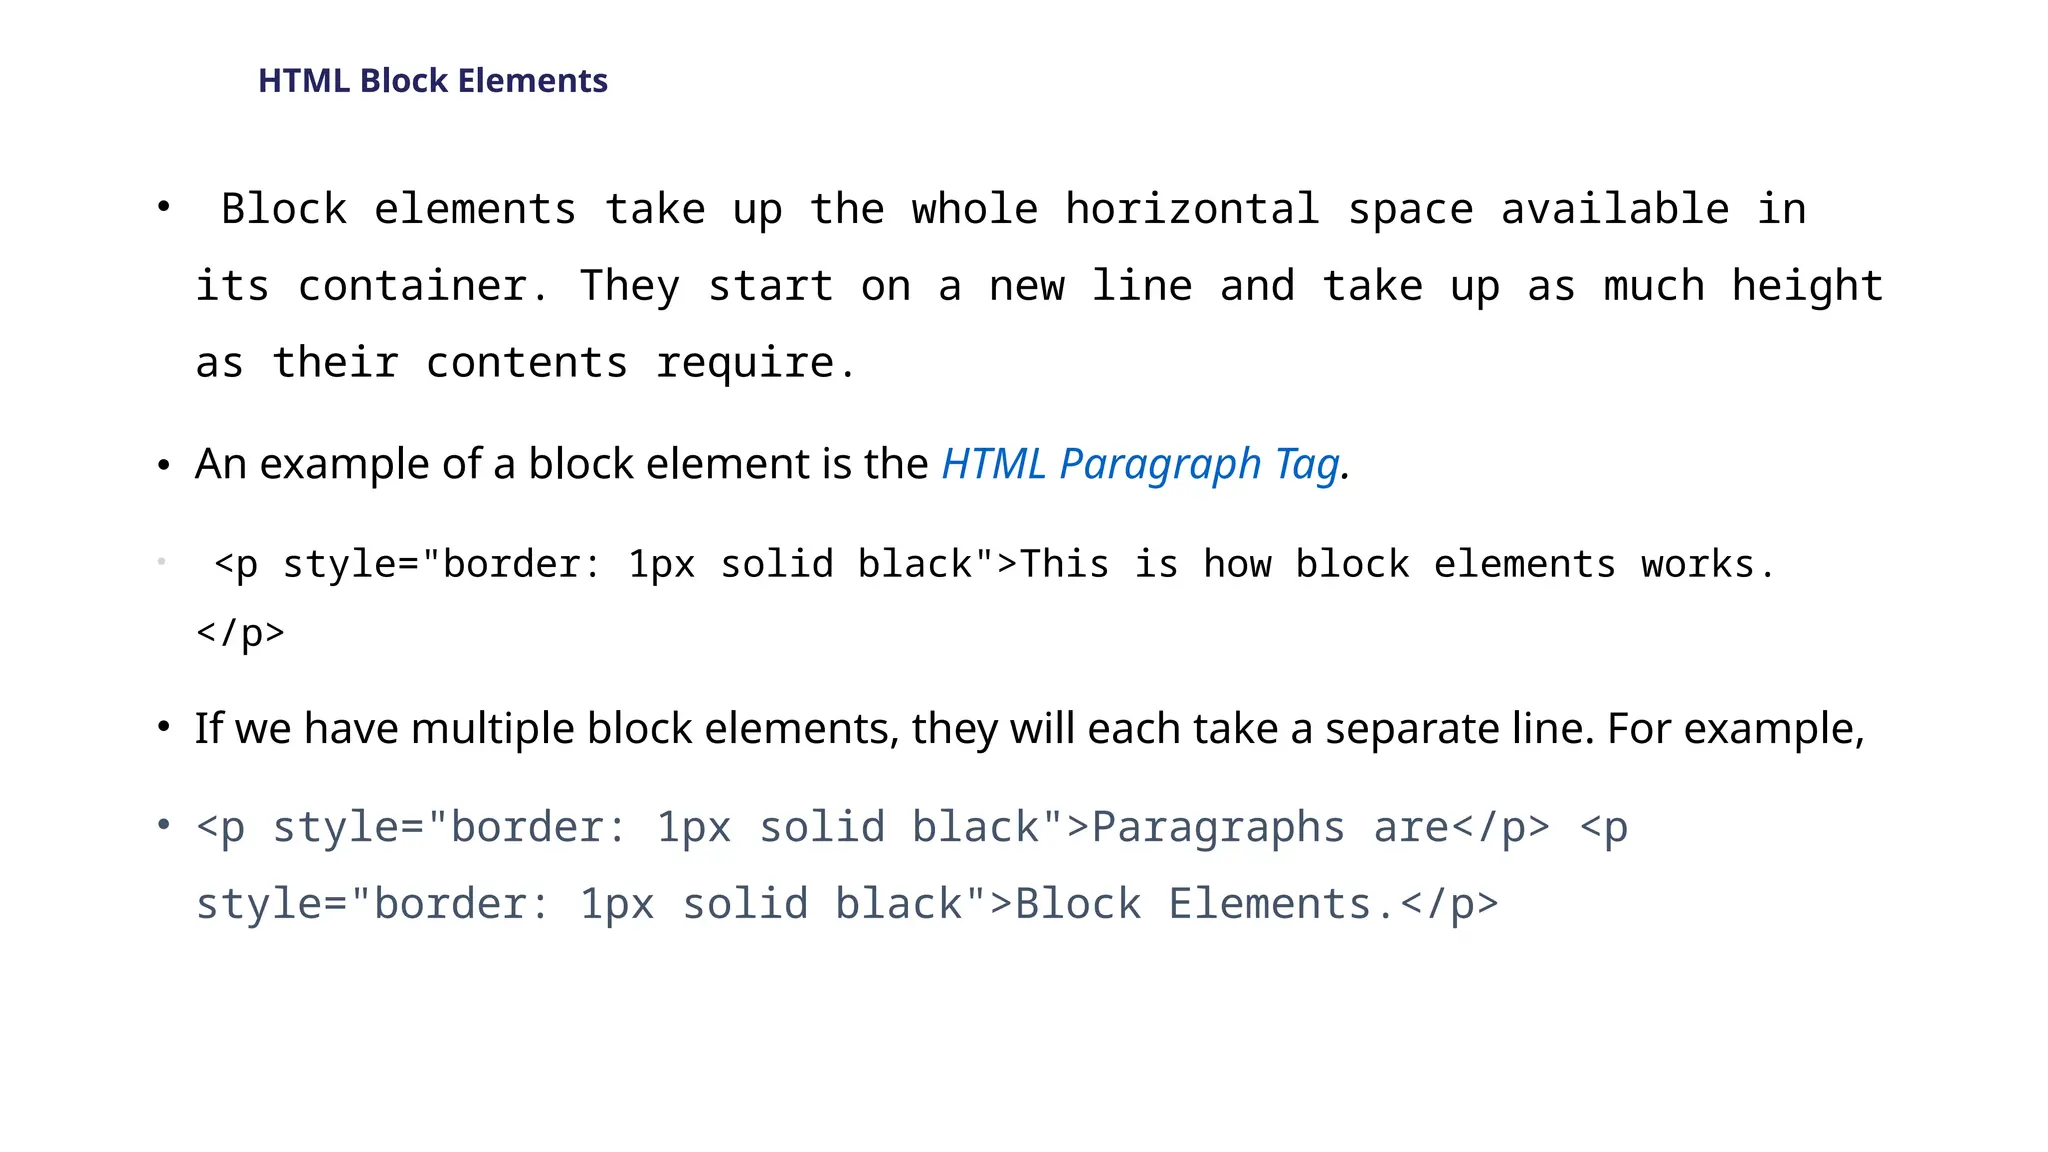
HTML Block Elements
•Block elements take up the whole horizontal space available in
its container. They start on a new line and take up as much height
as their contents require.
• An example of a block element is the HTML Paragraph Tag.
• <p style="border: 1px solid black">This is how block elements works.
</p>
• If we have multiple block elements, they will each take a separate line. For example,
• <p style="border: 1px solid black">Paragraphs are</p> <p
style="border: 1px solid black">Block Elements.</p>
78.
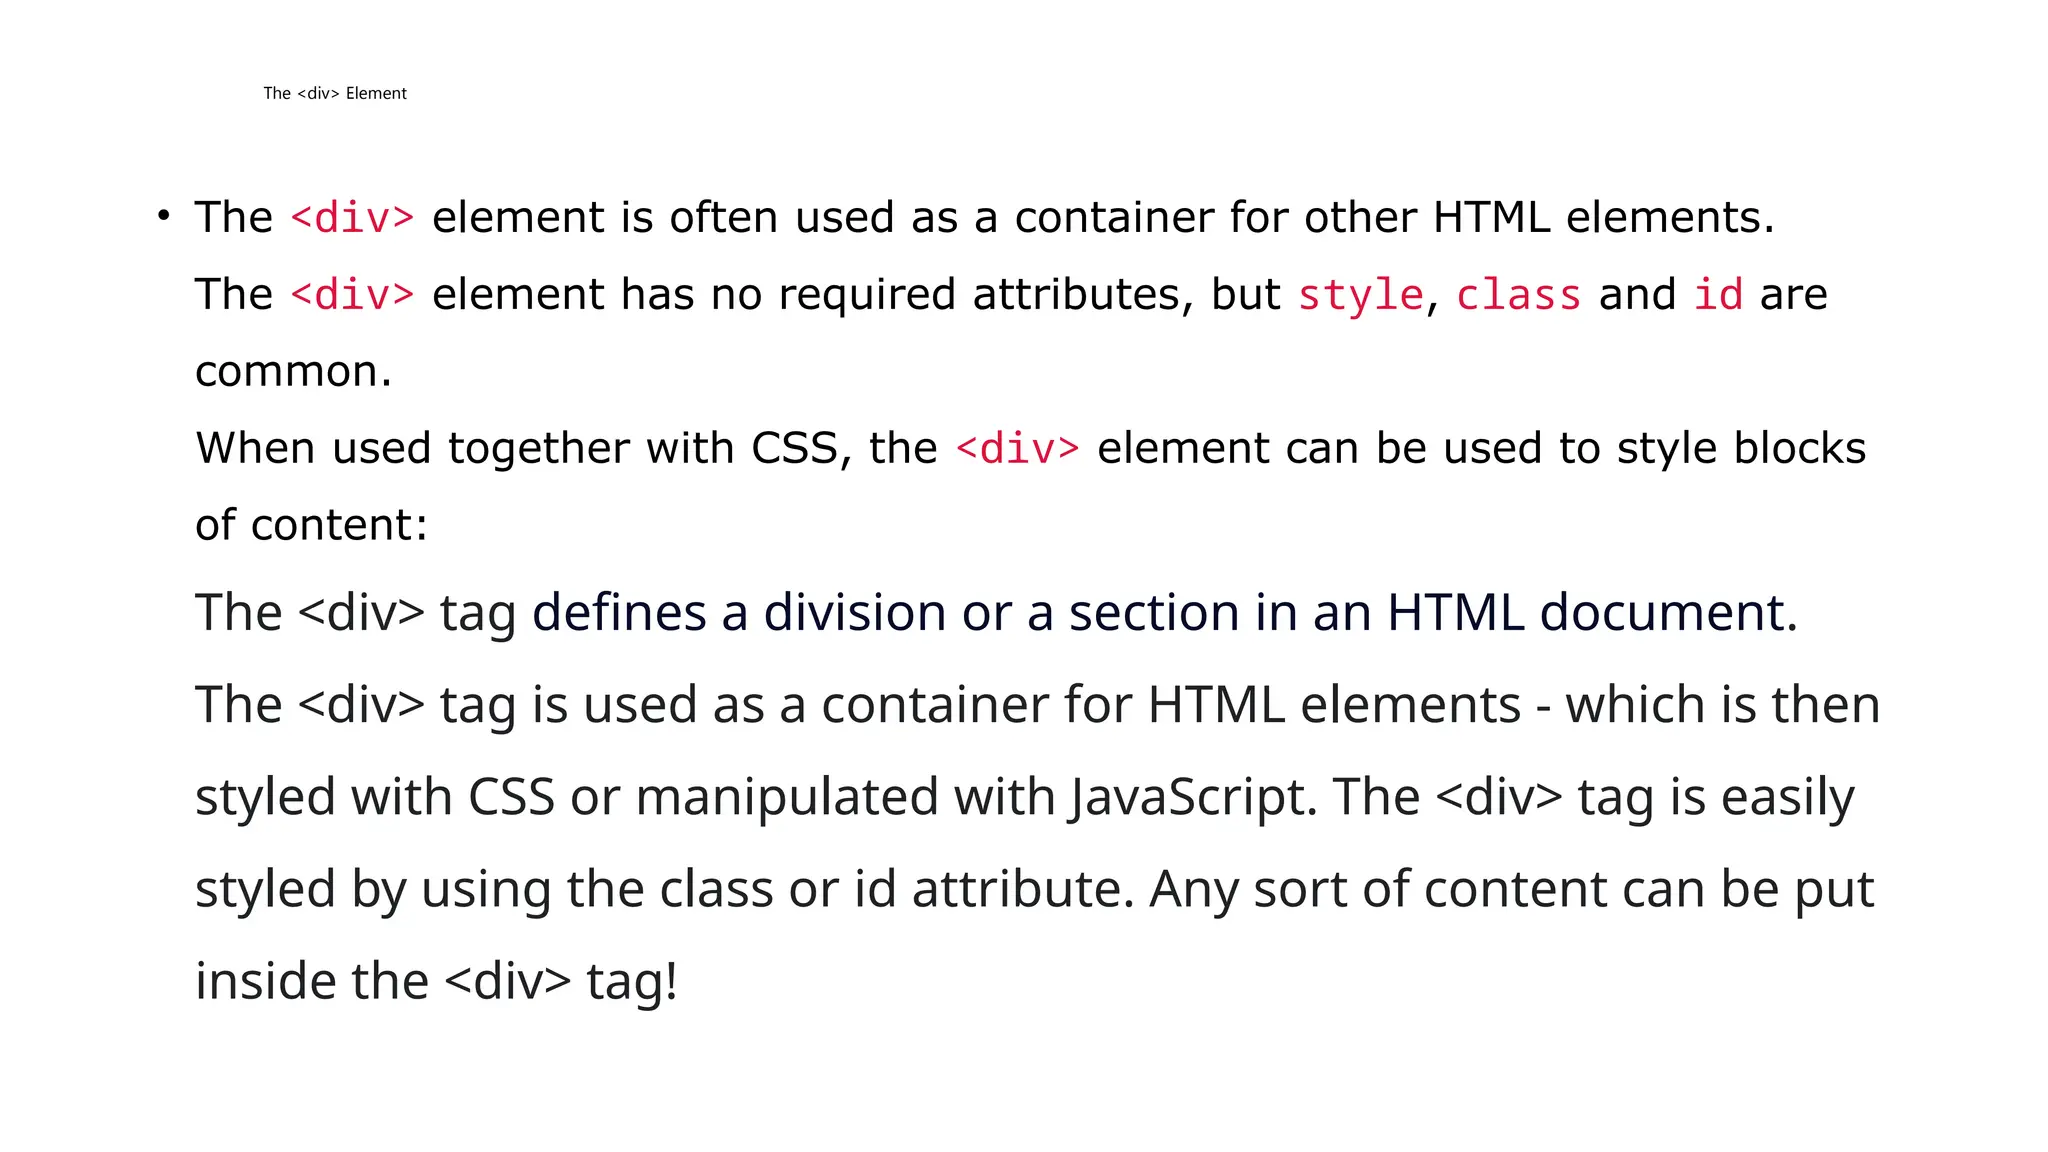
The <div> Element
•The <div> element is often used as a container for other HTML elements.
The <div> element has no required attributes, but style, class and id are
common.
When used together with CSS, the <div> element can be used to style blocks
of content:
The <div> tag defines a division or a section in an HTML document.
The <div> tag is used as a container for HTML elements - which is then
styled with CSS or manipulated with JavaScript. The <div> tag is easily
styled by using the class or id attribute. Any sort of content can be put
inside the <div> tag!
79.
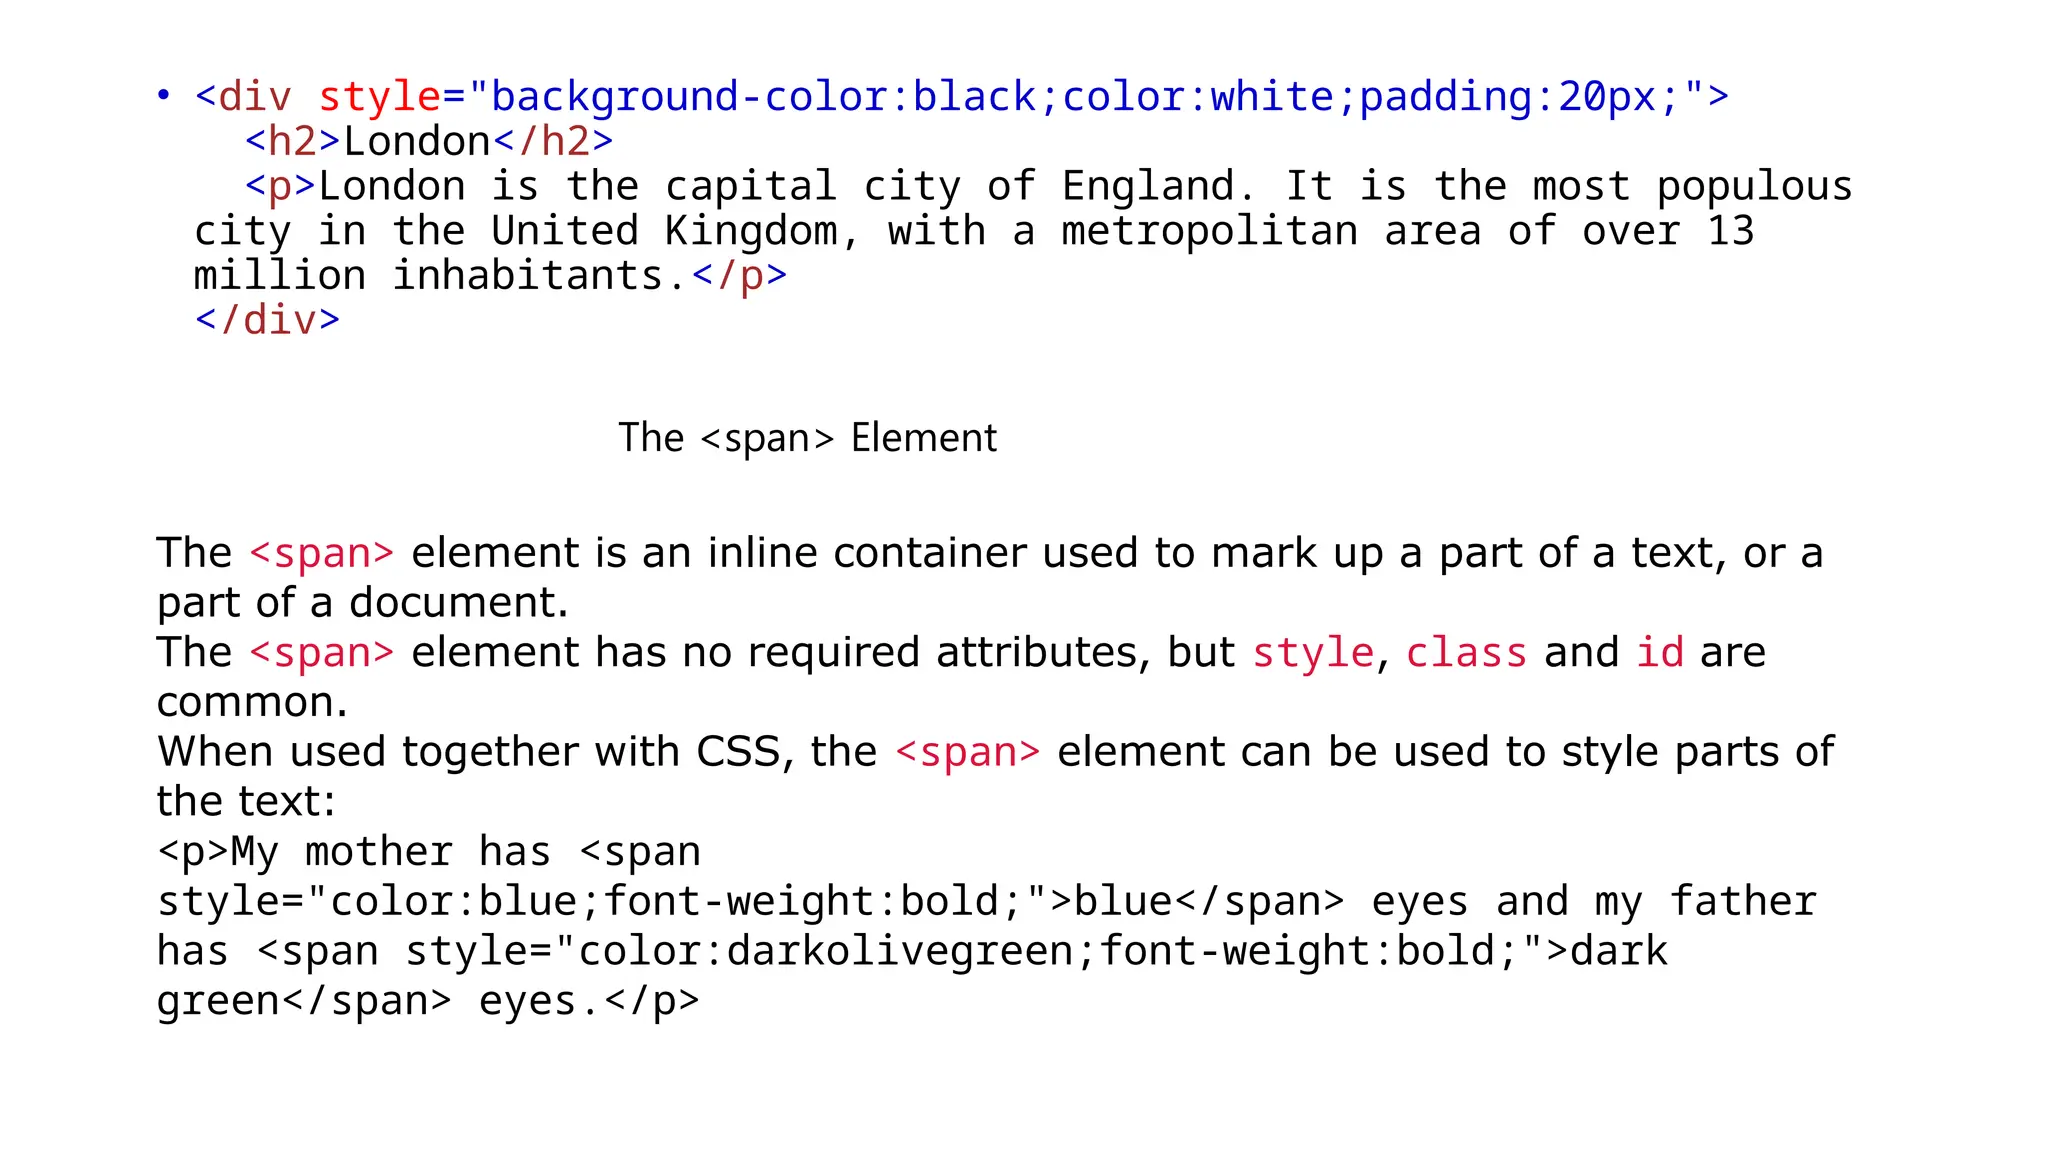
• <div style="background-color:black;color:white;padding:20px;">
<h2>London</h2>
<p>Londonis the capital city of England. It is the most populous
city in the United Kingdom, with a metropolitan area of over 13
million inhabitants.</p>
</div>
The <span> Element
The <span> element is an inline container used to mark up a part of a text, or a
part of a document.
The <span> element has no required attributes, but style, class and id are
common.
When used together with CSS, the <span> element can be used to style parts of
the text:
<p>My mother has <span
style="color:blue;font-weight:bold;">blue</span> eyes and my father
has <span style="color:darkolivegreen;font-weight:bold;">dark
green</span> eyes.</p>
80.
HTML class Attribute
•The HTML class attribute is used to specify a class for an HTML element.
Multiple HTML elements can share the same class.
The class attribute is often used to point to a class name in a style sheet. It
can also be used by a JavaScript to access and manipulate elements with the
specific class name.
In the following example we have three <div> elements with a class attribute
with the value of "city". All of the three <div> elements will be styled equally
according to the .city style definition in the head section:
81.
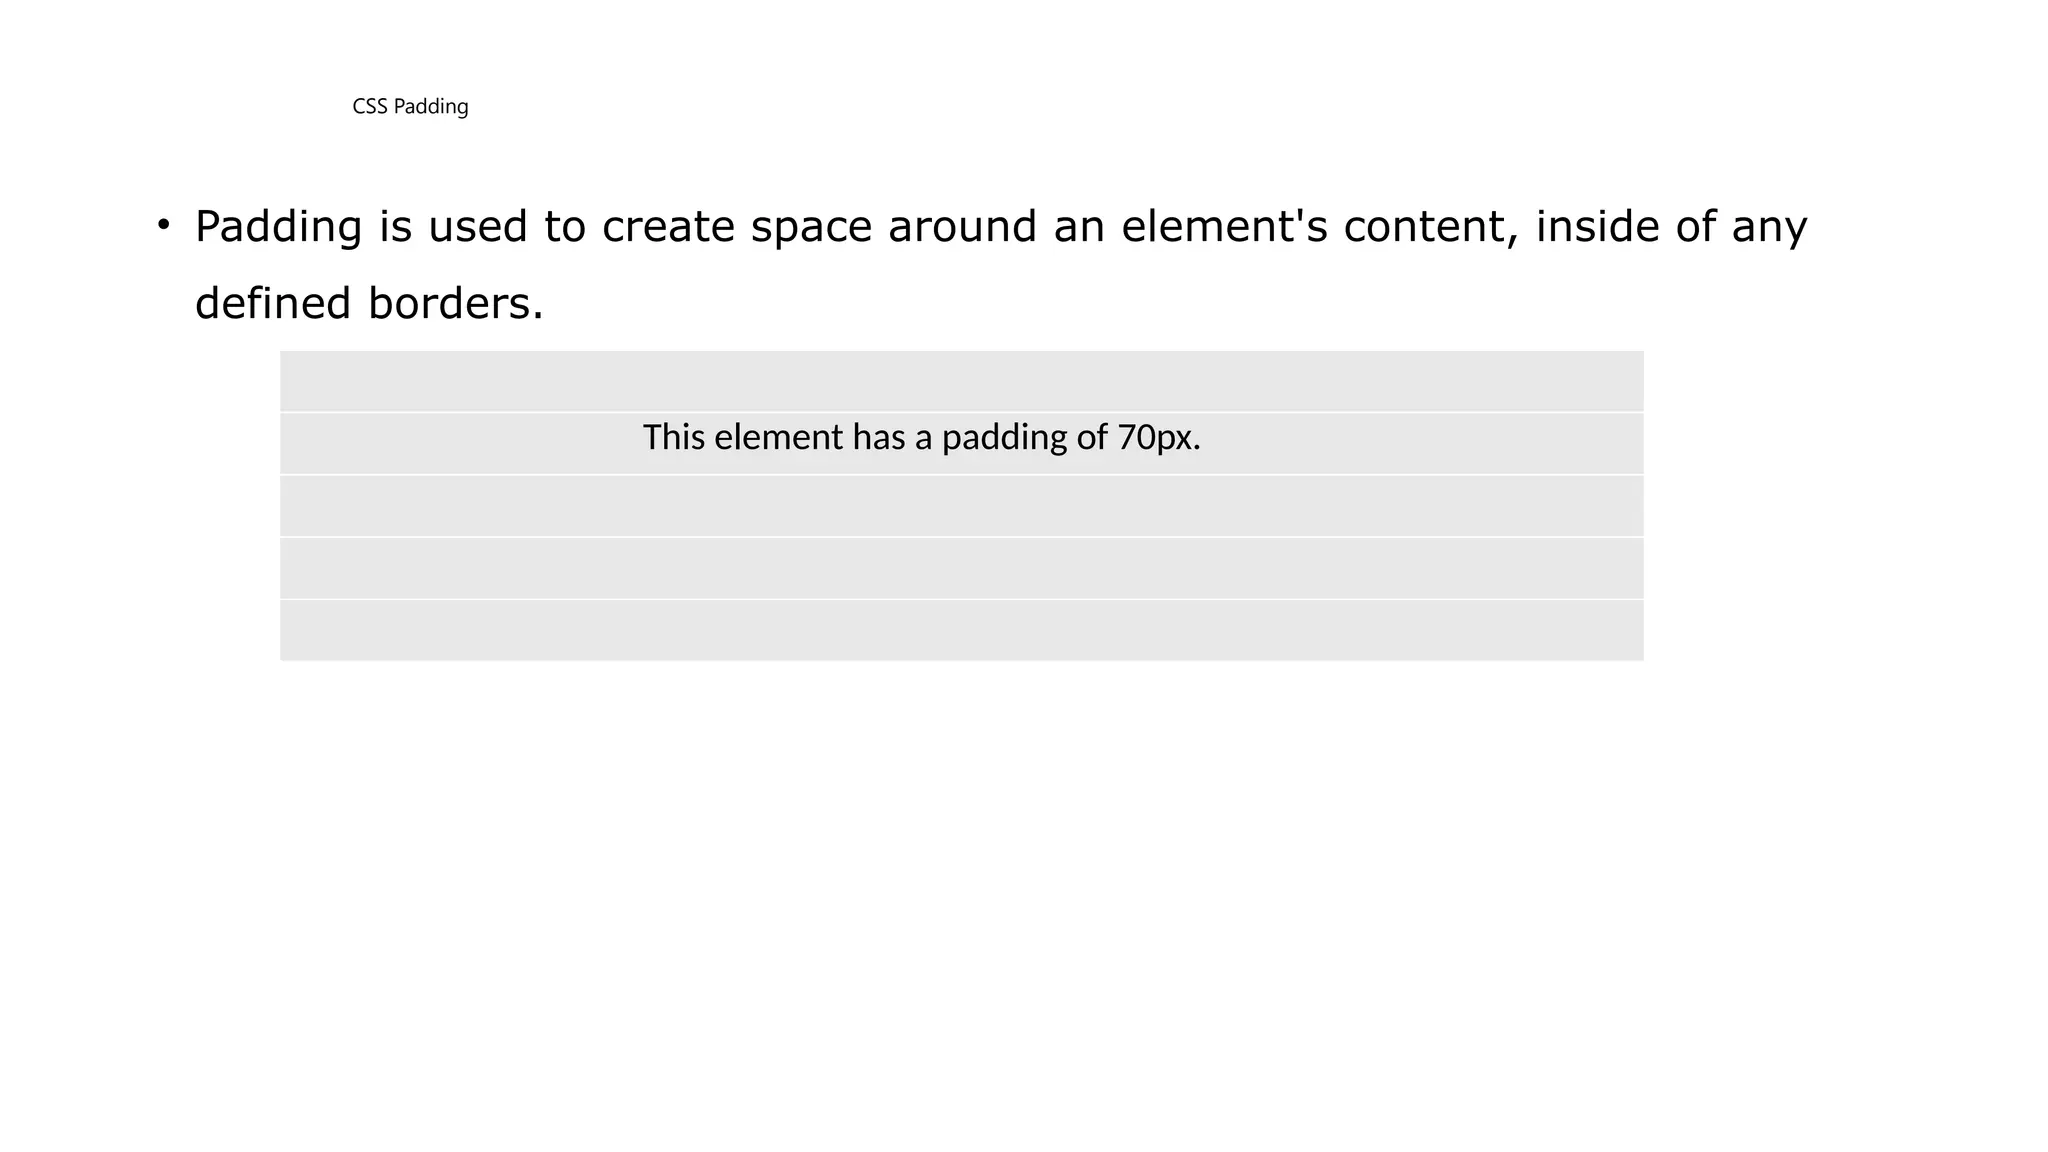
CSS Padding
• Paddingis used to create space around an element's content, inside of any
defined borders.
This element has a padding of 70px.
82.
• The CSSpadding properties are used to generate space around an element's
content, inside of any defined borders.
With CSS, you have full control over the padding. There are properties for
setting the padding for each side of an element (top, right, bottom, and left).
Padding - Individual Sides
CSS has properties for specifying the padding for each side of an element:
•padding-top
•padding-right
•padding-bottom
•padding-left
• All the padding properties can have the following values:
• length - specifies a padding in px, pt, cm, etc.
• % - specifies a padding in % of the width of the containing element
• inherit - specifies that the padding should be inherited from the parent element
• Note: Negative values are not allowed.
83.
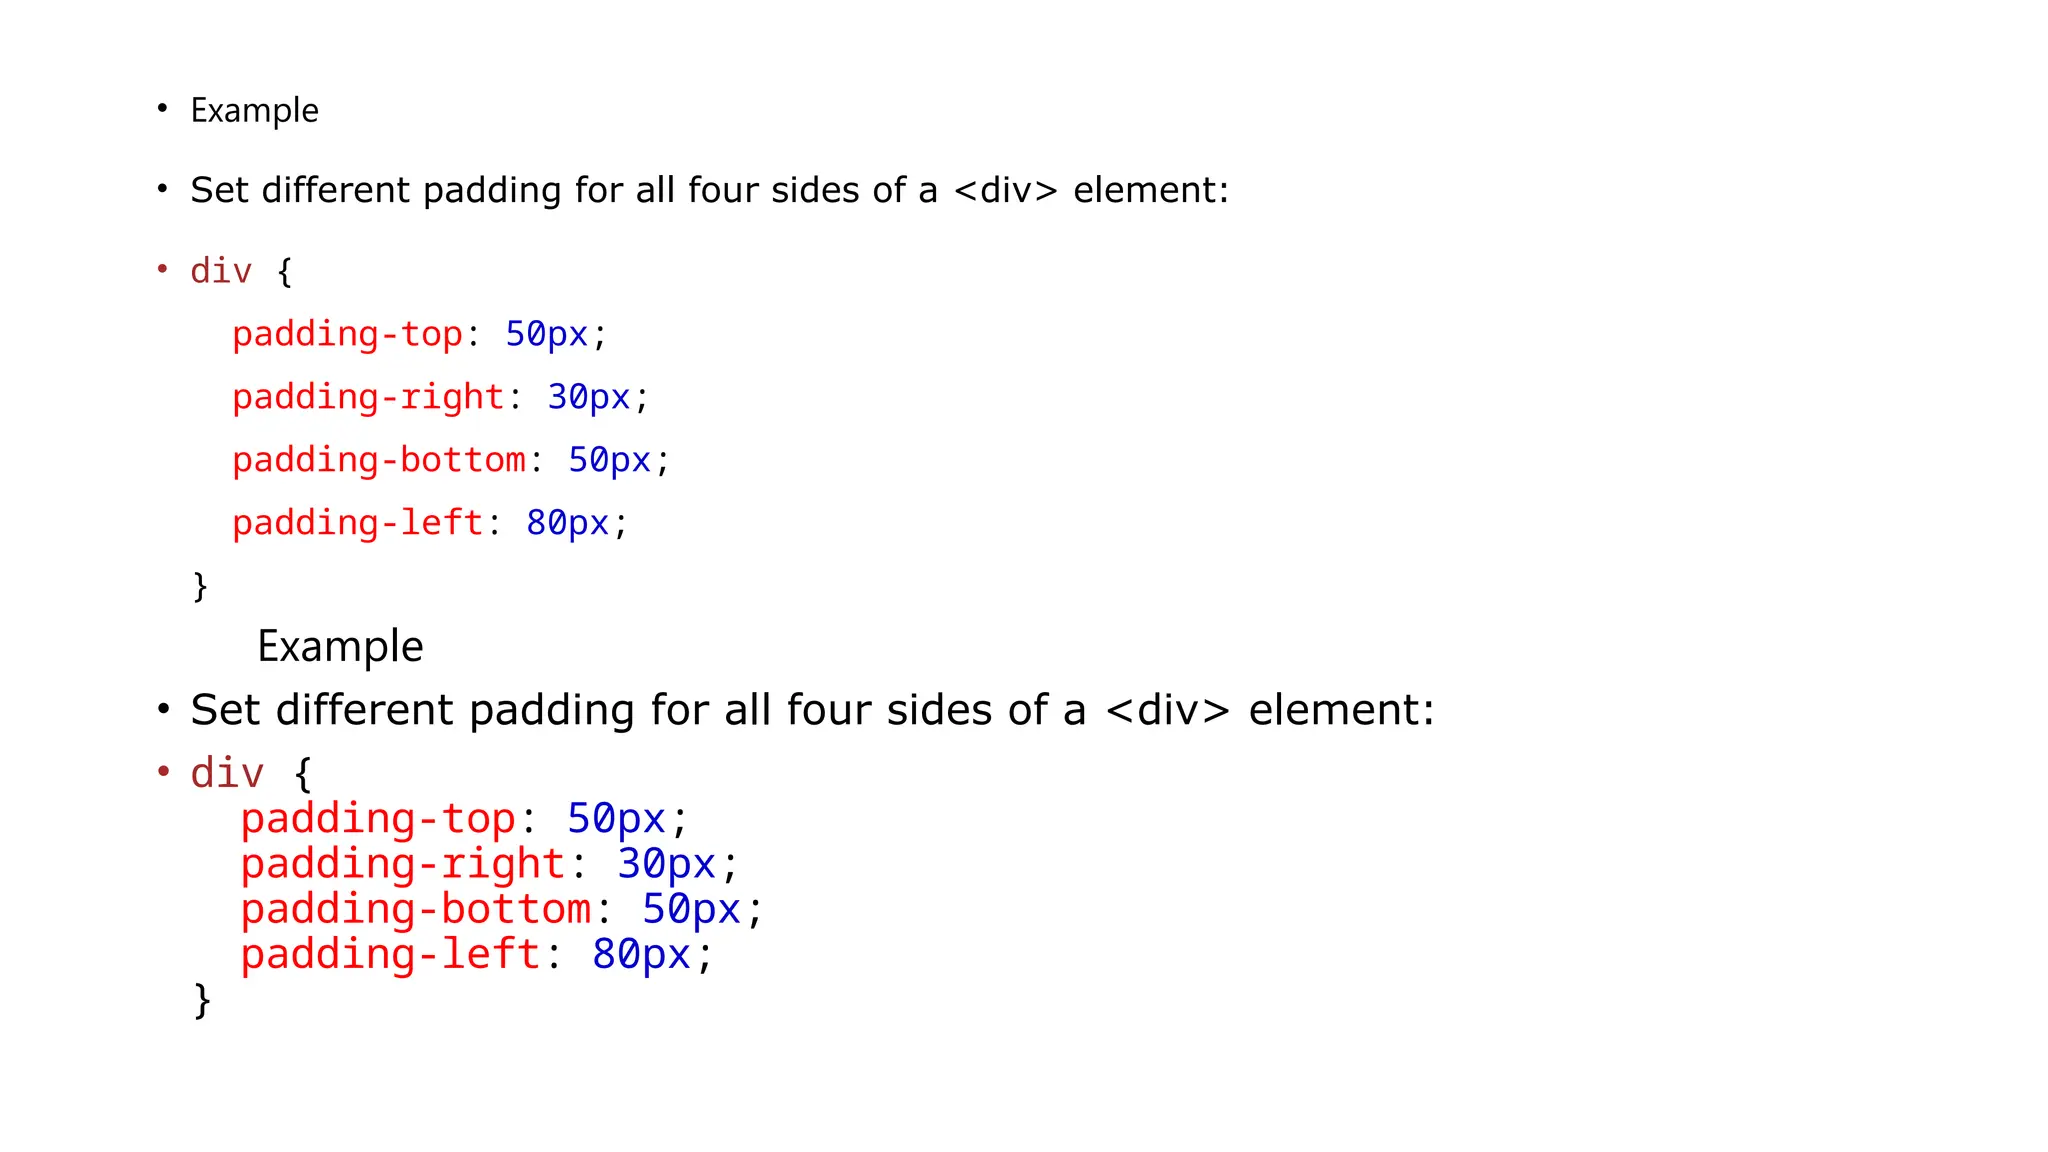
• Example
• Setdifferent padding for all four sides of a <div> element:
• div {
padding-top: 50px;
padding-right: 30px;
padding-bottom: 50px;
padding-left: 80px;
}
Example
• Set different padding for all four sides of a <div> element:
• div {
padding-top: 50px;
padding-right: 30px;
padding-bottom: 50px;
padding-left: 80px;
}
84.
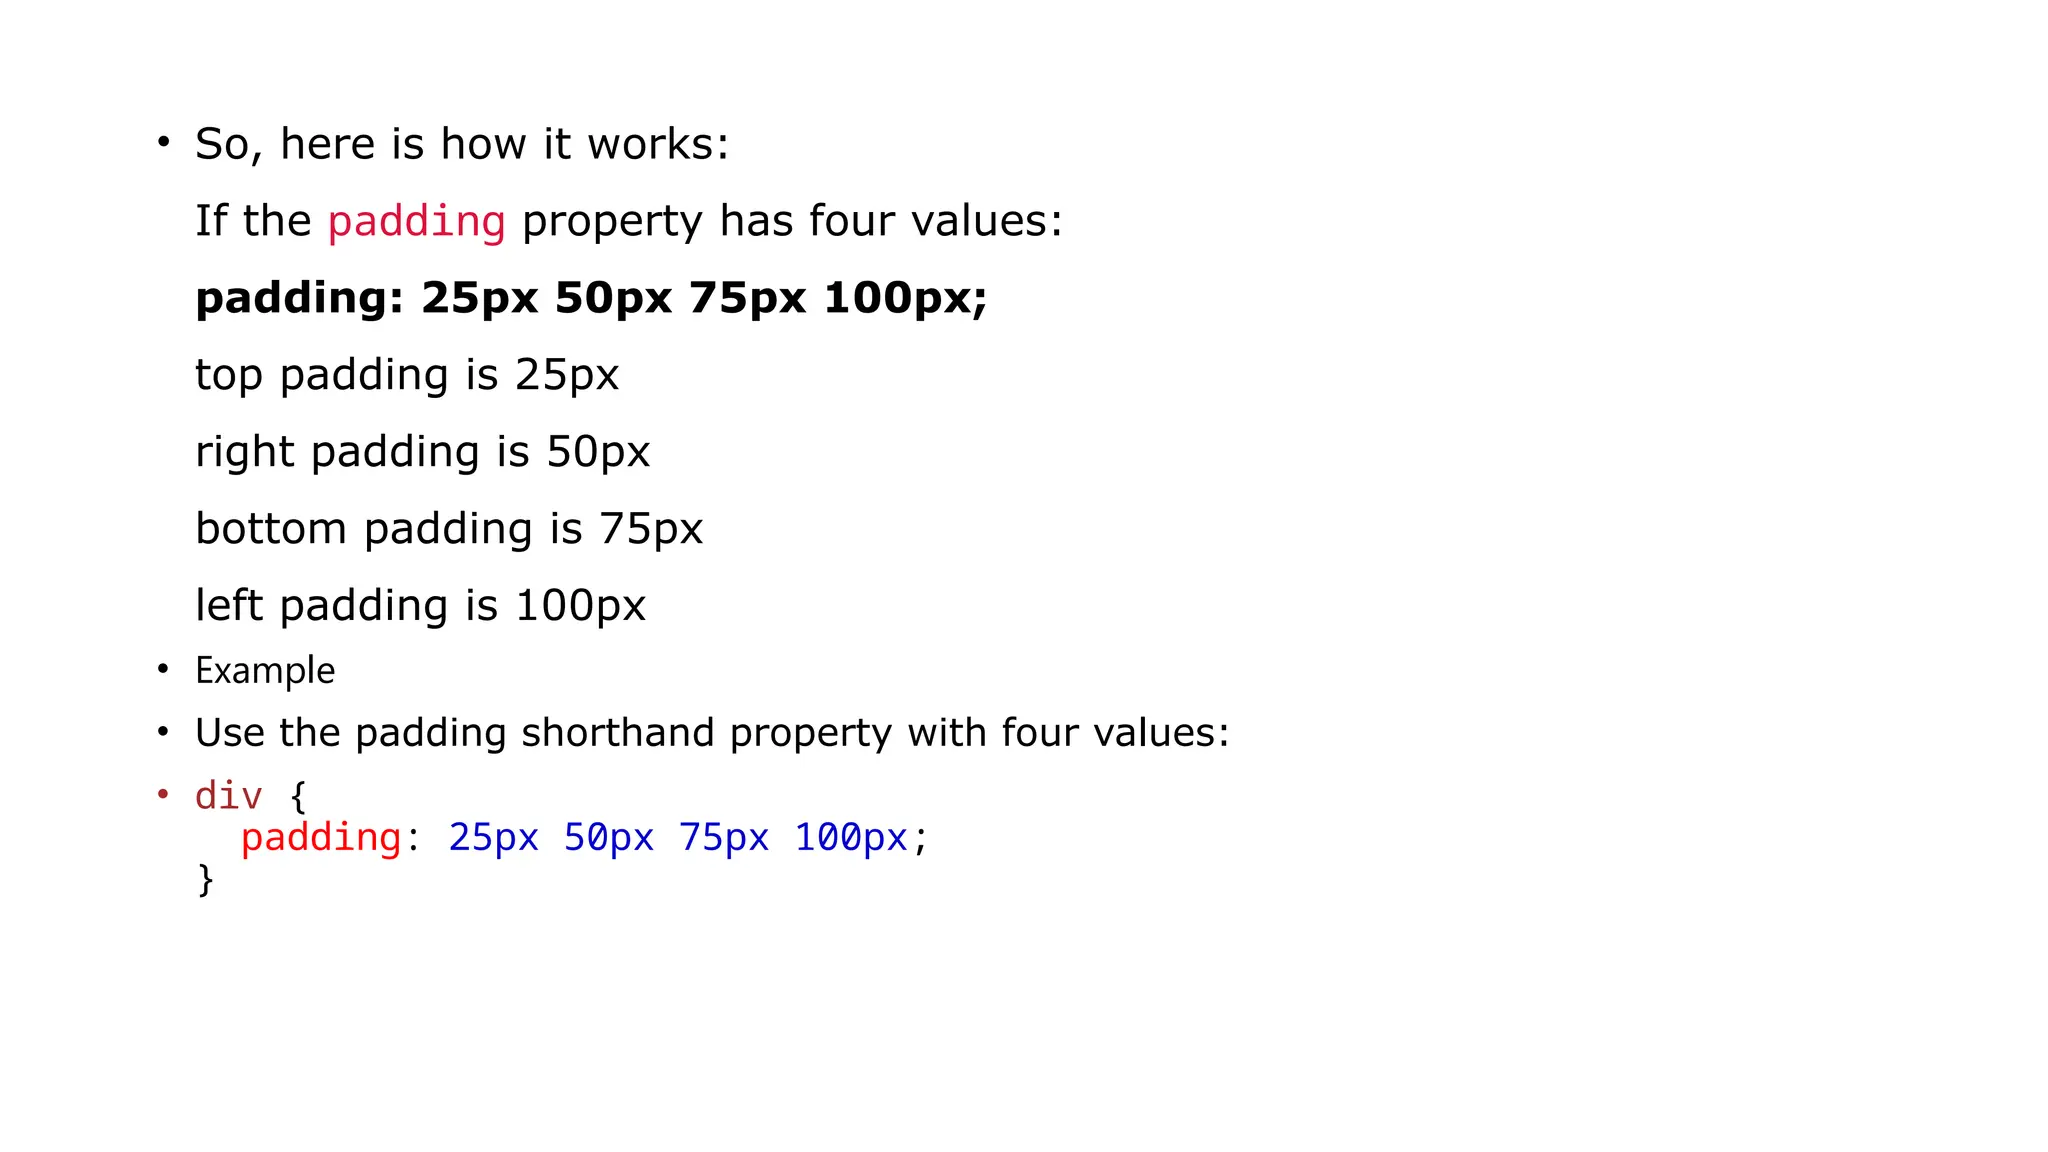
• So, hereis how it works:
If the padding property has four values:
padding: 25px 50px 75px 100px;
top padding is 25px
right padding is 50px
bottom padding is 75px
left padding is 100px
• Example
• Use the padding shorthand property with four values:
• div {
padding: 25px 50px 75px 100px;
}
85.
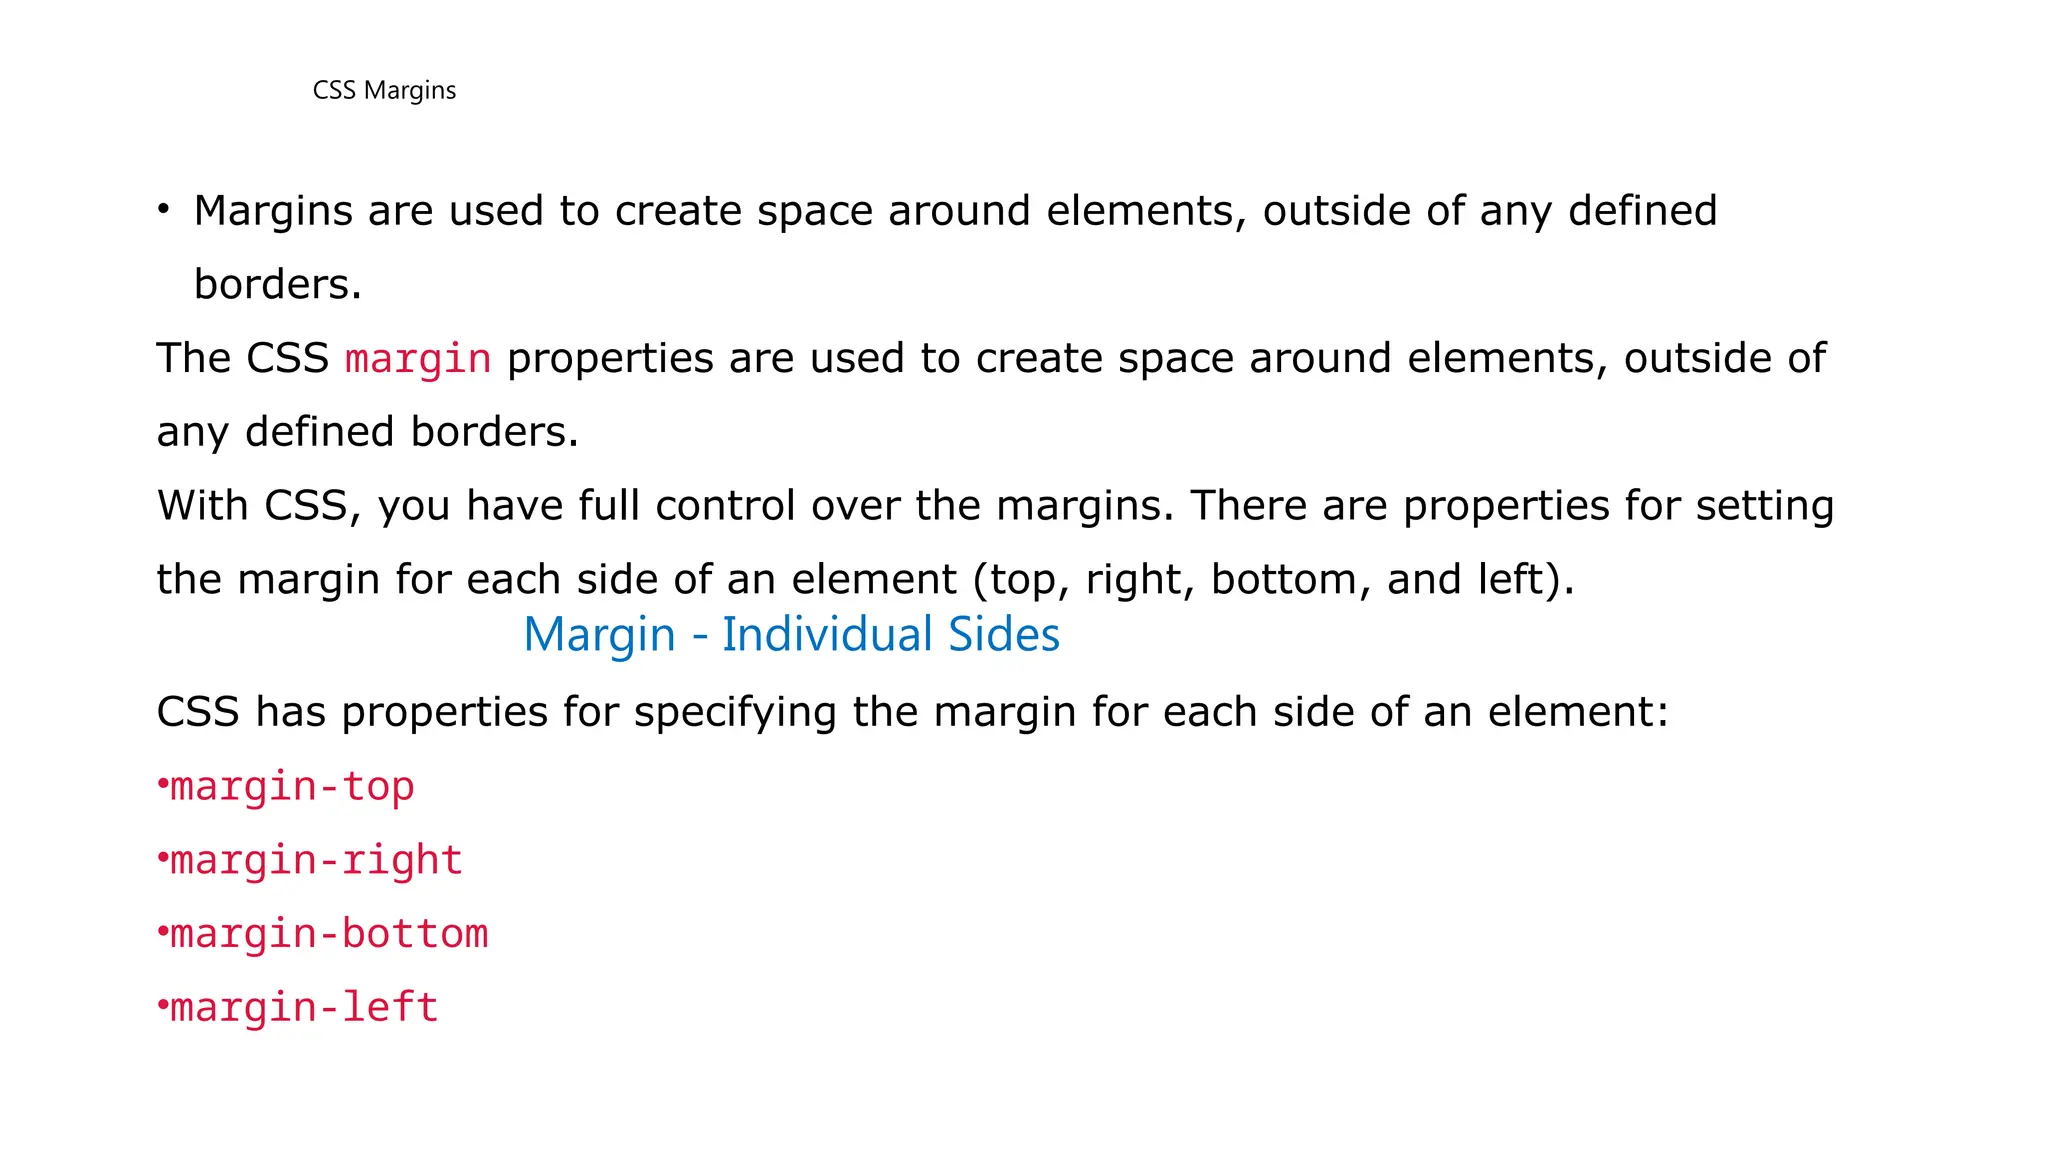
CSS Margins
• Marginsare used to create space around elements, outside of any defined
borders.
The CSS margin properties are used to create space around elements, outside of
any defined borders.
With CSS, you have full control over the margins. There are properties for setting
the margin for each side of an element (top, right, bottom, and left).
Margin - Individual Sides
CSS has properties for specifying the margin for each side of an element:
•margin-top
•margin-right
•margin-bottom
•margin-left
86.
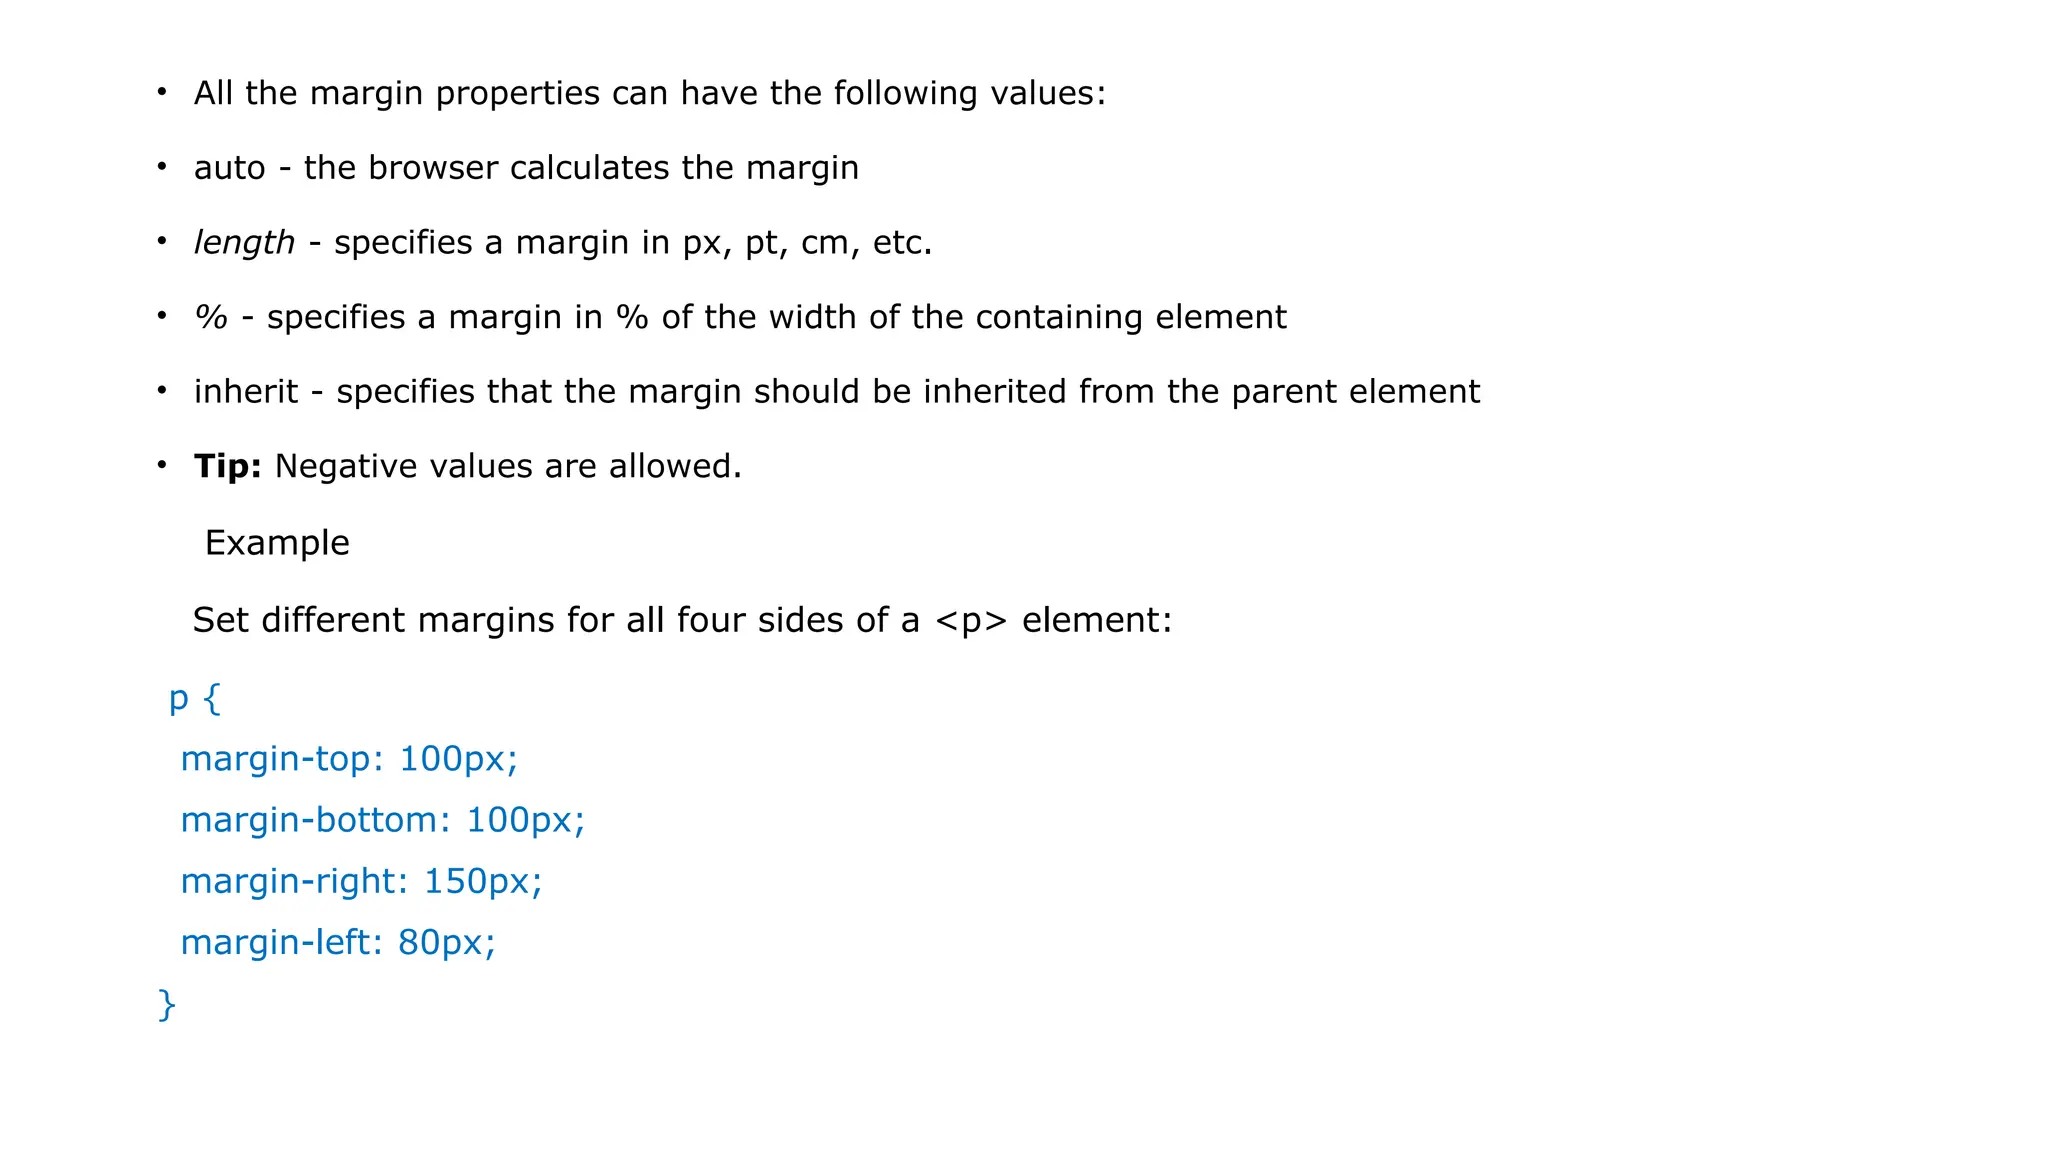
• All themargin properties can have the following values:
• auto - the browser calculates the margin
• length - specifies a margin in px, pt, cm, etc.
• % - specifies a margin in % of the width of the containing element
• inherit - specifies that the margin should be inherited from the parent element
• Tip: Negative values are allowed.
Example
Set different margins for all four sides of a <p> element:
p {
margin-top: 100px;
margin-bottom: 100px;
margin-right: 150px;
margin-left: 80px;
}
87.
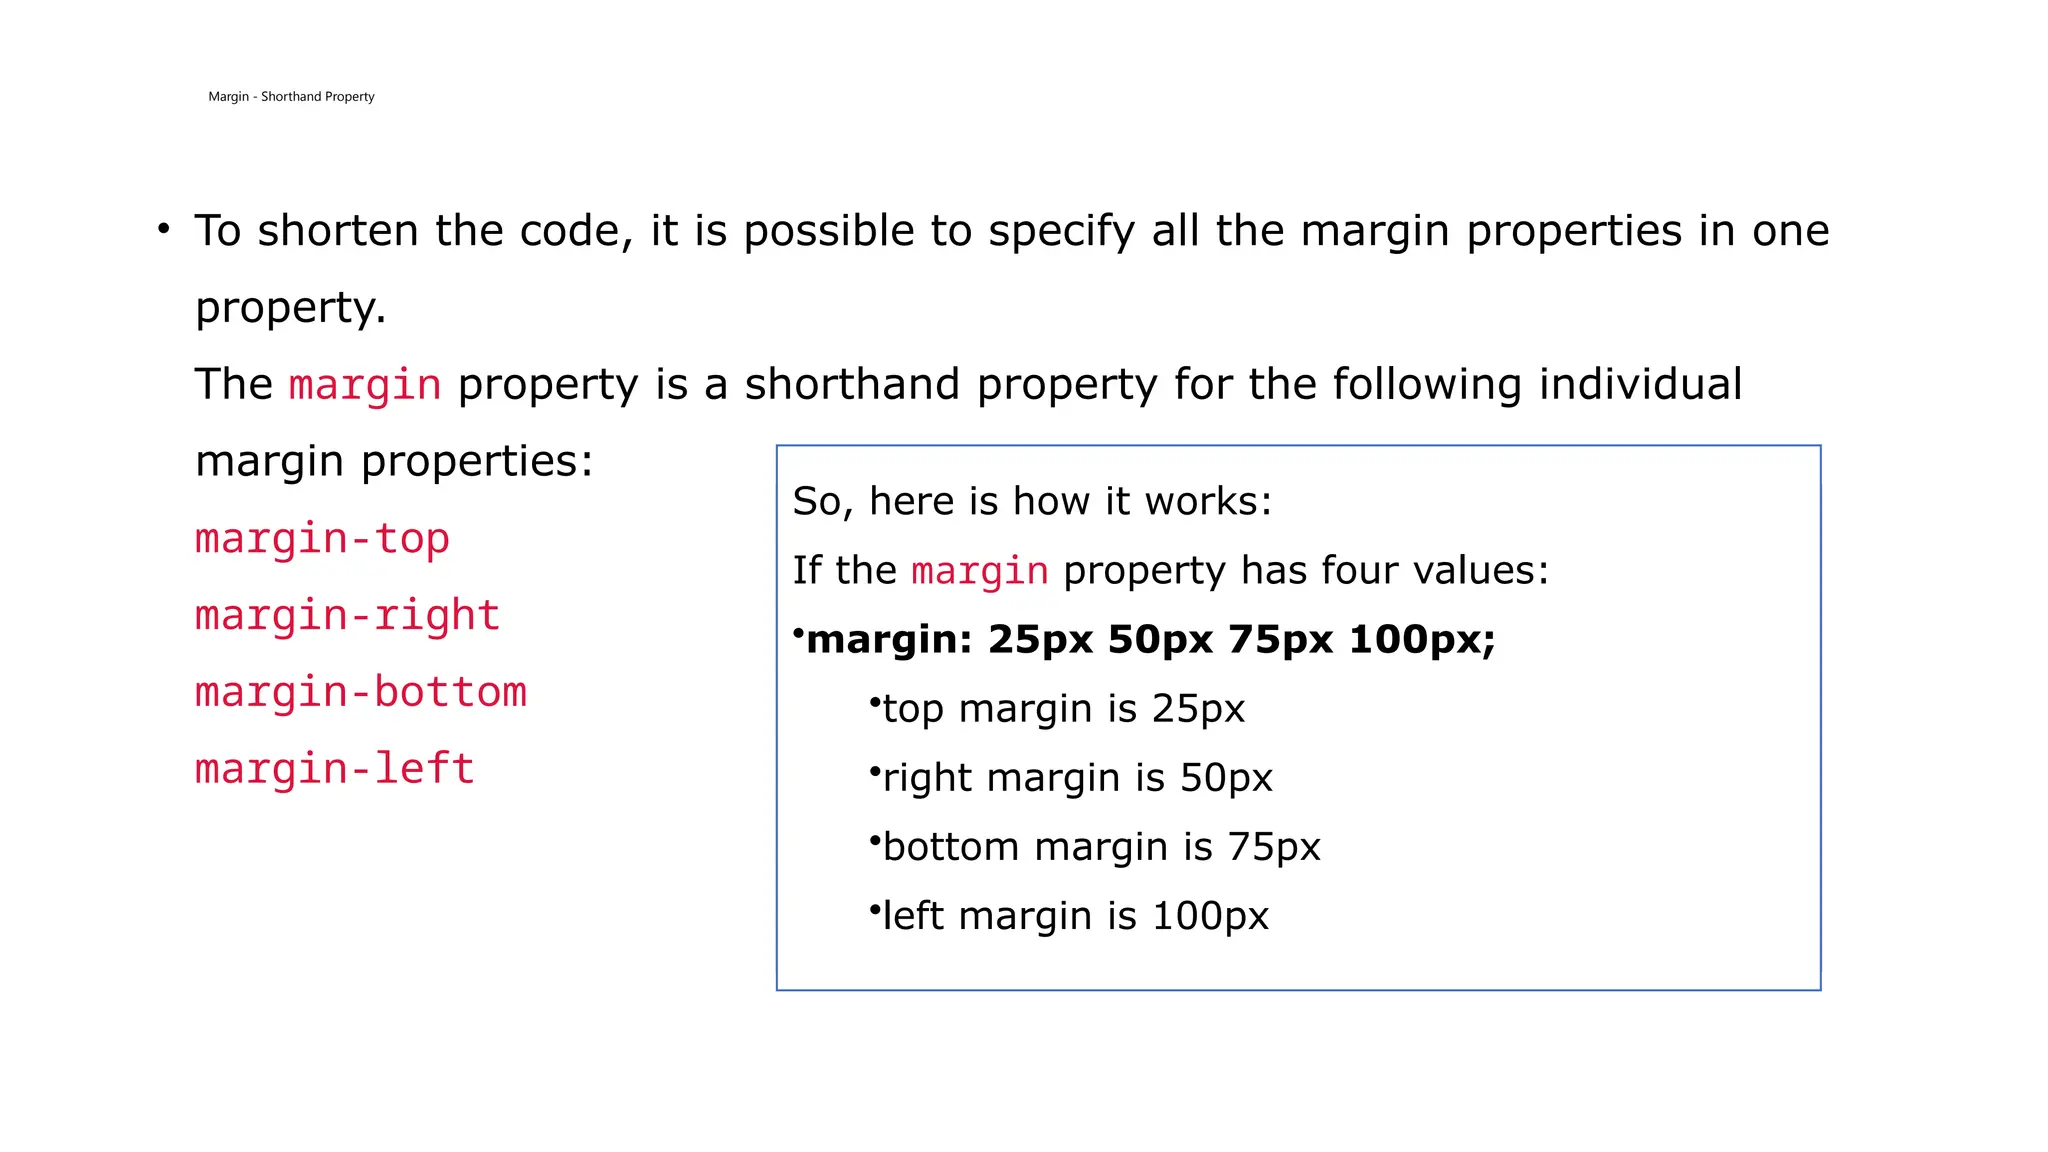
Margin - ShorthandProperty
• To shorten the code, it is possible to specify all the margin properties in one
property.
The margin property is a shorthand property for the following individual
margin properties:
margin-top
margin-right
margin-bottom
margin-left
So, here is how it works:
If the margin property has four values:
•margin: 25px 50px 75px 100px;
•top margin is 25px
•right margin is 50px
•bottom margin is 75px
•left margin is 100px
88.
Example
Use the marginshorthand property with four values:
p {
margin: 25px 50px 75px 100px;
}
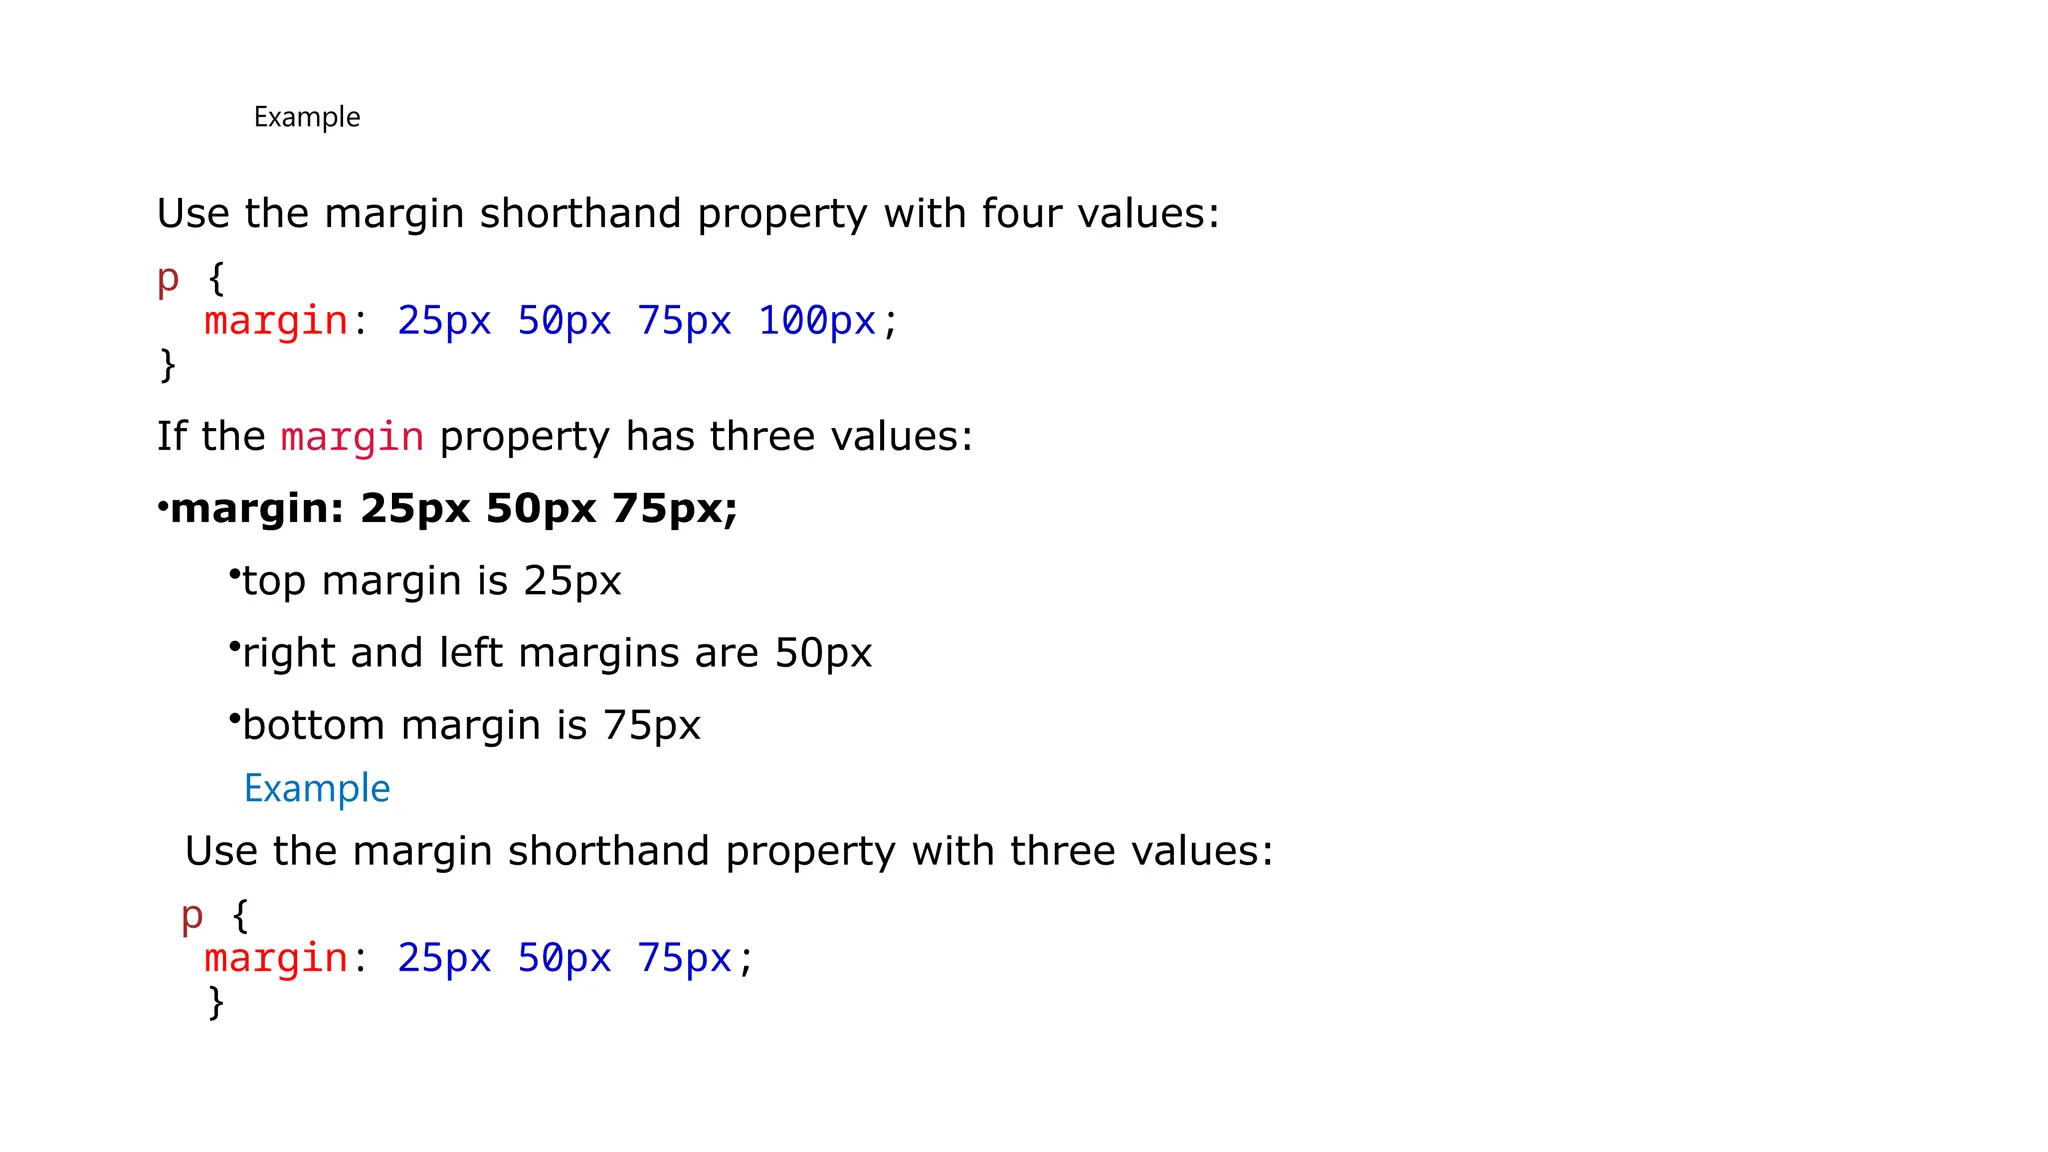
If the margin property has three values:
•margin: 25px 50px 75px;
•top margin is 25px
•right and left margins are 50px
•bottom margin is 75px
Example
Use the margin shorthand property with three values:
p {
margin: 25px 50px 75px;
}
89.
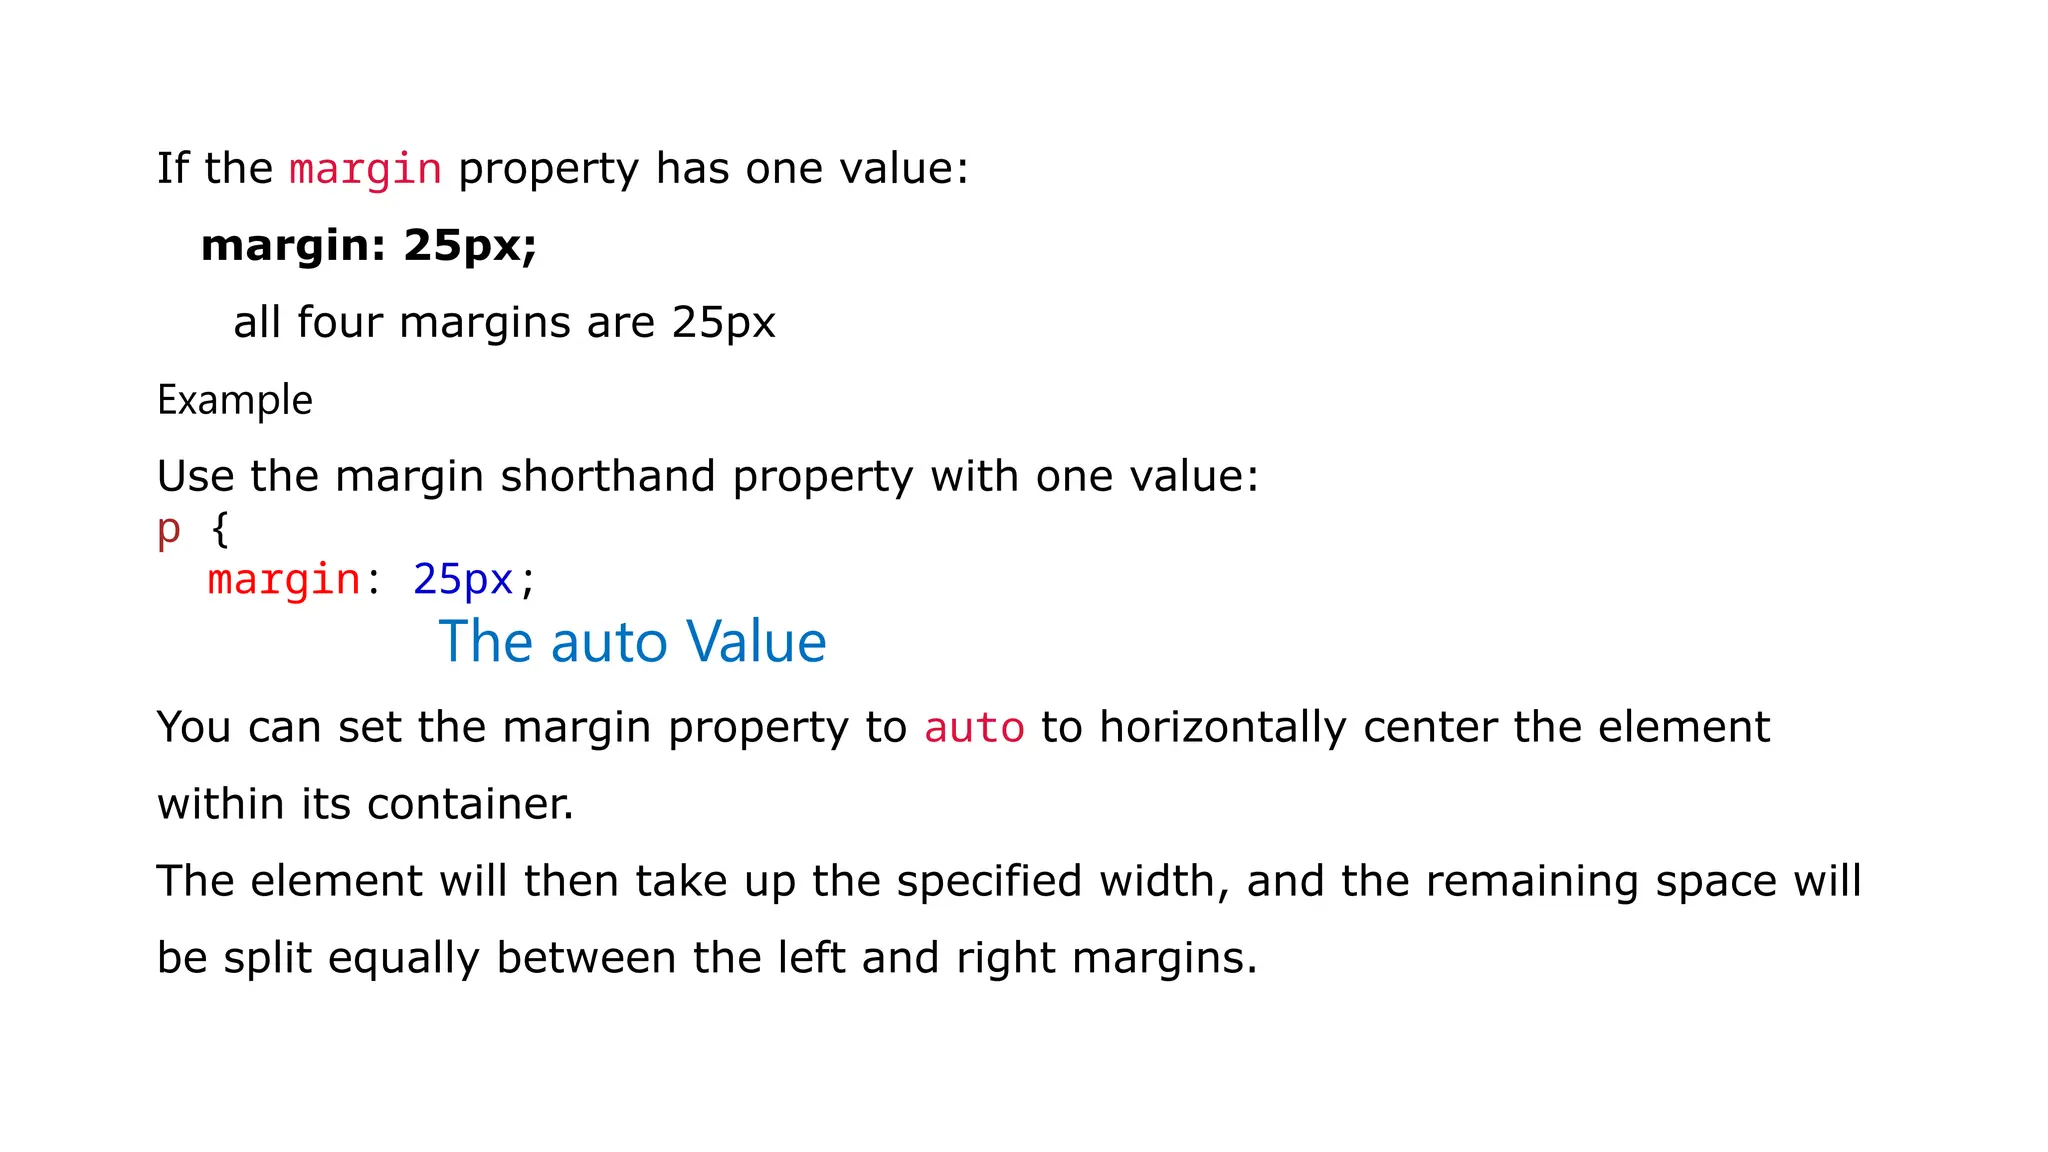
If the marginproperty has one value:
margin: 25px;
all four margins are 25px
Example
Use the margin shorthand property with one value:
p {
margin: 25px;
The auto Value
You can set the margin property to auto to horizontally center the element
within its container.
The element will then take up the specified width, and the remaining space will
be split equally between the left and right margins.
90.
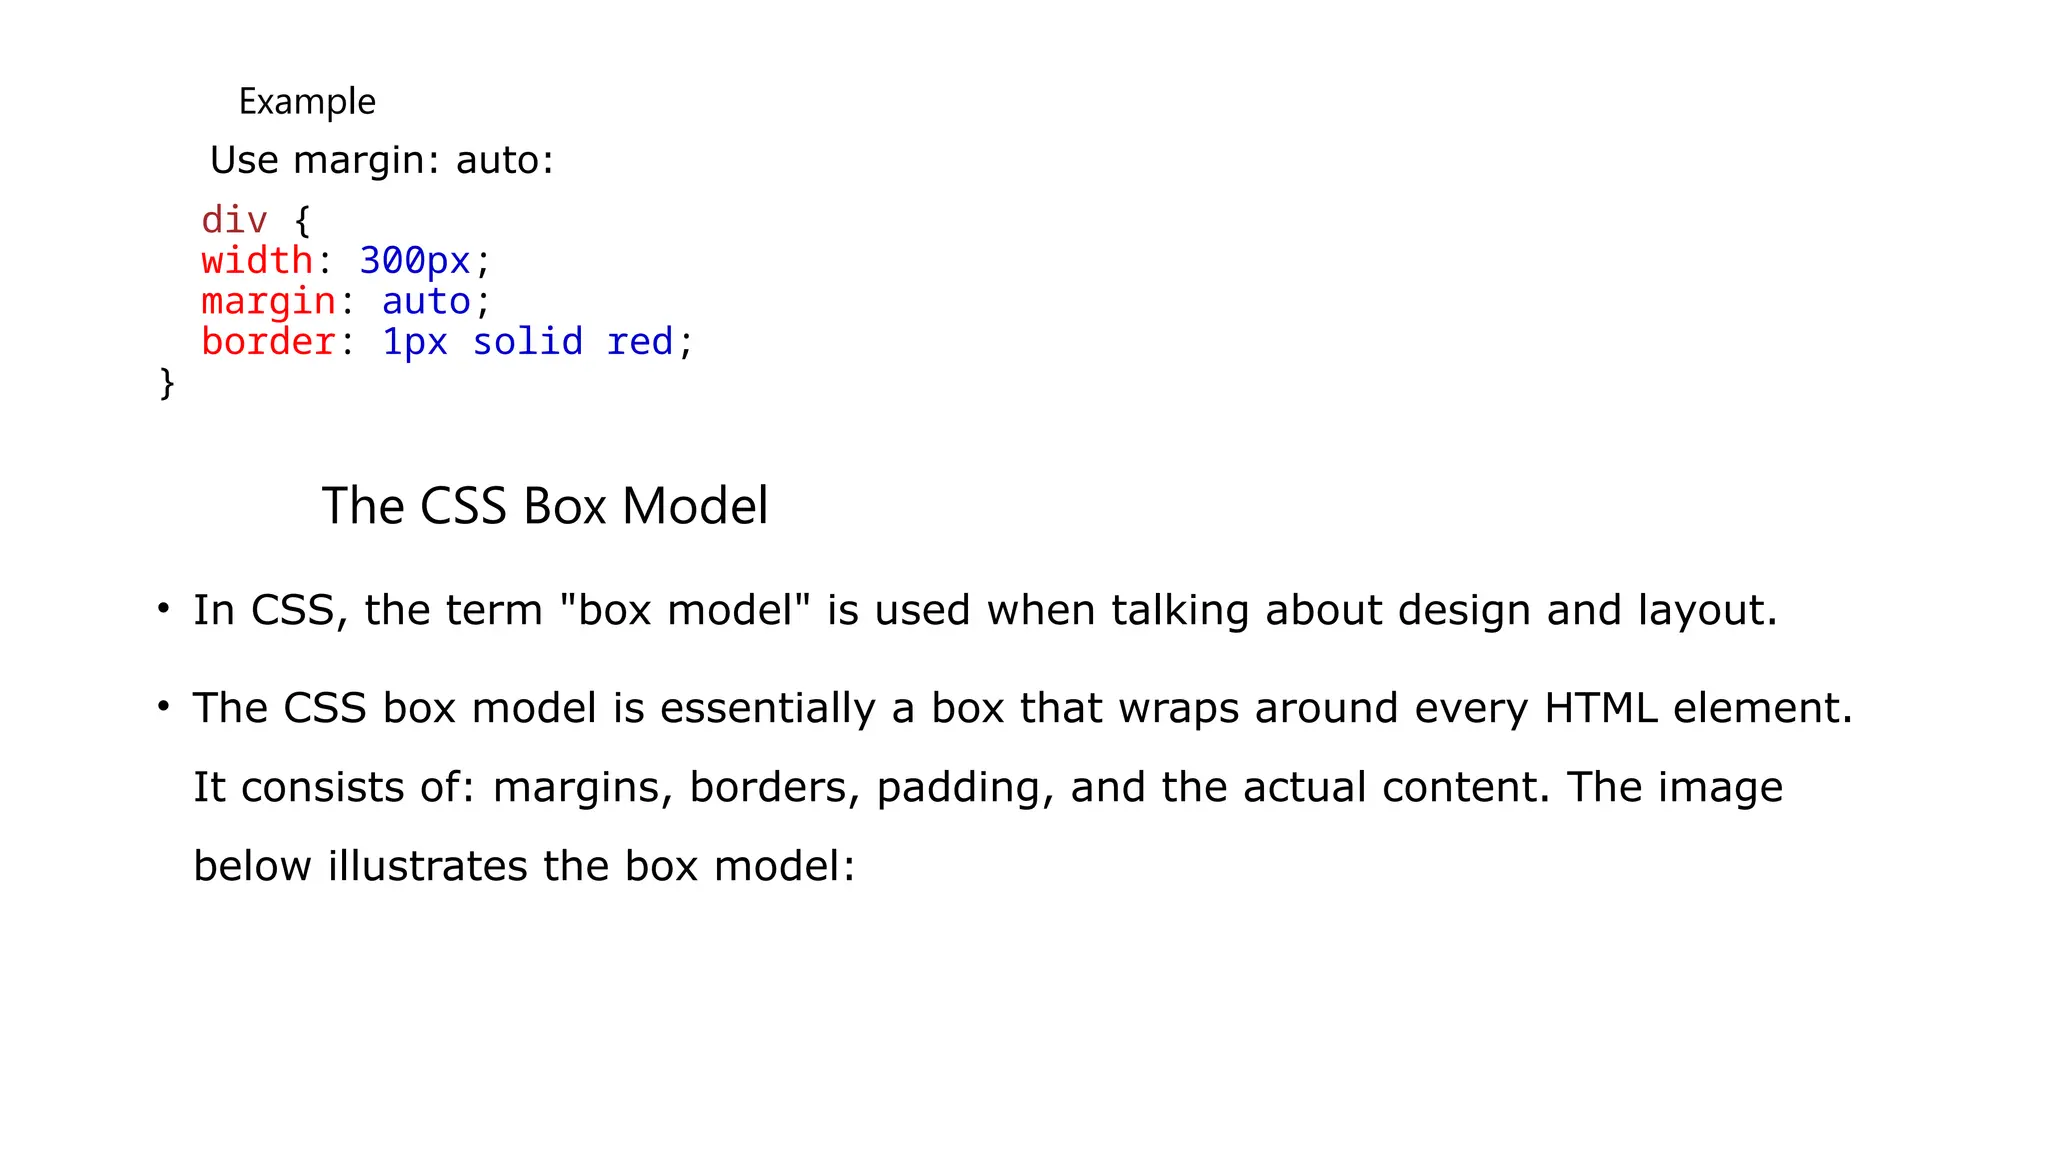
Example
Use margin: auto:
div{
width: 300px;
margin: auto;
border: 1px solid red;
}
The CSS Box Model
• In CSS, the term "box model" is used when talking about design and layout.
• The CSS box model is essentially a box that wraps around every HTML element.
It consists of: margins, borders, padding, and the actual content. The image
below illustrates the box model:
91.
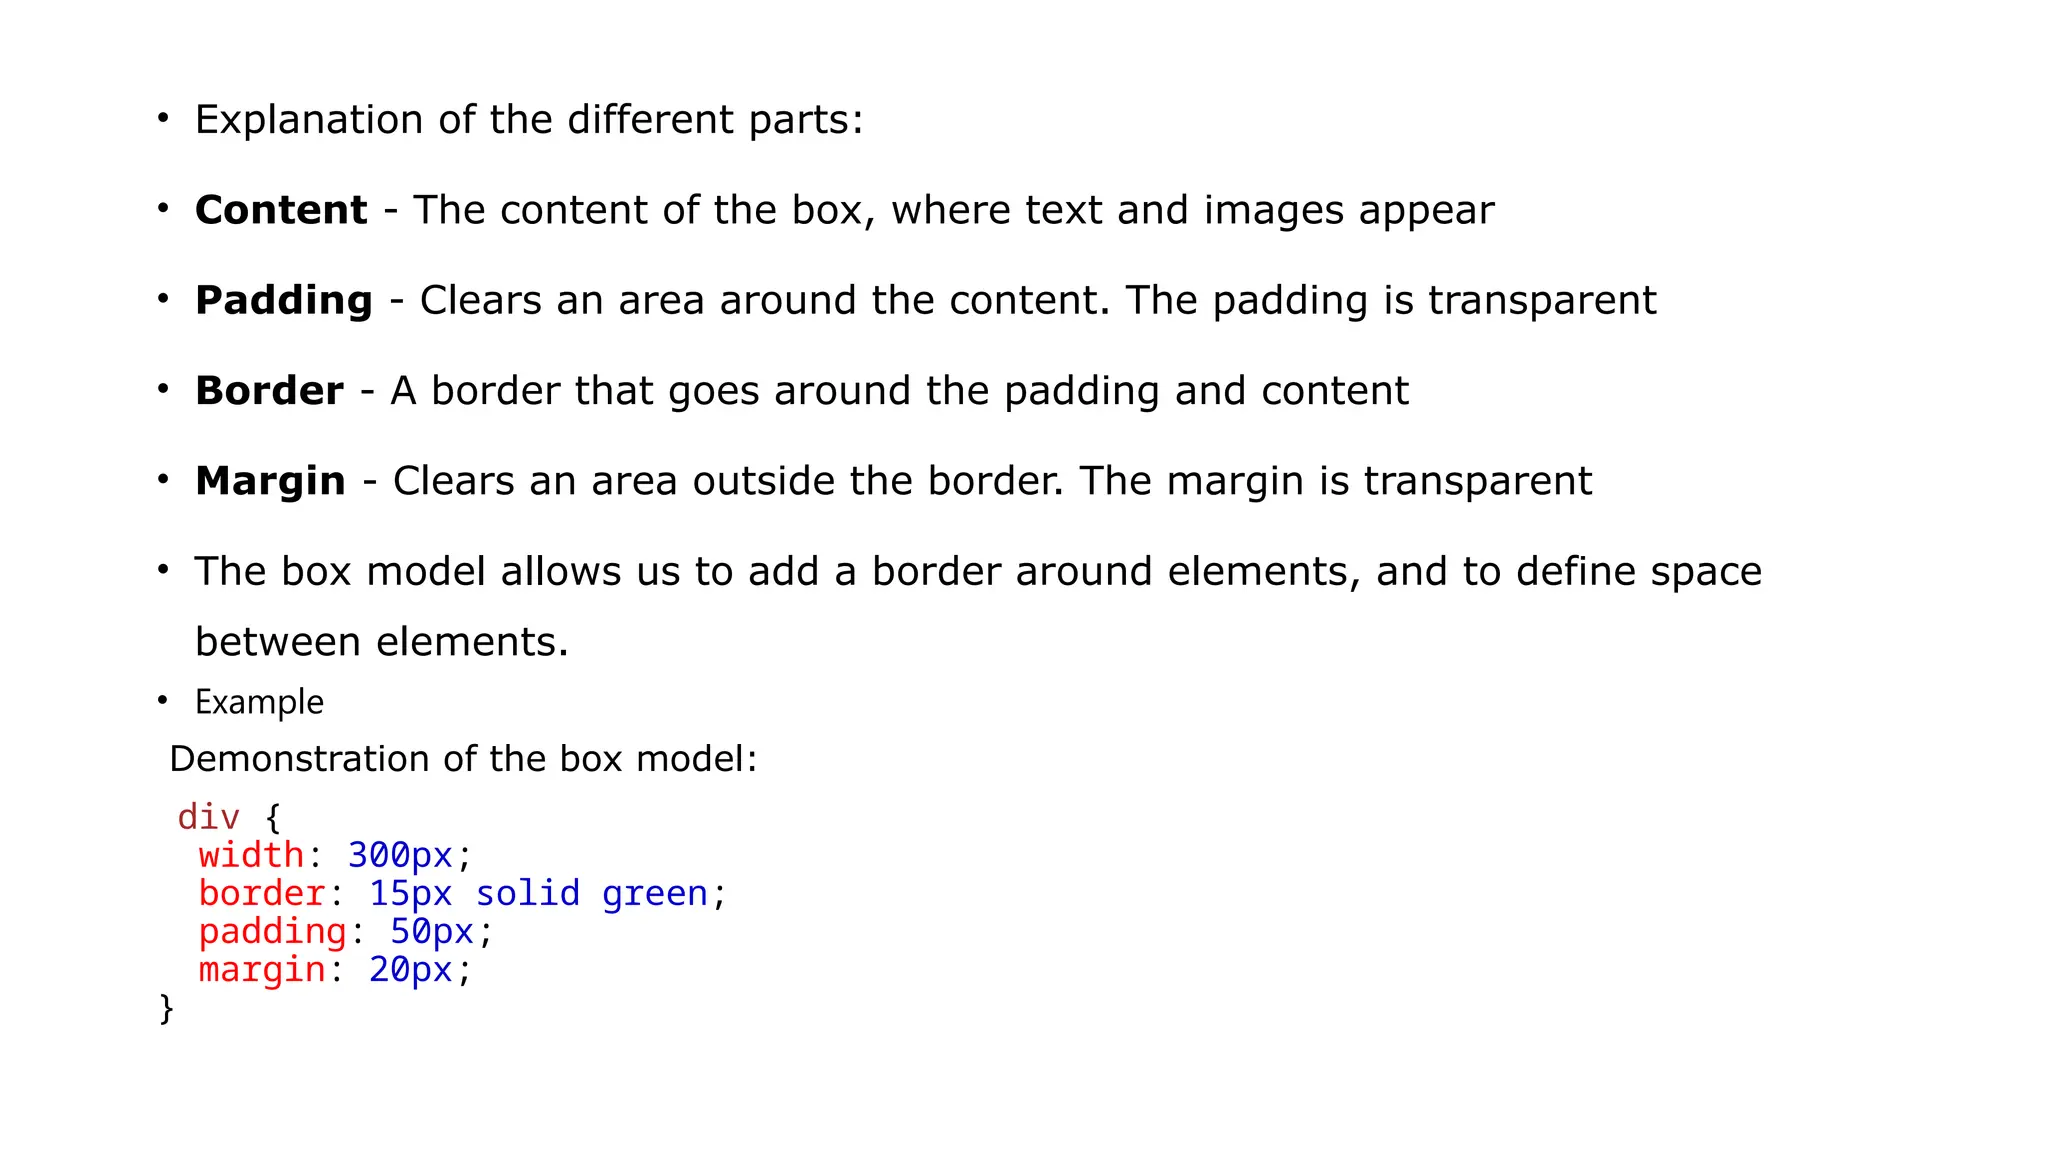
• Explanation ofthe different parts:
• Content - The content of the box, where text and images appear
• Padding - Clears an area around the content. The padding is transparent
• Border - A border that goes around the padding and content
• Margin - Clears an area outside the border. The margin is transparent
• The box model allows us to add a border around elements, and to define space
between elements.
• Example
Demonstration of the box model:
div {
width: 300px;
border: 15px solid green;
padding: 50px;
margin: 20px;
}
92.
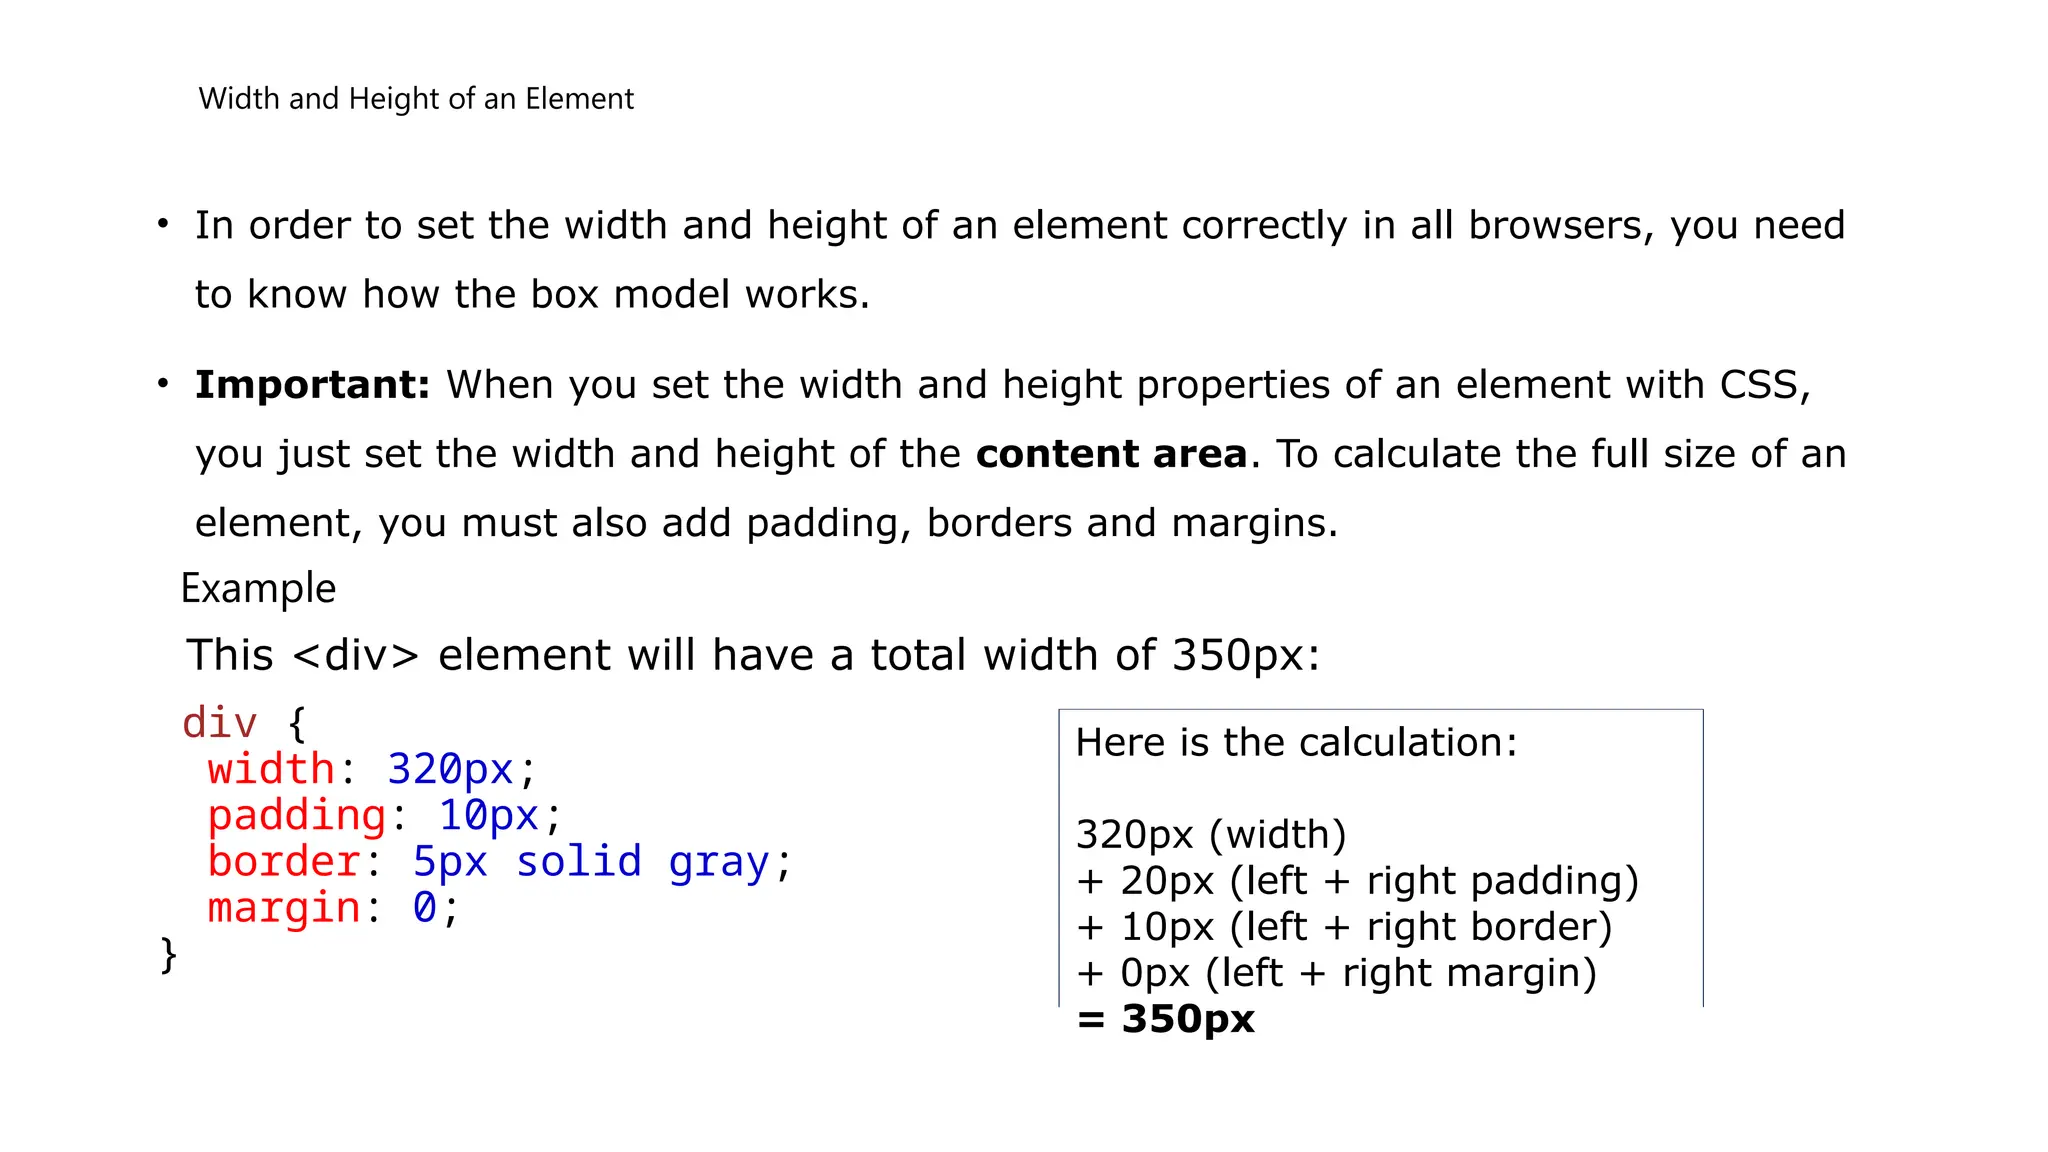
Width and Heightof an Element
• In order to set the width and height of an element correctly in all browsers, you need
to know how the box model works.
• Important: When you set the width and height properties of an element with CSS,
you just set the width and height of the content area. To calculate the full size of an
element, you must also add padding, borders and margins.
Example
This <div> element will have a total width of 350px:
div {
width: 320px;
padding: 10px;
border: 5px solid gray;
margin: 0;
}
Here is the calculation:
320px (width)
+ 20px (left + right padding)
+ 10px (left + right border)
+ 0px (left + right margin)
= 350px
93.
HTML Forms
• AnHTML form is used to collect user input. The user input is most
often sent to a server for processing.
• Example
FirstName
Abenezer
Tefera
LastName
Submit
94.
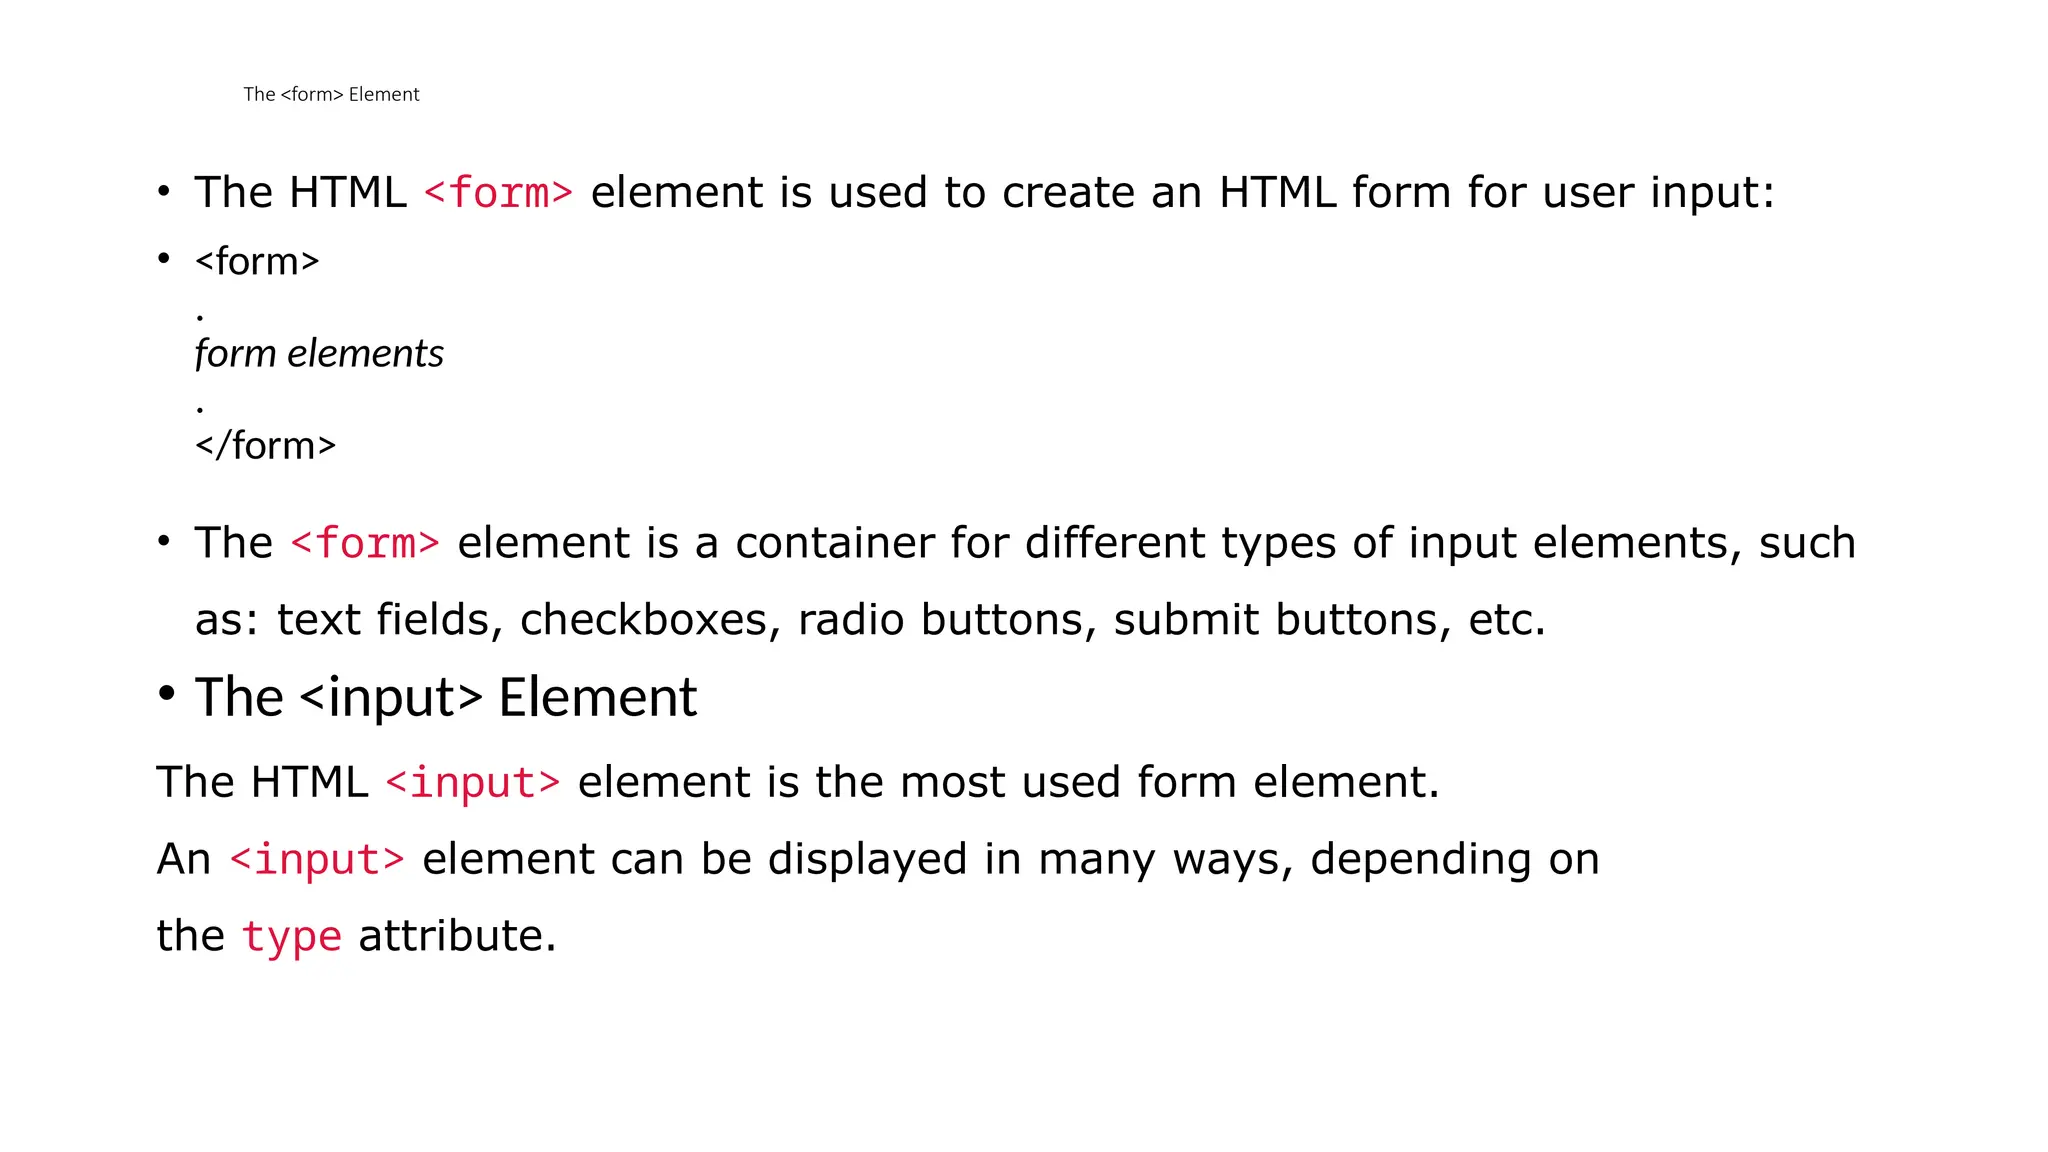
The <form> Element
•The HTML <form> element is used to create an HTML form for user input:
• <form>
.
form elements
.
</form>
• The <form> element is a container for different types of input elements, such
as: text fields, checkboxes, radio buttons, submit buttons, etc.
• The <input> Element
The HTML <input> element is the most used form element.
An <input> element can be displayed in many ways, depending on
the type attribute.
95.
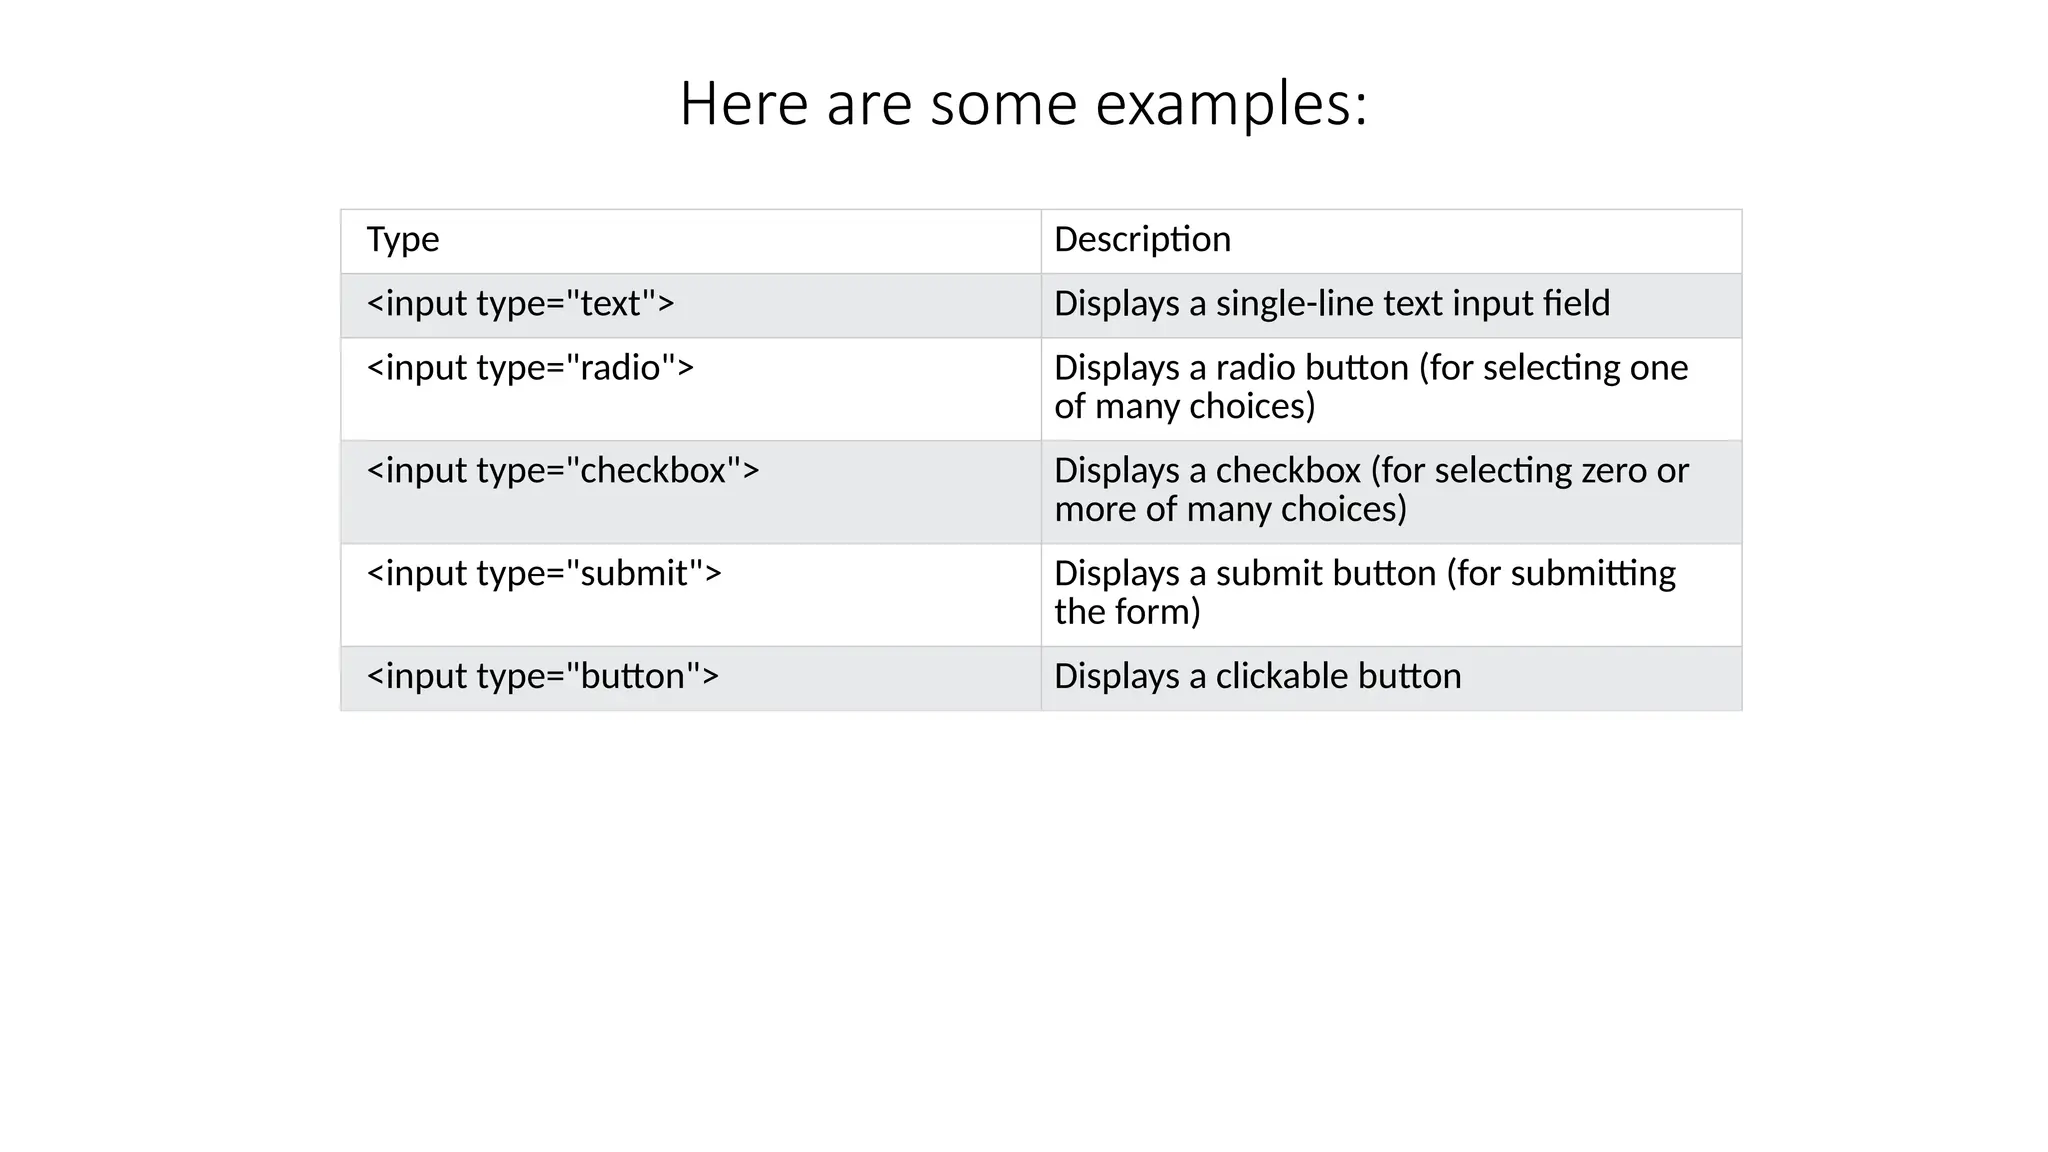
Here are someexamples:
Type Description
<input type="text"> Displays a single-line text input field
<input type="radio"> Displays a radio button (for selecting one
of many choices)
<input type="checkbox"> Displays a checkbox (for selecting zero or
more of many choices)
<input type="submit"> Displays a submit button (for submitting
the form)
<input type="button"> Displays a clickable button
96.
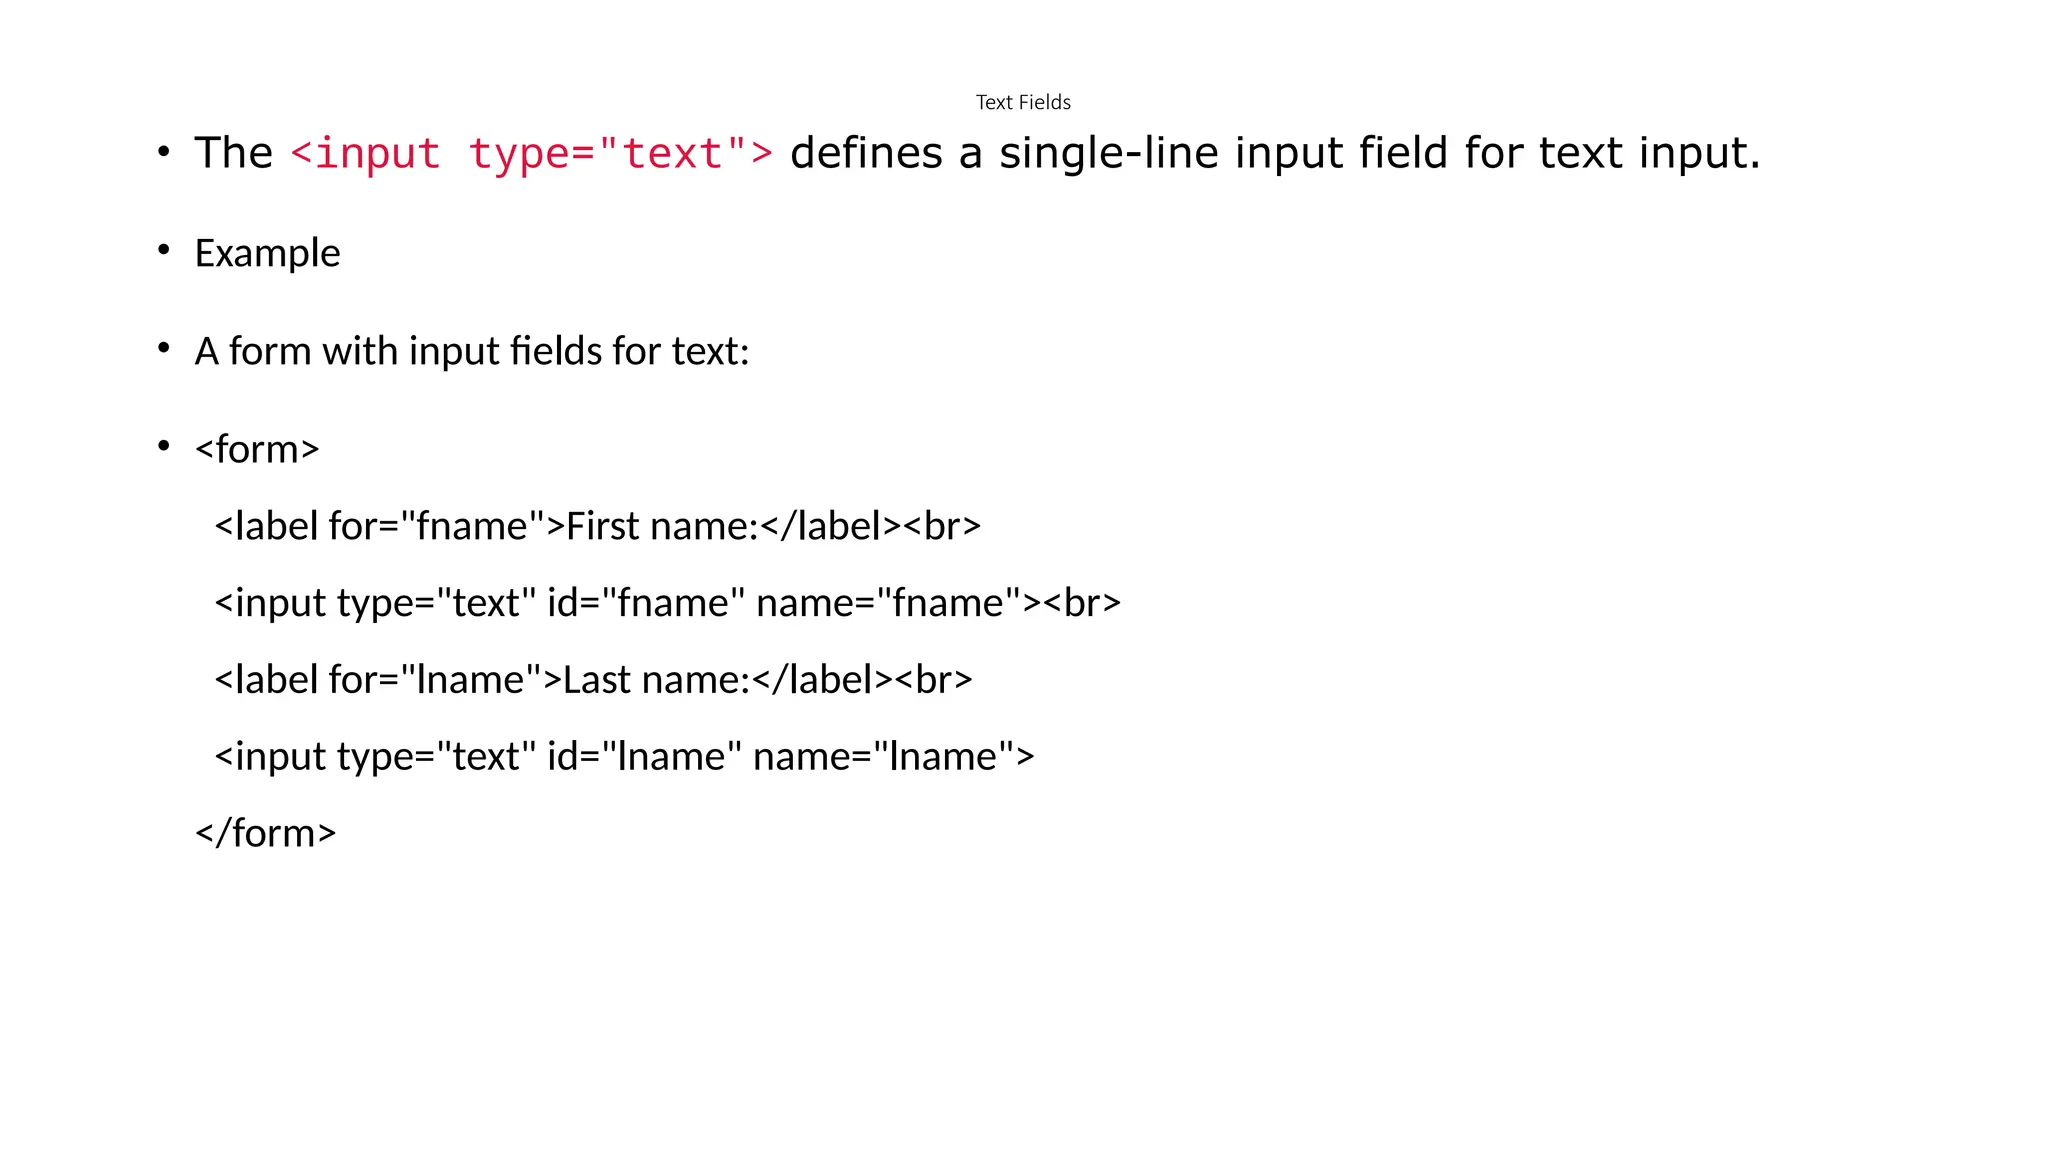
Text Fields
• The<input type="text"> defines a single-line input field for text input.
• Example
• A form with input fields for text:
• <form>
<label for="fname">First name:</label><br>
<input type="text" id="fname" name="fname"><br>
<label for="lname">Last name:</label><br>
<input type="text" id="lname" name="lname">
</form>
97.
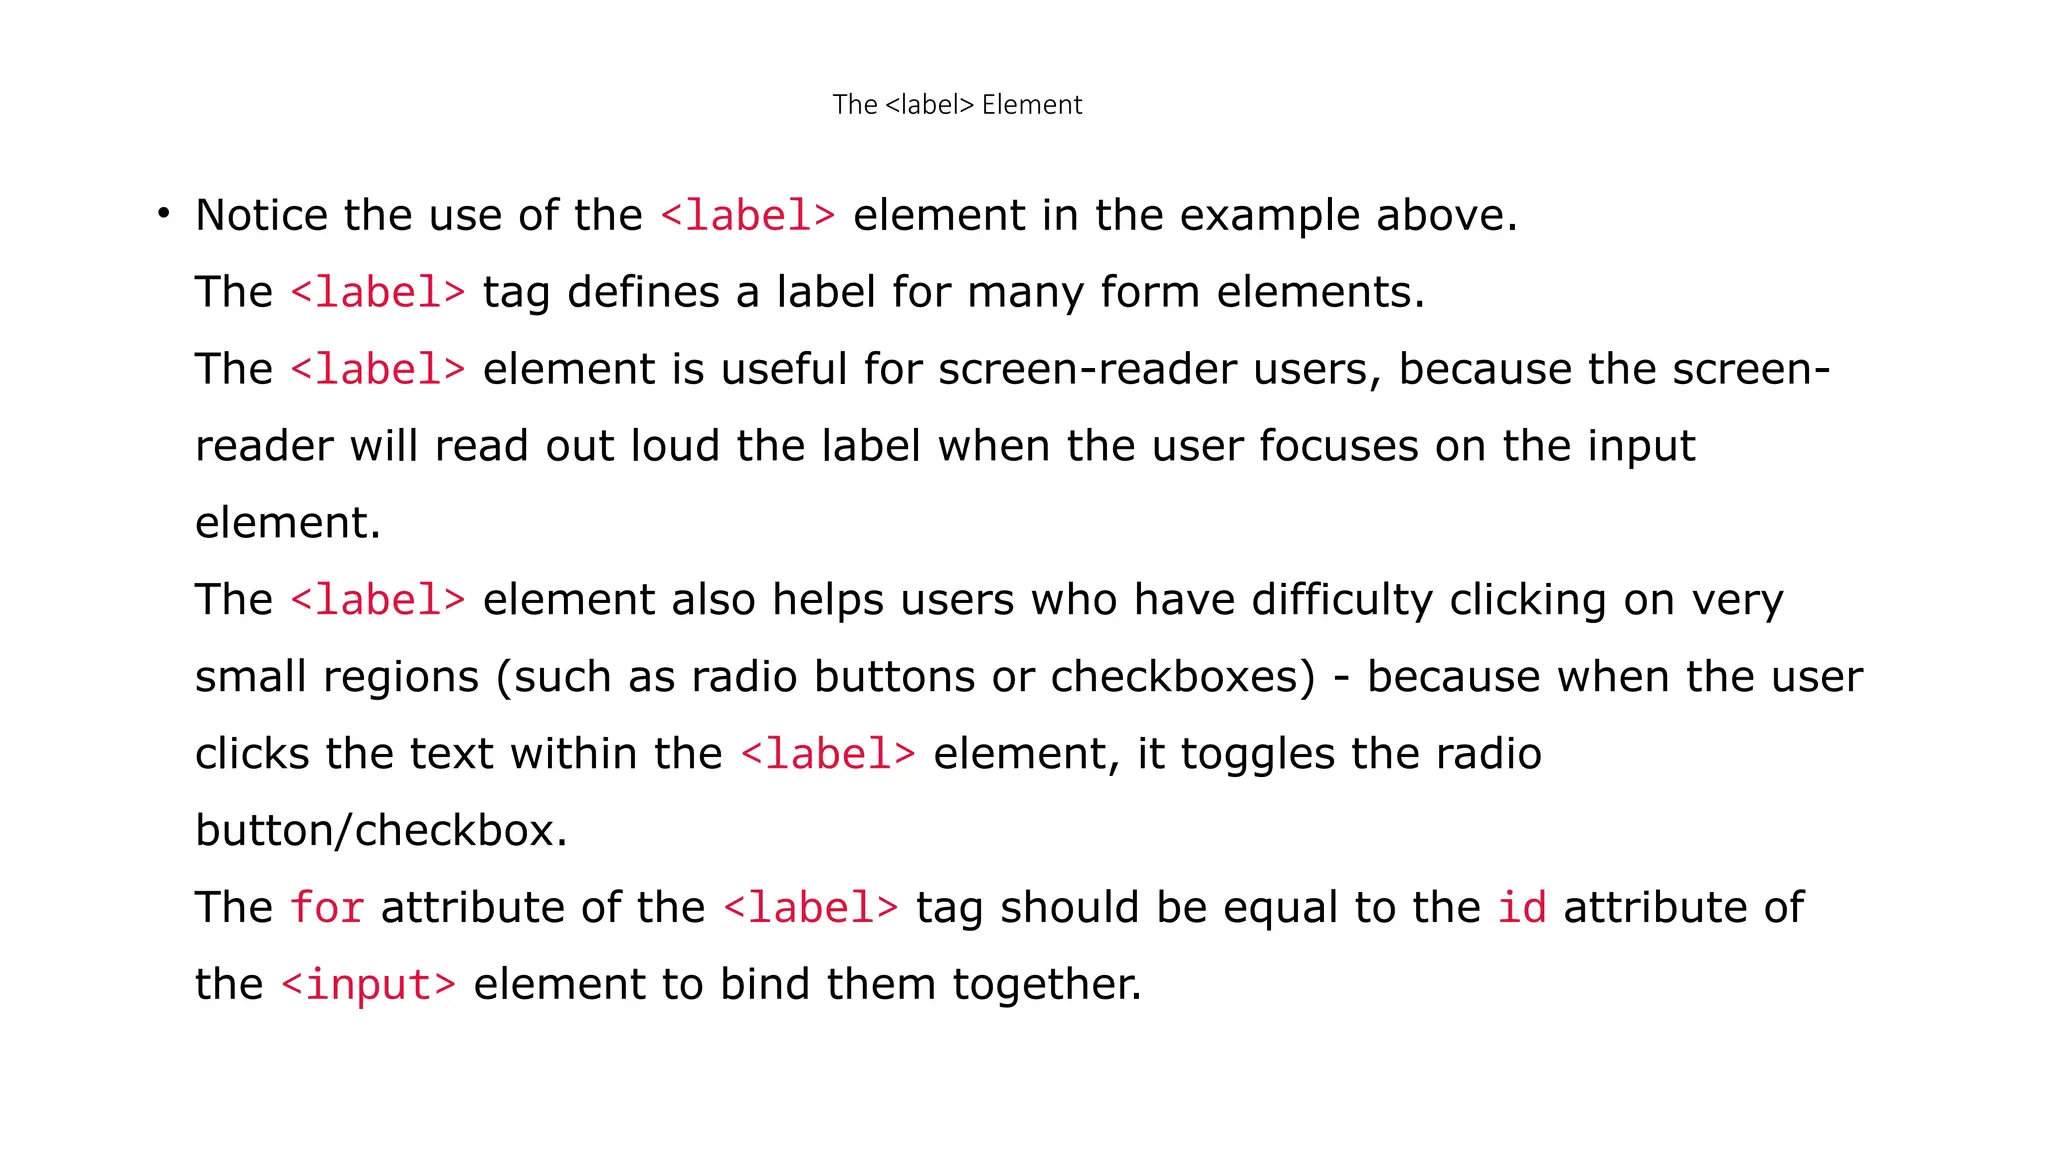
The <label> Element
•Notice the use of the <label> element in the example above.
The <label> tag defines a label for many form elements.
The <label> element is useful for screen-reader users, because the screen-
reader will read out loud the label when the user focuses on the input
element.
The <label> element also helps users who have difficulty clicking on very
small regions (such as radio buttons or checkboxes) - because when the user
clicks the text within the <label> element, it toggles the radio
button/checkbox.
The for attribute of the <label> tag should be equal to the id attribute of
the <input> element to bind them together.
98.
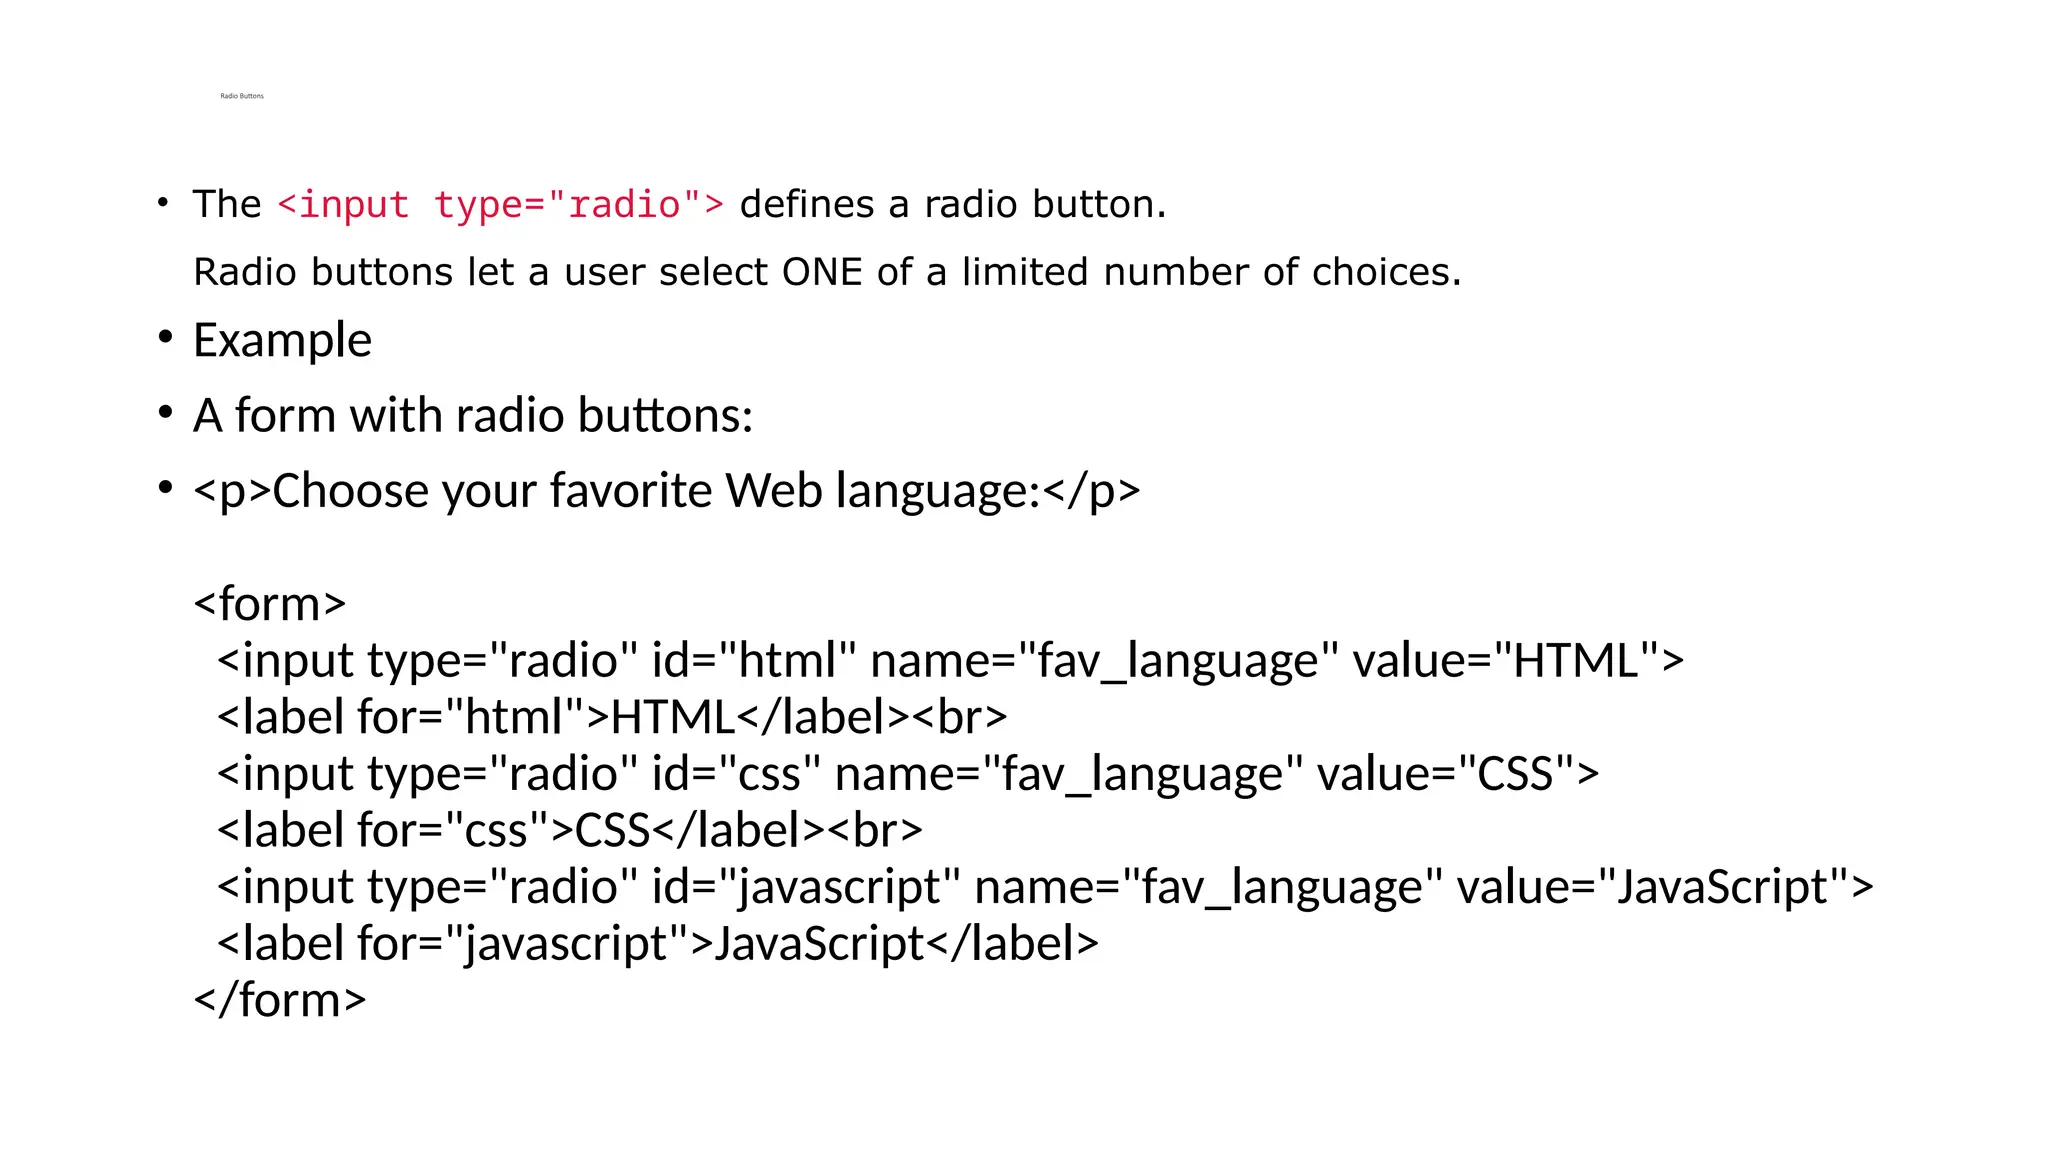
Radio Buttons
• The<input type="radio"> defines a radio button.
Radio buttons let a user select ONE of a limited number of choices.
• Example
• A form with radio buttons:
• <p>Choose your favorite Web language:</p>
<form>
<input type="radio" id="html" name="fav_language" value="HTML">
<label for="html">HTML</label><br>
<input type="radio" id="css" name="fav_language" value="CSS">
<label for="css">CSS</label><br>
<input type="radio" id="javascript" name="fav_language" value="JavaScript">
<label for="javascript">JavaScript</label>
</form>
99.
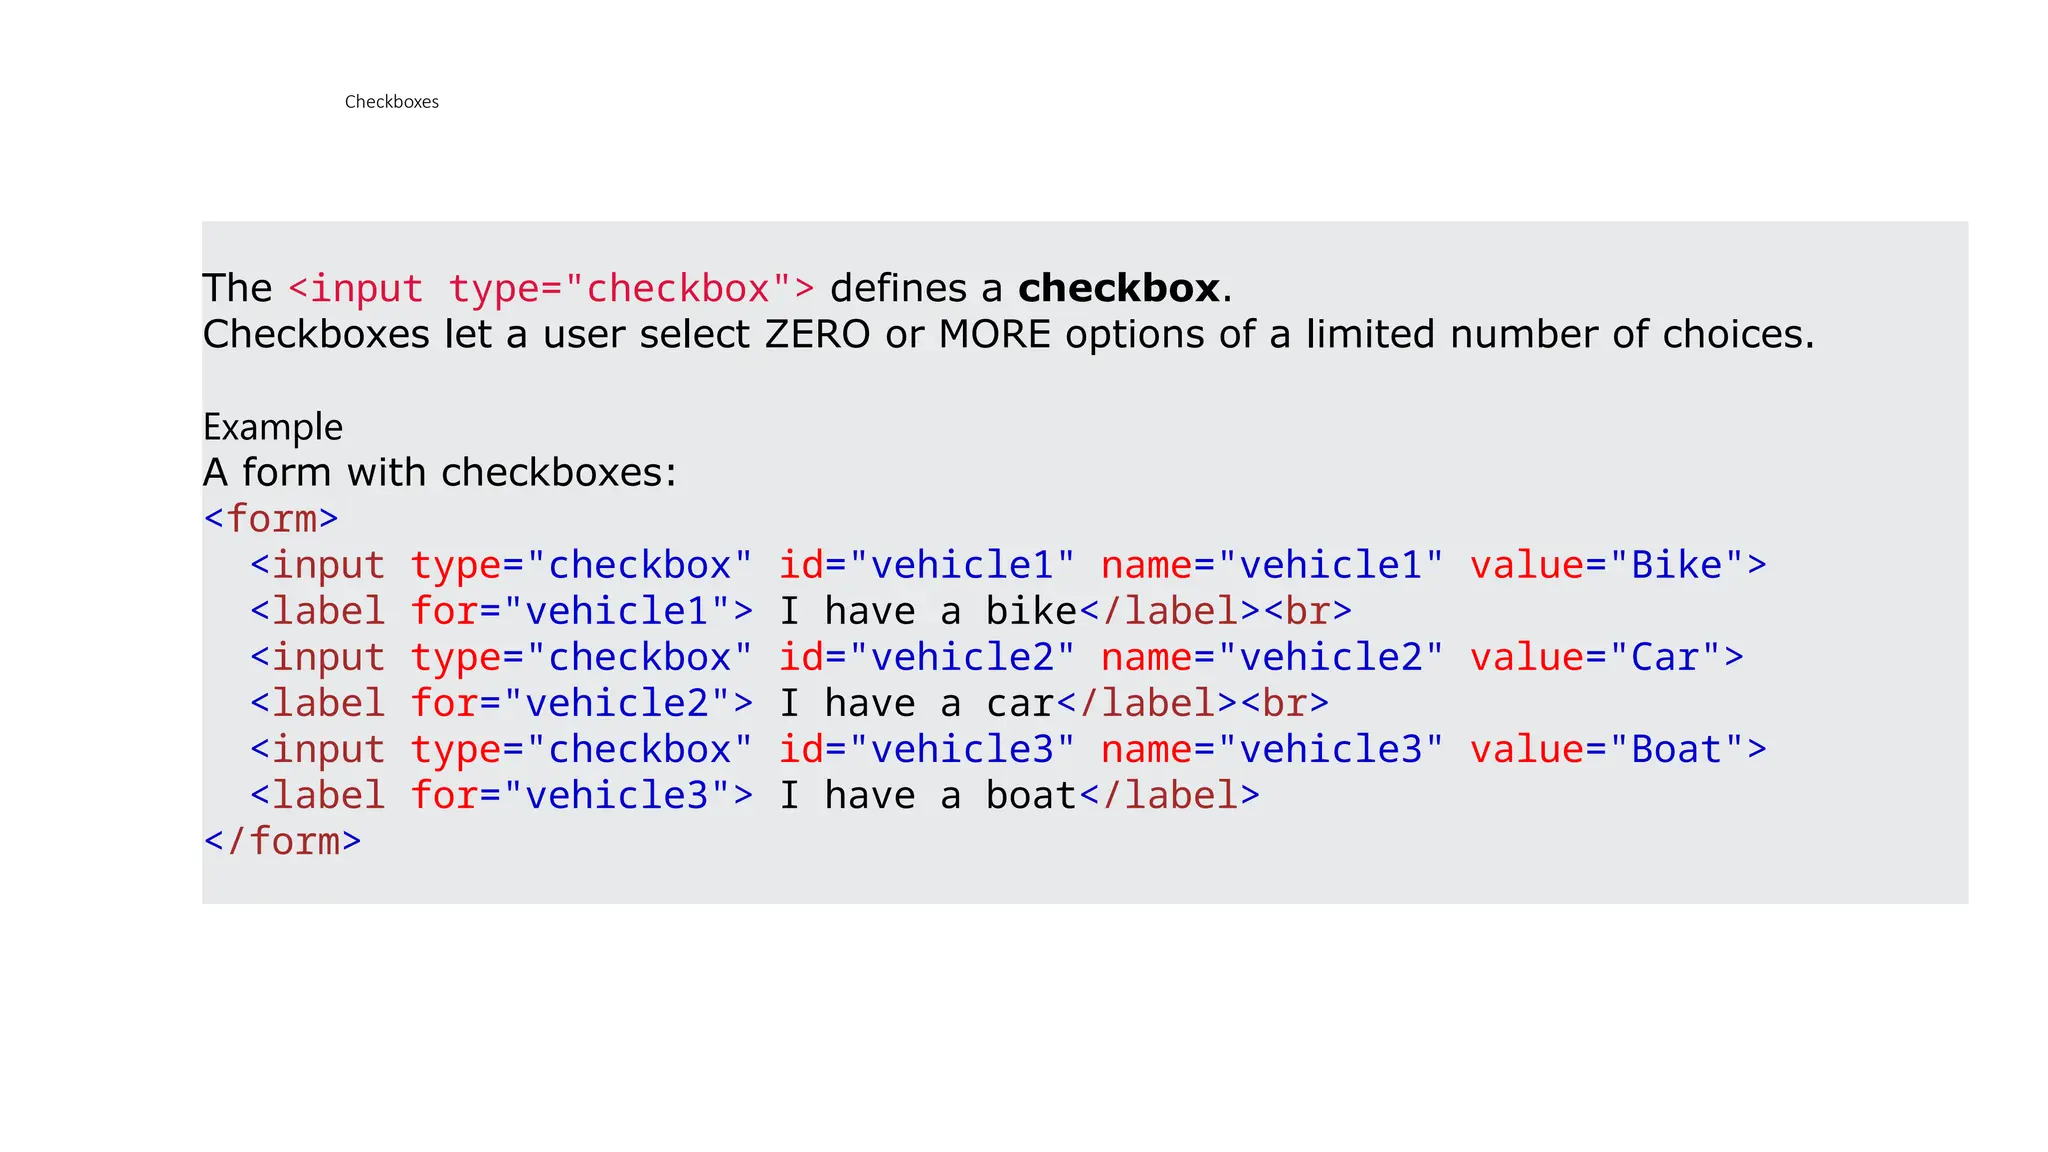
Checkboxes
The <input type="checkbox">defines a checkbox.
Checkboxes let a user select ZERO or MORE options of a limited number of choices.
Example
A form with checkboxes:
<form>
<input type="checkbox" id="vehicle1" name="vehicle1" value="Bike">
<label for="vehicle1"> I have a bike</label><br>
<input type="checkbox" id="vehicle2" name="vehicle2" value="Car">
<label for="vehicle2"> I have a car</label><br>
<input type="checkbox" id="vehicle3" name="vehicle3" value="Boat">
<label for="vehicle3"> I have a boat</label>
</form>
100.
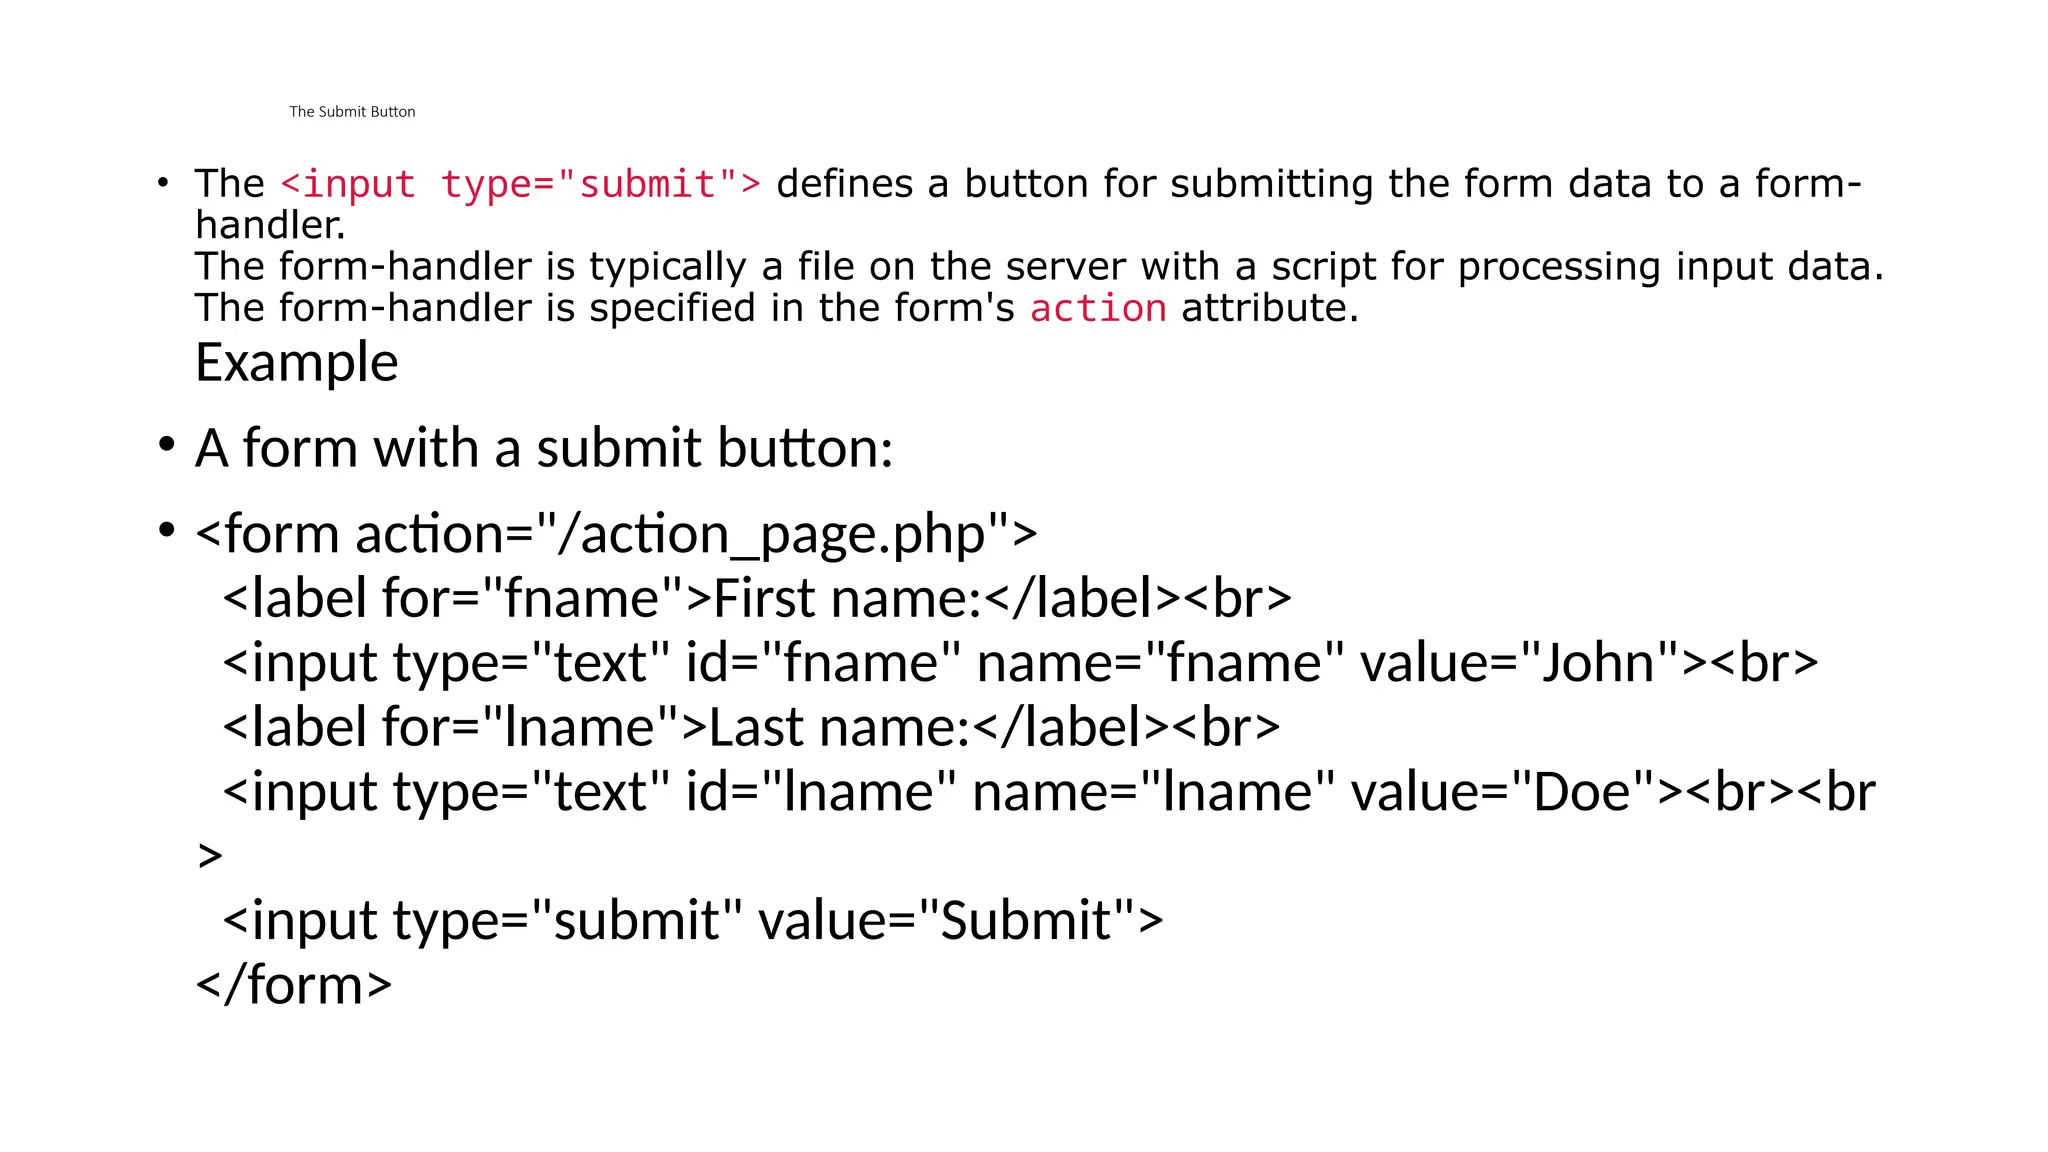
The Submit Button
•The <input type="submit"> defines a button for submitting the form data to a form-
handler.
The form-handler is typically a file on the server with a script for processing input data.
The form-handler is specified in the form's action attribute.
Example
• A form with a submit button:
• <form action="/action_page.php">
<label for="fname">First name:</label><br>
<input type="text" id="fname" name="fname" value="John"><br>
<label for="lname">Last name:</label><br>
<input type="text" id="lname" name="lname" value="Doe"><br><br
>
<input type="submit" value="Submit">
</form>
101.
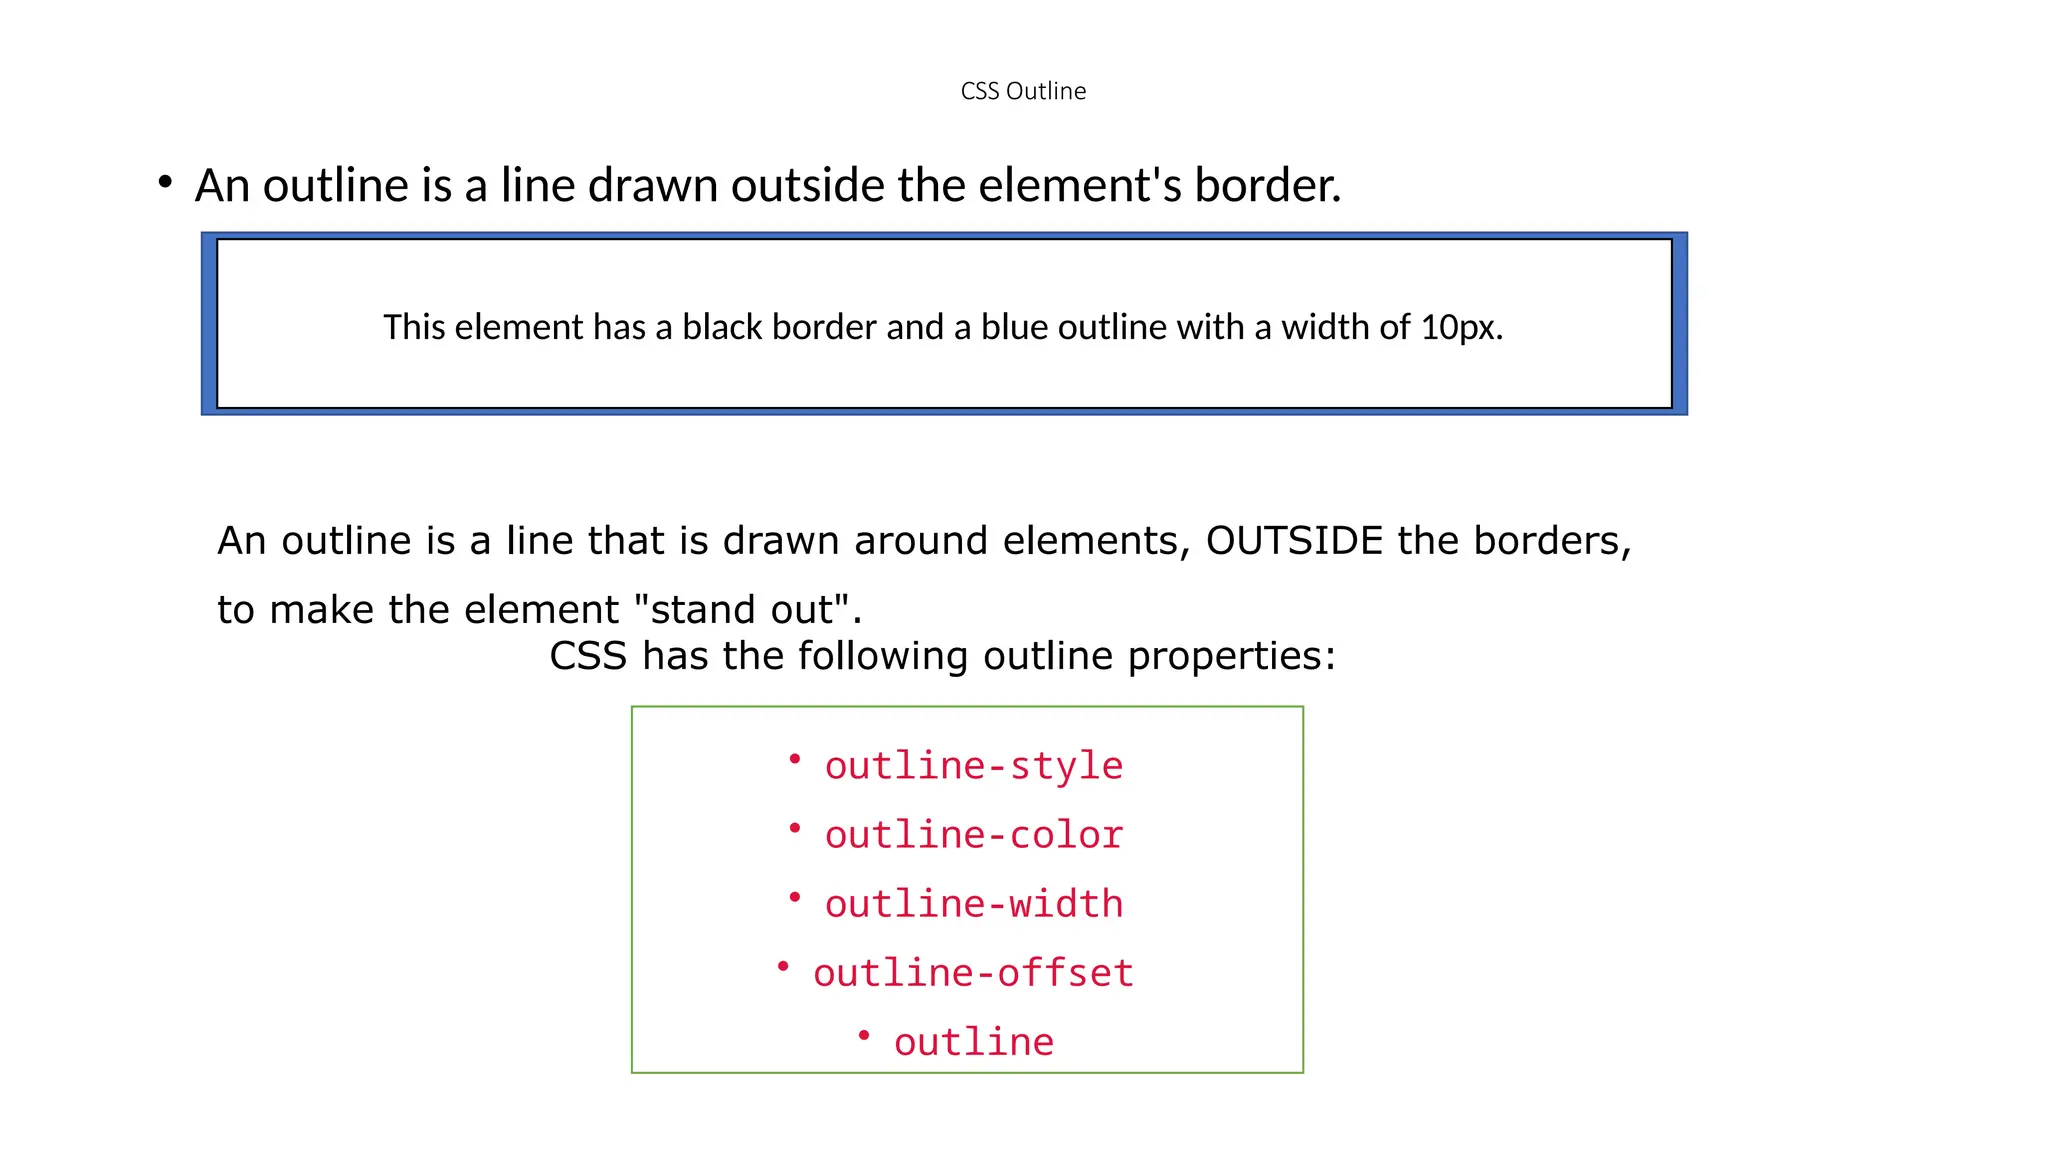
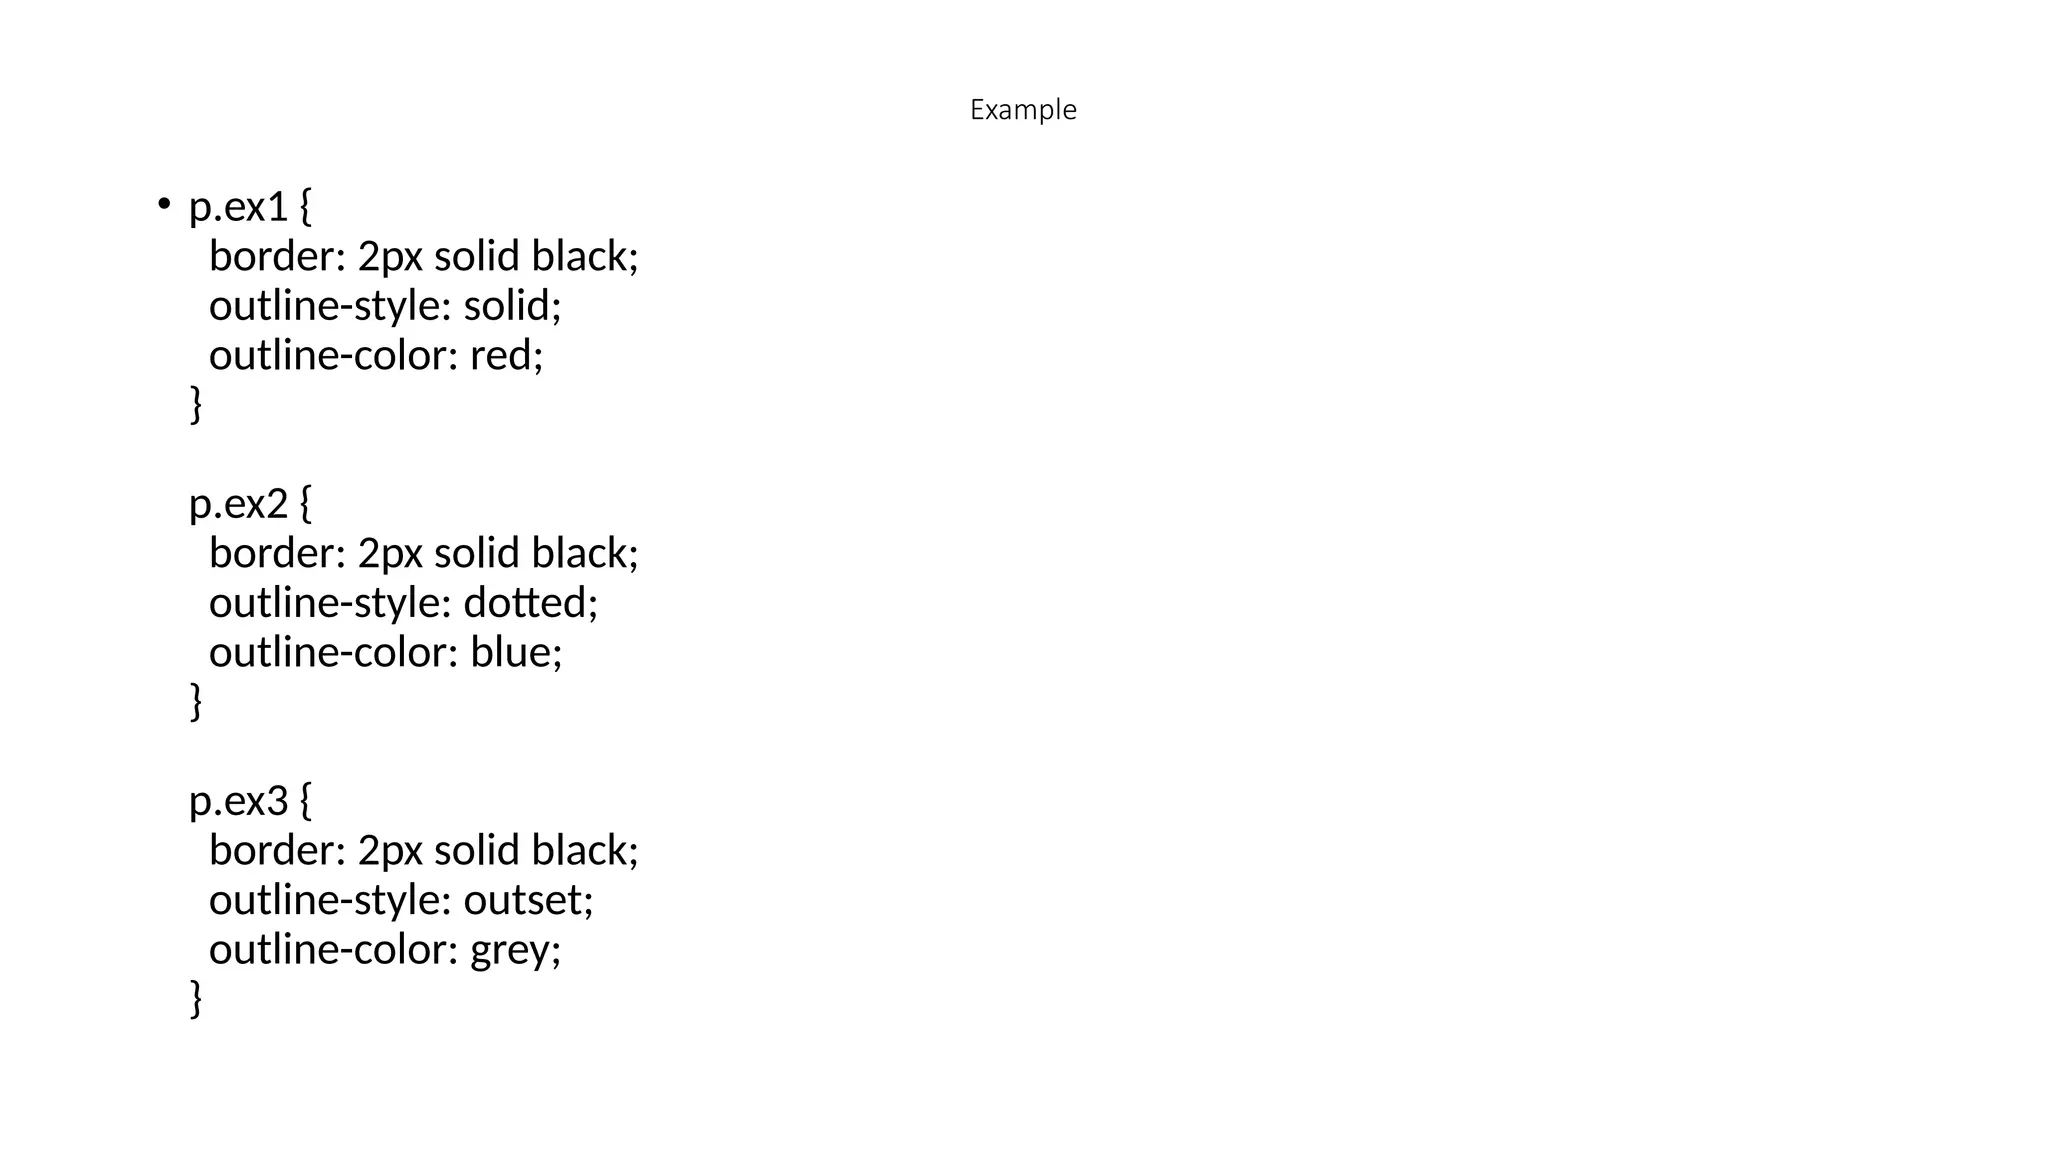
CSS Outline
• Anoutline is a line drawn outside the element's border.
This element has a black border and a blue outline with a width of 10px.
An outline is a line that is drawn around elements, OUTSIDE the borders,
to make the element "stand out".
CSS has the following outline properties:
• outline-style
• outline-color
• outline-width
• outline-offset
• outline
102.
• Note: Outlinediffers from borders! Unlike border, the outline is
drawn outside the element's border, and may overlap other
content. Also, the outline is NOT a part of the element's
dimensions; the element's total width and height is not affected
by the width of the outline.
103.
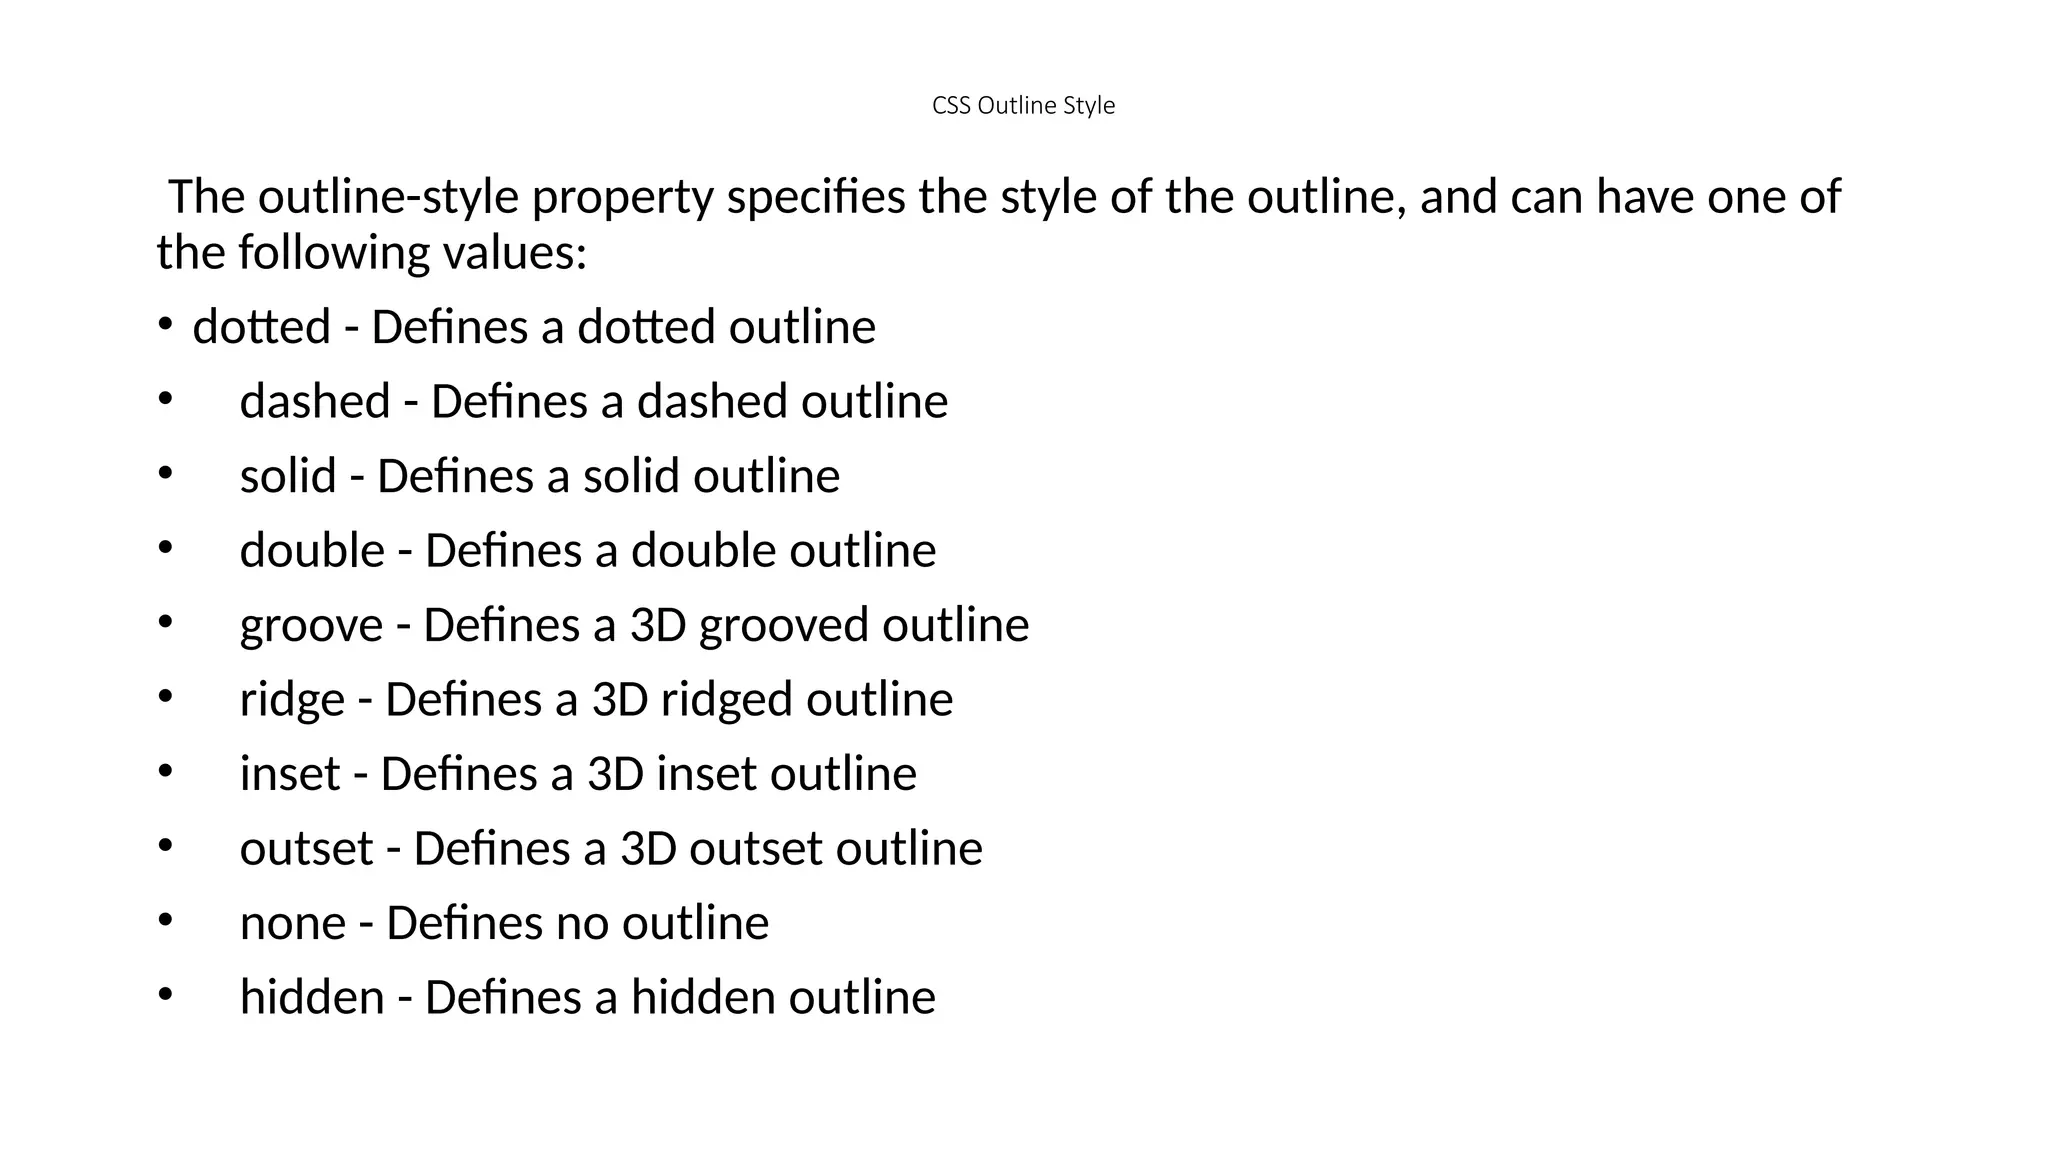
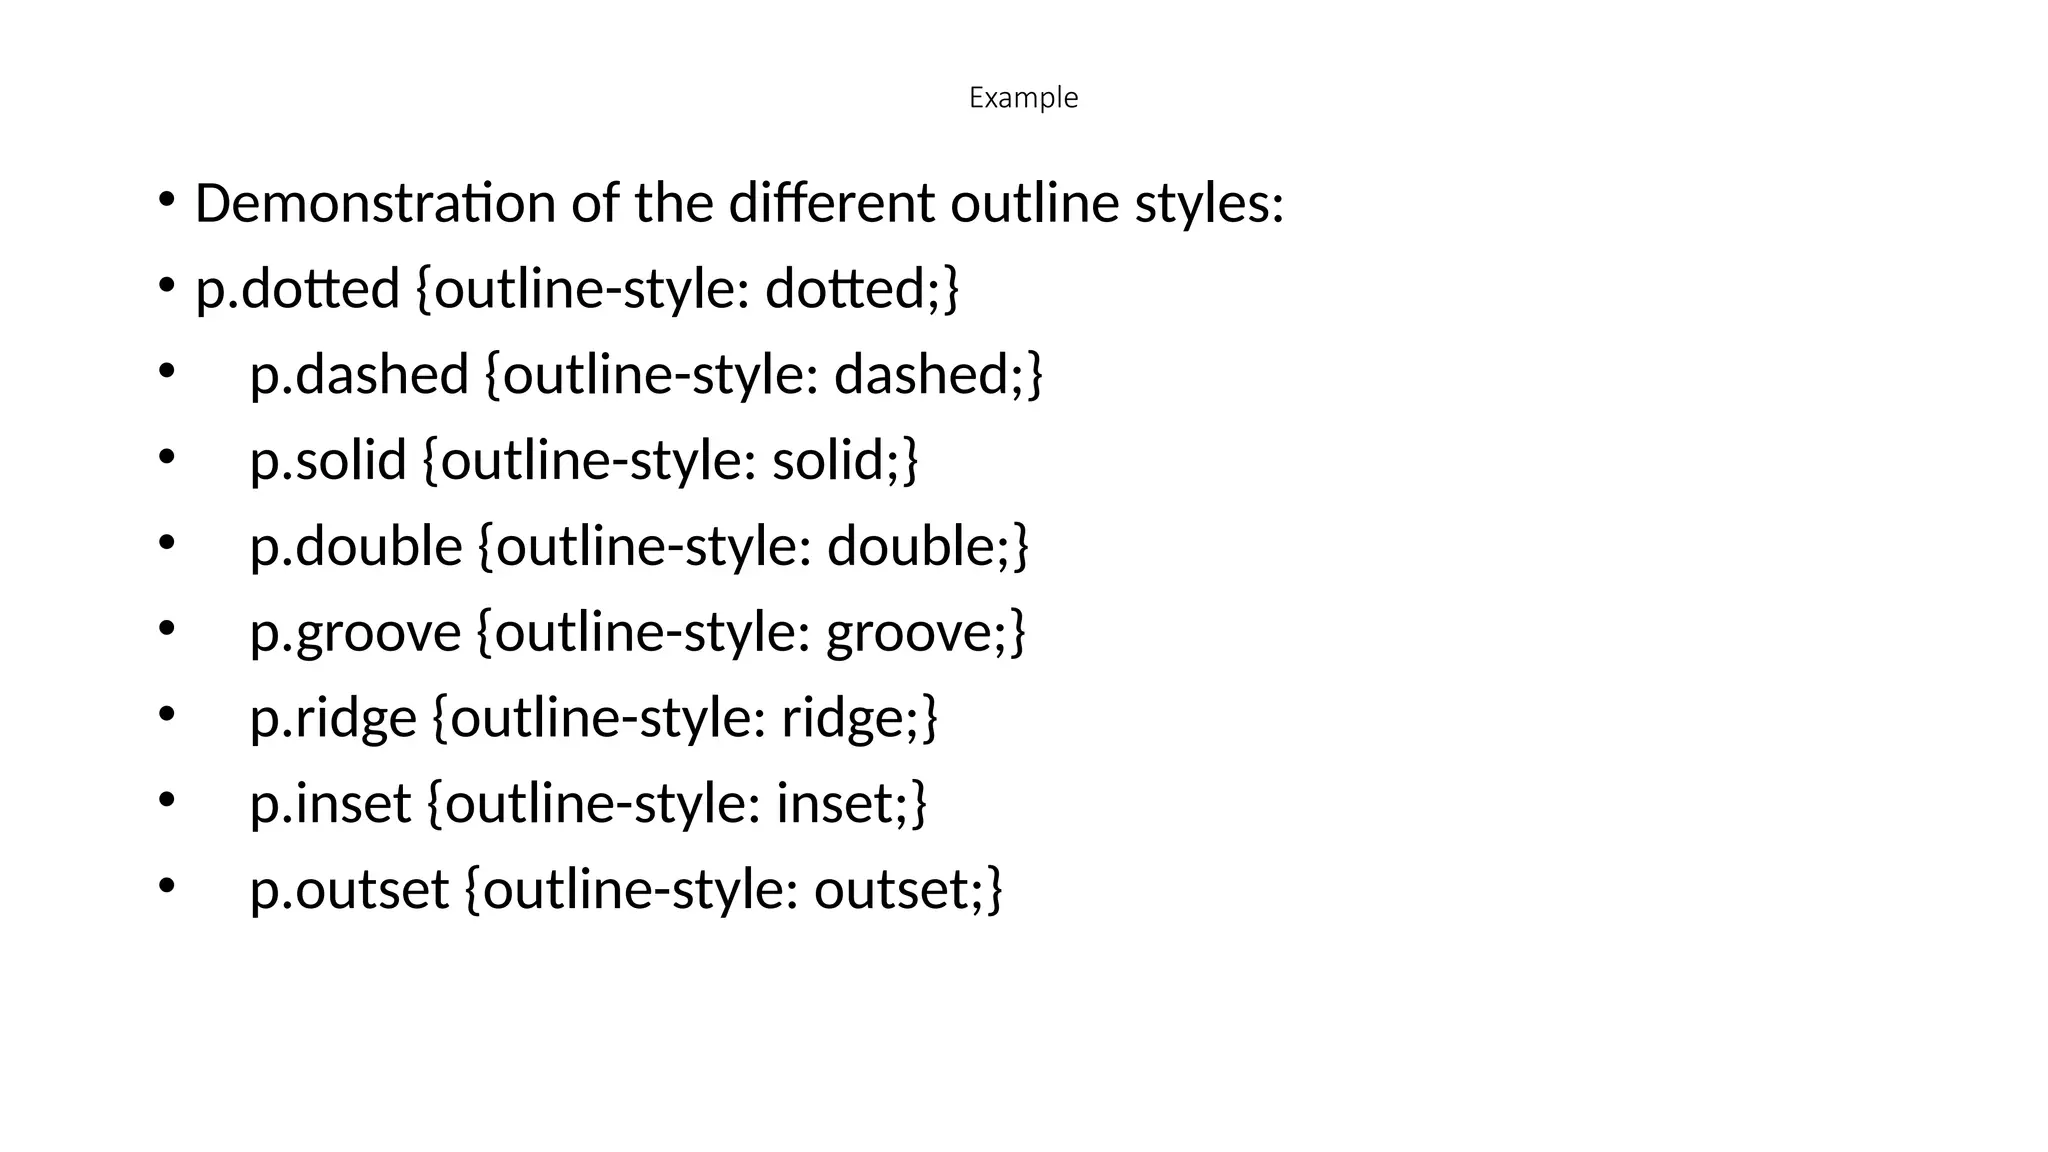
CSS Outline Style
Theoutline-style property specifies the style of the outline, and can have one of
the following values:
• dotted - Defines a dotted outline
• dashed - Defines a dashed outline
• solid - Defines a solid outline
• double - Defines a double outline
• groove - Defines a 3D grooved outline
• ridge - Defines a 3D ridged outline
• inset - Defines a 3D inset outline
• outset - Defines a 3D outset outline
• none - Defines no outline
• hidden - Defines a hidden outline
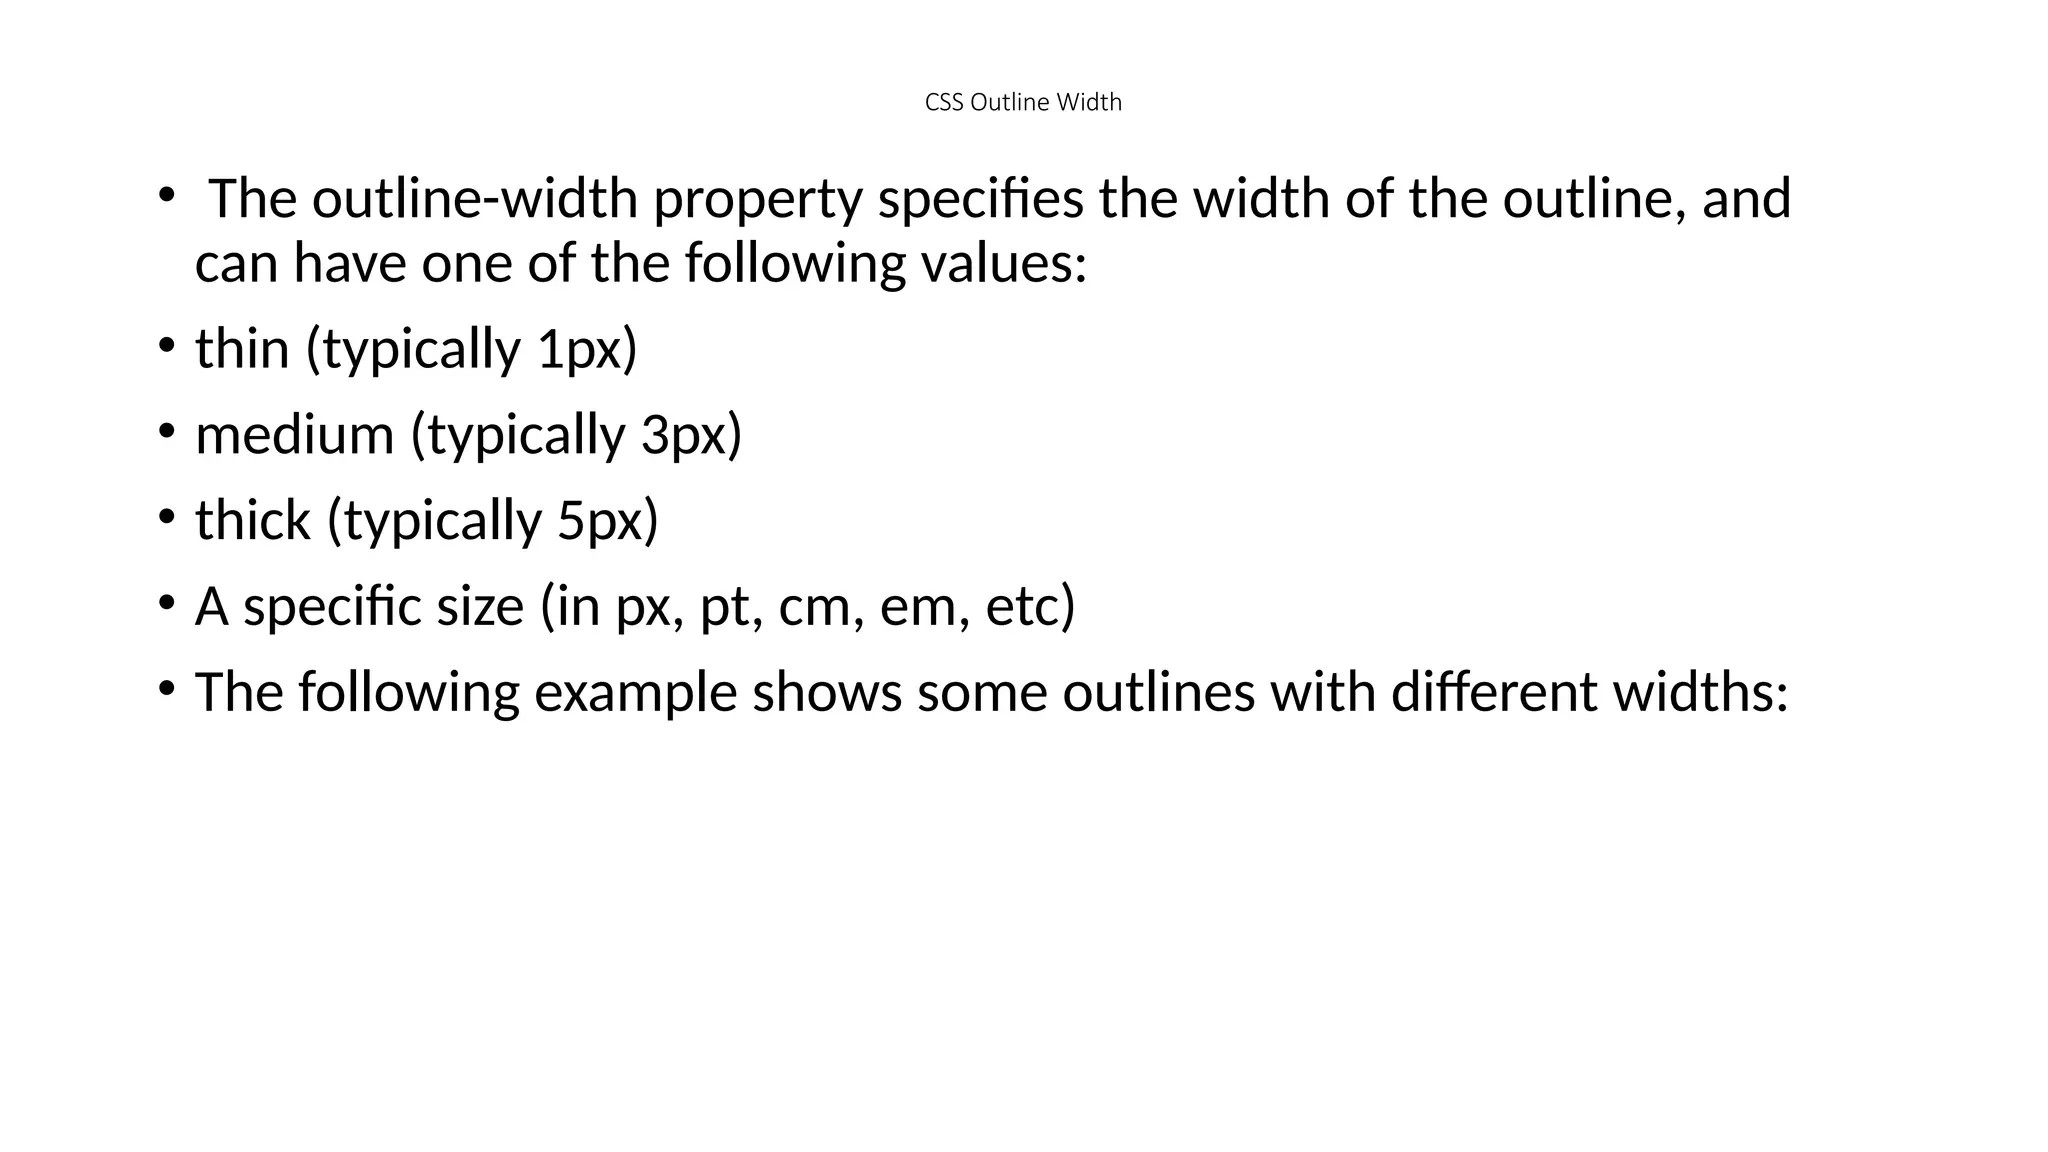
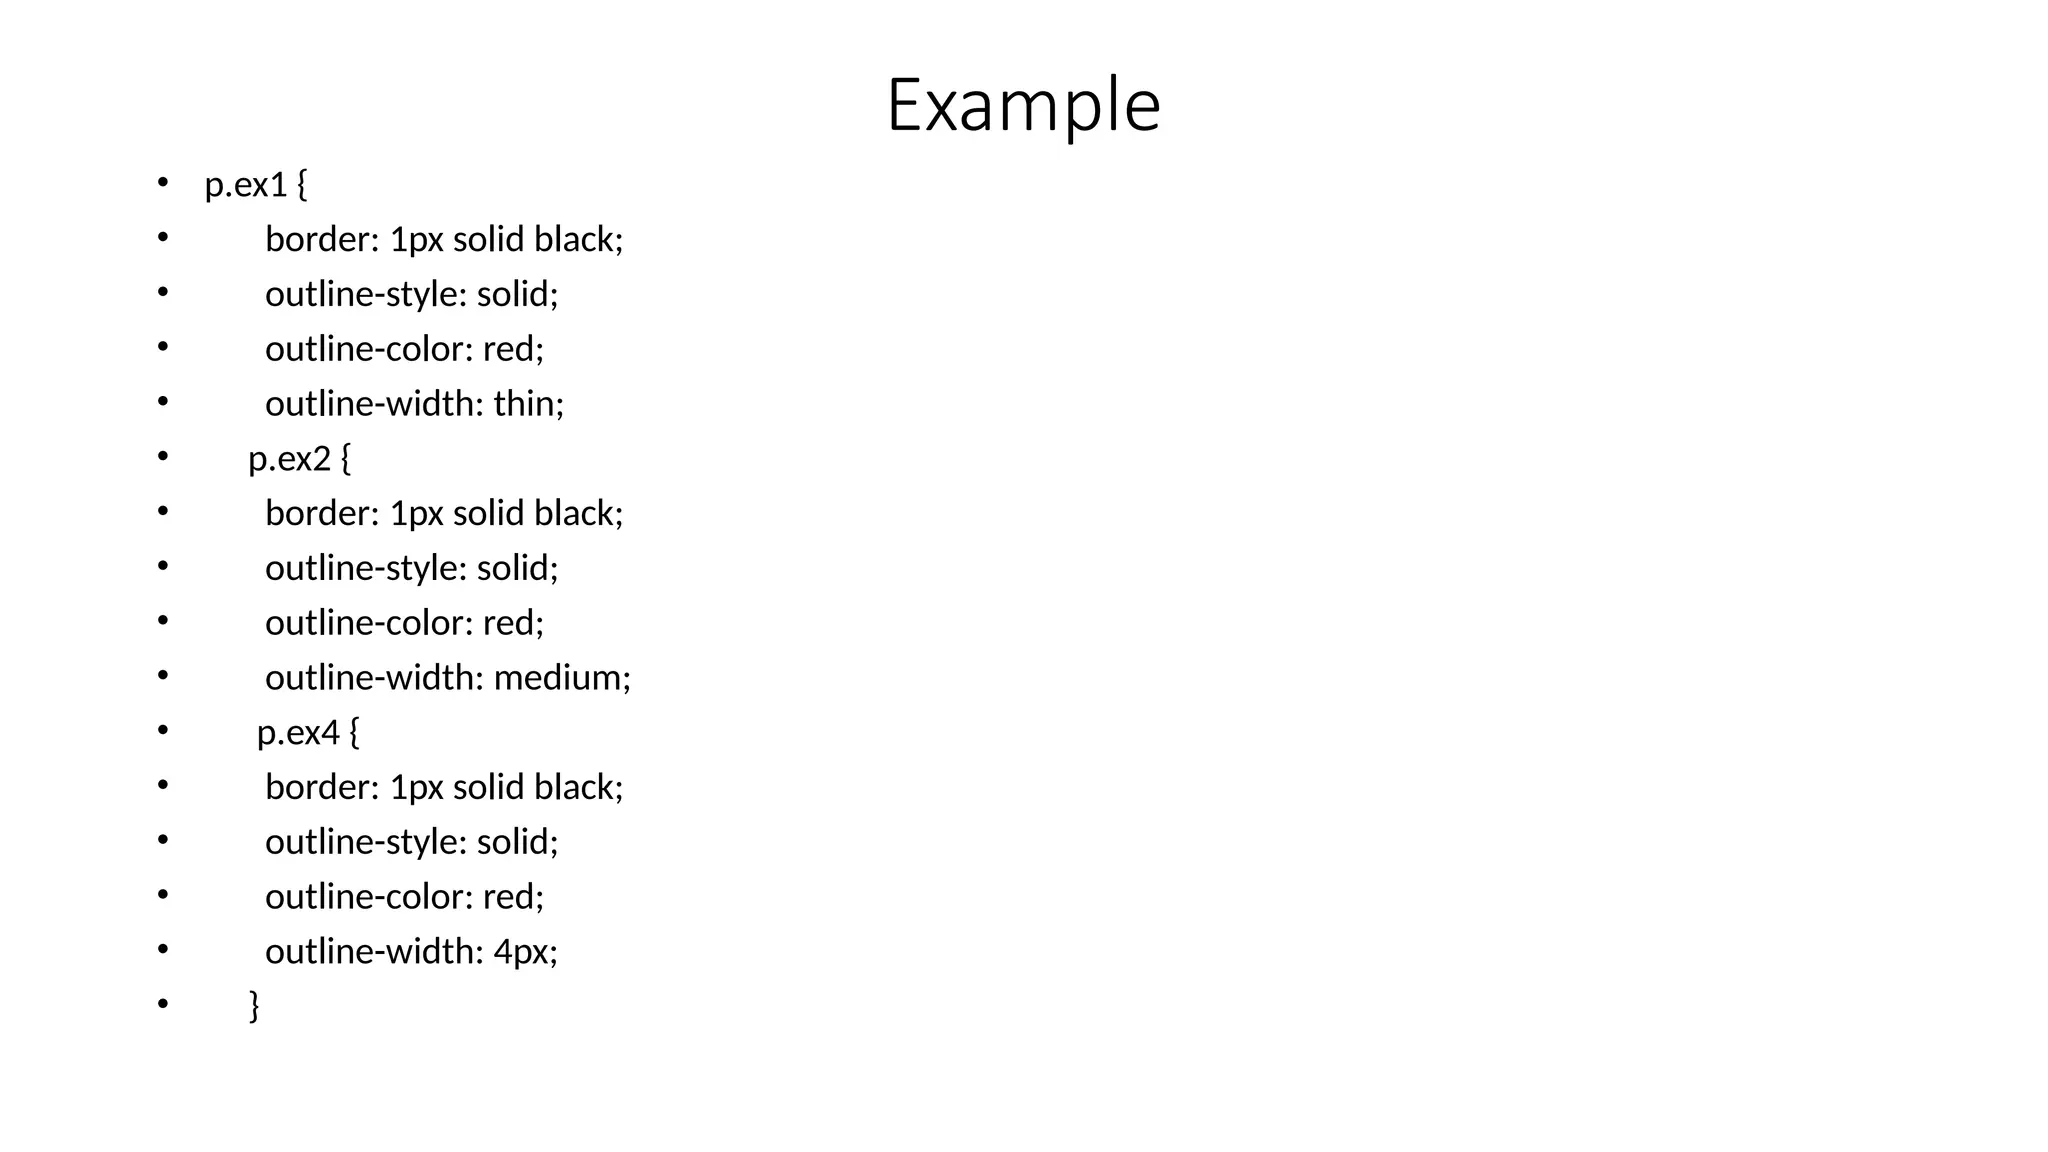
CSS Outline Width
•The outline-width property specifies the width of the outline, and
can have one of the following values:
• thin (typically 1px)
• medium (typically 3px)
• thick (typically 5px)
• A specific size (in px, pt, cm, em, etc)
• The following example shows some outlines with different widths:
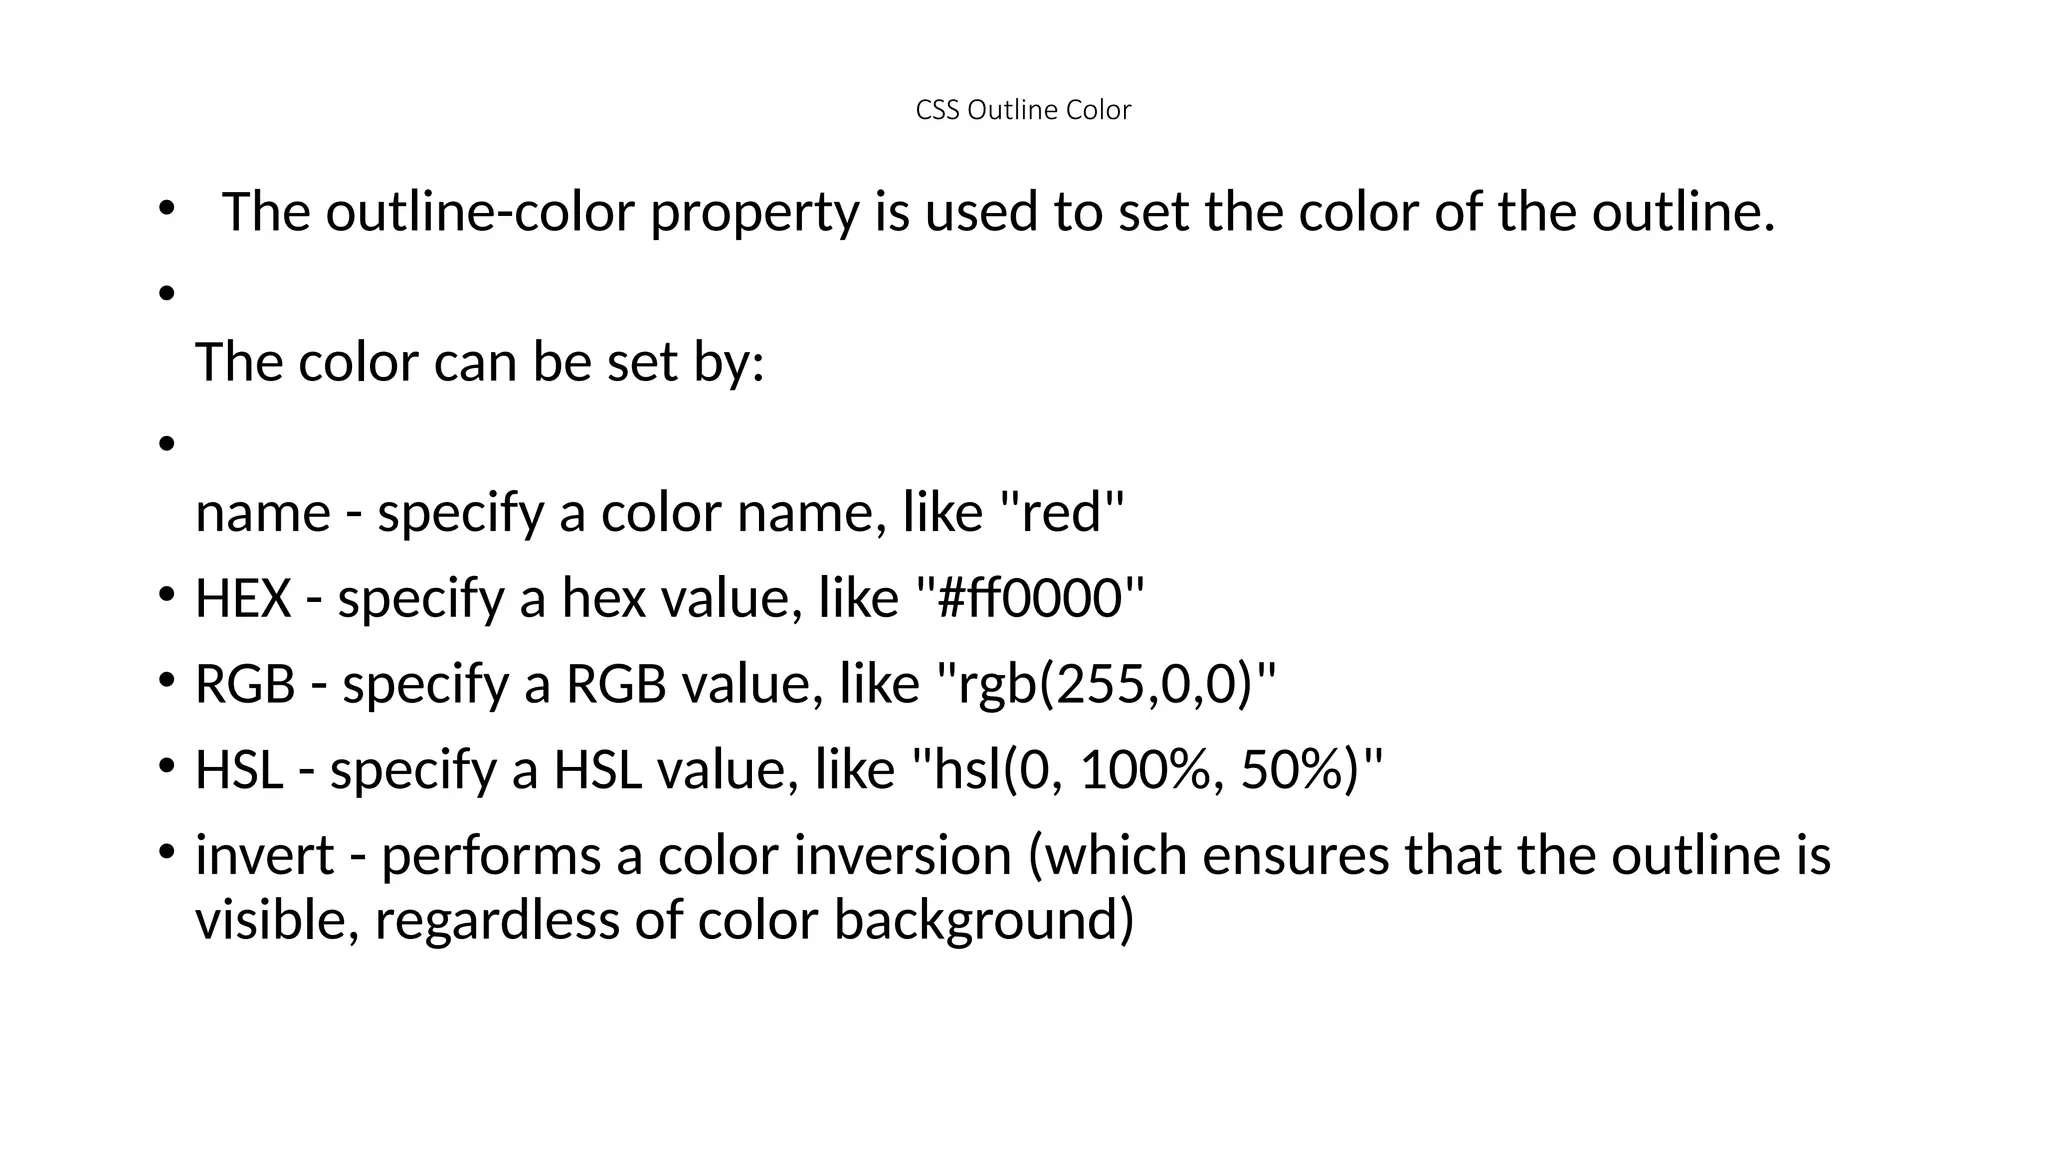
CSS Outline Color
•The outline-color property is used to set the color of the outline.
•
The color can be set by:
•
name - specify a color name, like "red"
• HEX - specify a hex value, like "#ff0000"
• RGB - specify a RGB value, like "rgb(255,0,0)"
• HSL - specify a HSL value, like "hsl(0, 100%, 50%)"
• invert - performs a color inversion (which ensures that the outline is
visible, regardless of color background)
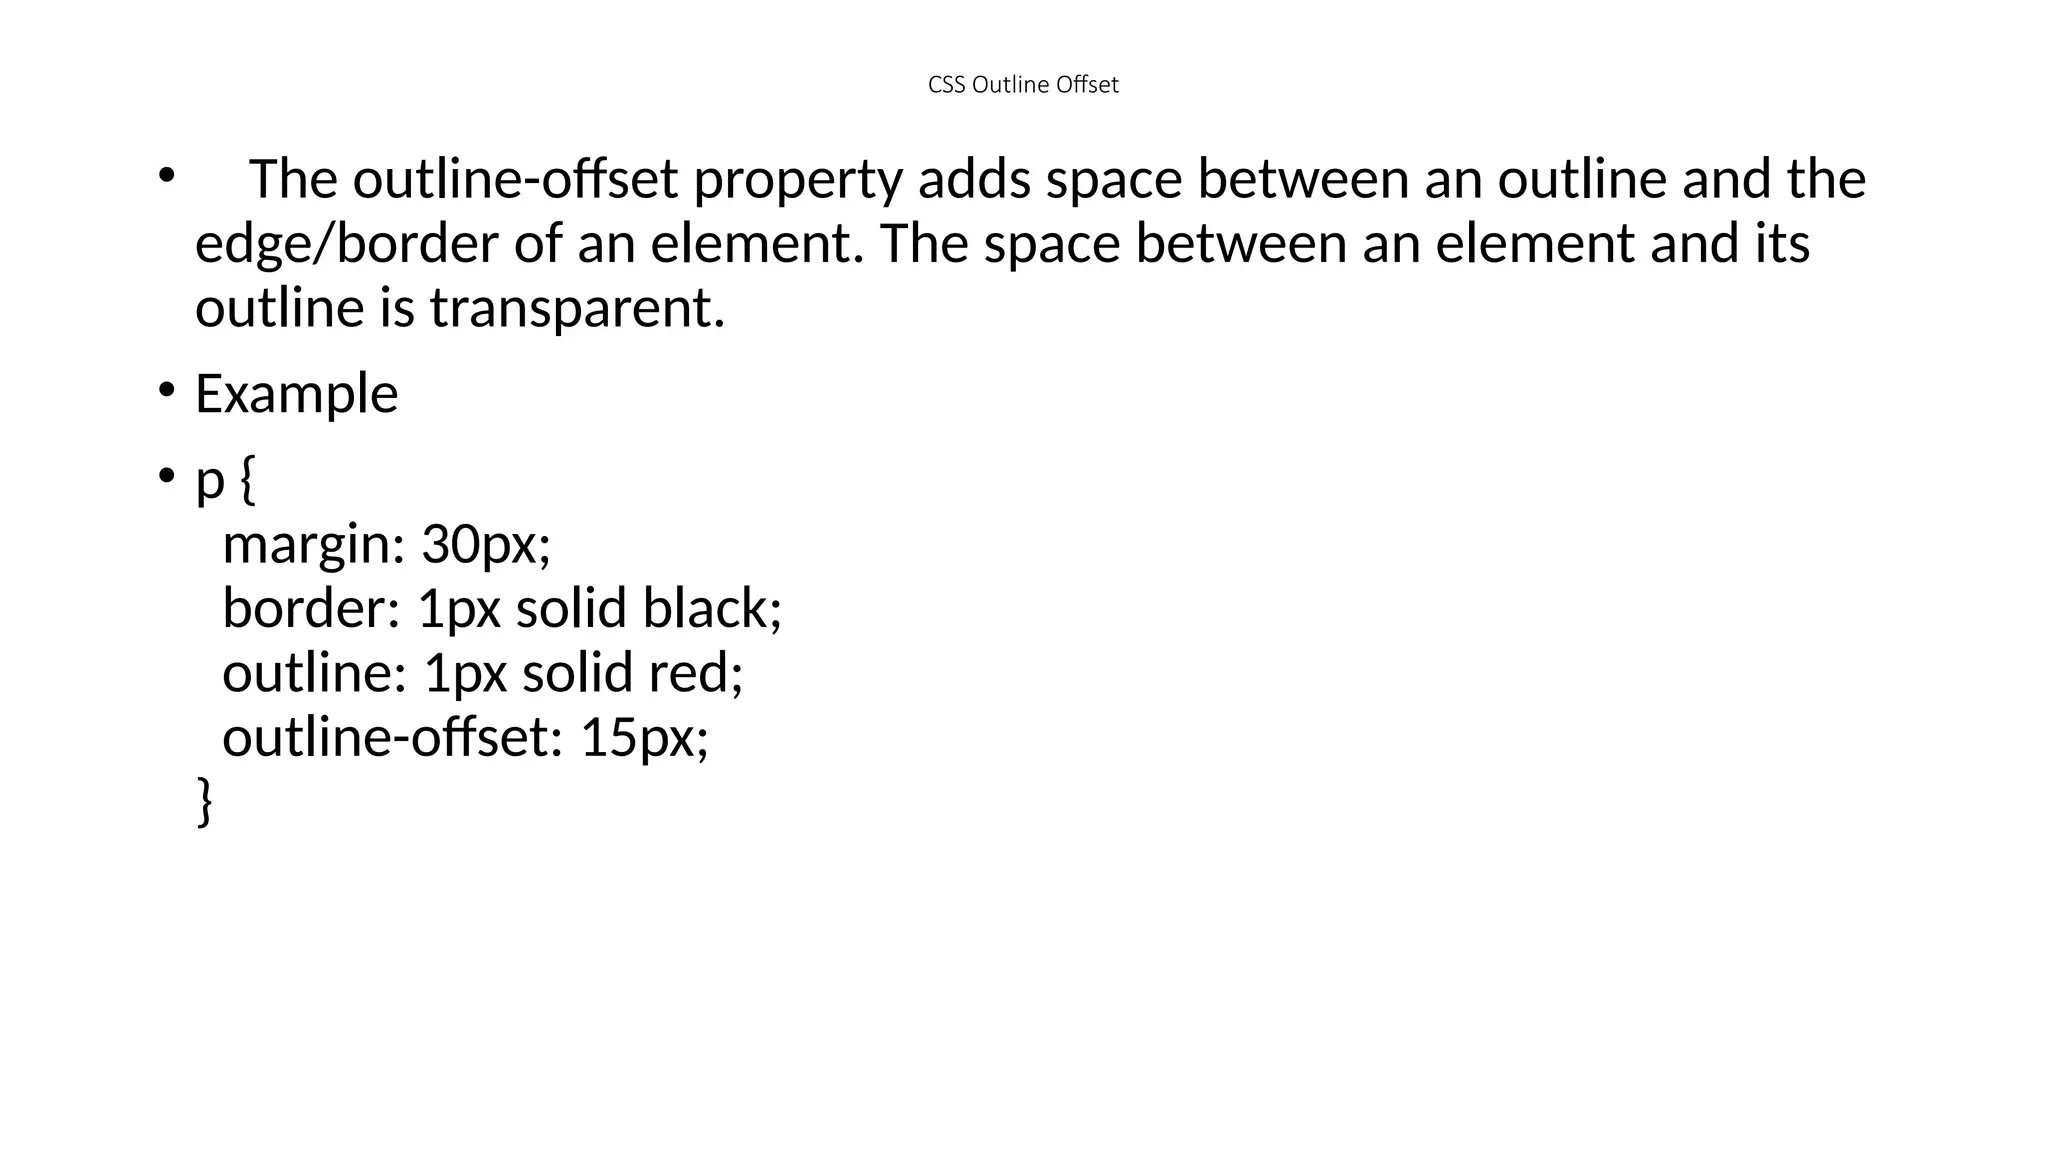
CSS Outline Offset
•The outline-offset property adds space between an outline and the
edge/border of an element. The space between an element and its
outline is transparent.
• Example
• p {
margin: 30px;
border: 1px solid black;
outline: 1px solid red;
outline-offset: 15px;
}
110.
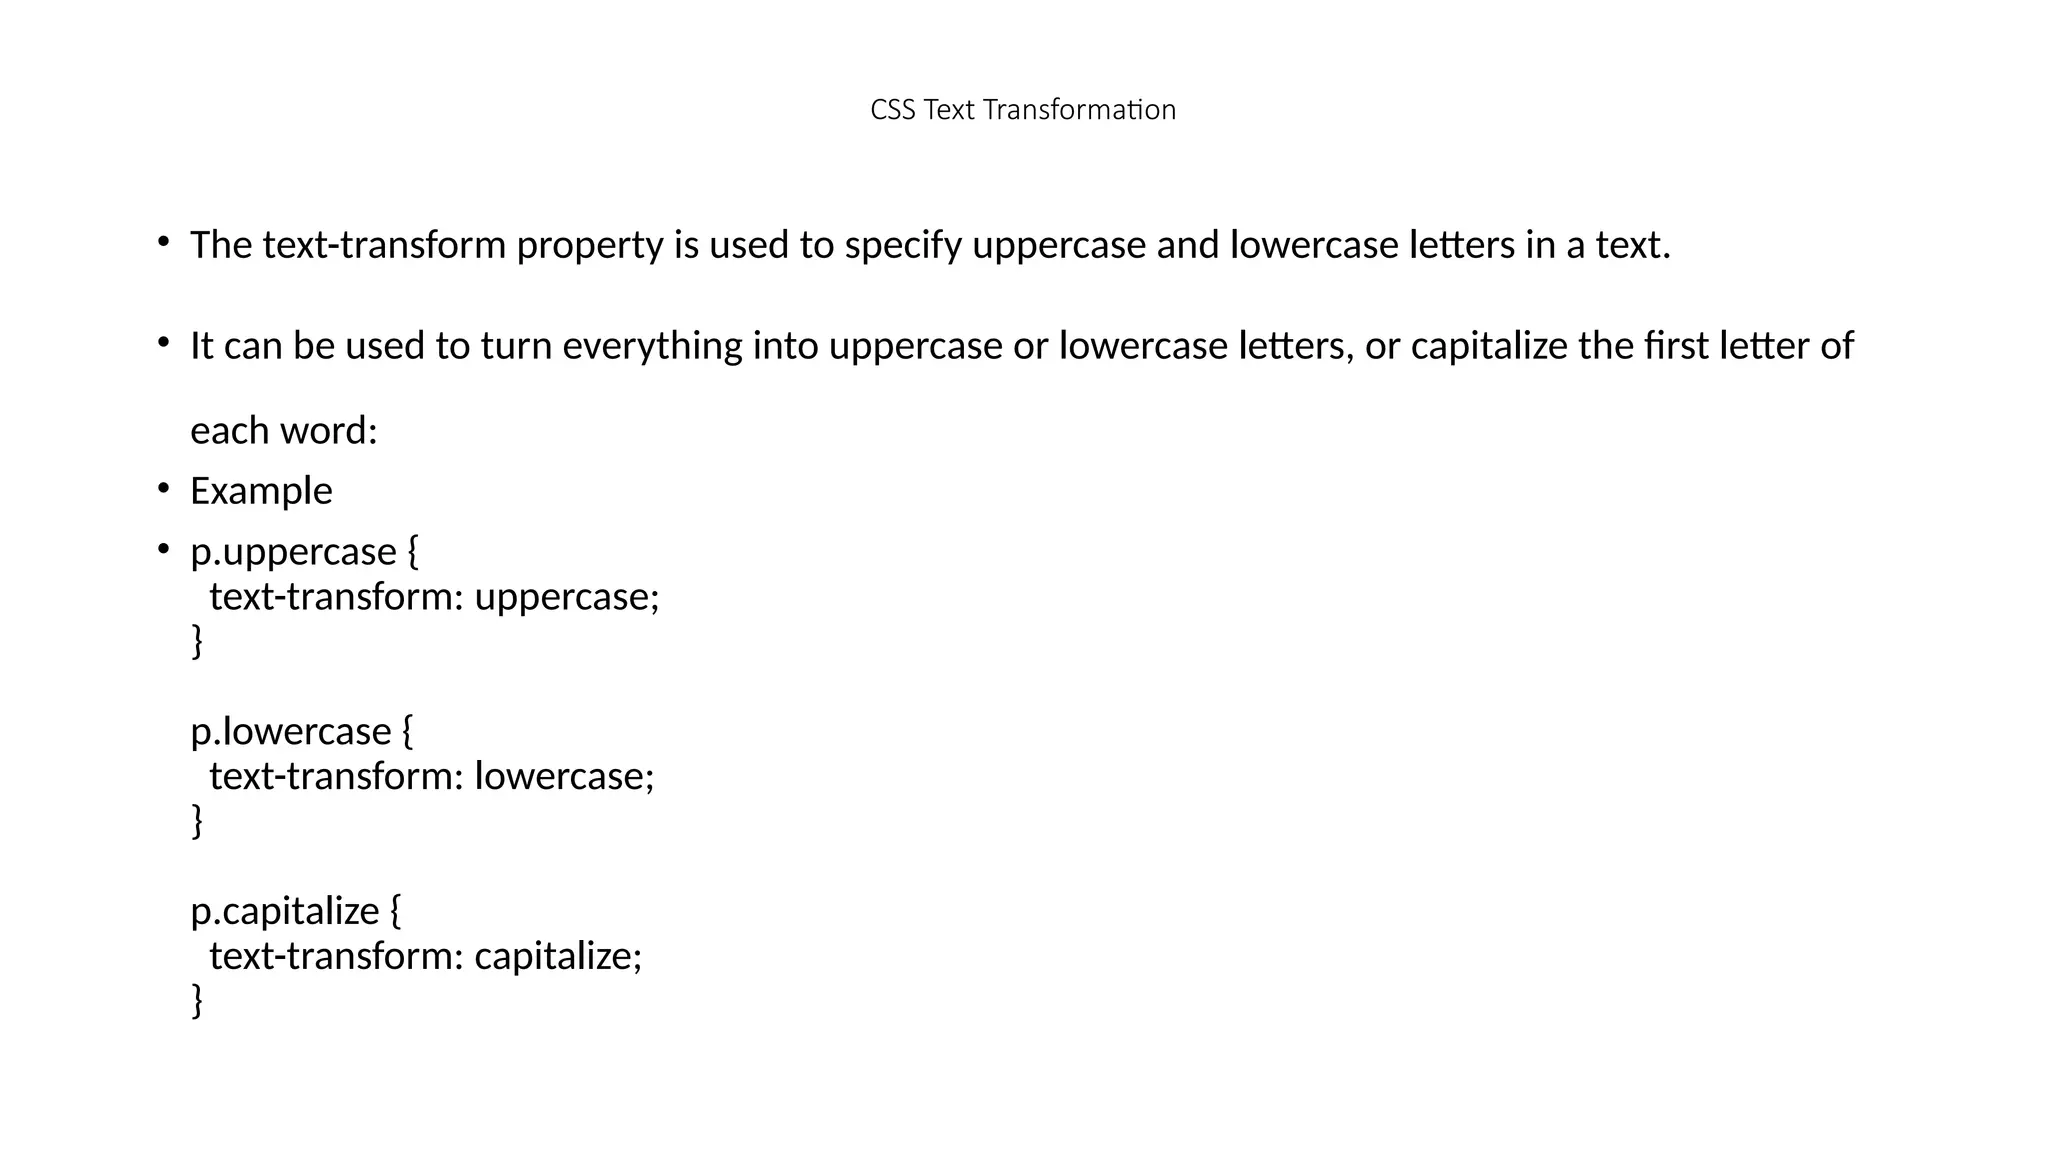
CSS Text Transformation
•The text-transform property is used to specify uppercase and lowercase letters in a text.
• It can be used to turn everything into uppercase or lowercase letters, or capitalize the first letter of
each word:
• Example
• p.uppercase {
text-transform: uppercase;
}
p.lowercase {
text-transform: lowercase;
}
p.capitalize {
text-transform: capitalize;
}
111.
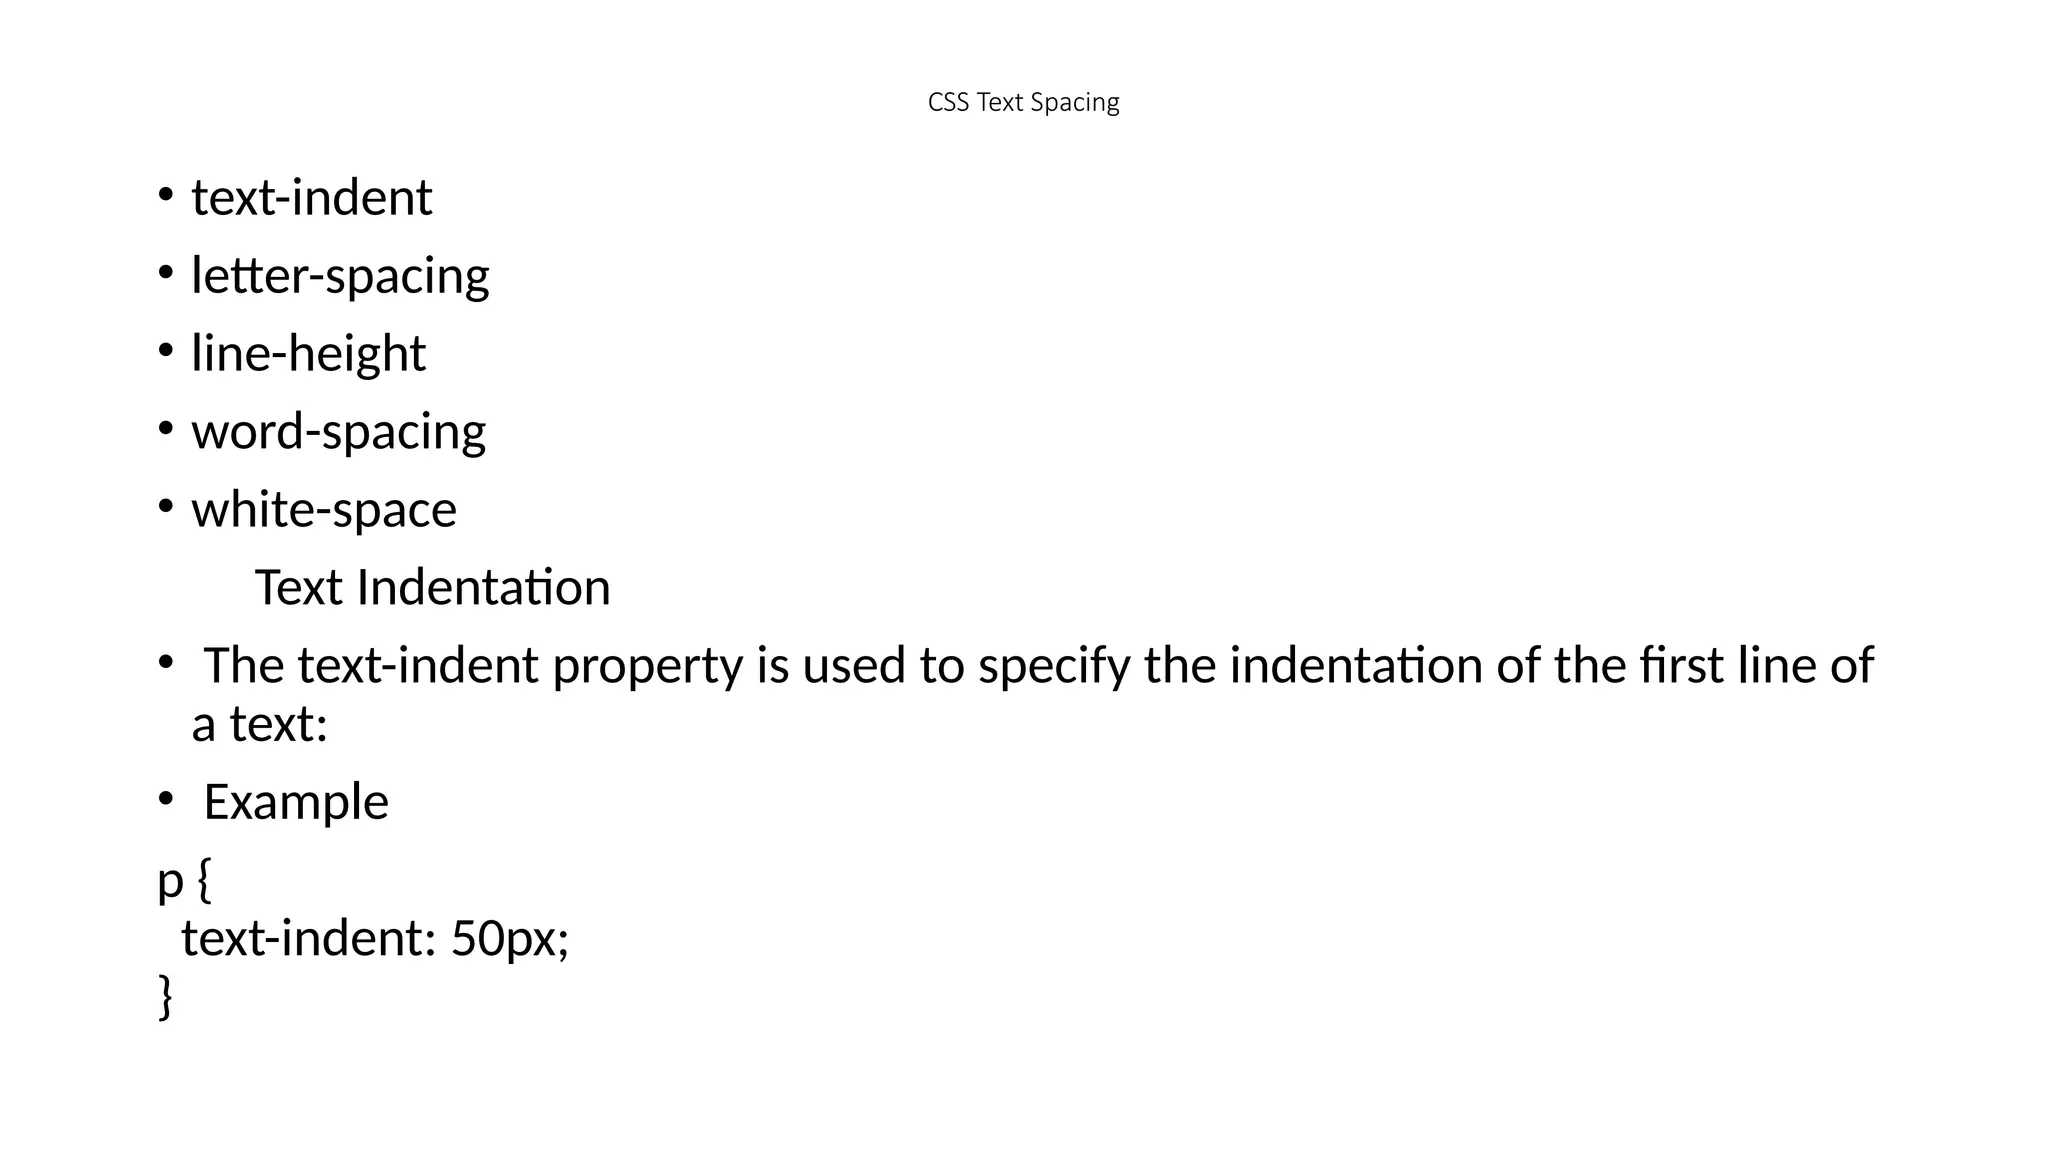
CSS Text Spacing
•text-indent
• letter-spacing
• line-height
• word-spacing
• white-space
Text Indentation
• The text-indent property is used to specify the indentation of the first line of
a text:
• Example
p {
text-indent: 50px;
}
112.
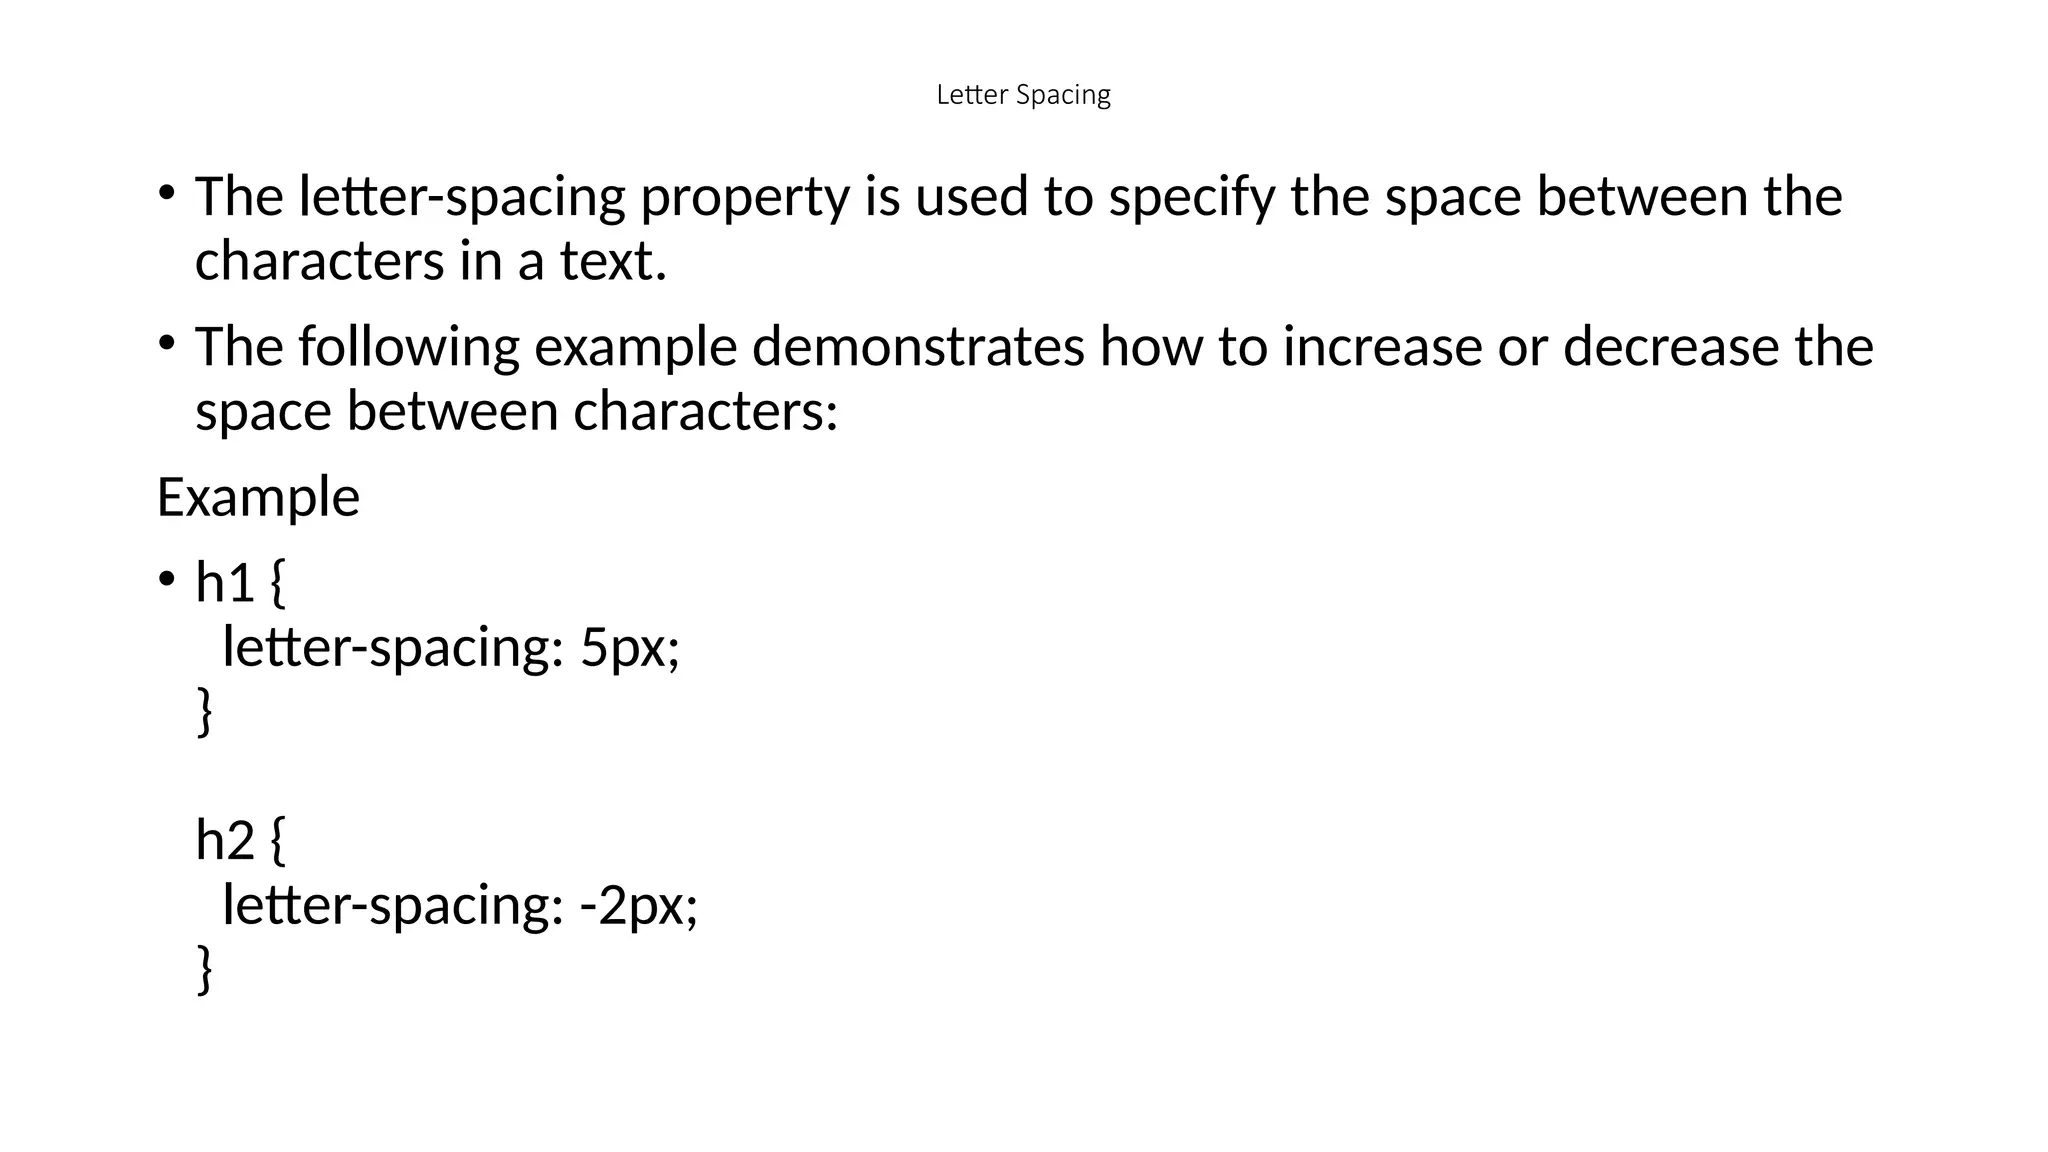
Letter Spacing
• Theletter-spacing property is used to specify the space between the
characters in a text.
• The following example demonstrates how to increase or decrease the
space between characters:
Example
• h1 {
letter-spacing: 5px;
}
h2 {
letter-spacing: -2px;
}
113.
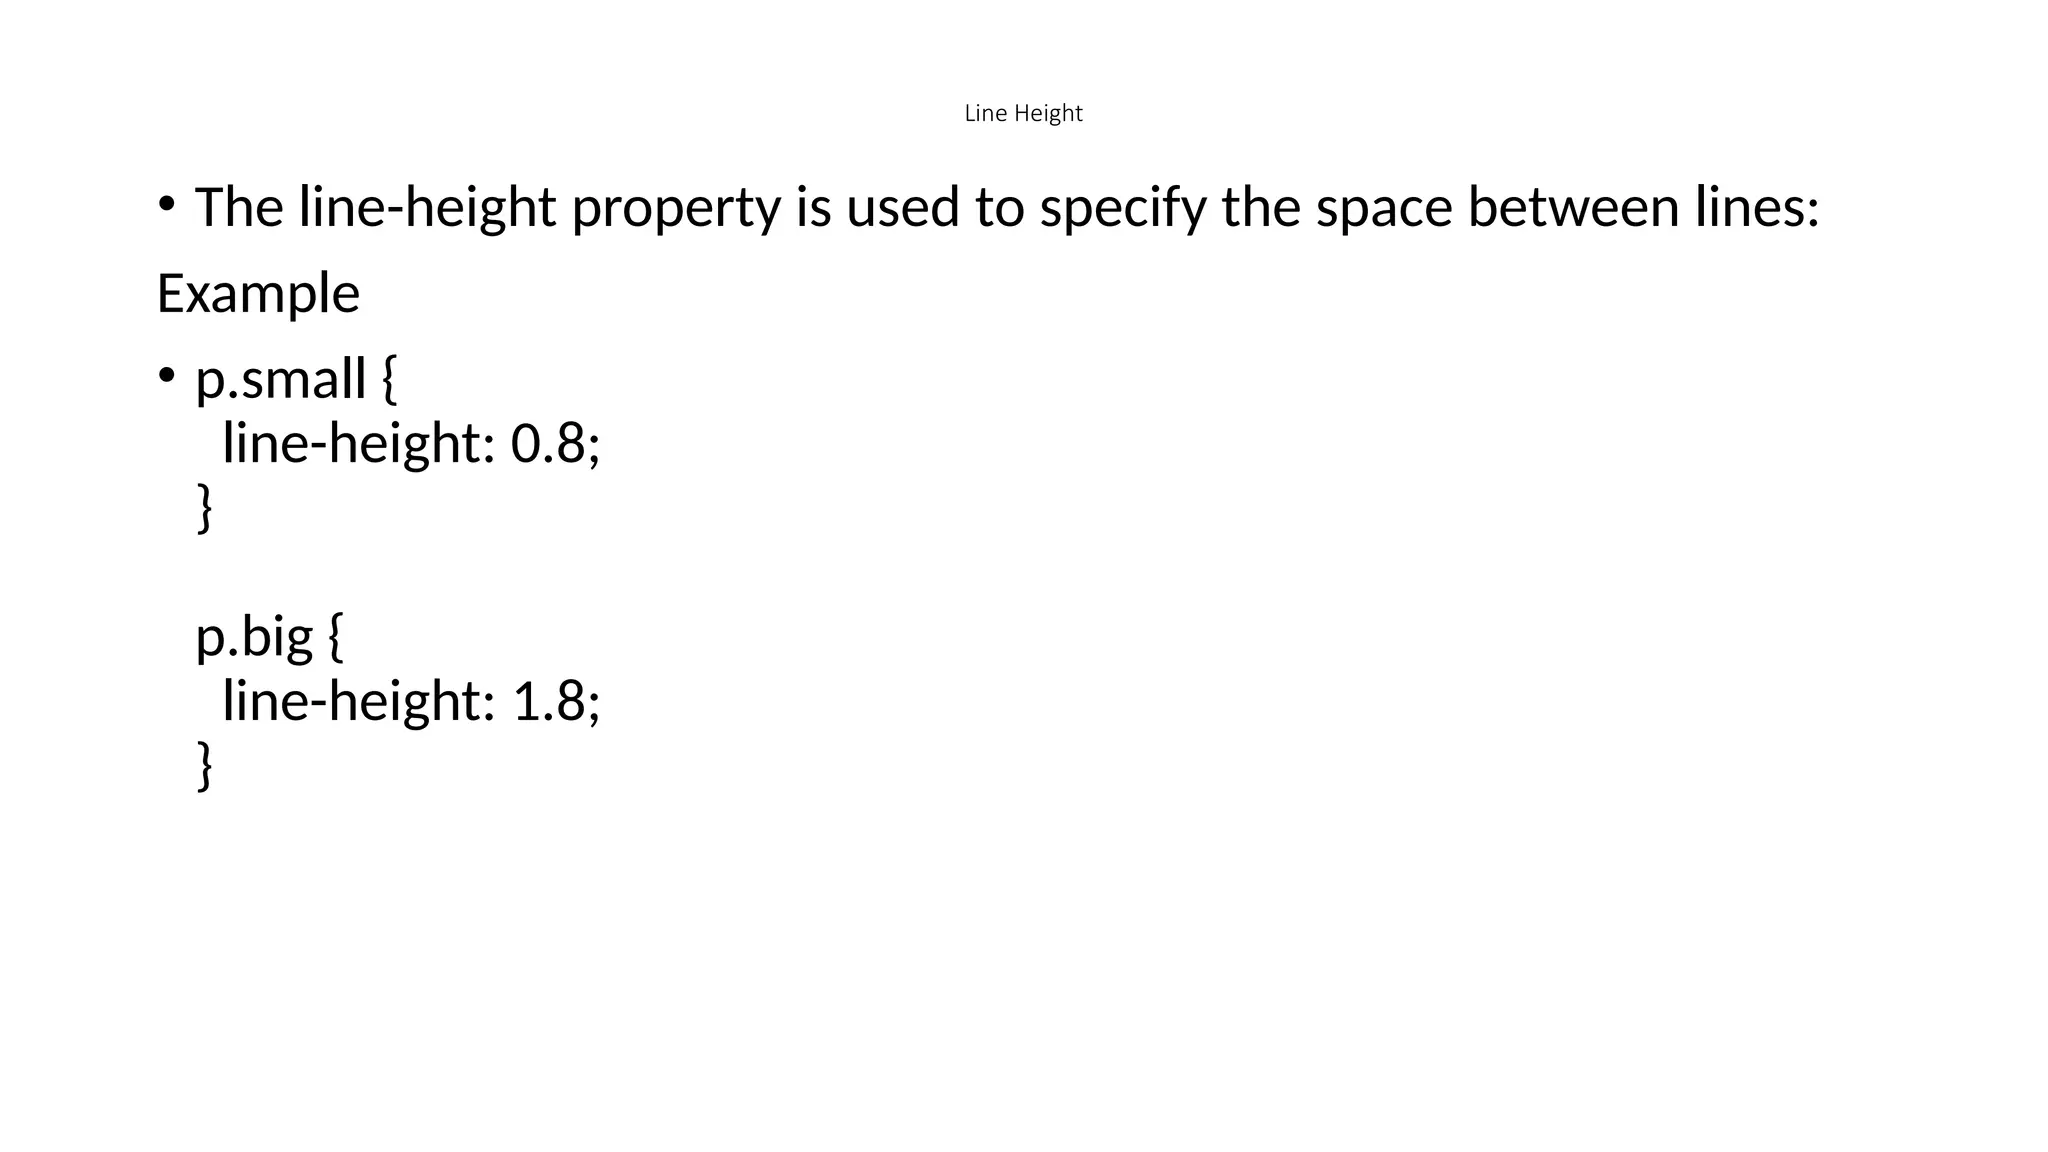
Line Height
• Theline-height property is used to specify the space between lines:
Example
• p.small {
line-height: 0.8;
}
p.big {
line-height: 1.8;
}
114.
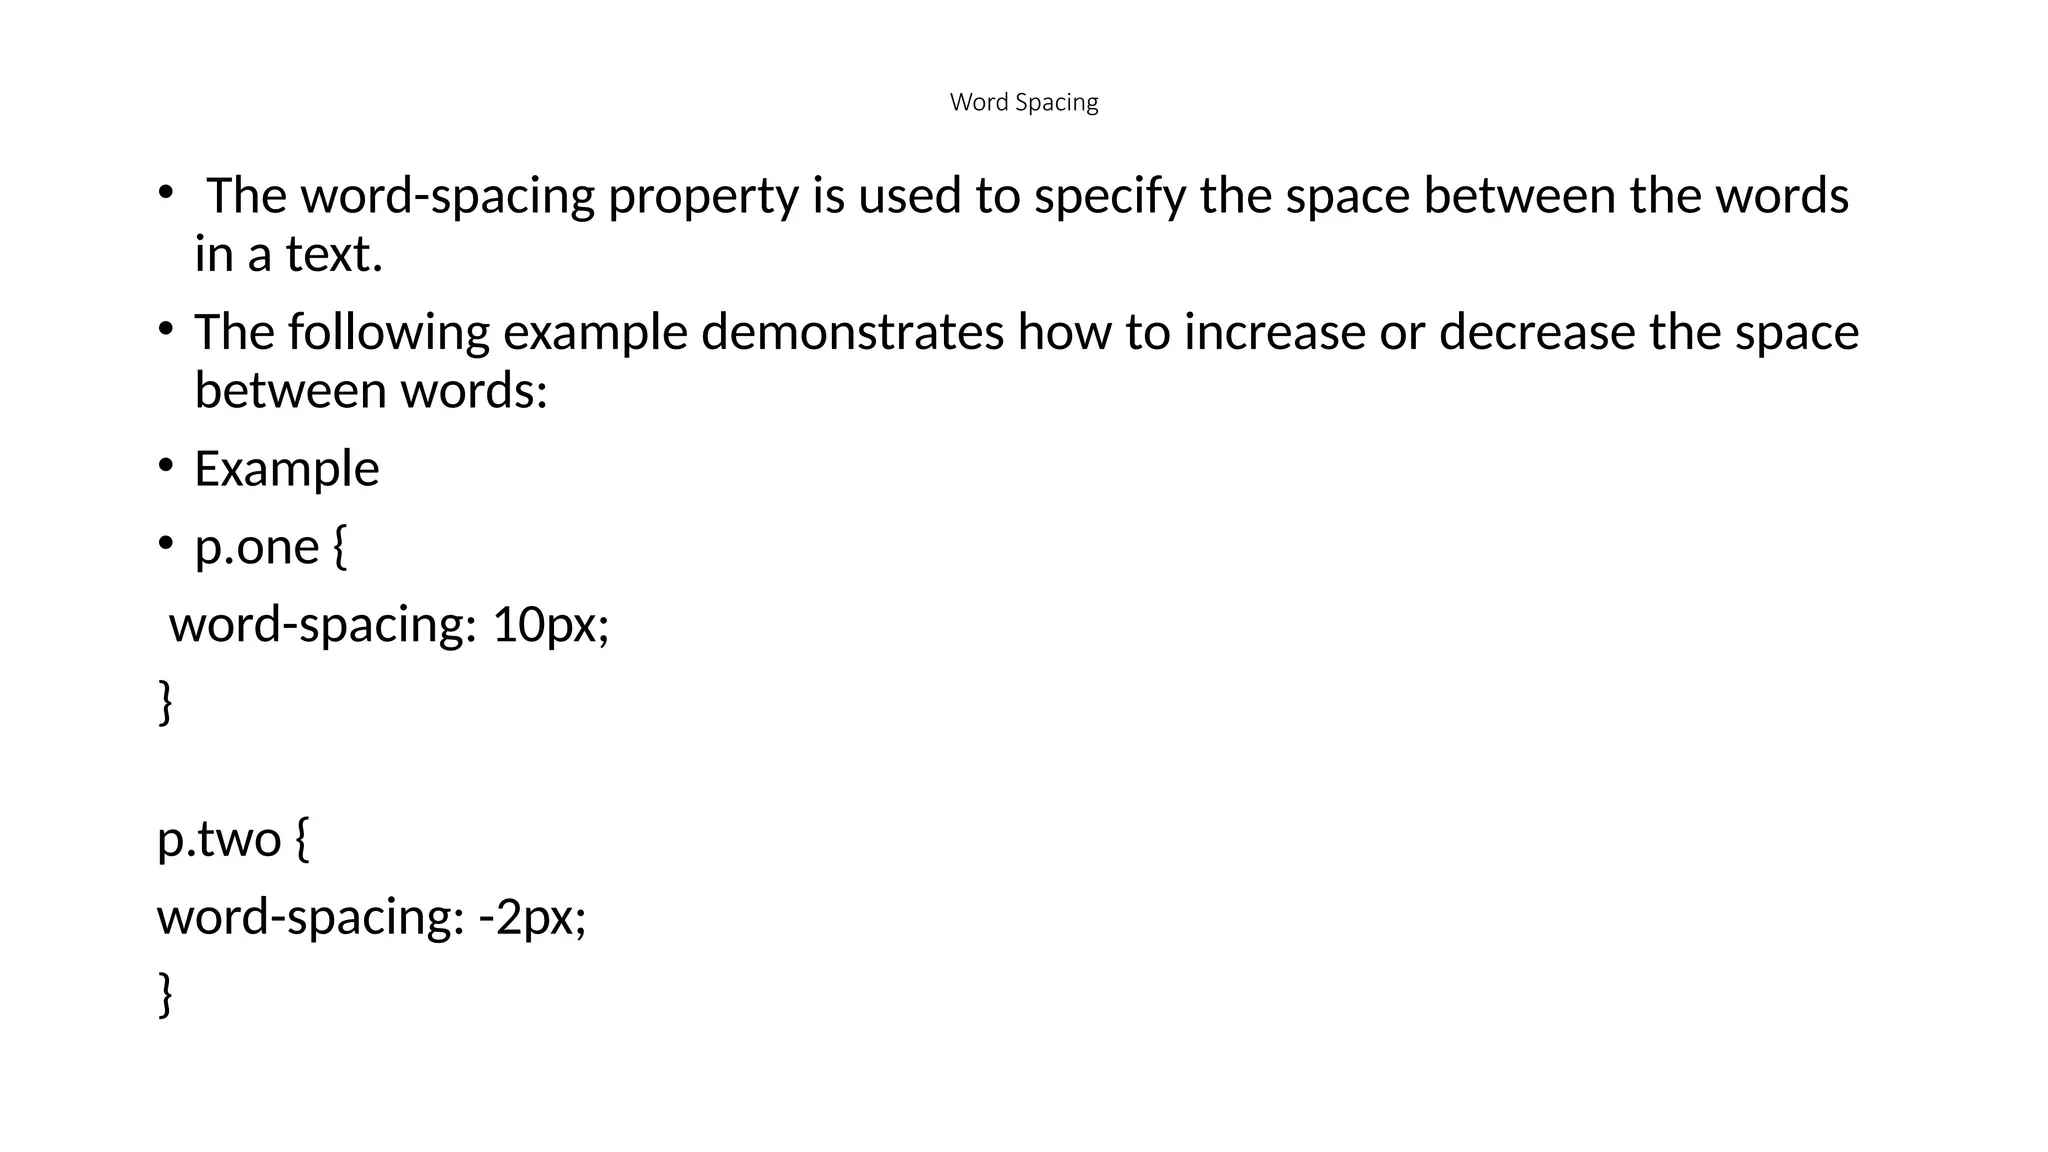
Word Spacing
• Theword-spacing property is used to specify the space between the words
in a text.
• The following example demonstrates how to increase or decrease the space
between words:
• Example
• p.one {
word-spacing: 10px;
}
p.two {
word-spacing: -2px;
}
115.
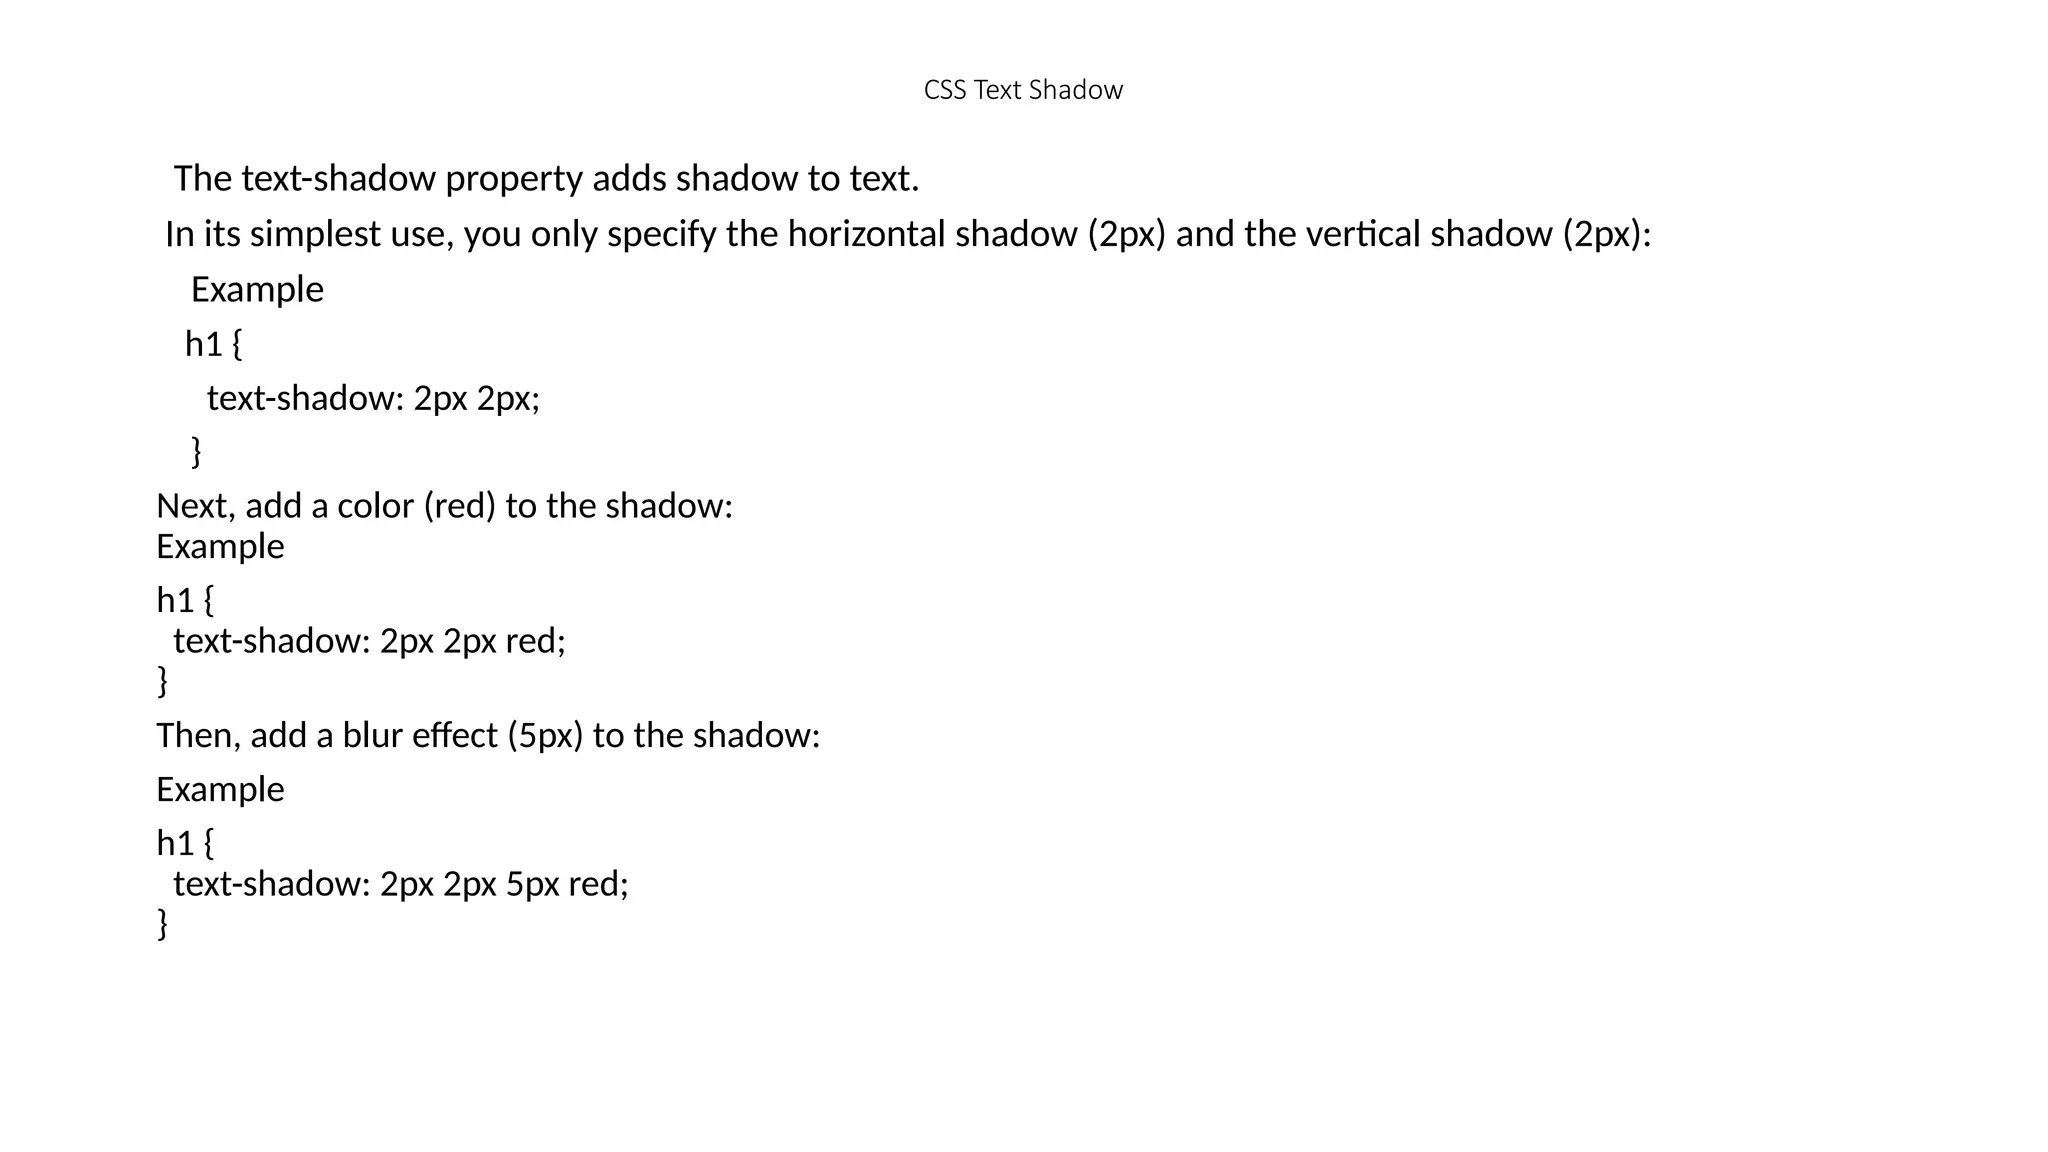
CSS Text Shadow
Thetext-shadow property adds shadow to text.
In its simplest use, you only specify the horizontal shadow (2px) and the vertical shadow (2px):
Example
h1 {
text-shadow: 2px 2px;
}
Next, add a color (red) to the shadow:
Example
h1 {
text-shadow: 2px 2px red;
}
Then, add a blur effect (5px) to the shadow:
Example
h1 {
text-shadow: 2px 2px 5px red;
}


![Day 2 - Web_Development [basic HTML tags and their functionalities].pptx](https://cdn.slidesharecdn.com/ss_thumbnails/day2-webdevelopmentbasichtmltagsandtheirfunctionalities-240906194136-26a4ba6f-thumbnail.jpg?width=640&height=640&fit=bounds)


