Download to read offline

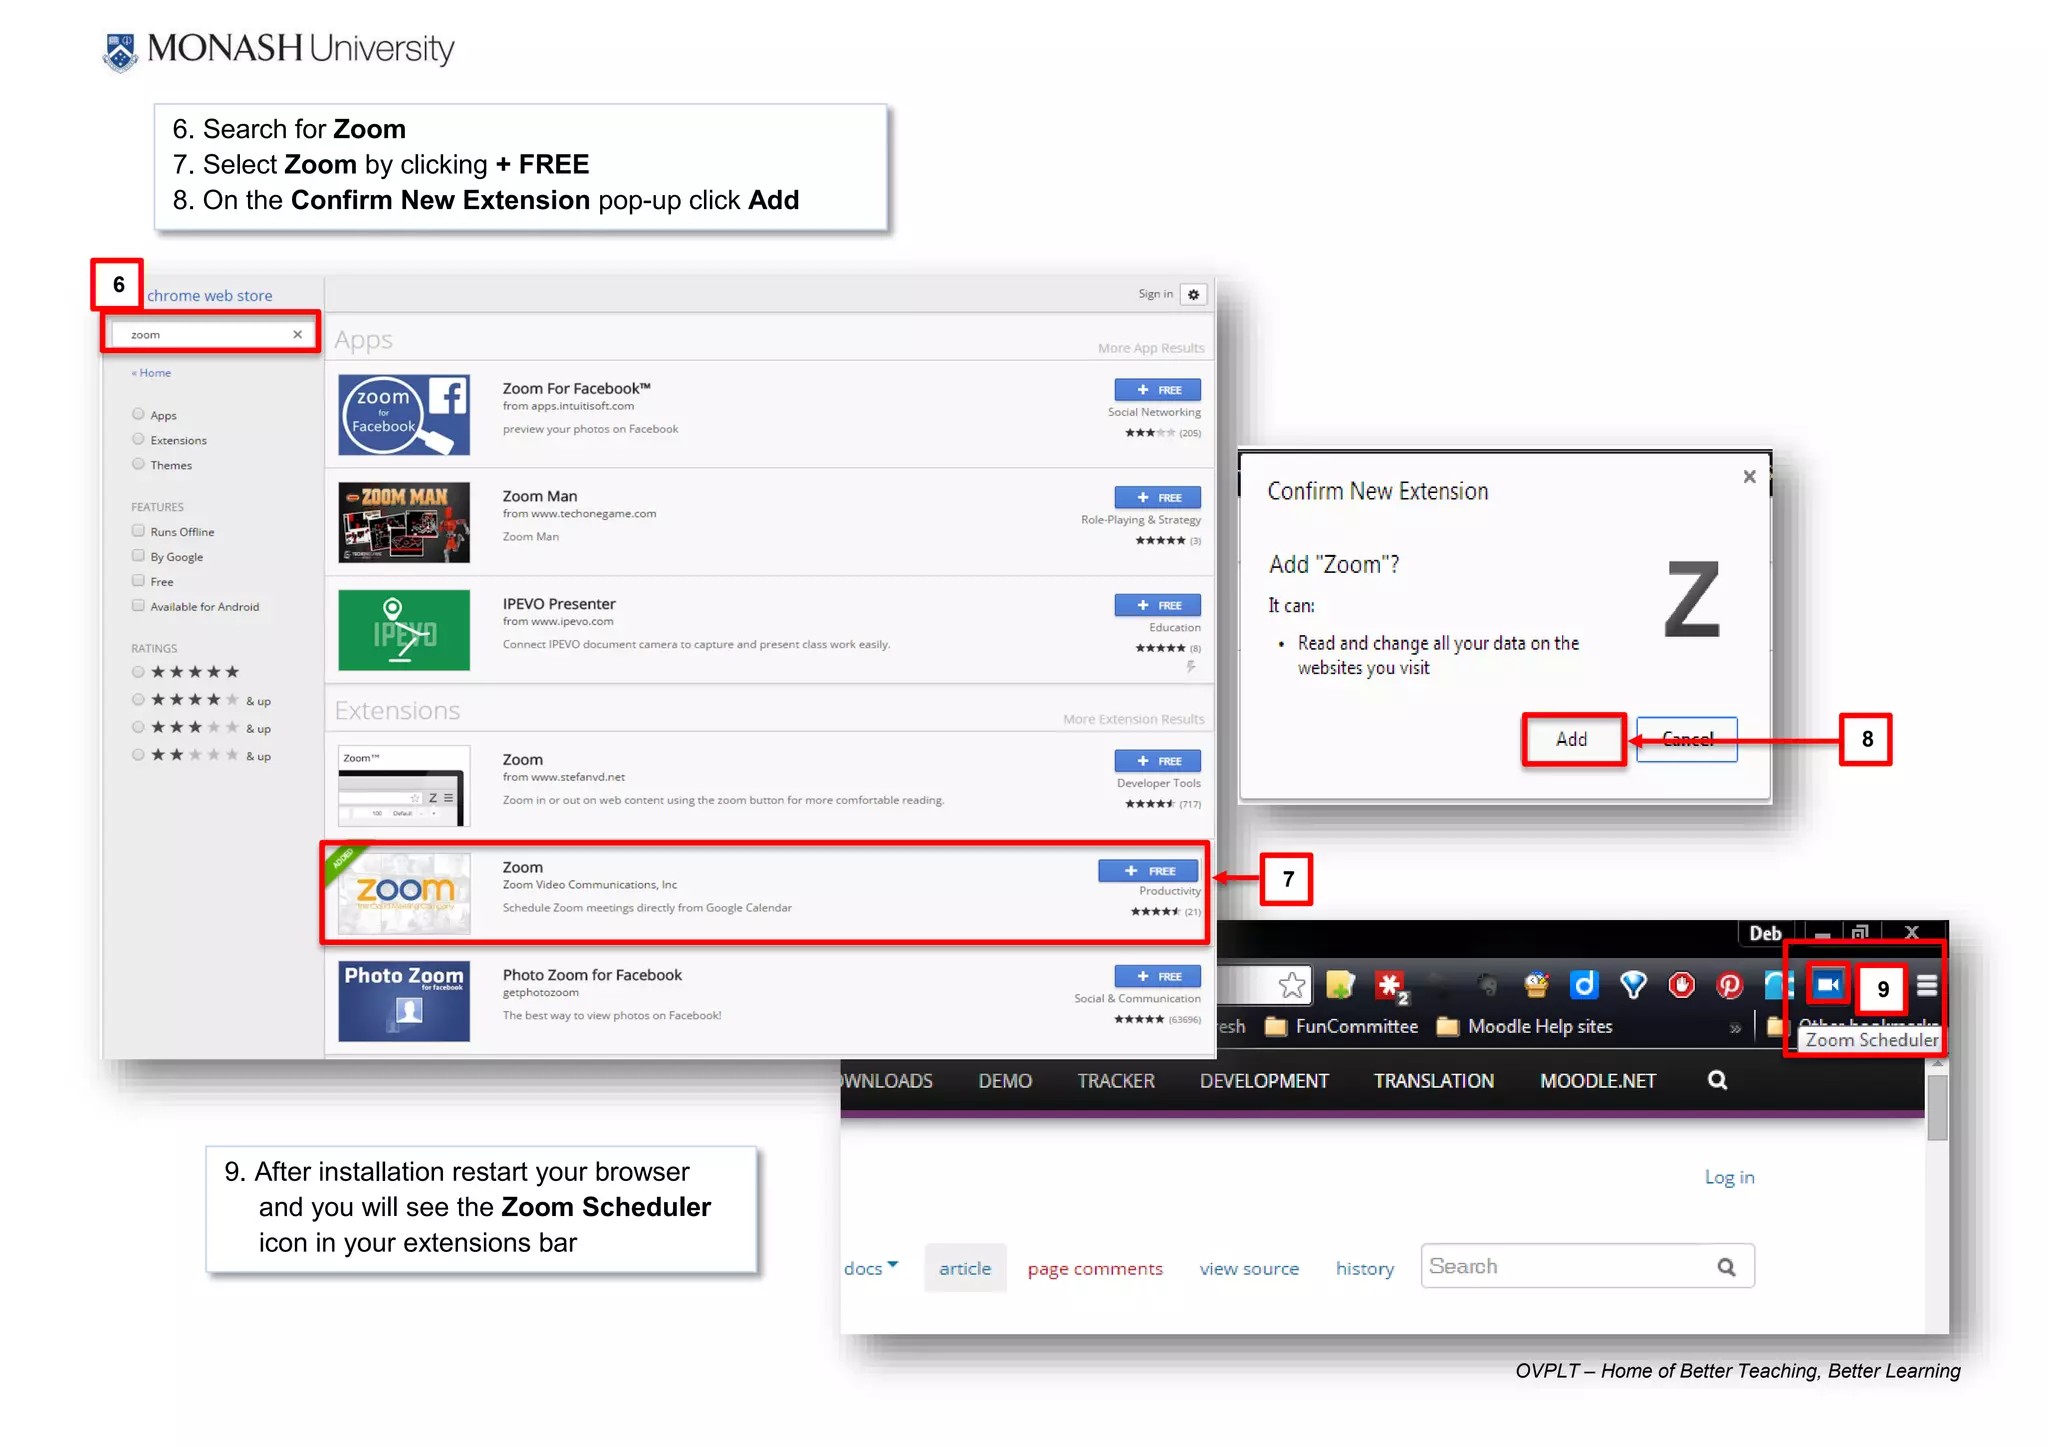


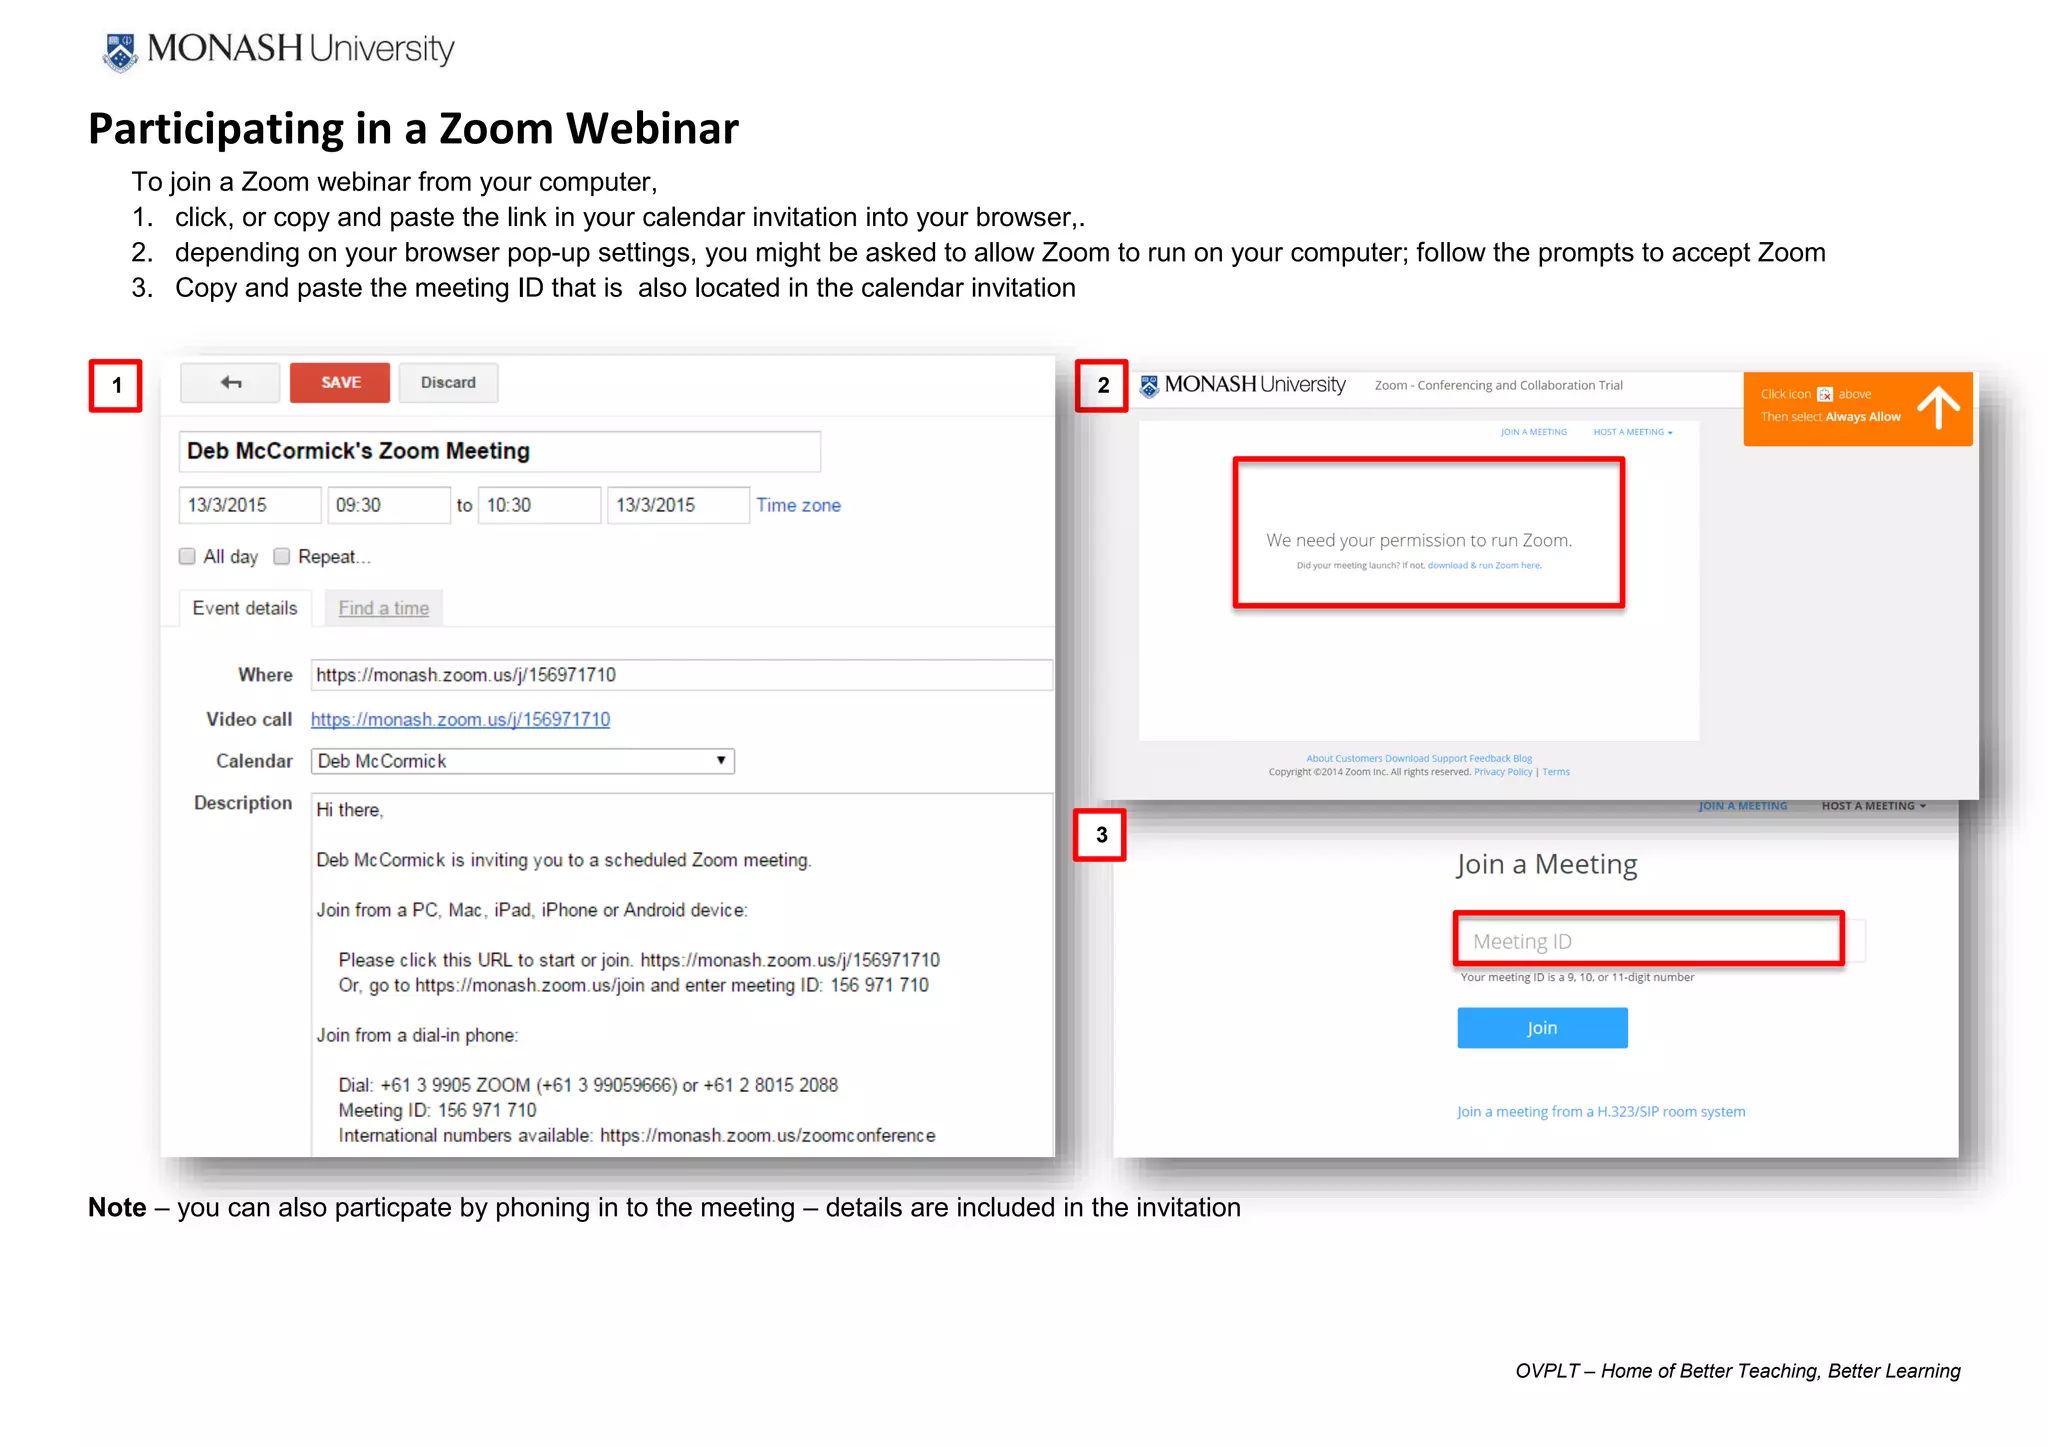
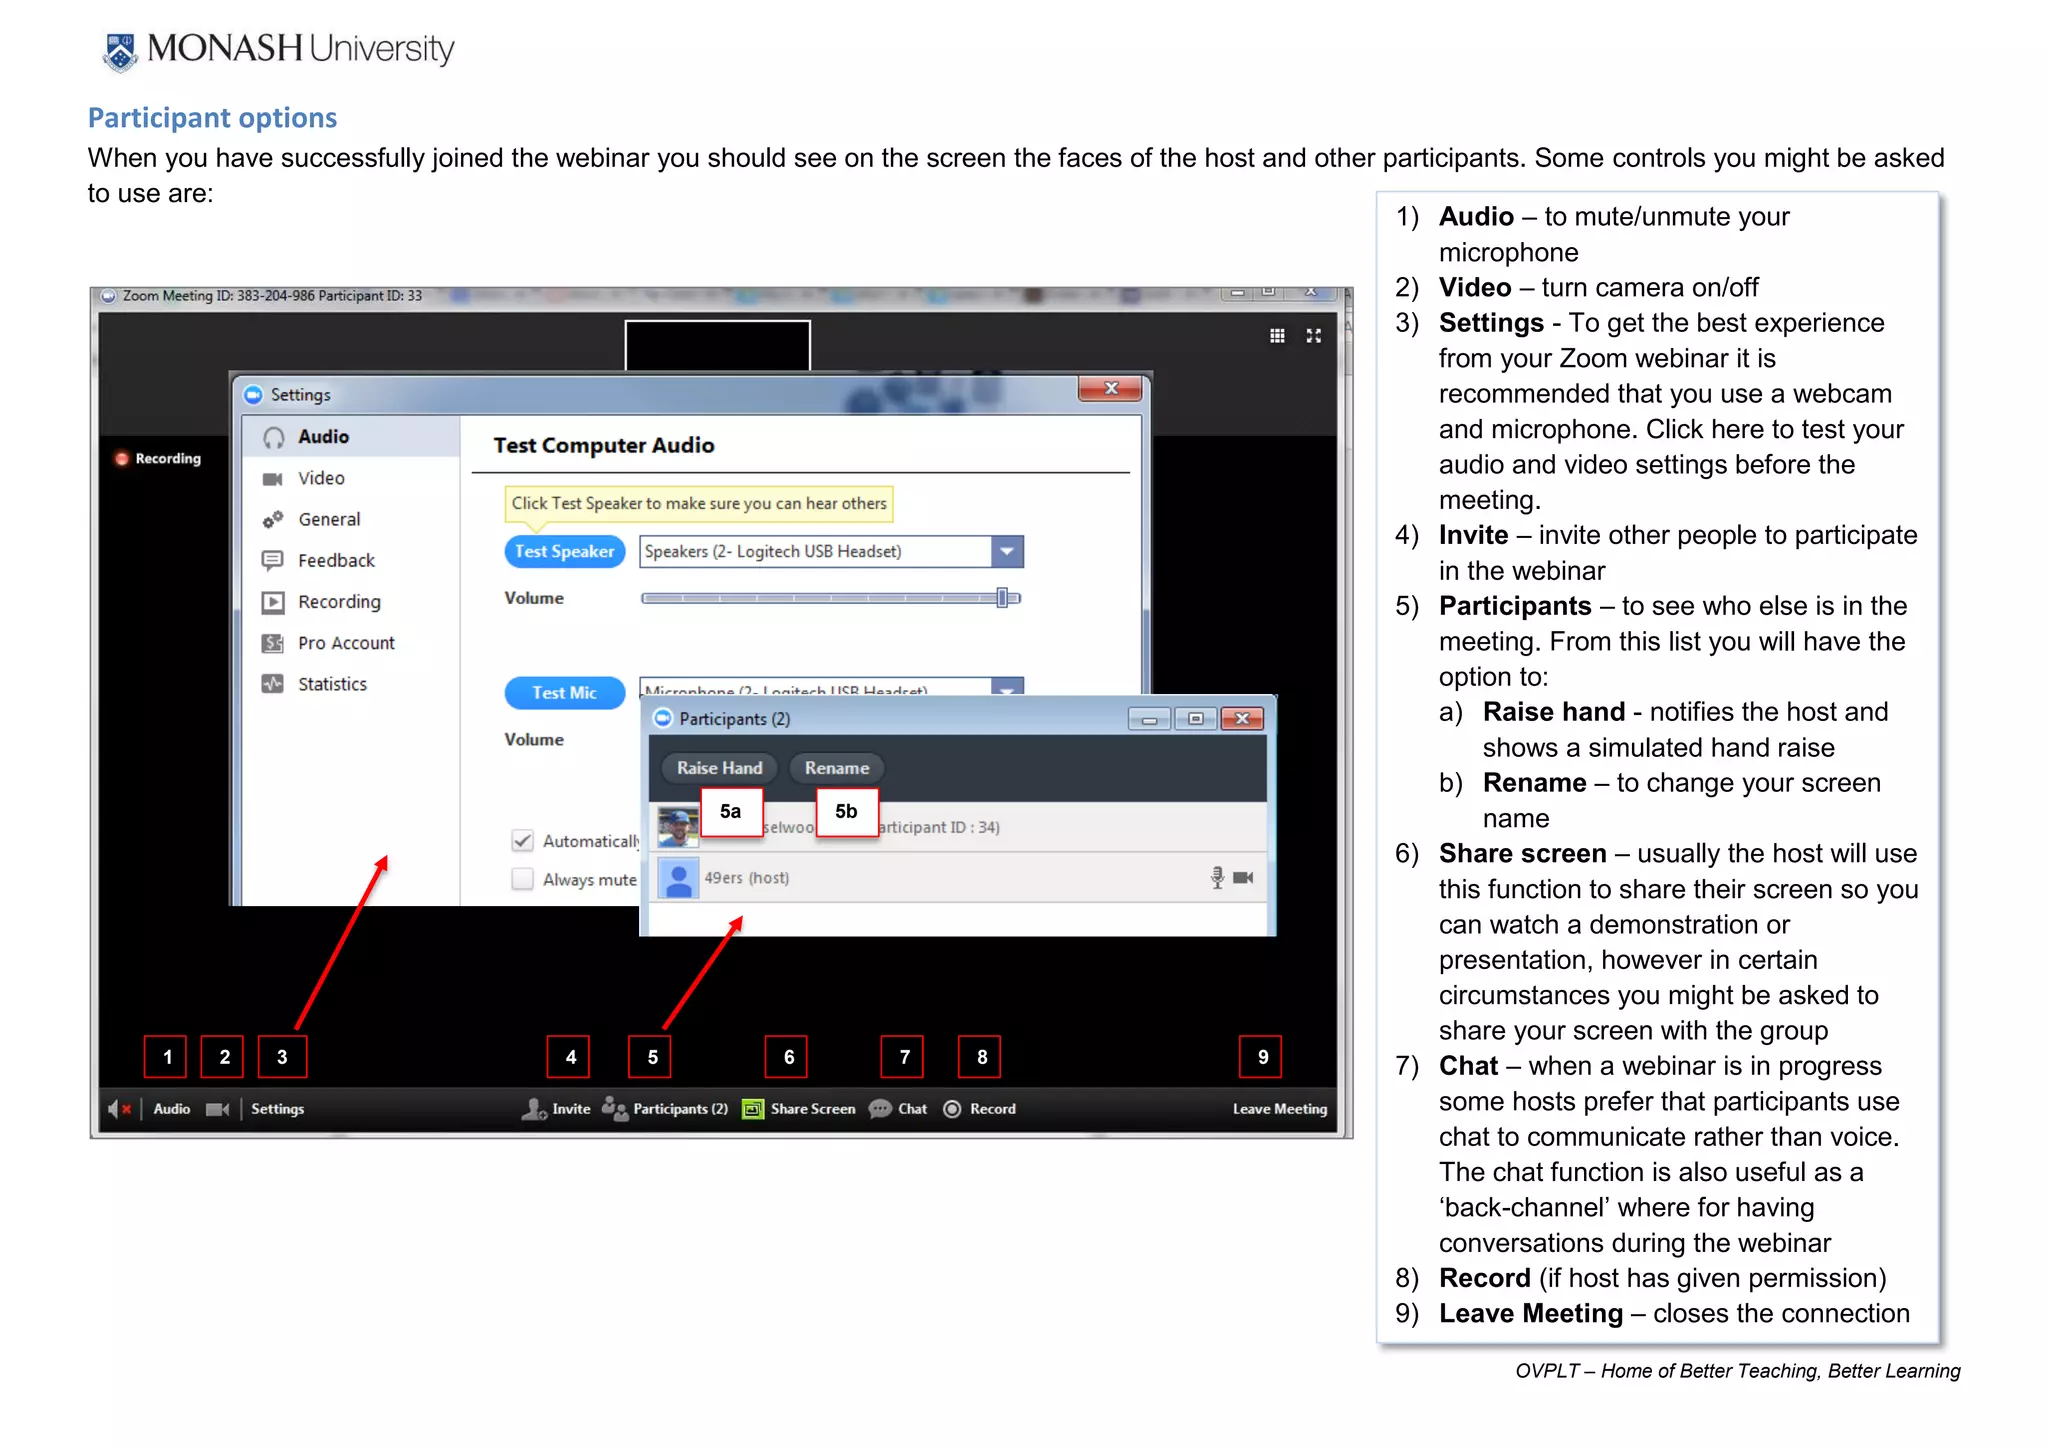

1) The document provides instructions for setting up and hosting a Zoom webinar. It explains how to install the Zoom extension, create a webinar, invite participants, and outlines the host controls. 2) As a participant, you can join a Zoom webinar by clicking the link in the calendar invite and entering the meeting ID. The document describes the participant controls. 3) It also reviews how to change the video layout, including switching between full screen, gallery, and mini modes.