Download as PDF, PPTX


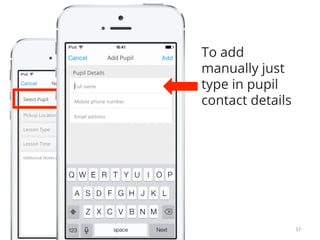


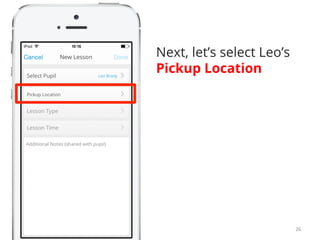


This document is a quick start guide for using the Roadio app to book lessons with pupils. It outlines steps for importing pupil contact details, arranging lessons, selecting lesson types, and sending notifications to pupils about bookings. Additionally, it provides instructions for tracking lesson details and pupil progress within the app.


