SlideShare a Scribd company logo
FD750/980 Rev.12.2012 1
FD
INDUSTRIAL DEHUMIDIFIERS
FD
SERIES
TECHNICAL MANUAL
FD750/980 Rev.12.2012 2
FD
Index
DECLARATION OF CONFORMITY.................................................................................................................. 4
Dehumidifiers FD750 / FD980 series ........................................................................................................ 4
UTILITY AND CONSERVATION OF THE MANUAL .......................................................................................... 5
NORMS REFERENCES................................................................................................................................ 5
GENERAL SAFETY NORMS ........................................................................................................................ 5
PERSONAL PROTECTIVE EQUIPMENT....................................................................................................... 6
UNIT DESCRIPTION....................................................................................................................................... 7
Frame: ...................................................................................................................................................... 7
Refrigerant circuit..................................................................................................................................... 7
Condenser and evaporators..................................................................................................................... 7
FINNED PACK........................................................................................................................................ 7
FINS....................................................................................................................................................... 7
TUBES ................................................................................................................................................... 7
Compressor .......................................................................................................................................... 7
FANS ..................................................................................................................................................... 8
ELECTRIC BOX ....................................................................................................................................... 8
MICROPROCESSORS ............................................................................................................................. 8
VERSIONS...................................................................................................................................................... 8
AVAILABLE MODELS AND THEIR ACCESSORIES........................................................................................ 8
TECHNICAL DATA FD.................................................................................................................................... 9
DRYING CAPACITY ...................................................................................................................................... 10
FAN PERFORMANCE................................................................................................................................... 12
FUNCTIONING LIMITS................................................................................................................................. 12
PERFORMANCE TABLES FD360................................................................................................................... 13
PERFORMANCE TABLES FD520................................................................................................................... 14
CONTROL AND SAFETY DEVICES................................................................................................................. 15
CONTROL DEVICES.................................................................................................................................. 15
HUMIDITY CONTROL SWITCH................................................................................................................. 15
SAFETY DEVICES...................................................................................................................................... 15
HIGH PRESSURE SWITCH........................................................................................................................ 15
LOW PRESSURE SWITCH......................................................................................................................... 15
DEFROST THERMOSTAT.......................................................................................................................... 15
CONTROL DEVICE OF THE PHASE SEQUENCES....................................................................................... 16
HYGROSTAT............................................................................................................................................ 16
THERMOSTAT .............................................................................................Error! Bookmark not defined.
INSPECTION, TRANSPORT AND SITE HANDLING ........................................................................................ 17
FD750/980 Rev.12.2012 3
FD
INSPECTION............................................................................................................................................ 17
LIFTING AND SITE HANDLING................................................................................................................. 17
UNPACKING............................................................................................................................................ 17
LOCATION............................................................................................................................................... 18
INSTALLATION ............................................................................................................................................ 18
CLEARANCES........................................................................................................................................... 18
MAINTENANCE AND PERIODIC CHECKS..................................................................................................... 19
IMPORTANT WARNINGS ........................................................................................................................ 19
CONNECTION TO THE CONDENSED WATER DRAINAGE FITTING............................................................... 20
DUCT WORK UNIT CONNECTION ............................................................................................................... 20
REFRIGERANT CONNECTIONS FOR TCR VERSIONS..................................................................................... 21
REFRIGERANT LAY-OUT VERSION FD-FDS .................................................................................................. 22
ELECTRICAL CONNECTIONS........................................................................................................................ 23
Generality............................................................................................................................................... 23
Main supply connection......................................................................................................................... 24
START UP.................................................................................................................................................... 24
PRE-START CHECK................................................................................................................................... 24
Before to proceed to start up, close electrical line main switch (not supplied with the unit): the green
led (line) will be lit up................................................................................................................................. 24
SIGNALLING LEDS PANEL........................................................................................................................ 25
MACHINE STOP (STAND BY) ................................................................................................................... 25
REMOTE CONTROL................................................................................................................................. 26
GENERAL OBSERVATIOTIONS AND ADVISE................................................................................................ 26
DISPOSAL OF THE UNIT AT END OF ITS LIFE............................................................................................... 27
TROUBLE SHOOTING .................................................................................................................................. 27
UNIT UNDER ALARM .............................................................................................................................. 27
ELECTRIC DIAGRAM.................................................................................................................................... 30
DRAWINGS (lay out)................................................................................................................................... 32
DIMENSIONAL DRAWINGS FD750 / 980............................................................................................... 34
DIMENSIONAL DRAWINGS STANDARD OUTSIDE CONDENSER............................................................ 35
DIMENSIONAL DRAWINGS SILENT OUTSIDE CONDENSER................................................................... 36
FD750/980 Rev.12.2012 4
FD
DECLARATION OF CONFORMITY
(Community directives Low Voltage and Electro-magnetic Compatibility)
FRAL Company s.r.l. Viale dell’Industria e dell’Artigianato 22/c – 35010 Carmignano di Brenta
– PD – hereby declares that the following products:
Dehumidifiers FD750 / FD980 series
have been designed, manufactured and distributed according to safety and electro-magnetic
compatibility of the European Norms and Regulations:
MACHINES NORMS 2006/42/CE;
SECURITY REGULATIONS FOR LOW TENSION APPLIANCES 2006/95/CE;
ELECTROMAGNETIC COMPATIBILITY (EMC) – 2004/108/CE.
It is hereby certified that this Dehumidifier conforms to the:
IEC Regulations CEI-EN 60335-2-40, CEI-EN 55014-1, 55014-2.
The machine is built according to RoHS European Norms
The Legal Agent
Ing. Alberto Gasparini
FD750/980 Rev.12.2012 5
FD
UTILITY AND CONSERVATION OF THE MANUAL
This Manual conforms to the requirements of the Norms 98/37/CE and subsequent modifications.
The Manual gives all necessary indications required for the transport, Installation, start-up and
maintenance of the machines, which must be strictly followed by the user for a correct functioning of
the same.
To this purpose, the user must also strictly comply with the security norms described in the Manual.
The manual must always follow the machine and must be kept in a place which will guarantee its
perfect conservation for the proper use from the operator.
GRAPHIC SYMBOLS AND INDICATIONS INCLUDED IN THE MANUAL:
NORMS REFERENCES
The machines described in this manual hav been designed according to the pertinent CE Norms, in
conformity with the MACHINES DIRECTIVES cited in the previous paragraph.
The machines are also complying with the essential requirements of the following European Rules
and Directives:
 Machine Safety Norms 89/392 CEE,
 Electrical Safety Rules for the Low Tension Appliances 2006/95 CEE,
 Electromagnetic Compatibility Norms2004/108 CEE,
 Under Pressure Devices 97/23/CE.
GENERAL SAFETY NORMS
When installing or servicing the unit, it is necessary to strictly follow the rules reported on this manual,
to conform to all the specifications of the labels on the unit, and to take any possible precautions of
the case for workers.
Pressure in refrigerant circuit and electrical equipment present in the unit can be hazardous when
installing or servicing the unit
Therefore, all operations on the unit must be done only by trained people.
shows that ATTENTION must be paid to all procedures and operations to be carried out
for ensuring the correct functioning of the machine, describes the operations that mus
be avoided , and finally informs the operator about the correct procedure and
operations to be followed for the proper use of the machine.
Not observing the rules reported on this manual, and every modification to the unit
done without explicit previous authorisation, will cause the immediate termination
of the warranty.
FD750/980 Rev.12.2012 6
FD
PERSONAL PROTECTIVE EQUIPMENT
When operating and maintaining the FD unit, use the following personal protective equipment.
Equiment: people who make maintenance or work with the unit, must wear an
equipment in accordance with the safety Directives. They must wear accident
prevention shoes with anti-slip sole where the paving is slippery.
Gloves: During the cleanings and the maintenance operations, it’s necessary the use of
appropriate gloves. In case of gas recharge, It’s complulsory the use of appropriate
gloves to avoid the rick of freezing.
Mask and goggles: Respiratory protection (mask) and eye protection
(goggles) should be used during cleaning and maintenance operations.
SAFETY SIGNS
The equipment features the following safety signs, which must be complied with:
General hazard
Electric shock hazard
Attention: before every operation of servicing on the unit, be sure that the
electric supply is disconnected.
Close to the unit a switched electrical plug must be present.
Main supply must be protected with a differential switch.
Never modify settings of the safety devices.
Never sprinkle water over the unit and its electrical components.
It must not be used under explosive atmosphere
FD750/980 Rev.12.2012 7
FD
UNIT DESCRIPTION
Frame:
All FD units are made from galvanised thick sheet metal, painted with polyurethane powder enamel
at 180°C to ensure the best resistance against the atmospheric agents. The frame is self-supporting
with anodized extruded aluminum profiles. The drip tray is present standard in all FD units and it’s in
stainless steel.
Refrigerant circuit
The refrigerant gas used in these units is R407C. The refrigerant circuit is made in according to ISO
97/23 concerning welding procedures and PED regulation.
The refrigerant circuit includes:
 filter drier,
 Schrader valves form maintenance and control,
 pressure safety device (according to PED regulation).
 thermal expansion valve with external equalizer.
 solenoid valve
 compressor.
Condenser and evaporators
FINNED PACK
It consist of copper tubes mechanically expanded into aluminium or copper fins provided with full
collars that allow their regular spacing. The best heat transmission is guaranteed by the fin collars that
completely cover the tubes.
FINS
They are manufactured by high precision pressing of aluminium, aluminium epoxy painted, copper or
pretinned copper sheets. The fin shape is slightly corrugated in order to improve the heat exchange
transmission coeffi cient without heavily affecting the air pressure drop. Furthermore a good water
draining is assures and the inside dust accumulation is avoided.
TUBES
For the heat exchangers high quality copper tubes are used. The tubes are suitable for the majority of
the primary refrigerants in both cold and warm working conditions.
Compressor
The compressor is scroll type with crankcase heater and thermal overload protection by a klaxon
embedded in the motor winding.
The characteristics of the compressor are the follow:
1. High efficiency for saving energy consumption
FD750/980 Rev.12.2012 8
FD
2. Low sound level ,quiet operation
3. Applied HFC refrigerant for protecting environment
4. High reliability, long lifetime.
FANS
Centrifugal fan type and direct coupled.
ELECTRIC BOX
The electric switch board is made according to electromagnetic compatibility norms (2004/108 CEE)
and Electrical Safety Rules for the Low Tension Appliances 2006/95 CEE.
Inside the electric box there are the following components:
1. Main switch
2. Phase Sequenze relay;
3. General disconnector with fuses;
4. Compressor Contactors;
5. Relay;
6. Terminals for remote control.
MICROPROCESSORS
The microprocessors check all the function of the machine like: General functioning, automatic
defrost system, alarms and set point of the humidty and temperature (temperature only for TCR
Version).
VERSIONS
AVAILABLE MODELS AND THEIR ACCESSORIES
HOT GASDEFROST VERSION (S): The frost which covers the battery, obtrsucts the passage of the
air, reduces the air contact surface and, consequently, the performance; if the frost accumulation is
excessive, it can seriously damage the whole system. All units are provided with Desfrost System.
The standard versions have their defrost simply throughly the periodic stop of the compressor, using
the heat of the environment itself. In the versions with Hot Gas Defrost System, the defrosting is
controlled by the electronic system in combination with a thermostat, the bulb of which is installed
inside the evaporator. The defrosting phase in the Hot Gas System takes place only when the
thermostat activates it in presence of freeze.
During the defrosting time the DEFROST light is ON.
TEMPERATURE CONTROL VERSION (FD TCR): The units of the control temperature version are
equipped with external remote condenser that is connected with the dehumidifier. The use of the
remote condenser allows the control of the temperature and humidity at the same time, operating in
cooling or dehumidifying mode. For to use both the functions is needs to have a thermostat and a
hygrostat.
FD750/980 Rev.12.2012 9
FD
TECHNICAL DATA FD
Mod. 750 980 750 TCR 980 TCR
Drying capacity (1)
L/24h 750 980 750 980
Cooling capacity
(at inside 26°C – out side 30°C) kW // // 26 31,5
Nominal power
consumption(3) kW 9,0 11,0 9,0 11,0
Maximum power
consumption(4) kW 11,0 13,0 11,0 13,0
Max.current consumption(4)
A 22 28 23,3 29,7
Nominal Air flow
m3
/h 6.200 8.500 6.200 8.500
m3
/s 1,7 2,3 1,7 2,3
Available static pressure Pa 200 200 200 200
R407C refrigerant charge Kg 6,5 7,5 // //
Sound pressure level
(3 mt free field) (5) dB(A) 67 70 67 70
Temperature operating
range(6) °C
5 - 35 5 - 35 5 - 35 5 - 35
1 – 35 (6)
1 – 35 (6)
1 – 35 (6)
1 – 35 (6)
Humidity operating range % 40 - 99 40 - 99 40 - 99 40 - 99
Condensate draining
connection
INCH’’ ¾’’ ¾’’ ¾’’ ¾’’
Length mm 1580 2000 1580 2000
Depth mm 1260 1300 1260 1300
Heigth mm 1130 1600 1130 1600
Operating weight Kg 230 320 230 320
Nominal power supply
V/ph/
Hz
400/3
+N/50
400/3
+N/50
400/3
+N/50
400/3
+N/50
(1) Referred to: inlet air temp. 32 °C relative humidity 90%
(3) Referred to: inlet air temp. 25 °C relative humidity 60%
(4) Referred to: inlet air temp. 35 °C relative humidity 95%
FD750/980 Rev.12.2012 10
FD
(5) Sound power level calucated according to ISO 3746
(6) S version with hot gas defrost
TECHNICAL DATA REMOTE CONDENSER
Mod.
750
TCR
980
TCR
750 TCR
SILENT
VERSION
980 TCR
SILENT
VERSION
Length mm 1100 1170 2950 2950
Depth mm 600 600 600 600
Heigth mm 833 833 983 983
Maximum input
current
A 1,35 1,35 1,7 1,7
Power supply V/ph/Hz 400/3/50 400/3/50 230/1/50 230/1/50
Nominal Air flow
m3
/h 7200 7200 6200 6200
m3
/s 2 2 1,7 1,7
Sound pressure level
(10 mt free field)
dB 45 45 36 36
Weight Kg 69 69 85 85
Silent remote condenserStandard remote condenser
FD750/980 Rev.12.2012 11
FD
DRYING CAPACITY
Condensed water kg/24 h
FD
Ambienttemperature°C
105
140 410270 510
15202530
860670
750
70% 80%
60%
50%
1000
Condensed water kg/24 h
FD
Ambienttemperature°C
105
140 410270 510
15202530
860670
980
70%
80%
60%
50%
1000
FD750/980 Rev.12.2012 12
FD
FAN PERFORMANCE
AIR FLOW WITH DIFFERENT HEAD PRESSURES
Available head
pressure (Pa)
160 170 180 190 200 210 230
Air flow cm/h
FD750
(Mid . fan speed)
6.200 6.000 5.800 5.600 5.500 5.400 5.300
Air flow cm/h
FD980
(max. fan speed)
8.500 8.300 8.200 8.100 8.100 8.000 8.000
FUNCTIONING LIMITS
Following Diagram represents FD units application .
Operating Table – standard units
In standard unit applications Table, on the left side is indicated operating limit extension, if unit is
provided with hot gas defrost.
Operation with
hot gas defrost
system
It is strongly recommended to let the units operate within the below reported
limits. Exceeding these limits it is not granted neither normal operation nor unit
reliability and integrity (for special applications, please contact our Company).
FD750/980 Rev.12.2012 13
FD
PERFORMANCE TABLES FD750Ambient
temperature
Dehumidification
capacity
Input power
Air temperature
increase
Thermal load in
ambient
[l/24h] [kW] [°C] [kW]
Relative humidity 50%
10°C 116 5,4 7,1 8,7
15°C 155 5,9 10,5 12,8
20°C 210 6,4 17,4 17,4
25°C 295 6,5 18,3 18,3
30°C 305 7,3 25,4 25,4
35°C 459 9,3 30,2 30,0
Ambient
temperature
Dehumidification
capacity
Input power
Air temperature
increase
Thermal load in
ambient
[l/24h] [kW] [°C] [kW]
Relative humidity 60%
10°C 156 5,6 9,8 12
15°C 209 6,2 13,7 16,8
20°C 250 6,5 16,9 20,8
25°C 418 7,4 21,3 26,0
30°C 483 8,8 25,5 31,3
35°C 593 9,9 31,5 38,6
Ambient
temperature
Dehumidification
capacity
Input power
Air temperature
increase
Thermal load in
ambient
[l/24h] [kW] [°C] [kW]
Relative humidity 70%
10°C 181 5,6 11,6 14,3
15°C 242 6,2 16,5 20,2
20°C 307 6,4 20 24,5
25°C 505 6,7 24,9 30,5
30°C 573 9,3 30,7 37,6
35°C 700 9,9 37,3 45,7
Ambient
temperature
Dehumidification
capacity
Input power
Air temperature
increase
Thermal load in
ambient
[l/24h] [kW] [°C] [kW]
Relative humidity 80%
10°C 230 5,7 14,2 17,3
15°C 296 6,0 14,8 18,1
20°C 464 6,8 22,7 27,7
25°C 606 8,0 29,4 36,0
30°C 637 9,7 30,8 42,7
35°C 810 11,0 39,4 48,2
FD750/980 Rev.12.2012 14
FD
PERFORMANCE TABLES FD980Ambient
temperature
Dehumidification
capacity
Input power
Air temperature
increase
Thermal load in
ambient
[l/24h] [kW] [°C] [kW]
Relative humidity 50%
10°C 135 6,3 9,6 11,7
15°C 181 6,8 14,0 17,3
20°C 244 7,4 19,0 23,4
25°C 343 7,6 20,0 24,7
30°C 343 8,5 28,0 34,3
35°C 533 10,8 33,2 40,7
Ambient
temperature
Dehumidification
capacity
Input power
Air temperature
increase
Thermal load in
ambient
[l/24h] [kW] [°C] [kW]
Relative humidity 60%
10°C 181 6,5 13,3 16,2
15°C 243 7,2 18,5 22,7
20°C 291 7,6 22,9 28,0
25°C 486 8,6 28,7 35,3
30°C 561 10,3 34,5 42,2
35°C 688 11,5 42,5 52,0
Ambient
temperature
Dehumidification
capacity
Input power
Air temperature
increase
Thermal load in
ambient
[l/24h] [kW] [°C] [kW]
Relative humidity 70%
10°C 211 6,5 15,7 19,3
15°C 281 7,2 22,2 27,2
20°C 357 7,4 27,0 33,1
25°C 584 7,7 33,6 41,2
30°C 665 10,8 41,5 50,8
35°C 813 11,5 50,3 61,6
Ambient
temperature
Dehumidification
capacity
Input power
Air temperature
increase
Thermal load in
ambient
[l/24h] [kW] [°C] [kW]
Relative humidity 80%
10°C 267 6,6 19,0 23,4
15°C 344 7,0 20,0 24,5
20°C 539 7,9 30,5 37,4
25°C 705 9,4 39,7 48,6
30°C 798 11,3 47,0 57,6
35°C 941 12,8 53,1 65,0
FD750/980 Rev.12.2012 15
FD
CONTROL AND SAFETY DEVICES
CONTROL DEVICES
All the control devices are tested on factory before the unit is delivered.
Their operating mode is described in the following paragraphs.
HUMIDITY CONTROL SWITCH
Humidity control switch enables or disables unit operation depending on the humidity value desired.
To verify its correct operation, rotate the control knob clock wise (or set the desired value through the
instrument keyboard if a keyboard instrument should be present) and set the humidity desired value
close to lower limit. At this point verify that fan and compressor (after a time delay) will be started in
sequence. Verify as well that the unit is stopped when humidity set is reached.
SAFETY DEVICES
All the safety devices are set and tested on factory before they are delivered.
Their operating mode is described in the following paragraphs.
HIGH PRESSURE SWITCH
High pressure switch stops the unit when the discharge pressure exceeds its pre-set limit value.
The reset is manual (by pressing the push-button at the top of the pressure switch located in the
electric panel) and can be done only when pressure is decreased below the device reset value (see
table below).
LOW PRESSURE SWITCH
Low pressure switch stops the unit when the suction pressure decreases below its limit pre-set value.
The reset is automatic and it occurs only when pressure is higher than the device differential resetting
value (see table below).
DEFROST THERMOSTAT
This device signals to electronic control that defrost procedure is needed.
When defrost cycle is activated, defrost thermostat will control its conclusion.
CONTROL DEVICES ACTIVATION DIFFERENTIAL REINSERTION
High pressure switch (bar) 29 7.7 Manual
Low pressure switch (bar) 0.7 2.2 Automatic
Defrost temperature switch (°C) 1 3 Automatic
All service operations on control and safety devices must be done by TRAINED
PEOPLE ONLY: wrong setting values of the mentioned devices could cause serious
damage to the unit and injuries to the people.
FD750/980 Rev.12.2012 16
FD
CONTROL DEVICE OF THE PHASE SEQUENCES
Since the SCROLL compressors can function only in one rotating direction, this device controls that the
phases be correctly connected.
In case they may not be correctly connected, the machine will not start, a light will begin to flash in
the relays and on the panel the green light ALARM will be ON ,
HYGROSTAT
The hygrostat enables or disables unit operation depending on the humidity value desired.
To verify its correct operation, rotate the control knob clock wise (or set the desired value through the
instrument keyboard if keyboard instrument should be present) and set the humidity desired value
close to lower limit. At this point verify that fan and compressor (after a time delay) will be started in
sequence. Verify as well that the unit is stopped when humidity set is reached.
FD750/980 Rev.12.2012 17
FD
INSPECTION, TRANSPORT AND SITE HANDLING
INSPECTION
After receiving the unit, immediately check its integrity. The unit left the factory in perfect condition;
any eventual damage must be questioned to the carrier and recorded on the Delivery Note before it
is signed. Our firm must be informed, within 8 days, of the extent of the damage.
The Customer must prepare a written statement of any severe damage.
LIFTING AND SITE HANDLING
The lifting is obtained by using a forklift: fork must be inserted in the base pallet, and care must be
taken in order that the fork does not hit the section base or panel (see the picture below).
To unload the unit with a crane, pass bars under the machine and attach the necessary cable or chain
lifting devices to the bar, ensuring that they are clamped firmly; protect the sides of the chiller with
boarding or material of a similar nature.
UNPACKING
When unpacking the unit pay attention not to damage the unit.
The package is made up by different materials: wood, paper, nylon etc.
It’s a good rule to keep them separately and deliver to the proper collecting centre in order to reduce
their environmental impact.
Lifting method with a crane Lifting method with a forklift
Protection boarding
Spacing bars
3m min
18
FD
LOCATION
Consideration must be given to the following points when determining the most suitable site for
the unit installation:
 location arrangement in order to guarantee adequate air flow (no narrow spaces)
 electrical power sup ply location;
 accessibility for servicing/maintenance and repair of the unit and/or its components;
 floor loading strength and ability to support the operating weight of the unit;
 possible objection to operating noise.
INSTALLATION
CLEARANCES
Absolute care must be taken to ensure adequate air volume to the air intake and fan discharge, and to
avoid air recirculation through the unit that will deeply reduce its performances.
For these reasons it is necessary to observe the following clearances (see the pictures in the following
pages):
Mod. A B C D E
FD360 500 800 800 800 800
FD520 500 800 800 800 800
E
A
B
C
D
19
FD
MAINTENANCE AND PERIODIC CHECKS
IMPORTANT WARNINGS
WARNING: Inside the unit some moving components are present. Be very
careful when operating in their surroundings even if the electric supply
is disconnected.
WARNING: The unit should be installed so that maintenance and/or repair services
be possible. The warranty does not cover costs due to lifting apparatus, platforms
or other lifting systems required by the warranty interventions.
WARNING: The top shell and discharge line of compressor are usually at high
temperature level. Be very careful when operating in their surroundings.
WARNING: Aluminium coil fins are very sharp and can cause serious wounds. Be
very careful when operating in their surroundings.
WARNING: After servicing operation close the unit with cover panels, fixing
them with locking screws.
All this operation described in this chapter MUST BE DONE BY TRAINED PEOPLE
ONLY
Before every operation of servicing on the unit, be sure that the electric supply
has been disconnected.
In the inner side of the unit movable parts are present. Be very careful when
operating in their surroundings.
Aluminium coil fins are very sharp and can cause serious wounds.
Be very careful when operating in their surroundings.
After servicing operations, close the unit with cover panels, fixing them with
locking screws.
20
FD
CONNECTION TO THE CONDENSED WATER DRAINAGE FITTING
Connect condensed water drainage fitting (¾’’ M) to a draining pipe.
It should be always avoided to form a doubble siphon, which could obstruct the water flowing with the
consequent risk of flooding the area.
DUCT WORK UNIT CONNECTION
All the units are provided with a centrifugal fan that can be ducted.
If only one side should be ducted, a flanged connection with overall dimensions larger than discharge
hole should be used.
If either suction side should be ducted, remove suction air filter and its panel, use a flanged connection
with overall dimensions larger than suction hole located on the front of the unit and install an air filter
into the suction ductwork.
It is very important to install an air filter into the suction ductwork if the filter of
the machine itself has been removed . If this filter should not be present, serious
damage could occur to the units.
See pag.11 for airflow performances
21
FD
REFRIGERANT CONNECTIONS FOR TCR VERSIONS
The maximum distance between the two units should be 12 mt, The diameter of liquid pipe is 14 mm of
gas pipe 22mm. For each mt of piping line add 145 grams of R407c.
Vertical distance between the units (Hv): -2m(*)<Hv<+8m [(*)with siphone]
Cause the oil during exchange of function (from dehumidifing to cooling) can return to the machine the
pendence of piping towards the indoor unit should be minimum 2%
Wiring connection between the units: 3x1.5mm²+ground,for power cable section look machine
absorption
Front Panel
Dehumidifier higher than condenser
Front Panel
Dehumidifier lower than condenser
22
FD
REFRIGERANT LAY-OUT VERSION FD-FDS AND TCR VERSION
REFRIGERANT LAY-OUT VERSION FD-TCR
- - - - Only for “S” version T.V Expansion Valve
COND. Condenser S.V Solenoid valve
EVAP. Evaporator VRL One way valve
FL Liquid line filter C.FAN Centrifugal fan
LPS Low pressure switch MAF Motor axial fan
HPS High pressure switch L.R. Liquid receiver
M.V Manual valve CV Charge valve
RE Liquid separator CAP Capillary
23
FD
ELECTRICAL CONNECTIONS
Generality
Power
supply
V/~/Hz 400 / 3 / 50
Control
circuit
V/~/Hz 230 / 1 / 50
Auxiliary
circuit
V/~/Hz 230 / 1 / 50
Fans power
supply
V/~/Hz 230 / 1 / 50
Remote condenser fan supply (FD750 version) V/~/Hz 400 / 3 / 50
Remote condenser fan supply (FD980 version) V/~/Hz 400 / 3 / 50
It must be verified that electric supply is corresponding to the unit electric nominal data
(tension, phases, frequency) reported on the label in the front panel of the unit.
Power connections must be made using a three-wire cable + neutral wire + ground cable.
Before every operation on the electric section, be sure that the electric supply is
disconnected.
Main supply must be protected with a differential switch
Close to the unit a main switch must be present.
Power cable and line protection must be sized according norm and laws according
with absorbed current of the machine (see technical data).
The line voltage fluctuations must not be more than ±5% of the nominal value, while
the voltage unbalance between one phase and another must not exceed 2%. If those
tolerances should not be respected, please contact our Firm to provide proper
devices.
Electric supply must be in the limits shown: in the opposite case warranty will
terminate immediately.
Electrical connections therefore must be always done according to the instructions
reported on the wiring diagram enclosed with the unit and norms and laws.
This machines series belongs to the electric appliances functioning at low tension
(230/400 V).
Please read carefully all safety norms
24
FD
Ground connection is compulsory. Installer must connect ground cable with a dedicated terminal on
the apposite terminal block.
Main supply connection
The Electric Power Supply Connection must be carried out according to the indications given in the
Electric Diagram, by connecting the cable supplied with the machine and according with safety norm.
Models FD750 must be electrically powered with 3 phase-neutral-earth.
Models FD980 must be electrically powered with 3 phase-neutral-earth.
The compressor has only one allowable rotation direction; therefore, the machine has a control
device for the phases sequence; in case that it may show a wrong sequence, the device inform you
with a blinking light; in this case two phases must be interchanged.
Pay much attention to above indications because the compressor will be damaged if the rotation
direction is not correct.
Remote humidistat connections
Remote humidistat connection must be realised according with electric diagram.
Connections must be done according to the electric wiring diagram specifications.
START UP
PRE-START CHECK
Before to proceed to start up, close electrical line main switch (not supplied with the unit): the green
led (line) will be lit up.
All the units are provided with microprocessor control that manages all the various functions of the
unit.
To start the unit, activate humidity switch by rotating the knob or by pressing the instrument
keyboard, depending on the type of instrument installed): the green light (WORKING) will be ON.
Check that all power cables are correctly connected and all terminals are fastly fixed.
The voltage at the phase R S T clamps must be the one indicated on the unit label ± 5%
tolerance. If this should not happen, please, contact our Factory.
Caution: before proceeding to start up, check that all the cover panel be located in the proper
position and locked with fastening screws.
For temporary stop (night-time, weekend, etc.) never break the power supply and strictly
follow the procedures illustrated at paragraph 4.6
25
FD
SIGNALLING LEDS PANEL
Units are provided with signalling light panel that indicates unit
operational status. Below is reported a brief description of their meaning.
Electrical supply RED Light (POWER):
indicates that unit is properly electrically supplied.
Compressor RED Light (WORKING):
indicates humidistat call and running compressor status.
Alarm GREEN Light (ALARM): indicates the unit alarm status.
Defrost Light (RED): indicates that the defrost cycle is on.
MACHINE STOP (STAND BY)
If the machine is connected, it works with automatic system controlled by a humidostat.
When the humidostat activates the defrost system, only the light Power is ON
When one wishes to turn off the machine, the knob of the humidostat must be set on position OFF.
Before the first Start-up, the machine must be kept in STAND-BY position at-least for 4 hours.
Led status
signalling panel
26
FD
REMOTE CONTROL
It is possibile to use a remote control with the machine. In this case must be used a remote humidostat
to be connected to the terminal boxes of the electric panelboard in place of the standard humidostat.
It is also possible to have an ON-OFF switch to be electrically connected in series to the humidostat.
GENERAL OBSERVATIOTIONS AND ADVISE
It is a good rule to carry on periodic checks in order to verify the correct working of the unit:
POWER SAVINGS
To reduce power consumption, take care of following suggestions :
Check that safety and control devices are working correctly (monthly).
Make sure that all the terminals on the electric board and on the compressor be well locked.
Periodic cleaning of the sliding terminals of the contactors should be done: if any damage is
found, please replace the contactors (monthly).
Make sure that there is no oil leakage from compressor (monthly).
Check that the electric resistance in the compressor crankcase be properly functioning
(monthly: low temperature units only).
Clean draining pan and pipeline (monthly).
Clean finned coils filters with compressed air in the opposite direction of the airflow. If
filters should be fully clogged, clean them with a water jet to be sprayed against the air flow
side(monthly or more frequently if the unit operates on a dusty environment).
Check mounting of fan blades and their balancing (every 4 months).
Make sure that room in which unit should operate has doors and windows firmly closed;
Set the humidity control switch to the proper value: lower set values than necessary (even
few points) may cause great capacity loss with consequently longer operating periods: it is
advisable to set humidity values below 60% only if strictly necessary.
For the machine which has a second condenser (monoblock or split system) check every
month if the heat exchanger is clean and free from room dust, and check the efficiency of
the motorfan.
27
FD
DISPOSAL OF THE UNIT AT END OF ITS LIFE
Once the unit is arrived at the end of its life and needs to be removed or replaced, the following
operations are recommended:
These operations allow easy material recovery and recycling process, reducing environmental impact.
It is recommended to follow the pertinent norms in the disposal of the wasted materials.
TROUBLE SHOOTING
In the following pages are reported the most common troubles that can cause the unit to stop or to
operate in an uncorrect way.
UNIT UNDER ALARM
When red light is lit up, the unit is stopped and set under alarm condition.
The unit refrigerant has to be recovered by trained people and sent to proper collecting
centre;
Ccompressor lubricating oil has to be recovered and sent to proper collecting centre;
the frame and various components, if no longer usable , have to be dismantled and
subdivided according to their nature; in particular, copper and aluminium, which are
present in conspicuous quantity in the unit.
Concerning the solutions, it is necessary to take an extreme care on the actions to adopt:
an excessive confidence may cause serious accidents to inexperienced people. It is
advisable, once the cause is detected, to contact our servicing people or trained people
only.
To restore normal operating mode, it is necessary to detect and remove the cause of
the alarm
28
FD
PROBLEM LED ON
PROBABLE
CAUSE
CORRECTIVE
ACTION
A
Unit does not start
but alarm green led
is off
None Power supply missing
Provide power supply,
replace fuses
Power supply led Humidistat on set Set a lower set point
Power supply led,
Compressor thermal
protection enabled,
compressor defective
Let the compressor
cool
down, replace
compressor defective
Power supply led,
Compressor thermal
protection enabled,
compressor defective
fan defective
Let the compressor
cool
down, replace
compressor defective,
replace fan defective
Any led
Electronic board or led
Board defective
Replace defective
board
PROBLEM LED ON
PROBABLE
CAUSE
CORRECTIVE
ACTION
B
Fan starts,
compressor does not
start, but red alarm led
Power supply led,
running led
Compressor thermal
Protection enabled,
compressor defective
Let the compressor cool
Down, replace
compressor defective
Any led
Electronic board or led
Board defective
Replace defective board
29
FD
PROBLEM LED ON
PROBABLE
CAUSE
CORRECTIVE
ACTION
C
Fan starts,
compressor does
not start, but red
alarm led is on
Red alarm led Air filter clogged
Clean filter and reset
unit
Red alarm led Low refrigerant charge
Charge the system
Red alarm led
Open panel, low air flow,
suction side obstructed,
high pressure switch on
Close the panel, clear
Suction side, reset high
pressure switch
Any led
Electronic board or led
Board defective
Replace defective board
30
FD
ELECTRIC DIAGRAM
31
FD
32
FD
33
FD
DRAWINGS (lay out)
INSTALLATIONDUCTING
Min. Distance 200 mm
INSTALLATION
WALL CEILING
INSTALLATION
ON TROLLEY
34
FD
DIMENSIONAL DRAWINGS FD750 / 980
35
FD
DIMENSIONAL DRAWINGS STANDARD OUTSIDE CONDENSER
FOR THE CORRECT SIZE LOOK THE TABLE IN PAG.10..IT IS ONLT A SAMPLE
36
FD
DIMENSIONAL DRAWINGS SILENT OUTSIDE CONDENSER
FOR THE CORRECT SIZE LOOK THE TABLE IN PAG.10..IT IS ONLT A SAMPLE

More Related Content

What's hot

Kobelco ed150 blade runner acera sr tier 3 excavator dozer service repair manual
Kobelco ed150 blade runner acera sr tier 3 excavator dozer service repair manualKobelco ed150 blade runner acera sr tier 3 excavator dozer service repair manual
Kobelco ed150 blade runner acera sr tier 3 excavator dozer service repair manual
hfjsekekmmd
 
Kioti daedong ds4110 tractor parts catalogue manual
Kioti daedong ds4110 tractor parts catalogue manualKioti daedong ds4110 tractor parts catalogue manual
Kioti daedong ds4110 tractor parts catalogue manual
fjsekdmmme
 
1999 sea doo speedster service repair manual
1999 sea doo speedster service repair manual1999 sea doo speedster service repair manual
1999 sea doo speedster service repair manual
fjsjjfkskeme
 
New holland ls140 skid steer loader service repair manual
New holland ls140 skid steer loader service repair manualNew holland ls140 skid steer loader service repair manual
New holland ls140 skid steer loader service repair manual
ufjjsjekkemme
 
Kioti daedong ds4510 tractor parts catalogue manual
Kioti daedong ds4510 tractor parts catalogue manualKioti daedong ds4510 tractor parts catalogue manual
Kioti daedong ds4510 tractor parts catalogue manual
fjskekdmjekm
 
Kioti daedong ds4110 tractor parts catalogue manual
Kioti daedong ds4110 tractor parts catalogue manualKioti daedong ds4110 tractor parts catalogue manual
Kioti daedong ds4110 tractor parts catalogue manual
fjkskedmme
 
Crown wp2000 s series pallet truck parts catalogue manual
Crown wp2000 s series pallet truck parts catalogue manualCrown wp2000 s series pallet truck parts catalogue manual
Crown wp2000 s series pallet truck parts catalogue manual
soeldksejdksem
 

What's hot (7)

Kobelco ed150 blade runner acera sr tier 3 excavator dozer service repair manual
Kobelco ed150 blade runner acera sr tier 3 excavator dozer service repair manualKobelco ed150 blade runner acera sr tier 3 excavator dozer service repair manual
Kobelco ed150 blade runner acera sr tier 3 excavator dozer service repair manual
 
Kioti daedong ds4110 tractor parts catalogue manual
Kioti daedong ds4110 tractor parts catalogue manualKioti daedong ds4110 tractor parts catalogue manual
Kioti daedong ds4110 tractor parts catalogue manual
 
1999 sea doo speedster service repair manual
1999 sea doo speedster service repair manual1999 sea doo speedster service repair manual
1999 sea doo speedster service repair manual
 
New holland ls140 skid steer loader service repair manual
New holland ls140 skid steer loader service repair manualNew holland ls140 skid steer loader service repair manual
New holland ls140 skid steer loader service repair manual
 
Kioti daedong ds4510 tractor parts catalogue manual
Kioti daedong ds4510 tractor parts catalogue manualKioti daedong ds4510 tractor parts catalogue manual
Kioti daedong ds4510 tractor parts catalogue manual
 
Kioti daedong ds4110 tractor parts catalogue manual
Kioti daedong ds4110 tractor parts catalogue manualKioti daedong ds4110 tractor parts catalogue manual
Kioti daedong ds4110 tractor parts catalogue manual
 
Crown wp2000 s series pallet truck parts catalogue manual
Crown wp2000 s series pallet truck parts catalogue manualCrown wp2000 s series pallet truck parts catalogue manual
Crown wp2000 s series pallet truck parts catalogue manual
 

Similar to Fral fd750 and fd980 manual

Gree unidades modulares inverter
Gree   unidades modulares inverterGree   unidades modulares inverter
Gree unidades modulares inverter
Guilherme Gugelmin
 
Crown GPC2000 Series Lift Truck Parts Catalogue Manual.pdf
Crown GPC2000 Series Lift Truck Parts Catalogue Manual.pdfCrown GPC2000 Series Lift Truck Parts Catalogue Manual.pdf
Crown GPC2000 Series Lift Truck Parts Catalogue Manual.pdf
dujdkksmdm
 
Crown GPC2000 Series Lift Truck Parts Catalogue Manual.pdf
Crown GPC2000 Series Lift Truck Parts Catalogue Manual.pdfCrown GPC2000 Series Lift Truck Parts Catalogue Manual.pdf
Crown GPC2000 Series Lift Truck Parts Catalogue Manual.pdf
8dskeddmdd
 
Crown GPC2000 Series Lift Truck Parts Catalogue Manual.pdf
Crown GPC2000 Series Lift Truck Parts Catalogue Manual.pdfCrown GPC2000 Series Lift Truck Parts Catalogue Manual.pdf
Crown GPC2000 Series Lift Truck Parts Catalogue Manual.pdf
f8usejdkdmmd2
 
Crown gpc2000 series lift truck parts catalogue manual
Crown gpc2000 series lift truck parts catalogue manualCrown gpc2000 series lift truck parts catalogue manual
Crown gpc2000 series lift truck parts catalogue manual
fjjskekmdmme
 
Crown GPC2000 Series Lift Truck Parts Catalogue Manual.pdf
Crown GPC2000 Series Lift Truck Parts Catalogue Manual.pdfCrown GPC2000 Series Lift Truck Parts Catalogue Manual.pdf
Crown GPC2000 Series Lift Truck Parts Catalogue Manual.pdf
f8uejkkdmdm8u
 
Crown GPC2000 Series Lift Truck Parts Catalogue Manual.pdf
Crown GPC2000 Series Lift Truck Parts Catalogue Manual.pdfCrown GPC2000 Series Lift Truck Parts Catalogue Manual.pdf
Crown GPC2000 Series Lift Truck Parts Catalogue Manual.pdf
fujjekdmdmd
 
Crown GPC2000 Series Lift Truck Parts Catalogue Manual.pdf
Crown GPC2000 Series Lift Truck Parts Catalogue Manual.pdfCrown GPC2000 Series Lift Truck Parts Catalogue Manual.pdf
Crown GPC2000 Series Lift Truck Parts Catalogue Manual.pdf
8ufjsekddm8u
 
Crown GPC2000 Series Lift Truck Parts Catalogue Manual.pdf
Crown GPC2000 Series Lift Truck Parts Catalogue Manual.pdfCrown GPC2000 Series Lift Truck Parts Catalogue Manual.pdf
Crown GPC2000 Series Lift Truck Parts Catalogue Manual.pdf
prmy389342
 
Crown GPC2000 Series Lift Truck Parts Catalogue Manual.pdf
Crown GPC2000 Series Lift Truck Parts Catalogue Manual.pdfCrown GPC2000 Series Lift Truck Parts Catalogue Manual.pdf
Crown GPC2000 Series Lift Truck Parts Catalogue Manual.pdf
ufjksemd8ujd
 
Crown GPC2000 Series Lift Truck Parts Catalogue Manual.pdf
Crown GPC2000 Series Lift Truck Parts Catalogue Manual.pdfCrown GPC2000 Series Lift Truck Parts Catalogue Manual.pdf
Crown GPC2000 Series Lift Truck Parts Catalogue Manual.pdf
fujskmd9dokk
 
Crown GPC2000 Series Lift Truck Parts Catalogue Manual.pdf
Crown GPC2000 Series Lift Truck Parts Catalogue Manual.pdfCrown GPC2000 Series Lift Truck Parts Catalogue Manual.pdf
Crown GPC2000 Series Lift Truck Parts Catalogue Manual.pdf
km7seydwuhdw
 
Crown GPC2000 Series Lift Truck Parts Catalogue Manual.pdf
Crown GPC2000 Series Lift Truck Parts Catalogue Manual.pdfCrown GPC2000 Series Lift Truck Parts Catalogue Manual.pdf
Crown GPC2000 Series Lift Truck Parts Catalogue Manual.pdf
fujeikdmdmd5
 
Crown gpc2000 series lift truck parts catalogue manual
Crown gpc2000 series lift truck parts catalogue manualCrown gpc2000 series lift truck parts catalogue manual
Crown gpc2000 series lift truck parts catalogue manual
idkkddkmd
 
Crown gpc2000 series lift truck parts catalogue manual
Crown gpc2000 series lift truck parts catalogue manualCrown gpc2000 series lift truck parts catalogue manual
Crown gpc2000 series lift truck parts catalogue manual
fjjsekmmm
 
CASE CX370B Crawler Excavator Service Repair Manual.pdf
CASE CX370B Crawler Excavator Service Repair Manual.pdfCASE CX370B Crawler Excavator Service Repair Manual.pdf
CASE CX370B Crawler Excavator Service Repair Manual.pdf
fujkskemdmd
 
CASE CX370B Crawler Excavator Service Repair Manual Instant Download.pdf
CASE CX370B Crawler Excavator Service Repair Manual Instant Download.pdfCASE CX370B Crawler Excavator Service Repair Manual Instant Download.pdf
CASE CX370B Crawler Excavator Service Repair Manual Instant Download.pdf
pugangjia7703
 
CASE CX350B Crawler Excavator Service Repair Manual.pdf
CASE CX350B Crawler Excavator Service Repair Manual.pdfCASE CX350B Crawler Excavator Service Repair Manual.pdf
CASE CX350B Crawler Excavator Service Repair Manual.pdf
f8usjekdmdm
 
CASE CX350B Crawler Excavator Service Repair Manual Instant Download.pdf
CASE CX350B Crawler Excavator Service Repair Manual Instant Download.pdfCASE CX350B Crawler Excavator Service Repair Manual Instant Download.pdf
CASE CX350B Crawler Excavator Service Repair Manual Instant Download.pdf
bu9525858114
 
CASE CX350B Crawler Excavator Service Repair Manual.pdf
CASE CX350B Crawler Excavator Service Repair Manual.pdfCASE CX350B Crawler Excavator Service Repair Manual.pdf
CASE CX350B Crawler Excavator Service Repair Manual.pdf
f8usejdkkddme3
 

Similar to Fral fd750 and fd980 manual (20)

Gree unidades modulares inverter
Gree   unidades modulares inverterGree   unidades modulares inverter
Gree unidades modulares inverter
 
Crown GPC2000 Series Lift Truck Parts Catalogue Manual.pdf
Crown GPC2000 Series Lift Truck Parts Catalogue Manual.pdfCrown GPC2000 Series Lift Truck Parts Catalogue Manual.pdf
Crown GPC2000 Series Lift Truck Parts Catalogue Manual.pdf
 
Crown GPC2000 Series Lift Truck Parts Catalogue Manual.pdf
Crown GPC2000 Series Lift Truck Parts Catalogue Manual.pdfCrown GPC2000 Series Lift Truck Parts Catalogue Manual.pdf
Crown GPC2000 Series Lift Truck Parts Catalogue Manual.pdf
 
Crown GPC2000 Series Lift Truck Parts Catalogue Manual.pdf
Crown GPC2000 Series Lift Truck Parts Catalogue Manual.pdfCrown GPC2000 Series Lift Truck Parts Catalogue Manual.pdf
Crown GPC2000 Series Lift Truck Parts Catalogue Manual.pdf
 
Crown gpc2000 series lift truck parts catalogue manual
Crown gpc2000 series lift truck parts catalogue manualCrown gpc2000 series lift truck parts catalogue manual
Crown gpc2000 series lift truck parts catalogue manual
 
Crown GPC2000 Series Lift Truck Parts Catalogue Manual.pdf
Crown GPC2000 Series Lift Truck Parts Catalogue Manual.pdfCrown GPC2000 Series Lift Truck Parts Catalogue Manual.pdf
Crown GPC2000 Series Lift Truck Parts Catalogue Manual.pdf
 
Crown GPC2000 Series Lift Truck Parts Catalogue Manual.pdf
Crown GPC2000 Series Lift Truck Parts Catalogue Manual.pdfCrown GPC2000 Series Lift Truck Parts Catalogue Manual.pdf
Crown GPC2000 Series Lift Truck Parts Catalogue Manual.pdf
 
Crown GPC2000 Series Lift Truck Parts Catalogue Manual.pdf
Crown GPC2000 Series Lift Truck Parts Catalogue Manual.pdfCrown GPC2000 Series Lift Truck Parts Catalogue Manual.pdf
Crown GPC2000 Series Lift Truck Parts Catalogue Manual.pdf
 
Crown GPC2000 Series Lift Truck Parts Catalogue Manual.pdf
Crown GPC2000 Series Lift Truck Parts Catalogue Manual.pdfCrown GPC2000 Series Lift Truck Parts Catalogue Manual.pdf
Crown GPC2000 Series Lift Truck Parts Catalogue Manual.pdf
 
Crown GPC2000 Series Lift Truck Parts Catalogue Manual.pdf
Crown GPC2000 Series Lift Truck Parts Catalogue Manual.pdfCrown GPC2000 Series Lift Truck Parts Catalogue Manual.pdf
Crown GPC2000 Series Lift Truck Parts Catalogue Manual.pdf
 
Crown GPC2000 Series Lift Truck Parts Catalogue Manual.pdf
Crown GPC2000 Series Lift Truck Parts Catalogue Manual.pdfCrown GPC2000 Series Lift Truck Parts Catalogue Manual.pdf
Crown GPC2000 Series Lift Truck Parts Catalogue Manual.pdf
 
Crown GPC2000 Series Lift Truck Parts Catalogue Manual.pdf
Crown GPC2000 Series Lift Truck Parts Catalogue Manual.pdfCrown GPC2000 Series Lift Truck Parts Catalogue Manual.pdf
Crown GPC2000 Series Lift Truck Parts Catalogue Manual.pdf
 
Crown GPC2000 Series Lift Truck Parts Catalogue Manual.pdf
Crown GPC2000 Series Lift Truck Parts Catalogue Manual.pdfCrown GPC2000 Series Lift Truck Parts Catalogue Manual.pdf
Crown GPC2000 Series Lift Truck Parts Catalogue Manual.pdf
 
Crown gpc2000 series lift truck parts catalogue manual
Crown gpc2000 series lift truck parts catalogue manualCrown gpc2000 series lift truck parts catalogue manual
Crown gpc2000 series lift truck parts catalogue manual
 
Crown gpc2000 series lift truck parts catalogue manual
Crown gpc2000 series lift truck parts catalogue manualCrown gpc2000 series lift truck parts catalogue manual
Crown gpc2000 series lift truck parts catalogue manual
 
CASE CX370B Crawler Excavator Service Repair Manual.pdf
CASE CX370B Crawler Excavator Service Repair Manual.pdfCASE CX370B Crawler Excavator Service Repair Manual.pdf
CASE CX370B Crawler Excavator Service Repair Manual.pdf
 
CASE CX370B Crawler Excavator Service Repair Manual Instant Download.pdf
CASE CX370B Crawler Excavator Service Repair Manual Instant Download.pdfCASE CX370B Crawler Excavator Service Repair Manual Instant Download.pdf
CASE CX370B Crawler Excavator Service Repair Manual Instant Download.pdf
 
CASE CX350B Crawler Excavator Service Repair Manual.pdf
CASE CX350B Crawler Excavator Service Repair Manual.pdfCASE CX350B Crawler Excavator Service Repair Manual.pdf
CASE CX350B Crawler Excavator Service Repair Manual.pdf
 
CASE CX350B Crawler Excavator Service Repair Manual Instant Download.pdf
CASE CX350B Crawler Excavator Service Repair Manual Instant Download.pdfCASE CX350B Crawler Excavator Service Repair Manual Instant Download.pdf
CASE CX350B Crawler Excavator Service Repair Manual Instant Download.pdf
 
CASE CX350B Crawler Excavator Service Repair Manual.pdf
CASE CX350B Crawler Excavator Service Repair Manual.pdfCASE CX350B Crawler Excavator Service Repair Manual.pdf
CASE CX350B Crawler Excavator Service Repair Manual.pdf
 

Fral fd750 and fd980 manual

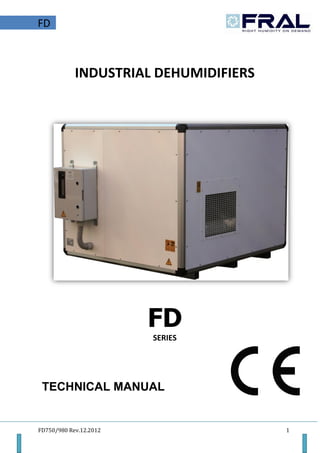
  • 1. FD750/980 Rev.12.2012 1 FD INDUSTRIAL DEHUMIDIFIERS FD SERIES TECHNICAL MANUAL
  • 2. FD750/980 Rev.12.2012 2 FD Index DECLARATION OF CONFORMITY.................................................................................................................. 4 Dehumidifiers FD750 / FD980 series ........................................................................................................ 4 UTILITY AND CONSERVATION OF THE MANUAL .......................................................................................... 5 NORMS REFERENCES................................................................................................................................ 5 GENERAL SAFETY NORMS ........................................................................................................................ 5 PERSONAL PROTECTIVE EQUIPMENT....................................................................................................... 6 UNIT DESCRIPTION....................................................................................................................................... 7 Frame: ...................................................................................................................................................... 7 Refrigerant circuit..................................................................................................................................... 7 Condenser and evaporators..................................................................................................................... 7 FINNED PACK........................................................................................................................................ 7 FINS....................................................................................................................................................... 7 TUBES ................................................................................................................................................... 7 Compressor .......................................................................................................................................... 7 FANS ..................................................................................................................................................... 8 ELECTRIC BOX ....................................................................................................................................... 8 MICROPROCESSORS ............................................................................................................................. 8 VERSIONS...................................................................................................................................................... 8 AVAILABLE MODELS AND THEIR ACCESSORIES........................................................................................ 8 TECHNICAL DATA FD.................................................................................................................................... 9 DRYING CAPACITY ...................................................................................................................................... 10 FAN PERFORMANCE................................................................................................................................... 12 FUNCTIONING LIMITS................................................................................................................................. 12 PERFORMANCE TABLES FD360................................................................................................................... 13 PERFORMANCE TABLES FD520................................................................................................................... 14 CONTROL AND SAFETY DEVICES................................................................................................................. 15 CONTROL DEVICES.................................................................................................................................. 15 HUMIDITY CONTROL SWITCH................................................................................................................. 15 SAFETY DEVICES...................................................................................................................................... 15 HIGH PRESSURE SWITCH........................................................................................................................ 15 LOW PRESSURE SWITCH......................................................................................................................... 15 DEFROST THERMOSTAT.......................................................................................................................... 15 CONTROL DEVICE OF THE PHASE SEQUENCES....................................................................................... 16 HYGROSTAT............................................................................................................................................ 16 THERMOSTAT .............................................................................................Error! Bookmark not defined. INSPECTION, TRANSPORT AND SITE HANDLING ........................................................................................ 17
  • 3. FD750/980 Rev.12.2012 3 FD INSPECTION............................................................................................................................................ 17 LIFTING AND SITE HANDLING................................................................................................................. 17 UNPACKING............................................................................................................................................ 17 LOCATION............................................................................................................................................... 18 INSTALLATION ............................................................................................................................................ 18 CLEARANCES........................................................................................................................................... 18 MAINTENANCE AND PERIODIC CHECKS..................................................................................................... 19 IMPORTANT WARNINGS ........................................................................................................................ 19 CONNECTION TO THE CONDENSED WATER DRAINAGE FITTING............................................................... 20 DUCT WORK UNIT CONNECTION ............................................................................................................... 20 REFRIGERANT CONNECTIONS FOR TCR VERSIONS..................................................................................... 21 REFRIGERANT LAY-OUT VERSION FD-FDS .................................................................................................. 22 ELECTRICAL CONNECTIONS........................................................................................................................ 23 Generality............................................................................................................................................... 23 Main supply connection......................................................................................................................... 24 START UP.................................................................................................................................................... 24 PRE-START CHECK................................................................................................................................... 24 Before to proceed to start up, close electrical line main switch (not supplied with the unit): the green led (line) will be lit up................................................................................................................................. 24 SIGNALLING LEDS PANEL........................................................................................................................ 25 MACHINE STOP (STAND BY) ................................................................................................................... 25 REMOTE CONTROL................................................................................................................................. 26 GENERAL OBSERVATIOTIONS AND ADVISE................................................................................................ 26 DISPOSAL OF THE UNIT AT END OF ITS LIFE............................................................................................... 27 TROUBLE SHOOTING .................................................................................................................................. 27 UNIT UNDER ALARM .............................................................................................................................. 27 ELECTRIC DIAGRAM.................................................................................................................................... 30 DRAWINGS (lay out)................................................................................................................................... 32 DIMENSIONAL DRAWINGS FD750 / 980............................................................................................... 34 DIMENSIONAL DRAWINGS STANDARD OUTSIDE CONDENSER............................................................ 35 DIMENSIONAL DRAWINGS SILENT OUTSIDE CONDENSER................................................................... 36
  • 4. FD750/980 Rev.12.2012 4 FD DECLARATION OF CONFORMITY (Community directives Low Voltage and Electro-magnetic Compatibility) FRAL Company s.r.l. Viale dell’Industria e dell’Artigianato 22/c – 35010 Carmignano di Brenta – PD – hereby declares that the following products: Dehumidifiers FD750 / FD980 series have been designed, manufactured and distributed according to safety and electro-magnetic compatibility of the European Norms and Regulations: MACHINES NORMS 2006/42/CE; SECURITY REGULATIONS FOR LOW TENSION APPLIANCES 2006/95/CE; ELECTROMAGNETIC COMPATIBILITY (EMC) – 2004/108/CE. It is hereby certified that this Dehumidifier conforms to the: IEC Regulations CEI-EN 60335-2-40, CEI-EN 55014-1, 55014-2. The machine is built according to RoHS European Norms The Legal Agent Ing. Alberto Gasparini
  • 5. FD750/980 Rev.12.2012 5 FD UTILITY AND CONSERVATION OF THE MANUAL This Manual conforms to the requirements of the Norms 98/37/CE and subsequent modifications. The Manual gives all necessary indications required for the transport, Installation, start-up and maintenance of the machines, which must be strictly followed by the user for a correct functioning of the same. To this purpose, the user must also strictly comply with the security norms described in the Manual. The manual must always follow the machine and must be kept in a place which will guarantee its perfect conservation for the proper use from the operator. GRAPHIC SYMBOLS AND INDICATIONS INCLUDED IN THE MANUAL: NORMS REFERENCES The machines described in this manual hav been designed according to the pertinent CE Norms, in conformity with the MACHINES DIRECTIVES cited in the previous paragraph. The machines are also complying with the essential requirements of the following European Rules and Directives:  Machine Safety Norms 89/392 CEE,  Electrical Safety Rules for the Low Tension Appliances 2006/95 CEE,  Electromagnetic Compatibility Norms2004/108 CEE,  Under Pressure Devices 97/23/CE. GENERAL SAFETY NORMS When installing or servicing the unit, it is necessary to strictly follow the rules reported on this manual, to conform to all the specifications of the labels on the unit, and to take any possible precautions of the case for workers. Pressure in refrigerant circuit and electrical equipment present in the unit can be hazardous when installing or servicing the unit Therefore, all operations on the unit must be done only by trained people. shows that ATTENTION must be paid to all procedures and operations to be carried out for ensuring the correct functioning of the machine, describes the operations that mus be avoided , and finally informs the operator about the correct procedure and operations to be followed for the proper use of the machine. Not observing the rules reported on this manual, and every modification to the unit done without explicit previous authorisation, will cause the immediate termination of the warranty.
  • 6. FD750/980 Rev.12.2012 6 FD PERSONAL PROTECTIVE EQUIPMENT When operating and maintaining the FD unit, use the following personal protective equipment. Equiment: people who make maintenance or work with the unit, must wear an equipment in accordance with the safety Directives. They must wear accident prevention shoes with anti-slip sole where the paving is slippery. Gloves: During the cleanings and the maintenance operations, it’s necessary the use of appropriate gloves. In case of gas recharge, It’s complulsory the use of appropriate gloves to avoid the rick of freezing. Mask and goggles: Respiratory protection (mask) and eye protection (goggles) should be used during cleaning and maintenance operations. SAFETY SIGNS The equipment features the following safety signs, which must be complied with: General hazard Electric shock hazard Attention: before every operation of servicing on the unit, be sure that the electric supply is disconnected. Close to the unit a switched electrical plug must be present. Main supply must be protected with a differential switch. Never modify settings of the safety devices. Never sprinkle water over the unit and its electrical components. It must not be used under explosive atmosphere
  • 7. FD750/980 Rev.12.2012 7 FD UNIT DESCRIPTION Frame: All FD units are made from galvanised thick sheet metal, painted with polyurethane powder enamel at 180°C to ensure the best resistance against the atmospheric agents. The frame is self-supporting with anodized extruded aluminum profiles. The drip tray is present standard in all FD units and it’s in stainless steel. Refrigerant circuit The refrigerant gas used in these units is R407C. The refrigerant circuit is made in according to ISO 97/23 concerning welding procedures and PED regulation. The refrigerant circuit includes:  filter drier,  Schrader valves form maintenance and control,  pressure safety device (according to PED regulation).  thermal expansion valve with external equalizer.  solenoid valve  compressor. Condenser and evaporators FINNED PACK It consist of copper tubes mechanically expanded into aluminium or copper fins provided with full collars that allow their regular spacing. The best heat transmission is guaranteed by the fin collars that completely cover the tubes. FINS They are manufactured by high precision pressing of aluminium, aluminium epoxy painted, copper or pretinned copper sheets. The fin shape is slightly corrugated in order to improve the heat exchange transmission coeffi cient without heavily affecting the air pressure drop. Furthermore a good water draining is assures and the inside dust accumulation is avoided. TUBES For the heat exchangers high quality copper tubes are used. The tubes are suitable for the majority of the primary refrigerants in both cold and warm working conditions. Compressor The compressor is scroll type with crankcase heater and thermal overload protection by a klaxon embedded in the motor winding. The characteristics of the compressor are the follow: 1. High efficiency for saving energy consumption
  • 8. FD750/980 Rev.12.2012 8 FD 2. Low sound level ,quiet operation 3. Applied HFC refrigerant for protecting environment 4. High reliability, long lifetime. FANS Centrifugal fan type and direct coupled. ELECTRIC BOX The electric switch board is made according to electromagnetic compatibility norms (2004/108 CEE) and Electrical Safety Rules for the Low Tension Appliances 2006/95 CEE. Inside the electric box there are the following components: 1. Main switch 2. Phase Sequenze relay; 3. General disconnector with fuses; 4. Compressor Contactors; 5. Relay; 6. Terminals for remote control. MICROPROCESSORS The microprocessors check all the function of the machine like: General functioning, automatic defrost system, alarms and set point of the humidty and temperature (temperature only for TCR Version). VERSIONS AVAILABLE MODELS AND THEIR ACCESSORIES HOT GASDEFROST VERSION (S): The frost which covers the battery, obtrsucts the passage of the air, reduces the air contact surface and, consequently, the performance; if the frost accumulation is excessive, it can seriously damage the whole system. All units are provided with Desfrost System. The standard versions have their defrost simply throughly the periodic stop of the compressor, using the heat of the environment itself. In the versions with Hot Gas Defrost System, the defrosting is controlled by the electronic system in combination with a thermostat, the bulb of which is installed inside the evaporator. The defrosting phase in the Hot Gas System takes place only when the thermostat activates it in presence of freeze. During the defrosting time the DEFROST light is ON. TEMPERATURE CONTROL VERSION (FD TCR): The units of the control temperature version are equipped with external remote condenser that is connected with the dehumidifier. The use of the remote condenser allows the control of the temperature and humidity at the same time, operating in cooling or dehumidifying mode. For to use both the functions is needs to have a thermostat and a hygrostat.
  • 9. FD750/980 Rev.12.2012 9 FD TECHNICAL DATA FD Mod. 750 980 750 TCR 980 TCR Drying capacity (1) L/24h 750 980 750 980 Cooling capacity (at inside 26°C – out side 30°C) kW // // 26 31,5 Nominal power consumption(3) kW 9,0 11,0 9,0 11,0 Maximum power consumption(4) kW 11,0 13,0 11,0 13,0 Max.current consumption(4) A 22 28 23,3 29,7 Nominal Air flow m3 /h 6.200 8.500 6.200 8.500 m3 /s 1,7 2,3 1,7 2,3 Available static pressure Pa 200 200 200 200 R407C refrigerant charge Kg 6,5 7,5 // // Sound pressure level (3 mt free field) (5) dB(A) 67 70 67 70 Temperature operating range(6) °C 5 - 35 5 - 35 5 - 35 5 - 35 1 – 35 (6) 1 – 35 (6) 1 – 35 (6) 1 – 35 (6) Humidity operating range % 40 - 99 40 - 99 40 - 99 40 - 99 Condensate draining connection INCH’’ ¾’’ ¾’’ ¾’’ ¾’’ Length mm 1580 2000 1580 2000 Depth mm 1260 1300 1260 1300 Heigth mm 1130 1600 1130 1600 Operating weight Kg 230 320 230 320 Nominal power supply V/ph/ Hz 400/3 +N/50 400/3 +N/50 400/3 +N/50 400/3 +N/50 (1) Referred to: inlet air temp. 32 °C relative humidity 90% (3) Referred to: inlet air temp. 25 °C relative humidity 60% (4) Referred to: inlet air temp. 35 °C relative humidity 95%
  • 10. FD750/980 Rev.12.2012 10 FD (5) Sound power level calucated according to ISO 3746 (6) S version with hot gas defrost TECHNICAL DATA REMOTE CONDENSER Mod. 750 TCR 980 TCR 750 TCR SILENT VERSION 980 TCR SILENT VERSION Length mm 1100 1170 2950 2950 Depth mm 600 600 600 600 Heigth mm 833 833 983 983 Maximum input current A 1,35 1,35 1,7 1,7 Power supply V/ph/Hz 400/3/50 400/3/50 230/1/50 230/1/50 Nominal Air flow m3 /h 7200 7200 6200 6200 m3 /s 2 2 1,7 1,7 Sound pressure level (10 mt free field) dB 45 45 36 36 Weight Kg 69 69 85 85 Silent remote condenserStandard remote condenser
  • 11. FD750/980 Rev.12.2012 11 FD DRYING CAPACITY Condensed water kg/24 h FD Ambienttemperature°C 105 140 410270 510 15202530 860670 750 70% 80% 60% 50% 1000 Condensed water kg/24 h FD Ambienttemperature°C 105 140 410270 510 15202530 860670 980 70% 80% 60% 50% 1000
  • 12. FD750/980 Rev.12.2012 12 FD FAN PERFORMANCE AIR FLOW WITH DIFFERENT HEAD PRESSURES Available head pressure (Pa) 160 170 180 190 200 210 230 Air flow cm/h FD750 (Mid . fan speed) 6.200 6.000 5.800 5.600 5.500 5.400 5.300 Air flow cm/h FD980 (max. fan speed) 8.500 8.300 8.200 8.100 8.100 8.000 8.000 FUNCTIONING LIMITS Following Diagram represents FD units application . Operating Table – standard units In standard unit applications Table, on the left side is indicated operating limit extension, if unit is provided with hot gas defrost. Operation with hot gas defrost system It is strongly recommended to let the units operate within the below reported limits. Exceeding these limits it is not granted neither normal operation nor unit reliability and integrity (for special applications, please contact our Company).
  • 13. FD750/980 Rev.12.2012 13 FD PERFORMANCE TABLES FD750Ambient temperature Dehumidification capacity Input power Air temperature increase Thermal load in ambient [l/24h] [kW] [°C] [kW] Relative humidity 50% 10°C 116 5,4 7,1 8,7 15°C 155 5,9 10,5 12,8 20°C 210 6,4 17,4 17,4 25°C 295 6,5 18,3 18,3 30°C 305 7,3 25,4 25,4 35°C 459 9,3 30,2 30,0 Ambient temperature Dehumidification capacity Input power Air temperature increase Thermal load in ambient [l/24h] [kW] [°C] [kW] Relative humidity 60% 10°C 156 5,6 9,8 12 15°C 209 6,2 13,7 16,8 20°C 250 6,5 16,9 20,8 25°C 418 7,4 21,3 26,0 30°C 483 8,8 25,5 31,3 35°C 593 9,9 31,5 38,6 Ambient temperature Dehumidification capacity Input power Air temperature increase Thermal load in ambient [l/24h] [kW] [°C] [kW] Relative humidity 70% 10°C 181 5,6 11,6 14,3 15°C 242 6,2 16,5 20,2 20°C 307 6,4 20 24,5 25°C 505 6,7 24,9 30,5 30°C 573 9,3 30,7 37,6 35°C 700 9,9 37,3 45,7 Ambient temperature Dehumidification capacity Input power Air temperature increase Thermal load in ambient [l/24h] [kW] [°C] [kW] Relative humidity 80% 10°C 230 5,7 14,2 17,3 15°C 296 6,0 14,8 18,1 20°C 464 6,8 22,7 27,7 25°C 606 8,0 29,4 36,0 30°C 637 9,7 30,8 42,7 35°C 810 11,0 39,4 48,2
  • 14. FD750/980 Rev.12.2012 14 FD PERFORMANCE TABLES FD980Ambient temperature Dehumidification capacity Input power Air temperature increase Thermal load in ambient [l/24h] [kW] [°C] [kW] Relative humidity 50% 10°C 135 6,3 9,6 11,7 15°C 181 6,8 14,0 17,3 20°C 244 7,4 19,0 23,4 25°C 343 7,6 20,0 24,7 30°C 343 8,5 28,0 34,3 35°C 533 10,8 33,2 40,7 Ambient temperature Dehumidification capacity Input power Air temperature increase Thermal load in ambient [l/24h] [kW] [°C] [kW] Relative humidity 60% 10°C 181 6,5 13,3 16,2 15°C 243 7,2 18,5 22,7 20°C 291 7,6 22,9 28,0 25°C 486 8,6 28,7 35,3 30°C 561 10,3 34,5 42,2 35°C 688 11,5 42,5 52,0 Ambient temperature Dehumidification capacity Input power Air temperature increase Thermal load in ambient [l/24h] [kW] [°C] [kW] Relative humidity 70% 10°C 211 6,5 15,7 19,3 15°C 281 7,2 22,2 27,2 20°C 357 7,4 27,0 33,1 25°C 584 7,7 33,6 41,2 30°C 665 10,8 41,5 50,8 35°C 813 11,5 50,3 61,6 Ambient temperature Dehumidification capacity Input power Air temperature increase Thermal load in ambient [l/24h] [kW] [°C] [kW] Relative humidity 80% 10°C 267 6,6 19,0 23,4 15°C 344 7,0 20,0 24,5 20°C 539 7,9 30,5 37,4 25°C 705 9,4 39,7 48,6 30°C 798 11,3 47,0 57,6 35°C 941 12,8 53,1 65,0
  • 15. FD750/980 Rev.12.2012 15 FD CONTROL AND SAFETY DEVICES CONTROL DEVICES All the control devices are tested on factory before the unit is delivered. Their operating mode is described in the following paragraphs. HUMIDITY CONTROL SWITCH Humidity control switch enables or disables unit operation depending on the humidity value desired. To verify its correct operation, rotate the control knob clock wise (or set the desired value through the instrument keyboard if a keyboard instrument should be present) and set the humidity desired value close to lower limit. At this point verify that fan and compressor (after a time delay) will be started in sequence. Verify as well that the unit is stopped when humidity set is reached. SAFETY DEVICES All the safety devices are set and tested on factory before they are delivered. Their operating mode is described in the following paragraphs. HIGH PRESSURE SWITCH High pressure switch stops the unit when the discharge pressure exceeds its pre-set limit value. The reset is manual (by pressing the push-button at the top of the pressure switch located in the electric panel) and can be done only when pressure is decreased below the device reset value (see table below). LOW PRESSURE SWITCH Low pressure switch stops the unit when the suction pressure decreases below its limit pre-set value. The reset is automatic and it occurs only when pressure is higher than the device differential resetting value (see table below). DEFROST THERMOSTAT This device signals to electronic control that defrost procedure is needed. When defrost cycle is activated, defrost thermostat will control its conclusion. CONTROL DEVICES ACTIVATION DIFFERENTIAL REINSERTION High pressure switch (bar) 29 7.7 Manual Low pressure switch (bar) 0.7 2.2 Automatic Defrost temperature switch (°C) 1 3 Automatic All service operations on control and safety devices must be done by TRAINED PEOPLE ONLY: wrong setting values of the mentioned devices could cause serious damage to the unit and injuries to the people.
  • 16. FD750/980 Rev.12.2012 16 FD CONTROL DEVICE OF THE PHASE SEQUENCES Since the SCROLL compressors can function only in one rotating direction, this device controls that the phases be correctly connected. In case they may not be correctly connected, the machine will not start, a light will begin to flash in the relays and on the panel the green light ALARM will be ON , HYGROSTAT The hygrostat enables or disables unit operation depending on the humidity value desired. To verify its correct operation, rotate the control knob clock wise (or set the desired value through the instrument keyboard if keyboard instrument should be present) and set the humidity desired value close to lower limit. At this point verify that fan and compressor (after a time delay) will be started in sequence. Verify as well that the unit is stopped when humidity set is reached.
  • 17. FD750/980 Rev.12.2012 17 FD INSPECTION, TRANSPORT AND SITE HANDLING INSPECTION After receiving the unit, immediately check its integrity. The unit left the factory in perfect condition; any eventual damage must be questioned to the carrier and recorded on the Delivery Note before it is signed. Our firm must be informed, within 8 days, of the extent of the damage. The Customer must prepare a written statement of any severe damage. LIFTING AND SITE HANDLING The lifting is obtained by using a forklift: fork must be inserted in the base pallet, and care must be taken in order that the fork does not hit the section base or panel (see the picture below). To unload the unit with a crane, pass bars under the machine and attach the necessary cable or chain lifting devices to the bar, ensuring that they are clamped firmly; protect the sides of the chiller with boarding or material of a similar nature. UNPACKING When unpacking the unit pay attention not to damage the unit. The package is made up by different materials: wood, paper, nylon etc. It’s a good rule to keep them separately and deliver to the proper collecting centre in order to reduce their environmental impact. Lifting method with a crane Lifting method with a forklift Protection boarding Spacing bars 3m min
  • 18. 18 FD LOCATION Consideration must be given to the following points when determining the most suitable site for the unit installation:  location arrangement in order to guarantee adequate air flow (no narrow spaces)  electrical power sup ply location;  accessibility for servicing/maintenance and repair of the unit and/or its components;  floor loading strength and ability to support the operating weight of the unit;  possible objection to operating noise. INSTALLATION CLEARANCES Absolute care must be taken to ensure adequate air volume to the air intake and fan discharge, and to avoid air recirculation through the unit that will deeply reduce its performances. For these reasons it is necessary to observe the following clearances (see the pictures in the following pages): Mod. A B C D E FD360 500 800 800 800 800 FD520 500 800 800 800 800 E A B C D
  • 19. 19 FD MAINTENANCE AND PERIODIC CHECKS IMPORTANT WARNINGS WARNING: Inside the unit some moving components are present. Be very careful when operating in their surroundings even if the electric supply is disconnected. WARNING: The unit should be installed so that maintenance and/or repair services be possible. The warranty does not cover costs due to lifting apparatus, platforms or other lifting systems required by the warranty interventions. WARNING: The top shell and discharge line of compressor are usually at high temperature level. Be very careful when operating in their surroundings. WARNING: Aluminium coil fins are very sharp and can cause serious wounds. Be very careful when operating in their surroundings. WARNING: After servicing operation close the unit with cover panels, fixing them with locking screws. All this operation described in this chapter MUST BE DONE BY TRAINED PEOPLE ONLY Before every operation of servicing on the unit, be sure that the electric supply has been disconnected. In the inner side of the unit movable parts are present. Be very careful when operating in their surroundings. Aluminium coil fins are very sharp and can cause serious wounds. Be very careful when operating in their surroundings. After servicing operations, close the unit with cover panels, fixing them with locking screws.
  • 20. 20 FD CONNECTION TO THE CONDENSED WATER DRAINAGE FITTING Connect condensed water drainage fitting (¾’’ M) to a draining pipe. It should be always avoided to form a doubble siphon, which could obstruct the water flowing with the consequent risk of flooding the area. DUCT WORK UNIT CONNECTION All the units are provided with a centrifugal fan that can be ducted. If only one side should be ducted, a flanged connection with overall dimensions larger than discharge hole should be used. If either suction side should be ducted, remove suction air filter and its panel, use a flanged connection with overall dimensions larger than suction hole located on the front of the unit and install an air filter into the suction ductwork. It is very important to install an air filter into the suction ductwork if the filter of the machine itself has been removed . If this filter should not be present, serious damage could occur to the units. See pag.11 for airflow performances
  • 21. 21 FD REFRIGERANT CONNECTIONS FOR TCR VERSIONS The maximum distance between the two units should be 12 mt, The diameter of liquid pipe is 14 mm of gas pipe 22mm. For each mt of piping line add 145 grams of R407c. Vertical distance between the units (Hv): -2m(*)<Hv<+8m [(*)with siphone] Cause the oil during exchange of function (from dehumidifing to cooling) can return to the machine the pendence of piping towards the indoor unit should be minimum 2% Wiring connection between the units: 3x1.5mm²+ground,for power cable section look machine absorption Front Panel Dehumidifier higher than condenser Front Panel Dehumidifier lower than condenser
  • 22. 22 FD REFRIGERANT LAY-OUT VERSION FD-FDS AND TCR VERSION REFRIGERANT LAY-OUT VERSION FD-TCR - - - - Only for “S” version T.V Expansion Valve COND. Condenser S.V Solenoid valve EVAP. Evaporator VRL One way valve FL Liquid line filter C.FAN Centrifugal fan LPS Low pressure switch MAF Motor axial fan HPS High pressure switch L.R. Liquid receiver M.V Manual valve CV Charge valve RE Liquid separator CAP Capillary
  • 23. 23 FD ELECTRICAL CONNECTIONS Generality Power supply V/~/Hz 400 / 3 / 50 Control circuit V/~/Hz 230 / 1 / 50 Auxiliary circuit V/~/Hz 230 / 1 / 50 Fans power supply V/~/Hz 230 / 1 / 50 Remote condenser fan supply (FD750 version) V/~/Hz 400 / 3 / 50 Remote condenser fan supply (FD980 version) V/~/Hz 400 / 3 / 50 It must be verified that electric supply is corresponding to the unit electric nominal data (tension, phases, frequency) reported on the label in the front panel of the unit. Power connections must be made using a three-wire cable + neutral wire + ground cable. Before every operation on the electric section, be sure that the electric supply is disconnected. Main supply must be protected with a differential switch Close to the unit a main switch must be present. Power cable and line protection must be sized according norm and laws according with absorbed current of the machine (see technical data). The line voltage fluctuations must not be more than ±5% of the nominal value, while the voltage unbalance between one phase and another must not exceed 2%. If those tolerances should not be respected, please contact our Firm to provide proper devices. Electric supply must be in the limits shown: in the opposite case warranty will terminate immediately. Electrical connections therefore must be always done according to the instructions reported on the wiring diagram enclosed with the unit and norms and laws. This machines series belongs to the electric appliances functioning at low tension (230/400 V). Please read carefully all safety norms
  • 24. 24 FD Ground connection is compulsory. Installer must connect ground cable with a dedicated terminal on the apposite terminal block. Main supply connection The Electric Power Supply Connection must be carried out according to the indications given in the Electric Diagram, by connecting the cable supplied with the machine and according with safety norm. Models FD750 must be electrically powered with 3 phase-neutral-earth. Models FD980 must be electrically powered with 3 phase-neutral-earth. The compressor has only one allowable rotation direction; therefore, the machine has a control device for the phases sequence; in case that it may show a wrong sequence, the device inform you with a blinking light; in this case two phases must be interchanged. Pay much attention to above indications because the compressor will be damaged if the rotation direction is not correct. Remote humidistat connections Remote humidistat connection must be realised according with electric diagram. Connections must be done according to the electric wiring diagram specifications. START UP PRE-START CHECK Before to proceed to start up, close electrical line main switch (not supplied with the unit): the green led (line) will be lit up. All the units are provided with microprocessor control that manages all the various functions of the unit. To start the unit, activate humidity switch by rotating the knob or by pressing the instrument keyboard, depending on the type of instrument installed): the green light (WORKING) will be ON. Check that all power cables are correctly connected and all terminals are fastly fixed. The voltage at the phase R S T clamps must be the one indicated on the unit label ± 5% tolerance. If this should not happen, please, contact our Factory. Caution: before proceeding to start up, check that all the cover panel be located in the proper position and locked with fastening screws. For temporary stop (night-time, weekend, etc.) never break the power supply and strictly follow the procedures illustrated at paragraph 4.6
  • 25. 25 FD SIGNALLING LEDS PANEL Units are provided with signalling light panel that indicates unit operational status. Below is reported a brief description of their meaning. Electrical supply RED Light (POWER): indicates that unit is properly electrically supplied. Compressor RED Light (WORKING): indicates humidistat call and running compressor status. Alarm GREEN Light (ALARM): indicates the unit alarm status. Defrost Light (RED): indicates that the defrost cycle is on. MACHINE STOP (STAND BY) If the machine is connected, it works with automatic system controlled by a humidostat. When the humidostat activates the defrost system, only the light Power is ON When one wishes to turn off the machine, the knob of the humidostat must be set on position OFF. Before the first Start-up, the machine must be kept in STAND-BY position at-least for 4 hours. Led status signalling panel
  • 26. 26 FD REMOTE CONTROL It is possibile to use a remote control with the machine. In this case must be used a remote humidostat to be connected to the terminal boxes of the electric panelboard in place of the standard humidostat. It is also possible to have an ON-OFF switch to be electrically connected in series to the humidostat. GENERAL OBSERVATIOTIONS AND ADVISE It is a good rule to carry on periodic checks in order to verify the correct working of the unit: POWER SAVINGS To reduce power consumption, take care of following suggestions : Check that safety and control devices are working correctly (monthly). Make sure that all the terminals on the electric board and on the compressor be well locked. Periodic cleaning of the sliding terminals of the contactors should be done: if any damage is found, please replace the contactors (monthly). Make sure that there is no oil leakage from compressor (monthly). Check that the electric resistance in the compressor crankcase be properly functioning (monthly: low temperature units only). Clean draining pan and pipeline (monthly). Clean finned coils filters with compressed air in the opposite direction of the airflow. If filters should be fully clogged, clean them with a water jet to be sprayed against the air flow side(monthly or more frequently if the unit operates on a dusty environment). Check mounting of fan blades and their balancing (every 4 months). Make sure that room in which unit should operate has doors and windows firmly closed; Set the humidity control switch to the proper value: lower set values than necessary (even few points) may cause great capacity loss with consequently longer operating periods: it is advisable to set humidity values below 60% only if strictly necessary. For the machine which has a second condenser (monoblock or split system) check every month if the heat exchanger is clean and free from room dust, and check the efficiency of the motorfan.
  • 27. 27 FD DISPOSAL OF THE UNIT AT END OF ITS LIFE Once the unit is arrived at the end of its life and needs to be removed or replaced, the following operations are recommended: These operations allow easy material recovery and recycling process, reducing environmental impact. It is recommended to follow the pertinent norms in the disposal of the wasted materials. TROUBLE SHOOTING In the following pages are reported the most common troubles that can cause the unit to stop or to operate in an uncorrect way. UNIT UNDER ALARM When red light is lit up, the unit is stopped and set under alarm condition. The unit refrigerant has to be recovered by trained people and sent to proper collecting centre; Ccompressor lubricating oil has to be recovered and sent to proper collecting centre; the frame and various components, if no longer usable , have to be dismantled and subdivided according to their nature; in particular, copper and aluminium, which are present in conspicuous quantity in the unit. Concerning the solutions, it is necessary to take an extreme care on the actions to adopt: an excessive confidence may cause serious accidents to inexperienced people. It is advisable, once the cause is detected, to contact our servicing people or trained people only. To restore normal operating mode, it is necessary to detect and remove the cause of the alarm
  • 28. 28 FD PROBLEM LED ON PROBABLE CAUSE CORRECTIVE ACTION A Unit does not start but alarm green led is off None Power supply missing Provide power supply, replace fuses Power supply led Humidistat on set Set a lower set point Power supply led, Compressor thermal protection enabled, compressor defective Let the compressor cool down, replace compressor defective Power supply led, Compressor thermal protection enabled, compressor defective fan defective Let the compressor cool down, replace compressor defective, replace fan defective Any led Electronic board or led Board defective Replace defective board PROBLEM LED ON PROBABLE CAUSE CORRECTIVE ACTION B Fan starts, compressor does not start, but red alarm led Power supply led, running led Compressor thermal Protection enabled, compressor defective Let the compressor cool Down, replace compressor defective Any led Electronic board or led Board defective Replace defective board
  • 29. 29 FD PROBLEM LED ON PROBABLE CAUSE CORRECTIVE ACTION C Fan starts, compressor does not start, but red alarm led is on Red alarm led Air filter clogged Clean filter and reset unit Red alarm led Low refrigerant charge Charge the system Red alarm led Open panel, low air flow, suction side obstructed, high pressure switch on Close the panel, clear Suction side, reset high pressure switch Any led Electronic board or led Board defective Replace defective board
  • 31. 31 FD
  • 32. 32 FD
  • 33. 33 FD DRAWINGS (lay out) INSTALLATIONDUCTING Min. Distance 200 mm INSTALLATION WALL CEILING INSTALLATION ON TROLLEY
  • 35. 35 FD DIMENSIONAL DRAWINGS STANDARD OUTSIDE CONDENSER FOR THE CORRECT SIZE LOOK THE TABLE IN PAG.10..IT IS ONLT A SAMPLE
  • 36. 36 FD DIMENSIONAL DRAWINGS SILENT OUTSIDE CONDENSER FOR THE CORRECT SIZE LOOK THE TABLE IN PAG.10..IT IS ONLT A SAMPLE