Fadal Safety Siemens Maintenance Manual.pdf
•
0 likes•120 views

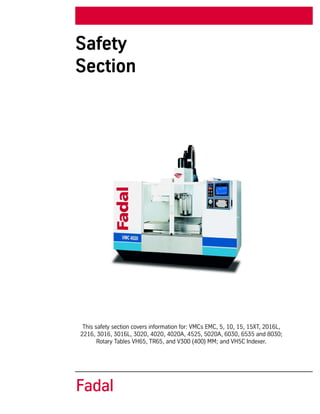
ITSCNC offer fadal safety section manual covers information for VMCs EMC, 5, 10, 15, 15XT, 2016L, and 8030; Rotary Tables and V300 (400) MM; and VH5C Indexer.

Recommended
Recommended
More Related Content
Similar to Fadal Safety Siemens Maintenance Manual.pdf
Similar to Fadal Safety Siemens Maintenance Manual.pdf (20)
More from Independent Technology Service Inc
More from Independent Technology Service Inc (20)
Recently uploaded
Recently uploaded (20)
Fadal Safety Siemens Maintenance Manual.pdf
- 1. Safety Section Fadal This safety section covers information for: VMCs EMC, 5, 10, 15, 15XT, 2016L, 2216, 3016, 3016L, 3020, 4020, 4020A, 4525, 5020A, 6030, 6535 and 8030; Rotary Tables VH65, TR65, and V300 (400) MM; and VH5C Indexer.
- 2. August 2001 SS-i Safety Section SAFETY SECTION Fadal TABLE OF CONTENTS TABLE OF CONTENTS............................................................................................................................... 1 MODIFICATIONS, ALTERATIONS, AND CHANGES.............................................................................................. 3 SAFETY WARNINGS ...................................................................................................................................... 4 GENERAL..................................................................................................................................................... 7 WARNINGS AND CAUTIONS ........................................................................................................................... 8 PICTORIALS ................................................................................................................................................. 8 POTENTIAL HAZARDS TO PERSONNEL............................................................................................................ 8 PHYSICAL ENVIRONMENT AND OPERATING CONDITIONS (CE SPECIFICATIONS).................................................. 8 ELECTRIC SHOCK ......................................................................................................................................... 9 SHARP EDGES ON CUTTING TOOLS................................................................................................................ 9 ROTATING CUTTING TOOLS........................................................................................................................... 9 NOISE ......................................................................................................................................................... 10 NOISE (CE COMPLIANCE)............................................................................................................................... 10 COMPRESSED AIR (CE COMPLIANCE).............................................................................................................. 11 ADDITIONAL SAFETY PRECAUTIONS............................................................................................................... 12 SAFETY LABELS........................................................................................................................................ 14 LBL-0123 .................................................................................................................................................... 14 LBL-0129 .................................................................................................................................................... 15 LBL-0158 .................................................................................................................................................... 15 LBL-0127 .................................................................................................................................................... 15 LBL-0130 .................................................................................................................................................... 16 LBL-0163 .................................................................................................................................................... 16 LBL-0126 .................................................................................................................................................... 17 LBL-0128 .................................................................................................................................................... 18 LBL-0125 .................................................................................................................................................... 19 LBL-0235 .................................................................................................................................................... 20 LBL-0131 .................................................................................................................................................... 21 LBL-0263 .................................................................................................................................................... 21 LBL-0187 .................................................................................................................................................... 22 LBL-0234 .................................................................................................................................................... 22 LBL-0124 .................................................................................................................................................... 23 LBL-0040 .................................................................................................................................................... 24 LBL-0036 .................................................................................................................................................... 24 SAFETY LABEL LOCATIONS..................................................................................................................... 25 4020S......................................................................................................................................................... 25 5020A, 4020A, 4020, 3016L, 2216, 2016L, 15, 15XT ...................................................................................... 27 6030, 8030.................................................................................................................................................. 29 4525, 3020.................................................................................................................................................. 33
- 3. SAFETY SECTION Safety Section SS-ii August 2001 Fadal CE SAFETY LABELS................................................................................................................................... 37 LBL-0431 small (CE) LBL-0434 large (CE) ........................................................................................................ 37 LBL-0432 (CE) .............................................................................................................................................. 37 LBl-0132 (CE) ............................................................................................................................................... 38 LBL-0435 (CE) .............................................................................................................................................. 38 LBL-0460 (CE) .............................................................................................................................................. 39 LBL-0430 (CE) .............................................................................................................................................. 39 LBL-0436 (CE) .............................................................................................................................................. 40 LBL-0433 (CE) .............................................................................................................................................. 40 LBL-0443 (CE) .............................................................................................................................................. 41 PROHIBITIONS .......................................................................................................................................... 42 LBL-0441 (CE) .............................................................................................................................................. 42 REQUIRED ACTIONS................................................................................................................................. 43 LBL-0439 (CE) .............................................................................................................................................. 43 LBL-0440 (CE) .............................................................................................................................................. 43 LBL-0442 (CE) .............................................................................................................................................. 44 LBL-0438 small (CE) LBL-0437 large (CE) ........................................................................................................ 44 CE SAFETY LABEL LIST AND LOCATION ................................................................................................ 45
- 4. SAFETY SECTION Safety Section SS-2 May 2002 Fadal Corporate Office voice (818) 407-1400fax (818) 407-0020 Service / Parts voice (818) 727-2100fax (818) 407-1004 Programming Support voice (818) 727-2100fax (818) 407-0061 support@fadal.com 20701 Plummer Street Chatsworth California 91311 U.S.A. The information in this document is reviewed regularly and any necessary changes will be incorporated in the next revision. We welcome any suggestions for improvement. Material is subject to change without notice. This manual is for the exclusive use of Fadal Customers and Distributors. The reproduction, transmission or use of this document or its contents is not permitted without the expressed written permission of Fadal Machining Centers. © Copyright 2001 Fadal Machining Centers.
- 5. May 2002 SS-3 Safety Section SAFETY SECTION Fadal MODIFICATIONS, ALTERATIONS, AND CHANGES Do not modify or alter this equipment without the written approval of Fadal Machining Centers. Unauthorized changes may lead to hazardous conditions. Address any questions to Fadal’s Service Department.
- 6. SAFETY SECTION Safety Section SS-4 May 2002 Fadal SAFETY WARNINGS 1. WARNING! WEAR ANSI or CE APPROVED SAFETY GLASSES AT ALL TIMES. Everyday glasses are not designed for protection. Only ANSI or CE approved safety glasses have impact resistant lenses. Hearing protection must be worn when operations exceed 90 (85 CE) decibels. 2. KEEP DOORS CLOSED WHILE MACHINING. 3. WEAR PROPER APPAREL. Do not wear loose clothing, gloves, neckties, rings, bracelets, or other jewelry that might get caught in moving parts or areas of potential electric shock. Non-slip footwear is recommended. 4. CONTAIN LONG HAIR. Tie long hair back and wear protective hair covering to contain long hair. 5. USE A NIOSH OR CE APPROVED DUST MASK OR RESPIRATOR. Protection is recommended when cutting operations are dusty, or exceed the permis- sible exposure limit. 6. KEEP WORK AREA CLEAN. Good housekeeping practices encourage safety. 7. Read SPINDLE, MANUALLY LOADING & UNLOADING A HOLDER in the Operator’s Manual. 8. DO NOT OPERATE THE MACHINE UNDER THE INFLUENCE OF DRUGS OR ALCOHOL, PRESCRIBED OR OTHERWISE. 9. READ THE SAFETY WARNINGS SUPPLIED WITH ALL TOOLING. 10. MAINTAIN TOOLS WITH CARE. Keep tools sharp and clean for best perfor- mance and to reduce the risk of injury. Follow instructions for lubrication and for changing accessories. 11. REMOVE ADJUSTING KEYS AND WRENCHES. Always check that keys and wrenches are removed from tools and tooling before starting the machine. 12. DO NOT EXCEED THE MANUFACTURER’S RECOMMENDED MAXIMUM RPM FOR THE TOOL. When tools are placed in the spindle, verify the current RPM commanded in the control before starting the spindle. 13. SECURE TOOLS PROPERLY IN THEIR HOLDERS. 14. SECURE WORK. Use common machining practices for holding (fixturing) material to be machined. 15. REMOVE ALL TOOLS FROM THE SPINDLE AND TOOL CHANGER before ser- vicing and changing accessories such as tooling, fixtures, indexers, the tail stock of a fourth axis and any fourth axis or fourth-fifth axis combination, etc. 16. ALWAYS DEBUG A NEW PROGRAM before running it in the AUTO mode. (See DEBUG PROGRAM in the User’s Manual.) 17. The machine tool MUST be connected to a grounded, metal, permanent wiring system, or to a system having an equipment-grounding conductor.
- 7. May 2002 SS-5 Safety Section SAFETY SECTION Fadal 18. DO NOT OPERATE THE MACHINE IN AN UNSAFE ENVIRONMENT. Do not use the machine in damp or wet locations, or expose to rain. Keep the work area well lighted. 19. DO NOT FORCE TOOL. Tools are designed to perform properly and safely at proper rates. Keep tools sharp. 20. USE THE CORRECT TOOL. Do not attempt to use tools or attachments to perform a job for which they were not designed. 21. DON’T OVERREACH. Keep proper footing and balance at all times. Use a steady object for support when reaching over the machine. 22. REDUCE THE RISK OF UNINTENTIONAL STARTING. Power off the machine at the main disconnect switch and use the proper lockout/tagout proce- dures while working within the chip enclosure, or when there is potential for a release of energy. 23. POWER OFF THE MACHINE AT THE MAIN DISCONNECT SWITCH AND LOCK OUT WHEN WORKING INSIDE ANY OF THE ELECTRONIC CABINETS. 24. USE RECOMMENDED ACCESSORIES. Refer to the User’s Manual for FADAL recommended accessories. Unapproved accessories increase the risk of injury. 25. NEVER STAND ON OR IN THE MACHINE. Besides the risk of slipping or fall- ing, serious injury could occur if a tool is unintentionally contacted. 26. CHECK FOR DAMAGED PARTS. Always check all parts for binding, break- age, and any other condition that will affect the proper operation of the machine and/or increase the risk of injury. Damaged or missing parts must be repaired or replaced BEFORE operating the machine. 27. NEVER LEAVE THE MACHINE UNATTENDED. Turn the power off to the machine when leaving the machine unattended. Never leave the machine until it comes to a complete stop. 28. DO NOT DISCONNECT THE FRONT DOOR SAFETY SWITCHES. 29. )WIPE UP SPILLS. Immediately cover with absorbent material and wipe up coolant and oil spills around the machine. Correct the cause of the leakage to prevent any hazards. 30. ELECTRICAL INSTALLATION OF THE MACHINE MUST BE DONE BY A QUAL- IFIED ELECTRICIAN. 31. ONLY FADAL OR FADAL DISTRIBUTOR FACTORY AUTHORIZED INDIVIDU- ALS MAY INSTALL THE MACHINE. 32. USE PROPER SAFETY GLOVES WHEN HANDLING SHARP OR JAGGED EDGES. Do not wear gloves around rotating machinery.
- 8. SAFETY SECTION Safety Section SS-6 May 2002 Fadal 33. DO NOT USE AIR HOSES TO BLOW CHIPS OFF YOUR BODY OR CLOTHES. Serious injury to your eyes, hearing, and skin could result. Do not blow towards others.
- 9. May 2002 SS-7 Safety Section SAFETY SECTION Fadal GENERAL A carelessly or improperly operated VMC can cause serious injury or death as well as damage or destruction of equipment. The emergency and safety procedures in this manual are to help users operate the VMC in a safe manner. The warnings in this manual follow accepted industry safety practices. Tasks involving toxic materials must be reviewed and approved by an industrial hygienist or safety engineer. Fadal has no control over the applications the operator may use the VMC for and is not responsible for injuries or equipment damage. Read and understand the User’s Manual. The safe use and disposal of all hazardous materials processed or used by the VMC is the responsibility of the user. All safety warnings and procedures must be followed. It is the sole responsibility of the user to comply with all local, state, national (Federal), and international and environmental safety laws and regulations applicable to the VMC and its use.
- 10. SAFETY SECTION Safety Section SS-8 May 2002 Fadal WARNINGS AND CAUTIONS This manual contains information that will assist qualified operators and maintenance personnel. Unqualified operators should never attempt to operate or perform maintenance on the VMC. PICTORIALS Pictorials are used within warnings to rapidly communicate a hazard to the reader. The pictorials and their meaning are given in this section. A diagram of the locations and types of warnings that are physically attached to, or engraved on, the VMC is also included. POTENTIAL HAZARDS TO PERSONNEL The most serious potential hazards associated with the VMC are: • electric shock • sharp edges on cutting tools • rotating cutting tools • noise • compressed air PHYSICAL ENVIRONMENT AND OPERATING CONDITIONS (CE SPECIFICATIONS) FADAL VMCs meet or exceed the environmental requirements stated in EN 60204-1:1992 section 4.4. Electromagnetic Compatibility meets or exceeds the levels specified by EN 50081-2:1993 and EN 50082-2:1995. Ambient air temperature conforms as specified in EN60204-1:1992 section 4.4.2 (+5 deg C to +40 deg C). Humidity conforms as specified in EN60204-1:1992 section 4.4.3 (relative humidity 30% to 95% non-condensing). Altitude conforms as specified in EN60204-1:1992 section 4.4.4 (maximum altitude without derating exceeds 1000 meters above sea level). Contaminants conform as specified in EN60204-1:1992 section 4.4.5. Equipment is not intended for use in a corrosive atmosphere. Equipment that will be used in an environment with excessive amounts of fine conductive particulate matter (e.g. graphite) must be ordered with the graphite restraint package.
- 11. May 2002 SS-9 Safety Section SAFETY SECTION Fadal ELECTRIC SHOCK The VMC has numerous subsystems powered by high voltage electricity. This electricity is not a hazard during most operations, however certain maintenance operations conducted by qualified individuals may require the defeat of interlocks so that power may be maintained during diagnostics or adjustments tasks. Under no circumstances should the operator defeat any interlock. Read all applicable manuals and follow their warnings to prevent accidental electric shock. Operators must never remove shields or panels, nor should operators bypass or otherwise disable interlocks. SHARP EDGES ON CUTTING TOOLS Cutting tools have sharp edges that could lead to a serious cut. The tools used on the VMC are stored in a tool tray when not being used. Under most circumstances they pose no threat to operator or maintenance personnel. It is possible for personnel to come into contact with stationary cutting tools during job setup or when replacing cutting tools for any reason. Extreme care must be taken to avoid coming into contact with the sharp edges on cutting tools. ROTATING CUTTING TOOLS Rotating cutting tools used by the VMC create potential hazards of entanglement. A cutting hazard is also possible if the operator comes into contact with rotating cutting tools. The Polycarbonate shield is equipped with an interlock to prevent the VMC from operating when the shield is opened. Under no circumstances should operators disable or remove the interlocks. If the interlock is not functioning properly, qualified maintenance personnel should be notified and the VMC must not be used until it is functioning properly. Prior to starting any job, the operator on the VMC should inspect all of the cutting tools being used to ensure they are in good condition and free of defects such as cracks. The operator should also insure that only the appropriate cutting tools for the material being machined are present. Using the wrong tool or using a damaged tool could result in the failure of the tool or material being machined. Failure of either could lead to pieces of either the tool or the material being ejected at extremely high speed. Ejection of either could lead to serious injury or death to personnel in the vicinity. Major equipment damage could also be sustained.
- 12. SAFETY SECTION Safety Section SS-10 May 2002 Fadal NOISE Exposure to occupational hazardous noise or prolonged exposure to noise above 90 decibels may cause permanent hearing damage. The amount of noise the VMC produces varies by the type of material, speed of the cut, and several other factors. To prevent loss of hearing from the noise of an operating VMC, hearing protection must always be worn by personnel exposed to noise above 90 decibels or above. The level of protection required may vary because of variation in the amount of noise being produced by the VMC. To insure adequate hearing protection is attained, compliance with OSHA standards is required. Consult a qualified industrial hygienist or safety engineer to insure adequate protection prior to operating the VMC. NOISE (CE COMPLIANCE) Exposure to occupational hazardous noise or prolonged exposure to noise above 85 decibels may cause permanent hearing damage. The amount of noise the VMC produces varies by the type of material, speed of the cut, and several other factors. To prevent loss of hearing from the noise of an operating VMC, hearing protection must always be worn by personnel exposed to noise above 85 decibels or above. The level of protection required may vary because of variation in the amount of noise being produced by the VMC. To insure adequate hearing protection is attained, compliance with CE standards is required. Consult a qualified industrial hygienist or safety engineer to insure adequate protection prior to operating the VMC. Continuous equivalent A-weighted sound pressure at workstation is 77dB(A) or less when tested according to Annex D of prEN 12417. The figures quoted are emission levels and are not necessarily safe working levels. While there is a correlation between the emission and exposure levels, this cannot be used reliably to determine whether or not further precautions are required. Factors that influence the actual level of exposure of the workforce include characteristics of the work room, the other sources of noise, etc. i.e., the number of machines and other adjacent processes. Also the permissible exposure level can vary from country to country. This information, however, will enable the user of the machine to make a better evaluation of the hazard and risk.
- 13. May 2002 SS-11 Safety Section SAFETY SECTION Fadal COMPRESSED AIR (CE COMPLIANCE) Compressed air poses a potential hazard from flying debris. Under normal conditions the compressed air may not present a hazard to the operator. Failure of any component of a compressed air system may cause parts to be ejected at high speed. Operators and maintenance personnel must always wear eye protection that meets OSHA standards and ANSI standard Z87.1 (or CE standards) when working on systems that use compressed air. The operator may also use their shop’s compressed air to remove debris from material being machined. If shop air is used for this purpose, it must be done in accordance with OSHA or CE standards. Alternative means of debris removal, such as debris rakes, should be considered. UNDER NO CIRCUMSTANCES SHOULD THE OPERATOR ATTEMPT TO REMOVE DEBRIS WHILE THE VMC IS RUNNING. Consult a qualified industrial hygienist or safety engineer to insure debris removal is accomplished in a safe manner and in a manner that complies with local, state, national (Federal), and international regulations.
- 14. SAFETY SECTION Safety Section SS-12 May 2002 Fadal ADDITIONAL SAFETY PRECAUTIONS Compliance with the following safety practices is required to safely operate the VMC: 1. Never work alone on live electrical circuits. Another person qualified to turn off power to the VMC must be present when voltage is 600 or over. That person must also know CPR (cardiopulmonary resuscitation) and company emergency procedures. 2. Never wear jewelry or loose fitting clothing while working on the VMC. Long hair should be secured and under a cap. 3. .Wear eye protection when operating or maintaining this machine. 4. Never operate this machine without all guards, safety shields, and inter- locks in place and functioning properly. 5. Report any unsafe conditions to the supervisor immediately. Do not operate this machine until the unsafe condition has been resolved. If the operator is not familiar with a condition, consult an industrial hygienist or safety engi- neer for approval prior to proceeding. 6. Comply with all local, state, national (Federal), and international (CE) regu- lations pertaining to the handling, processing or disposal of hazardous materials used in conjunction with VMC operations. 7. Do not leave electrical cords where they may be tripped over. Secure all electrical cords and compressed air lines connected to the VMC. 8. Keep a UL or CE approved fire extinguisher close to the VMC and make sure all personnel know the location of the fire extinguisher. 9. Do not turn the VMC on or try to operate it if there are explosive or flamma- ble gases present. 10. Do not install substitute parts or modify the VMC without consulting a safety engineer. Contact FADAL or your local distributor for authorized repair parts and service. 11. The Polycarbonate viewing panels are an integral part of the safety enclo- sure for the VMC. They must be inspected at least monthly for any signs of reduced effectiveness (such as cracking or crazing) and replaced immedi- ately if such signs or other indications of reduced effectiveness are noticed. Furthermore, tests have indicated that coolants can reduce the effective- ness of the panels over a period of time, therefore the panels should be replaced, regardless of condition, at least every two years.
- 15. May 2002 SS-13 Safety Section SAFETY SECTION Fadal 12. The Polycarbonate shield is equipped with an interlock to prevent the VMC from operating when the shield is opened. Under no circumstances should the operator disable or remove the interlocks. If power is lost to the VMC, the spindle will free wheel for 30 seconds. Under no circumstances should the operator open the Polycarbonate shield before the spindle stops rotat- ing completely. 13. The machine is not intended for use with flammable or harmful sub- stances. 14. Take appropriate additional safety precautions and measures when work- ing with magnesium, wood, or other combustible materials. 15. Dust removal equipment is needed when working with dust-producing materials or procedures. 16. Due to danger of slips or falls on a wet or oily surface, table and enclosure floor should be clean and dry before using them for maintenance access. 17. Do not enter enclosure area unless machine is off and power is locked out.
- 16. SAFETY SECTION Safety Section SS-14 May 2002 Fadal SAFETY LABELS LBL-0123
- 17. May 2002 SS-15 Safety Section SAFETY SECTION Fadal LBL-0129 LBL-0158 LBL-0127
- 18. SAFETY SECTION Safety Section SS-16 May 2002 Fadal LBL-0130 LBL-0163
- 19. May 2002 SS-17 Safety Section SAFETY SECTION Fadal LBL-0126
- 20. SAFETY SECTION Safety Section SS-18 May 2002 Fadal LBL-0128
- 21. May 2002 SS-19 Safety Section SAFETY SECTION Fadal LBL-0125
- 22. SAFETY SECTION Safety Section SS-20 May 2002 Fadal LBL-0235
- 23. May 2002 SS-21 Safety Section SAFETY SECTION Fadal LBL-0131 LBL-0263
- 24. SAFETY SECTION Safety Section SS-22 May 2002 Fadal LBL-0187 LBL-0234
- 25. May 2002 SS-23 Safety Section SAFETY SECTION Fadal LBL-0124
- 26. SAFETY SECTION Safety Section SS-24 May 2002 Fadal LBL-0040 LBL-0036
- 27. May 2002 SS-25 Safety Section SAFETY SECTION Fadal SAFETY LABEL LOCATIONS 4020S LBL-0123 LBL-0234 LBL-0129 LBL-0234 LBL-0123 LBL-0163
- 28. SAFETY SECTION Safety Section SS-26 May 2002 Fadal LBL-0235 LBL-0125 LBL-0128 LBL-0234
- 29. May 2002 SS-27 Safety Section SAFETY SECTION Fadal 5020a, 4020a,4020, 3016L, 2216, 2016L, 15, 15xt, EMC LBL-0128 LBL-0263 LBL-0235 LBL-0128 LBL-0263 LBL-0126
- 30. SAFETY SECTION Safety Section SS-28 May 2002 Fadal LBL-0125 LBL-0125 LBL-0235 LBL-0127
- 31. May 2002 SS-29 Safety Section SAFETY SECTION Fadal 6030, 8030 LBL-0123 LBL-0128 LBL-0263 LBL-0235 LBL-0128 LBL-0263
- 32. SAFETY SECTION Safety Section SS-30 May 2002 Fadal LBL-0235 LBL-0126 LBL-0129 LBL-0124
- 33. May 2002 SS-31 Safety Section SAFETY SECTION Fadal LBL-0235 LBL-0125 LBL-0123 LBL-0163 LBL-0128
- 34. SAFETY SECTION Safety Section SS-32 May 2002 Fadal LBL-0128 LBL-0263 LBL-0235 LBL-0128 LBL-0263 LBL-0235
- 35. May 2002 SS-33 Safety Section SAFETY SECTION Fadal 6535, 4525, 3020 LBL-0126 LBL-0036 LBL-0123
- 36. SAFETY SECTION Safety Section SS-34 May 2002 Fadal LBL-0128 LBL-0123 LBL-0128 LBL-0263 LBL-0126
- 37. May 2002 SS-35 Safety Section SAFETY SECTION Fadal LBL-0128 LBL-0263 LBL-0036 LBL-0235 LBL-0125
- 38. SAFETY SECTION Safety Section SS-36 May 2002 Fadal LBL-0235 LBL-0125
- 39. May 2002 SS-37 Safety Section SAFETY SECTION Fadal CE SAFETY LABELS LBL-0431 small (CE) LBL-0434 large (CE) Cutting of Fingers or Hand / Rotating Cutter Cutting tools can seriously injure. Never place any part of your body near rotating tools. Do not operate this machine unless the doors are closed and the door interlocks are working. LBL-0432 (CE) Hand Entanglement / Belt Drive Rotating pulleys and belts can seriously injure. Never place any part of your body near rotating or moving parts. Always insure that guards are in place before operating this machine.
- 40. SAFETY SECTION Safety Section SS-38 May 2002 Fadal LBl-0132 (CE) Electric Shock / Electrocution Hazardous voltages in this enclosure can kill. Do not operate with the door open. Servicing should be done by qualified personnel only. Lockout the power before servicing. LBL-0435 (CE) Flying Debris and Loud Noise Flying objects from this machine may injure. Always wear safety glasses when operating this machine. Do not operate this machine with the doors open or the enclosures removed. Also, noise from this machine can damage hearing. Always wear ear protection when operating this machine.
- 41. May 2002 SS-39 Safety Section SAFETY SECTION Fadal LBL-0460 (CE) Flying Debris Flying debris and compressed air can cause eye injuries. Do not perform maintenance on pressurized systems. Disconnect the air source before performing maintenance. Always wear eye protection when performing maintenance on compressed air systems. LBL-0430 (CE) Skin Puncture / Pressurized Air Compressed air can seriously injure. Do not perform maintenance on pressurized systems. Disconnect air source before performing maintenance. Always wear eye protection when performing maintenance on compressed air systems.
- 42. SAFETY SECTION Safety Section SS-40 May 2002 Fadal LBL-0436 (CE) Leg or Body Entanglement / Auger Auger can serious injure or kill. Keep body parts out of the auger system at all times. Turn off the machine and lockout the power before doing maintenance inside the enclosure. LBL-0433 (CE) Hand Crush / Moving Parts Automatic pallet changer door will crush hands. Stand clear when the door is closing.
- 43. May 2002 SS-41 Safety Section SAFETY SECTION Fadal LBL-0443 (CE) Hand Crush / Force from Side Automatic pallet changer can crush hands. Do not place hands or any part of the body in the path of a moving pallet.
- 44. SAFETY SECTION Safety Section SS-42 May 2002 Fadal PROHIBITIONS LBL-0441 (CE) Do Not Operate with Guard Removed Do not operate this machine with the doors open or the guards removed. Moving machinery and rotating cutters can seriously injure or kill.
- 45. May 2002 SS-43 Safety Section SAFETY SECTION Fadal REQUIRED ACTIONS LBL-0439 (CE) Wear Eye Protection Flying objects may injure. Always wear safety glasses when operating this machine. LBL-0440 (CE) Wear Ear Protection Noise from this machine can damage hearing. Always wear ear protection when operating this machine.
- 46. SAFETY SECTION Safety Section SS-44 May 2002 Fadal LBL-0442 (CE) Consult Operator's Manual Read and understand the Operator's Manual before operating this machine. This machine must be operated by qualified personnel only, LBL-0438 small (CE) LBL-0437 large (CE) Lockout Electrical Power Whenever servicing the machine, turn the machine off and lockout the power. Turn off the machine and lockout the power before working in this cabinet.
- 47. May 2002 SS-45 Safety Section SAFETY SECTION Fadal CE SAFETY LABEL LIST AND LOCATION Location Domestic or old Labels CE Labels ATC Slide Arm Plate LBL-0129 LBL-0432 (1009B-ISO), LBL-0438 (6011B-ISO) Spindle Belt Guide (inside spindle cover) LBL-0129 LBL-0432 (1009B-ISO), LBL-0438 (6011B-ISO) Front by Pendant LBL-0123, LBL-0163 LBL-0435 (3002A-ISO), LBL-0439 (6040A-ISO), LBL-0440 (6041A-ISO), LBL-0442 (6126A-ISO) Tool Turret Cover LBL-0136 LBL-0136 (revised) Tool Changer Cover LBL-0127 LBL-0434 (1007A-ISO) Head (Spindle) Cover LBL-0130 LBL-0137,-0138, or -0139 LBL-0435 (3002A-ISO), LBL-0439 (6040A-ISO), LBL-0440 (6041A-ISO) LBL-0137,-0138, or -0139 (revised) Right Front Door LBL-0124 LBL-0140 LBL-0431 (1007B-ISO), LBL-0441 (6060B-ISO) (LBL-0140 deleted after doors locked) On Control, Transformer, and Pendant Cabinet Doors LBL-0128, LBL-0131 --- LBL-0131 (6010A-ISO) Inside of Control, Transformer, and Pendant Cabinets LBL-0125 LBL-0235 LBL-0131 (6010A-ISO), LBL-0437 (6011A-ISO) (B size labels used in Slant Control cabinet - LBL- 0461, LBL-0438) Grounding Labels LBL-0133 (chassis ground) LBL-0186 (Protective Earth input) LBL-0133, LBL-0186 (same) Flood, Mist, RS-232 Outlets LBL-0192, LBL-0188, LBL-0189 LBL-0192, LBL-0188, LBL-0189 (same) On Chiller Cabinet LBL-0300 LBL-0300 (same, 3 languages) Chiller Outlets LBL-0191, LBL-0190 LBL-0191, LBL-0190 (same) CNC Power Button LBL-0038 LBL-0038 (same) Air Regulator LBL-0126 LBL-0146 LBL-0430 (1120B-ISO) LBL-0460 (3021B-ISO) keep LBL-0146 Maintenance & Pull Stud labels LBL-0036, LBL-0037 LBL-0036, LBL-0037 (same) Translated versions must be used for non-English speaking countries. CE --- LBL-0141 Left Side LBL-0123 ----- On Control and Transformer Cabinet Doors LBL-0263 ----
- 48. SAFETY SECTION Safety Section SS-46 May 2002 Fadal Main Disconnect, Aux. Disconnect, and Motor Starter Enclosures LBL-0132 LBL-0132 (6010C-ISO) Main Disconnect LBL-0134, LBL-0135 LBL-0134 (I5007a-D), LBL-0135 (I5008a-D) Next to Main Disconnect (Inside) LBL-0187 keep LBL-0187 Translated versions must be used. Main Disconnect inputs (U,V,W) LBL-0142, LBL-0143, LBL-0144 LBL-0142, LBL-0143, LBL-0144 (same) Auger - by left and right access panels, lower left of front door LBL-0234 LBL-0436 (5004A-ISO) Pallet Changer Base (front & rear) ---- LBL-0443 (1042B-ISO) Pallet Changer Door LBL-0158 LBL-0433 (1099A-ISO)
- 49. May 2002 TABLE OF CONTENTS i Fadal Maintenance Manual TABLE OF CONTENTS TABLE OF CONTENTS .................................................................................................i Overview .....................................................................................................................1 1.1 Introduction ........................................................................................... 1 1.2 Digital Control System ............................................................................ 2 1.3 Digital Drive Converter System ................................................................. 2 1.3.1 CCU ................................................................................................... 2 1.3.2 CCU Interface Panel ............................................................................. 3 1.3.3 Axis Extension Module ......................................................................... 7 1.4 Power Supply ........................................................................................ 7 1.5 Pendant Components ............................................................................. 8 1.5.1 MCP .................................................................................................. 8 1.5.2 HMI ................................................................................................... 8 1.5.3 CNC Keyboard .................................................................................... 9 1.5.4 MPG .................................................................................................. 10 1.6 System Components and Parts ................................................................ 10 Hand –Held Unit (Remote MPG) – Description of elements. ................................ 12 Control Components ..................................................................................................13 2.1 Replacement of Modules ................................................................................... 13 2.1.1 Reactor and Line Module Replacement ................................................... 13 2.1.2 Replacing the E/R Module ..................................................................... 18 2.1.3 CCU1 Module Replacement .................................................................. 18 2.1.4 Power Module Replacement .................................................................. 19 2.1.5 Connecting Modules ............................................................................ 21 2.2 Wiring Connections ........................................................................................... 22 2.2.1 CCU1 Module Connections ................................................................... 22 2.2.2 Simodrive 611 Module Connections ....................................................... 24 2.2.3 Reactor/Line Filter Module Connections .................................................. 25 2.2.4 Power Module Connections ................................................................... 26 2.3 Replacing the 24V Power Supply ........................................................................ 26 2.4 Replacing the I/O Module ................................................................................... 27 2.5 Replacing the 2010-0 Board .............................................................................. 28 2.6 Replacing Fadal 5 VDC Power Supply .................................................................. 32 2.7 Replacing Pendant Components ......................................................................... 33 2.7.1 2020 Power Distribution Board ............................................................. 34 2.7.2 MPG Panel ......................................................................................... 34
- 50. ii TABLE OF CONTENTS May 2002 Fadal Maintenance Manual 2.7.3 MCU Panel ..........................................................................................35 2.7.4 PCU 210 .............................................................................................35 2.7.5 Keyboard ............................................................................................35 2.7.6 Wiring Connections ..............................................................................35 Power On Procedure ...................................................................................................37 Alarms ..................................................................................................................37 1000 Series Alarms ......................................................................................37 2000 Series Alarms ......................................................................................37 3000 Series Alarm .......................................................................................40 4000 Series Alarm .......................................................................................41 6000 Series Alarm .......................................................................................47 8000 Series Alarm .......................................................................................49 10000 Series Alarm ......................................................................................49 MMC 100 Messages .....................................................................................56 Machine Operating Area ................................................................................57 Fadal 3020 PLC Alarm Messages ...................................................................60 Action List ....................................................................................................................69 Compensation ..............................................................................................................79 5.1 Cold Start Position .............................................................................................79 5.1.1 SET OFFSETS ......................................................................................79 5.2 Spindle Belt ......................................................................................................80 5.2.1 M83 Program ......................................................................................80 5.2.2 M84 Program ......................................................................................81 5.3 Axis Backlash ...................................................................................................81 5.3.1 COMP_VALUES_n ................................................................................81 5.4 Reset Tool Magazine ..........................................................................................84 5.4.1 TC_BASE ............................................................................................84 MMC100 Software Update .........................................................................................87 General Information ................................................................................................87 List of Components .................................................................................................87 Tools Required .......................................................................................................88 MMC100 Update Procedure .....................................................................................88 3. Recording Original Cold Start Position, Backlash Data and Gain Settings ..........89 7.Back Up Other Data ...................................................................................97 DATC Hardware Update 1.7.2 (or above) ...................................................................118 General Information ................................................................................................118 Tools Required .......................................................................................................118 1. Replace Hardware for DATC .......................................................................118 MMC103 Software Update v1.7.2 (or above) ..............................................................119
- 51. May 2002 TABLE OF CONTENTS iii Fadal Maintenance Manual General Information ................................................................................................ 119 List of Components ................................................................................................ 119 Tools Required ....................................................................................................... 120 MMC103 Update Procedure ..................................................................................... 120 3.“Get” Offset and Backlash Data .................................................................. 121 10.Back Up Hard Disk Files ........................................................................... 143 12.Install New Pre-imaged Hard Disk ............................................................. 145 13. Display (HMI) Firmware ........................................................................... 146 DATC Hardware Update v1.7.2 (or above) ................................................................. 149 General Information ................................................................................................ 149 Tools Required ....................................................................................................... 149 1. Replace Hardware for DATC ...................................................................... 149 Parameters ..................................................................................................................151 Setting Options on the Fadal Siemens ............................................................ 151 Setting the Bits ............................................................................................ 152 How To set the number of tools in the ATC magazine ....................................... 152 The Options program ................................................................................... 153 Fadal Siemens Spindle Parameters ................................................................ 160 C-axis default ratio ....................................................................................... 162 Siemens 50 Taper .......................................................................................................163 MACHINE OVERVIEW .................................................................................... 163 Troubleshooting ..........................................................................................................169 .1 Introduction ............................................................................................. 169 .2 The Alarms and Messages Line ................................................................. 169 .3 The Alarms/Messages Page ...................................................................... 169 .4 The Central Control Unit (CCU) Front Panel .................................................. 170 .5 The In-feed/Regeneration (I/R) Module ........................................................ 172 .5.1 The I/R Module ..................................................................................... 173 How to monitor the DATC interface. ................................................................ 174 HOW TO RE-SET THE TOOL MAGAZINE LOCATION. ......................................... 175
- 52. iv TABLE OF CONTENTS May 2002 Fadal Maintenance Manual
- 53. Jan 2003 :Overview: 1 SIEMENS CONTROL Maintenance Manual Fadal Section 01: Overview 1.1 Introduction The SINUMERIK 810D/840D is a digital CNC (Computerized Numerical Control). Figure 1-1 shows an 810D digital control system. Its input and output is based on binary numbers, as opposed to continuously varying current flow and voltage levels, as on analog controls. When using analog controls in a machine tool position control operation, the motors take in current or voltage (for example, 0 to 30 amps or 0 to 100 volts) to run at a certain speed and for a certain length of time in order to motion to a preset point. In a digital control, currents and voltages in a control loop are generated in digital form by a digital encoder, for example, a series of ones and zeroes or a series of 0 volt and +5 volt signals. Motor current consumption is converted into numbers at a very early stage in the control loop. These numbers are then input into a computer which, in turn, takes these numbers and manipulates them, perform calculations with them, or filters them to obtain an output. The output is the instructions that tell the machine what to do. A digital control has several advantages over an analog control. For instance, it is more accurate. It only needs to sense the difference between two clearly distinguishable states. For example, a slight voltage fluctuation would affect the result in an analog control, but a slight voltage fluctuation would not affect a digital control because the control could still easily distinguish the “0” state from the “1” state of any circuit element. Other advantages include the ability to share data more easily with other devices in the control, digital data is less prone to noise, and digital signal processing can be used to filter the data and correct problems (for example, resonance frequency from a mechanical system) that can affect movement. Figure 1-1. The 810D digital drive converter system.
- 54. SIEMENS CONTROL Maintenance Manual 2 :Overview: Jan 2003 Fadal 1.2 Digital Control System The typical digital control system is comprised of a digital drive converter system, power supply, operator panel, CNC full keyboard, machine control panel, and motors for digital converter system (see Figure 1-2). 1.3 Digital Drive Converter System The digital drive converter system is housed inside an electronics cabinet mounted on the backside of the VMC (Vertical Machining Center). There are two main components that make up the digital drive converter system are the CCU and the SIMODRIVE 611D axis extension module. 1.3.1 CCU The CCU (Compact Control Unit) consists of two major components, as shown in Figure 1-3. One component is the CCU box. This box contains a fan (for cooling), two to three integrated power sections, and a slot for the CCU module. The other component is the CCU module. It consists of the NCK (Numerical Control Kernal), the PLC (Programmable Logic Control), and six one-motor control sections (three for the power sections in the CCU box and three for external power module). Figure 1-4 shows a diagram of these three sections of the CCU module. The CCU module performs all CNC, PLC, communication, and control tasks. Figure 1-2. The basic 810D controls system.
- 55. Jan 2003 :Overview: 3 SIEMENS CONTROL Maintenance Manual Fadal The NCK is a computer that decodes the part program and sends the commands to the appropriate drives. The drives can be internal to the 810D, or external. The drives take the commands and position the axes accordingly. The PLC is also a computer. It is an open ended sequential logic, programmable, computerized controller. The main characteristic of the PLC is the flexible set of inputs and outputs that can be programmed to search for incoming signals and respond with outputs based on logical conditions preset by the machine tool manufacturer. The PLC is needed to control the rest of the machine coordination with the NCK. For example, the PLC can be programmed to send a signal to the NCK to stop program execution in case the hydraulics are not on. The PLC also controls equipment, such as coolant pumps, pallet changer, and work lights. In the operation of the work light, for example, pressing the work light button sends a signal to a preset input in the PLC. The program inside then takes that signal and compares the state against a logical statement (something like “if work light button is pressed, then turn on work light”) and sends the appropriate output, like a voltage to a relay that turns the light on. 1.3.2 CCU Interface Panel All the necessary interfaces for receiving feedback from the motor and other components of the system are on the front panel of the CCU module. But, unlike other stand-alone control modules, the control sections of the CCU have only one feedback connector, instead of two. If a second measurement system is needed, one of the available control sections has to be used for feedback input. For example, if control section four is being used as a second Figure 1-3. The two major components make up the 810D. They are the CCU box and the CCU module.
- 56. SIEMENS CONTROL Maintenance Manual 4 :Overview: Jan 2003 Fadal feedback, and assuming control sections one through three are also being used, then it can no longer be used to control an additional motor. The motor would have to be connected to the next available control section; in this case, it is control section five. The following list is a description of the SINUMERIK 810D control module interface connections from Figure 1-5: a. X411 - X416 are the measuring system connections for indirect and direct position sensing. b. X121 is the I/O interface (cable distributor for handwheel and probe). c. X113 and X114 are reserved. d. X122 is the MPI interface (187.5 kBaud). e. X102 is the PROFIBUS-DP interface (as of 6/99). f. X111 is the P bus (PLC I/O bus) connection of S7-300 I/O and single I/O module. g. H3 (not labeled) is the 7-segment display for software supported output of test diagnostic signals. h. X431 is the terminal block for the connection of starting lockout, pulse enable (all drives), and external zero marker (BERO). i. H1 and H2 (not labeled) are error and status LEDs. j. X130 is the SIMODRIVE 611D drive bus interface and I/O extension. NCK PLC Control Module 1 Control Module 4 Control Module 5 Control Module 2 Control Module 3 Control Module 6 To/from external control module Drive Bus Figure 1-4. The three sections of the CCU module are the NCK, PLC, and one-motor control sections.
- 57. Jan 2003 :Overview: 5 SIEMENS CONTROL Maintenance Manual Fadal k. PCMCIA memory card slot (shown with memory card inserted). l. X341, X342, X351, and X352 are the DAC test sockets. m. S3 is the NCK start-up switch. n. S4 is the PLC operating mode switch. o. X151 is the device bus interface (power supply). q. X304 - X306 are the axis extension connections.
- 58. SIEMENS CONTROL Maintenance Manual 6 :Overview: Jan 2003 Fadal Figure 1-5. SINUMERIK 810D control module interfaces. a b e d c g f h i j k l o p q m n
- 59. Jan 2003 :Overview: 7 SIEMENS CONTROL Maintenance Manual Fadal 1.3.3 Axis Extension Module The SIMODRIVE 611D module, mounted to the left of the CCU, consists of an axis extension control module and a power module (See Figure 1-6). The axis extension control module has everything that is required to interface with the rest of the drive system, as well as position and speed feedback connections. Both the motor encoder and an optional second measuring system (linear scale or second encoder) plug into the drive. The motor encoder also provides the rotor logic (brushless DC motors) and speed feedback. The power module has one primary responsibility. It takes the power from the DC link and converts it to the required AC output that is needed to run the motor(s). In addition, the power module also has a number of sensors for current and temperature feedback to the control module. The DC link voltage is generated from the power supply module. This module provides power to the drives, as well as, the different “logic” voltages that are needed for the electronics. In general, the control module takes commands from the NCK and sends information back to itself by means of the drive bus. Each control module controls one or two motors for position, speed, and current consumption. 1.4 Power Supply The I/RF (Infeed Regenerative Feedback) module is the power supply for the SINUMERIK 810D control and drives. It is mounted to the right of the SINUMERIK 810D. This power supply generates a +15 VDC and +24 VDC output for the electronics of the SINUMERIK 810D and has a DC link voltage of 600 VDC (+300 VDC and -300 VDC) for a regulated I/R module and 550 VDC for an unregulated UE module. Figure 1-6. The 611D control module and power module.
- 60. SIEMENS CONTROL Maintenance Manual 8 :Overview: Jan 2003 Fadal 1.5 Pendant Components Mounted on the pendant are the components that create the machine interface system for the operator. The system components consists of a MCP, HMI, CNC keyboard, and manual pulse generator (See Figure 1-7). 1.5.1 MCP The MCP (Machine Control Panel) controls the physical functions of the machine. It is mostly used in conjunction with the HMI, CNC keyboard, and MPG. One simple example of an MCP function can be turning the coolant on and off. Another common function is referencing the axes of the machine. The makeup of the MCP consists of several groups of keys, referred to as hard keys, a spindle control dial, a feedrate dial, and an EMERGENCY STOP button. 1.5.2 HMI The HMI (Human Machine Interface) is a graphical display system that provides the interfacing between the operator and the control. It consists of a bank of vertical and horizontal soft keys, and a TFT flat display screen. The HMI is the main component of the pendant because it provides both input to and output from the control. Some of the functions of the HMI are it displays A B C D Figure 1-7. The pendant is comprised of four operator interface components: (A) MCP-Machine Control Panel, (B) HMI-Human Machine Interface, (C) CNC keyboard, (D) MPG-Manual Pulse Generator.
- 61. Jan 2003 :Overview: 9 SIEMENS CONTROL Maintenance Manual Fadal event and alarm messages, allows a user to control and supervise a job process by means of menus, gives the user ability to load programs, and gives users access to both the PLC and NCK. The HMI communicates with the PLC and NCK via the MPI (Multi-Port Interface) bus. As illustrated in Figure 1-8, the MPI connects the NCK, the PLC, and the HMI. There is a constant exchange of information between the NCK and the drives through the MPI bus. The NCK, the PLC, and the HMI are also individual computers that need to exchange data on a constant basis through the MPI (Multi Port Interface) bus. 1.5.3 CNC Keyboard The CNC keyboard is installed below the HMI. It is not laid out like a standard QWERTY keyboard but its function is essentially the same as a QWERTY keyboard. It is used for functions such as, MDA data input, programming manual data entry, Shopmill programming, and advanced operator parameters programming. When the control is in PC mode, the keyboard is used in the same way as a PC keyboard. The CTRL key, ALT key, and arrow keys, for example, are used to navigate through Windows. Drive Bus MPI Bus NCK PLC HMI Keyboard PLC Input/Output Drive 1 Drive 2 Drive 3 Figure 1-8. The MPI bus is the communication link for the HMI, PLC, and NCK.
- 62. SIEMENS CONTROL Maintenance Manual 10 :Overview: Jan 2003 Fadal 1.5.4 MPG The MPG (Manual Pulse Generator), installed in the lower left corner of the pendant, is used to manually jog the axes of the machine. The MPG is enabled by pressing the “MPG” hard key, located on the MCP. Jogging an axis is accomplished by selecting an axis with the selector knob and then turning the dial clockwise or counterclockwise to move the selected axis. 1.6 System Components and Parts Component Part No. Description MCP CTR-0127 Machine Control Panel PCU 210 CTR-0126 Flat panel display - Solid State Membrane keyboard ELE-1094 Keyboard for PCU 210 OP032S CTR-0128 Flat panel display for MMC103 (PC based front end) DIN Keyboard CTR-0129 Keyboard for MMC103 (PC based front end) MMC 103 SFT-0017 PC based front end (Hard Drive) Floppy Drive ELE-1174 Floppy Drive for MMC103 (PC based front end) ISA/PCI Adapter ELE-1175 Expansion adapter for ISA/PCI cards - MMC103 Power Supply 16kW ELE-1083 Power Supply 15 HP Spindle - Low voltage power supply for electronics Reactor 16kW ELE-1084 Line Reactor 15HP Spindle Filter 16kW ELE-1085 Line Filter 15HP Spindle Overvoltage Lim. Module ELE-1087 Line Voltage Surge Protection Module for Power Supply Power Supply 28kW ELE-1165 Power Supply 20 HP Spindle - Low voltage power supply for electronics Reactor 28kW ELE-1166 Line Reactor 20HP Spindle Pulsed Resistor ELE-1167 Pulsed Resistor for 28kW Power Supply Filter 28kW ELE-1168 Line Filter 20HP Spindle CCU Box ELE-1088 Subrack for holding the CCU1 with 3 integrated power modules CCU1 ELE-1089 “Central Unit containing NCK, PLC, communications, digital standard control” Compact I/O ELE-1093 “PLC I/O module 64 In, 32 Out” Power Supply 24V-5A ELE-1095 24VDC power supply - for PCU 210 Power Supply 24V-10A ELE-1134 24VDC power supply - for MMC 103
- 63. Jan 2003 :Overview: 11 SIEMENS CONTROL Maintenance Manual Fadal Axis Expansion Board ELE-1091 For installation of a 611 power module. 45A Power Module ELE-1090 15HP Spindle Power Module 60A Power Module ELE-1164 20HP Spindle Power Module 9/18A Power Module ELE-1196 Single Axis Power Module - 4th Axis 2 * 9/18A Pwr Module ELE-1161 Dual Axis Power Module - 4th & 5th Axes 611 Controller Board ELE-1155 611D Standard controller board for axis expansion Servo Motor - Lin. Axis MTR-0167 Servo motor for linear axis -XYZ Servo Motor - Rot. Axis ELE-1157 Servo motor for rotary axis -AB MPI cable WIR-0745 MPI cable - 5 meters. Between CCU and front panel PLC I/O cable WIR-0740 “PLC I/O cable, 2.5 meters - Between CCU and compact I/O” a b Figure 1-9. (a) WIR-740 cable connection at CCU front panel. (b) WIR-740 cable connection at compact I/O module.
- 64. SIEMENS CONTROL Maintenance Manual 12 :Overview: Jan 2003 Fadal Hand –Held Unit (Remote MPG) – Description of elements. 1. Remote MPG wheel. Activated by selecting the “Remote” position in the main axis selector switch in the machine control panel and the MPG mode. Generates square-wave pulses for the incremental movement of the selected axis. 2. Remote axis selector switch. Selects the active axis. The active axis can be jogged or moved incrementally. X, Y, Z, 4th and 5th axis available. 3. + key. Moves the active axis in the positive direction. If in jog, the axis moves as long as the key is pressed. If in incremental, the axis moves one increment in the positive direction. 4. - key. Moves the axis in the negative direction. . If in jog, the axis moves as long as the key is pressed. If in incremental, the axis moves one incre- ment in the negative direction. 5. ~ key (Rapid traverse override key). Pressed together with the + or – key the active axis moves at rapid jog speed (only in jog mode). 6. F1 key. Works exactly as the “TOOL IN/OUT” key in the machine con- trol panel. Active only when the main axis selector switch is in the “Remote” position. 7. F2 key. Toggles between MPG and JOG mode when the remote MPG is activated. 8. F3 key. Selects the incremental multiplier for incremental movements. When the remote MPG is selected, the multiplier defaults to x1 (1 times .001 mm or .0001 in). By pressing F3, the incremental multiplier changes to x10, x100 and variable multiplier in succession. If F3 is pressed further, the cycle repeats. 9. Enabling button (back of the unit). Electrically connected in parallel to the “override” button in the machine control panel, it allows to move the axes with the doors open. 10. Emergency stop. Connected in series with the E-stop circuit in the machine. Stops the machine in case of an emergency.
- 65. Jan 2003 : Control Components: 2.1 Replacement of Modules 13 SIEMENS CONTROL Maintenance Manual Fadal Section 02: Control Components 2.1 Replacement of Modules 2.1.1 Reactor and Line Module Replacement Part Numbers: ELE-1084 Reactor, Siemens, 16KW ELE-1085 Line Filter for I/R ELE-1086 I/R Module, 16KW (6 sheet metal parts) Tools Required: Torx driver set Flat Tip Screwdriver Nut Driver NOTE: To remove components for repair or replacement, follow the assembly instructions as necessary, in reverse order, until the component has been disassembled to required level to conduct the repair.
- 66. SIEMENS CONTROL Maintenance Manual 14 : Control Components: 2.1 Replacement of Modules Jan 2003 Fadal 1. Attach the Reactor Module (ELE-1084) to the back plate (ELE-1086 one of six parts) with four M6 flathead torx screws, flat and lock washers, and nuts. 2. Attach the upper ventilation grid to the upper portion of the back plate with two M6 flathead torx screws.
- 67. Jan 2003 : Control Components: 2.1 Replacement of Modules 15 SIEMENS CONTROL Maintenance Manual Fadal 3. Pull apart the output terminal and install it on the lower ventilation grid. 4. Attach the lower ventilation grid to the lower portion of the back plate with two M6 flathead torx screws. 5. Connect wires from the Reactor Module (ELE-1084) to the output terminal.
- 68. SIEMENS CONTROL Maintenance Manual 16 : Control Components: 2.1 Replacement of Modules Jan 2003 Fadal Connect the wires for the Line Filter to the Reactor and feed them out through the access on the top ventilation grid. U V W 1U1 1V1 1W1 1U2 1V2 1W2 U1 V2 W2 REACTOR FILTER OUTPUT Reactor Line Side View Output Wiring Diagram Filter
- 69. Jan 2003 : Control Components: 2.1 Replacement of Modules 17 SIEMENS CONTROL Maintenance Manual Fadal 6. Attach the Main Line Filter and its mounting plate to the Reactor Module assembly with four M6 round head torx screws. Connect the wires from the Reactor to the Line Filter. 7. Attach the two wire shields to the bottom of the assembly using two each M4 torx screws. 8. Mount the Reactor and Line Filter assembly on the left side of the mounting bars with four 1/2-20 x 3/4” torx screws.
- 70. SIEMENS CONTROL Maintenance Manual 18 : Control Components: 2.1 Replacement of Modules Jan 2003 Fadal 2.1.2 Replacing the E/R Module Parts Numbers: ELE-1083 Simodrive E/R Module Int. 16/21KW ELE-1087 Over Volt Limit Module Tools Required: Torx driver set NOTE: To remove components for repair or replacement: Follow the assembly instructions as necessary, in reverse order, until the component has been disassembled to required level to conduct the repair. 1. Attach the E/R Module (ELE-1083) to the mount- ing bars with four 1/4-20 x 3/4” torx screws. Located immediately to the right of the Reactor Line Filter Assembly. 2. Remove the 8 position terminal block from X181 on the E/R module, plug the Over Volt Module (ELE-1087) onto the front of the Simodrive Mod- ule. Install the 8 position terminal block into the over voltage module. 2.1.3 CCU1 Module Replacement Parts Numbers: ELE-1088 CCU box 810D ELE-1089 CCU1 unit Tools Required: Torx driver set Flat Tip Screwdriver ELE-1087
- 71. Jan 2003 : Control Components: 2.1 Replacement of Modules 19 SIEMENS CONTROL Maintenance Manual Fadal NOTE: To remove components for repair or replacement: Follow the assembly instructions as necessary, in reverse order, until the component has been disassembled to required level to conduct the repair. 1. Attach the CCU box (ELE-1088) to the mounting bars with four 1/4-20 x 3/4” torx screws. Locate immediately to the right of the Simodrive Module. 2. Insert the CCU1 (ELE-1089) unit into the CCU box (ELE-1088) and tighten the four screws. 2.1.4 Power Module Replacement Parts Numbers: ELE-1090 Power Section ELE-1091 Accessory Expansion Module Tools Required: Torx driver set NOTE: To remove components for repair or replacement: Follow the assembly instructions as necessary, in reverse order, until the component has been disassembled to required level to conduct the repair.
- 72. SIEMENS CONTROL Maintenance Manual 20 : Control Components: 2.1 Replacement of Modules Jan 2003 Fadal 1. Attach the Power Section Module (ELE-1090) to the mounting bars with four 1/4-20 x 3/4” torx screws. Locate to the immediate right of the CCU Module. 2. Insert the Accessory Expansion Module 810D (ELE-1091) in the Power Section.
- 73. Jan 2003 : Control Components: 2.1 Replacement of Modules 21 SIEMENS CONTROL Maintenance Manual Fadal 2.1.5 Connecting Modules Tools Required: Torx Screwdriver 1. Plug the Device Bus Interface X151 Ribbon Cable from the CCU1 unit into the Simodrive X351 Device Bus Port. 2. Plug the Axis Extension Ribbon Cable (X301/X302) from the Accessory Expansion Module into the X304 Port on the Simodrive Module. X301/X302 X151 IMPORTANT Leave the intermodule DC bus link bars disconnected at this time until power-on procedure.
- 74. SIEMENS CONTROL Maintenance Manual 22 : Control Components: 2.2 Wiring Connections Jan 2003 Fadal 2.2 Wiring Connections Tools Required: Torx driver set Phillips screwdriver Flat tip screwdriver Nut driver set NOTE: To remove components for repair or replacement: Follow the assembly instructions as necessary, in reverse order, until the component has been disassembled to required level to conduct the repair. 2.2.1 CCU1 Module Connections 1. Attach the 37 Pin D-shell line (black) from the MPG into the X121 connec- tion. Secure with thumbscrews. Attach jumper wire (grey) to the X431 ter- minal block. Red wire to position B, black wire to position 19. 2. Attach the Y-axis signal cable (blue) to the X413 connection. Secure with thumb screws. 3. Attach the X-axis signal cable (blue) to the X412 connection. Secure with thumb screws. 4. Attach the Z-axis signal cable (blue) to the X411 connection. Secure with thumb screws. 5. Attach the spindle encoder cable (grey) to the X414 connection. Secure with thumb screws. 6. Attach the I/O module cable (WIR-0740 black) to the X111 connection. Secure with thumb screws. z x y WIR-0740 Encoder Cable
- 75. Jan 2003 : Control Components: 2.2 Wiring Connections 23 SIEMENS CONTROL Maintenance Manual Fadal 7. Attach the spindle orientation magnet out cable (grey) to the X431 terminal block Red to location B Black to location 19. Secure with lug screws. 8. Plug Z axis motor power connection into terminal plug A1 located on the bottom of the CCU Box. Secure with thumbscrews. Cable clamp cable to shielding plate. 9. Attach the Z motor grounding wire to ground plate with existing screw.
- 76. SIEMENS CONTROL Maintenance Manual 24 : Control Components: 2.2 Wiring Connections Jan 2003 Fadal 10.Plug X-axis motor power connection into terminal plug A2 located on the bottom of the CCU Box. Secure with thumbscrews. Cable clamp cable to shielding Plate. 11.Attach the X motor grounding wire to ground plate with existing screw. 12.Plug Y-axis motor power connection into terminal plug A3 located on the bottom of the CCU Box. Secure with thumbscrews. Cable clamp cable to shielding Plate. 13.Attach the Y motor grounding wire to ground plate with existing screw. 14.Attach grounding wire from the ground bar to the CCU Box. 2.2.2 Simodrive 611 Module Connections 1. Attach the E-stop signal wires to X121 terminal, Red to #64 and Blk/ Shd to #19. Secure with lug screws. 2. Attach the E-stop MCP to X121, Red to #9, Blk to #64. 3. Terminate the jumper at #63 and #9. 4. Attach contactor control signal wires to X161 terminal. Secure with lug screws. 5. Attach the power input wires U1, V1, W1 to the appropriately labeled terminals on the bottom of the E/R module. Secure with lug screws. 6. Attach the grounding wire from the ground bar to the grounding terminal on the bottom of the E/R module.
- 77. Jan 2003 : Control Components: 2.2 Wiring Connections 25 SIEMENS CONTROL Maintenance Manual Fadal 2.2.3 Reactor/Line Filter Module Connections 1. Attach the 380 Volt input wires L1, L2, L3 to the appropriately labeled ter- minals on the bottom of the Line Filter, secure with lug screws. 2. Attach the Reactor output wires U1, V1, W1 to the appropriately labeled ter- minals on the bottom of the module, secure with lug screws. 3. Attach the grounding wire from the ground bar to the bottom of the line fil- ter module with a 1/4-20 nut and washer.
- 78. SIEMENS CONTROL Maintenance Manual 26 : Control Components: 2.3 Replacing the 24V Power Supply Jan 2003 Fadal 4. Attach the grounding wire from the ground bar to the reactor module. 2.2.4 Power Module Connections 1. Attach the spindle drive output wires U2, V2, W2 to the appropriately labeled terminals on the bottom of the power module, secure with lug screws. 2. Attach the grounding wire from the ground bar to the bottom of the power module, secure with lug screw. 2.3 Replacing the 24V Power Supply Parts Numbers: ELE-1095 24 Volt Power Supply Tools required: Screwdriver NOTE: To remove components for repair or replacement: Follow the assembly instructions as necessary, in reverse order, until the component has been disassembled to required level to conduct the repair. 1. Snap power supply onto the rail. GROUND
- 79. Jan 2003 : Control Components: 2.4 Replacing the I/O Module 27 SIEMENS CONTROL Maintenance Manual Fadal 2. Attach the 120 VAC input wires to the 24 VDC power supply. 3. Attach the 24 VDC output wires to the power supply. 2.4 Replacing the I/O Module Parts Numbers: ELE-1093 I/O Module Tools required: Phillips screwdriver NOTE: To remove components for repair or replacement: Follow the assembly instructions as necessary, in reverse order, until the component has been disassembled to required level to conduct the repair. 1. Attach I/O module (ELE-1093) to the lower left corner of cabinet with two 1/4-20 x 3/4” screws. 2. Connect the X404 cable from the 2010-0 interface board to the X404 plug on the I/O module. 3. Connect the X405 cable from the 2010-0 interface board to the X405 plug on the I/O module. 4. Connect the X402 cable from the 2010-0 interface board to the X402 plug on the I/O module. 24 VDC 120 VAC
- 80. SIEMENS CONTROL Maintenance Manual 28 : Control Components: 2.5 Replacing the 2010-0 Board Jan 2003 Fadal 5. Connect WIR-0740 from the CCU1 module to the X3IN plug on the I/ O module. Secure with thumb screws. 6. Connect the 24 volt power supply wiring to X1 (Ground to M24, + 24 VDC to P24 logic, shield no connection) and connect jumper to X5 (Ground to M24, + 24 VDC to P24 logic, shield not connected). 7. Connect the ground wire to the chassis. 2.5 Replacing the 2010-0 Board Parts Numbers: PCB-0205 2010-0 Interface Board PCB-0045 Temperature Control Card Tools Required: Assorted Screwdrivers 1. Attach 2010-0 board (PCB-0205) to the back of the cabinet with hardware (HDW-0509, HDW-0460, HDW-0453). 6 5 2 3 4 7
- 81. Jan 2003 : Control Components: 2.5 Replacing the 2010-0 Board 29 SIEMENS CONTROL Maintenance Manual Fadal 2. Connect the X402 cable to the X402 plug on the 2010-0 card. 3. Connect the X1201 cable to the X1201 plug on the 2010-0 card. 4. Connect the X404 cable to the X404 plug on the 2010-0 board. X404 X1201
- 82. SIEMENS CONTROL Maintenance Manual 30 : Control Components: 2.5 Replacing the 2010-0 Board Jan 2003 Fadal 5. Connect the X1202 cable to the X1202 plug on the 2010-0 board. 6. Connect the X405 cable to the X405 plug on the 2010-0 board. 7. Connect the Axis Selector wire two pin plug into the J4 socket on the 2010- 0 board. 8. Connect the J2 wire plug into the J2 eight position wire connector on the 2010-0 board. 9. Terminate contactor control wires T9 (red) and T48 (blk) at appropriate location on terminal strip J6. 10.Terminate door override wires #3 (red) and #4 (blk) at appropriate location on terminal strip J6. 11.Terminate spindle contactor wires #5 (brn) and #6 (wht) at appropriate loca- tion on terminal strip J6. 12.Terminate control bus wires to appropriate location on right side terminal strip. X1202 X405 J2 J4 X1202 X405 J2 J4 Steps 9-11 See steps 9 through 11
- 83. Jan 2003 : Control Components: 2.5 Replacing the 2010-0 Board 31 SIEMENS CONTROL Maintenance Manual Fadal 13.Terminate J5 bus wires at appropriate location on J5 terminal. 14.Connect the J1 cable from the 1100-1 board into the J1 plug on the 2010- 0 board. 15.Plug the temperature control board into the J7 socket on the 2010-0 board. J1 J5
- 84. SIEMENS CONTROL Maintenance Manual 32 : Control Components: 2.6 Replacing Fadal 5 VDC Power Supply Jan 2003 Fadal 16.Connect the temperature control wire plug into the socket on the tempera- ture control board. 17.Plug the K1 relay into the 24 VDC K1 receptacle on the 2010-0 board. 18.Plug the K6 relay into the 120 VAC K6 receptacle on the 2010-0 board. 2.6 Replacing Fadal 5 VDC Power Supply Parts Numbers: ELE-1139 5 volt and 12 volt power supply Tools Required: Screwdriver Nut Driver NOTE: To remove components for repair or replacement: Follow the assembly instructions as necessary, in reverse order, until the component has been disassembled to required level to conduct the repair. 1. Attach power supply (ELE-1139) to cabinet with three 10/32 nuts (HDW- 0339).
- 85. Jan 2003 : Control Components: 2.7 Replacing Pendant Components 33 SIEMENS CONTROL Maintenance Manual Fadal . 2. Terminate 5 volt, +12 VDC, and -12 VDC wires at power supply. 2.7 Replacing Pendant Components NOTE: To remove components for repair or replacement: Follow the assembly instructions as necessary, in reverse order, until the component has been disassembled to required level to conduct the repair.
- 86. SIEMENS CONTROL Maintenance Manual 34 : Control Components: 2.7 Replacing Pendant Components Jan 2003 Fadal 2.7.1 2020 Power Distribution Board 1. Install 2020 power distribution board (PCB-0204) with four nylock nuts (HDW-0657). 2. Terminate all connections on the 2020 power distribution board as shown. 2.7.2 MPG Panel Install lower left MPG panel (STM-0872).
- 87. Jan 2003 : Control Components: 2.7 Replacing Pendant Components 35 SIEMENS CONTROL Maintenance Manual Fadal 2.7.3 MCU Panel Install machine control panel (CTR-0127). 2.7.4 PCU 210 Install PCU 210 Op panel (CTR-0126). 2.7.5 Keyboard Install keyboard (ELE-1094) 2.7.6 Wiring Connections Terminate all wiring and check for proper connections. CR-0127 CTR-0126 ELE-1094
- 88. SIEMENS CONTROL Maintenance Manual 36 : Control Components: 2.7 Replacing Pendant Components Jan 2003 Fadal 24VDC COM 1 COM 2 Keyboard Cable MPI Cable to Profibus 24VDC
- 89. Jan 2003 Power On Procedure: Alarms 37 SIEMENS CONTROL Maintenance Manual Fadal Section 03: Power On Procedure Alarms The Siemens control has an extensive alarm code series. The alarms most likely to occur while performing power on and assembly procedures for the machine are listed. For a complete listing of all alarms refer to the Siemens diagnostics manual. 1000 Series Alarms The 1000 series alarms are an indication of a serious problem with the Siemens controller. Overview of the system error alarms The following alarms are system errors: 1000 1005 1013 1017 1001 1010 1014 1018 1002 1011 1015 1019 1003 1012 1016 1160 These system error alarms are not described in detail. If such a system error occurs, please contact your dealer or Fadal Machining Centers indicating the alarm number, the alarm text and the appropriate internal system error number. 2000 Series Alarms 2001 PLC has not started up Explanation: The PLC must give at least one sign of life within the time defined in the MD 10120 PLC_RUNNINGUP_TIMEOUT (default setting: 1 sec.). There is a serious problem with the PLC program. Reaction: NC Start disable. NC not ready. Mode group not ready. NC Stop when alarm. Alarm display. Interface signals are set. Remedy: The monitoring time in MD 10120 PLC_RUNNINGUP_TIMEOUT must be checked and adapted to the first OB1 cycle.
- 90. SIEMENS CONTROL Maintenance Manual 38 Power On Procedure: Alarms Jan 2003 Fadal Establish the cause of error in the PLC (loop or stop in the user program) and eliminate. Program Continuation: Switch control OFF - ON. 2100 NCK battery warning threshold reached Explanation: The undervoltage monitoring of the NCK battery has reached the prewarning threshold. This is at 2.7-2.9 V (nominal voltage of the battery is 3.0 - 3.1 V at 950 mAh). Reaction: Alarm display. Remedy: The battery must be replaced within the next 6 weeks. After this period, the voltage can drop below the alarm limit of 2.4 - 2.6 V if the RAMs to be buffered take up a lot of current. Program Continuation: Clear the alarm with the Delete key. No further operator action necessary. 2101 NCK battery alarm Explanation: The undervoltage monitoring (2.4 - 2.6 V) of the NCK battery has responded during cyclic operation. Reaction: Alarm display. Remedy: If the NCK battery is replaced without interrupting the power supply, no data will be lost. This means that production can continue without taking any further steps. (A buffer capacitor on the NCK holds the supply voltage for at least 30 minutes and the battery can be replaced within this time even when the control is switched off). Program Continuation: Clear the alarm with the Delete key. No further operator action necessary. 2102 NCK battery alarm Explanation: The undervoltage monitoring (2.4 - 2.6 V) of the NCK battery was detected during system power-up. Reaction: Alarm display. Interface signals are set. NC not ready. Mode group not ready. NC Start disable. NC Stop when alarm. The NC switches to follow-up mode.
- 91. Jan 2003 Power On Procedure: Alarms 39 SIEMENS CONTROL Maintenance Manual Fadal Remedy: Pull out the battery/fan unit from the NC module and replace the battery (type: lithium battery with lead, size 1/2 AA, 850 mAh, min. 3.2 V). The system must then be reinitialized because it must be assumed that data has been lost in the buffered RAM during the last power-off phase as a result of insufficient supply voltage (refer to section in the Installation and Start-up Guide for the procedure). The following data might have been corrupted or entirely lost: • NC machine data • Drive machine data • Operator panel machine data • Option data • Setting data • User variable • Global subroutines • Cycles and macros, as well as • PLC machine data • PLC basic program • PLC user program, and all • PLC user data User data in the NCK and PLC that had been altered since the last data save by the ongoing manufacturing process (e.g. tool and workpiece data) must be adapted manually to the momentary machine state. Program Continuation: Switch control OFF - ON. 2110 NCK temperature alarm Explanation: The temperature sensor has reached the response threshold of 60°C ± 2.5°C. Reaction: Alarm display. Remedy: For switching back the sensor, a temperature reduction of 7 °C is necessary. Program Continuation: Clear the alarm with the Delete key. No further operator action necessary. 2120 NCK fan alarm Explanation: The fan consists of a 26 V DC motor with electronic commutator (rated speed: approx. 8700 rpm). The commutator signal is used for speed monitoring, response speed: <7500 rpm. Reaction: Alarm display. Remedy: The unit with the fan must be replaced.
- 92. SIEMENS CONTROL Maintenance Manual 40 Power On Procedure: Alarms Jan 2003 Fadal Program Continuation: Clear alarm with the RESET key. Restart part program. 2130 NCK encoder power supply (%1 V) has failed Explanation:%1 = Voltage The power supply (5V / 24V) for the encoders has failed. Reaction: Mode group not ready. Channel not ready. NC Start disable. NC Stop when alarm. The NC switches to follow-up mode. Alarm display. Interface signals are set. The axes are no longer synchronized with machine actual value (reference point is lost). Remedy: Check encoders and cables for short circulating (disconnect cables, then this error should be cleared). Eliminate any defect. Program Continuation: Switch control OFF - ON. 2140 The actual service switch position forces a SRAM to be cleared at the next Power On (general reset active) Explanation: The initialization switch is currently set to overall reset. This means that the module's SRAM is deleted at the next module reset. The NC data memory is cleared during this operation. Reaction: Alarm display Interface signals are set NC not ready. Remedy: Reset initialization switch to one Program Continuation: Alarm display disappears with cause of alarm. No further operator action necessary. 3000 Series Alarm 3000 Emergency Stop Explanation: The EMERGENCY STOP request is applied to the NCK/PLC interface (DB 10, DBX 56.1). Reaction:
- 93. Jan 2003 Power On Procedure: Alarms 41 SIEMENS CONTROL Maintenance Manual Fadal NC Start disable. NC not ready All mode groups not ready. NC Stop when alarm. Alarm display. Interface signals are set. Remedy: Rectify the cause of EMERGENCY STOP and acknowledge EMERGENCY STOP via the PLC/NCK interface (DB 10, DBX 56, bit 2). Program Continuation: Press the Reset key to clear alarm in all channels of this mode group. Make sure that the E-stop is not pressed. 3001 Internal emergency stop Explanation: This alarm is not displayed. Reaction: NC Start disable. NC not ready. All mode groups not ready. NC Stop when alarm. NC reacts within a machining station. Remedy: No remedy required Program Continuation: Press the Reset key to clear alarm in all channels of this mode group. 4000 Series Alarm 4000 Channel %1 machine data %2 has gap in axis assignment Explanation: %1 = Channel number %2 = String: Machine data identifier The assignment of a machine axis to a channel by the machine data 20070 AXCONF_MACHAX_USED must be contiguous. At system power-up (Power On) gaps are detected and displayed as an alarm. Reaction: Alarm display. Interface signals are set. Mode group not ready. Channel not ready NC Start disable. NC Stop when alarm.
- 94. SIEMENS CONTROL Maintenance Manual 42 Power On Procedure: Alarms Jan 2003 Fadal Remedy: Configure channel-specific machine data 20070 AXCONF_MACHAX_USED for the axis assignment without gaps, that is, with increasing channel axis indices a machine axis must continue to be assigned until a zero is entered for the first time (not a machine axis). All MD higher indices must then also contain a 0. The sequence of the machine axis numbers is irrelevant! Assignment of channel axes to machine axes Program Continuation: Switch control OFF - ON. 4001 Channel %1 axis %2 defined for more than one channel via machine data %3 Explanation: %1 = Channel number %2 = Index: Machine axis number %3 = String: Machine data identifier In the channel-specific MD: 20070 AXCONF_MACHAX_USED [CHn, AXm]=x (n... channel number, m... channel axis number, x... machine axis number) several channels have been assigned to one machine axis without having defined a master channel for this axis. There is usually not much point in assigning a machine axis to several channels. In exceptional cases, multiple assignment can be performed if a master channel is defined for this axis. The channel assignment can be performed in accordance with the machining requirements in the NC part program by means of a keyword (yet to be defined in later product versions). Reaction: Alarm display. Interface signals are set. Mode group not ready. Channel axis index 1st channel 2nd channel Machine axis number 0 1 4 AXCONF_MACHAX_USED [CH1, AX1] = 1 1 2 5 AXCONF_MACHAX_USED [CH1, AX2] = 2 2 3 6 AXCONF_MACHAX_USED [CH1, AX3] = 3 3 7 0 AXCONF_MACHAX_USED [CH1, AX4] = 7 4 8 0 AXCONF_MACHAX_USED [CH1, AX5] = 8 5 0 0 AXCONF_MACHAX_USED [CH2, AX1] = 4 6 0 0 AXCONF_MACHAX_USED [CH2, AX2] = 5 7 0 0 AXCONF_MACHAX_USED [CH2, AX3] = 6
- 95. Jan 2003 Power On Procedure: Alarms 43 SIEMENS CONTROL Maintenance Manual Fadal Channel not ready. NC Start disable. NC Stop when alarm. Remedy: In the axis-specific MD 30550 AXCONF_ASSIGN_MASTER_CHAN [AXm]=n (m... machine axis number, n... channel number) a master channel must be specified for the axes that are assigned by the NC program alternately for one channel or the other. Program Continuation: Switch control OFF - ON. 4002 Channel %1 machine data %2[%3] assigns an axis not defined in channel Explanation: %1 = Channel number %2 = String: Machine data identifier %3 = Index: Machine data array index Only axes that have been activated in the channel by means of the channel- specific machine data 20 070 AXCONF_MACHAX_USED [k x]=m may be declared as geometry axes by means of the MD 20050 AXCONF_GEOAX_ASSIGN_TAB [g x]=k. g x... Geometry axis index k... Channel axis no. k x... Channel axis index m... Machine axis no.Program continuation Assignment of geometry axes to channel axes Reaction: Alarm display. Interface signals are set. Mode group not ready. AXCONF_GEOAX_ASSIGN_TAB (includes channel axis no. k) AXCONF_MACHAX_USED (includes channel axis no. m) Geometry axis index 1st channel 2nd channel Channel axis index 1st channel 2nd channel 0 1 1 0 1 4 1 2 0 1 2 5 2 3 3 2 3 6 3 7 0 4 8 0 5 0 0 6 0 0 7 0 0
- 96. SIEMENS CONTROL Maintenance Manual 44 Power On Procedure: Alarms Jan 2003 Fadal Channel not ready. NC Start disable. NC Stop when alarm. Remedy: Check and correct machine data 20050 AXCONF_GEOAX_ASSIGN TAB and 20 070 AXCONF_MACHAX_USED. The basis is the MD array AXCONF_MACHAX_USED in which the machine axis number is entered that is to controlled from a specific channel. The resulting “Channel axes” are given a name by the MD AXCONF_CHANAX_NAME_TAB and assigned to a geometry axis by the MD AXCONF_GEOAX_ASSIGN_TAB; the corresponding channel axis is entered for each geometry axis in this MD. Program Continuation: Switch control OFF - ON. 4003 Axis %1 assignment of master channel in machine data %2 incorrect or missing Explanation: %1 = Axis %2 = String: Machine data identifier For some applications, it is useful to operate an axis in several channels (C axis or spindle on single spindle or double carriage machines). The machine axes which are defined in several channels by means of the MD 20 070 AXCONF_MACHAX_USED, must be assigned to a master channel with the axis-specific machine data 30 550 AXCONF_ASSIGN_MASTER_CHAN. For axes that are activated in only one channel, the number of this channel or zero must be entered as master channel. Reaction: Alarm display. Interface signals are set. NC not ready. Mode group not ready. NC Start disable. NC Stop when alarm. Remedy: Correct MD 20 070: AXCONF_MACHAX_USED and/or MD 30 550: AXCONF_ASSIGN_MASTER_CHAN. Program Continuation: Switch control OFF - ON. 4060 Standard machine data loaded
- 97. Jan 2003 Power On Procedure: Alarms 45 SIEMENS CONTROL Maintenance Manual Fadal Explanation: With the next system power-up, the standard MDs are loaded by the system-specific MD 11 200 INIT_MD if • MD buffer voltage has failed or • After an initialization for loading the standard machine data. Reaction: Alarm display. Remedy: After automatically loading the standard MDs, the individual MDs must be entered or loaded in the relevant system. Program Continuation: Clear alarm with the RESET key. Restart part program. 4062 Backup data loaded Explanation: The user data saved in the flash memory are loaded to the SRAM. Reaction: Alarm display. Remedy: Load specific machine data again Program Continuation: Clear alarm with the RESET key. 4075 Machine data %1 (and maybe others) not altered - permission level %2 needed Explanation: %1 = String: MD identifier %2 = Write protection level of the MD On executing a TOA file or when writing data from the part program, an attempt has been made to write an item of data with a higher protection level than the access authorization currently set in the control. The item of data in question has not been written and program execution is continued. This alarm is set only when access violation is detected for the first time. Reaction: Alarm display. Remedy: Set the required access level by means of password entry or delete the machine data concerned from the MD file / part program. Program Continuation: Clear the alarm with the Delete key. No further operator action necessary. 4076 %1 Machine data could not be altered with permission level %2 Explanation: %1 = Number of MDs %2 = Preset access authorization
- 98. SIEMENS CONTROL Maintenance Manual 46 Power On Procedure: Alarms Jan 2003 Fadal On executing a TOA file or when writing data from the part program an attempt has been made to write data with a higher protection level than the access authorization currently set in the control. The data in question have not been written and program execution is continued without hindrance. This alarm is issued on acknowledging the alarm EXBSAL_MD_PERMISSION_DENIED. It can be cleared only with Power On. Reaction: Alarm display. Remedy: Set the required access level by means of password entry or delete the machine data concerned from the MD file / part program. Program Continuation: Switch control OFF - ON Note: The following two alarms indicate problems requiring a service call by a trained technician. 4290 Sign-of-life monitoring: local P-bus not alive Explanation: The COM computer must alter the sign-of-life on the local P-bus in each SERVO cycle. Monitoring for alteration takes place in the IPO cycle. If the sign of life has not altered, this alarm is triggered. Reaction: Alarm display. Interface signals are set. NC not ready. Mode group not ready. NC Start disable. NC Stop when alarm. Remedy: Check hardware Program Continuation: Switch control OFF - ON. 4291 Failure of module in local P-bus slot %1, error codes %2 %3 %4 Explanation: %1 = Slot number %2 = Error code %3 = Error code %4 = Error code The module on the specified slot has signaled a diagnostics alarm. The error code reported corresponds to the AS300 documentation Reaction: Alarm display. Interface signals are set. NC not ready.
- 99. Jan 2003 Power On Procedure: Alarms 47 SIEMENS CONTROL Maintenance Manual Fadal Mode group not ready. NC Start disable. NC Stop when alarm. Remedy: Check hardware Program Continuation: Switch control OFF - ON. 6000 Series Alarm 6020 Machine data have been altered - now memory is reorganized Explanation: Machine data have been changed that define the NC user memory allocation. Data management has restructured the memory in accordance with the altered machine data. Reaction: Alarm display. Remedy: No remedial measures are required. Any user data that are required must be input again. Program Continuation: Clear alarm with the RESET key. Restart part program. 6500 NC memory is full Explanation: The file system (part of the NC memory) of the NC is full. The job cannot be executed, e.g. too many part programs loaded. Note: During initial start-up, this can concern files from the NC file system, e.g. drive data, MMC files, FIFO files, NC programs, ... Reaction: Alarm display. Remedy: Delete or unload files (e.g. part programs). Program Continuation: Clear the alarm with the Delete key. No further operator action necessary. 6510 Too many files in the NC memory Explanation: The number of files in the file system (part of the NC memory) of the NC has reached the maximum number possible Note: During initial start-up, this can concern files from the NC file system, e.g. drive data, MMC files, FIFO files, NC programs, ... Reaction: Alarm display. Remedy:
- 100. SIEMENS CONTROL Maintenance Manual 48 Power On Procedure: Alarms Jan 2003 Fadal • Delete or unload files (e.g. part programs), or • Increase $MM_NUM_FILES_IN_FILESYSTEM Program Continuation: Clear the alarm with the Delete key. No further operator action necessary. 6520 Too many protocol files in the NC memory Explanation: The number of files in the file system (part of the NC memory) of the NC has reached the maximum limit. Reaction: Alarm display. Remedy: Run fewer log activities in the NC at the same time. Program Continuation: Clear the alarm with the Delete key. No further operator action necessary. 6530 Too many files in directory Explanation: The number of files in one directory of the NCK has reached the maximum limit Reaction: Alarm display. Remedy: • Delete or unload files (e.g. part programs) in the respective directory, or • Increase $MM_NUM_FILES_PER_DIR Program Continuation: Clear the alarm with the Delete key. No further operator action necessary. 6540 Too many directories in the NC memory Explanation: The number of directories in the file system of the NCK has reached the maximum limit Reaction: Alarm display. Remedy: • Delete or unload directory (e.g. workpiece), or • Increase $MM_NUM_DIR_IN_FILESYSTEM Program Continuation: Clear the alarm with the Delete Key. No further operator action is necessary. 6550 Too many subdirectories Explanation: The number of subdirectories in a directory of the NCK has reached the maximum limit Reaction: Alarm display.
- 101. Jan 2003 Power On Procedure: Alarms 49 SIEMENS CONTROL Maintenance Manual Fadal Remedy: • Delete or empty subdirectories in the respective directory, or • Increase $MM_NUM_SUBDIR_PER_DIR Program Continuation: Clear the alarm with the Delete key. No further operator action necessary. 6560 Data format not allowed Explanation: An attempt was made to write impermissible data in an NCK file. This error can occur in particular when the attempt was made to load binary data in the NCK as ASCII file. Reaction: Alarm display. Remedy: Specify that the file concerned is a binary file (e.g. extension:.BIN) Program Continuation: Clear the alarm with the Delete key. No further operator action necessary. 8000 Series Alarm 8030 Channel %1 block %2 option 'interpolation of more than 4 axes' not set Explanation: %1 = Channel number %2 = Block number, label The option for the number of interpolating axes does not correspond to the number of axes programmed in the interpolation group. Reaction: Alarm display. Interface signals are set. NC Start disable. Interpreter Stop. Remedy: Option: Retrofit "Interpolation of more than 4 axes" (the number of axes that is then allowed can be set in this option) or specify in the part program as many (or fewer, as required) axes corresponding to the configuration of the control. Program Continuation: Clear alarm with the RESET key. Restart part program. 10000 Series Alarm 10203 Channel %1 NC Start not possible with unreferenced axes (action =%2) Explanation: %1 = Channel number
- 102. SIEMENS CONTROL Maintenance Manual 50 Power On Procedure: Alarms Jan 2003 Fadal NC Start has been activated in the MDA or AUTOMATIC mode and at least one axis that needs to be referenced or has not reached its reference point. Reaction: Alarm display. Remedy: Via the channel-specific MD 20700: REFP_NC_START_LOCK (NC Start without reference point) you can decide whether the axis must be referenced before NC Start or not. The start of referencing can be enabled channel-specific or axis-specific. On the FADAL 3020 all axes must be referenced before switching to AUTO or MDA. 1. Channel-specific reference point approach: The rising edge of the interface signal "activate referencing" (DB 21 - 28, DBX 1.0) starts an automatic sequence which starts the axes of the channel in the same sequence as specified in the axis-specific MD: 34110 REFP_CYCLE_NR (axis sequence channel-specific referencing). -1: The axis does not participate in channel-specific referencing, but it must be referenced for NC Start 0: The axis does not participate in channel-specific referencing, but it need not be referenced for NC Start 1- 8: Start sequence for channel-specific referencing (simultaneous start with identical no.) 2. Axis-specific referencing: Press the direction key that corresponds to the approach direction in the axis-specific MD: 34010 REFP_CAM_MDIR_IS_MINUS (reference point approach in minus direction). Program Continuation: Clear alarm with NC START and continue processing. 10208 Channel %1 Continue program with NC Start Explanation: %1 = Channel number After block search with calculation, the control is in the desired state. The program can now be started with NC Start or the state can be changed for the time being with overstore/jog. M01 present and active in part program. Reaction: Alarm display. NC Stop when alarm. Remedy: Press NC Start Program Continuation: Clear alarm with NC START and continue processing. 10223 Channel %1 command %2 already active Explanation: