Download to read offline
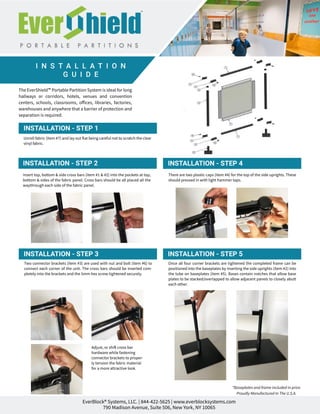

The document provides a step-by-step installation guide for the EverShield™ Portable Partition System, which is suitable for various environments such as schools, offices, and venues. It describes the unrolling of fabric, the insertion of crossbars, and the connection of corner brackets to assemble the unit securely. The guide emphasizes the importance of proper tensioning of the fabric for aesthetics and includes details about baseplates and stacking capabilities.


